Frontend Rewind 2023 – Day 15
Original Source: https://tympanus.net/codrops/2023/12/15/frontend-rewind-2023-day-15/
Day 15 of our special calendar awaits with more frontend links from 2023.
Original Source: https://tympanus.net/codrops/2023/12/15/frontend-rewind-2023-day-15/
Day 15 of our special calendar awaits with more frontend links from 2023.
Original Source: https://www.webdesignerdepot.com/40-best-new-websites-2023/
What makes a website great? Is it the design, the functionality, the subject? Or is it specific design elements like the typography, or colors?
Original Source: https://smashingmagazine.com/2023/12/building-components-consumption-not-complexity-part1/
Design systems are on the tip of every designer’s tongue, but the narrative in the industry mainly focuses on why you need a design system and its importance rather than the reality of endless maintenance and internal politics. The truth is that design teams spend years creating these systems only to find out that few people adhere to the guidelines or stay within the “guardrails.”
I’ve been fortunate with Figma to host and run workshops at various conferences across Europe that center on one very specific aspect of product design: components.
I love components! They are the start, the end, the hair-tearing-out middle, the “building blocks,” and the foundation — the everything within every great product design organization.
The reason they are so important to me is because, firstly, who doesn’t like efficiency? Second, and more importantly, they are proven to increase the time-to-delivery from design to engineering, and here comes a buzzword — they offer a route to return on investment (ROI) within design teams. This is becoming increasingly important in a tough hiring market. So what’s not to love?
Note: You may be interested in watching Matt Gottschalk’s talk from Figma’s Config 2023 conference, which was dedicated to the topic of ROI within small design teams. The talk explored how small design teams can use design systems and design operations to help designers have the right environment for them to deliver better, more impactful results.

Like in most things, a solution to this is education and communication. If you aren’t comfortable with modifications on styles, you may want to set up your components in such a way as to indicate this. For example, using emojis in layers is the quickest way to say, “Hey, please don’t edit this!” or “You can edit this!”.
Or, consider shipping out components that are named for intention. Would separating components entirely (components named for intention) work better? An Input/Error, rather than a customizable Input?

When considering the emoji name approach, here’s a set that I’ve relied on in the past:
Components
🚨 Deprecated
🟠 Not ready
Component instances
🔐️ Not editable
✍️ Overwritten name
Layers
✍️ Editable
🚨 Important
Component properties
◈ Type
✍️ Edit text
🔁️ Swap instance
🔘 Toggle
←️ Left
→️ Right
🖱 Interaction
📈 Data
↔️ Size

Flexible: Responsive Design
Ahh, our old friend, responsive design (RWD)!
“The control which designers know in the print medium, and often desire in the web medium, is simply a function of the limitation of the printed page. We should embrace the fact that the web doesn’t have the same constraints and design for this flexibility. But first, we must accept the ebb and flow of things.”
— John Allsopp, “A Dao of Web Design”
As it stands, there is no native solution within Figma to create fully responsive components. What I mean by “fully responsive” is that layout directions and contents change according to their breakpoint.
Here’s an example:

Note: It is technically possible to achieve this example now with auto layout wrapping and min/max widths on your elements, but this does not mean that you can build fully responsive components. Instead, you will likely end up in a magic numbers soup with a lengthy list of variables for your min and max widths!
With this limitation in mind, we may want to reconsider goals around responsive design within our component libraries. This may take the form of adapting their structure by introducing… more components! Do we want to be able to ship one component that changes from mobile all the way up to the desktop, or would it be easier to use, find, and customize separate components for each distinct breakpoint?
“Despite the fun sounding name, magic numbers are a bad thing. It is an old school term for ‘unnamed numerical constant,’ as in, just some numbers put into the code that are probably vital to things working correctly but are very difficult for anyone not intimately familiar with the code to understand what they are for. Magic numbers in CSS refer to values which ‘work’ under some circumstances but are frail and prone to break when those circumstances change.”
— Chris Coyier, “Magic Numbers in CSS”
Never be hesitant to create more components if there is a likelihood that adoption will increase.
Then, what does this look like within Figma? We have a few options, but first, we need to ask ourselves a few questions:
Does the team design for various screen sizes/dimensions? E.g., mobile and desktop web.
Does the development team build for a specific platform/screen size(s)? E.g., an iOS team.
Do you build apps aligning with native style guides? E.g., Material Design.

The answers to these questions will help us determine how we should structure our components and, more importantly, what our library structures will look like.

If the answer to questions 1. (Design for various screen sizes/dimensions?) and 2. (build for a specific platform/screen sizes?) is “No,” and to 3. (Build apps aligning with native style guides?) is “Yes,” to me, this means that we should split out components into separate component library files. We don’t want to enter into a world where an iOS component is accidentally added to a web design and pushed to production! This becomes increasingly common if we share component naming conventions across different platforms.
If the answer to question 3. (“Do we build native apps, using their design guidelines?”) is “Yes,” this definitely requires a separate component library for the platform-specific styles or components. You may want to investigate an option where you have a global set of styles and components used on every platform and then a more localized set for when designing on your native platforms.
The example below, with an example mapping of library files for an iOS design project, is inspired by my Figma community file (“Simple design system structure”), which I created to help you set up your design system more easily across different platforms.
→ Get “Simple design system structure” [FigJam file / Luis Ouriach, CC-BY license]

If you are designing across multiple platforms in a device-agnostic manner, you can bring components a lot closer together! If you aren’t currently working with an agnostic codebase, it might be worth checking Mitosis (“Write components once, run everywhere”).
A common challenge among development teams is using the same language; while one sub-team may be using Vue, another perhaps is using React, causing redundant work and forcing you to create shared components twice. In “Create reusable components with Mitosis and Builder.io,” Alex Merced explores in detail Mitosis, a free tool developed under the MIT license. Mitosis can compile code to standard JavaScript code in addition to frameworks and libraries such as Angular, React, and Vue, allowing you to create reusable components with more ease and speed.

Using A Variant
This may look like a variant set, with a specific property for device/size/platform added. For example,

As you can imagine, as those components increase in complexity (with different states added, for example), this can become unwieldy. Combining them into the same variant is useful for a smaller system, but across larger teams, I would recommend splitting them up.
Using Sections
You could consider grouping your components into different sections for each platform/device breakpoint. The approach would be the following:
Use pages within Figma libraries to organize components.
Within the pages, group each breakpoint into a section. This is titled by the breakpoint.
Name the component by its semantic, discoverable name.

There is a caveat here! I’m sure you’re wondering: “But couldn’t variables handle these breakpoints, removing the need for different components?” The answer, as always, is that it’s down to your specific implementation and adoption of the system.
If your designer and developer colleagues are comfortable working within the variable workflow, you may be able to consolidate them! If not, we may be better served with many components.
Additionally, the split-component approach allows you to handle components in a structurally different manner across these different sizes — something that is not currently possible with variants.
Auto Layout
Regardless of how we organize the components, responsiveness can be pushed very far with the use of auto layout at every level of our screens. Although it can be intimidating at first, the auto layout makes components work similarly to how they would be structured in HTML and CSS, moving design and engineering teams closer together.

Let’s take a simple example: a generic input field. In your main component, you’re likely to have a text label within it with the text, e.g., “Label.” Generics are useful! It means that we can swap this content to be specific to our needs at an instance level.
Now, let’s say you insert this component into your design and swap that “Label” content for a label that reads “Email address.” This is our override; so far, so good.

However, if you then decide to change your main component structurally, you put that label at risk of losing its overrides. As an example of a structural change, your original “Placeholder” now becomes a “Label” above the input field. Instinctively, this may mean creating a new text element for the label. But! Should you try this, you are losing the mapping between your original text element and the new one.

This could potentially break your existing signed-off designs. Even though this seems like it could work — layer names are a great way to preserve overrides — they are separate elements, and Figma won’t know how to transfer that override to the new element.
At this point, introducing component properties can save us from this trouble. I’d recommend adding a text component property to all of your text layers in order to try to prevent any loss of data across the design files in which we are using the component.

As I showed before, I find adding a writing emoji (✍️) to the property name is a nice way to keep our component properties panel as scannable as possible.
Content Specificity
A decision then needs to be made about how specific the default content is within the component.
And this is where we should ask ourselves a question: do we need to change this content frequently? If the answer is yes, abstracting specific textual values from components means that they can be interpreted more widely. It’s a little bit of reverse psychology, but a text layer reading “[placeholder]” would prompt a designer to change it to their local use case.

If the answer is no, we will bake the fixed value we want into the component. Going back to our input field example, we might set the default label value to be “Email address” instead of “placeholder.” Or, we could create an entirely new email address component! (This is a call we’d need to make based on anticipated/recorded usage of the component.)
Imagery / Media
When setting up a content system within Figma, a few different questions immediately pop up:
How do you use specific media for specific components?
How do you fix aspect ratios for media?
Within Figma, an image is essentially a fill within a shape rather than its own content type, and this impacts how we manage that media. There are two ways to do this:
Using styles.
Using component sets (variants).
Before we look at styles and components, though, let’s take a look at the format that all assets within Figma could take.

Practically, I would advise setting up your media assets as their own library within Figma, potentially even setting up a few libraries if you work across various products/brands with different approaches to media.

For example, the imagery your product team uses within design files and marketing materials is likely to be very different, so we would look to set these up as different Figma libraries. A designer using those assets would toggle “on” the library they need to create an asset for a specific intention, keeping the right media in the right place.
Because this media is the same as any other style or component within Figma, we can use slash naming conventions to group types of media within the names.
Domain examples:
Company website,
Product,
Marketing,
Sub brand/s.
Media types:
Logo,
Icon,
Illustration,
Image,
Video.

Example names, using the format:
Figma.com/Logo/Figma,
Figma.com/Icon/Variable,
Figma.com/Illustration/Components,
Figma.com/Image/Office,
Designsystems.com/Logo/Stripe,
Designsystems.com/Icon/Hamburger,
Designsystems.com/Illustration/Orbs,
Designsystems.com/Image/Modular grid.
These are split into:
Library: Figma.com or Designsystems.com,
Media type: Illustration or Logo,
Media name: e.g., Component libraries, Iconography.
Although I’m using images for the examples here, it works with video assets, too! This means we can move in the direction of effectively using Figma like a mini DAM (digital asset manager) and iterate fast on designs using brand-approved media assets, rather than relying on dummy content.
“A digital asset management solution is a software solution that provides a systematic approach to efficiently storing, organizing, managing, retrieving, and distributing an organization’s digital assets. DAM functionality helps many organizations create a centralized place where they can access their media assets.”
— IBM, “What is digital asset management?”
Using Fill Styles
Fill styles aren’t just for color! We can use them for images, videos, and even illustrations if we want to. It’s worth bearing in mind that because of the flexible nature of fills, you may want to consider working within fixed sizes or aspect ratios to ensure cropping is kept to a minimum.
Figma’s redline “snapping” feature lets us know when the original asset’s aspect ratio is being respected as we resize. It’s a pretty cool trick!

You can get the above example from Figma’s community:
→ “Fixed aspect ratio images with variants” [Figma file / Luis Ouriach, CC-BY license]
For this world, though, I would advise against trying to hack Figma into setting up fully responsive images. Instead, I’d recommend working with a predefined fixed set of sizes in a component set. This may sound like a limitation, but I strongly believe that the more time we spend inside Figma, the further we get from the production environment. “Can we test this in the actual product?” is a question we should be asking ourselves frequently.
Practically, this looks like creating a component set where we set the fixed sizes along one dimension and the aspect ratio along the other. Creating a matrix like this means we can use the Component Properties panel to toggle between sizes and aspect ratios, preserving the media inside the component.
This can be used in tandem with a separate set of components specifically for images. If we combine this with Figma’s “nested instances” feature within variant components, we can “surface” all the preferred images from our component set within every instance at the aspect ratios needed!

Arrangement
This is the hardest thing to predict when we think through the usability of customizable components. The simplest example here is our old enemy: the form. Instinctively, we may create a complete form in a component library and publish it to the team. This makes sense!
The issue is that when a designer working on a particular project requires a rearrangement of that structure, we are kind of in trouble.

This problem extends to almost all component groups that require manipulation. Tables, menus, lists, forms, navigation… we will hit this wall frequently. This is where I’d like to introduce the concept of fixed vs flexible content within components, which should help to address the future problems of a world where we put the DRY (don’t repeat yourself) principles at risk.
As design system maintainers, we naturally want to keep components as composable as possible. How can this one component be used in lots of different ways without requiring us to ship an infinite number of variations? This is the central theme of the DRY principle but can be challenging in design tools because of the lack of component order management within the main components.
As a result, we often end up in a world where we build, maintain, and ship endless variations of the same component in an attempt to keep up with snowflake implementations of our core component.
“‘When should we make something a component?’ is a question I’ve been fielding for years. My strong answer: right from the start. Creating things with a component-based mindset right out the gate saves countless hours — everything is a component!”
— Brad Frost, “Design system components, recipes, and snowflakes”
For example, the form we spoke about before could be one for:
Logging in;
Registering;
Signing up to the newsletter;
Adding billing information.
These are all clearly forms that require different data points and functionality from an engineering perspective, but they will most likely share common design foundations, e.g., padding, margins, headings, labels, and input field designs. The question then becomes, “How can we reduce repetition whilst also encouraging combinatorial design?”

A concept that has been long-used in the developer world and loosely agreed upon in the design community is termed “component slots.” This approach allows the design system maintainers to ship component containers with agreed properties — sizing, padding, and styles — whilst allowing for a flexible arrangement of components inside it.
Taking our previous form examples, we can then abstract the content — login form, register form, newsletter form, and billing information form — and provide a much simpler shell component from the library. The designers using this shell (let’s call it a “form/wrapper”) will then build their forms locally and replace the slot component inside the shell with this new custom main component.
This is best explained visually:

Does this custom component need to live in multiple files? If yes, we move it to the next level up, either team-level libraries or global, if working on a smaller system. If not, we can comfortably keep that component local to the specific Figma file on a page (I like to call it “❖ Components”).
Important: For this premise to really work, we must employ auto layout at every level, with no exceptions!
Conclusion
That was a lot to process (over five thousand words, actually), and I think it‘s time for us to stop staring at the computer screen and take a little break before walking through the next set of principles.
Go grab a drink or take some rest, then meet me in Part 2, where you will learn even more about the adoptable, indexable, logical, and specific components.
Original Source: https://www.hongkiat.com/blog/five-types-of-bosses/
Working in the financial sector for years has exposed me to various kinds of bosses. Some were challenging to work with, yet I was lucky to have mostly supportive ones guiding me. Moving into sales and marketing, I observed that bosses often tried to form a strong bond with their sales teams.

Perhaps they saw the sales team as the heart of the company, which is why they took extra care of us. However, that didn’t mean things were always smooth. The sales team sometimes faced tough times, especially when we didn’t meet expectations. That’s when you’d really see what your boss was like.
Read Also:
8 Legit Ways to Impress Your Boss
How to Work Well With Your Boss?
Bosses are people too, with their own likes and dislikes. If you know how to play your cards right, you can work with them, not just for them. I’ve known colleagues who weren’t top performers but kept their jobs because they were on good terms with the boss.
Understanding how to work with your boss is a crucial skill that will help you in any job. It’s a key factor in how far you’ll go in your career. While not all bosses fit neatly into five categories, if you recognize yours here, I’ve got some advice on how you can thrive in your workplace.
1. The Boss with a Superiority Complex
This type of boss often raises their voice and looks for chances to criticize others. They seem to think they’re always right and others are wrong. They’re quick to react, preferring to reprimand someone rather than solve the problem at hand. You’ve probably met a boss like this before.
You can tell by their restless demeanor, not just by their tone but also in their posture. If you glance into their office, you’ll notice they’re constantly moving in their chair. Their presence alone can make you tense, anxious about what they might say next.

How to work with them?
To handle this boss, be ready for some tough criticism. They seem to find satisfaction in seeing employees endure their harsh words. If you can do this without showing that you’re upset by their behavior, you’ll stay on their good side.
However, if you try to outsmart them or challenge them, you could jeopardize your position in the company. You may be better suited to working with a different type of boss.
2. The Boss Who Flaunts Their Power
This boss loves to show off their authority, not just at work but sometimes even at home. They enjoy playing the role of the boss and think it’s the most important job in the world.
They’re overly protective of their position and want to seem like they have everything under control, even when they don’t. They may ignore mistakes made by employees, pretending not to notice them.

How to work with them?
This boss values discipline over actual performance, believing that with discipline, performance will follow. If you have a boss like this, it’s best not to break the rules too often. And if you do, try not to let them find out. Show them respect, let them feel in charge, and you should be able to continue your work without issue.
Read Also:
5 Characteristics “The Employee Of The Century” Has
3. The Boss Who Feels Out of Place
This boss seems to have landed the role without being quite ready for it. Perhaps they were promoted due to a lack of other candidates, not necessarily because they had the right skills. They’re that person the management had to rely on, despite other options not being available.
In meetings, they often boast about their previous successes, but when it comes to inspiring the team, they fall short. They emphasize the importance of performance but don’t have the management prowess to back it up. Despite their shortcomings and the quiet jokes about them, this boss is diligent and willing to correct their mistakes.
They lack confidence and struggle to stick with a plan when things go awry.
How to work with them?
Offering guidance to this boss is usually appreciated; it’s a chance to build a positive relationship with them. Don’t expect leniency, though – they’re focused on proving themselves and can’t afford slip-ups, either from themselves or their team.
With time and patience, you may find that they grow into the role. Their willingness to learn can eventually make them a competent leader.
4. The Boss Who Intimidates
This boss is all about business, with an aggressive style and a commanding presence. He seems to have a big ego, which he doesn’t leave at the door when he comes to work. Sometimes, it feels like he’s trying to manage the team with an iron fist.
He may come across as threatening to ensure tasks are completed, but he won’t push too far due to his own insecurities – he fears losing his influence over the team.
He’ll occasionally ignore mistakes because he wants to maintain a certain level of control. By nature, he’s more reserved and likes to keep to himself.

How to work with them?
The best approach with this boss is to respect his space and avoid unnecessary interaction. If you’re clever and can find a way to connect with him, you might even be able to develop a rapport and enjoy some flexibility at work.
But be cautious not to take it too far, as he could also be the one to show you the door if you cross the line.
5. The Boss Who Excels and Influences
This is the ideal leader, someone who steers the company and its employees with skill. They bring a positive energy to the workplace and convince everyone that they can achieve great things, even when times are tough.
They’re serious about their work but aren’t too hard on their team. Influential bosses might not always be motivational, but they know how to push people to their peak performance. They’re very professional and expect the same from their employees.

How to work with them?
If you do your job well, you’ll find this boss easy to work with. But be careful: if they sense you could overshadow their ambitions, they might see you as a rival and could steer you out of the company.
An influential boss often has a trusted circle who keeps them updated on office dynamics. Stay focused on your tasks, and you’ll likely remain in their good graces.
Read Also:
How to Move Up The Corporate Ladder (10 Tips)
Conclusion
While we might not all have the chance to work under great leaders, we all must work under a boss – the one who leads an organization or manages a team. Bosses mobilize people towards the company’s goals, and often, people don’t quit their jobs; they quit their bosses.
So, what’s your boss like, and how do you manage your relationship with them?
The post 5 Common Types of Bosses and Strategies to Handle Them appeared first on Hongkiat.
Original Source: https://www.creativebloq.com/reviews/apple-watch-series-9
Small but sleek upgrades keep the Apple Watch Series 9 on top of the smartwatch pile.
Original Source: https://ecommerce-platforms.com/articles/shopify-to-bigcommerce-migration
At some point, you may find that another ecommerce platform suits your online business better. Perhaps you plan to migrate from Shopify to BigCommerce.
If that’s the case, we’re here to guide you through the process. Regardless of your reasoning, the migration from Shopify to BigCommerce can be completed in various ways.
We’ll outline those below, but mainly focus on the manual method, since that’s the only way to truly transfer over the most specific data required.
And most of the automated methods eventually require you to work on your site manually, so we find the manual method to be the easiest of them all.
Content:
Step 1: Sign Up For a BigCommerce Account
Step 2: Export All Essential Data from Shopify
Step 3: Import Shopify Store Data to BigCommerce
Step 4: Review the Site for Accuracy
Step 5: Design Your Store
Step 6: Connect Your Domain Name to BigCommerce
Visit site
Highly Customizable
99% Uptime Rate
Free Trial
From $29.95/month
Built-In Blog
SEO Friendly
App store
Visit site
Read review
Visit site
6,000+ apps
1,2 Million Stores
Full solution from $29/month
Limited time offer: first 3 months for $1/month
SEO Friendly
Offline Store
App Store
24/7 Support
Beautiful Templates
Visit site
Read review
Methods to Migrate from Shopify to Bigcommerce
There are three ways to migrate from Shopify to Bigcommerce:
A manual migration: This method works for all experience levels and gives you the most control over which data you migrate from Shopify to Bigcommerce. It may take a little longer than using a migration app, but you at least see the data get transferred as opposed to hoping everything works out with a more automated process.
Using a migration app: Some automation apps (to migrate from Shopify to Bigcommerce) include LitExtension, Next-Cart, and Cart2Cart. They allow you to select and automatically move over data like customers, products, categories, orders, and SEO URLs. As premium tools, you must pay for the vast majority of features. They’re great for quickly moving large amounts of data, but that also means you have to double check the entire automation process, since it doesn’t always work out as well as you’d think. The entire website design also requires manual work, so that’s why we usually recommend you stick with the manual method.
Hiring a professional to complete the migration: This is perhaps the most expensive option, but it allows you to take a hands-off role in the migration, yet you know that a real person controls the data transfer. Realistically, that person will probably use a combination of manual and automated techniques to migrate from Shopify to BigCommerce.
How to Migrate from Shopify to Bigcommerce using the Manual Method (A Method That’s Simple and Offers the Most Control)
No one needs technical expertise to migrate from Shopify to BigCommerce. In fact, you should only have to spend a few hours to completely move over data for your customers, orders, and products.
You’ll then go into the process of designing your website on the new platform (BigCommerce) to match or improve upon what you had on Shopify.
Let’s jump right in.
Step 1: Sign Up For a BigCommerce Account
We’re assuming you already have a Shopify account, since you want to move away from that platform. You must, however, create a free Bigcommerce account before attempting to migrate from Shopify to Bigcommerce.
Go to the Bigcommerce.com website and start a free trial. This gets you a 15-day free trial to test out Bigcommerce, move over data from Shopify, and design your website long before you launch it and start selling. At this point, you can use the free sub-domain provided by Bigcommerce. Eventually, you’ll want to point your real domain to the Bigcommerce website.
It’s best, however, to keep the Shopify site active (with its domain name) until you’ve tested out the BigCommerce site and know it’s ready to launch to the public.
Initial Bigcommerce Settings to Configure:
Although optional, it’s wise to set up up some of the basic Bigcommerce settings prior to migrating data.
Things like:
Tax settings
Staff accounts
Shipping settings
Business location
Payment information
Step 2: Export All Essential Data from Shopify
With a Bigcommerce account ready to go, you can jump back to your Shopify account to export or download the data you need to move to a Bigcommerce site.
Here are the steps required to export data for customers, products, and orders:
To Export Product Data From Shopify:
Open the Shopify dashboard
Click on Products in the main menu
Select the Export button
Choose to export the Current Page, All Products, Selected Products, or Products Matching Your Search
Pick whether you’d like to export the file as a CSV (for spreadsheet programs) or a Plain CSV File
Click on the Export button
This compiles the download file and sends it to the email address associated with your account. You should then save that file to be used later when you upload it into the Bigcommerce dashboard.
To Export Customer Data from Shopify:
Open the Shopify dashboard
Click on the Customers tab in the main menu
Select the Export button
Choose to export the Current Page, All Customers, Selected Customers, or Customers Matching Your Filters
Mark whether you’d like to export as a CSV (for spreadsheet programs) or a Plain CSV File
Click on Export Customers
As a result, you receive an exported list of your customers sent to the email address associated with your account. Download the file to your machine for later use when we upload it back to Bigcommerce.
To Export Order Data from Shopify:
Open the Shopify dashboard
Click on Orders in the main menu
Choose filters to decide on which orders to export; for instance, you might only want to export orders By Date
Choose a file format under the Export As section
Click Export Orders to download all information attached to your orders; otherwise, choose Export Transaction Histories to only download transactional information
Depending on the size of the file, you will either see the file downloaded in your browser or sent to the email address associated with your account.
Step 3: Import Shopify Store Data to BigCommerce
The next step involves taking all of that data you just downloaded from Shopify and uploading it into the new Bigcommerce account.
To Import Product Data to BigCommerce
Open the Bigcommerce dashboard
Go to Products > Import
Click Upload File, or drag and drop a CSV file into the designated area
Mark whether you’d like to Overwrite Existing Products
Click Preview
View how Bigcommerce has matched the CSV header columns with the required values for import (make changes to the upload file as necesarry)
Click on Start Import
Review the import when it’s done and click on View Product List
Things always change, but at the time of this article the fields from a Shopify export CSV match up pretty well to what you need to import to Bigcommerce. For instance, Bigcommerce recognizes the Product Category, Title, Handle, Price, and various other elements.
If you need to change the column headers for the import file (to make it compatible with Bigcommerce), use the sample product import file provided by Bigcommerce. We recommend transferring the Shopify data into this sheet so that it’s ready to upload into Bigcommerce.
To Import Customer Data to BigCommerce
Open the Bigcommerce dashboard
Go to Customers > Import
Leave this checkbox empty: File was exported using the ‘Bulk Edit’ template
Only check the Override Existing Records box if that’s appropriate for your migration
Mark the option to Upload a CSV File From My Computer
Click the Choose File button
Choose the customer data file you previously downloaded from Shopify
Mark the box for This File Contains Headers
Leave everything else as is, then click Next
On the Link Import Fields page, match each field on the imported spreadsheet to what it should be in Bigcommerce (like making the Email field from Shopify match with the Email Address field in Bigcommerce); click Next to proceed
Click the Start Import button
As a result you should see a how many customer records imported successfully to Bigcommerce. Click on the View Customers button to see if everything moved over the way you intended. You can always click on the Import Again button if needed.
To Import Order Data to BigCommerce:
Importing orders to Bigcommerce requires access to the API. Therefore, you have a few options to consider:
Hire someone to complete the transfer by going to the Bigcommerce Partner Directory and finding a company to make the order migration for you
Talk to Bigcommerce; they offer an order migration service for those moving from another platform (like Shopify)
Use an order migration app like Migration of Orders by Be A Part Of; the Bigcommerce App Store has many other order migration apps – the one suggested has a one-time fee, while others tend to have recurring fees
Step 4: Review the Site for Accuracy
Now it’s time to review your export and import work on the Bigcommerce website. Go to the Products page to review products, the Customers page to review customers, and the Orders page to review orders. Check that all necesarry specifics transfered over properly, like the product name, pricing, and media elements for all products.
Complete this review for the customers and orders as well. Keep in mind that order migrations are for historical purposes only. You won’t have much control over the orders (like to change their statuses), but you can look back on past orders to incorporate them into reports or view customer histories.
We also recommend looking at the frontend of your store, since you want to ensure that the product details appear there as well. Be sure that every new product is marked as Visible on Storefront.
Step 5: Design Your Store
You can’t move a Shopify theme to Bigcommerce (or vice versa). Therefore, you need to pick a new Bigcommerce theme that hopefully matches, or gets close to the original design you had on Shopify. As an alternative, you might consider this as an opporuntity to completely revamp the branding of your store.
Start with these steps:
Go to the Storefront tab in the dashboard
Use the Logo option to upload a logo and favicon
Consider using a text logo with specific colors and a larger font size
Go to the Blog tab to customize what your blog looks like
To customize the overall design of your store:
Click View Store
Click the button to Design This Page In Page Builder
Use the Widgets, Layers, and Theme Style buttons to customize every part of the homepage
Click on the Page dropdown field to either add a new page or customize an already created page
Step 6: Connect Your Domain Name to BigCommerce
There are many other settings to configure in Bigcommerce – including payments, tax rates, and shipping settings – but the main thing you want to do in order to publish your new website is to connect your domain name to the Bigcommerce platform.
In some situations, you may want to transfer the domain you had on the Shopify site. Other times, you might want to buy a completely new domain. You can complete either task through the Bigcommerce dashboard.
How to buy or add an existing domain name to Bigcommerce:
In the Bigcommerce dashboard, go to Settings > Domain Name
Click the Purchase button if you’d like to buy a new domain name
Click the Add New button if you already own a domain name and want to transfer it to this Bigcommerce website; this is the route you would take if trying to move a domain name from Shopify to Bigcommerce
Walk through the steps provided by either option. You may have to verify domain name ownership and redirect where the DNS points to.
Go to the top
Our Conclusion on How to Migrate from Shopify to Bigcommerce
You have several methods to consider when trying to migrate from Shopify to Bigcommerce. We highly recommend moving most of your data manually, since it gives you full control over the process and removes the risk of missing something along the way. You are more than welcome to use some of the more automated methods, but just keep in mind that you still have to design the site yourself, and it’s wise to double check every automated process to see if the app missed something.
One note to remember is that migrating orders into Bigcommerce requires some sort of API integration. This means you must either hire someone to complete the job for you, talk to Bigcommerce about their order migration process, or use an app.
Other than that, the manual importing and exporting of products and customers goes pretty smoothly between Shopify and Bigcommerce. You receive some field mapping tools right inside Bigcommerce, and you can bulk import instead of individually importing items. You can also individually add products, orders, and customer whenever you want, which gives you an opportunity to correct any mistakes that may occur with bulk or automated migrations.
If you have any questions about how to migrate from Shopify to Bigcommerce, let us know in the comments section below! Good luck with your migration.
The post Shopify to BigCommerce Migration in 6 Easy Steps (2024) appeared first on Ecommerce Platforms.
Original Source: https://smashingmagazine.com/2023/12/five-second-testing-case-study/
In today’s world of shortening attention spans and omnipresent hustle, wasting even a second could mean losing the chance to earn more time from a person you want to impress. If your interests lie in creating good user experiences, there is a fair chance you have heard of five-second testing.
Five-second testing is an established technique of usability research used by UX researchers, designers, product managers, and in a variety of other professions, such as marketing or business analysis.
In short, you show a picture of whatever you are designing (site, app, pair of socks) to a member of your intended audience for exactly five seconds. Then, you hide the picture and ask the participant a couple of questions. The goal is to learn whether the reaction — the participants’s first impression — is what you wanted to see. Did you get the main message across? Do people remember the company’s name? Sounds like an efficient way to test your product without needing to turn to full-on usability testing, right?
Note: The word “participant” in this article is used to refer to users involved in five-second testing or related usability research methods. The word “user” is used in more general contexts since users form first impressions all the time, not just when you are testing it.

Why is it five seconds exactly, though? Are five seconds some magical moment when everything we see should become clear? And if it does not, does it automatically mean that a user experience is bad? Or are five seconds just the right amount of time for first impressions to brew in the user’s mind so that they’re neither undercooked nor overcooked?
These are some of the questions that we asked ourselves. Not satisfied with the answers written by others who covered the topic before us, we kept drilling and conducted an actual peer-reviewed scientific case study, exploring the hidden truths behind the testing of first impressions. The research paper examines the five-second test and discusses the results.
So strap in and read what science has to say about five-second testing. And then, what the implications are for you so that you can take practical advantage of this new knowledge to develop better first impressions of your services or products. But first, let us delve into what we know about five-second testing and its caveats so that you see the greater picture of the focal points of our investigation.
The Mythos Of Five Seconds And Its Gaps
You may be familiar with the well-known statistic that a website has about ten seconds to communicate its key message to the user. Knowing that waiting only five seconds to ask testing participants about their first impressions may suddenly seem like an odd choice. If indeed visitors of a website have about ten seconds to grasp a message, are five seconds really enough time for users? There is an alleged justification, as we explain below.
Cutting a bit forward, though, the factual basis for it is admittedly a bit of a Wild West if you look for hard data to support it. There is an almost uncanny resemblance to another not wholly scientific five-second rule that says it’s okay to eat food off the ground if it’s within five seconds from when it dropped there.
The five-second testing method has its origins as a simplification of usability testing. The first references to five-second testing point to Christine Perfetti, who coined the term for the method in the mid-2000s. The answer to “Why five seconds exactly?” comes largely from anecdotal evidence in the form of the experience of usability researchers.
The common story is that if something is shown to participants for more than five seconds, their first impressions will start to deviate from the actual user’s genuine initial impressions. The participant’s perspective becomes more analytical and less task-driven. The five-second test lets you avoid overtly speculative feedback that nobody would give you under normal circumstances.
Fair enough, that could potentially be true. But five seconds is still quite a short period of time. Consider how different people can be when it comes to their cognitive abilities (and there is nothing wrong with that). For example, one user’s sharp perception may let them realistically form first impressions in five seconds or faster, but another user may barely have the time to blink, much less absorb any meaningful information–they need a moment to take it in at their own tempo.
The reasoning starts to fall apart a bit more at its seams once you also consider the visual complexity of the stimulus (a.k.a., the picture you show to the participants). The nature of the things you may want to test can range from very simple to very complex. If the stimulus is simple, it is possible to take even less than five seconds for participants to form their initial impressions. Would this mean that there would be the risk of them using the remaining time to get over-exceedingly analytical?
Conversely, there is the question of whether five seconds is enough time to let participants realistically visually scan a more complex stimulus. I can already hear staunch proponents of five-second testing saying that this last discrepancy is actually rightfully intentional. It’s a feature, not a bug, if you will.
After all, if a stimulus is too complex, that is exactly why you conduct five-second testing. It allows us to find out about things like complexity. It can help you find out if participants cannot extract the key information you want to communicate so that you can fix it.
However, we need to consider that not all user interfaces are the landing pages of websites. They serve to support different user tasks, some of which cannot avoid having a certain degree of complexity.
Five-second testing guides typically avoid directly addressing testing of these types of user interfaces by saying that the method has the following limitation: it should not be used to test user interfaces with multiple purposes. If the same stimulus serves for more than one task, it is alleged that you should probably conduct full-fledged usability testing, which is technically correct (the best kind of correct).
Giving up on the five-second testing in the inherently more complex user interfaces, however, also gives up on its advantages for measuring and optimizing first impressions. For instance, the idea that a screenshot or a mockup is all you need to quickly find usability problems and iterate your designs. This is where five-second testing really shines.
Usability testing does not tell you accurately what the actual first impressions are without considerably interrupting the participant. And even then, you would encounter the same problem: At what moment from when the participant is exposed to a design should their first impressions be gauged so that they are genuine?
As we have discussed so far, there are certainly a fair number of question marks surrounding five-second testing. The method still undeniably has a number of merits, as proven by our experience at UXtweak, where we also provide our own Five Second Test tool. A lack of proper research on the topic is what drove us at UXtweak Research to conduct our very own case study.
The Science, Abridged
Essentially, what we sought to investigate in our case study are the relations of a number of key factors that are absolutely crucial for five-second testing:
What are the cognitive abilities of the participant engaging in the five-second test?
How visually complex is the stimulus shown to the participant?
For how long is the stimulus shown to the participant?
What kinds of questions do we ask the participants afterward?
What is the feedback that participants give you?
As you may have noticed, time — that iconic yet controversial five-second threshold — is considered a variable factor. In our experiment, we investigate the differences in feedback between three separate groups of participants who are shown pictures for either five (5) or alternatively two (2) or (10) seconds (so a bit less and a bit more time, respectively). This means that it would not be correct to refer to it as just a five-second test anymore, but rather an N-second test (or a first impression test, if you do not wish to be too pedantic about the number of seconds).
Each participant first passes not just one but two cognitive ability tests. Human minds are multifaceted, and there is not just a single “cognitive ability” metric that would encompass everything that the mind can do. Among standard tests used by psychologists, we picked two that are linked to abilities that can be found as the most relevant to the formation and testing of first impressions:
Perceptual speed: How quickly you pick up visual information.
Working memory: How much information you can mentally process at the same time.
Working memory is the appropriate memory ability to focus on since it operates with information that receives the user’s attention. This distinguishes it from sensory memory (the memory processing information that our senses pick up) and long-term memory, where information is stored persistently for later use.

For the first impression test itself, six website screenshots were used as the stimuli. These screenshots were selected for possessing a broad range of visual complexity, from the simplest with just a few visual elements to the most complex with a number of distinct sections that serve different purposes.
Screenshots of real websites local to Czechia and Slovakia were translated into English, and their logos were replaced with fictional brand names so that, for all intents and purposes, the website screenshots would be authentic yet also unfamiliar to the participants who were recruited in the UK.

Finally, participants were asked to provide feedback by answering practically a complete portfolio of the various types of questions that can be typically asked during a first impression test. Each type of question tests a different aspect of the first impressions that the participants have formed inside their heads:
Attitudinal questions: Rating a perceived quality of the website (e.g., ugly vs. attractive) on a scale from 1 to 7.
Target identification questions: Questions directed at specific elements or aspects of the stimulus.
Memory dump questions: Asking participants to describe everything that they remember about what they saw.
The resulting answers were analyzed both quantitatively (with statistics) and qualitatively (by inspecting the contents of the received answers on an individual level). With it, a number of conclusions can be reached, some expected and some rather surprising.
Now that you have a picture of what our case study was about let’s dive into the actual, interesting implications for developing the first impressions of your product.
Note: If you would like to immerse yourself in further details of how our case study was conducted, you can learn more in our scientific paper.
Takeaways
Statistically, all the variables we experimented with — the time duration of showing pictures to participants, the participants’ innate cognitive abilities, and the visual complexity of pictures — had a significant effect on the first impression answers.
For instance, between the groups that were shown screenshots of websites for two, five, and ten seconds, the number of answers that incorrectly identified what the websites were for dropped as time progressed. Notable is the difference between five and ten seconds. If the participants were really focusing on inconsequential details after five seconds, there should not be differences in recognition of such a key aspect as the website’s entire purpose.

Statistical differences lay the grounds for further observations on how changing the conditions of a test can (or cannot) affect its results:
Attitudes crystallize faster than in five seconds.
In attitudinal questions where participants are asked to rate how they view the picture’s various qualities (e.g., from clear to confusing, from captivating to dull), answers stay relatively consistent, regardless of how much time the participant has or how good their cognitive abilities are. If you are laser-focused on assessing participants’ attitudes about your product and nothing else, you could present pictures for two seconds, or possibly even less, as research done by others on a related topic also implies.
Logos are recognized earlier than in five seconds (with one exception).
The target identification questions where participants are asked to recall the company name from the logo are, on the whole, impacted by time very little. This is to be expected: when viewing a website, our eyes are usually drawn to the top left corner to find out where we have found ourselves. There is an exception to this rule, however.
Among participants with slower perceptual speed, significantly fewer identified the company name correctly at two seconds when compared to five seconds. This establishes five seconds as a more inclusive choice for timing your first impression test if you expect your target audience to have, on average, lower perceptual speed than the general populace and if the primary aim is to test contents of the header, such as logo design or company name identification. Otherwise, two seconds is a safe bet.
Irrelevant nitpicking? Yes, if visual complexity is low.
In some cases, the popular narrative about five seconds being a good viewing time for testing first impressions is indeed true. Particularly for the simplest website screenshots, once five seconds have elapsed, participants start paying attention to minute details (e.g., the girl’s shirt color in the hero image).
Curiously, though, having more time does not mean that participants would write longer or more complex answers. Instead, when participants have ten seconds to view the screenshots, the higher visual complexity of the screenshots is reflected in better-quality answers. Participants stay more on-topic–describing how the site is visually structured or justifying their criticisms of the page’s design. Different viewing times may be optimal in different situations. Especially since…
Low working memory warrants longer viewing time.
When asked to reiterate what they saw in their own words, participants with low and high working memory provided significantly different answers. With low working memory, answers become shorter, less complex, and recall fewer concepts overall. However, when the viewing time is extended to ten seconds, these differences disappear. This implies that the same information is being processed — memory capacity just dictates how fast it can happen.
Without knowing where each participant’s memory ability stands, it is difficult to tell what they would actually recall if we left them to work at their own pace. Consequently, assessment of working memory before testing first impressions (and adjusting viewing time accordingly) should be considered a good practice.
For cognitive powerhouses, five seconds are enough.
A less practical point maybe, but if you are developing an app for people with reasonably high perceptual speed and working memory — be it the mentally gifted, hyperproductive hustle enthusiasts, or caffeine addicts — you could likely show them your screenshots for just two seconds and get similar results as in a five-second test.
Give participants the proper amount of time to form a first impression.
When the visual stimulus is more visually complex in a first impression test, the task of mentally processing it becomes more difficult and time-consuming (just like in any normal scenario). This manifests in test results. Fewer people correctly identify the purpose of a more visually complex website, and they recall fewer elements and aspects of the website.
This could be seen as a bit of a paradox since more complex stimuli mean there is actually more content that participants could potentially remember and comment on, but only if they had the time to absorb the information properly. Data shows that when participants are given ten seconds, the answers do actually normalize, becoming more similar to stimuli of lower visual complexity.
If the purpose of the particular first impression test is not to remove all visual complexity at any cost outright, we would suggest adjusting the viewing time to reflect the visual complexity of the stimulus.
Keep in mind there are still aspects of first impression testing that remain unknown. A reasonable question that you can ask now would be: “Okay, so how exactly do I time my first impression test?” While we can sum up our observations into a conceptual framework of how time can be treated in first-impression test planning, it is not an exact guideline; there may be other interpretations or exceptions.

Take this more as an eye-opener and a call to action. Indeed, in our study, ten seconds yielded more appropriate results for more complex websites than five seconds did. But there is nothing to say that for other websites, the best timing could not be fifteen or even twenty seconds. Even more so, once you also factor in the influence of the cognitive ability of each individual participant.
The key takeaway? When you gauge your audience’s first impressions about something, take a more holistic approach.
Consider your goals for your test. What kind of questions do you want to ask? Use some of the tools that are available to measure the visual complexity of the pictures that you want to present. Give your participants a short working memory test before you start bombarding them with pictures and questions.
Try to adjust the timing in your first impression test to match the situation. To give an analogy, by blindly following a different five-second rule and eating off the floor, you could end up getting sick. Be just as cautious about relying on myths in your usability research methods. This is not to discount five seconds. As we show, it is still good timing for first impression tests in plenty of cases, but it is not the be-all and end-all as far as first impression testing goes. By broadening your perspective, you can do even better.
Resources
“Cognitive abilities and visual complexity impact first impressions in five-second testing”
The paper by UXtweak Research investigates the impact of timing, cognitive abilities, and visual complexity on first impression testing. Read for further details about the experiment, its outcomes, and a discussion of findings.
“How Long Do Users Stay on Web Pages?”
Jakob Nielsen’s article on how long it takes people to leave a website (a fact to consider when testing first impressions).
“Attention web designers: You have 50 milliseconds to make a good first impression!”
The paper by Lindgaard et al. shows that when it comes to attitudes, some first impressions are genuinely formed in a flash.
“The UX Five-Second Rules: Guidelines for User Experience Design’s Simplest Testing Technique”
Paul Doncaster’s book on five-second testing provides a thorough summary of existing knowledge about the method and its applications.
“How to Test a Design Concept for Effectiveness”
Paul Boag’s walkthrough of key concept testing methods, including five-second testing.
“5-Second Tests: Measuring Your Site’s Content Pages”
This article by Christine Perfetti, dating back to 2007, can be seen as the first reference to modern five-second testing.
Aalto Interface Metrics tool for measuring visual complexity of user interfaces
Human Benchmark test of visual working memory
UXtweak’s Five Second Test tool
Original Source: https://www.webdesignerdepot.com/30-most-exciting-new-tools-for-designers-2023/
As we near the end of 2023, we wanted to take a look back over all the tools we collected over the past year, to pick out our favorites.
Original Source: https://tympanus.net/codrops/2023/12/05/frontend-rewind-2023-day-05/
Join us in opening the next door to unveil what’s in store for Day 5 of “Frontend Rewind 2023”
Original Source: https://abduzeedo.com/innovative-editorial-design-placebo-studios-masterpiece
Innovative Editorial Design: Placebo Studio’s Masterpiece

abduzeedo1204—23
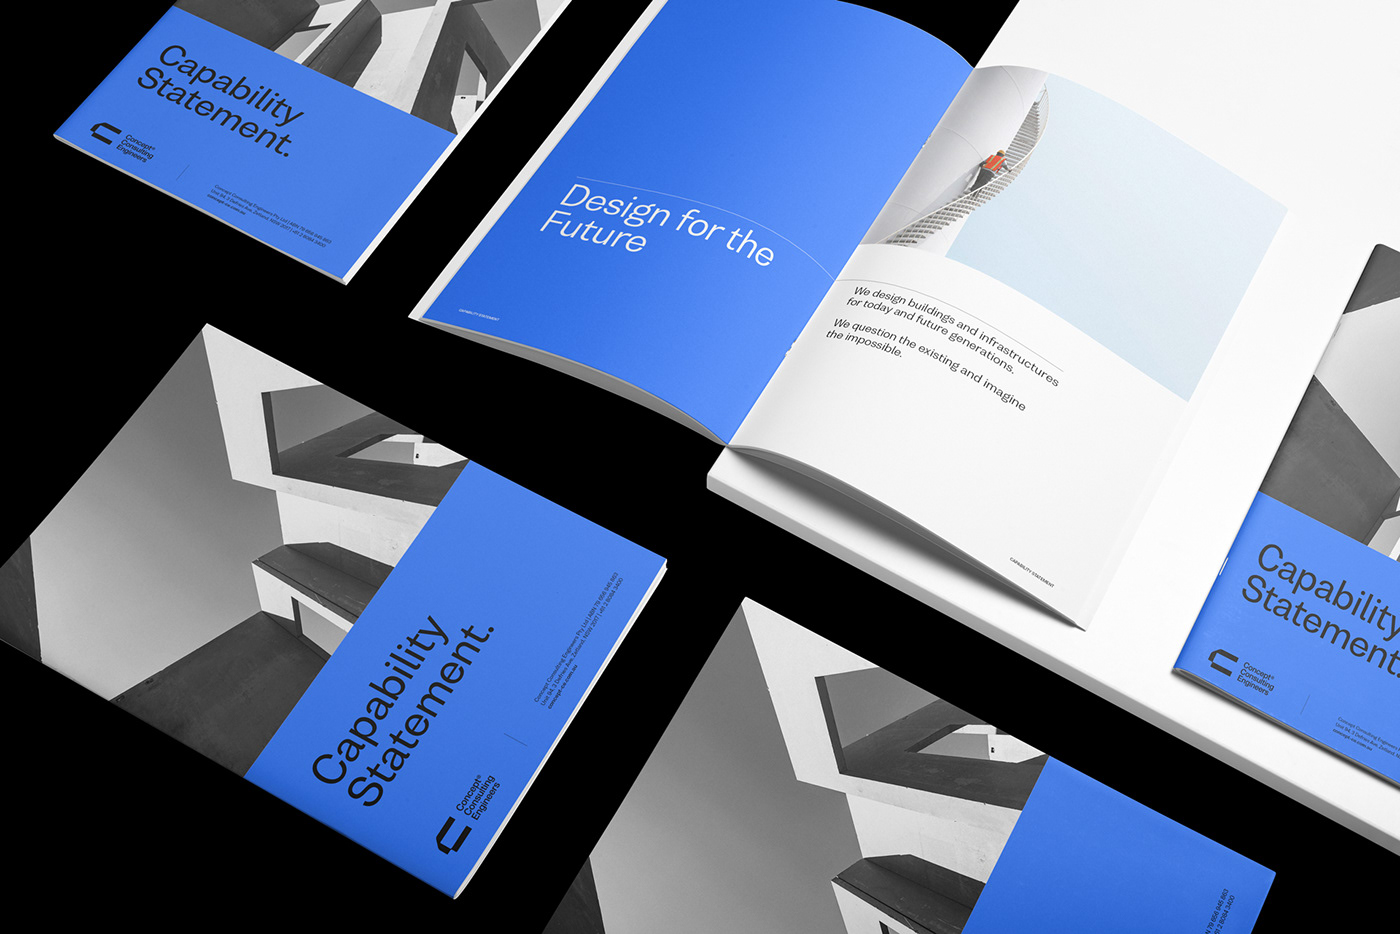
Explore Placebo Estudio’s exceptional approach to editorial design and visual identity in their latest work for CCE’s Capability Statement.
Placebo Estudio, a distinguished name in the design industry, recently undertook an inspiring project for Concept Consulting Engineers (CCE). Their task was to craft the editorial design for CCE’s Capability Statement, a comprehensive showcase of the engineering consultancy’s diverse projects.
Based in Sydney, Australia, Concept Consulting Engineers specialize in boutique structural and façade consultancy. They sought to encapsulate their expertise and project spectrum in a visually striking format. This is where Placebo Estudio’s expertise came into play, transforming the Capability Statement into not just a document, but a piece of art.
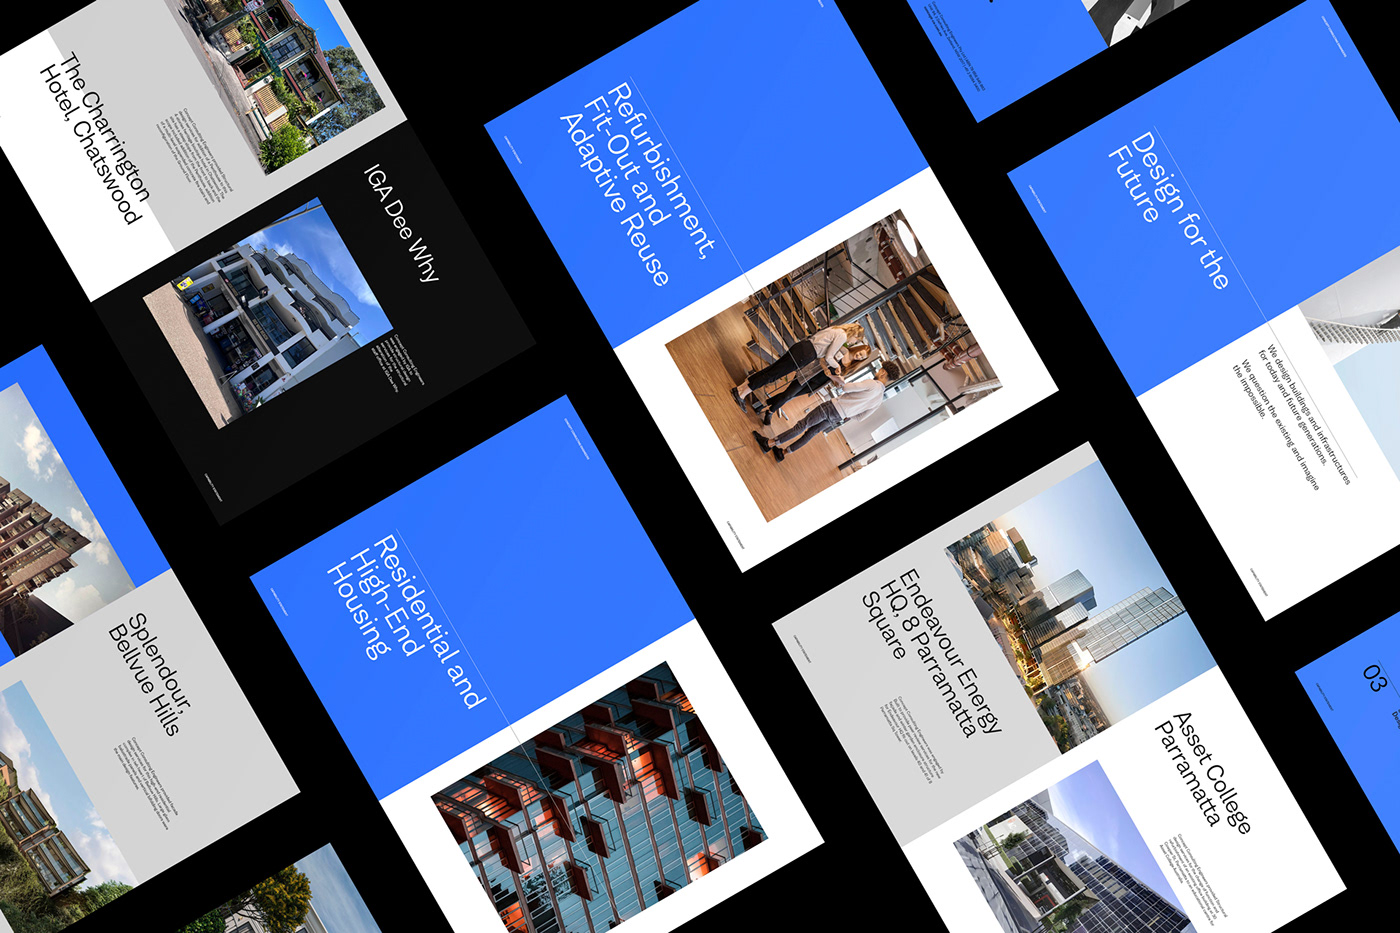
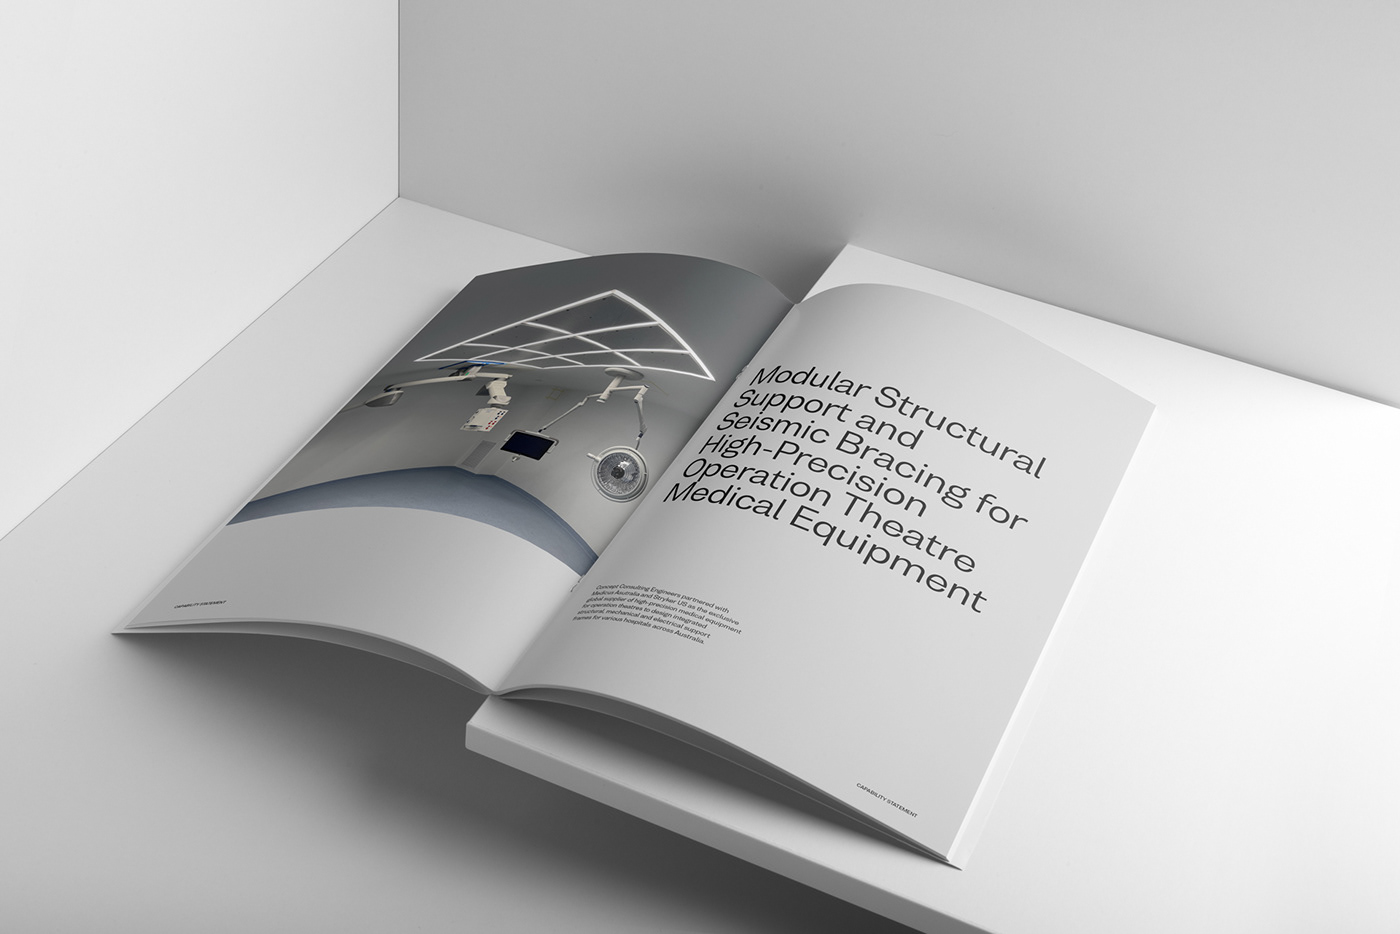
Placebo Estudio’s approach to this project is a testament to their mastery in blending simplicity with functionality. Their design philosophy pivots around minimalist yet impactful elements. The grid system they employed is a perfect example of this balance. It harmonizes photographs with spot-on typography, creating a visual narrative that is both compelling and informative.
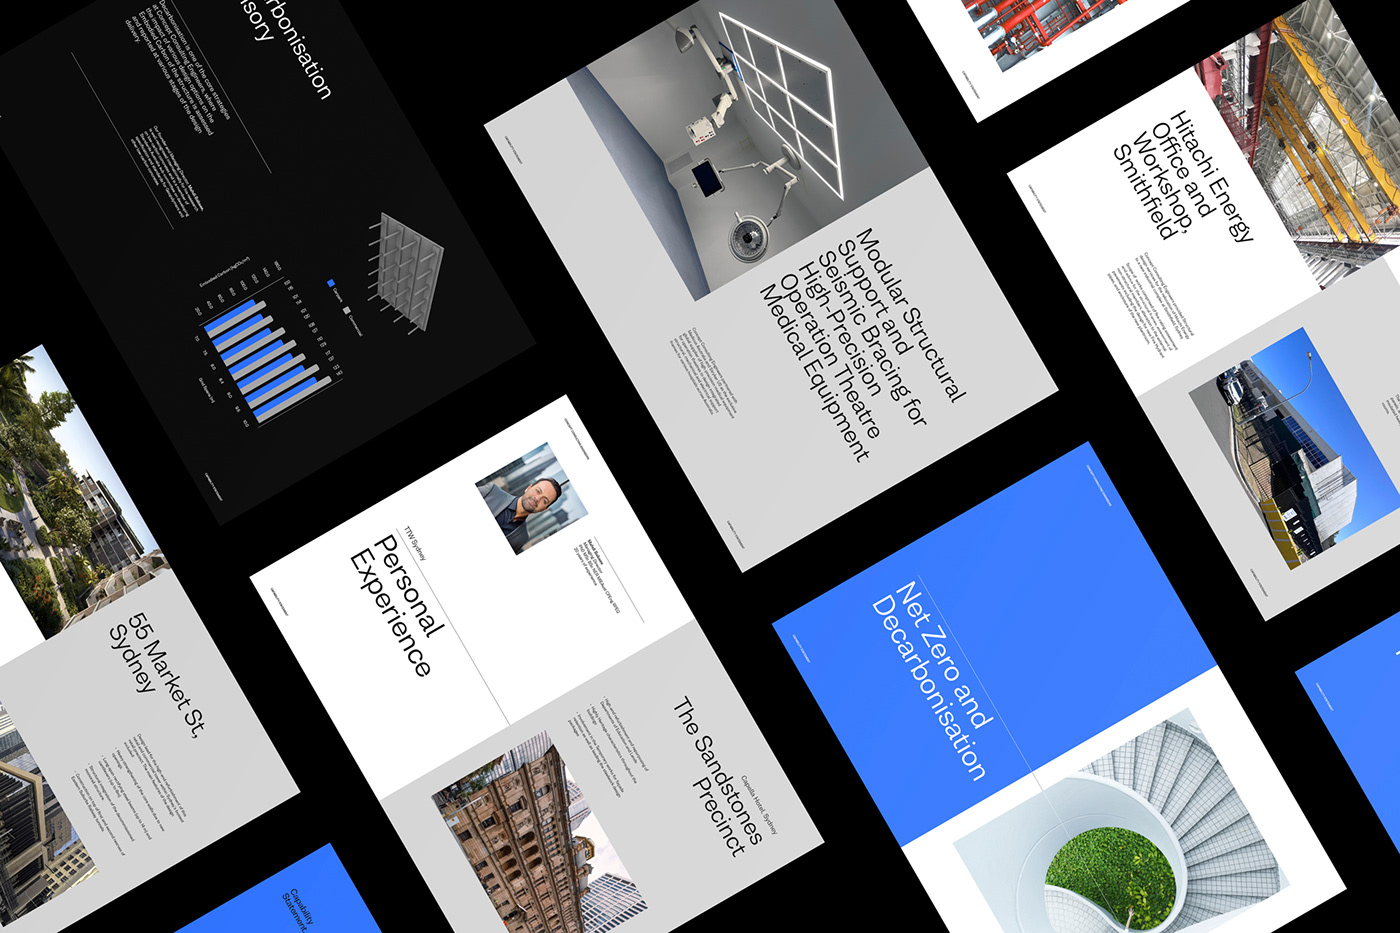
A standout feature of this design is the contrast in typography. The interplay of type sizes for titles and headings injects a dynamic rhythm into the pages. Columns of text are punctuated with cleverly placed dividers, reminiscent of a well-composed poster. This thoughtful structuring of content enhances readability while maintaining aesthetic appeal.
The color palette is another element where Placebo Estudio’s expertise shines. The use of black, white, and a striking blue as an accent creates a bold statement. This palette is not just visually pleasing but also strategically used to underscore key information. Designers alternating white and black text over blue backgrounds is a striking choice, showcasing their ability to play with color for maximum impact.
In conclusion, Placebo Estudio’s work on the Capability Statement for CCE is a masterclass in editorial design. It demonstrates how visual identity can be powerfully conveyed through thoughtful design elements. Their work is not just a representation of CCE’s projects but an embodiment of design excellence itself, setting a high bar in the field of editorial design and visual identity.
Editorial design artifacts
For more information check out ©PLACEBO, Behance and INSTAGRAM.