Will Future Fonts change the way we buy typefaces?

Original Source: http://feedproxy.google.com/~r/CreativeBloq/~3/h3X6uKMyfaI/will-future-fonts-change-the-way-we-buy-typefaces

A new site has launched that offers exciting new opportunities for type designers and buyers, and could revolutionise the way we buy and sell fonts. Future Fonts is a marketplace for work-in-progress fonts, where you can buy workable early versions of the newest typefaces for bargain prices.

The long – and therefore expensive – process of designing a full typeface makes it an unsustainable venture for many creatives. And the (justifiably) high prices of the resulting work can put off prospective customers – especially when there are so many great free fonts around. In short, the industry is due a shake-up. 

The software industry adopted a similar approach years ago, and there's no reason why it couldn't work equally well for type design. Here are four reasons the Future Fonts model could be the best thing that's happened to the type industry for a while.

01. Access to the newest fonts

All the typefaces on Future Fonts are still being developed, which means they're just about the freshest typefaces around– and they won't have been used in a million ads or branding campaigns already. 

As well as helping graphic designers stay ahead of the curve when it comes to typography trends, there are benefits for type designers too. Only the best ideas will attract attention and customers, so this is a great way to see early on if there's a market for your design.

02. Buy in early for discounts (and free updates)

Often, to get exactly what you want, you need to shell out – and the best typefaces don't come cheap. With Future Fonts, the price of a typeface goes up with each updated release. 

If you spot a typeface you like, you can purchase it for an early bird price, then get free updates as they're released. If you have a good eye for fonts, this is a win-win way to keep your designs fresh without devaluing the creative process.

03. Help fund the design process

As any type designer will know, the process of designing a fully functional typeface is a long and arduous one. This new model effectively means customers can help fund typographers by purchasing their work earlier on in the design process. 

A more sustainable process lowers the barriers to entry into the type design industry, so more budding designers can get involved. And that's a good thing for everyone. 

04. Collaborative approach to design

Future Fonts promises to make type design a more collaborative effort. It's an online community space for type designers and fans, where experts can share their expertise by commenting on other works in progress. 

Although the site doesn't require type designers to finish every project, the moral and financial support provided by this approach aims to help type designers on their way over the finish line.

If you're intrigued, you can find out more in this Medium post.

Read more:

5 tips for better typesetting12 fun fonts to liven up your design projects50 top typography tutorials

Magic Password Revolutionizes WordPress Security

Original Source: https://www.webdesignerdepot.com/2018/02/magic-password-revolutionizes-wordpress-security/

Properly protecting the security of your website has to be number 1 on everybody’s digital checklist. Unfortunately, security is only as strong as the weakest link in the chain, and that weakest link is usually your password.

It’s a fact of digital life, that thanks to the vast number of logins we have to recall, most people use a variation on their “master” password: using “passwordLI” for LinkedIn, “passwordE” for email, “passwordFB” for Facebook. It doesn’t take an AI with advanced machine learning to work out that your WordPress password is “passwordWP”—although worryingly, that AI does exist.

Cue Magic Password…

Magic Password is a revolutionary WordPress plugin that takes a radically different approach to site security by ditching the password altogether!

Password-less authentication has already been pioneered by SaaS like Slack, and Magic Password takes the concept to new heights with its implementation for WordPress. All you need is the smartphone app—which is available for both Android and iOS—and the Magic Password plugin. Both the app, and the plugin are completely free.

Magic Password is one of those rare plugins that’s so useful, you expect WordPress to buy it and build it into the core code.

Once the plugin is installed in your WordPress site, and the app is synced, all you need to do to log into your site is take out your smartphone and scan the Magic code displayed on your login screen. It’s as simple and secure as that; the only person who can access your account is you.

Using Magic Password to login is really easy. Not as easy as typing a password, but easier than trying to remember a different, secure password each week, and certainly easier than two-factor authentication.

If you’re someone who prefers to access WordPress on a mobile device, then Magic Password is even simpler: simply tap the screen and you’re logged in. Super-easy to do and extra secure when you combine it with your phone’s built-in security features like Face ID or fingerprint scanning.

It’s an incredibly convenient process, but Magic Password’s real benefits come from its contribution to your site’s security measures.

The sad reality is that passwords can, and do get hacked. And we make things easier for hackers because human beings are predictable. Hackers know your password is probably 8 characters plus or minus 2, and that it probably ends in a number.

Magic Password completely rewrites the rules by changing the whole login process: The latest end-to-end encryption means login credentials are all but impossible to hack; With no password to type you aren’t vulnerable to a keylogger attack; Brute-force attacks are blocked thanks to limited login attempts; Magic Password doesn’t rely on database or local file storage, your login credentials aren’t stored anywhere, which means there’s simply nothing to steal.

If hackers were taking aim at your site login, they’ll now find themselves looking at a moving target.

One of the most common points of failure in any security plan is a particular user’s lack of caution. It doesn’t matter how diligent you are, if Darren in marketing insists on using “FutureMrBeyonce” as his password on every single site, sooner or later your details will be compromised. Magic Password can be used by anyone on your team, in fact one of the latest features is the ability to require all subusers to login with Magic Password; so you can be confident that Darren’s optimistic password policy won’t wreck your security.

What’s more, the Magic code generated by the plugin and scanned by the phone app is constantly updated on the backend by the app. If hackers were taking aim at your site login, they’ll now find themselves looking at a moving target. As an added bonus, you won’t have to update your login every week “just in case”.

Magic Password is one of those rare plugins that’s so useful, you expect WordPress to buy it and build it into the core code.

You can download the plugin and the app for free.


[– This is a sponsored post on behalf of Magic Password –]

Add Realistic Chalk and Sketch Lettering Effects with Sketch’it – only $5!

Source

p img {display:inline-block; margin-right:10px;}
.alignleft {float:left;}
p.showcase {clear:both;}
body#browserfriendly p, body#podcast p, div#emailbody p{margin:0;}

Paint an expressive still life in acrylics

Original Source: http://feedproxy.google.com/~r/CreativeBloq/~3/o_71n5BvdB0/paint-an-expressive-still-life-in-acrylics

Still life isn’t everybody’s cup of tea – it takes a certain set of painting techniques – but for me it's always been a favourite. I like having complete control over the colours and style of the setup, the objects, drapes and the way they all work together.

Flowers from the garden are a must, and in this painting the retro coffee pot and cups really set the colour and tone. I take my time to get the setup just right. I am aiming for a very relaxed painting, without lots of detail but hopefully with lots of life and energy.

First, I create an underpainting using vibrant and sometimes contrasting colour. I build the painting in layers. Working at speed firstly with a large brush and then a palette knife I capture the mood with expressive marks, vibrant colour and texture.

01. Start bold

Rough painting of still life

A base layer can be very rough

Using a decorator's brush, I start the painting with some bold colour. This is the underpainting – the first layer of paint that will provide a colourful base over which to work later on. I am not worried about drips and don’t want any detail, just lots of vibrant colour.

02. Find the composition

Roughly painted objects on a table

A simple viewfinder can nail down the composition

In these early stages, I am using a viewfinder – a piece of card with a window cut out to the same shape as my board. I can shut one eye and look through to see the composition. This is very helpful as I start to draw in the objects with the brush.

03. Look for shapes

Table of roughly painted objects

Don’t forget to focus on negative space

As I apply the vibrant colour, I am looking for shapes. Not just the shapes of the objects themselves, but the spaces between them – the negative shapes. Just a few simple marks help me to plot the composition. I am keeping it all very free and working over the whole board.

04. Cover up

Woman painting still life

Build the whole board up at the same time

The white of the board is nearly all covered now and the colours are rich. As the darker tones are added, the objects are becoming more obvious. I am gradually working over the whole board, trying not to concentrate on any details, just the basic shapes. The flowers are simplified blocks of colour.

05. Keep it sketchy

Rough painting with darker colours

Details can be carved out of thick paint

I'm using the paint thickly now and it is still wet as I draw into it with the end of an old brush. This creates a textural surface as I pick out some sketchy detail in the coffee pot. This is still the underpainting and I’m excited to see the gorgeous colour and texture coming together.

06. Add more colour

Rough painting with added blues and greens

Bold colours are blocked in with a broad brush

Going back in with the broad brush, I add more colour on the tabletop and among the flowers. There is a white cloth on the table in my setup, but at the moment in the painting it is green and blue. The white will be added later. Using the end of an old brush, I scratch in to the flowers.

07. Coffee break

Rough underpainting of a vibrant still life

Once the underpainting’s done it’s time for a pause

At this stage I am finishing the underpainting. I give a little more definition to the coffee pot and fruit and add some more foliage. Keeping the painting very free and sketchy, I have created a colourful textural surface and the basic elements of the composition are there. It's time for a cuppa before I switch to my palette knife.

08. Use a palette knife

Still life with pale colours

Pale colours are scraped on with a palette knife

Using a palette knife to apply the paint, the background drape is now a soft green, with a little of the orange showing through. The cloth is now white. The palette knife with thick paint picks up the texture of the underpainting. Using it lightly, I leave some of the vibrant colours to show through.

09. Add a little detail

Rough still life with signs of definition

Working with a knife keeps the composition loose

With the knife I can continue to work freely without getting bogged down with too much detail. I’m still looking for the negative shapes as I paint around the objects, and the green on the table helps the coffee pot and cups stand out. I add a little detail to the objects but keep it simple.

10. Keep it clean

Still life with vibrant flowers

Contrasting tones help the colours to pop

The dark tones of the vase help the light and vibrant flowers to stand out. I paint the flowers with the palette knife, making sure I keep it clean. I paint directly and at speed, keeping the colours fresh and the marks clean. I use the shape of the knife to describe the shape of the petals.

11. Know when to stop

Vibrant still life of flowers, a jug, and fruit

Be careful not to over-work the painting

It can be hard to know when a painting is finished. I remind myself of what I wanted to achieve. I wanted to capture a mood with expressive marks, vibrant colour and texture – I wasn’t aiming for detail or precision. There comes a point when to carry on working on a painting would ruin the vitality and muddy the colour.

This article was originally published in issue 13 of best-selling magazine Paint & Draw, offering tips and inspiration for artists everywhere.

Related articles:

Sharpen your still life painting skills4 important tips for painting a still life sceneStill life photography: 30 beautiful examples

10 designers and artists to follow on Vero

Original Source: http://feedproxy.google.com/~r/CreativeBloq/~3/RSrDuYiYsnk/10-graphic-designers-follow-vero

Move over Facebook, Twitter and Instagram, there's a hot new social media platform on the block and it's called Vero. The platform, which is currently topping the App Store, is being picked up by creatives from all sorts of industries who are looking to ditch other social media sites that have become cluttered with ads.

Is it time for designers to leave Twitter?

According to Vero, what sets it apart from its rivals is that there are no ads and no algorithms. Vero is being presented as the next logical step for people who want to connect and share online. 

However usability issues, such as an inability for users to delete their accounts immediately, have already dogged the platform's image. 

Every platform goes through teething troubles, though, so could Vero be the go-to social media site of the future? If the current influx of designers and artists are anything to go by, the answer's yes. 

To help you get acquainted with the platform, we've rounded up 10 designers and artists who have already made the move to Vero. 

(Vero is currently experiencing high demand, so for now we've linked to their portfolio websites. We'll update this article with Vero handles as soon as we can.) 

01. Tom Muller

Tom Muller

Tom Muller has a diverse range of design talents under his belt

Tom Muller is a creative director who splits his time between running his own design practice, helloMuller, and working as the creative director at Possible. Specialising in creative direction, graphic design, branding design and more, Muller will be one to follow on Vero for choice insights on a broad range of design principles.

02. Thom Simpson

Thom Simpson illustration homepage

Thom Simpson’s illustrations are an intricate marvel

It's easy to lose hours looking at the detailed wonders that are Thom Simpson's illustrations. By following the talented artist on Vero you'll be able to do exactly that, and you won't be distracted by ads.

03. Siggi Eggertsson

Siggi Eggertsson

6 followers… for now

Siggi Eggertsson's beautiful creations pack all the charm of pixel art, but with their rounded elements they're a bit easier on the eyes. Be sure to follow him for visual treats straight into your timeline (or whatever the Vero version is.)

04. James Boast

James Boast

James Boast has created illustrations for the New York Times, Volvo, Easy Jet and many more

What could be nicer than logging into a social media platform and seeing the delightful artwork of freelance illustrator James Boast? It beats endless holiday snaps in our books.

05. Ben the Illustrator

Ben the Illustrator

You might remember Ben the Illustrator from his Illustrator’s survey

If you're an illustrator knocking about online, chances are you have heard of Ben the Illustrator thanks to his annual illustrator's survey. To keep up to date with all of his latest works and thoughts, why not give him a follow on Vero?

06. Velvet Spectrum

Velvet Spectrum

Velvet Spectrum is sure to take off on Vero

The Los Angeles-based creative studio of Australian graphic artist Luke Choice already has a strong following on other social media platforms, so be sure to get in on the ground floor as he sets up shop on Vero. Expect posts that explore his portfolio of surreal and unexpected art.

07. James Jean

James Jean

James Jean designed the poster for The Shape of Water

Artist James Jean already has over 60,000 followers on Twitter, but in comparison his Vero profile is looking a little lonely. Why not join him on the new site and give him a larger audience for his stunning work?

08. Thomas Fenton

Thomas Fenton

Thomas Fenton’s posts are sure to inspire 3D artists

There are a lot of traditional and digital illustrators on this list, so to shake up your tastes we recommend following 3D artist Thomas Fenton. And thanks to Vero's lack of data mining algorithms, you won't get spammed by Vero with recommendations for pretenders to his throne.

09. Bobby Chiu

Bobby Chiu

Learn something new with Bobby Chiu (heh, that rhymes)

On Twitter Bobby Chiu describes himself as an artist/teacher/creator, but now he can add Vero user to that list. With work for clients including Disney, Warner Bros and Star Wars, you're sure to pick up useful industry insights by giving him a follow.

10. TNMZ Design

TNMZ Design

Posters and lettering are the order of the day for TNMZ Design

Type fans are in for a treat with TNMZ Design. Set up by 21 year-old self taught graphic designer known as Hendry, TNMZ specialises in logo design, poster design, and professional hand lettering. If those are your bag, give TNMZ Design a follow on Vero and prepare to be bombarded by design goodness.

Related articles:

10 social media tricks you didn't know about5 golden rules for social media strategyHow to make social media work for you

Are You Choosing the Right Font for Your Website?

Original Source: http://feedproxy.google.com/~r/Designrfix/~3/CalhG42t2Qo/choosing-font-website

There is an art to choosing the right font to suit the tone and style of your website. Have you ever seen a website where the font choice just seemed off? On the other hand, there are times when a font seems to perfectly match the tone of the design. Your goal as a designer […]

The post Are You Choosing the Right Font for Your Website? appeared first on designrfix.com.

Collective #393

Original Source: http://feedproxy.google.com/~r/tympanus/~3/eanvVa5q1N8/

C393_devx

Devx Experiments

As part of the Digital Design Days, the Devx Experiments showcase some great WebGL work.

Check it out

C393_Sponsor

Our Sponsor
Over 70,000 small businesses & freelancers use Paymo

This project management app takes away the pain of planning, scheduling, task management, time tracking, and invoicing.

Check it out

C393_30css

30 Seconds of CSS

A curated collection of useful CSS snippets you can understand in 30 seconds or less.

Check it out

C393_jellymario

Jelly Mario

Stefan Hedman puts Mario into a gelatinous Mushroom Kingdom. So much more fun!

Play it

C393_webpack4

Webpack 4

Read all about the new webpack 4 (Legato) version in this article by Sean T. Larkin.

Read it

C393_midi

Neural Arpeggiator

Tero Parviainen’s amazing deep learning experiment: Let a deep neural network play an arpeggiated pattern around your chord.

Check it out

C393_svgdate

This SVG always shows today’s date

Terence Eden created this SVG that dynamically shows the current date.

Check it out

C393_Photomosh

PhotoMosh

An image glitching app with tons of options to create unique effects.

Check it out

C393_Blackchurch

Free Font: BlackChurch

A great display font designed by Yann Conan.

Get it

C393_ampemail

On AMP for Email

Jason Rodriguez shares his thoughts on Google’s announcement about adding dynamic content and interactivity to Gmail with AMP for email.

Read it

C393_titles

The Truth About Design Titles

Tobias Van Schneider humorously translates all the fancy design titles for us.

Check it out

C393_halftone

Pure CSS Halftone Effect

A brilliant experiment with CSS filters, gradients and blend modes. By Marco Buono.

Check it out

C393_tipsdesign

7 Practical Tips for Cheating at Design

Some really useful advice for better UI design by Adam Wathan and Steve Schoger.

Read it

C393_graphtheory

How to think in graphs: An illustrative introduction to Graph Theory and its applications

Vardan Grigoryan explains Graph Theory in an easy to understand way in this brilliant guide.

Read it

C393_frontend

Frontend Case Studies

A curated list of technical talks and articles about real-world enterprise frontend development. By Andrew Romanov.

Check it out

C393_cssdebugging

Custom properties for breakpoint debugging

Emil Björklund’s smart CSS debugging trick combined from various solutions.

Read it

C393_variables2

Want to learn CSS Variables? Here’s my free 8-part course!

Per Harald Borgen has created a free course on CSS Variables at Scrimba to help you get started.

Read it

C393_html

Requests-HTML: HTML Parsing for Humans

A library that intends to make parsing HTML when scraping web content as simple and intuitive as possible.

Check it out

C393_gifski

Gifski

Gifski is a macOS app for the gifski encoder, which converts videos to GIF animations.

Check it out

C393_svgburger

Would you like fries with that?

Tiffany Choong’s demo where you can build your own SVG burger 🙂

Check it out

C393_arber

Free Font: Arber Vintage

A distressed vintage font designed by Krisjanis Mezulis.

Get it

C393_amp

AMP: the missing controversy

From earlier this month but quite an interesting read: Ferdy Christant explains how Google cheats with performance.

Read it

C393_FragmentSlideshow

From Our Blog
Animated Fragment Slideshow

A tutorial on how to create an experimental slideshow that animates in fragments. The slider is powered by the “Pieces” library, which was created for achieving interesting effects like these easily.

Check it out

Collective #393 was written by Pedro Botelho and published on Codrops.

Bootstrap Native: Using Bootstrap Components without jQuery

Original Source: https://www.sitepoint.com/use-bootstrap-components-without-jquery/

Do you use Bootstrap’s JavaScript components? Do you like Vanilla JavaScript? Then you might be interested in the Native JavaScript for Bootstrap project (Bootstrap Native), which aims to remove the jQuery dependency required by the components by porting them to plain JavaScript.

Why use Bootstrap Native?

The motivations of such a port are mostly related to performance.

One benefit is the potential performance gain that can come from the superior execution speed of plain JavaScript over jQuery, as reported in many benchmarks.

Another performance advantage is the reduced page weight. Let’s make a quick comparison. All the numbers below refer to minified gzipped files and are expressed in KBs. bootstrap.js refers to the original Bootstrap scripts, bsn.js to the Bootstrap Native scripts, and jq to jQuery. Here we’re looking at the bundled files that gather together all the components, but it should be noted that both libraries have a modular structure that allows the loading of only the needed components and their dependencies.

Bootstrap.js:

jQuery 3.3.1 + Bootstrap.js = 30.0 + 12.9 = 42.9
jQuery 3.1.0 slim + bootstrap.js = 23.6 + 12.9 = 36.5
jQuery 2.2.4 + bootstrap.js = 34.3 + 11.2 = 45.5
jQuery 1.12.4 + bootstrap.js = 38.8 + 11.2 = 50.0

Bootstrap Native JavaScript:

minifill + bsn.js = 2.4 + 7.8 = 10.2
polyfill.io(on chrome 54) + bsn.js = 1.1 + 7.8 = 8.9
polyfill.io(on IE 8) + bsn.js = 12.1 + 7.8 = 19.9

(The polyfill.io size for IE8 was taken from here. These polyfills are discussed in the next sections.)

So, with the Bootstrap components the size varies over the range 36.5 to 50.0 KB, while with Bootstrap Native the range shrinks to 8.9 to 19.9 KB.

Bootstrap Native Browser Support

Regarding browser support, it’s comparable to the original Bootstrap jQuery-based script. That is, it supports the latest browsers on the major mobile and desktop platforms and IE8+. This is accomplished by means of two polyfill strategies.

The first revolves around the use of the Polyfill.io service. All you have to do is insert the relative script tag in the document to get a set of polyfills tailored to each browser:

<script src=”https://cdn.polyfill.io/v2/polyfill.js”></script>

The service can be configured to customize its response based on the features really used on the site. See the Pollyfill.io documentation for details.

Alternatively, it’s possible to use minifill, a potentially lighter custom polyfill supplied by the project author itself.

Bootstrap Native Usage

The usage is similar to the original Bootstrap scripts, except we’ll remove jQuery, replace the Bootstrap scripts with the ones supplied by the Bootstrap Native project, and, if necessary, include the polyfills.

So, before the end </body> tag we include the script for the Bootstrap Native components:

[code language=”html”]
<script src=”https://cdn.jsdelivr.net/npm/bootstrap.native@2.0.15/dist/bootstrap-native-v4.min.js”></script>
[/code]

Other CDN URLs are available and listed on the Bootstrap Native documentation page. Alternatively, the file can be downloaded and served locally.

If the polyfills are needed, they should be included in the <head> tag:

[code language=”html”]
<script src=”text/javascript” src=”https://cdn.jsdelivr.net/gh/thednp/minifill@0.0.4/dist/minifill.min.js”> </script>
<!–[if IE]>
<script src=”https://oss.maxcdn.com/html5shiv/3.7.2/html5shiv.min.js”></script>
<![endif]–>
[/code]

This snippet employs the minifill polyfill.

See the Bootstrap Native project documentation page for more detailed usage instructions.

A Port?

To be precise, it’s not a literal port that replicates all the features of the original scripts. The Bootstrap Native author deliberately chose to leave out some slight functionality, particularly lesser-used features, mainly for performance reasons and to simplify the development.

Let’s take a look at some of these issues.

The Custom Events

These are the events triggered by many Bootstrap components during their life cycle. For example, a Modal fires two events — one when it’s opened and the other when it’s closed. (Actually, two events are fired in each case, one before (‘show’) and the other (‘shown’) after the action.)
Similar events are employed by a Tab to notify its observers when there’s a tab switch: a hide event is dispatched for the current tab and a show event for the tab that has to be shown.

Bootstrap Native, instead, provides these events only for the Carousel and the Button. The original Carousel triggers a couple of custom events when there’s a transition between two slides. The first event, ‘slide’, is fired just before the transition begins, while the other one, ‘slid’, is fired after the transition has completed. The event object passed to the handlers has two properties that supply information about the transition, direction, and relatedTarget.

The following jQuery snippet illustrates:

[code language=”js”]
$carousel
.on(‘slide.bs.carousel’, function(e) {
var caption = $(e.relatedTarget).find(‘.carousel-caption’).text();
console.log(‘About to slide to the ‘ + e.direction + ‘ to slide ‘ + caption);
})
.on(‘slid.bs.carousel’, function(e) {
var caption = $(e.relatedTarget).find(‘.carousel-caption’).text();
console.log(‘Slid to the ‘ + e.direction + ‘ to slide ‘ + caption);
});
[/code]

Bootstrap Native supports both events, but the event object doesn’t have the direction and relatedTarget properties. We can translate the previous snippet into vanilla JS in this way:

[code language=”js”]
carousel.addEventListener(‘slide.bs.carousel’, function(e) {
console.log(‘About to slide’);
});

carousel.addEventListener(‘slid.bs.carousel’, function(e) {
console.log(‘Slid’);
});
[/code]

What about if we need the custom events for some other component? It’s not too difficult to implement them ourselves. We can refer to the Bootstrap Native Carousel code and use the CustomEvent API.

First create the event objects:

[code language=”js”]
if ((‘CustomEvent’ in window) && window.dispatchEvent) {
slid = new CustomEvent(“slid.bs.carousel”);
slide = new CustomEvent(“slide.bs.carousel”);
}
[/code]

When a slide transition is about to start, the ‘slide’ event is fired:

[code language=”js”]
if (slide) {
this.carousel.dispatchEvent(slide);
}
[/code]

And, finally, when the transition has finished, the ‘slid’ event is triggered:

[code language=”js”]
if (slid) {
self.carousel.dispatchEvent(slid);
}
[/code]

Based on this model, similar code can be easily added to other components.

The CustomEvent API is not readily available on every browser, but the aforementioned polyfills cover it.

Continue reading %Bootstrap Native: Using Bootstrap Components without jQuery%

5 Ways to Design Like a Dungeon Master

Original Source: https://www.webdesignerdepot.com/2018/02/5-ways-to-design-like-a-dungeon-master/

Storytelling is great for design, so long as you aren’t trying to sell a fairy tale…

Do you tell your users a story about how you’ll save them from their troubles? It’s not very realistic, and users generally know this. You might try a different approach.

Once upon a time in the videogame industry, some game developers got tired of writing stories and quests into their games. So they made a bunch of sandbox-style games where the player could do almost anything they wanted. They just had to want to do it. The “story” would be formed in the player’s own mind, as they took actions and saw consequences in the game.

This was called “emergent storytelling”, and the game developers were very proud of themselves. But they didn’t invent it. Not at all. Emergent narratives have a long history, but were perhaps perfected by the “Game Masters” and “Dungeon Masters” of the tabletop roleplaying games, like Dungeons & Dragons.

There’s a lot we designers can learn from the experiences of Dungeon Masters.

The crash course: Remember when you were a kid playing pretend with others, and then one kid suddenly had a pretend gun, another had a pretend bazooka, and another a nuke? Roleplaying games are basically codified sets of rules that allow people to play pretend without that sort of instant escalation.

The Dungeon Master is a person who referees the game, enforces the rules, tells the story, and doles out consequences for actions. They’ve been telling stories for a long time, often with main characters who are stubborn, ignorant, and determined to break everything the DM might create.

Does that sound familiar to you? There’s a lot we designers can learn from the experiences of Dungeon Masters. They’re experts in both telling pre-planned stories with input from the players, and letting players tell their own stories altogether, and we need to learn both, too.

1. Make Your User the Main Character

Whether a DM has a specific story he wants to tell, or intends to let the player write their own, one thing remains mostly-constant. The player is the protagonist. They are not necessarily the hero, or the “chosen one”, but the protagonist. It is this perspective that allows players to quickly get invested in their character, and the world.

So much of the storytelling I see in web design would have you believe that the product they’re selling is the main character. Worse, sometimes they try to tell you that the website itself is somehow the protagonist of the story. To the Pit with that idea!

Your product is just a tool in their inventory, like a handy rope, or a +4 Vorpal Longsword. They’re the ones making things happen. Remember that, and do your best to play that role. Fight against your role, and they might see you as more of a cursed weapon, to be discarded and dismantled at their earliest convenience.

2. Players May Not Do What You Want

Writers have it easy-ish. They can make their characters do whatever they want, even when it doesn’t make a lot of sense for the character. (Sure, that’s bad writing, but whatever.) Dungeon Masters have to deal with real people playing characters who will do what they want, when they want. Yes, they can punish players for undesired behavior, but that’s a fast way to drive players to another game.

Users are pretty much the same. Learn to adapt to the way your users want to do things. Remember that even if you have a greater narrative going on, it’s still their story in the end. They won’t always be content to go from the Home page, to the Features page, to the Buy Now page every time, in that order. They will find their own path somehow, but it will be easier on both of you if you give them more than one.

3. Players Will Abuse Every System They Can

D&D players and users alike will eventually find the most efficient way to get something done…

A corollary for the point above is that D&D players and users alike will eventually find the most efficient way to get something done, and you may not like it. This is called “meta-gaming” and in D&D, it involves combining classes, special gear, and abilities to create characters that are far more powerful than they should be.

In using web sites or apps, it means that if users find a way to get what they want without jumping through any hoops you have set up, they’ll do it. And they’ll get annoyed if you take their shortcuts away.

4. Have a Big Plan Anyway

Good Dungeon Masters have stuff going on in their world. The players themselves may or may not decide to interact with all of the people and events around them, but “life” will go on. Usually, players will eventually come face to face with the big boss in any case, if only because that boss is bent on dominating the whole world anyway.

Unless your users leave your site altogether, they’re at least going to look at your prices and a big “Buy Me” button eventually. Just because some people won’t follow the plan doesn’t mean you shouldn’t have one. Most users are less obstinate than your average D&D player, and will be glad to have a quick and easy route to their goal.

5. Have Another Plan for When Things Really Break

In D&D, player’s characters can die, and they have to make new ones. In one campaign, a mistake the DM made allowed us to blow up an entire (alternate) plane of existence with most of us in it. Long story. Anyway, he was able to continue the story with new characters, and some fast adjustments to the main story between sessions. Long-time DMs learn to account for catastrophic turns of events like that one.

In web design, we don’t have the option to fix things between sessions, though. The story has to keep going, even if your players are on, say, an error page. If you’re going to use storytelling as a metaphor for your user experience design, then you need to use it everywhere. The story shouldn’t end just because a link went missing.

And with that, have fun. And happy adventuring!

Bouncy Castle Modern Calligraphy Font Family – only $9!

Source

p img {display:inline-block; margin-right:10px;}
.alignleft {float:left;}
p.showcase {clear:both;}
body#browserfriendly p, body#podcast p, div#emailbody p{margin:0;}

Freebie: “Dropcast” Website Template (HTML, Sketch)

Original Source: http://feedproxy.google.com/~r/tympanus/~3/qV2u5fHLbWk/


Dropcast_Featured

Today we’re thrilled to share another modern, responsive HTML template for podcasts with you.

Dropcast is a responsive HTML/CSS/Javascript template which comes with Sketch files and a fully working site with SCSS. It has two page templates and it works very well for podcasts landing pages or blogs. You can easily customize the style.

You can use Dropcast freely for your personal project or commercially, for your client work.

Live demo

Check out the live demo: Dropcast Live Preview

Download the template for free:

You can download the ZIP file of the template and the design file here:

Download Dropcast (ZIP file 4.8 MB)
Download the Dropcast design file (Sketch file 58.6 MB)

Use it freely but please don’t republish or redistribute the template.

GitHub repo link coming soon!

We hope you enjoy this freebie and find it useful!

If you’d like to contribute and publish your freebie on Codrops drop us a line.

Freebie: “Dropcast” Website Template (HTML, Sketch) was written by Amie Chen and published on Codrops.

The 13 best photography websites

Original Source: http://feedproxy.google.com/~r/CreativeBloq/~3/MsZ7GBblMd0/websites-10121096

The web is full of endless resources and tutorials on the subject of photography, but sometimes too much choice can be confusing. Here, we've picked the top photography websites that will really help you take your photography skills to the next level.

If you're a designer or creative after stock photography, check out our Best websites to download stock art post. And if you're looking to upgrade your camera, don't miss our guide to the best cameras for creatives.

But if you'd like to learn more about taking stunning photographs, gain inspiration from expert photographers and develop your camera craft, check out these great photo websites.

01. Digital Camera World

Digital Camera World screenshot

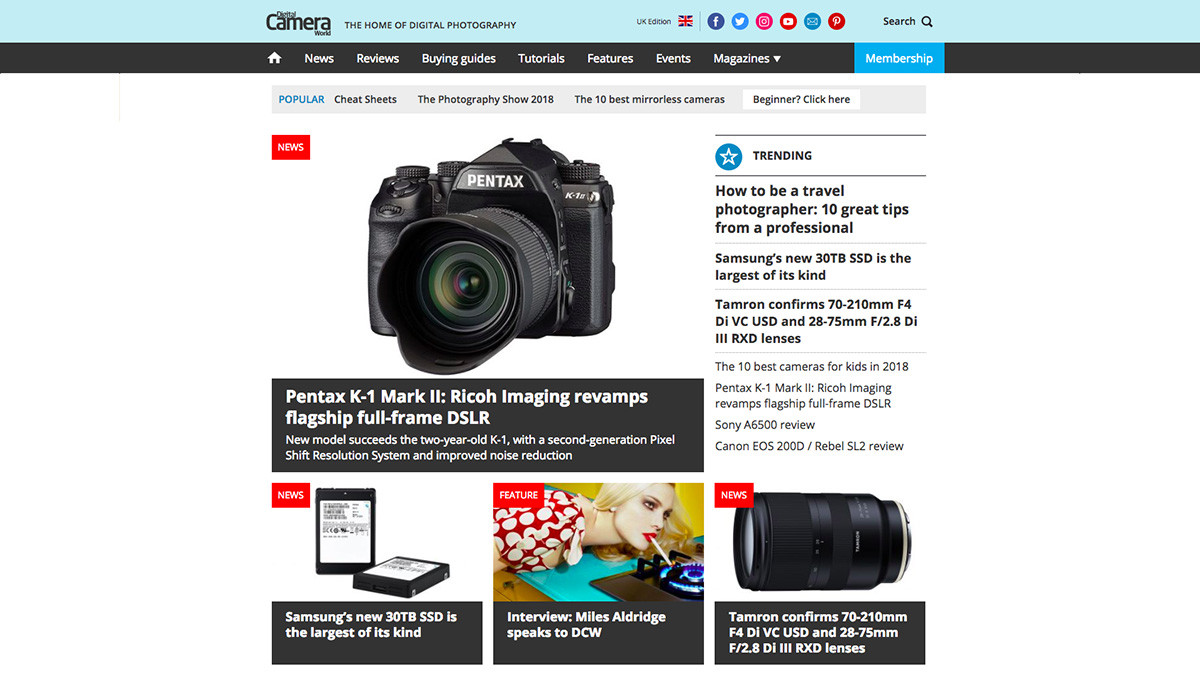
Visit Digital Camera World for daily news, tip, tutorials, reviews and much more

Digital Camera World is the world's fastest-growing photography website, covering every aspect of image-making, from DSLRs and photo editing to mobile photography and drones.

Through informative tutorials, no-nonsense reviews and in-depth buying guides, DCW helps photographers find the best gear, and shows them how to use it. Full disclosure: it's one of our sister titles, also made by Future Publishing.

02. Camera Jabber

Camera Jabber screenshot

Camera Jabber is a goldmine of news, reviews and tips for photographers

Built by photographers for photographers, Camera Jabber offers up an enticing mix of news, reviews and buyers' guides, on everything from phone cameras and DSLRs up to the latest action and 360 cameras. 

You'll also find a wealth of how-to material that'll take you through the photographic basics and on to more specific guides on things like editing your shots and building a portfolio. It's updated daily, and always worth checking in to see what's new.

03. British Journal of Photography

British Journal of Photography website screenshot

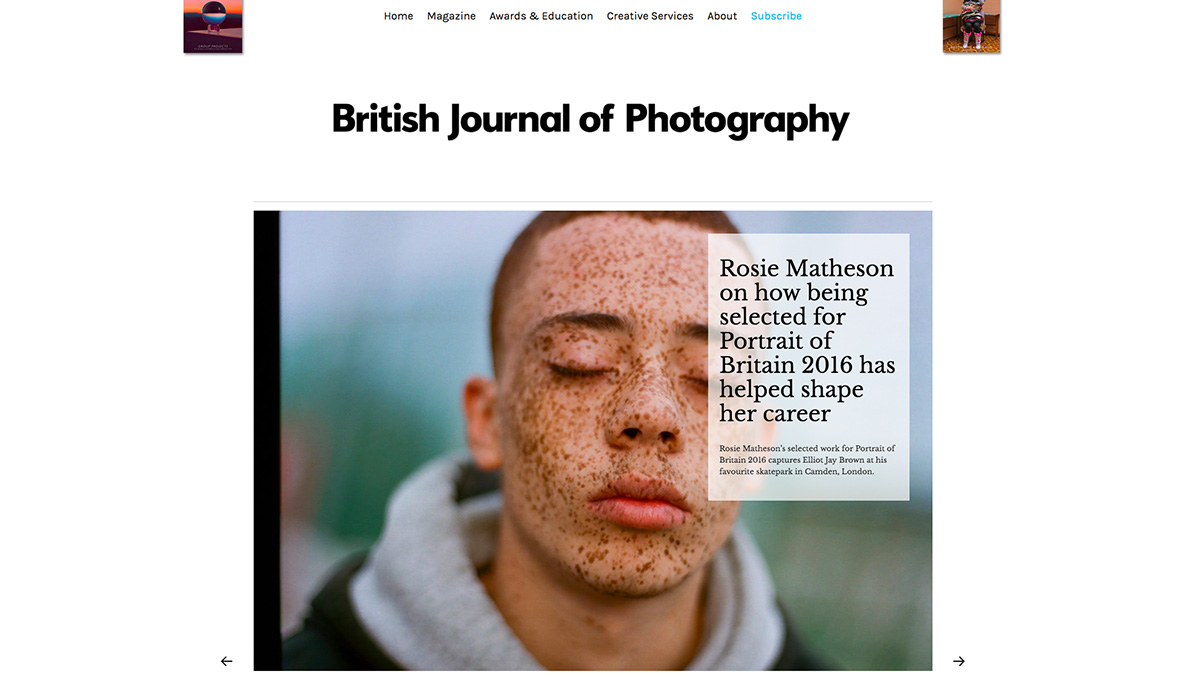
The British Journal Photography has been supporting photographers since 1854

The British Journal of Photography has been around since 1854, and it's kept up with the times since then. Its website is a great accompaniment to the venerable magazine, serving up thought-provoking photography and fresh perspectives every day. 

And its student and professional awards are a great way to discover new talent – or, indeed, to get your own photography skills recognised.

04. DIY Photography

DIY Photography website screenshot

DIY Photography has been running for over 10 years and is rammed with useful advice

Started in 2006 as a place for gear-lusting photographers, DIY Photography is a great place to pick up expert advice and read about the latest kit. 

Again written by photographers for photographers, it's heavy on the tutorials with hundreds of useful how-to articles online, plus a whole load of DIY articles that'll help you build your own gear rather than splashing out on expensive kit.

05. iPhone Photography School

iPhone Photography School screenshot

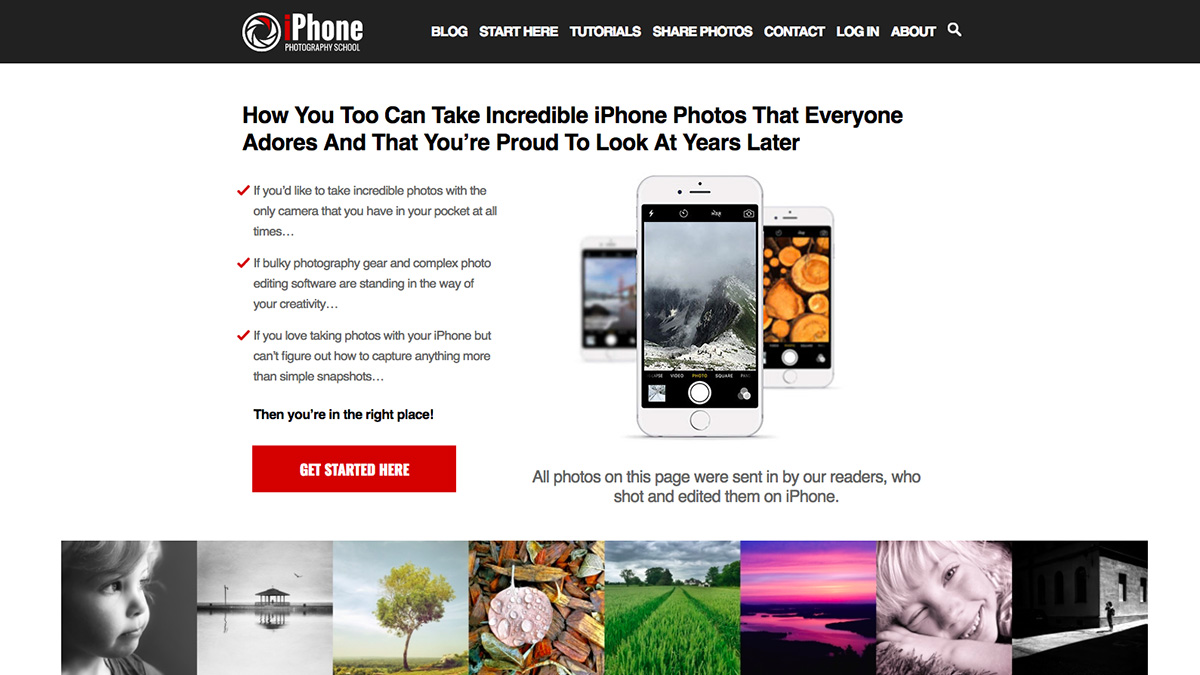
Don’t have a DSLR? You can still take excellent photos with your phone

Just because you don't have a heavyweight camera, it doesn't mean that you can't take beautiful photos. iPhone Photography School has one simple aim: to help you take better photos with your iPhone than most people can with a DSLR. It does this with plenty of in-depth tutorials covering photography techniques and photo editing, as well as inspiring articles and regular competitions so you can pit your newfound skills against others.

06. Digital Photography Review

DP Review screenshot

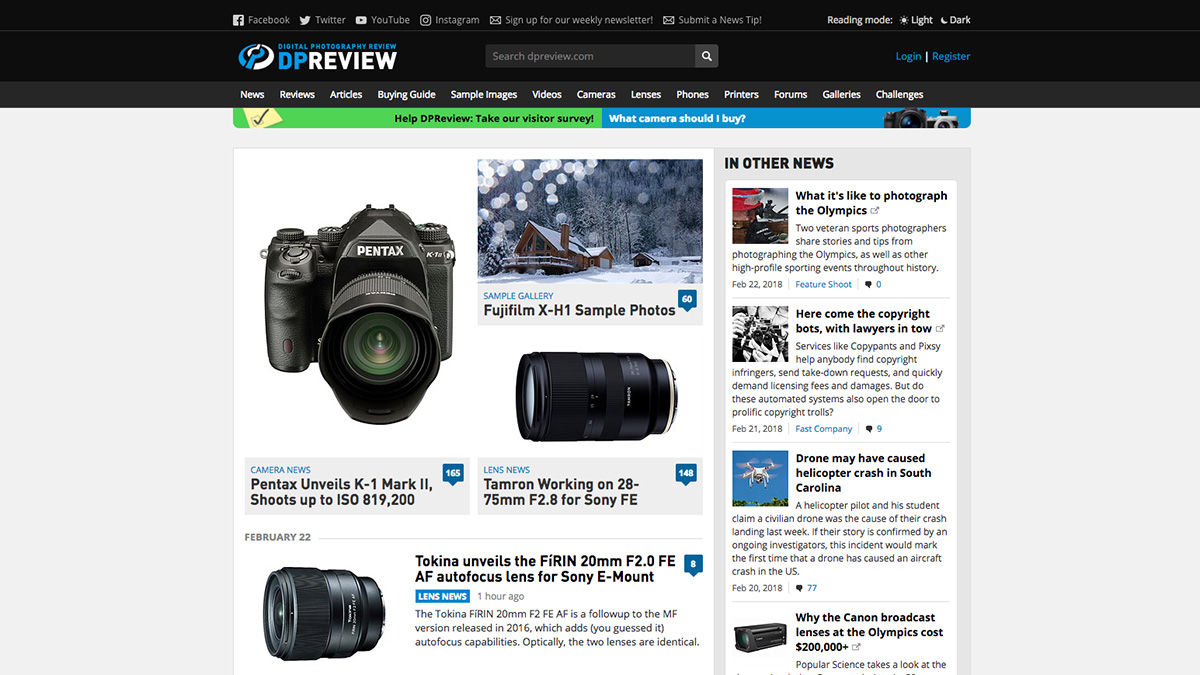
Digital Photography Review is bursting at the virtual seams with all the sector’s latest news and product reviews

Touted as the number one destination for everything digital photography-related, Digital Photography Review is bursting at the virtual seams with all the sector's latest news and product reviews. 

Complete with video tutorials, buying guides and forums, there's plenty on this photography website to keep you hooked and clicking back for more.

07. The Spruce: Photography

The Spruce: Photography screenshot

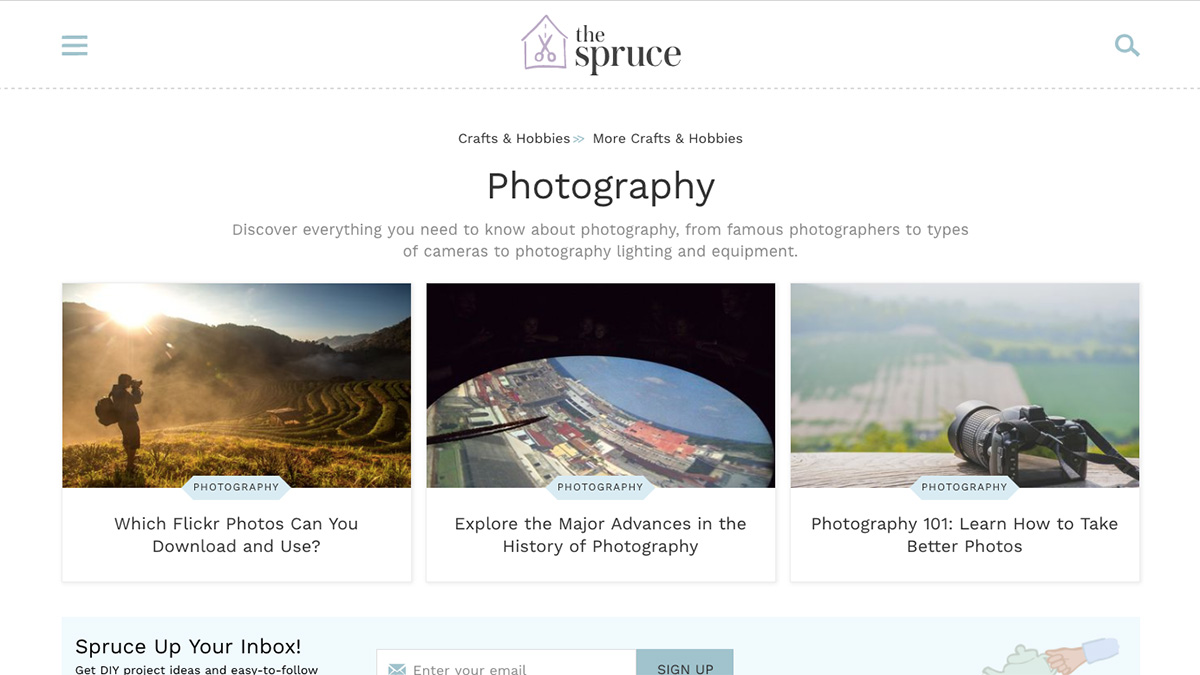
The Spruce: Photography is both an advice centre and repository of extensive further reading

Written by a host of photography experts, The Spruce: Photography is both an advice centre and a repository of extensive further reading. Once you're on this website's photography channel, you'll be clicking from one useful video to another before veering off down a rabbit hole of enlightening articles. There's plenty to enjoy – just make sure that you don't get lost.

08. Digital Photography School

Digital Photography School website screenshot

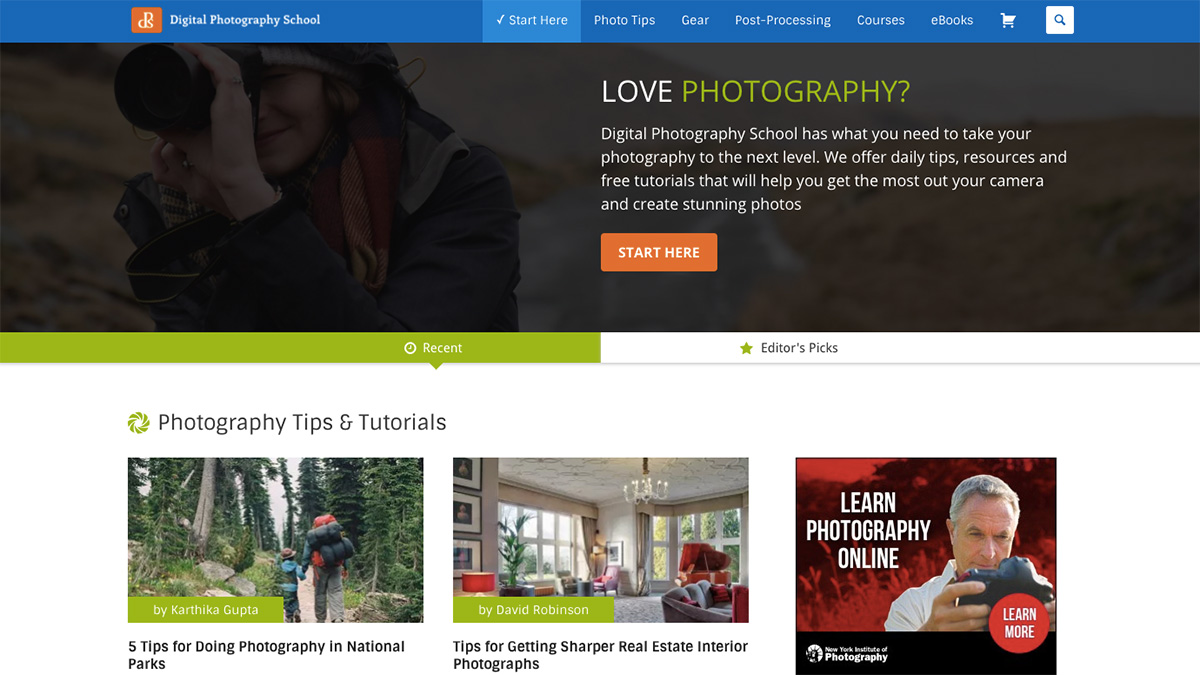
Digital Photographers School aims to help photographers get the most out of their cameras

Digital photography enthusiast Darren Rowse is the man behind Digital Photography School, a site that aims to help photographers get the most out of their cameras. With sections including photo tips, gear and post-processing, all the essentials are well covered.

09. Strobist

Strobist website screenshot

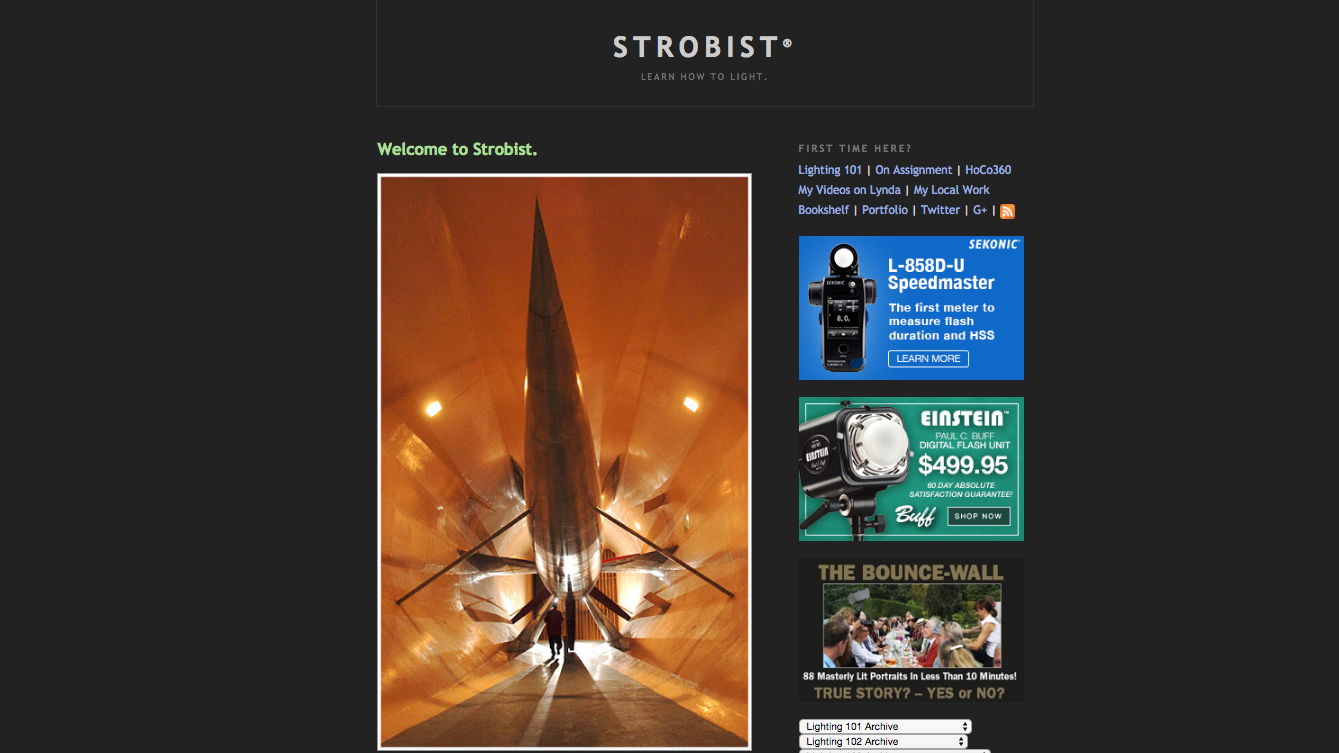
Strobist is a must for anyone just starting out with light

Strobist is about one thing: Learning how to use off-camera flash with your DSLR to take your photos to the next level. Or the next 10 levels. If you’re a complete beginner at lighting, no worries. The free Lighting 101 course starts from the very beginning, and can get you up and running fast.

10. 500px

500px screenshot

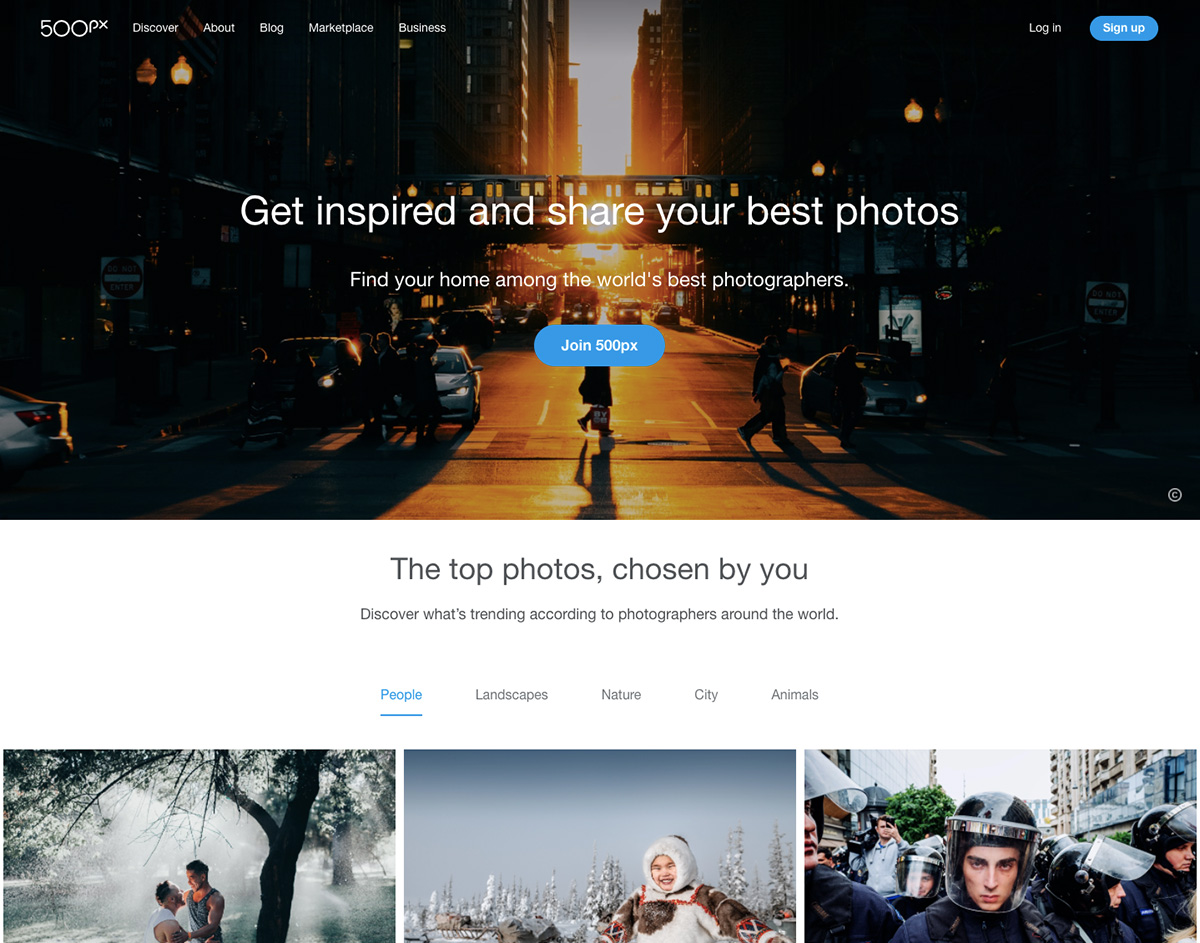
Connect with like-minded people at online photography community 500px

If it's inspirational images you're after then look no further than 500px. Founded by Oleg Gutsol and Evgeny Tchebotarev, this online photography community is a place to gain exposure, find inspiration and connect with other photographers. The site has had a recent redesign, and with a library of over six million photos you'll never run out of pretty pictures to look at and feel inspired by.

11. The Photo Argus

The Photo Argus website screenshot

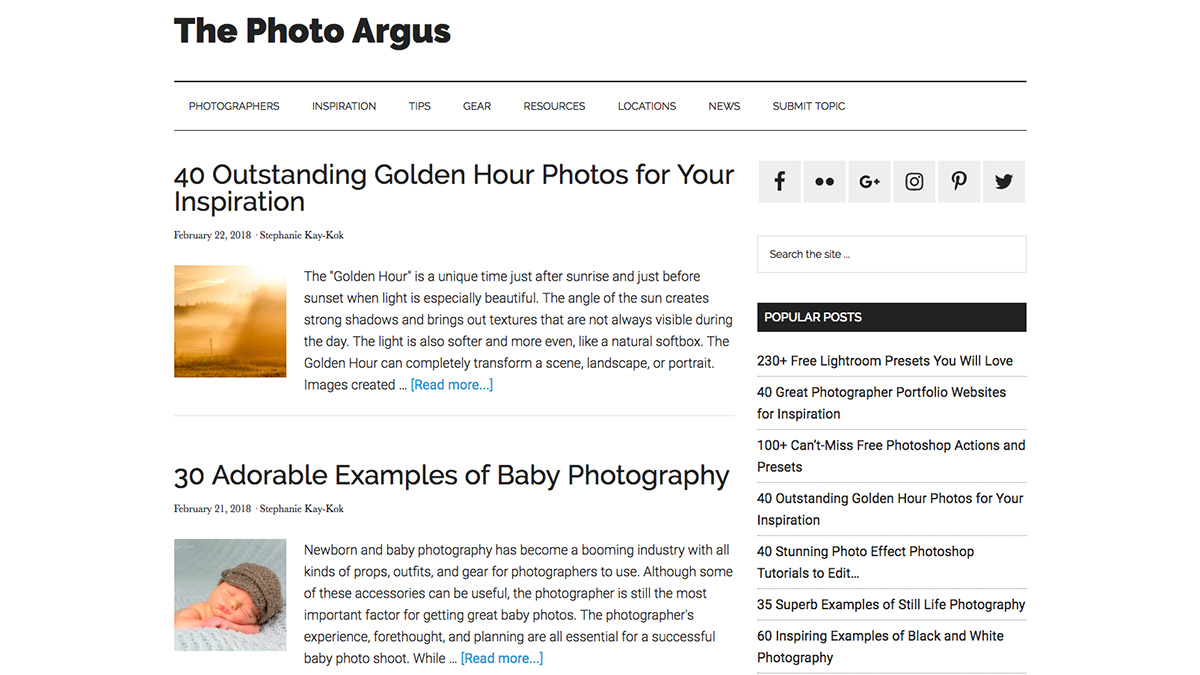
Find helpful tips, tricks and techniques on photography blog The Photo Argus

The Photo Argus is an online resource for photographers – from novice users to advanced pros. The site provides useful information, inspiration, techniques, photographer showcases and more. Find what you're looking for using the organised topic sections or browse through the Popular Posts and the most up-to-date articles on the homepage.

12. PetaPixel

PetaPixel homepage screenshot

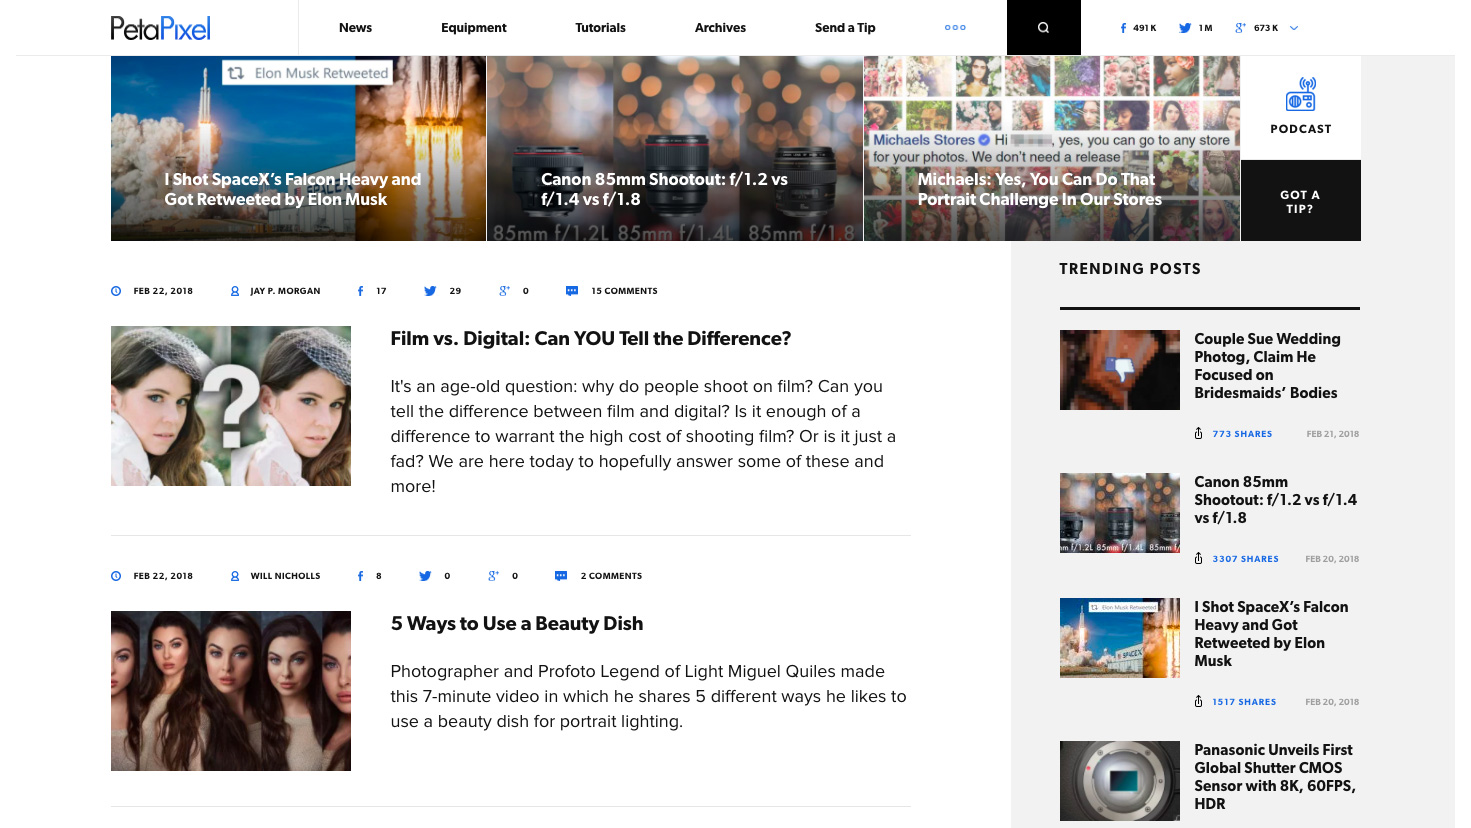
Tutorials cover a range of topics

PetaPixel is a website offering tutorials, news and kit. The tutorials are imaginative and practical, offering videos and screen grabs to guide you through each step. 

Equipment covers new camera, lens and other photography kit announcements, but doesn't include reviews (you'll need to look elsewhere for those). News covers all sorts of interesting developments in the photography world – both hilarious and informative.

13. Photography Week

Photography Week front cover and article view

Photography Week is a digital magazine

While not technically a website, Photography Week is a digital magazine, so we're including it here. Packed with beautiful photography, it offers heaps of fresh inspiration every week. 

Full disclosure: It's another of our sister titles, also made by Future Publishing. Get it on iPad and iPhone, Android devices or through Zinio for multiple devices, including computers.

Related articles:

15 ways to improve your photography skillsThe best cameras for creativesThe best photo editor apps