Facebook Goes All Meta

Original Source: https://www.webdesignerdepot.com/2021/10/facebook-goes-all-meta/

It’s almost Halloween, so we were all expecting the odd scare, but little could have prepared us for the blood-chilling horror of Facebook CEO Mark Zuckerberg ‘acting’ amazed in front of a green-screened mockup of The Metaverse, during his keynote at the company’s Connect event.

Zuckerberg — or The Zuckster, as I imagine he introduces himself when arriving uninvited to your birthday drinks — was in the process of announcing that the company formally known as Facebook would from now on be known simply as Meta.

Facebook, the social network, will remain Facebook, but it will be one product among many. Or, as The Zuckster clearly hopes, one among all.

Meta logo reveal.

With the new name comes a new visual identity, one so bland that I need to go full-on Clockwork Orange just to critique it. Eyes pinned open, you’ll see an elongated infinity wave in an inoffensive tech-blue gradient and a generic geometric sans logotype. You could throw $5 at a sweat-shop style freelance site and receive a more ambitious, inspiring design than this. It is utterly bland.

If I try really, really hard to find something wrong, I might suggest the M feels a little too large, the single-story a is a little too open compared to the spacing elsewhere, and the wave is a little unbalanced and a little too small. But that is being super-picky because just as there’s little to get excited about, there’s little to be offended by either. It’s a logo fit to adorn a mid-range domestic router.

The Zuckster’s faith in himself as a positive brand ambassador means that he takes full credit for the new direction. The small team involved was reportedly required to sign extensive NDAs, and there’s no credit being given to any external agency.

Of course, it’s very easy to point out what Meta (née Facebook) gets wrong. What it doesn’t get wrong is making money. And this is a sensible business decision from a company that has watched Google extricate itself from algorithm-related ethics allegations with its Alphabet rebrand.

Leaked internal research suggests that Facebook is extremely concerned about its ability to maintain its position in the social media landscape. The app is in sharp decline. It’s no longer the most installed app, and even for those who still have an account, it’s used weekly rather than hourly. Most worrying of all, the average age of its userbase is steadily increasing.

Strategically, it’s a good design direction for Facebook. The most significant benefit is that absolutely none of the insidious, anti-democratic crimes that Facebook has been accused of can be associated with Meta; Meta is a blank slate.

In a press release that echoed The Zuckster’s keynote, Meta notes that it will begin trading under the stock ticker MVRS from December 1, staking a claim as the Metaverse business entity.

The Metaverse — and let’s be clear, this is not The Zuckster’s concept — is a so far ill-defined collection of ideas that will potentially coalesce over the next few years into some form of virtual reality web. It’s almost as if someone over at Facebook HQ said, “If only we could name ourselves ‘Inter,’ then we’d own the whole Internet!” And everyone cheered.

So yes, there is the sickening reality that we’re going to spend the rest of our careers trying to find a less tainted name for metadata. But that’s nothing to the amount of time we’ll devote explaining to future generations that Meta is not The Metaverse.

From now on, I’ll be referring to all Web 3.0 as the Geoverse and see if I can’t revive the fortunes of Geocities. Ah, now there’s a social network worth raising from the dead. Happy Halloween.

Source

p img {display:inline-block; margin-right:10px;}
.alignleft {float:left;}
p.showcase {clear:both;}
body#browserfriendly p, body#podcast p, div#emailbody p{margin:0;}

The post Facebook Goes All Meta first appeared on Webdesigner Depot.

Collection of Innovative Kitchen Tools & Gadgets

Original Source: https://www.hongkiat.com/blog/innovative-kitchen-tools-gadgets/

Cooking is one of the many splendors of life. At least, if you know your way around the kitchen, it would be. Not a fan of cooking because you hate chopping up ingredients? Maybe these gadgets will…

Visit hongkiat.com for full content.

Collective #685

Original Source: http://feedproxy.google.com/~r/tympanus/~3/1ca3kHO8-n8/

Inspirational Website of the Week: Miranda

A true masterpiece with a playful editorial look, unique layouts and a hot page transition!

Get inspired

Our Sponsor
Be: The WordPress Theme that follows the latest eCommerce design trends

Build stunning eCommerce websites with Live search or bottom sticky menu on mobile which makes mobile sites act more like apps! All wrapped in outstanding eCommerce performance.

Discover more

Building an effective Image Component

An image component encapsulates performance best practices and provides an out-of-the-box solution to optimize images.

Read it

Front End Tables: Sorting, Filtering, and Pagination

Tania Rascia shows how to code a table that has sorting, filtering, and pagination using React.

Read it

Skeletonise yourself with pose detection

Learn how to create a fun Halloween AI based experience entirely in the browser with TensorFlow.js.

Read it

Prevent Scroll Chaining With Overscroll Behavior

Ahmad Shadeed shows how to prevent scroll chaining with overscroll-behavior property in CSS.

Read it

My Little Storybook

My Little Storybook is a wonderful Lusion Monthly Experiment. It is a story of a bird family crossing the river.

Check it out

Next.js 12

Next.js 12 introduces a brand-new Rust compiler, Middleware (beta), React 18 Support, Native ESM Support, URL Imports, React Server Components (alpha), and more!

Check it out

Cleanup.pictures

A free tool to remove objects, people, text and defects from any picture. It works really well!

Check it out

CookLang

CookLang is a markup language for recipes. Create a recipe file, where each line is a step in the recipe.

Check it out

Flatmap

A fast and flexible tool to build vector tiles from OpenStreetMap data.

Check it out

We Analyzed 425,909 Favicons

A super-interesting analysis of almost half a million favicons.

Check it out

20 Years of G2K

G2K creative Agency’s celebration with an exciting scroll experience.

Check it out

Obsidian

Obsidian is a powerful knowledge base on top of a local folder of plain text Markdown files. Free for personal use.

Check it out

Photoshop’s journey to the web

Read how by using various new standardized web technologies, Adobe has brought a public beta of Photoshop to the web.

Read it

New HTTP standards for caching on the modern web

Learn about the recent work to launch two new HTTP header draft standards intended to make debugging your caching easier, and to provide more control over your cache configuration.

Read it

Johanna Jaskowska

An amazing interactive gooey effect by Johanna Jaskowska.

Check it out

Life of Discipline

A free habit tracker using GitHub-style calendar heat maps to help you track anything.

Check it out

The Button Cheat Sheet

Do you need a button for your next project but you’re not sure about the right markup? This cheatsheet has got you covered!

Check it out

Localstack

A fully functional local AWS cloud stack. Develop and test your cloud and Serverless apps offline.

Check it out

This sneaker does not exist

A fun project where you can customize your AI-generated sneakers.

Check it out

Compatlib

With these Python utilities you can easily write cross-version compatible libraries.

Check it out

Sparse vs Dense Arrays in JavaScript

Learn about the difference between sparse and dence arrays in JavaScript in this article by Dmitri Pavlutin.

Read it

Release Notes for Safari Technology Preview 134

Some important updates for Safari are coming.

Check it out

From Our Blog
The Process of Building a CSS Framework

A behind-the-scenes look at making a CSS framework and a tutorial on how to build a website with it.

Check it out

From Our Blog
Creating the Effect of Transparent Glass and Plastic in Three.js

Learn how to create convincing transparent, glass-like and plastic-like materials in Three.js using MeshPhysicalMaterial.

Check it out

The post Collective #685 appeared first on Codrops.

Pricing Tables: Best Designs and WordPress Plugins

Original Source: http://feedproxy.google.com/~r/1stwebdesigner/~3/tiXnOsrCxWk/

If you’re a regular online shopper, you’ve definitely come across pricing tables before. Pricing tables are an important feature of websites that sell online. These tables help customers compare product features and prices.

Pricing tables need to be simple and easy to understand because they help users make an informed buying decision. A lot of information is likely to overwhelm the customer while too little or unclear information can be ineffective.

Other benefits of pricing tables include:

Tables help remove unnecessary clutter.
They save on space.
Provide a clear call to action.
Can attract more clients and generate more sales.

Now, it is important to note that not all WordPress themes have pre-built pricing tables, so you might need to download a plugin to integrate this feature.

UNLIMITED DOWNLOADS: 1,500,000+ Icons & Design Assets

DOWNLOAD NOW


What To Look For In A WordPress Table Plugin

Before we get to the list, let’s first pause to discuss what features are a must-have for any pricing table plugin you decide to use.

1. Pricing Table Templates

Look for plugins that offer several pricing table templates. This will help you in customizing your designs according to exactly what you’re looking for.

2. Price

If your website is small and you’re just looking for something simple, be sure to check the available free plugins before purchasing one. There are so many free plugins, many with a bunch of cool features.

3. Customization

You should look for a plugin that will allow you to customize your table according to your branding. That means custom colors, fonts, etc.

4. Integrations

Look for a plugin that can easily integrate with your WordPress theme so it works seamlessly.

WordPress Pricing Table Plugins

Below, we have identified some of the best pricing table plugins available and we hope you’ll find one that best suits your needs.

1. Go Pricing

Go Pricing - WordPress Pricing Table Plugins

Go Pricing is a table plugin that offers you almost 200 table designs. Its modern and stylish features will help you create the perfect pricing table for your website.

The plugin will help you customize your table without having to code. This is perfect for someone who isn’t familiar with web design.

It also offers you 200 templates, 2,000+ font icons, over 600 fonts, an unlimited color selection, modern media options, and more.

Some of its pros and cons include:

Pros

Has extensive customization options and is feature-rich.
Has a live preview option that allows you to see how your table will look at the end.
Popular with page builders like Elementor, WP Bakery, and Beaver Builder.
Has a column animation feature.

Cons

You have to be on a paid subscription to download table templates.

2. Responsive Pricing Table

Responsive Pricing Table

Responsive Pricing Table is a free WordPress plugin that has a shortcode that allows you to show your table anywhere on the website. It adds a pricing table tab in the admin section which makes adding a pricing table easy.

With the many features it offers, you’re able to: add different colors to your table, choose unique fonts, and more.

Some of its pros and cons include:

Pros

Easy to create and customize.
Can be used to compare products.
You can change the currency sign.
You can highlight any plan.

Cons

Poor customer support.

3. CSS3 Responsive WordPress Compare Tables

CSS3 Responsive WordPress Compare Tables

The CSS3 Responsive pricing table is a premium plugin with several customization features. It comes with two table styles and 20 predefined color options.

It also offers a number of features that will help you create the best tables for your site such as hover animations, pop-ups, and ribbons. This plugin is perfect for creating beautiful pricing tables.

Some of its pros and cons include:

Pros

Allows you to see your changes in real-time.
Can highlight columns and customize fonts.

Cons

You need CSS if you wish to access more customization features.
Comes with only two table styles and 20 color themes.
Can be time-consuming to set up.

4. ArPrice Pricing Tables

ArPrice Pricing Tables

This is a free and premium WordPress plugin that allows you to make responsive pricing tables that can be used on multiple devices. Some of its features include the ability to create an animated pricing table.

With ArPrice you have a selection of over 170 already made templates to choose from. You can also use the drag and drop editor to adjust and resize columns as needed.

ArPrice has a real time editor feature that will make the customization of your site easier.

Some of its pros and cons include:

Pros

Allows language translation.
It’s lightweight.
Easy to use.
Offers a variety of colors.

Cons

Can be slow at times.

5. Easy Pricing Tables

Easy Pricing Tables WordPress Plugin

Easy Pricing Tables is a WordPress plugin that lets you create your tables with ease. The plugin is easy to use and gets the job done quickly. It includes predefined colors and themes. With this plugin you get 120+ ribbons, a live preview, 100+ content elements, and more.

Some of its pros and cons include:

Pros

Easy to use.
Has the drag and drop feature.
Gutenberg compatible.
Compatible with all WordPress themes.

Cons

No cons found.

Best Pricing Table Designs

So, you now know about a few pricing table plugins that can help you display pricing information in a straightforward way. But if you’re stumped on design inspiration, we’ve compiled a shortlist of some top designs to add some fuel to your design fire.

1. Shopify

Shopify pricing table

The Shopify pricing table is one of the best around because its layout makes it easy to compare different plans. And the prominent Free Trial buttons encourage conversions.

2. Dropbox

Dropbox pricing table

The Dropbox table layout makes it easy for buyers to compare pricing and features. This helps users get to know what exactly they are purchasing and decide on what works better for them.

3. Slack

Slack pricing table

Slack’s pricing table uses different colors to highlight different available plans. This makes the table more eye-catching and is likely to grab the customer’s attention. Each plan comes with a description of how they are billed and also includes a call-to-action.

4. Airtable

Airtable pricing table

Airtable is another great example of a pricing table that uses colors to grab attention. It has a simple design that draws focus to the features available on each plan.

There’s also a monthly or yearly option at the top of the table that helps you select your preferred plan.

5. LightCMS

LightCMS pricing table

LightCMS is another great example of a well designed pricing table. They have incorporated different colors to grab attention and to highlight the different available plans. They’ve also used different font sizes for comparison.

Conclusion

A well designed pricing table is likely to grab the consumer’s attention. If you’re looking for a good pricing table for your website, we hope this list of plugins and designs has helped you figure out what will work best for your site. Best of luck! Be sure to check out our other articles about WordPress plugins while you’re at it.


How To Build An Amazon Product Scraper With Node.js

Original Source: https://smashingmagazine.com/2021/10/building-amazon-product-scraper-nodejs/

Have you ever been in a position where you need to intimately know the market for a particular product? Maybe you’re launching some software and need to know how to price it. Or perhaps you already have your own product on the market and want to see which features to add for a competitive advantage. Or maybe you just want to buy something for yourself and want to make sure you get the best bang for your buck.

All these situations have one thing in common: you need accurate data to make the correct decision. Actually, there’s another thing they share. All scenarios can benefit from the use of a web scraper.

Web scraping is the practice of extracting large amounts of web data through the use of software. So, in essence, it’s a way to automate the tedious process of hitting ‘copy’ and then ‘paste’ 200 times. Of course, a bot can do that in the time it took you to read this sentence, so it’s not only less boring but a lot faster, too.

But the burning question is: why would someone want to scrape Amazon pages?

You’re about to find out! But first of all, I’d like to make something clear right now — while the act of scraping publicly available data is legal, Amazon has some measures to prevent it on their pages. As such, I urge you always to be mindful of the website while scraping, take care not to damage it, and follow ethical guidelines.

Recommended Reading: “The Guide To Ethical Scraping Of Dynamic Websites With Node.js And Puppeteer” by Andreas Altheimer

Why You Should Extract Amazon Product Data

Being the largest online retailer on the planet, it’s safe to say that if you want to buy something, you can probably get it on Amazon. So, it goes without saying just how big of a data treasure trove the website is.

When scraping the web, your primary question should be what to do with all that data. While there are many individual reasons, it boils down to two prominent use cases: optimizing your products and finding the best deals.

Let’s start with the first scenario. Unless you’ve designed a truly innovative new product, the chances are that you can already find something at least similar on Amazon. Scraping those product pages can net you invaluable data such as:

The competitors’ pricing strategy
So, that you can adjust your prices to be competitive and understand how others handle promotional deals;
Customer opinions
To see what your future client base cares about most and how to improve their experience;
Most common features
To see what your competition offers to know which functionalities are crucial and which can be left for later.

In essence, Amazon has everything you need for a deep market and product analysis. You’ll be better prepared to design, launch, and expand your product lineup with that data.

The second scenario can apply to both businesses and regular people. The idea is pretty similar to what I mentioned earlier. You can scrape the prices, features, and reviews of all the products you could choose, and so, you’ll be able to pick the one that offers the most benefits for the lowest price. After all, who doesn’t like a good deal?

Not all products deserve this level of attention to detail, but it can make a massive difference with expensive purchases. Unfortunately, while the benefits are clear, many difficulties go along with scraping Amazon.

The Challenges Of Scraping Amazon Product Data

Not all websites are the same. As a rule of thumb, the more complex and widespread a website is, the harder it is to scrape it. Remember when I said that Amazon was the most prominent e-commerce site? Well, that makes it both extremely popular and reasonably complex.

First off, Amazon knows how scraping bots act, so the website has countermeasures in place. Namely, if the scraper follows a predictable pattern, sending requests at fixed intervals, faster than a human could or with almost identical parameters, Amazon will notice and block the IP. Proxies can solve this problem, but I didn’t need them since we won’t be scraping too many pages in the example.

Next, Amazon deliberately uses varying page structures for their products. That is to say, that if you inspect the pages for different products, there’s a good chance that you’ll find significant differences in their structure and attributes. The reason behind this is quite simple. You need to adapt your scraper’s code for a specific system, and if you use the same script on a new kind of page, you’d have to rewrite parts of it. So, they’re essentially making you work more for the data.

Lastly, Amazon is a vast website. If you want to gather large amounts of data, running the scraping software on your computer might turn out to take way too much time for your needs. This problem is further consolidated by the fact that going too fast will get your scraper blocked. So, if you want loads of data quickly, you’ll need a truly powerful scraper.

Well, that’s enough talk about problems, let’s focus on solutions!

How To Build A Web Scraper For Amazon

To keep things simple, we’ll take a step-by-step approach to writing the code. Feel free to work in parallel with the guide.

Look for the data we need

So, here’s a scenario: I’m moving in a few months to a new place, and I’ll need a couple of new shelves to hold books and magazines. I want to know all my options and get as good of a deal as I can. So, let’s go to the Amazon market, search for “shelves”, and see what we get.

The URL for this search and the page we’ll be scraping is here.

Ok, let’s take stock of what we have here. Just by glancing at the page, we can get a good picture about:

how the shelves look;
what the package includes;
how customers rate them;
their price;
the link to the product;
a suggestion for a cheaper alternative for some of the items.

That’s more than we could ask for!

Get the required tools

Let’s ensure we have all the following tools installed and configured before continuing to the next step.

Chrome
We can download it from here.
VSCode
Follow the instructions on this page to install it on your specific device.
Node.js
Before starting using Axios or Cheerio, we need to install Node.js and the Node Package Manager. The easiest way to install Node.js and NPM is to get one of the installers from the Node.Js official source and run it.

Now, let’s create a new NPM project. Create a new folder for the project and run the following command:

npm init -y

To create the web scraper, we need to install a couple of dependencies in our project:

Cheerio
An open-source library that helps us extract useful information by parsing markup and providing an API for manipulating the resulting data. Cheerio allows us to select tags of an HTML document by using selectors: $(“div”). This specific selector helps us pick all <div> elements on a page. To install Cheerio, please run the following command in the projects’ folder:

npm install cheerio

Axios
A JavaScript library used to make HTTP requests from Node.js.

npm install axios

Inspect the page source

In the following steps, we will learn more about how the information is organized on the page. The idea is to get a better understanding of what we can scrape from our source.

The developer tools help us interactively explore the website’s Document Object Model (DOM). We will use the developer tools in Chrome, but you can use any web browser you’re comfortable with.

Let’s open it by right-clicking anywhere on the page and selecting the “Inspect” option:

This will open up a new window containing the source code of the page. As we have said before, we are looking to scrape every shelf’s information.

As we can see from the screenshot above, the containers that hold all the data have the following classes:

sg-col-4-of-12 s-result-item s-asin sg-col-4-of-16 sg-col sg-col-4-of-20

In the next step, we will use Cheerio to select all the elements containing the data we need.

Fetch the data

After we installed all the dependencies presented above, let’s create a new index.js file and type the following lines of code:

const axios = require(“axios”);
const cheerio = require(“cheerio”);

const fetchShelves = async () => {
try {
const response = await axios.get(‘https://www.amazon.com/s?crid=36QNR0DBY6M7J&k=shelves&ref=glow_cls&refresh=1&sprefix=s%2Caps%2C309’);

const html = response.data;

const $ = cheerio.load(html);

const shelves = [];

$(‘div.sg-col-4-of-12.s-result-item.s-asin.sg-col-4-of-16.sg-col.sg-col-4-of-20’).each((_idx, el) => {
const shelf = $(el)
const title = shelf.find(‘span.a-size-base-plus.a-color-base.a-text-normal’).text()

shelves.push(title)
});

return shelves;
} catch (error) {
throw error;
}
};

fetchShelves().then((shelves) => console.log(shelves));

As we can see, we import the dependencies we need on the first two lines, and then we create a fetchShelves() function that, using Cheerio, gets all the elements containing our products’ information from the page.

It iterates over each of them and pushes it to an empty array to get a better-formatted result.

The fetchShelves() function will only return the product’s title at the moment, so let’s get the rest of the information we need. Please add the following lines of code after the line where we defined the variable title.

const image = shelf.find(‘img.s-image’).attr(‘src’)

const link = shelf.find(‘a.a-link-normal.a-text-normal’).attr(‘href’)

const reviews = shelf.find(‘div.a-section.a-spacing-none.a-spacing-top-micro > div.a-row.a-size-small’).children(‘span’).last().attr(‘aria-label’)

const stars = shelf.find(‘div.a-section.a-spacing-none.a-spacing-top-micro > div > span’).attr(‘aria-label’)

const price = shelf.find(‘span.a-price > span.a-offscreen’).text()

let element = {
title,
image,
link: https://amazon.com${link},
price,
}

if (reviews) {
element.reviews = reviews
}

if (stars) {
element.stars = stars
}

And replace shelves.push(title) with shelves.push(element).

We are now selecting all the information we need and adding it to a new object called element. Every element is then pushed to the shelves array to get a list of objects containing just the data we are looking for.

This is how a shelf object should look like before it is added to our list:

{
title: ‘SUPERJARE Wall Mounted Shelves, Set of 2, Display Ledge, Storage Rack for Room/Kitchen/Office – White’,
image: ‘https://m.media-amazon.com/images/I/61fTtaQNPnL._AC_UL320_.jpg’,
link: ‘https://amazon.com/gp/slredirect/picassoRedirect.html/ref=pa_sp_btf_aps_sr_pg1_1?ie=UTF8&adId=A03078372WABZ8V6NFP9L&url=%2FSUPERJARE-Mounted-Floating-Shelves-Display%2Fdp%2FB07H4NRT36%2Fref%3Dsr_1_59_sspa%3Fcrid%3D36QNR0DBY6M7J%26dchild%3D1%26keywords%3Dshelves%26qid%3D1627970918%26refresh%3D1%26sprefix%3Ds%252Caps%252C309%26sr%3D8-59-spons%26psc%3D1&qualifier=1627970918&id=3373422987100422&widgetName=sp_btf’,
price: ‘$32.99’,
reviews: ‘6,171’,
stars: ‘4.7 out of 5 stars’
}

Format the data

Now that we have managed to fetch the data we need, it’s a good idea to save it as a .CSV file to improve readability. After getting all the data, we will use the fs module provided by Node.js and save a new file called saved-shelves.csv to the project’s folder. Import the fs module at the top of the file and copy or write along the following lines of code:

let csvContent = shelves.map(element => {
return Object.values(element).map(item => “${item}”).join(‘,’)
}).join(“n”)

fs.writeFile(‘saved-shelves.csv’, “Title, Image, Link, Price, Reviews, Stars” + ‘n’ + csvContent, ‘utf8’, function (err) {
if (err) {
console.log(‘Some error occurred – file either not saved or corrupted.’)
} else{
console.log(‘File has been saved!’)
}
})

As we can see, on the first three lines, we format the data we have previously gathered by joining all the values of a shelve object using a comma. Then, using the fs module, we create a file called saved-shelves.csv, add a new row that contains the column headers, add the data we have just formatted and create a callback function that handles the errors.

The result should look something like this:

Bonus Tips!
Scraping Single Page Applications

Dynamic content is becoming the standard nowadays, as websites are more complex than ever before. To provide the best user experience possible, developers must adopt different load mechanisms for dynamic content, making our job a little more complicated. If you don’t know what that means, imagine a browser lacking a graphical user interface. Luckily, there is ✨Puppeteer✨ — the magical Node library that provides a high-level API to control a Chrome instance over the DevTools Protocol. Still, it offers the same functionality as a browser, but it must be controlled programmatically by typing a couple of lines of code. Let’s see how that works.

In the previously created project, install the Puppeteer library by running npm install puppeteer, create a new puppeteer.js file, and copy or write along the following lines of code:

const puppeteer = require(‘puppeteer’)

(async () => {
try {
const chrome = await puppeteer.launch()
const page = await chrome.newPage()
await page.goto(‘https://www.reddit.com/r/Kanye/hot/’)
await page.waitForSelector(‘.rpBJOHq2PR60pnwJlUyP0’, { timeout: 2000 })

const body = await page.evaluate(() => {
return document.querySelector(‘body’).innerHTML
})

console.log(body)

await chrome.close()
} catch (error) {
console.log(error)
}
})()

In the example above, we create a Chrome instance and open up a new browser page that is required to go to this link. In the following line, we tell the headless browser to wait until the element with the class rpBJOHq2PR60pnwJlUyP0 appears on the page. We have also specified how long the browser should wait for the page to load (2000 milliseconds).

Using the evaluate method on the page variable, we instructed Puppeteer to execute the Javascript snippets within the page’s context just after the element was finally loaded. This will allow us to access the page’s HTML content and return the page’s body as the output. We then close the Chrome instance by calling the close method on the chrome variable. The resulted work should consist of all the dynamically generated HTML code. This is how Puppeteer can help us load dynamic HTML content.

If you don’t feel comfortable using Puppeteer, note that there are a couple of alternatives out there, like NightwatchJS, NightmareJS, or CasperJS. They are slightly different, but in the end, the process is pretty similar.

Setting user-agent Headers

user-agent is a request header that tells the website you are visiting about yourself, namely your browser and OS. This is used to optimize the content for your set-up, but websites also use it to identify bots sending tons of requests — even if it changes IPS.

Here’s what a user-agent header looks like:

Mozilla/5.0 (Windows NT 10.0; Win64; x64) AppleWebKit/537.36 (KHTML, like Gecko) Chrome/93.0.4577.82 Safari/537.36

In the interest of not being detected and blocked, you should regularly change this header. Take extra care not to send an empty or outdated header since this should never happen for a run-fo-the-mill user, and you’ll stand out.

Rate Limiting

Web scrapers can gather content extremely fast, but you should avoid going at top speed. There are two reasons for this:

Too many requests in short order can slow down the website’s server or even bring it down, causing trouble for the owner and other visitors. It can essentially become a DoS attack.
Without rotating proxies, it’s akin to loudly announcing that you’re using a bot since no human would send hundreds or thousands of requests per second.

The solution is to introduce a delay between your requests, a practice called “rate limiting”. (It’s pretty simple to implement, too!)

In the Puppeteer example provided above, before creating the body variable, we can use the waitForTimeout method provided by Puppeteer to wait a couple of seconds before making another request:

await page.waitForTimeout(3000);

Where ms is the number of seconds you would want to wait.

Also, if we would want to do the same thig for the axios example, we can create a promise that calls the setTimeout() method, in order to help us wait for our desired number of miliseconds:

fetchShelves.then(result => new Promise(resolve => setTimeout(() => resolve(result), 3000)))

In this way, you can avoid putting too much pressure on the targeted server and also, bring a more human approach to web scraping.

Closing Thoughts

And there you have it, a step-by-step guide to creating your own web scraper for Amazon product data! But remember, this was just one situation. If you’d like to scrape a different website, you’ll have to make a few tweaks to get any meaningful results.

Related Reading

If you’d still like to see more web scraping in action, here is some useful reading material for you:

“The Ultimate Guide to Web Scraping with JavaScript and Node.Js,” Robert Sfichi
“Advanced Node.JS Web Scraping with Puppeteer,” Gabriel Cioci
“Python Web Scraping: The Ultimate Guide to Building Your Scraper,” Raluca Penciuc

Creating the Effect of Transparent Glass and Plastic in Three.js

Original Source: http://feedproxy.google.com/~r/tympanus/~3/HMKYObAHg48/

In a recent release of Three.js (r129 and beyond) some fabulous new features to MeshPhysicalMaterial were merged. The new features allow us to create convincing transparent, glass-like and plastic-like materials that refract and diffuse the content behind them, and are as easy-to-use as adding a couple of material properties!

About this article

This article explores some advanced properties of materials. While the results are very technically impressive, the new features that enable them are simple to use! Some experience with three and an intermediate understanding of the concept of “materials” in 3D graphics is ideal. Code examples are written for brevity, so it’s best to dive into the sandbox code (provided with each screenshot) if you’re interested in the gritty implementation details.

The physics of optics, light, reflection and refraction are not discussed in-depth here. This article approaches these effects through an aesthetic lens: aiming for convincing and visually pleasing results, even if they are not scientifically accurate.

Rather than introducing new concepts, this is primarily a walkthrough of features that exist within three and its MeshPhysicalMaterial class. I’d like to gush and shower praise upon the contributors and maintainers of three. It continues to be a core pillar of 3D in the browser. It has a vibrant community and extremely talented contributors who continue to push the boundaries of what’s possible on a humble web page.

Prior Art

Creating transparent materials, especially with texture and diffusion, has for a long time required deep technical expertise and creative problem solving. Some projects have achieved an impressive and convincing effect in WebGL through bespoke techniques:

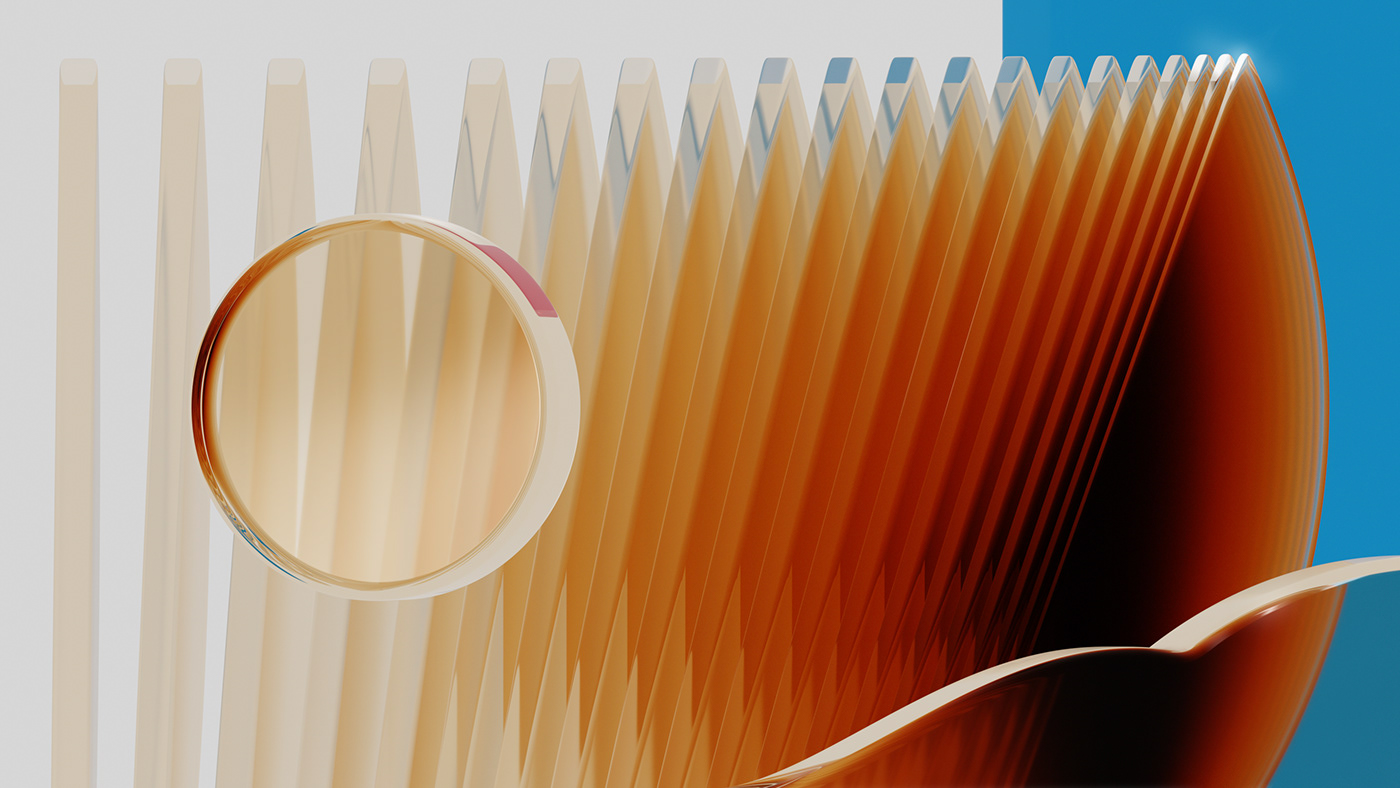
A screenshot from Make Me Pulse’s 2018 Wishes, showcasing frosted glass materials in WebGL

The Jam3 FWA 100 project, showcasing glass-like orbs

Jesper Vos published an incredible tutorial here on Codrops: Real-time Multiside Refraction in Three Steps, which includes some great insights into the science and simulation of refraction.

In addition, these excellent technical examples provided the inspiration for writing this article, and further exploring what’s possible with these new features.

Three.js

three is an open-source javascript library for rendering 3D graphics in the browser. It provides a friendly API and abstractions that make working with WebGL more palatable and expressive. three has been around since 2010, is extremely well battle-tested, and is the de-facto standard for rendering 3D content on the internet. See the list of case studies on the home page, docs, examples, or source.

MeshPhysicalMaterial

MeshPhysicalMaterial is a relatively recent Physically-Based Rendering (PBR) built-in material for three. It’s an evolution and extension of the already impressive MeshStandardMaterial, providing additional features to pump the photo-realism.

This visual fidelity comes at a cost, from the docs:  As a result of these complex shading features, MeshPhysicalMaterial has a higher performance cost, per pixel, than other Three.js materials. Most effects are disabled by default, and add cost as they are enabled.

Beyond the properties offered in MeshStandardMaterial, it introduces some new ones:

Transmission

transmission is the key to transparent glass-like and plastic-like effects. Traditionally when we adjust the opacity of an element to make it transparent, its visual presence is diluted as a whole. The object appears ghostly, uniformly transparent, and not realistic as a see-through object. In the real-world, transparent objects reflect light and show glare. They have a physical presence even though they may be perfectly clear.

Reflectivity properties

MeshPhysicalMaterial includes some properties that estimate refraction through the transmissible object: thickness, ior (Index-of-refraction) and reflectivity. We’ll mostly ignore ior and reflectivity (which changes ior too, but is mapped to a 0-1 range) as the defaults work great!

thickness is the magic here, as we’ll see shortly.

Clearcoat

Like a layer of lacquer, clearcoat provides an additional thin reflective layer on the surface of objects. Previously this would require a second version of the object, with a separate material, and with different parameters.

Other

There are some other additional properties on MeshPhysicalMaterial like sheen and attenuationTint which I won’t be touching on in this article.

We can expect to see more and more features added to this material in future releases.

First steps

First things first, let’s create a scene and pop something in it! We’ll start with an Icosahedron because hey, they just look cool.

I’m skipping the basic scene setup stuff here, I recommend diving into the sandbox source or three docs if you’re unfamiliar with this.

const geometry = new THREE.IcosahedronGeometry(1, 0);
const material = new THREE.MeshNormalMaterial();
const mesh = new THREE.Mesh(geometry, material)
scene.add(mesh);

An Icosahedron with normal shading in a blank scene
View on CodeSandbox

Looks like an Icosahedron! Let’s apply our MeshPhysicalMaterial:

const material = new THREE.MeshPhysicalMaterial({
metalness: 0,
roughness: 0
});

The options metalness and roughness are the two primary handles with PBR materials (they are on MeshStandardMaterial too). They can be used to set the stage for how our material responds to lighting and environment. Having both set at zero describes something like “A non-metallic object with a highly polished surface”.


View on CodeSandbox

Doesn’t look like much! Physically-based materials need light to reflect, so let’s add some light:

const light = new THREE.DirectionalLight(0xfff0dd, 1);
light.position.set(0, 5, 10);
scene.add(light);


View on CodeSandbox

Cool, there it is again… Now let’s make it transparent!

Call the Glazier

The transmission option is responsible for applying our transparency. It makes the “fill” or “body” of the object transparent, while leaving all lighting and reflections on the surface in-tact.

Note that we’re not using the opacity option, which applies a uniform transparency to the material as a whole. We also don’t need to include the transparent option on the material for it to appear transparent through transmission.

const material = new THREE.MeshPhysicalMaterial({
roughness: 0,
transmission: 1, // Add transparency
});


View on CodeSandbox

I think that’s transparent, we can see the background colour through it. Let’s pop something else behind it to be sure. We’ll add a textured plane as our “backdrop”:

const bgTexture = new THREE.TextureLoader().load("src/texture.jpg");
const bgGeometry = new THREE.PlaneGeometry(5, 5);
const bgMaterial = new THREE.MeshBasicMaterial({ map: bgTexture });
const bgMesh = new THREE.Mesh(bgGeometry, bgMaterial);
bgMesh.position.set(0, 0, -1);
scene.add(bgMesh);


View on CodeSandbox

It’s transparent! It’s lacking something though. There’s nothing but a tiny flicker of movement on the corners of our geometry; as if our material is made from the most delicate and fragile of super-thin, super-clear glass.

Now here’s the magic part!

const material = new THREE.MeshPhysicalMaterial({
roughness: 0,
transmission: 1,
thickness: 0.5, // Add refraction!
});


View on CodeSandbox

By adding a single option: thickness to our material, we’ve now been given the gift of refraction through our object! Our background plane, which is a completely separate object, simply sitting behind our Icosahedron in the scene, now gets refracted.

This is incredible! Previous methods of achieving this required much more work and intense technical understanding. This has immediately democratised refractive materials in WebGL.

The effect is especially impressive when viewed in motion, and from an angle:

Swooping around our glass object to see it refracting the rest of the scene

Have a play by dragging around in this sandbox:

Diverse objects

While the sharp facets of our Icosahedron show a nice “cut-gem” style of refraction, we rarely see such precisely cut glass objects at any size other than tiny. This effect is greatly enhanced when geometries with smoother edges are used.
Let’s increase the detail level of our Icosahedron to form a sphere:

const geometry = new THREE.IcosahedronGeometry(1, 15);


View on CodeSandbox

This shows some optical distortion in addition to the refraction based on the shape of the geometry!

Hot tip: with all of the PolyhedronGeometry types in three, any detail level above zero is rendered as a sphere, rather than a faceted polyhedron as far as transmission is concerned.

You may notice that the distorted content is a little pixelated, this is due to the material upscaling what’s transmitted through it to perform the distortion. We can mitigate this a bit with some other effects which we’ll cover later.

Let’s explore adding some texture to our glass material:

const material = new THREE.MeshPhysicalMaterial({
roughness: 0.7,
transmission: 1,
thickness: 1
});

The roughness option on our transmissible material provides us with a “frosting” level, making light that passes through the material more diffuse.


View in CodeSandbox

This becomes immediately recognisable as a frosted glass object, with a fine powdery texture.

Notes on roughness:

The middle of the roughness range can display some quite noticeably pixelated transmitted content (at the time of writing). In my experience the best results are found in the low (0-0.15) and higher (0.65+) ends of the range. This can also be quite successfully mitigated with some of the things we’ll add shortly.The distance of the transmissible object from the camera affects how roughness is rendered. It’s best to tweak the roughness parameter once you’ve established your scene

Hot tip: Using a small amount of roughness (0.05 – 0.15) can help soften aliasing on the transmitted content at the cost of a bit of sharpness.

For the rest of our examples we’ll include two additional geometries for reference: a RoundedBoxGeometry and a 3D model of a dragon (loaded as a GLTF, but only used for the geometry):


View on CodeSandbox

Through the lens

While the transmission effect is already appealing, there’s so much more we can do to make this appear truer-to-life.

The next thing we’ll do is add an environment map. It’s recommended that you always include an envMap when using MeshPhysicalMaterial, as per the docs: For best results, always specify an environment map when using this material.

Highly reflective objects show reflections, and glare, and glimpses of their surrounding environment reflected off their surface. It’s unusual for a shiny object to be perfectly unreflective; as they have been in our examples so far.

We’ll use a high quality High Dynamic Range Image (HDRI) environment map. I’ve chosen this one for its bright fluorescent overhead lighting:

const hdrEquirect = new THREE.RGBELoader().load(
"src/empty_warehouse_01_2k.hdr",
() => {
hdrEquirect.mapping = THREE.EquirectangularReflectionMapping;
}
);
const material = new THREE.MeshPhysicalMaterial({

envMap: hdrEquirect
});


View on CodeSandbox

NICE! Now that looks more realistic. The objects glint and shimmer in our bright environment; much more like the lighting challenges faced by a photographer of shiny things.

This is where our rounded geometries really shine too. Their smoother curves and edges catch light differently, really amplifying the effect of a highly polished surface.

Hot tip: Adding an envMap texture of some sort helps to resolve some rendering artifacts of this material. This is why it’s always recommended to include one (beyond the fact that it looks great!).

If you adjust the roughness level upward, you’ll notice that the reflections are diffused by the rougher frosted texture of the surface; however, we may want an object that’s semi-transparent while still having a shiny surface.

The clearcoat options allow us to include an additional reflective layer on the surface of our object (think lacquered wood, powder coatings, or plastic films). In the case of our transparent objects, we can make them from semi-transparent glass or plastic which still has a polished and reflective surface.


View on CodeSandbox

Adjusting the clearcoatRoughness option adjusts how highly polished the surface is; visually spanning the range from highly-polished frosted glass through to semi-gloss and matte frosted plastics. This effect is pretty convincing! You can almost feel the tack and texture of these objects.

So far we’ve been exploring objects with perfectly smooth surfaces. To really bring some texture to them, we can add a normal map:

const textureLoader = new THREE.TextureLoader();
const normalMapTexture = textureLoader.load("src/normal.jpg");
normalMapTexture.wrapS = THREE.RepeatWrapping;
normalMapTexture.wrapT = THREE.RepeatWrapping;
const material = new THREE.MeshPhysicalMaterial({

normalMap: normalMapTexture,
clearcoatNormalMap: normalMapTexture,
});


View on CodeSandbox

The interplay between the normalMap and clearcoatNormalMap is interesting. By setting the normalMap we affect the transmission through the object, adding a textured frosting that refracts light differently. By setting the clearcoatNormalMap we affect the finish on the surface of the object.

Hot tip: The additional texture added by the normalMap greatly reduces the visible pixelation on the transmitted content, effectively solving this issue for us.

As a final touch, we’ll add a post-processing pass to apply bloom to our scene. Bloom adds that extra little bit of photographic appeal by simulating volumetric glare from the bright overhead lighting bathing our objects.

I’ll leave information around implementation post-processing within three to the docs and examples. In this sandbox I’ve included the UnrealBloomPass.

Bloom always looks good.

There we have it! Convincingly transparent, textured and reflective 3D objects, rendered in real-time, and without much effort. This deserves to be celebrated, what an empowering experience it is working with MeshPhysicalMaterial.

Drippin ice

Just for fun, let’s crank the dial on this by rendering many of our transparent objects using three‘s InstancedMesh (link).


View on CodeSandbox

OOOUF! YES.
Instances can’t be seen through each other, which is a general limitation of transmission on MeshPhysicalMaterial (current as of r133); but in my opinion the effect is still very cool.

Explore for yourself

Finally, here’s our dragon model with a bunch of material options enabled in the GUI:


View on CodeSandbox

Have a play, check out metalness, play around with color to explore colourful tinted glass, tweak the ior to change our glass into crystal!

Sign-off

I’ve really only scratched the surface of what can be achieved with MeshPhysicalMaterial. There are even more options available within this material, sheen, roughnessMap, transmissionMap, attenuationTint and all sorts of other things provide inroads to many more effects. Dig deep into the docs and source if you’re interested!

This is an enabler, given the creative vision for a transparent object you can use these tools to work towards a convincing result. Transparent materials in three are here, you can start using them in your projects today.

Attributions

Environment map: Empty Warehouse 01 HDRI by Sergej Majboroda, via Poly Haven3D model: Dragon GLB by Stanford University and Morgan McGuire’s Computer Graphics Archive, via KhronosGroupNormal map: Packed Dirt normal by Dim, via opengameart.orgSandboxes: Hosted on CodeSandbox and running in canvas-sketch by @MattDesl.

© 2021 Kelly Milligan

The post Creating the Effect of Transparent Glass and Plastic in Three.js appeared first on Codrops.

Botanical Glassworks in Blender 3D

Original Source: http://feedproxy.google.com/~r/abduzeedo/~3/dFu1ww92b6s/botanical-glassworks-blender-3d

Botanical Glassworks in Blender 3D

abduzeedo1027—21

Calvin Sprague shared a 3D project using Blender, Octane, Adobe Illustrator & Photoshop for Botanical Glassworks. The project is a selection of personal works experimenting with flat illustrated botanical shapes transformed into a three-dimensional space. As a beginner using 3d software, Calving found the process quite challenging but that gave him a new appreciation towards 3d artists and how they work with cameras and lighting.

3D abstract botanical glass octane plants3D abstract botanical glass octane plants3D abstract botanical glass octane plants3D abstract botanical glass octane plants3D abstract botanical glass octane plants3D abstract botanical glass octane plants

To see more work follow Calvin on

Behance
Instagram
Website


4 Ways to Create an Email Testing Strategy

Original Source: https://www.hongkiat.com/blog/email-testing-strategy/

(Guest writer: Téa Liarokapi) A great email message consists of a plethora of things that, upon testing, could or could not work out. Maybe you’ve got the perfect copy for your email marketing…

Visit hongkiat.com for full content.

How To Build A Real-Time Multi-User Game From Scratch

Original Source: https://smashingmagazine.com/2021/10/real-time-multi-user-game/

As the pandemic lingered, the suddenly-remote team I work with became increasingly foosball-deprived. I thought about how to play foosball in a remote setting, but it was clear that simply reconstructing the rules of foosball on a screen would not be a lot of fun.

What _is_ fun is to kick a ball using toy cars — a realization made as I was playing with my 2-year old kid. The same night I set out to build the first prototype for a game that would become Autowuzzler.

The idea is simple: players steer virtual toy cars in a top-down arena that resembles a foosball table. The first team to score 10 goals wins.

Of course, the idea of using cars to play soccer is not unique, but two main ideas should set Autowuzzler apart: I wanted to reconstruct some of the look and feel of playing on a physical foosball table, and I wanted to make sure it is as easy as possible to invite friends or teammates to a quick casual game.

In this article, I’ll describe the process behind the creation of Autowuzzler, which tools and frameworks I chose, and share a few implementation details and lessons I learned.

First Working (Terrible) Prototype

The first prototype was built using the open-source game engine Phaser.js, mostly for the included physics engine and because I already had some experience with it. The game stage was embedded in a Next.js application, again because I already had a solid understanding of Next.js and wanted to focus mainly on the game.

As the game needs to support multiple players in real-time, I utilized Express as a WebSockets broker. Here is where it becomes tricky, though.

Since the physics calculations were done on the client in the Phaser game, I chose a simple, but obviously flawed logic: The first connected client had the doubtful privilege of doing the physics calculations for all game objects, sending the results to the express server, which in turn broadcasted the updated positions, angles and forces back to the other player’s clients. The other clients would then apply the changes to the game objects.

This led to the situation where the first player got to see the physics happening in real-time (it is happening locally in their browser, after all), while all the other players were lagging behind at least 30 milliseconds (the broadcast rate I chose), or — if the first player’s network connection was slow — considerably worse.

If this sounds like poor architecture to you — you’re absolutely right. However, I accepted this fact in favor of quickly getting something playable to figure out if the game is actually fun to play.

Validate The Idea, Dump The Prototype

As flawed as the implementation was, it was sufficiently playable to invite friends for a first test drive. Feedback was very positive, with the major concern being — not surprisingly — the real-time performance. Other inherent problems included the situation when the first player (remember, the one in charge of everything) left the game — who should take over? At this point there was only one game room, so anyone would join the same game. I was also a bit concerned by the bundle size the Phaser.js library introduced.

It was time to dump the prototype and start with a fresh setup and a clear goal.

Project Setup

Clearly, the “first client rules all” approach needed to be replaced with a solution in which the game state lives on the server. In my research, I came across Colyseus, which sounded like the perfect tool for the job.

For the other main building blocks of the game I chose:

Matter.js as a physics engine instead of Phaser.js because it runs in Node and Autowuzzler does not require a full game framework.
SvelteKit as an application framework instead of Next.js, because it just went into public beta at that time. (Besides: I love working with Svelte.)
Supabase.io for storing user-created game PINs.

Let’s look at those building blocks in more detail.

Synchronized, Centralized Game State With Colyseus

Colyseus is a multiplayer game framework based on Node.js and Express. At its core, it provides:

Synchronizing state across clients in an authoritative fashion;
Efficient real-time communication using WebSockets by sending changed data only;
Multi-room setups;
Client libraries for JavaScript, Unity, Defold Engine, Haxe, Cocos Creator, Construct3;
Lifecycle hooks, e.g. room is created, user joins, user leaves, and more;
Sending messages, either as broadcast messages to all users in the room, or to a single user;
A built-in monitoring panel and load test tool.

Note: The Colyseus docs make it easy to get started with a barebones Colyseus server by providing an npm init script and an examples repository.

Creating A Schema

The main entity of a Colyseus app is the game room, which holds the state for a single room instance and all its game objects. In the case of Autowuzzler, it’s a game session with:

two teams,
a finite amount of players,
one ball.

A schema needs to be defined for all properties of the game objects that should be synchronized across clients. For example, we want the ball to synchronize, and so we need to create a schema for the ball:

class Ball extends Schema {
constructor() {
super();
this.x = 0;
this.y = 0;
this.angle = 0;
this.velocityX = 0;
this.velocityY = 0;
}
}
defineTypes(Ball, {
x: “number”,
y: “number”,
angle: “number”,
velocityX: “number”,
velocityY: “number”
});

In the example above, a new class that extends the schema class provided by Colyseus is created; in the constructor, all properties receive an initial value. The position and movement of the ball is described using the five properties: x, y, angle, velocityX, velocityY. Additionally, we need to specify the types of each property. This example uses JavaScript syntax, but you can also use the slightly more compact TypeScript syntax.

Property types can either be primitive types:

string
boolean
number (as well as more efficient integer and float types)

or complex types:

ArraySchema (similar to Array in JavaScript)
MapSchema (similar to Map in JavaScript)
SetSchema (similar to Set in JavaScript)
CollectionSchema (similar to ArraySchema, but without control over indexes)

The Ball class above has five properties of type number: its coordinates (x, y), its current angle and the velocity vector (velocityX, velocityY).

The schema for players is similar, but includes a few more properties to store the player’s name and team’s number, which need to be supplied when creating a Player instance:

class Player extends Schema {
constructor(teamNumber) {
super();
this.name = “”;
this.x = 0;
this.y = 0;
this.angle = 0;
this.velocityX = 0;
this.velocityY = 0;
this.teamNumber = teamNumber;
}
}
defineTypes(Player, {
name: “string”,
x: “number”,
y: “number”,
angle: “number”,
velocityX: “number”,
velocityY: “number”,
angularVelocity: “number”,
teamNumber: “number”,
});

Finally, the schema for the Autowuzzler Room connects the previously defined classes: One room instance has multiple teams (stored in an ArraySchema). It also contains a single ball, therefore we create a new Ball instance in the RoomSchema’s constructor. Players are stored in a MapSchema for quick retrieval using their IDs.

Now, with all the magic happening on the server, the client only handles the input and draws the state it receives from the server to the screen. With one exception:

Interpolation On The Client

Since we are re-using the same Matter.js physics world on the client, we can improve the experienced performance with a simple trick. Rather than only updating the position of a game object, we also synchronize the velocity of the object. This way, the object keeps on moving on its trajectory even if the next update from the server takes longer than usual. So rather than moving objects in discrete steps from position A to position B, we change their position and make them move in a certain direction.

Lifecycle

The Autowuzzler Room class is where the logic concerned with the different phases of a Colyseus room is handled. Colyseus provides several lifecycle methods:

onCreate: when a new room is created (usually when the first client connects);
onAuth: as an authorization hook to permit or deny entry to the room;
onJoin: when a client connects to the room;
onLeave: when a client disconnects from the room;
onDispose: when the room is discarded.

The Autowuzzler room creates a new instance of the physics world (see section “Physics In A Colyseus App”) as soon as it is created (onCreate) and adds a player to the world when a client connects (onJoin). It then updates the physics world 60 times a second (every 16.6 milliseconds) using the setSimulationInterval method (our main game loop):

// deltaTime is roughly 16.6 milliseconds
this.setSimulationInterval((deltaTime) => this.world.updateWorld(deltaTime));

The physics objects are independent of the Colyseus objects, which leaves us with two permutations of the same game object (like the ball), i.e. an object in the physics world and a Colyseus object that can be synced.

As soon as the physical object changes, its updated properties need to be applied back to the Colyseus object. We can achieve that by listening to Matter.js’ afterUpdate event and setting the values from there:

Events.on(this.engine, “afterUpdate”, () => {
// apply the x position of the physics ball object back to the colyseus ball object
this.state.ball.x = this.physicsWorld.ball.position.x;
// … all other ball properties
// loop over all physics players and apply their properties back to colyseus players objects
})

There’s one more copy of the objects we need to take care of: the game objects in the user-facing game.

Client-Side Application

Now that we have an application on the server that handles the synchronization of the game state for multiple rooms as well as physics calculations, let’s focus on building the website and the actual game interface. The Autowuzzler frontend has the following responsibilities:

enables users to create and share game PINs to access individual rooms;
sends the created game PINs to a Supabase database for persistence;
provides an optional “Join a game” page for players to enter the game PIN;
validates game PINs when a player joins a game;
hosts and renders the actual game on a shareable (i.e. unique) URL;
connects to the Colyseus server and handle state updates;
provides a landing (“marketing”) page.

For the implementation of those tasks, I chose SvelteKit over Next.js for the following reasons:

Why SvelteKit?

I have been wanting to develop another app using Svelte ever since I built neolightsout. When SvelteKit (the official application framework for Svelte) went into public beta, I decided to build Autowuzzler with it and accept any headaches that come with using a fresh beta — the joy of using Svelte clearly makes up for it.

These key features made me choose SvelteKit over Next.js for the actual implementation of the game frontend:

Svelte is a UI framework and a compiler and therefore ships minimal code without a client runtime;
Svelte has an expressive templating language and component system (personal preference);
Svelte includes global stores, transitions and animations out of the box, which means: no decision fatigue choosing a global state management toolkit and an animation library;
Svelte supports scoped CSS in single-file-components;
SvelteKit supports SSR, simple but flexible file-based routing and server-side routes for building an API;
SvelteKit allows for each page to run code on the server, e.g. to fetch data that is used to render the page;
Layouts shared across routes;
SvelteKit can be run in a serverless environment.

Creating And Storing Game PINs

Before a user can start playing the game, they first need to create a game PIN. By sharing the PIN with others, they can all access the same game room.

This is a great use case for SvelteKits server-side endpoints in conjunction with Sveltes onMount function: The endpoint /api/createcode generates a game PIN, stores it in a Supabase.io database and outputs the game PIN as a response. This is response is fetched as soon as the page component of the “create” page is mounted:

Storing Game PINs With Supabase.io

Supabase.io is an open-source alternative to Firebase. Supabase makes it very easy to create a PostgreSQL database and access it either via one of its client libraries or via REST.

For the JavaScript client, we import the createClient function and execute it using the parameters supabase_url and supabase_key we received when creating the database. To store the game PIN that is created on each call to the createcode endpoint, all we need to do is to run this simple insert query:

import { createClient } from ‘@supabase/supabase-js’

const database = createClient(
import.meta.env.VITE_SUPABASE_URL,
import.meta.env.VITE_SUPABASE_KEY
);

const { data, error } = await database
.from(“games”)
.insert([{ code: 123456 }]);

Note: The supabase_url and supabase_key are stored in a .env file. Due to Vite — the build tool at the heart of SvelteKit — it is required to prefix the environment variables with VITE_ to make them accessible in SvelteKit.

Accessing The Game

I wanted to make joining an Autowuzzler game as easy as following a link. Therefore, every game room needed to have its own URL based on the previously created game PIN, e.g. https://autowuzzler.com/play/12345.

In SvelteKit, pages with dynamic route parameters are created by putting the dynamic parts of the route in square brackets when naming the page file: client/src/routes/play/[gamePIN].svelte. The value of the gamePIN parameter will then become available in the page component (see the SvelteKit docs for details). In the play route, we need to connect to the Colyseus server, instantiate the physics world to render to the screen, handle updates to game objects, listen to keyboard input and display other UI like the score, and so on.

Connecting To Colyseus And Updating State

The Colyseus client library enables us to connect a client to a Colyseus server. First, let’s create a new Colyseus.Client by pointing it to the Colyseus server (ws://localhost:2567in development). Then join the room with the name we chose earlier (autowuzzler) and the gamePIN from the route parameter. The gamePIN parameter makes sure the user joins the correct room instance (see “match-making” above).

let client = new Colyseus.Client(“ws://localhost:2567”);
this.room = await client.joinOrCreate(“autowuzzler”, { gamePIN });

Since SvelteKit renders pages on the server initially, we need to make sure that this code only runs on the client after the page is done loading. Again, we use the onMount lifecycle function for that use case. (If you’re familiar with React, onMount is similar to the useEffect hook with an empty dependency array.)

onMount(async () => {
let client = new Colyseus.Client(“ws://localhost:2567”);
this.room = await client.joinOrCreate(“autowuzzler”, { gamePIN });
})

Now that we are connected to the Colyseus game server, we can start to listen to any changes to our game objects.

Here’s an example of how to listen to a player joining the room (onAdd) and receiving consecutive state updates to this player:

this.room.state.players.onAdd = (player, key) => {
console.log(`Player has been added with sessionId: ${key}`);

// add player entity to the game world
this.world.createPlayer(key, player.teamNumber);

// listen for changes to this player
player.onChange = (changes) => {
changes.forEach(({ field, value }) => {
this.world.updatePlayer(key, field, value); // see below
});
};
};

In the updatePlayer method of the physics world, we update the properties one by one because Colyseus’ onChange delivers a set of all changed properties.

Note: This function only runs on the client version of the physics world, as game objects are only manipulated indirectly via the Colyseus server.

updatePlayer(sessionId, field, value) {
// get the player physics object by its sessionId
let player = this.world.players.get(sessionId);
// exit if not found
if (!player) return;
// apply changes to the properties
switch (field) {
case “angle”:
Body.setAngle(player, value);
break;
case “x”:
Body.setPosition(player, { x: value, y: player.position.y });
break;
case “y”:
Body.setPosition(player, { x: player.position.x, y: value });
break;
// set velocityX, velocityY, angularVelocity …
}
}

The same procedure applies to the other game objects (ball and teams): listen to their changes and apply the changed values to the client’s physics world.

So far, no objects are moving because we still need to listen to keyboard input and send it to the server. Instead of directly sending events on every keydown event, we maintain a map of currently pressed keys and send events to the Colyseus server in a 50ms loop. This way, we can support pressing multiple keys at the same time and mitigate the pause that happens after the first and consecutive keydown events when the key stays pressed:

let keys = {};
const keyDown = e => {
keys[e.key] = true;
};
const keyUp = e => {
keys[e.key] = false;
};
document.addEventListener(‘keydown’, keyDown);
document.addEventListener(‘keyup’, keyUp);

let loop = () => {
if (keys[“ArrowLeft”]) {
this.room.send(“move”, { direction: “left” });
}
else if (keys[“ArrowRight”]) {
this.room.send(“move”, { direction: “right” });
}
if (keys[“ArrowUp”]) {
this.room.send(“move”, { direction: “up” });
}
else if (keys[“ArrowDown”]) {
this.room.send(“move”, { direction: “down” });
}
// next iteration
requestAnimationFrame(() => {
setTimeout(loop, 50);
});
}
// start loop
setTimeout(loop, 50);

Now the cycle is complete: listen for keystrokes, send the corresponding commands to the Colyseus server to manipulate the physics world on the server. The Colyseus server then applies the new physical properties to all the game objects and propagates the data back to the client to update the user-facing instance of the game.

Minor Nuisances

In retrospect, two things of the category nobody-told-me-but-someone-should-have come to mind:

A good understanding of how physics engines work is beneficial. I spent a considerable amount of time fine-tuning physics properties and constraints. Even though I built a small game with Phaser.js and Matter.js before, there was a lot of trial-and-error to get objects to move in the way I imagined them to.
Real-time is hard — especially in physics-based games. Minor delays considerably worsen the experience, and while synchronizing state across clients with Colyseus works great, it can’t remove computation and transmission delays.

Gotchas And Caveats With SvelteKit

Since I used SvelteKit when it was fresh out of the beta-oven, there were a few gotchas and caveats I would like to point out:

It took a while to figure out that environment variables need to be prefixed with VITE_ in order to use them in SvelteKit. This is now properly documented in the FAQ.
To use Supabase, I had to add Supabase to both the dependencies and devDependencies lists of package.json. I believe this is no longer the case.
SvelteKits load function runs both on the server and the client!
To enable full hot module replacement (including preserving state), you have to manually add a comment line <!– @hmr:keep-all –> in your page components. See FAQ for more details.

Many other frameworks would have been great fits as well, but I have no regrets about choosing SvelteKit for this project. It enabled me to work on the client application in a very efficient way — mostly because Svelte itself is very expressive and skips a lot of the boilerplate code, but also because Svelte has things like animations, transitions, scoped CSS and global stores baked in. SvelteKit provided all the building blocks I needed (SSR, routing, server routes) and although still in beta, it felt very stable and fast.

Deployment And Hosting

Initially, I hosted the Colyseus (Node) server on a Heroku instance and wasted a lot of time getting WebSockets and CORS working. As it turns out, the performance of a tiny (free) Heroku dyno is not sufficient for a real-time use case. I later migrated the Colyseus app to a small server at Linode. The client-side application is deployed by and hosted on Netlify via SvelteKits adapter-netlify. No surprises here: Netlify just worked great!

Conclusion

Starting out with a really simple prototype to validate the idea helped me a lot in figuring out if the project is worth following and where the technical challenges of the game lay. In the final implementation, Colyseus took care of all the heavy lifting of synchronizing state in real-time across multiple clients, distributed in multiple rooms. It’s impressive how quickly a real-time multi-user application can be built with Colyseus — once you figure out how to properly describe the schema. Colyseus’ built-in monitoring panel helps in troubleshooting any synchronizing issues.

What complicated this setup was the physics layer of the game because it introduced an additional copy of each physics-related game object that needed to be maintained. Storing game PINs in Supabase.io from the SvelteKit app was very straightforward. In hindsight, I could have just used an SQLite database to store the game PINs, but trying out new things is half of the fun when building side projects.

Finally, using SvelteKit for building out the frontend of the game allowed me to move quickly — and with the occasional grin of joy on my face.

Now, go ahead and invite your friends to a round of Autowuzzler!

Further Reading on Smashing Magazine

“Get Started With React By Building A Whac-A-Mole Game,” Jhey Tompkins
“How To Build A Real-Time Multiplayer Virtual Reality Game,” Alvin Wan
“Writing A Multiplayer Text Adventure Engine In Node.js,” Fernando Doglio
“The Future Of Mobile Web Design: Video Game Design And Storytelling,” Suzanne Scacca
“How To Build An Endless Runner Game In Virtual Reality,” Alvin Wan

Tilda – The Website Builder That Disrupted The Way We Create Websites

Original Source: https://www.webdesignerdepot.com/2021/10/tilda-the-website-builder-that-disrupted-the-way-we-create-websites/

Tilda website builder combines everything we liked so much about constructors when we were kids – you can experiment, test out and build myriads of new creative ideas out of ready-to-use blocks. Tilda is that type of constructor that allows you to own your creative process and create pretty much any website: landing page, business website, online store, online course with members area, blog, portfolio, or event promo page.

Founded seven years ago, Tilda is a website builder that completely revamped the way we create websites. Tilda has been the first website builder to introduce block mechanics that allows users to create websites out of pre-designed pieces. This breakthrough technology allowed all users – not only designers – to create professional-looking websites. Just like in kid constructors, you can drag-and-drop and mix-and-match blocks on Tilda to let your creativity flow and build a dazzling website, at extraordinary speed. 

When you ask designers why they love Tilda, they usually say it’s because the platform provides the ultimate balance between choosing from templates and being able to fully customize and create from scratch to bring any creative idea to life. Here’s what else they say:

Tilda has been a game-changer for us. It allows our team to quickly spin up new web pages, make edits, and ship new programs. We left WordPress for Tilda and after being with Tilda for 2 years, I don’t ever want to go back.

~ Andy Page, Executive Director, Forge.

I built my first website in 2001. Since then I’ve used countless platforms and website builders for customer websites and my own business. Tilda is the perfect combination of ease of use with powerful features at an unbeatable value.

~ Robby Fowler, Branding and Marketing Strategist, robbyf.com & The Brand ED Podcast.

Let’s dive deeper into core functionalities you can leverage on Tilda. 

#1 Cut Corners With 550+ Pre-Designed Blocks And 210+ Ready-Made Templates

The beauty of Tilda is that it provides 550+ blocks in the ever-growing Block Library designed by professional designers. Thus, you can quickly build a website out of pre-designed blocks that encompass virtually all elements you might need for your website: menu, about us page, features, contact, pricing, etc. 

Customizing each block is a breeze with Tilda: You can drag-and-drop images, edit text right in the layout, alter block height, background color, padding, select the style of buttons, use custom fonts, and assign ready-made animation effects to specific parts of it. Also, Tilda provides a built-in free image library with 600K+ images, so you can find images that are just right for you without leaving Tilda, add them to your website with just one click, and use them for free.

Finally, all blocks fit together so well that it’s almost impossible to create a bad design on Tilda – even if you are a stranger to website building.

For a quick take-off, you can use 210+ ready-made templates for different kinds of websites and projects: online stores, landing pages, webinar promo pages, multimedia articles, blogs, and more. Each template is a sample of modern web design and consists of blocks. It means that templates don’t limit your creativity: you can modify them to your liking by playing with settings, adding extra or removing existing blocks, and embedding images and text. 

Each of the templates and blocks covers over 90% of use cases you’ll ever require and is mobile-ready, meaning that your website will look great on desktop computers, tablets, and smartphones by default.

#2 Jazz Up Your Site With Zero Block: Professional Editor For Web Designers 

To better meet the demands of a creative brief and unleash your creativity, you can use Tilda’s secret weapon called Zero Block. It is a tool for creating uniquely designed blocks on Tilda.

You can control each element of the block, including text, image, button, or background, and decide on their position, size, and screen resolution on which they’ll appear. For example, you can work with layers to create depth with overlay and opacity techniques or set a transparency level on any element and shadow effects below them. Additionally, you can also insert HTML code to add more complex elements, such as calendars, paywall, comments, social media posts, and so much more.  

Finally, Zero Block allows you to fool around with basic and more advanced step-by-step animation for a more individual look. Here’re some animation examples that you can make on Tilda:

Animation on scroll (position of elements is changing on scroll).

Trigger animation (animation is triggered when pointing at or clicking on an object).

Infinite scrolling text.

#3 Import Designs From Figma To Tilda In Minutes

Creators love using Figma for prototyping, but when you have to transfer every element and rebuild your website design from scratch – that’s what’s killing the party. With Tilda, you can easily turn your static designs into an interactive website in no time. 

All it takes is to prepare your Figma design for import with a few easy steps, paste the Figma API token and your layout URL to Tilda, click import and let the magic happen. Once your design is imported, you can bring your project online just by clicking publish.

#4. Make Search Engines Love Your Website With Built-In SEO Optimization

Thanks to the consecutive positioning of blocks on the page, websites designed on Tilda are automatically indexed well by search engines. There is also a set of SEO parameters you can fine-tune right inside the platform to ensure that your web pages rank high even if you don’t have an SEO specialist in-house. These parameters include the title tag, description and keywords meta tags, reader-friendly URLs, H1, H2, and H3 header tags, alt text for images, and easily customizable social media snippets. 

As an additional value, Tilda provides an SEO Assistant that will show you what errors are affecting the indexing of your website and will help test the website for compliance with the search engines’ main recommendations.

#5. Turn Visitors Into Clients

Tilda gives you the power to set up data capture forms and integrate them with 20+ data capture services, such as Google Sheets, Trello, Notion, Salesforce, Monday.com, etc., to ensure seamless lead generation.

For more fun, Tilda developed its CRM to manage your leads better and keep your business organized right inside of a website builder. This is a very easy-to-use tool that automatically adds leads from forms and allows you to manually add leads you captured outside of the website. There is a kanban board that gives you an overall view of how leads are moving through your sales funnel and allows you to move leads between stages easily.

#6. Build A Powerful Online Store In One Day

Tilda provides a set of convenient features to create a remarkable online shopping experience. The platform gives you the power to sell online using ready-made templates or build an online store completely from scratch, add a shopping cart and connect a payment system of choice — Stripe, PayPal, 2Checkout, etc. — to accept online payments in any currency.

If you are looking to run a large ecommerce business, you should also consider Tilda. Thanks to the built-in Product Catalog, you can add up to 5000 items, import and export products in CSV files, easily manage stock, orders, and keep track of store stats.

And thanks to adaptive design, your store will look good across all devices, including tablets and smartphones. 

#7. Bring Your Project Online For Free

Tilda offers three subscription plans: Free, Personal ($10/month with annual subscription), and Business ($20/month with annual subscription). When you sign up for Tilda, you get a lifetime free account. It allows you to publish a website with a free subdomain and gives you access to a selection of blocks and a limited number of features that offer enough to create an impressive website. 

Personal and Business tariffs allow more advanced options, such as connecting custom domains, adding HTML code, receiving payments, and embedding data collection forms. The business plan also allows users to export their website and create five websites (while personal and free plans allow one website per account). 

To discover all features and templates on Tilda, activate a two-week free trial – no credit card required.

Source

p img {display:inline-block; margin-right:10px;}
.alignleft {float:left;}
p.showcase {clear:both;}
body#browserfriendly p, body#podcast p, div#emailbody p{margin:0;}

The post Tilda – The Website Builder That Disrupted The Way We Create Websites first appeared on Webdesigner Depot.