8 Easy Ways To Ruin Your User Onboarding

Original Source: https://www.webdesignerdepot.com/2020/08/8-easy-ways-to-ruin-your-user-onboarding/

To understand why user onboarding is such an indispensable tool, we need to empathize with the people using our products; we all come from different backgrounds and cultures, we make different assumptions, and we see the world differently.

User onboarding helps mitigate these differences by making your product’s learning curve less steep.

However, companies often make unfortunate mistakes that hinder user experience and cause frustration. In today’s article, we’ll take a look at eight ways companies ruin their products’ onboarding process.

Let’s dive right in, shall we?

1. No User Onboarding at all

As a part of the team that created a product, you’ve probably spent hundreds of hours going over its features and the most minute detail. Naturally, you know the product like the back of your hand. The user does not.

Naturally, you know the product like the back of your hand. The user does not

We may believe that the app we’ve worked on is straightforward and that user onboarding is probably overkill — but that’s almost never the case. Guiding our users through a product will help with retention, conversion, and their overall satisfaction.

However, there are very rare cases when you can do without user onboarding, here are a few:

Your product is too straightforward to cause any confusion;
Your product has a formulaic structure, similar to that of other products’ in your category, i.e., social media or e-commerce;
Your product relies heavily on Google or iOS design guidelines with common design patterns;
Your product is too complex (enterprise or business-oriented) — in such cases, users need special training, rather than just an onboarding;

2. Assuming That Users “Get It”

 One of the vital UX mottos we should always be mindful of is that “we are not our users.” When onboarding them, we always need to assume that they’re at square one. We should communicate with them as if they have no prior knowledge of our product, its terminology, and the way it works.

Providing freshly-registered users with highly contextual information will most likely confuse them. As a result, this will render your attempts to create a helpful onboarding process useless.  

3. Onboarding Users on a Single Touchpoint

it’s tempting to brainstorm which features should make it into the onboarding, then design and code them; that’s a very bad idea

The main problem with the previous point is that it’s too contextual for new users. However, providing no context altogether can be problematic as well. This is commonly found in onboarding processes that focus on a single touchpoint while leaving out the rest of the product.

By choosing to inform users of our product’s features, we force them to detour from their “normal” course of action. This comes at the cost of the user’s frustration.

Since we’re asking people to pay this price, it’s best to provide them with information that will also help them navigate the entire product. As a result, this will decrease the number of times we’ll have to distract them from their ordinary flow.

4. Forcing Users Through Onboarding

We’ve previously mentioned that we mustn’t assume that users have any background knowledge about our products.

The opposite argument can be made — experienced users don’t need a basic onboarding process. It will most likely frustrate them, and it won’t provide them with any real value. Also, forcing users through this process will most likely take the onboarding frustration to a whole other level.

This is why it’s essential that we allow them to skip the parts they don’t find useful. This way, we’ll address the knowledge gaps of the people who really want it and need it.

5. Onboarding Based Purely on Assumptions

This is yet another point that’s implicit in “we are not our users”. Oftentimes, it’s tempting to brainstorm which features should make it into the onboarding, then design and code them; that’s a very bad idea.

Here’s what every designer should do instead:

Do user interviews: You should conduct these before having anything designed; user interviews will help you shortlist and prioritize features in terms of their significance, so that the onboarding is focused around the features that matter most.
Do usability testing: Once you have a good idea of what features your users consider most important, design onboarding that reflects that; having completed your design, make sure to conduct at least 5 usability testing sessions with users, so that you can make sure that your design works.

6. Just Letting Users Quit

While we shouldn’t force people to go through onboarding, it doesn’t mean we shouldn’t nudge them in the right direction.

find that sweet spot between being front of mind and annoying

People choose not to onboard for many reasons, but showing them around will benefit both parties. Therefore, it’s never wrong to remind them that they can always resume onboarding via email or push notifications (unless you’re too pushy). Make sure to find that sweet spot between being front of mind and annoying. 

Similarly, these two mediums are a great way to deliver valuable information as well.

Here’s a great example of an onboarding email from InVision:

And here’s a clever notification from TripPlanner:

Source: clevertap.com

7. Asking For Too Much Information

We need to always be mindful of the fact that the product’s spokesperson should act as a guide during onboarding. Its goal at the very beginning is to build trust.

We can ask for small favors when we’ve built a solid and lasting relationship

Not only is asking for too much information from the get-go unproductive, but it will also undermine the trust that the user already gave us.

It’s best to abstain from asking freshly-registered users for their credit card information. Nearly 100% of businesses care about profits — and there’s no shame in it. However, today’s most successful companies make money by providing users with value. So it’s best to stimulate users to share their financial data in subtler ways while focusing on customer experience.

The same can be said about subjecting the people using your service to extensive questionnaires. At the first steps of our interaction, it’s all about giving and gaining trust. We can ask for small favors when we’ve built a solid and lasting relationship.

8. Onboarding for the Sake of Onboarding

While there are dozens of reasons why you should guide your users through your product, it needs to be done well. A pointless onboarding process that doesn’t provide users with value is more frustrating than the lack thereof.

Onboarding can be a bit frustrating at times. Pointless onboarding will just raise eyebrows. It will slow users down and disengage them, which is exactly the opposite of what we want.

Conclusion

The process of introducing your users to your product is one of the factors that will define its success.

A critical aspect of user onboarding that we need to always take into account is value. Is this detour from our user’s ordinary course of action valuable to them? Will this improve their experience with the product?

Onboarding demands careful and continuous tailoring. Once perfected, this process will help you win new users’ hearts and help you build brand loyalty.


Featured image via Unsplash.

Source

p img {display:inline-block; margin-right:10px;}
.alignleft {float:left;}
p.showcase {clear:both;}
body#browserfriendly p, body#podcast p, div#emailbody p{margin:0;}

32 Creative and Interesting Bento Boxes

Original Source: https://www.hongkiat.com/blog/creative-and-interesting-bento-boxes/

For most Japanese mothers, lunch is not just simple food preparation and packing meals for their love ones, they spend their time arranging the meal in aesthetically pleasing way. These lunch boxes…

Visit hongkiat.com for full content.

Adversarial Interoperability

Original Source: https://www.sitepoint.com/adversarial-interoperability/?utm_source=rss

“Interoperability” is the act of making a new product or service work with an existing product or service: modern civilization depends on the standards and practices that allow you to put any dish into a dishwasher or any USB charger into any car’s cigarette lighter.

But interoperability is just the ante. For a really competitive, innovative, dynamic marketplace, you need adversarial interoperability: that’s when you create a new product or service that plugs into the existing ones without the permission of the companies that make them. Think of third-party printer ink, alternative app stores, or independent repair shops that use compatible parts from rival manufacturers to fix your car or your phone or your tractor.

Adversarial interoperability was once the driver of tech’s dynamic marketplace, where the biggest firms could go from top of the heap to scrap metal in an eyeblink, where tiny startups could topple dominant companies before they even knew what hit them.

But the current crop of Big Tech companies has secured laws, regulations, and court decisions that have dramatically restricted adversarial interoperability. From the flurry of absurd software patents that the US Patent and Trademark Office granted in the dark years between the first software patents and the Alice decision to the growing use of “digital rights management” to create legal obligations to use the products you purchase in ways that benefit shareholders at your expense, Big Tech climbed the adversarial ladder and then pulled it up behind them.

That can and should change. As Big Tech grows ever more concentrated, restoring adversarial interoperability must be a piece of the solution to that concentration: making big companies smaller makes their mistakes less consequential, and it deprives them of the monopoly profits they rely on to lobby for rules that make competing with them even harder.

For months, we have written about the history, theory, and practice of adversarial interoperability. This page rounds up our writing on the subject in one convenient resource that you can send your friends, Members of Congress, teachers, investors, and bosses as we all struggle to figure out how to re-decentralize the Internet and spread decision-making power around to millions of individuals and firms, rather than the executives of a handful of tech giants.

Interoperability: Fix the Internet, Not the Tech Companies: a taxonomy of different kinds of interoperability, from “indifferent interoperability” (I don’t care if you plug your thing into my product) to “cooperative interoperability” (please plug your thing into my product) to “adversarial interoperability” (dang it, stop plugging your thing into my product!).
Unix and Adversarial Interoperability: The ‘One Weird Antitrust Trick’ That Defined Computing How do you get a ruthless monopolist to sit on its hands while competitors large and small make interoperable versions of one of its inventions? The story of Unix shows the way.
alt.interoperability.adversarial: The history of the alt. hierarchy shows how an Internet dominated by protocols, not products, ensured that users could shape their online experiences. Restoring legal protections to interoperators could turn today’s Big Tech companies back into protocols that anyone could plug a new service into.
Adversarial Interoperability: Reviving an Elegant Weapon From a More Civilized Age to Slay Today’s Monopolies: The history of adversarial interoperability and how it drove the tech revolutions of the past four decades, and what we can do to restore it.
Gopher: When Adversarial Interoperability Burrowed Under the Gatekeepers’ Fortresses: Before the Web devoured Gopher, Gopher devoured mainframes.
Interoperability and Privacy: Squaring the Circle: Big Tech companies created a privacy dumpster fire on the Internet, but now they say they can’t fix it unless we use the law to ban competitors from plugging new services into their flaming dumpsters. That’s awfully convenient, don’t you think?
A Cycle of Renewal, Broken: How Big Tech and Big Media Abuse Copyright Law to Slay Competition: Cable TV exists because of adversarial interoperability, which gave it the power to disrupt the broadcasters. Today, Big Cable is doing everything it can to stop anyone from disrupting it.
‘IBM PC Compatible’: How Adversarial Interoperability Saved PCs From Monopolization: IBM spent more than a decade on the wrong end of an antitrust action over its mainframe monopoly, but when it created its first PCs, scrappy upstarts like Phoenix and Compaq were able to clone its ROM chips and create a vibrant, fast-moving marketplace.
SAMBA versus SMB: Adversarial Interoperability is Judo for Network Effects: Microsoft came this close to owning the modern office by locking up the intranet in a proprietary network protocol called SMB…That is, until a PhD candidate released SAMBA, a free/open product that adversarially interoperated with SMB and allows Macs, Unix systems, and other rivals to live on the same LANs as Windows machines.
Felony Contempt of Business Model: Lexmark’s Anti-Competitive Legacy: Printer companies are notorious for abusive practices, but Lexmark reached a new low in 2002, when it argued that copyright gave it the right to decide who could put carbon powder into empty toner cartridges. Even though Lexmark failed, it blazed a trail that other companies have enthusiastically followed, successfully distorting copyright to cover everything from tractor parts to browser plugins.
Mint: Late-Stage Adversarial Interoperability Demonstrates What We Had (And What We Lost): The last great hurrah of Adversarial Interoperability, fought the finance sector…and won!
Adblocking: How About Nah?: The early Web was infested with intrusive pop-up ads, and adversarial interoperability rendered them invisible. Today, adblocking is the largest boycott in history, doing more to curb bad ads and the surveillance that goes with them than any regulator.
African WhatsApp Modders are the Masters of Worldwide Adversarial Interoperability: GB WhatsApp started life in the Syrian conflict and is now the leader of the pack in Africa, where it is more popular than Facebook itself — and where it has to compete with other WhatsApp mods, each customized to a different kind of user and use-case.

(Republished from EFF Deeplinks under a Creative Commons Attribution 4.0 license)

Continue reading
Adversarial Interoperability
on SitePoint.

How to Use Deno’s Built-in Tools

Original Source: https://www.sitepoint.com/deno-built-in-tools/?utm_source=rss

How to Use Deno’s Built-in Tools

One surprising difference between Deno and Node.js is the number of tools built into the runtime. Other than a Read-Eval-Print Loop (REPL) console, Node.js requires third-party modules to handle most indirect coding activities such as testing and linting. Deno provides almost everything you need out of the box.

Before we begin, a note. Deno is new! Use these tools with caution. Some may be unstable. Few have configuration options. Others may have undesirable side effects such as recursively processing every file in every subdirectory. It’s best to test tools from a dedicated project directory.

Install Deno

Install Deno on macOS or Linux using the following terminal command:

curl -fsSL https://deno.land/x/install/install.sh | sh

Or from Windows Powershell:

iwr https://deno.land/x/install/install.ps1 -useb | iex

Further installation options are provided in the Deno manual.

Enter deno –version to check installation has been successful. The version numbers for the V8 JavaScript engine, TypeScript compiler, and Deno itself are displayed.

Upgrade Deno

Upgrade Deno to the latest version with:

deno upgrade

Or upgrade to specific release such as v1.3.0:

deno upgrade –version 1.30.0

Most of the tools below are available in all versions, but later editions may have more features and bug fixes.

Deno Help

A list of tools and options can be viewed by entering:

deno help

Read-Eval-Print Loop (REPL)

Like Node.js, a REPL expression evaluation console can be accessed by entering deno in your terminal. Each expression you enter returns a result or undefined:

$ deno

Deno 1.3.0
exit using ctrl+d or close()
> const w = ‘World’;
undefined
> w
World
> console.log(`Hello ${w}!`);
Hello World!
undefined
> close()

$

Previously entered expressions can be re-entered by using the cursor keys to navigate through the expression history.

Dependency Inspector

A tree of all module dependencies can be viewed by entering deno info <module> where <module> is the path/URL to an entry script.

Consider the following lib.js library code with exported hello and sum functions:

// general library: lib.js

/**
* return “Hello <name>!” string
* @module lib
* @param {string} name
* @returns {string} Hello <name>!
*/
export function hello(name = ‘Anonymous’) {

return `Hello ${ name.trim() }!`;

};

/**
* Returns total of all arguments
* @module lib
* @param {…*} args
* @returns {*} total
*/
export function sum(…args) {

return […args].reduce((a, b) => a + b);

}

These can be used from a main entry script, index.js, in the same directory:

// main entry script: index.js

// import lib.js modules
import { hello, sum } from ‘./lib.js’;

const
spr = sum(‘Site’, ‘Point’, ‘.com’, ‘ ‘, ‘reader’),
add = sum(1, 2, 3);

// output
console.log( hello(spr) );
console.log( ‘total:’, add );

The result of running deno run ./index.js:

$ deno run ./index.js

Hello SitePoint.com reader!
total: 6

The dependencies used by index.js can be examined with deno info ./index.js:

$ deno info ./index.js

local: /home/deno/testing/index.js
type: JavaScript
deps:
file:///home/deno/testing/index.js
└── file:///home/deno/testing/lib.js

Similarly, the dependencies required by any module URL can be examined, although be aware the module will be downloaded and cached locally on first use. For example:

$ deno info https://deno.land/std/hash/mod.ts

Download https://deno.land/std/hash/mod.ts
Download https://deno.land/std@0.65.0/hash/mod.ts
Download https://deno.land/std@0.65.0/hash/_wasm/hash.ts
Download https://deno.land/std@0.65.0/hash/hasher.ts
Download https://deno.land/std@0.65.0/hash/_wasm/wasm.js
Download https://deno.land/std@0.65.0/encoding/hex.ts
Download https://deno.land/std@0.65.0/encoding/base64.ts
deps:
https://deno.land/std/hash/mod.ts
└─┬ https://deno.land/std@0.65.0/hash/_wasm/hash.ts
├─┬ https://deno.land/std@0.65.0/hash/_wasm/wasm.js
│ └── https://deno.land/std@0.65.0/encoding/base64.ts
├── https://deno.land/std@0.65.0/encoding/hex.ts
└── https://deno.land/std@0.65.0/encoding/base64.ts

For further information, see the Deno Manual: Dependency Inspector.

Linter (Syntax Checker)

Deno provides a linter to validate JavaScript and TypeScript code. This is an unstable feature which requires the –unstable flag, but no files will be altered when it’s used.

Linting is useful to spot less obvious syntax errors and ensure code adheres with your team’s standards. You may already be using a linter such as ESLint in your editor or from the command line, but Deno provides another option in any environment where it’s installed.

To recursively lint all .js and .ts files in the current and child directories, enter deno lint –unstable:

$ deno lint –unstable

(no-extra-semi) Unnecessary semicolon.
};
^
at /home/deno/testing/lib.js:13:1

Found 1 problem

Alternatively, you can specify one or more files to limit linting. For example:

$ deno lint –unstable ./index.js
$

For further information, see the Deno Manual: Linter. It includes a list of rules you can add to code comments to ignore or enforce specific syntaxes.

Test Runner

Deno has a built-in test runner for unit-testing JavaScript or TypeScript functions.

Tests are defined in any file named <something>test with a .js, .mjs, .ts, .jsx, or .tsx extension. It must make one or more calls to Deno.test and pass a test name string and a testing function. The function can be synchronous or asynchronous and use a variety of assertion utilities to evaluate results.

Create a new test subdirectory with a file named lib.test.js:

// test lib.js library

// assertions
import { assertEquals } from ‘https://deno.land/std/testing/asserts.ts’;

// lib.js modules
import { hello, sum } from ‘../lib.js’;

// hello function
Deno.test(‘lib/hello tests’, () => {

assertEquals( hello(‘Someone’), ‘Hello Someone!’);
assertEquals( hello(), ‘Hello Anonymous!’ );

});

// sum integers
Deno.test(‘lib/sum integer tests’, () => {

assertEquals( sum(1, 2, 3), 6 );
assertEquals( sum(1, 2, 3, 4, 5, 6), 21 );

});

// sum strings
Deno.test(‘lib/sum string tests’, () => {

assertEquals( sum(‘a’, ‘b’, ‘c’), ‘abc’ );
assertEquals( sum(‘A’, ‘b’, ‘C’), ‘AbC’ );

});

// sum mixed values
Deno.test(‘lib/sum mixed tests’, () => {

assertEquals( sum(‘a’, 1, 2), ‘a12’ );
assertEquals( sum(1, 2, ‘a’), ‘3a’ );
assertEquals( sum(‘an’, null, [], ‘ed’), ‘annulled’ );

});

To run all tests from all directories, enter deno test. Or run tests stored in a specific directory with deno test <dir>. For example:

$ deno test ./test

running 4 tests
test lib/hello tests … ok (4ms)
test lib/sum integer tests … ok (2ms)
test lib/sum string tests … ok (2ms)
test lib/sum mixed tests … ok (2ms)

test result: ok. 4 passed; 0 failed; 0 ignored; 0 measured; 0 filtered out (11ms)

$

A –filter string or regular expression can also be specified to limit tests by name. For example:

$ deno test –filter “hello” ./test

running 1 tests
test lib/hello tests … ok (4ms)

test result: ok. 1 passed; 0 failed; 0 ignored; 0 measured; 3 filtered out (5ms)

Longer-running tests can be stopped on the first failure by passing a –failfast option.

For further information, see the Deno Manual: Testing. A few third-party test modules are also available, including Merlin and Ruhm, but these still use Deno.test beneath the surface.

Continue reading
How to Use Deno’s Built-in Tools
on SitePoint.

The Complete Guide to Windows Terminal

Original Source: https://www.sitepoint.com/windows-terminal/?utm_source=rss

In this article, we’ll explore Windows Terminal, the ideal accompaniment to WSL2. It’s fast, configurable, looks great, and offers all the benefits of both Windows and Linux development.

Windows has fully embraced Linux, and WSL2 makes it a seamless pleasure.

Your distro’s terminal can be accessed by:

clicking its Start menu icon
entering wsl or bash at a Powershell or command prompt
using a third-party terminal option such as Cmder, ConEmu, and Hyper with a profile which launches %windir%system32bash.exe ~
setting Linux as the default shell in VS Code by pressing Ctrl + Shift + P and typing/choosing Terminal: Select Default Shell, and selecting WSL Bash.

Windows Terminal offers a further choice, but you won’t regret installing it. The new application features:

support for WSL2, SSH, Powershell, cmd and other command lines
multiple tabs and split panes
configurable themes, background images, and transparency effects
a search box
custom key bindings
GPU accelerated text rendering
a great-looking new font, Cascadia Code
low resource usage (typically 10MB per tab)
auto-updating (if using the Microsoft Store)
good documentation
and it’s open source!

Windows Terminal

How to Install Windows Terminal

The easiest way to install Windows Terminal is via the Microsoft Store:

ms-windows-store://pdp/?ProductId=9n0dx20hk701

If this link fails, try opening the Microsoft Store in your browser or launching the Microsoft Store app from the Windows Start menu and searching for “Terminal”.

Note: be careful not to select the earlier “Windows Terminal Preview” application.

Windows Terminal at the Microsoft Store

Hit Get and wait a few seconds for installation to complete.

If you don’t have access to the Store, you can download the latest release from GitHub.

The Windows Terminal app icon is now available in the Windows Start menu. For easier access, right-click the icon and choose Pin to Start or More, followed by Pin to taskbar.

Getting Started with Windows Terminal

When it’s first run, Windows Terminal starts with Powershell as the default profile. A drop-down menu is available to launch other tabs and access the settings:

Windows Terminal start

Terminal automatically generates profiles for all WSL distros and Windows shells you have installed, although it’s possible to disable generation in the global settings.

Managing Tabs and Panes

Open a new tab for the default profile by clicking the + icon or Ctrl + Shift + T. To open a tab for a different profile, choose it from the drop-down menu or press Ctrl + Shift + N, where N is the profile’s number.

Press Alt + Shift + D to duplicate and split the pane. The active pane is split in two along the longest axis each time it is used:

Windows Terminal split panes

To force creation of a:

vertical pane, press Alt + Shift + +, or
horizontal pane, press Alt + Shift + –

To open another profile in a new pane, hold down the Alt key when choosing it from the drop-down menu.

Hold down Alt and use the cursor keys to switch between active panes from the keyboard. The size of a pane can be adjusted by holding Alt + Shift and using the cursor keys to resize accordingly.

Tabs can be renamed by double-clicking the text. You can also change the name or color by right-clicking the tab and choosing a menu option:

Windows Terminal tab name and color

This only affects the current tab; it doesn’t permanently change the profile.

To close the active pane or tab, press Alt + Shift + W or enter the terminal’s standard exit command (usually exit).

Text size

The text size of the active terminal can be resized with Ctrl + + and Ctrl + -. Alternatively, hold down Ctrl and scroll the mouse wheel.

Scrolling

Use the scroll bar to navigate through the terminal output. Alternatively, hold down Ctrl and press cursor up, cursor down, Page Up or Page Down to navigate using the keyboard.

Search

Press Ctrl + Shift + F to open the search box:

Windows Terminal search

Enter any term then use the up and down icons to search the terminal output. Click the Aa icon to activate and deactivate exact-case matching.

Copy and Paste

By default, copy and paste are bound to Ctrl + Shift + C and Ctrl + Shift + V respectively, although Ctrl + C and Ctrl + V will also work.

Note: be wary that Ctrl + C can terminate a Linux application, so using Shift is advisable.

An automatic copy-on-select option is available in the global settings, and you can also paste the current clipboard item by right-clicking the mouse.

Settings

Settings are accessed from the drop-down menu or Ctrl + , (comma). The configuration is defined in a single settings.json file, so you may be prompted to choose a text editor. VS Code is a great choice, although Notepad is fine if you’re happy to edit without color-coding and syntax checking.

settings.json controls:

global settings, which apply to all profiles
profile settings, which define profiles
custom color scheme settings, and
keybinding settings

The file uses the following format:

// This file was initially generated by Windows Terminal
{

// general settings, e.g.
“initialRows”: 40,

// profile settings
“profiles”:
{

“defaults”:
{
// settings that apply to all profiles
}
“list”:
[
// list of individual profiles, e.g.
{
“guid”: “{81d1dceb-c123-5678-90a1-123abc456def}”,
“name”: “Windows PowerShell”,
“commandline”: “powershell.exe”
},
{
“guid”: “{91d1dceb-c123-5678-90a1-123abc456def}”,
“name”: “Ubuntu”,
“source”: “Windows.Terminal.Wsl”
}
]

}

// custom color schemes, e.g.
“schemes”: [
{
“name”: “My new theme”,
“cursorColor”: “#FFFFFF”,
“selectionBackground”: “#FFFFFF”,
“background” : “#0C0C0C”,
“foreground” : “#CCCCCC”
}
],

// custom key bindings, e.g.
“keybindings:
[
{ “command”: “find”, “keys”: “ctrl+shift+f” }
]

}

Defaults are defined in defaults.json. Open it by holding down Alt when clicking Settings in the drop-down menu.

Warning: do not change the defaults file! Use it to view default settings and, where necessary, add or change a setting in settings.json.

Global Settings

The following global settings are the most useful, although more are documented in the Windows Terminal documentation.

“defaultProfile” defines the GUID of the profile used as the default when Windows Terminal is launched.

Set “copyOnSelect” to true to automatically copy selected text to your clipboard without having to press Ctrl + Shift + C.

Set “copyFormatting” to false to just copy plain text without any styling. (I wish this were the default for every application everywhere!)

Set “initialColumns” and “initialRows” to the number of characters for the horizontal and vertical dimensions.

“tabWidthMode” can be set to:

“equal”: each tab is the same width (the default)
“titleLength”: each tab is set to the width of its title, or
“compact”: inactive tabs shrink to the width of their icon.

“disabledProfileSources” sets an array which prevents profiles being automatically generated. For example:

“disabledProfileSources”: [
“Windows.Terminal.Wsl”,
“Windows.Terminal.Azure”,
“Windows.Terminal.PowershellCore”
],

This would disable all generated profiles; remove whichever ones you want to retain.

Continue reading
The Complete Guide to Windows Terminal
on SitePoint.

150+ Amazing Examples of CSS Animation & Effects

Original Source: http://feedproxy.google.com/~r/1stwebdesigner/~3/lPBdpEDPD0U/

We have compiled a huge collection of amazing CSS effects for you to check out. Have a look and use these examples to help you learn the nitty-gritty details so you can create more beautiful and engaging web sites. When you’re done, you can also take a look at our other articles on CSS effects for even more ideas. Enjoy!

Web Designer Toolbox: Unlimited Downloads Starting at $16.50/Month

Website Kits

Website Kits
16,000+ Web Designs

UX & UI Kits

UX & UI Kits
14,000+ UX & UI Kits

Graphic Assets

Graphic Assets
33,000+ Graphics

DOWNLOAD NOW
Envato Elements

1. Swatch Book Tutorial with CSS3 & jQuery [Demo]

CSS Effects - Swatch Book with CSS3 and jQuery

2. 3D Thumbnail Hover Effects [Demo]

CSS Effects - 3D Thumbnail Hover Effects

3. Stunning Menu Tutorial in CSS3 [Demo]

CSS Effects

4. Collection of Cool CSS Hover Effects

CSS Effects - Hover_css_-_A_collection_of_CSS3_powered_hover_effects

This awesome website consists of more than 100 different CSS effects like 2D transitions, background transitions, icon CSS effects, border transitions, shadow and glow transitions, speech bubble CSS effects, and cool CSS curl effects. Check it out!

5. Collection of CSS Animation Examples

CSS Effects - Animate_css

You will find more than 50 CSS animation examples on this simple website. Text CSS animation effects like bouncing, fading, flipper, zoom entrances, and more.

6. Mastering CSS3 Multiple Backgrounds

CSS Effects - Mastering CSS3 Multiple Backgrounds

7. Custom Drop-Down List Styling [Demo]

CSS Effects - Custom Drop-Down List Styling

8. Quickly Build a Swish Teaser Page With CSS3 [Demo]

CSS Effects

9. Growing Thumbnails Portfolio [Demo]

CSS Effects - Growing Thumbnails Portfolio

10. Button Switches with Checkboxes & CSS3 Fanciness [Demo]

CSS Effects - Button Switches with Checkboxes and CSS3 Fanciness

11. CSS3 Filters: Altering HTML & Images with Just CSS

12. 3D Flipping Circle with CSS3 & jQuery [Demo]

3D Flipping Circle with CSS3 and jQuery

13. Cool Product Showcase with CSS3 [Demo]

Making an Impressive Product Showcase with CSS3

14. CSS-Only Responsive Layout with Smooth Transitions [Demo]

CSS-Only Responsive Layout with Smooth Transitions

15. Creating an Animated 3D Bouncing Ball with CSS3 Effect [Demo]

Creating an Animated 3D Bouncing Ball with CSS3

16. Making a Page Flip Magazine with turn.js [Demo]

Making a Page Flip Magazine with turn.js

17. Animated 3D Bar Chart with CSS3 [Demo]

Animated 3D Bar Chart with CSS3

18. A Pure CSS3 Cycling Slideshow Effect [Demo]

A Pure CSS3 Cycling Slideshow

19. Annotation Overlay Effect with CSS3 Effect [Demo]

Annotation Overlay Effect with CSS3

20. Create an Interactive Graph Using CSS3 & jQuery [Demo]

Create an Interactive Graph using CSS3 & jQuery

21. Fluid CSS3 Slideshow with Parallax Effect [Demo]

Fluid CSS3 Slideshow with Parallax Effect

22. Create a Sticky Note Effect with CSS3 & HTML5 [Demo]

Create a Sticky Note Effect with CSS3 and HTML5

23. Animated Content Tabs with CSS3 [Demo]

Animated Content Tabs with CSS3

24. Swishy CSS3 Navigation Effect [Demo]

Swishy CSS3 navigation

25. Rotating Words with CSS Animation Examples [Demo]

Rotating Words with CSS Animations

26. Create an Accordion Menu in Pure CSS3 [Demo]

Create Accordion Menu in Pure CSS3

27. Login & Registration Form with HTML5 & CSS3 [Demo]

Login and Registration Form with Html5 and CSS3

28. An Introduction to the CSS Flexbox Module [Demo]

An Introduction to the CSS Flexbox Module

29. Responsive Content Navigator with CSS3 [Demo]

Responsive Content Navigator with CSS3

30. Recreating the IBM Lotusphere Logo in CSS3 [Demo]

Recreating the IBM Lotusphere logo in CSS3

31. Apple-like Login Form with CSS 3D Transforms [Demo]

Apple-like Login Form with CSS 3D Transforms

32. CSS3 Dropdown Menu Tutorial [Demo]

CSS3 Dropdown Menu

33. Original Hover Effects with CSS3 [Demo]

Original Hover Effects with CSS3

34. CSS3 Menu Navigation Effect [Demo]

CSS3 Menu Navigation Effect

35. CSS3 with jQuery Reverse Animation [Demo]

CSS3 with jQuery / Reverse Animation

36. CSS3 Progress Bars [Demo]

CSS3 Progress Bars

37. PHP & CSS3 Powered About Page [Demo]

Creating a PHP and CSS3 Powered About Page

38. Create a Beautiful Icon with CSS3 [Demo]

Create a Beautiful Icon with CSS3

39. Create 3D Ribbons Using CSS3 [Demo]

How To Create Depth And Nice 3D Ribbons Only Using CSS3

40. Create an Upload Form Using CSS3, HTML5 & jQuery [Demo]

Create an Upload Form using CSS3, HTML5 and jQuery

41. Create an Video Player with jQuery, HTML5 & CSS3 [Demo]

Create an Video Player in jQuery, HTML5 & CSS3

42. Master the New CSS Layout Properties [Demo]

Master the new CSS layout properties

43. Image Accordion with CSS3 [Demo]

44. Modern Lightbox with CSS3 & JavaScript [Demo

Creating a Modern Lightbox with CSS3 and JavaScript

45. Create a CSS Password Strength Meter [Demo]

Create a Beautiful Password Strength Meter

46. Fullscreen Slit Slider with jQuery & CSS3 [Demo]

Fullscreen Slit Slider with jQuery and CSS3

47. The Facebook Loading Animation [Demo]

The Facebook loading animation

48. CSS3 Clock With jQuery

Use the basic features of CSS3 Transform: rotate. And the combination of Javascript frameworks like jQuery can produce a cool CSS3 clock.

49. Analogue Clock CSS Effect

Analogue clock created using webkit transition and transform CSS. JavaScript is only used to pull in the current time.

50. 3D Cube That Rotates Using Arrow Keys

You can use up, down, left, and right keys to navigate the 3D cube. This 3D cube is built using -webkit-perspective, -webkit-transform and -webkit-transition.

51. Multiple 3D Cubes (Slide In/Out) CSS Effect

Multiple 3D Cubes using CSS3 and proprietary “transform” and “transition” properties. I thought it was amazing. You can see the writing on the 3D object.

52. CSS3 Accordion Tutorial

An accordion effect using only CSS. Proprietary animation in WebKit based browsers.

53. Auto-Scrolling Parallax CSS Animation Effect

Auto-Scrolling Parallax is an animated parallax effect using WebKit’s CSS transition property, no need for JavaScript.

54. Isocube Image CSS Effect

Isocube is like 3DCube but a little different. Isocube can load images on one side.

55. Image Gallery with CSS

56. Matrix

The Matrix is one of the best sci-fi films of all time. CSS3 capable of making such an amazing animated film made

57. 7 Javascript-Effect Alternatives Using CSS3

Seven examples of alternatives to the Javascript effect using CSS3. Various effects such as Fade Block, Block Pulsate, Nudge, Expand Block, Block Bounce, Spin Block, and Accordion are covered here.

58. Image Hover Effects

Image Hover Effects is an example of using CSS to replace Javascript. The image will shrink when you put your mouse pointer on top of it.

59. Turning Coke Can (Control With Scrollbar)

60. 3D Meninas

61. Polaroid Gallery

Polaroid Gallery is animated pile of photographs utilizing a ton of new CSS3 commands. It’s interesting to watch: when your mouse cursor is above an image, it will enlarge.

62. Space

63. CSS Mac Dock

Take a list of links and change them into an OS X icon dock. It’s nothing short of amazing.

64. Drop-In Modals

With CSS3 effects and property Drop In Modals, you can make quick animations and subtle design cues.

.

65. Sliding Vinyl

The vinyl effect can be created by using CSS3 transitions and a little HTML. This can make for a standard album cover with an eye-catching style

66. Zooming Polaroids in CSS3

Polaroids lets you display images in boxes that are shuffled and spun as though lying in a pile. It relies on CSS3 techniques to create. You can also insert text and an alt attribute.

67. Animated Rocket CSS Tutorial

Animated Rocket uses CSS effects to transform the appearance of an element in the browser, by moving, rotating, or through other means.

68. Poster Circle

Poster Circle. is an animated spinning column consisting of a row of colored boxes and text . The overall effect is cool and undeniably dizzying.

69. Morphing Cubes

Morphing Cubes can be used to display your most interesting content using 3D transformations, animations, and transitions.

70. Animated Polaroid Gallery

This is the example of another Polaroid Gallery. Piles of images appear at random and when the cursor hovers over an image, it enlarges.

71. Spotlight Cast Shadow CSS Effect

When the cursor moves, it’s like a lamp spotlight leading up to the writing and casts a shadow.

72. Colorful Clock

Colorful Clock is a colorful jQuery & CSS3 effect for creating countdowns or timers.

73. CSS and jQuery Lightbox Gallery

Lightbox Gallery is an awesome image gallery which leverages the latest CSS3 and jQuery techniques. Lightbox Gallery uses jQuery, jQuery UI (for the drag and drop) and the fancybox jQuery plugin for lightbox display capability in addition to PHP and CSS for interactivity and styling.

74. Elastic Thumbnail Menu

Elastic Thumbnail Menu is an alternative method for smoothing the menu, in particular by increasing the menu items when the mouse is hovering over it.

75. Coverflow CSS Animation Example

This animation mimics Apple’s style and combines CSS transformations and jQueryUI. This one truly animates between two half states, resulting in a slider like that featured in iTunes.

76. jQuery DJ Hero

DJ Hero uses an interesting combination of CSS3 with jQuery. You can use on-screen controls to control the pace.

77. Dynamic Stacking Cards

This effect features a dynamic stack of index cards that simply use HTML and CSS3 features such as change and transition (for the dynamic effects) and the @ font-face, box-shadow and border-radius (for styling).

78. Another Image Gallery

This is an example of another image gallery that uses the CSS3 transforms property and property transitions.

79. Snow Stack (Control With Arrow Keys)

80. Animated Pricing Column

CSS3 animation can also be used in the package list price of a product. Animated Column Pricing can be applied in such cases.

81. Slick jQuery Menu

Slick jQuery Menu is achieved through a combination of CSS3 and jQuery.

82. CSS Tabs Without Javascript

83. Tab Menus Without Javascript

84. SVG Fisheye Menu

CSS animation can animate almost any property on the item and do funny things, such as rotate and tilt.

85. Falling Leaves

Like Autumn. Animated falling leaves are made using CSS3.

86. Rotating Gallery

This is an image gallery with a rotating build with CSS transform transitions and CSS features. To see the effects of rotation, click the small image

87. Dropdown Menu

Dropdown Menu is a very nice navigation menu made using the CSS3 transition property.

88. Star Wars Crawl

Star Wars opening crawl, using only HTML & CSS. It only works in Snow Leopard in Safari 4.0.4 and the WebKit.

89. Sticky Notes

90. Snowflakes

91. Another Fisheye CSS Effect

This is another fisheye that uses CSS3.

92. Frame-by-Frame Animation

The first demonstration requires you to keep clicking the image to see the next frame, and it wraps around to the start when you reach the last frame. The second demonstration just needs you to keep the mouse moving over the image in MOST browsers. But the BIG drawback to this method is that the speed of movement of the mouse governs the speed of animation.

93. AT-AT Walker

This AT-AT Walker is not flash-based but only CSS3. Amazing!

94. Another Accordion

95. Dynamic Presentation Without Flash in CSS

96. Smoothie Slider Menu

97. Magic Animation CSS Effects

cool css effects

50 Powerful CSS3 Effect Tutorials

Now that most browsers support the majority of the features CSS3 offers, it’s important for developers to catch up and be aware of the power of CSS3. Photoshop and JavaScript are slowly losing their significance because it’s become possible to echo the same results with just a few lines of code easier and faster than ever.

The techniques that were new a year ago have become standard now. CSS3 is evolving fast and for that reason we’ve prepared 50 cool CSS3 tutorials.

CSS Typography Text Effects
1. Rotating Words with CSS Animations

Rotating-words-css3-text-effect-tutorials

The idea in this tutorial is to rotate a part of a sentence. You’ll be “exchanging” certain words of that sentence using CSS animations.

2. Texturize web type with CSS

Texture-css3-text-effect-tutorials

In this tutorial you’ll walk through texturizing type from scratch – beginning with basic HTML and CSS, then creating a semi-transparent texture in Photoshop and implementing it on some headline text within a web page. You’ll finish it off by adding some extra CSS and JavaScript love.

3. Arctext.js – Curving Text with CSS3 and jQuery

Arctext-css3-text-effect-tutorials

While CSS3 allows us to rotate letters, it is quite complicated to arrange each letter along a curved path. Arctext.js is a jQuery plugin that let’s you do exactly that. Based on Lettering.js, it calculates the right rotation of each letter and distributes the letters equally across the imaginary arc of the given radius. This is not a tutorial but you can play with the plugin, break it down and learn new techniques.

4. How To Add Text Gradients With CSS

Gradient-css3-text-effect-tutorials

In this tutorial you are going to look at some of the new CSS3 features for dealing with text colors.

5. Everything You Need To Know About CSS3 Text Shadow Effects

Shadow-css3-text-effect-tutorials

With CSS3, a whole host of text shadow effects are available for us to play with. In this article, you’ll see some of the effects you can make with relatively little CSS code.

6. Add Texture to Your Web Fonts Using a Magic Pill

Texture-font-css3-text-effect-tutorials

Implement a subtle texture over text with just a few lines of code.

7. CSS3 Properties to Handle Text and Word Wrapping

Properties-css3-text-effect-tutorials

The word-wrap property has been removed from the CSS3 spec but other related properties have been added. Find out what they are and how to use them.

CSS Navigation and Sliders
1. Create a CSS3 Dropdown Menu

Dropdown-css3-text-effect-tutorials

In this tutorial you will learn how to code a pure CSS3 navigation dropdown menu.

2. Pure CSS3 LavaLamp Menu

Lavalamp-css3-text-effect-tutorials

You probably have already seen animated menus with the LavaLamp effect (based on jQuery plugin). In this tutorial you’ll learn how to repeat the same behavior using only CSS3.

3. Accordion with CSS3

Accordion-css3-text-effect-tutorials

Using hidden inputs and labels, you will create a CSS-only accordion that will animate the content areas on opening and closing.

4. Responsive Content Navigator with CSS3

Content-css3-text-effect-tutorials

This tutorial will show you how to create a content navigator with CSS only. The idea is to have several slides or content layers that will be shown or hidden using the :target pseudo-class.

5. Create a Content Accordion in Pure CSS3

Content-accordion-css3-text-effect-tutorials

This tutorial will show you how to create a pure CSS3 content accordion. This will work on all browsers and devices that support the :target selector.

6. Page Transitions with CSS3

Transitions-css3-text-effect-tutorials

In the last few years, we’ve seen a lot of single page websites, most of them using JavaScript for some transition effects. This tutorial teaches you how you can have your own, but instead using CSS transitions and the :target property to do all the magic.

7. Image Accordion with CSS3

Image-accordion-css3-text-effect-tutorials

In this tutorial, you will create an image accordion that will expand an item on click. Using the sibling combinators and a nested structure you can control the opening of the items/slides with radio buttons.

8. A Pure CSS3 Cycling Slideshow

Cycle-slider-css3-text-effect-tutorials

Thanks to CSS3, we can create effects and animations without using JavaScript. We must be careful to avoid abusing CSS3 because old browsers do not support all of its properties. In any case, we all see the potential of CSS3, and this article will discuss how to create an infinitely looping slider of images using only CSS3 animation.

9. Orman Clark’s Vertical Navigation Menu: The CSS3 Version

Vertical-css3-text-effect-tutorials

Recreate Orman Clark’s Vertical Navigation Menu with CSS3 and jQuery while using the minimum amount of images possible.

10. Google Play’s Minimal Tabs with CSS3 & jQuery

Tabs-css3-text-effect-tutorials

In this article you’ll learn how to build some new CSS3 and  jQuery tabs inspired by Google Play‘s design.

11. Interactive Menu with CSS3 & jQuery

Interactive-css3-text-effect-tutorials

In this tutorial you’ll learn how to create an interactive menu using CSS3 goodness and jQuery’s power.

12. Create a Vertical Accordion Menu using CSS3 Tutorial

Accordion-2-css3-text-effect-tutorials

This tutorial will show you how to create an accordion menu using CSS3. There are many CSS3 accordion tutorials around on the web, this version is using the :target pseudo-class and works on browsers that support the CSS3 properties.

13. Create an Image Slider Using jQuery & CSS3

Slider-2-css3-text-effect-tutorials

In this tutorial you will be creating a slider with “Nivo Slider jQuery Script” and CSS3.

14. CSS3 Breadcrumbs

Breadcrumb-css3-text-effect-tutorials

A breadcrumb navigation allow users to know where they are in a hierarchical structure and navigate back to higher-level pages. In this tutorial you’ll learn how to create your own cool CSS3 breadcrumbs.

15. Responsive CSS3 Slider

Responsive-css3-text-effect-tutorials

CSS3 Responsive Slider is, as the name implies, a responsive CSS3 slider without Javascript. The actual slider is much like any JavaScript slider. It floats all of the content areas (articles) next to each other. Not a tutorial but you should check out this awesome slider.

Creative CSS Layouts
1. Quickly Build a Swish Teaser Page With CSS3

Teaser-css3-text-effect-tutorials

In this tutorial, you’ll learn how to build a teaser page using just CSS, no images or even a Photoshop design.

2. Timeline Portfolio with CSS3 & jQuery

Timeline-css3-text-effect-tutorials

Timeline is a jQuery plugin specializing in showing a chronological series of events. You can embed all kinds of media including tweets, videos, and maps, and associate them with a date. Learn how to tweak the template with some CSS3 tricks.

3. Impressive Product Showcase with CSS3

Showcase-css3-text-effect-tutorials

A product page is any page on your website that showcases a product. It has to describe its features, have some screenshots, and be descriptive. Learn how to create one with CSS3 and a little touch of jQuery.

4. Stacked Elements with CSS3 Pseudo-Elements

Stacks-css3-text-effect-tutorials

Hopefully you’re familiar with the use of the :before and :after pseudo-elements in order to create some interesting effects with CSS. This tutorial will show you how you can create a simple “stacked” look to some images.

5. CSS3 Pricing Table

Table-css3-text-effect-tutorials

This tutorial will teach you how to create this pricing table with the CSS scaling effects. Improve a look of a PSD just by using CSS.

6. Login & Registration Form with HTML5 & CSS3

Form-css3-text-effect-tutorials

In this tutorial, you are going to create two HTML5 forms that will switch between login and registration using the CSS3 pseudo class:target.

7. CSS3 Signup Form

Registration-form-css3-text-effect-tutorials

If you’re about to launch a new web product or you just need to improve the user experience for an existing web form, then this tutorial is for you.

8. Fullscreen Slit Slider with jQuery and CSS3

Slider-css3-text-effect-tutorials

A tutorial on how to create a fullscreen slideshow with a twist: the idea is to slice open the current slide when navigating to the next or previous one. Using jQuery and CSS animations you can create unique slide transitions.

9. Tagtastic Tag Cloud with CSS Transformations

Tag-cloud-css3-text-effect-tutorials

In this tutorial you’ll be creating Premium Pixels’ Tagtastic Tag Cloud. As an experiment in alternative approaches, you’ll create the tags using gradients, shadows, and (most importantly) CSS transforms, which will form the point of each tag. After completion you’ll have to even take a step further and cater for IE.

10. Build a Quick and Elegant Login Form

Login-css3-text-effect-tutorials

In this tutorial you’re going to code up Orman Clark’s Elegant Login Form using CSS3 and HTML5, plus some of Dan Eden’s CSS Animations to Embellish the Experience.

11. Create a Video Player in jQuery, HTML5 & CSS3

Player-css3-text-effect-tutorials

Create a sleek and functional video player using HTML5 and CSS3.

12. Fancy Image Gallery with CSS3 Transitions

Gallery-css3-text-effect-tutorials

This tutorial will show you how to create a fancy image gallery with CSS3 transitions. The techniques used are mainly CSS3 transitions combined with CSS :hover pseudo-class.

CSS Tips, Tricks & Techniques
1. Control Image Aspect Ratios with CSS3

Aspect-ratio-css3-text-effect-tutorials

Making media display consistently on your site can be a problem, especially with multiple content authors. Opera’s Chris Mills shows you how object-fit and object-position can solve it.

2. Filter Functionality with CSS3

Filter-css3-text-effect-tutorials

Using the general sibling combinator and the :checked pseudo-class, you can toggle states of other elements by checking a checkbox or a radio button. This tutorial will be exploring those CSS3 properties by creating a experimental portfolio filter that will toggle the states of items of a specific type.

3. Creating an Animated 3D Bouncing Ball with CSS3

Bouncing-ball-css3-text-effect-tutorials

In this tutorial, you’ll learn how to create an animated 3D bouncing ball using only CSS3 transitions, animations, and shadow effects.

4. Perfectly Rotate and Mask Thumbnails With CSS3

Thumbnails-css3-text-effect-tutorials

Have you ever seen a website showcasing image thumbnails that are slightly rotated? It’s a simple effect that adds a layer of visual personality. That said, if you’re not achieving the rotation effect with CSS, you’re working too hard. Learn how to do it right!

5. Transforming Elements in 3D Using CSS3

Transform-css3-text-effect-tutorials

In this tutorial you will be driven through the basics of rotating in three dimensions and will combine these transforms with the scale and translate transforms for more complex results. You will also add a basic level of interaction to animate the effects as the user interacts with the page.

6. Thumbnail Proximity Effect with jQuery & CSS3

Proximity-css3-text-effect-tutorials

This tutorial will show you how to create a neat thumbnail proximity effect with jQuery. The idea is to scale thumbnails when hovering over them and also scale their neighboring thumbnails proportionally to their distance. You’ll also make a description appear.

7. Tutorial for a CSS3 Animated Hover Effect

Hover-css3-text-effect-tutorials

This tutorial will show you a quick and easy way to incorporate a shine effect transition to your images with CSS3, useful in making your user interface elements look like they’re a real Polaroid photo.

8. CSS3 Image Styles

Styles-accordion-css3-text-effect-tutorials

Learn how to style the image element with CSS3 inset box-shadow and border-radius so it works for responsive design.

9. Code a Set of Animated App Store Buttons With CSS

Buttons-css3-text-effect-tutorials

In this tutorial you’ll learn how to use some fancy techniques like how to incorporate icon fonts into a design and how to insert objects using pseudo elements.

10. Direction-Aware Hover Effect with CSS3 and jQuery

Direction-hover-css3-text-effect-tutorials

create a direction-aware hover effect using CSS3 and jQuery. The idea is to slide in an overlay from the direction we are moving with the mouse.

11. Create CSS3 Buttons

Buttons-2-css3-text-effect-tutorials

In this beginner tutorial you will be making some cool CSS3 buttons.

12. Enhance Required Form Fields with CSS3

Fields-css3-text-effect-tutorials

Enhance required fields in a form with this little effect. The idea is to allow better visibility for obligatory fields while de-emphasizing optional ones.

13. Animated Twitter Bird

Twitter-css3-text-effect-tutorials

Create an animated bird that animates each time you hover it. This is a very simple CSS3 trick and doesn’t require any advanced knowledge of HTML or CSS.

14. The Multi Column Layout and How it Will Change Web Design

Multi-column-css3-text-effect-tutorials

CSS3 Multi Column Module is perhaps one of the most interesting and exciting things that has happened to CSS in a long time. It’s not a gimmick or design trick like box-shadow or animation. It’s a real, tangible device which we can use to make designing websites easier. Check out what it does and see examples.

15. CSS3 Ordered List Styles

Lists-css3-text-effect-tutorials

In this article you’ll learn how to add some CSS3 fine tuning to your ordered lists, using a semantic approach.

16. Showing Product Information With CSS3 3D Transform

3d-css3-text-effect-tutorials

This tutorial will show you how to show product information with cube style using CSS3 3D Transform.

Editor’s note: This post was last updated on August 19, 2020


Thumbnail to Full Width Image Animation

Original Source: http://feedproxy.google.com/~r/tympanus/~3/bsl0RQIrNuU/

The other day I stumbled upon this fantastic animation by Akram Khalid which he also coded up as part of a tutorial on page transitions with React Router and Framer Motion. The GitHub repo can be found here. It’s a really beautiful design and I wanted to have a go on experimenting with it and animating the initial thumbnail view to a full image (with article), using only scale transforms.

I also wanted to add some smooth scrolling and on-scroll animations, so I’ve used Locomotive Scroll. The beautiful images are by DeMorris Byrd.

This is highly experimental and it turned out to be a complex process. But I hope it gives you some of sort idea and entry point of how to pull off these kind of animations without touching the width and height of an element.

The main idea behind this technique is to scale an element and then counter-scale the child. Paul Lewis and Stephen McGruer show how to do that on a menu using expand and collapse animations. Avoiding animating the width and height of an element helps keep performance in check.

So what we do is to initially set the scale of the content__intro wrapper to a value that will make it shrink to an exact size. Then we set a counter scale to the image. This will make the image maintain the same size as before. Then, we add another scale to the image, shrinking it also the to the target size.

<div class=”content__intro content__breakout”>
<img class=”content__intro-img” src=”img/1.jpg” alt=”Some image” />
</div>

Having the initial width and height of an element and also the target dimensions, we can calculate the scale values of the outer wrapper based on this:

let introTransform = {
scaleX: imageSettings.imageWidthEnd / imageSettings.imageWidthStart,
scaleY: imageSettings.imageHeightEnd / imageSettings.imageHeightStart,
y: (winsize.height/2 – introRect.top) – introRect.height/2
};

We also move the element to be centered on the screen (y).

We define these initial (start) and target (end) dimensions as variable in our CSS:

body {

–image-height-start: 555px;
–image-width-end: 260px;
–image-height-end: 320px;
}

Our starting width is 100% of the viewport width, so we don’t need to set that here. The image will then have the following scale applied:

gsap.set(this.DOM.introImg, {
scaleX: 1/introTransform.scaleX * imageSettings.imageWidthEnd / this.DOM.introImg.clientWidth,
scaleY: 1/introTransform.scaleY * imageSettings.imageHeightEnd / this.DOM.introImg.clientHeight
});

1/introTransform.scaleX is the counter scale of the outer wrapper. The second value that we multiply makes sure that we scale the image down to our desired size, just like we did with the outer wrapper before.

And that’s the main idea behind the scaling magic.

I hope this gives you a starting point for these kind of tricky animations! Thank you for checking it out ?

The post Thumbnail to Full Width Image Animation appeared first on Codrops.

Using Mobx As A State Manager In React Native Applications

Original Source: https://www.smashingmagazine.com/2020/08/mobx-state-manager-react-native-applications/

Using Mobx As A State Manager In React Native Applications

Using Mobx As A State Manager In React Native Applications

Fortune Ikechi

2020-08-26T11:00:00+00:00
2020-08-27T11:33:40+00:00

State management is an integral part of developing JavaScript applications especially React and React Native applications. In this tutorial, we are going to learn how to use the MobX library for state management; understand the core concepts, some use cases and build a simple example.

Note: Basic knowledge of Javascript and React Native will be of great benefit as you work through this tutorial.

Using MobX In React Applications

State is the data that your component(s) is working with — it holds the data that a component requires and it dictates what a component renders. State management is the process of managing how the state gets updated and passed from one component to another. Monitoring and working with data in an application can be difficult and that’s the need for state management libraries. Handling all the data for your application can be a little daunting especially when your application grows in size and complexity, building your own state management tool is not just time-consuming but difficult, This is why you might want to use a state management library.

However, it is important to know that state isn’t the only data that a component renders, components can also render props passed down to it.

Options For State Management

State management libraries for React Native applications include; React Context API, Redux, MobX and Unstated Next.

Although these state managers each have their advantages and disadvantages, I personally recommend MobX because of its simplicity, minimal boilerplate code — it doesn’t require you change your code, this is because in its core, MobX is and looks like JavaScript; you don’t need a change of architecture to support it (unlike Redux and to a lesser extent Context).

In fact it’s such an invisible abstraction that in many cases if you take out all of the MobX code — the @observable, @computed, @action and observer decorators, your code will work exactly the same (though it’ll have some performance issues) and it’s not limited to a global state. These are some reasons to go forward with MobX as a state manager of choice for your React Native applications.

Although it’s also important to note some issues with using MobX as a state manager, some of which include its avoidance of rules on how to implement it and MobX can be difficult to debug especially when you change state directly in a component without using the @actions parameter.

What Is MobX?

According to the official documentation, MobX is a battle-tested library that makes state management simple and scalable by transparently applying functional reactive programming. MobX treats your application like a spreadsheet. The logic is that Anything that can be derived from the application state, should be done automatically.

MobX state architecture

MobX state architecture. (Large preview)

Core Principles And Concept Of MobX

MobX differentiates itself from other state managers with the following concepts.

1. State

State is the data your application holds — it’s roughly the entire contents of its memory. This also applies to your components.

2. Derivations

In MobX, anything that can be derived from the state without interactions is a derivation. Examples of derivations include:

User interface,
Backend add-ons such as changes to a server.

MobX has two mains types of derivations:

Computed values
Computed values are mostly values that can be derived from a current state using pure functions.
Reactions
Reactions in derivations are side effects that happen as a results of changes in your application state. They are similar to a computed value, but instead of producing a new value, a reaction produces a side effect for things like printing to the console, making network requests, incrementally updating the React component tree to patch the DOM, and so on.

A golden rule when using MobX is that when creating a value based on the current state, use a computed value.

3. Actions

Unlike derivations, actions are code that cause changes to an application state — code that changes the state. They are anything that modifies the state. With MobX you can make it explicit in your code, Actions are mostly user events such as inputs, backend data pushes or even scheduled events.

To better understand Actions, let’s look at an example from the MobX documentation.

class Ticker {
@observable tick = 0

@action
increment() {
this.tick++ // ‘this’ will always be correct
}
}

const ticker = new Ticker()
setInterval(ticker.increment, 1000)

Here, we set an @observable tick with an initial value of 0. Next, we created a function increment that is also an action that updates the initial value once a tick is made every second.

Observables In MobX

Observables or observable values in MobX are mostly JavaScript primitives, plain objects, classes, arrays and maps. They’re mostly used by first declaring an observable and adding a value to it and then calling it by adding an @observable as shown below:

observable(value)
@observable classProperty = value

Store Architecture Approach In MobX

MobX principal architecture includes parts and ideas such as services, store, view models and containers — some of which are explained below.

Service
This is usually a function called from a container; they can be used to get data from APIs and be added to the store.
Store
As the name implies, this is the central place of the state used by an application. Usually in MobX, these include the observables, variables, actions and computed properties.
Container
This calls service and puts data from View Model to View Component as React props (should be marked with @observer decorator).

MobX In React And Native Applications

For learning purposes, in this tutorial, we are going to build a simple list app that will allow a user to add, view, and delete list items. We will be using MobX as a state manager in this application to add lists, update and delete them from the app state. However, it’s important to note that you already understand the basic concepts of JavaScript and React.

Without further ado, let’s start!

Setting Up Your Environment

Now that we know how what MobX is and how it works, let me walk you through setting up your project.

First, let’s create a project with the following, write the following code on your terminal to initialise a project:

npx create-react-app listapp

The above code will create a bare React application using the create-react-app package. Move into the project directory:

cd listapp

For this app, we will need three components:

TitleInput
This will contain the title for our project and an input form for adding lists.
List
This will be an input form that would allow a user to add a list. It will have an add button to add our list items.
ListsDisplay
This component will display all of the user list items and also a delete button that’s automatically generated when a user adds a list item.

We will use a Store.js to contain the app state and methods to modify it similar to Redux. Let’s outline what they will be used for.

mobx
This is the state manager we will be using for this project.
mobx-react
This is the official React bindings for MobX.
bootstrap
We will be using bootstrap version 4.5 to style our project.
uuid
This is used to automatically create keys for deleting lists.

Having done that, let’s go ahead and install these packages. I will be installing them with an npm alternative done in yarn:

yarn add mobx mobx-react bootstrap@4.5.0 uuid

Once the packages are installed, we will start our app in development mode by running the code below in our terminal:

yarn start

Setting Up Our App Store

Let’s create a store for our project. First, create a file in the root directory of our project called ListStore, this will be the central location of our app state.

For this app, we will need to create a ListStore in order not to repeat ourselves when we use it in other app components.

/*** src/Store.js ***/

import { observable, action, computed } from “mobx”;
import { v4 } from “uuid”;

export class List {
@observable value
@observable done

constructor (value) {
this.id = v4()
this.value = value
}
}

export class ListStore {
@observable lists = []
@observable filter = “”
@action addList = (value) => {
this.lists.push(new List(value))
}

@action deleteList = (list) => {
this.lists = this.lists.filter(t => t !== list)
}
@computed get filteredLists () {
const matchCase = new RegExp(this.filter, “i”)
return this.lists.filter(list=> !this.filter || matchCase.test(list.value))
}
}

In the code above, we imported three functions from mobx.

observable
This holds a variable which can be updated in the event of a change in state.
action
Used to modify the application state.
computed
Values that can be derived from the existing state or other computed values, it changes after a state gets modified.

The class List has two object values which are done and value which will hold the initial state of the app and the modification in the case of changes.

We want our new list to automatically create a key so that we can automatically get a delete button once a list is created, Here uuid is used to automatically create keys in our application.

Next, we added an addList function that will add lists when clicked by using the .push() method to push the list in the array we already created in the @observable lists array.

The deleteList function accepts List as a property which is supposed to be the item the user wants to remove. Then we set the value of this.Lists to a new array after we have removed the selected item.

Both addLists and deleteList are actions because they modify the state of our app when changes are made.

Initializing The MobX Store

Next on our list is to import our store in our App.js and use it in our project.

import React from ‘react’;
import Navbar from “./components/navbar”;
import ListDisplay from “./components/ListDisplay”;
import {ListStore} from ‘./ListStore’;
function App() {
const store = new ListStore()
return (
<div>
<Navbar store={store}/>
<ListDisplay store={store}/>
</div>
);
}
export default App;

Here we imported the TitleInput and ListDisplay components. Then we initialized the store in our App.js in order to be able to pass it as props to the TitleInput and ListDisplay components.

Normally this will throw an error because we’ve not worked on the other components, so let’s do that. Let’s build out the ListDisplay component.

ListDisplay

This component displays all of our added lists and also automatically generates a delete button once a new list is added.

import React from ‘react’

import List from “./List”;
import { observer } from ‘mobx-react’;

function ListDisplay(props) {
const { deleteList, filteredLists } = props.store

return (
<div>
<div className=”container”>
{filteredLists.map(list => (
<List key={list.id}
list={list}
deleteList={deleteList}
/>
))}
</div>
</div>
)
}
export default observer(ListDisplay)

For this component, we created a function ListDisplay and made it an observer, we also destructure the list and deletelist functions from the store, by doing this, we made it easier to pass then as object props.

Next, we map through filteredLists to return the lists, which we then use in building the individual list by passing the returned item as props to the List component.

Once done, our component should look like this with lists added:

The list display component

Lists displayed by `ListDisplay` component. (Large preview)

Next is to add a List and TitleInput components.

List Component

Just like our other components, our List component will export the list as an observer in order to help the store watch it for changes.

import React from ‘react’
import { observer } from ‘mobx-react’
function List(props) {
return (
<div className=”card”>
<div className=”card-body”>
<div className=”d-flex justify-content-between
align-items-center”>
<p className={`title ${props.list.done
? “text-secondary” : “”}`}>
{props.list.value}
</p>
<div>
<button
onClick={props.deleteList.bind(this, props.list)}
className=”btn btn-danger
font-weight-bold py-2 px-5 ml-2″>
Delete
</button>
</div>
</div>
</div>
</div>
)
}
export default observer(List)

I used the bootstrap to create cards in the first set of divs and also align the delete icon to move towards the right-hand side of the app. First, we created a card component to handle our list and then we created a button tag for the delete button that will accept two objects of this and pass a prop to the list, this will on click, will remove the selected list item from the lists in the page.

The list component

A single list component with the delete button. (Large preview)

Next is to our TitleInput which will contain our input form for adding lists and the title for the project.

TitleInput

Similar to our other projects, we will be adding an @observer function so that the component will be able to accept props from the app Store.

import React, { useState } from ‘react’
import { observer } from ‘mobx-react’
function Navbar(props) {
const [value, setValue] = useState(“”)

const {addList} = props.store
const prepareAddList = (e) => {
e.preventDefault()
addList(value)
setValue(“”)
}
return (
<div className=”container mt-3″>
<h1 className=”title”>List App</h1>
<form onSubmit={prepareAddList} className=”form-group”>
<div className=”row ml-lg-2″>
<input className=”form-control-lg col-12 col-lg-9
col-sm-12 mr-3 border border-secondary”
value={value} type=”text” onChange={(e) =>
setValue(e.target.value)} placeholder=”Enter list”
/>
<button className=”col-lg-2 col-5 col-sm-5 mt-2
mt-lg-0 mt-sm-2 btn btn-lg btn-success
font-weight-bold”>
Add to List
</button>
</div>
</form>
</div>
)
}
export default observer(Navbar)

First, we initialized an initial state. Using React Hooks, we added an initial state called values which we set to an empty string. We use this to hold the value of what is entered in the input field. To know more about React Hooks, you can check out this article by David Abiodun.

Then we called an object for adding lists to the store addList and passed it as props from the app store.

Next we created a function preparedAddList to accept an event object for the input forms, we also added a button for adding the lists manually on click.

Almost done, we need to restart our project server by running:

yarn start

And our TitleInput should look like this:

A title input

Title and input component. (Large preview)

We are now done with all of our app components, so let’s assemble it in our App.js. To do that, we need to import our components titleInput and ListDisplay. We also need to import our store from the Store component.

In order for MobX to work in our App, we need to pass the MobX store as props in our App and individual components so that they get the properties and functions in the store.

import React from ‘react’;
import Navbar from “./components/navbar”;
import ListDisplay from “./components/ListDisplay”;
import {ListStore} from ‘./ListStore’;
function App() {
const store = new ListStore()
return (
<div>
<Navbar store={store}/>
<ListDisplay store={store}/>
</div>
);
}
export default App;

Our app should look like this when completed:

Completed list app

(Large preview)

Conclusion

MobX is a great state manager especially for React-based applications, building our list app, we’ve learned the basic concepts of MobX, state, derivations, and actions. A working version of this app can be found here:

You can take this further by using MobX in the next application you build that involves the management of state. I’d love to see what new things you come up with. You can read more on MobX and state management applications in the references below.

Resources And References

“React Native with MobX — Getting Started,” Nader Dabit, Medium
“Concepts & Principles” MobX (official documentation)
“Best Practices With React Hooks,” Adeneye David Abiodun, Smashing Magazine

Smashing Editorial
(ks, ra, yk, il)

Top 50 jQuery Gallery & Image Sliders for 2020

Original Source: http://feedproxy.google.com/~r/1stwebdesigner/~3/x9hx79pJEZs/

Since usually the best galleries are created in jQuery, we’ve mainly focused on jQuery type sliders, but there are a few simple CSS galleries as well. This collection has been organized into five main categories so you can easy switch to your preferred section. Before we start, we wanted to tell you that it’s up to you to go for a free or premium solution for your jQuery gallery or slider.

Web Designer Toolbox: Unlimited Downloads Starting at $16.50/Month

Website Kits

Website Kits
16,000+ Web Designs

UX & UI Kits

UX & UI Kits
14,000+ UX & UI Kits

Graphic Assets

Graphic Assets
33,000+ Graphics

DOWNLOAD NOW
Envato Elements

We did find quite a few free quality image solutions, that you will enjoy. Of course, with premium resources – there were some galleries that simply blew us away.

Table of Contents

jQuery Image Slideshows
jQuery Image Galleries
jQuery Image Sliders
jQuery Portfolio, News and Tour Sliders
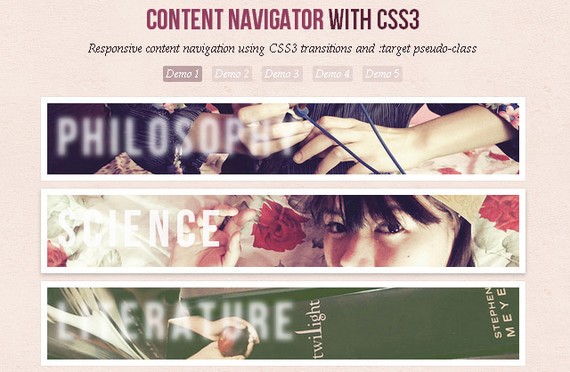
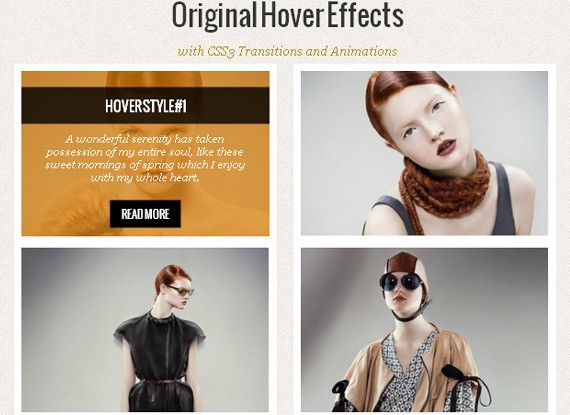
CSS Based Galleries

Just go through the collection and find the best image solution for your needs. If it’s a personal project, surely you will not want to spend any money. But on other hand, if it’s a freelance job, maybe it’s worth spending a little money to really leave an impact on your client and save lots of time at the same time!

I guess what I am suggesting is to always look at how much time it takes for you to modify, install, or setup a free solution. If you aren’t as skilled or it’s time consuming – definitely look into pre-made code and inexpensive but high-quality tools like these.

jQuery Image Slideshows

Below you will find all the best jQuery slideshows. Usually slideshows are used on top of the website to present the most important parts in the most fashionable way.

1. AviaSlider

AviaSlider - jQuery Slideshow

AviaSlider is a very flexible and easy to use image slideshow plug-in built with jQuery. It has a set of really unique transitions that I have not seen anywhere else, as well as some basic transitions.

It comes with an image pre-loader so the slider starts working only when images are loaded and ready to be presented. No clumsy animations with half loaded images.

To see how it works live, here is a demo preview.

2. Jssorr (Free)

Jssor Image slider

Jssor Slider is a touch swipe image slideshow with 360+ JavaScript slideshow effects. When you touch Jssor Slider, it will freeze the animation and swipe slides to the direction that your finger moves to.

There are more than 360 different effects, you can check all of them here. My own favourite slideshow effects are the simple fade and carousel slider.

3. S3Slider (Free)

s3slider-jquery

S3Slider a jQuery Slideshow with three different features and displaying sides. You can easily adjust the size of the slider and  delay the change speed. Oh, and it comes with a really good documentation, too.

4. Camera Slideshow (Free)

camera-jQuery-image-slideshow

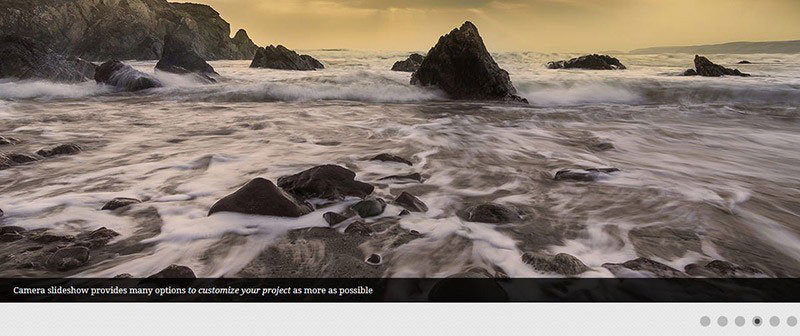
Camera slideshow is a jQuery plugin, that can also be used as a WordPress plugin.

It comes with 33 build-in themes, but you can be creative too, because slideshow has a CSS file included, where you can customize the parts you want.

You can easily implement HTML objects, videos, and captions. One downside is that this slideshow is based on a project called Diapo, that is no longer supported. But still, it has been tested on all major browsers.

Check the live demo here.

5. Sequence JS (Free)

Sequence_js-javascript-slider

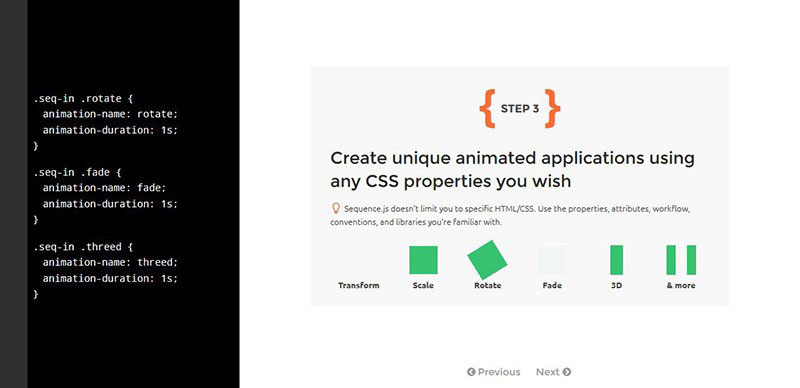
Sequence JS is a JavaScript slideshow based on a CSS framework. It’s meant to be used for creating sliders, banners, presentations and other step-based applications.

If free pre-built themes aren’t enough for you, check out their own theme shop. You can also simply order your custom-made theme. But as I look at it, you really do get all you need in the free version, plus there are quite a bit free themes available.

6. jQuery Banner Rotator / Slideshow

jQuery-Banner-Rotator

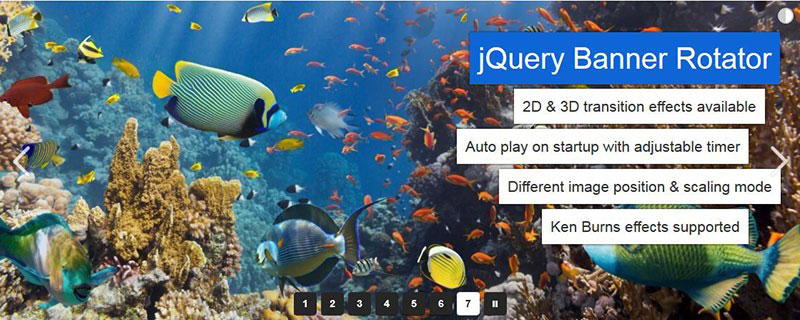
This is a jQuery banner rotator plugin featuring multiple transitions. The thumbnails and buttons allow for easy navigation for your banners/ads. The banner rotator is also re-sizeable and configurable through the plugin parameters.

7. Slide JS (Free)

Slides-JS-jQuery-slideshow

Slide JS is a jQuery plugin that is responsive, has touch support, easy setup, and CSS3 transitions. It’s great to be displayed as a starting page of your website, and it is free. It also has full documentation, check the live preview on their home page.

8. Slideshow 2 (Free)

slideshow

Slideshow 2 is a JavaScript class for Mootools 1.2 to stream and animate the presentation of images on your website. Please visit their website for a full feature list.

9. JavaScript TinySlideshow (Free)

javascrip-tinyslideshow

This dynamic JavaScript slideshow is a lightweight (5kb) and free image gallery / slideshow script.

You can easily set it to auto-display the images, set the scroll speed, thumbnail opacity or to disable thumbnail slider. I wanted to include it in this collection because it is so lightweight. Click here to download this slideshow and see a live preview.

jQuery Image Galleries

In this section you will find Image Galleries. They are best suitable for portfolios, but can also be used in blogs. So let’s dig in.

10. Galleria

Galleria-JavaScript-Image-Gallery

Galleria is a JavaScript Image Gallery. It’s built so that it simplifies your process of creating a beautiful image gallery. You don’t have to be a programming expert to use it. Just a few lines of code, add some pictures, and you’re done.

Galleria has a lot of great tools, which you can use to create your own image gallery. Galleria, you can see in the screenshot, is the free version, which you can customize as you want.

However, if you want to get any of Galleria other designs, you will need to pay for them, find more on their store. These themes are in price range between $9 and $29.

11. Sideways

sideways-image-jquery-gallery

Sideways Image Gallery is a jQuery plugin with added CSS3 styling. The Gallery is responsive and features full-screen images with different modes and custom scrollbars. It is a modern and eye catching image gallery.

This one is the most suitable for photography portfolio showcasing, because it can really give the right credit to their work.

As if it wasn’t good enough, it’s also free to use. Check out the live preview here.
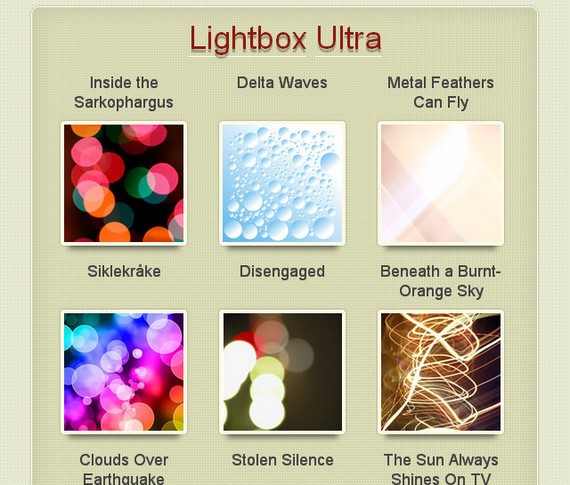
12. Visual Lightbox

Visual-Lightbox-Gallery

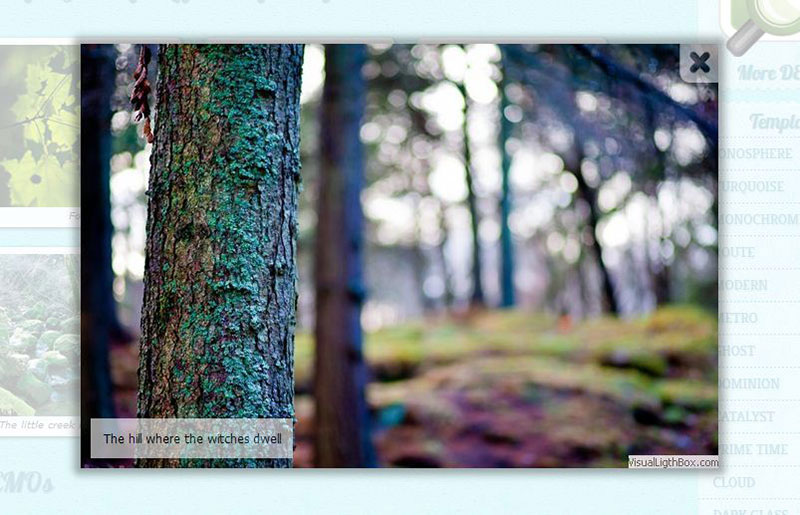
VisualLightBox is a free wizard jQuery program that helps you easily generate web photo galleries. It is based on famous LightBox2 script. In a few clicks you can create breathtaking galleries without writing a single line of code.

On their website they offer a lot of templates, that can be used for variety of purposes. It is the most suitable for travel agencies, adventure blogs, and work portfolio websites.

13. TripTracker

Trip-Tracker-slideshow

The TripTracker slideshow is a lightweight JavaScript image viewer with an animated slideshow feature. It does exactly what it says that it does. There are no extra options, it is a simple photo viewer. Very suitable for articles.

Click here to try it out.

14. NoobSlide

noobslide

NoobSlide has 8 different examples of how to view your images using MooTools. Unfortunately, there isn’t any documentation, but it is a very easy to use gallery and worth checking out.It can be used as a showcase on a travel blog or even a portfolio.

15. PrettyPhoto

Pretty-Photo-jQuery-lightbox-slider

Pretty Photo is a jQuery Lightbox clone. Pretty similar to original Lightbox with few added features and full documentation. It is easy to setup and very flexible.

This plugin supports videos, Ajax, and iframes. It can be used for single photos or galleries. Galleries can also have mixed content. It is very suitable for different types of blogs.

For a demo and download, visit them here.

16. Unite Gallery

Unite-Gallery-jQuery-plugin

Unite Gallery is a modern gallery that uses jQuery. It is modular designed, with customization in mind. You can also create your own theme with ease.

This gallery is fully responsive. It offers 9 different skins and is fully documented. You can download it for WordPress, Drupal, PrestaShop, OpenCart and Joomla.

This gallery is suitable for photography showcases or Restaurant menus. It is free to use, as it is released under the MIT license. All in all, it’s a great addition to the image-packed websites.

You can see it in action here.

17. Auto Generating Gallery

auto-generating-gallery

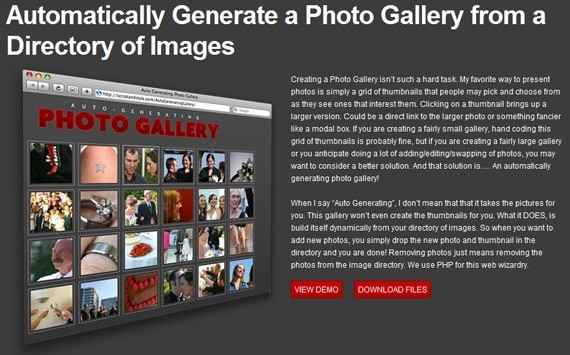
Auto Generating Gallery doesn’t actually take the pictures for you, but it’s pretty smart just the same. This gallery won’t even create the thumbnails for you. What it DOES, is build itself dynamically from your directory of images. So when you want to add new photos, you simply drop the new photo and thumbnail in the directory and you are done! Removing photos just means removing the photos from the image directory. This gallery use PHP for it’s web wizardry. You can find a complete tutorial and demo here.
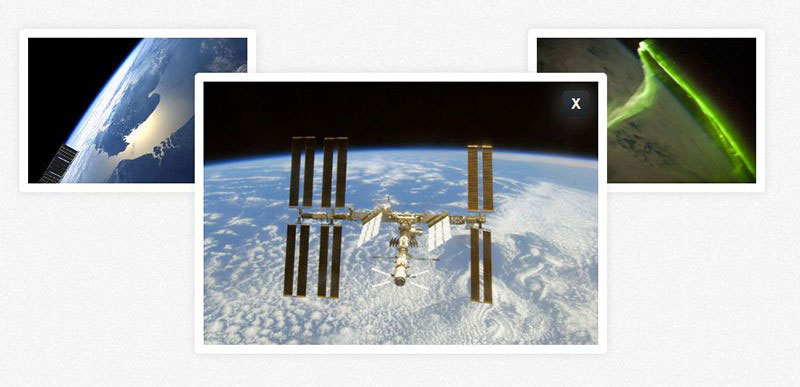
18. HighSlide JS

Highslide-JS-JavaScript-gallery

Highslide JS is an open source JavaScript software, offering a Web 2.0 approach to pop-up windows. It streamlines the use of thumbnail images and HTML pop-ups on web pages. You can use it asa  thumbnail viewer or scrolling HTML content holder.

A live preview of its functionality can be found here.

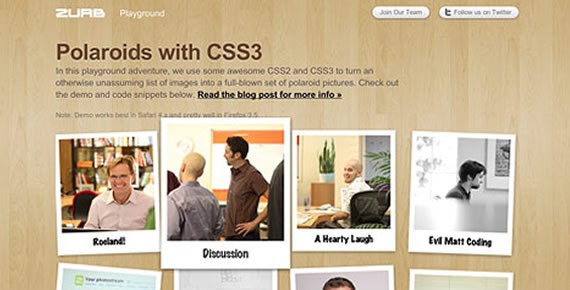
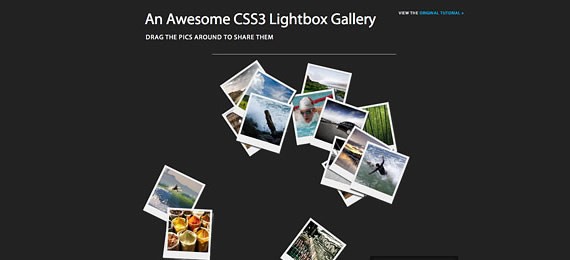
19. Flat-styled Polaroid gallery

Scattered-Polaroids-Gallery-jQuery-slider

Polaroid gallery is available as a jQuery plugin. It takes the vintage look of Polaroid pictures to the next level.

Strengths of Polaroid Gallery include that it is designed with responsive and flat design in mind. Polaroid Gallery also offers shuffle transition and content holders if you need it. The images can flip and show the back as well.

This gallery is a good choice for travelers or bloggers who want to show off their last adventure.

Make sure to see it in action here.

jQuery Image Sliders

This section is dedicated to all the best and most beautiful sliders, both premium and free. They do a similar job as the Slideshows, but can emphasize content holders.

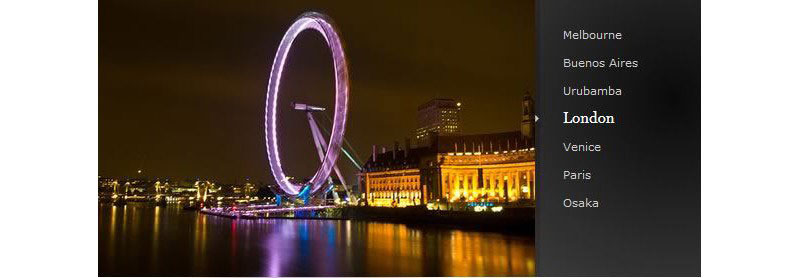
20. Touch Enabled RoyalSlider

RoyalSlider_-_Touch-Enabled_Image_Gallery_and_Content_Slider_Plugin

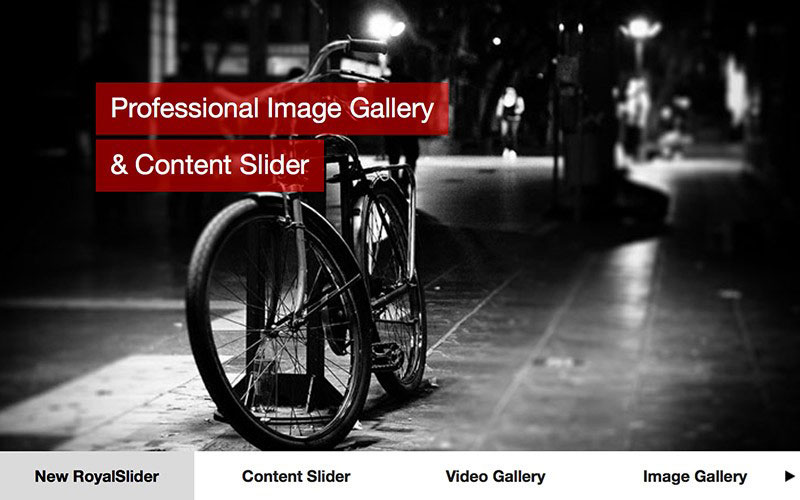
Royal Slider is a jQuery image gallery and more. This slider can be used as an image slider, slideshow, HTML content slider, gallery, banner rotator, video gallery carousel, or just as a presentation. Options are limitless. This full-featured slider is also available as a WordPress plugin.

It has built-in animated captions, supports touch for mobile devices, and is fully responsive. This is a must have jQuery image slider. Check out the live preview here.

21. LayerSlider

LayerSlider-jQuery-Slider

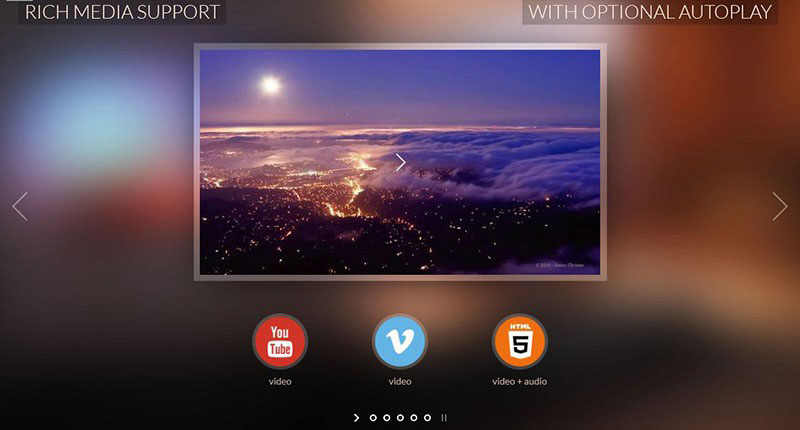
LayerSlider is a premium WordPress plugin for creating beautiful image galleries, content sliders, and amazing slideshows with unbelievable effects.

LayerSlider comes with 13 built-in skins. It has more than 200 2D and 3D slide transitions and 3 types of navigation. LayerSlider also offers support for mobile devices and multiple layouts.

You can add any content, from images, text, custom HTML, YouTube video, and Vimeo video to HTML5 self-hosted multimedia content.

By allowing you to build semantic markup with custom attributes that search engines can index easily, it is also SEO friendly.

See it for yourself here.

22. UnoSlider

UnoSlider jQuery plugin

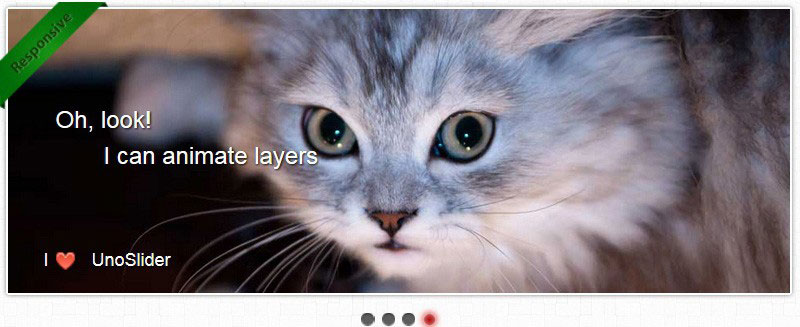
UnoSlider is a image slider that comes as a WordPress and jQuery plugin. It has unlimited transition animations.

This image slider is fully responsive and is also compatible with older browsers. Layers are very well animated with lots of customization options. Setup and use are simple.

UnoSlider features more than 30 animation options, per-slide options and is easy to theme. This slider is also equipped with public API, image pre-loader, and has the ability to hold multiple sliders on one page. HTML content can be shown as well. Choose from 12 pre built themes and more than 40 transitions options.

You can see a demo of this amazing image slider here.

23. Master Slider

Master-Slider-jQuery-image-Slider

Master Slider is a high value and quality-designed image and content slider. It is available as a jQuery and WordPress plugin. And it also has a free version.

This slider has everything that you need to build eye catching image and content sliders. It’s fully responsive and can work on any screen or any device. You can choose from 6 different interactive transitions and 25 pre-built templates.

This slider offers touch swipe navigation, animated layers, thumbnails, and tabs. Master Slider is also equipped with smart preloading of images.

24. Wow Slider

WOW-jQuery-Slider

Wow slider is actually a slider for non-coders. It offers a drag and drop menu, that you use to create an image slider for your website.

In the core Wow slider is a jQuery image slider, but it can also operate without jQuery. It can be as light as you want it to be.

The drag and drop creator can generate using an HTML page, or WordPress or Joomla plugin. You can choose from 25 different transitions and it’s free to use.

Main features are:

Fully responsive
Highly customisable
Touch swipe navigation
All browser support
SEO friendly

These are just a few main characteristics. For a full list and live demo check their website.

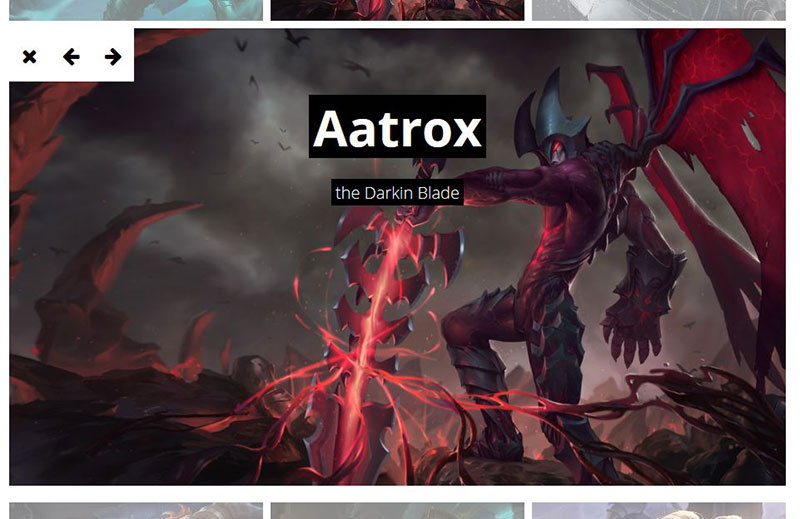
25. Slider Revolution

Slider Revolution

Slider Revolution is a responsive and full-width slider with must-see-effects and SEO friendliness built-in. See the heaps of custom transitions and animations for each object on the page! Customize this slider with their convenient drag & drop back-end to suit your needs.

This plugin features tons of unique transition effects, an image pre-loader, video embedding, auto-play that stops on user interaction and lots of easy to set up options to create your own effects. Slider Revolution can be purchased as a WordPress, Drupal, PrestaShop, Magento OpenCart and jQuery plugin.

Worried about coding skills? Slider Revolution has Video Support which is easy to follow. No advance coding skills required, easy as cooking bacon. Ah…what am I saying? Just check for yourself.

26. Accordion Slider

Accordion-Slider-jQuery-image-slider

Accordion Slider is a fully responsive jQuery based slider. It’s available also as a WordPress plugin. There is almost nothing you can’t do with it.

Accordion Slider comes with animated layers and smooth animations. You don’t have to compromise with the design, as the slider has touch support for the best possible user experience.

Pagination on this slider is unique, because you can set the number of panels visible per page. The layout is fully customizable.

Because it has a lazy loading feature, the images can be loaded only when they are viewed. You can also set high-resolution images to be loaded only on high PPI screens, as it has support for Retina screens.

Some additional features are available for the WordPress plugin.

27. Fotorama image slider

Fotorama-jQuery-image-slider

Fotorama image slider is simple but at the same time very powerful. You can use it for jQuery or for WordPress and Ruby on Rails . To help you setp Fotorama, they also have a video tutorial.

It is a simple way to show your pictures or images, but powerful enough to blow you away. It’s free to use. Check it out here.

28. All in One Slider

All-in-One-Jquery-Slider

All in One slider is a jQuery slider and comes with five different ways to help you create a beautiful Banner rotator, Thumbnails Banner, Banner with Playlist, Content Slider, and Carousel.

It’s an advanced slider, that allows you to create powerful slides with animated text and HTML tags. This is a powerful tool that provides you with everything you need in development of a website to show your products or images.

All in One slider is fully responsive and touch screen supporting image slider. All in One slider offers 16 different transitions and animated text. Supports all major browsers and is a award winning product.

See it for your self. Here is a live preview.

29. Blueberry Image Slider

Blueberry-jQuery-image-slider

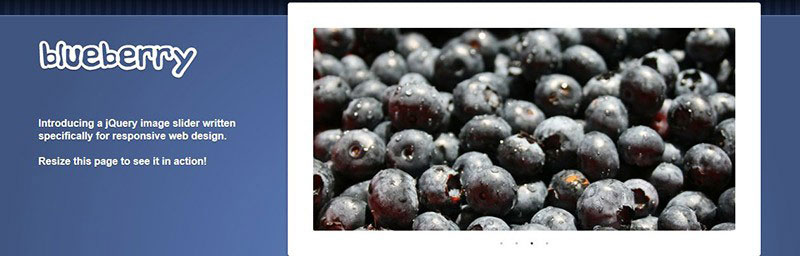
Blueberry image slider is a jQuery plugin, that was developed specifically for responsive web design. Blueberry image slider is an open-source project, based on a 1140px grid system from cssgrid.net. It’s simple and at the same time an excellent free option.

I’m sure you will like it as much as I do. Check the live preview and download option here.

30. RhinoSlider

Rhinoslider-jQuery-slider

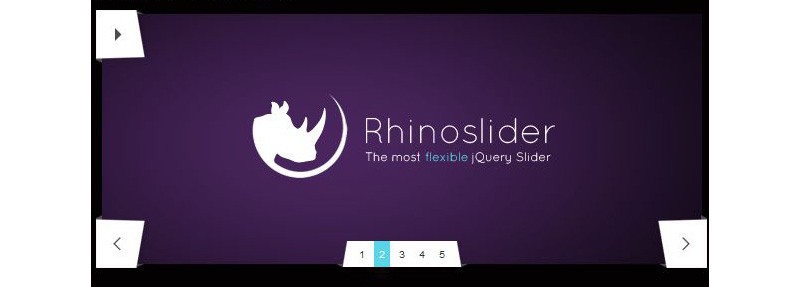
RhinoSlider is a jQuery slider that comes with the possibility of customising your version before downloading. This can significantly decrease time spent on setting it up. You can of course download the whole package, but I think the best way is to use the generator.

It is very flexible and offers a lot of options on callbacks and callbefores. You can set it on auto-play or make it stop on hover. Captions are also available and are customisable.

Check for yourselves on their website. It is a great free tool.

31. Slippry

Slippry-jQuery-image-slider

Slippry image slider is a jQuery plugin that uses CSS3 transitions and HTML5 elements. It can be as simple or as complex as you want it to be.

Because the CSS and Sass files are included, you can let your imagination free and style it as you want it. Slippry does its job best at the top of the home page. With captions it can serve as good presentation of a company.

Dont believe us, check it out here for full documentation and a live demo.

32. Un Slider

Unslider-jQuery-image-slider

Unslider is a very simple slider that is based on jQuery. It’s very small but powerful. You can change everything, so it works and feels like you want.

Unslider is really the simplest slider I have come across. You really don’t have to be an expert to use this one. Just add a few lines of code, put in images and you have a slick slider for your website or blog.

Their whole site is a one big demo for this slider.

33. Unleash 3

Unleash-jQuery-Slider

Unleash 3 is another jQuery accordion slider on our list. It’s one of the best there is. You have a lot of options and settings to choose from. You can add captions and controls with different styles or add any other content with multiple CSS3 animations.

Main properties are:

Fully responsive
Full screen mode
Ability to choose a slide when page is loaded
Step by step documentation
Touch support
Video support

34. MightySlider

mightySlider--jQuery-Slider

Mighty Slider is everything you need to create an amazing one-directional slider. Mighty Slider can be used as a banner rotator, video gallery, presentation and basic slider. All of this is possible because of a very powerful API. Mighty Slider gives you total control over layout and design.

35. Fullscreen Slit slider

Fullscreen-Slit-jQuery-Slider

Fullscreen Slit Slider is a jQuery plugin and uses CCS3 animations. Slider can stretch across the whole viewport or be used as slider inside of other context.

Fullscreen Slit Slider is fully responsive and has some unique split screen transitions. With captions it is a great way of representing your cause to the visitors.

Check it out in action. I am sure you will be amazed of what this free slider can do.

jQuery Portfolio, News & Tour Sliders

This section is dedicated to sliders that are particularly designed to showcase portfolios, news, and tours.

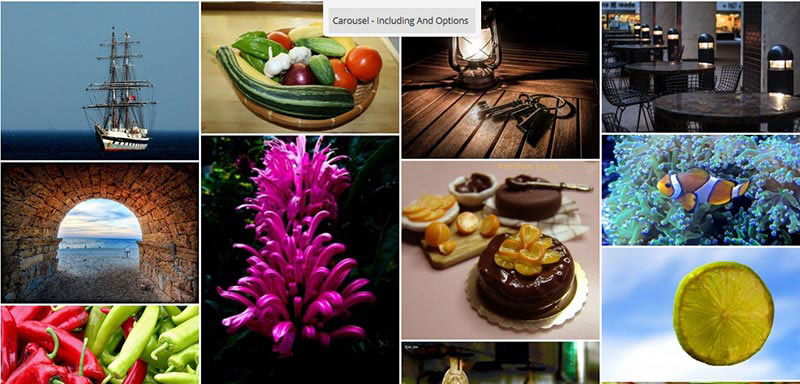
36. jQuery Carousel Evolution

jQuery-Carousel-Evolution-jQuery-slider

jQuery Carousel Evolution is an easy and low cost way to create an eye catching product or team presentation. Yes it’s a premium slider, but it delivers a great value for it’s money.

jQuery Carousel Evolution is a powerful slider that uses HTML markup. It offers 9 different styles for sliders. This slider also supports YouTube and Vimeo video implementation. All major browsers are also supported.

You can check the demo here.

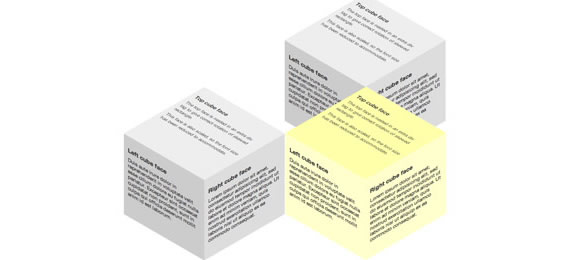
37. Cube Portfolio – Responsive jQuery Grid Plugin

Cube-porfolio-jQuery-responsive-slider

Cube Portfolio is a very cool jQuery plugin with tons of animations. It offers custom captions and plays well with your current HTML and CSS code.

Cube Portfolio provides 30+ options, that gives you complete layout and design control. Slider has fully responsive design and is fully customizable. It uses CSS3 animations and you can choose from 19 starter pack templates. Cube Portfolio is also equipped with a filtering system.

It is best used for vertical sliders, portfolio projects, team members presentation, photography showcasing, or other mosaic grids. Usage is limitless. Cube Portfolio is also available as a WordPress plugin.

Check live preview here.

38. Slideme

slideme-jQuery-slider

This jQuery plugin is great for the top of the website, to present your work or say more about you.

Slideme has got full documentation and a tutorial how to set up your slider, for every type of device individually. Design is fully responsive with CSS3 animations. It is easy to setup and provides a public API.

Slideme is free to use and definitely worth a look. Check out the demo here.

39. PgwSlider

PgwSlider-jQuery-slider

Pgw slider is a jQuery slider, that is designed for showcasing your images. This slider is fully responsive. It is lightweight and all-browser compatible. Pgw slider is also SEO friendly.

This slider is very suitable for news or blogging websites as it can show your most recent post or articles.

For full features and a demo slider click here.

40. All Around Content Slider

All-Around-jQuery-Slider

All Around slider is a multi purpose jQuery slider. You can use it as a carousel or slider. It also supports video. All Around slider offers 6 pre built themes or layouts and ton of options.

Slider is equipped with a drag and move circles option and infinite loop. Besides that, it’s fully responsive with mobile support. Every single image can be magnified and can contain a description, too.

All Around slider is best used as a product showcase or team presentation.

Check live preview here.

41. Lens Slider

Lens-Jquery-Slider

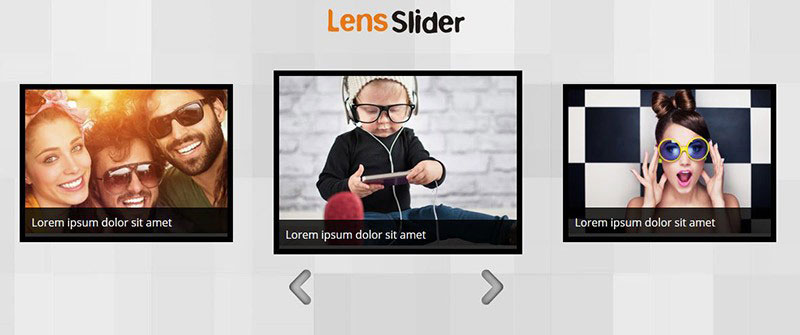
Lens Slider is an open-source project and so, fully customisable. Slider uses very simple HTML markup of an unordered list. Images are shown as you can see in the screenshot. No other option is available. Lens Slider is also available as a WordPress plugin and free to use.

The most suitable usage would be for products, services, or ateam presentation.

Check it out here.

42. Gridder

Gridder-js-jQuery-slider

Gridder is an awesome slider for showcasing your work. Gridder kind of mimics Google image search. To view the larger picture you click on a thumbnail and it expands. This is a great way to show a large number of images at the same time.

Gridder is available as a jQuery or Ajax thumbnail previewer. It is an awesome free solution for your next portfolio project.

For jQuery live preview check here. If you want Ajax click here.

43. Barack Slideshow 0.3

Barack-JS-Slideshow

Barack Slideshow is an elegant, lightweight slideshow written in JavaScript. This slideshow can operate with vertical, horizontal, and irregular lists. The images are preloaded with MooTool Assets. To keep your code clean, you should check the CSS code. This means changing some parts if needed.

Barack Slideshow can be used as a portfolio showcase, product list, or even for listing your clients.

Here you can find a demo and test different options.

44. jQZoom Evolution

jqzoom JQ Zoom Evolution

JQZoom is a JavaScript image magnifier, built on top of the popular jQuery JavaScript framework. jQZoom is a great and really easy to use script to magnify parts of your image.

This image magnifier is the most suitable for online stores and restaurants menus.

Find the documentation and demo here.

45. Multimedia Portfolio 2

Multimedia-Portfolio-2-jQuery slider

Multimedia Portfolio 2 is a jQuery plugin that can automatically detect the extension of each media file and apply the appropriate player. It supports images and videos. Multimedia Portfolio uses simple HTML markup and it’s easy to use.

This slider is best suitable for showcasing products, services, and even news.

Check out their demo.

46. jQuery Virtual Tour

jquery-virtual-tour

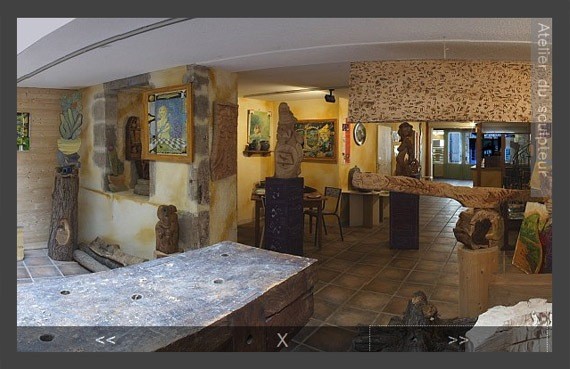
jQuery Virtual tour is an extension of the simple panorama viewer. This jQuery virtual tour allows you to transform some panoramic views into a virtual tour! It’s a great plugin that is worth looking at.

You can find a demo and download options here.

47.jQuery Vertical News Slider

Vertical News-jQuery-Slider

jQuery Vertical News slider is very useful for websites that want to show some news or marketing campaigns on their sites. It’s responsive and uses CSS3 animations. Vertical News slider also allows you to fully customise the style of the slider.

Check out the live preview here.

48. Multi Item Slider

Multi-Item-jQuery-Slider

This gallery is also a tutorial on how to create it on your own. Multi item jQuery gallery was inspired by Apple slider, that shows multiple products at once. It’s fully responsive with a flat design with a variety of effects.

Multi item jQuery gallery is very suitable for online stores for showcasing their products. It comes with simple navigation, as seen in the screenshot. The navigation is intuitive for changing between a variety of categories.

For a live preview click here.

CSS Based Galleries

We have come to our last section, where you will find the best pure CSS Based Galleries. They may not be as popular but are sure worth a try. See it for yourselves.

49. HoverBox Image Gallery

hoverbox-image-gallery

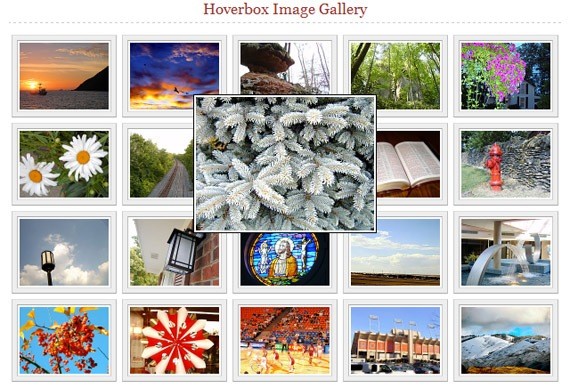
HoverBox Image Gallery is basically a super light-weight (8kb) roll-over photo gallery that uses nothing but CSS. For faster loading it only uses one image for thumbnail and roll-over preview. All major browsers are supported. HoverBox Image Gallery is free to use for your own projects.

It is best used as a photography showcasing for photographers, any type of portfolio and restaurant menus.

Live preview here.

50. CSS Image slider with 3-D transitions

css3-image-slider

CSS image slider is an experimental project that also includes a full tutorial. For animation purposes it uses CSS and CSS3 techniques with the addition of 3-D effects on transitions. Intended usage is strictly as an image slider.

CSS image slider can be used for product and service showcasing. In my opinion it could do well also as an image slider in a full width article.

Check out the live preview.

51. CSS3 Animated Image Gallery

CSS3-Animated-Image-Gallery

CSS3 animated image gallery uses CSS3 and HTML5 to render effects. The images zoom in when you hover over them. This enables a more detailed look. If you are interested, you can take a look at the tutorial and create it yourself. Otherwise you can just download the source code.

CSS3 animated image gallery it’s suitable for photography showcases.

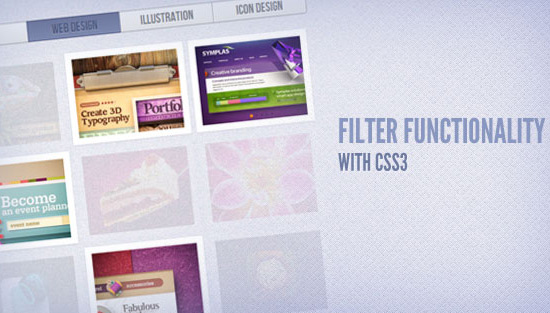
52. Filtronio CSS3 Portfolio

Filtronio-CSS-image-gallery

Filtronio CSS3 portfolio is a great pure CSS and HTML5 gallery for showcasing your portfolio or even your products.

It’s simple but at the same time a very powerful and professional portfolio gallery. You can choose from 3 different themes. Filtronio CSS3 portfolio also offers animated layers and a category filter. Gallery is clean coded and easy to customize.

Check out the live demo here.

53. Pure CSS3 Image Gallery

Pure-CSS3-image-gallery

This is a simple CSS3 image gallery that creates the effect of a pop up window when you click on the image. It’s suitable for showcasing portfolios on the websites. If you are interested, you can also follow the tutorial to make it by yourself.

Check out the live preview.

54. CSS Lightbox Image Gallery

CSS-Lightbox-Image-gallery

This image gallery is another pure CSS gallery. It zooms out on images when they’re clicked. You can download the source code, or if you feel like it, go trough the tutorial..

CSS Lightbox image Gallery should be used on a non-scrollable website. However this can be overridden with a single line of JavaScript, that is included at the end of the tutorial. The most suitable usage would be a portfolio showcase.

55. Slidea

Slidea-jquery-image-slider

And here is a gem of this collection, Slidea. Slidea is a multi purpose content slider. This slider plugin was build on the jQuery, VelocityJS and Animus animation framework. With Slidea there are no animation limitations–you can so much awesomeness with it!

I can try to describe how cool it is, but just check the demo and you’ll understand why I like it so much!

Conclusion

I have to say I really enjoyed researching these plugins. We found amazing sliders that will, hopefully, help you to work on your next project more efficiently. There’s something for every situation here.

There are so many amazing sliders and slideshows that it’s hard to decide what to pinpoint. But in my opinion you should definitely check out Gridder slider, because it’s really amazing what it can do, especially for free, so it’s a win-win situation.

And you definitely should not forget Slidea. Yes it’s a premium slider, but it carries so much value it’s well worth the investment!

If you enjoyed our article, share it with your friends, and tell us if we missed your favorite slider.

Which is your favorite gallery plugin? We would love to hear your experiences!

Editor’s note: this article was last updated August 26, 2020.


40 Firefox Add-ons For Better Productivity

Original Source: https://www.hongkiat.com/blog/50-time-saving-firefox-add-ons/

Anyone who uses the Internet spends a lot of time on browsing the web. However, people always appreciate if they can save time during their borwsing experience. So if Firefox is your go-to browser…

Visit hongkiat.com for full content.