The Startup Button Lets Discover New Startups with Just A Click

Original Source: https://www.hongkiat.com/blog/startup-button-randomizer/

Free gallery of fresh startup companies that you can browse through to take a look at their work and new projects.

The post The Startup Button Lets Discover New Startups with Just A Click appeared…

Visit hongkiat.com for full content.

20 Responsive Image Galleries and Slideshows (2018)

Original Source: https://www.hongkiat.com/blog/free-responsive-image-gallery/

If your website is image-heavy i.e. a portfolio or photography website etc., then there are two things that you’ll be needing the most – photo gallery plugins to help you better manage…

Visit hongkiat.com for full content.

How to build a chatbot interface

Original Source: http://feedproxy.google.com/~r/CreativeBloq/~3/IcBeA4d9R0Q/how-to-build-a-chatbot-interface

In the mid-2000s, virtual agents and customer service chatbots received a lot of adulation, even though they were not very conversational, and under the hood they were merely composed of data exchanges with web servers. 

Nowadays, even though a huge number of examples of ‘weak AI’ exist (including Siri, Alexa, web search engines, automated translators and facial recognition) and other topics such as responsive web design are hogging the limelight, chatbots are still causing a stir. With major investment from big companies, there remain plenty of opportunities to hack the conversational interfaces of the future.

How to design a chatbot experience

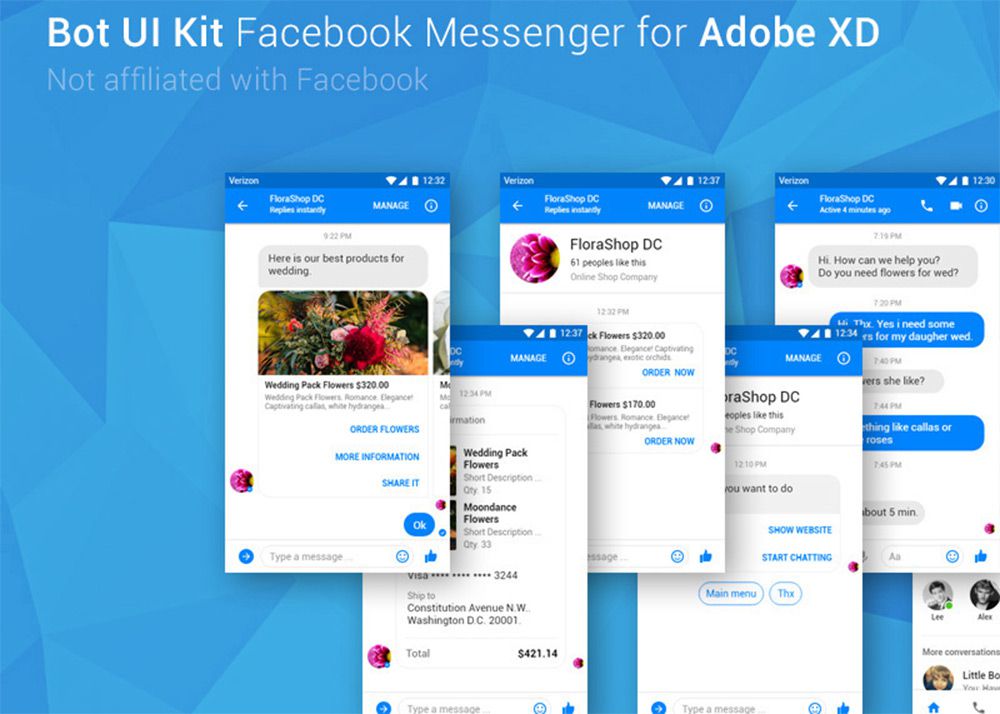
Sometimes they get a bad reputation, but chatbots can be useful. They don’t need to feel like a basic replacement for a standard web form, where the user fills in input fields and waits for validation – they can provide a conversational experience. 

Essentially we’re enhancing the user experience to feel more natural, like conversing with an expert or a friend, instead of web browser point-and-clicks or mobile gestures. The aim is that by providing empathetic, contextual responses, this technology will become embedded directly in people’s lives.

Watch the video below or read on to discover a practical way to design and build a chatbot, based on a real project-intake application in a service design practice.

01. Set a personality

It’s important to ensure the chatbot’s personality reflects the company it’s representing

As this practice serves over 110,000 members globally, the goal was to provide a quick, convenient and natural interface through which internal stakeholders could request effective digital services, instead of having to fill out confusing forms.

The first step was to establish the chatbot’s personality, as this would represent the voice of the service design team to its stakeholders. We built on Aarron Walter’s seminal work on design personas. This greatly helped our team develop the bot’s personality traits, which then determined the messages for greetings, errors and user feedback.

This is a delicate stage, as it affects how the organisation is perceived. To make sure we had as much information as possible, we immediately set up stakeholder workshops to nail the appropriate personality, colour, typography, imagery and user’s flow when engaging with the bot.

After we had gained all the necessary approvals – including seeking legal counsel – we set out to convert archaic request forms into a series of back- and-forth questions that mimicked a conversation between the stakeholders and a representative of our design services team.

02. Use RiveScript

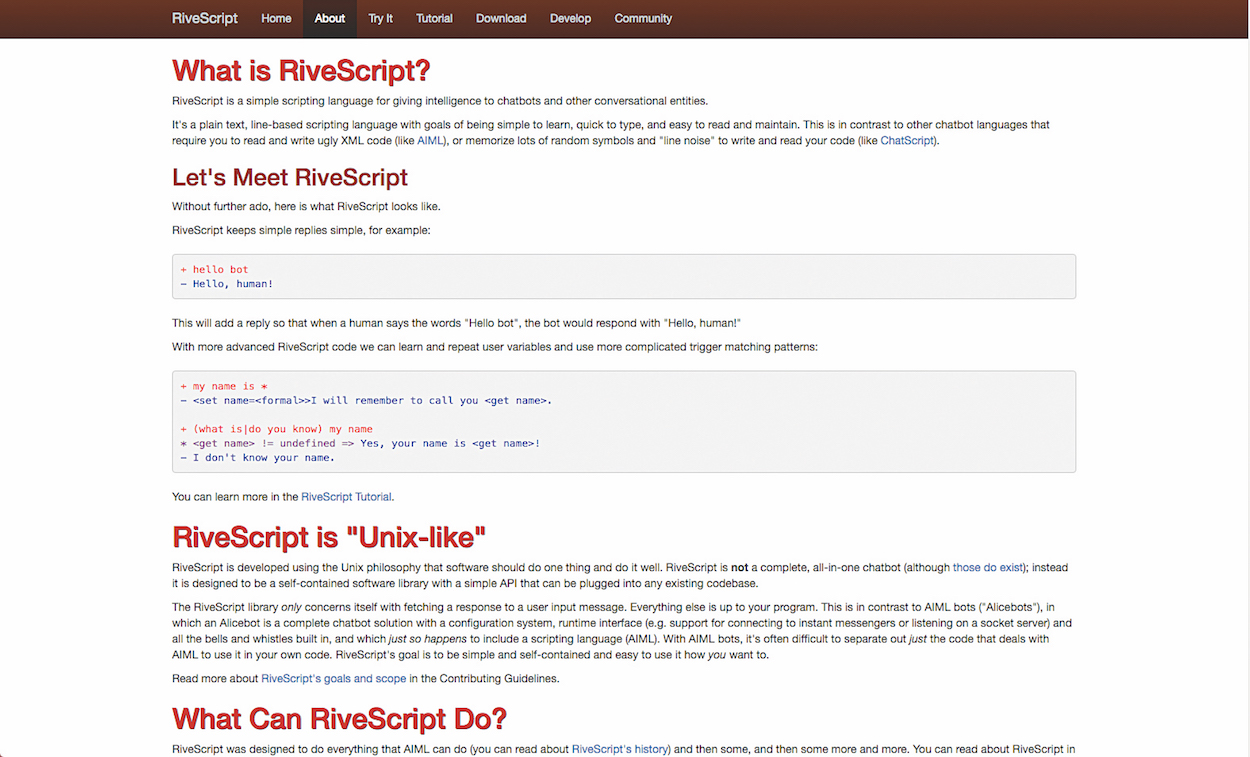
This simple scripting language provides everything you need to design and build a chatbot POC

We knew we didn’t want to get too deep into AI markup language for the processing part – we just needed enough to jump-start the experience. 

RiveScript is a simple chatbot API that is easy enough to learn and sufficed for our needs. Within a few days we had the logic down to intake a project request from the bot, and parse it with enough business logic to validate and categorise it so it could be sent it through JSON REST services to the appropriate internal project tasking queue.  

To get this basic chatbot working, head to the RiveScript repo, clone it and install all the standard Node dependencies. In the repo you can also gain a taste of the interactions you can add with the various example snippets. 

Next, run the web-client folder, which turns the bot into a web page by running a basic Grunt server. At this point you can enhance the experience to suit your needs.

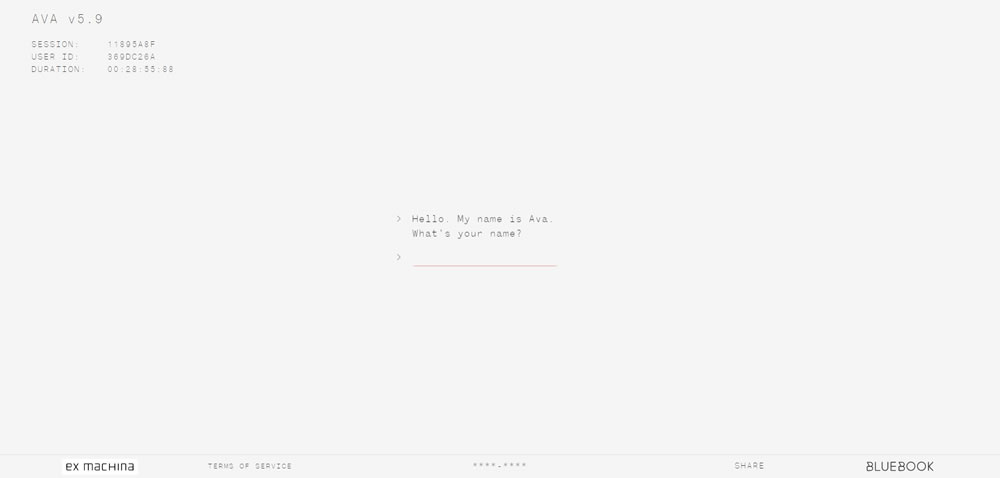
03. Generate your bot's brain

The next step is to generate the ‘brain’ of our bot. This is specified in files with the .RIVE extension, and thankfully RiveScript already comes with basic interactions out of the box (for example, questions such as ‘What is your name?’, ‘How old are you?’ and ‘What is your favourite colour?’).

When you initiate the web-client app using the proper Node command, the HTML file is instructed to load these .RIVE files.

Next we need to generate the part of our chatbot’s brain that will deal with project requests. Our main goal is to convert a selection of project tasking intake questions into a regular conversation.

So, for example:

Hello, how can we help?Great, how soon do we need to start?Can you give me a rough idea of your budget?Tell me more about your project…How did you hear about us?

A typical accessible web form would look like this:

With web forms, we’re very familiar with certain patterns: you click the Submit button, all form data is sent to another page where the request is processed, and then most likely a cheeky Thank you page pops up. 

With chatbots, we’re able to take the interaction of submitting a request, and make it more meaningful.

04. Design a voice

To convert this form to a conversational user interface served in RiveScript’s chatbot web client, we need to convert the information architecture from rigid to fluid; or field labels into UI strings. 

Let’s consider some accessible field labels, and their related question tone:

Request: How can we help? Not sure? Do you mind if I ask a few questions?Timeline: How soon do we need to get started?Budget information: Can you give me a rough idea of your budget?Project description: OK, can you tell me a summary of the problem to be solved?Reference: Also, who referred you to us?

Next we need to convert the web form’s code into AI script, following RiveScript’s very learnable processing logic for two-way conversations:

05. Request submission

As opposed to standard form variables being sent to another page or service to process, chatbots can validate and submit information entered by the user in a chat window (or spoken) immediately, which means users can also revisit previously entered values easily. 

We needed to send the user’s request entered in the chatbot UI via the JSON REST API to an external project tasking server.

In RiveScript-js we are free to make use of an XMLHttpRequest object to submit the request almost simultaneously, as the data is entered by the user:

06. Do not fear the chatbot

Soon, current ways of interacting with computers to obtain information will give in to AI-based technology like chatbots, where people just make simple voice commands, like we've seen with tech such as Amazon Echo and Google Home.

The web design community need not fear – we should all be embracing the added value of this new technology. 

It could be a game-changer for the companies it works for, offering fully scalable customer service and improved customer intelligence. 

This article was originally featured in net magazine,  the world's best-selling magazine for web designers and developers. Subscribe here.

Related articles:

How chatbots are learning – interview with Giles ColborneHow the intelligent web will change our interactionsHow conversational interfaces are innovating banking

Bootstrap Card Component: a Complete Introduction

Original Source: https://www.sitepoint.com/bootstrap-card-component-introduction/

In this article, I’m going to introduce you to the Bootstrap card component and walk you through its many features and uses. By the end of this tutorial, you’ll be able to incorporate Bootstrap cards in your web projects for great layouts and page content organization.

Bootstrap is the most popular HTML, CSS, and JavaScript framework for quickly creating responsive and mobile-first web layouts.

Using Bootstrap offers many advantages to developers, including the following:

you can easily and quickly build a responsive layout by having only some knowledge of HTML and CSS
the library was built to be mobile-first from the core
it’s compatible with all modern browsers etc.
it uses Flexbox for its grid system
it provides tons of features and components.

The latest release of Bootstrap offers many new, modern features — such as the support for Flexbox, and the new card component, which replaces panels, thumbnails and wells from earlier versions of the library.

What Is the Bootstrap Card Component?

Bootstrap introduces a new UI component for creating cards which provides a flexible and stylish container for showing content. Cards come with minimal styling, but you can easily extend them with extra styling options.

This component is built on top of Flexbox, and you can use the Bootstrap spacing utility classes for margins and padding.

Cards can conveniently accommodate different types of content like title, subtitle, body copy, and images etc., and optional header and footer sections. You can also include different sections (card blocks) to construct different types of cards depending on your use.

Including Bootstrap in Your Project

You can very easily start using Bootstrap in your website by either including it from a CDN or downloading it from getbootstrap.com.

For the sake of introducing the new Bootstrap card component, you’re going to create a simple HTML page with Bootstrap styling to demonstrate the basic elements of the card component. Go ahead and create the index.html file inside your project folder, then add the following content from the docs starter template:

<!doctype html>
<html lang=”en”>
<head>
<!– Required meta tags –>
<meta charset=”utf-8″>
<meta name=”viewport” content=”width=device-width, initial-scale=1, shrink-to-fit=no”>

<!– Bootstrap CSS –>
<link rel=”stylesheet” href=”https://maxcdn.bootstrapcdn.com/bootstrap/4.0.0/css/bootstrap.min.css” integrity=”sha384-Gn5384xqQ1aoWXA+058RXPxPg6fy4IWvTNh0E263XmFcJlSAwiGgFAW/dAiS6JXm” crossorigin=”anonymous”>

<title>Bootstrap Card Example</title>
</head>
<body>
<div class=”container”>
</div>

<!– Optional JavaScript –>
<!– jQuery first, then Popper.js, then Bootstrap JS –>
<script src=”https://code.jquery.com/jquery-3.2.1.slim.min.js” integrity=”sha384-KJ3o2DKtIkvYIK3UENzmM7KCkRr/rE9/Qpg6aAZGJwFDMVNA/GpGFF93hXpG5KkN” crossorigin=”anonymous”></script>
<script src=”https://cdnjs.cloudflare.com/ajax/libs/popper.js/1.12.9/umd/popper.min.js” integrity=”sha384-ApNbgh9B+Y1QKtv3Rn7W3mgPxhU9K/ScQsAP7hUibX39j7fakFPskvXusvfa0b4Q” crossorigin=”anonymous”></script>
<script src=”https://maxcdn.bootstrapcdn.com/bootstrap/4.0.0/js/bootstrap.min.js” integrity=”sha384-JZR6Spejh4U02d8jOt6vLEHfe/JQGiRRSQQxSfFWpi1MquVdAyjUar5+76PVCmYl” crossorigin=”anonymous”></script>
</body>
</html>

We’ve included Bootstrap files and their dependencies (jQuery and popper.js) from different CDNs, then created a container division.

Minimal Styling for Cards

In order to create a basic card, we need to —

use .card with a div tag to create the outer container
add the .card-body class to an inner div tag to create the card body
use .card-title and card-subtitle classes with heading tags for adding the title and the subtitle
use the card-text class with <p> tags to add textual content
use the card-img-top class with the <img> tag to add an image to the top of the card.

These are the basic elements that constitute a full but basic card layout, as we can see from the following example:

<div class=”card”>
<img class=”card-img-top” src=”https://source.unsplash.com/daily” alt=”Card image top”>
<div class=”card-body”>
<h3 class=”card-title”>Card title</h3>
<h4 class=”card-subtitle”>Card subtitle</h4>
<p class=”card-text”>This is a simple Card example</p>
</div>
</div>

This is a screenshot of the result:

Bootstrap card component: Basic card layout

As can be seen, the card takes the full width of its container div.

By simply switching the card-body class with the card-img-overlay class, we can use the image as an overlay:

Bootstrap card component: Using the image as an overlay

We can also use the class .card-img-bottom with the <img> tag to add the image at the bottom of the card:

<div class=”card”>
<div class=”card-header”>
This is a header
</div>
<img class=”card-img-top” src=”https://source.unsplash.com/daily” alt=”Card image top”>
<div class=”card-body”>
<p class=”card-text”>A Card with a top and bottom images</p>

</div>
<img class=”card-img-bottom” src=”https://source.unsplash.com/daily” alt=”Card image top”>

<div class=”card-footer”>
This is a footer
</div>
</div>

Bootstrap card component: Adding the image at the bottom of the card

The card top and bottom images are called image caps.

Continue reading %Bootstrap Card Component: a Complete Introduction%

The Best Adobe XD Mobile App Freebies for UI Designers

Original Source: http://feedproxy.google.com/~r/1stwebdesigner/~3/UB0KOAQ3OgM/

Adobe’s XD program is a direct competitor to Sketch. And while XD is still pretty new it’s catching on like wildfire.

If you’re thinking of trying Adobe XD, you can sign up for the beta and see what you think. If you really like the program, you might even keep it long term, and for that, you’ll probably want some design assets to play around with.

I’ve curated a handful of Adobe XD freebies already released on the web. All of these are editable just like PSD freebies and there’s a lot of variety to pick from.

All the Mobile UI Kits You Could Ask For


DOWNLOAD NOW

Wires for Adobe XD

wires adobe xd wireframe

The Wires Kit for Adobe XD is perhaps the best wireframing kit out there. It was designed specifically for designers by Kyle Galle, a very skilled designer in his own right.

You can grab the Wires kit for free and reuse it for all your UI projects. It comes with a massive collection of 170 mobile templates, 90 website templates, 240 different page elements and over 170 custom icons.

And yes, all of that is 100% free to download.

iPhone X Mockup & iOS 11 GUI

iphonex ios 11 xd gui

Whenever there’s a new iPhone launch you can bet designers are hard at work releasing UI kits to match. With this new Apple device GUI it nails two kits in one: the newer iOS 11 GUI along with a mockup for the new iPhone X.

It all comes in one massive Adobe XD file created by designer Jason Chuang.

The pack includes tons of sample screens that you can rework and style to suit your own application. Not to mention many of these elements should work for iOS 10 and older.

UI Prototype Screens

ui prototype screens freebie

Talented UI designer Gabriel Cambreling released these prototyping screens for general download. And they’re a great starting point for tinkering in Adobe XD.

These prototypes cover the bases for most of the screens you might plan for a mobile app. List views, login pages, maps, sliding responsive navigation along with other general page designs.

Spoon + Fork iOS UI

spoon and fork gui xd

Now for a more detailed UI kit check out the Spoon + Fork set created by Aprylle Ricafort.

This works like a mobile iOS food app with custom icons, graphics, and a beautiful color scheme. All the elements are 100% vectorized so you can resize them and rework everything if you want.

Anyone looking for a full UI kit for Adobe XD should definitely grab a copy of Spoon + Fork and keep it saved for project work.

Mobile E-Commerce Checkout

ecommerce cart xd freebie

Ecommerce shopping is huge and growing every year. A solid interface is required to increase conversions and you’ll see this mostly in the Mobile E-Commerce Checkout.

The freebie comes with 15 unique line icons and it’s fully open source including all the Google webfonts. Plus this interface basically covers the line of every page you’ll need for a trustworthy shopping app.

Piggy Bank App

piggy bank app freebie

This delightful little piggy bank app UI was released for free by designer Caio in late 2017. It’s one of the newest freebie kits on the web and it’s certainly a simple design.

This probably won’t help you prototype an entire working app, but it will help you learn the XD interface.

Check this out if you’re brand new to Adobe Experience Design and want a simple freebie to mess around with.

Facebook Messenger Bot UI

facebook messenger app gui

The Facebook Messenger app is pretty cool and lets you connect with people wherever you are. It also comes from one of the largest tech companies in the world known for designing great interfaces.

Vladimir Tatarovich’s Facebook Messenger Bot UI is a free UI kit designed around simple app interface screens.

This doesn’t exactly mimic the Facebook messenger but instead tries to rebuild using their existing style. A great starting point for designing your own mobile apps.

XD Mobile Apps

xd mobile app freebie

Here’s another pack dedicated to mobile app GUIs although this one’s a little more generic. But while the styles don’t match a particular brand, these styles are still incredibly useful.

The kit comes with dozens of custom screens including dynamic elements like graphs, checkout pages, audio/video players, ticket purchasing screens and user profiles(plus a whole lot more).

Glancing over this app UI kit you may think it’s just another simple freebie.

But this is by far one of the best freebies you can nab to mess around in XD.

Voice App Concept

voice app freebie

If you do want something real simple to get started with XD try downloading this voice app GUI by designer Ashwin Merle.

It only comes with a few screens, but they work with custom vector elements and some pretty cool text effects to boot.

Walkthrough Screens

walkthrough screens

Digital walkthroughs are crucial to the onboarding process and you should always try to work this into your applications.

If you’re looking for some XD inspiration take a look at this walkthrough screen pack that offers 5 free guided GUI screens built solely for XD. The kit is naturally 100% free and it’s a cool way to gather ideas for your app designs.

Messenger UI Kit

messenger gui kit freebie

Mobile networking is huge and messengers are crucial to every networking app. Whether you’re designing one yourself or just building a practice project, you can learn a lot from this messenger UI kit.

Designer Egor Kuznetsov released this for free and it serves a great purpose for XD users who wanna play around with messenger interfaces.

This kit offers dozens of screens and while the text is in Russian you can always change that with a bit of XD magic.

Bamb UI Kit

bamb ui freebie xd

It was tough finding quality UI kits but I think the Bamb UI really takes the cake.

No doubt this is one of the most complete UI kits you’ll find for Adobe XD. It comes with a specific design style for colors, gradients, typography, and spacing for mobile app GUIs.

Not to mention this thing is totally free, so it’s a great asset for screwing around with XD.

Wallet Mobile App

xd freebie wallet app

Banks and credit card companies usually offer mobile apps for banking on the go. If you’re working on a project like that you might grab a copy of this wallet app GUI kit for Adobe XD.

It comes with quite a few different screen styles for news, account balance info, and for moving money around. This one’s designed around a Bitcoin wallet but you could rework the style to fit anything.

So these are just my top picks for XD freebies, but new ones come out every few months.

If you have time to search around I highly recommend browsing through the free Adobe XD files on PSDDD.co to find more.


The New Gmail – Material Design and 8 New Features

Original Source: https://www.hongkiat.com/blog/new-gmail-material-design-and-features/

Gmail has received a major update recently, which brings the beautiful material design interface to our favorite email provider. That is not all, it introduces many requested features to help…

Visit hongkiat.com for full content.

Why Passion Is a Key Ingredient to Freelance Success

Original Source: http://feedproxy.google.com/~r/1stwebdesigner/~3/KBj_JBR5GhI/

Have you ever thought about why you became a web designer?  It’s one of those questions that may not have entered your mind because, it’s just who you are.

Recently, I’ve given some thought to my own path to where I am now. As a high school senior in 1995, my family subscribed to an unlimited dialup internet service. Previously, internet service had been metered by the likes of AOL and so I had been extremely limited in how much time I could spend online. But with the arrival of unlimited access, it literally opened up the world.

I mention this because, without that slow-as-a-snail dialup account, I may never have started to play around with HTML. And I probably wouldn’t have taken the time to learn Photoshop or any other graphics program.

Those items helped to spark a creative passion that I didn’t know I had. Thankfully, even through some ups and downs, it’s something that I still have over 20 years later.

Passion Led Us Here

Where Passion Begins and Ends

Creative fields like web design require a certain amount of talent. But to really succeed, I’d argue that passion is just as important.

Anyone who’s read a Dilbert comic or watched The Office knows that these fictional employees have a dearth of passion for what they do. While the stories are made up, the almost-robotic way the characters go about their jobs is something very real and relatable.

If you’re a designer who acts similarly in your daily grind, it’s hard to imagine that you’d be very creative. No, design requires a real passion to do things the right way. Without it, your work is going to suffer.

However, those who decide to take on the challenge of becoming a freelance designer often face a stark reality: There are days where it’s really hard to conjure up any passion for what you’re doing. And it’s not very surprising.

When you consider the amount of added responsibility you take on while running a business, it can weigh on you. Finances, client relations and all the stress that goes along with the gig is enough to drain anyone of excitement.

And, just like in the more creative parts of your job, facing each task with dread or ambivalence is a recipe for failure.

Where Passion Begins and Ends

Finding Passion and Purpose in Your Business

How, then, can we become passionate about the day-to-day challenges of freelance life? Let’s take a look at some fairly simple things you can do:

Embrace Reality
As it turns out, neither life nor work is 100% fun all of the time. So it makes sense to set realistic expectations when it comes to running a business. There are going to be days that, simply put, are going to stink like a closet full of rotten eggs. But, each day is an opportunity to get those creative juices flowing again.

Find a New Muse
Being creative in and of itself can stir some passion. In my own career, I’m happiest when doing design work or writing. But we can’t spend every moment on those tasks. So it’s up to us to find other things that create some mojo. It might be finding a new niche or service to offer. Or, spend some time on a different aspect of your business that brings out your best. Feeling as though you’ve done a great job can be enough to keep you going.

Learn Something
Another possibility here is to learn a new skill. Study up on that new JavaScript framework you’ve wanted to use or find a new tool to increase productivity. Just the act of learning can make things more fun. You might even find that you just can’t wait to apply this new knowledge to a project and show off your skills.

Challenge Yourself
Creating goals and challenging yourself to top them is a great way to stay in the right frame of mind. Set a goal for how many new clients you want to book in a month or even how many blog posts you want to write. Whatever it is, you’ll have something positive to focus on. Just remember to keep your goals realistic!

Don’t Overdo It
Working yourself too hard is one of the biggest soul-crushing activities for a freelancer. This is especially tough when you’re extremely busy and have deadlines to meet. But there are also times when you simply need a break. Take some time away from your desk and your phone. It can give you a more positive perspective on life.

Finding Passion and Purpose in Your Business

Make Your Work Mean Something

Finding passion in what you do will put you on the right path towards a successful freelance web design career.  The key to developing it is in finding purpose in each day – even the bad ones. How you find it is really up to you.

For instance, if you don’t have enough clients, maybe your purpose can be in making contact with a new prospect. If you’re buried under a mountain of work, you might find purpose in reaching little milestones each day.

That purpose leads to passion, which will shine through to everyone you work with. And when others can see how deeply connected you are to your work, it not only makes them want to work with you but also sing your praises to others.

The result is that your business starts to build momentum. Keep it up and you’ll find yourself in the middle of a successful career.


15 Inspirational Examples of Minimal Web Design

Original Source: http://feedproxy.google.com/~r/1stwebdesigner/~3/uhBoQDKCBTs/

Considering that the current philosophy of UI design is “less is more,” the expected rise in popularity of minimalism has reached an all-time high amongst web designers, especially in the last couple of years. But, perhaps unknowingly, its appeal to users has also grown.

The principles of minimalism in web design are that a website (and other mediums as well) should be stripped down to their bare bones, while carefully making use of whitespace and improving readability with clearer typography. When implemented correctly, the result will allow users to focus on what’s truly important without being distracted by non-essential elements.

While this may sound easy, it can be difficult deciding what the truly important elements are and what’s little more than decoration. It can also be risky. Accidentally removing a seemingly innocuous element could be deemed critical by the user and could result in the wrong message (or worse, no message at all) being delivered to your target audience.

minimal web design Rotate

Source: Rotate°

If you think about the logistics, it makes sense that minimalism appeals to users: the less fluff on the site, the less you have to think about. When there are just a few links or blocks of text, and the point of interest is directly in front of you, you can let your mind rest for a bit – relax, and the website will spoon feed you just what you need.

This collection features fifteen websites that have been designed using the minimalistic principles mentioned above. Some of the sites have also been influenced by many of the popular web design trends we have seen over that past year or so, like flat design, yet still retain a look and feel that can only be described as minimal. Here are the beautifully designed sites:

minimal web design McKennaJones.co.uk

Source: McKennaJones.co.uk

minimal web design Good Cop Bad Cop

Source: Good Cop Bad Cop

minimal web design Ballet BC

Source: Ballet BC

minimal web design Ava Sessions

Source: Ava Sessions

minimal web design Cropmark

Source: Cropmark

minimal web design Mike Guss

Source: Mike Guss

minimal web design Inside Discovery

Source: Inside Discovery

minimal web design GSArora

Source: GSArora

minimal web design Seedlip

Source: Seedlip

minimal web design The Outpost

Source: The Outpost

minimal web design We Ain't Plastic

Source: We Ain't Plastic

minimal web design Tim Brack

Source: Tim Brack

minimal web design Hatch Inc

Source: Hatch Inc.

minimal web design The Nero Design

Source: The Nero Design

minimal web design Ruslan Siiz

Source: Ruslan Siiz

minimal web design Elastique

Source: Elastique

minimal web design Chapter 3

Source: Chapter 3

Finshed

Minimalism isn’t the miracle solution that you can slap on every single project. There’s a time and place for everything; the time is now, but you need to carefully decide the place.


10 Free Icon Sets for Ecommerce UI Design

Original Source: http://feedproxy.google.com/~r/1stwebdesigner/~3/iC2TElFqUGg/

Designing an ecommerce site is not like any other web project. You have to think about branding along with user experience and marketing based on the design. It can be quite difficult to say the least.

But there are lots of free resources you can use to make your job easier. Icon sets, for one, are a lot of work to design. You can save hours (even days) worth of time by using a free icon pack instead.

The sets below are all totally free and come in a variety of styles. If you’re looking for ecommerce-related icons, you’ll find plenty to dig through in this list.

All the Icons, Fonts, Web Templates & Design Assets You Could Ask For


DOWNLOAD NOW

54 Ecommerce Icon Pack

54 Ecommerce Icon Pack

First up is a massive 54-set icon pack featuring simple line icons that will work well for typical ecommerce features.

This set was created by designer Virgil Pana and released for free on Dribbble. The entire pack comes as a PSD file and it really is one of the better ecommerce sets out there.

I like this particular style because I think it can easily blend in with any website.

The minimalist line style is very common and so it’s worth trying – regardless of what project you’re building.

Simple Green Icon Set

Simple Green Iconset

Here’s one more freebie pack hosted on Dribbble with a focus on beautiful green icons. Although, technically the color scheme can be altered with a few clicks in Illustrator.

Designer Pavel Kozlov created this pack of 40 free ecommerce icons and released it to the world a few years ago. Yet, the icons are just as relevant today as ever before.

To download a copy you’ll need to visit the Gumroad page. Typically items on Gumroad cost money, but this pack is actually 100% free.

If you want to give Pavel a tip for all his efforts, you certainly can. But it’s not a requirement to gain access to these lush green icons.

Flat Vector Shopping Icons

Flat Vector Shopping Icons

Another really popular trend is flat design. This has been applied to everything from mobile apps to websites and yes, even icons.

Take a look at this vector icon set featuring 80 different shopping icons. Some are colored, some are just plain line icons, but they’re all super easy to use and customize.

You can nab the pack as static PNGs or as vectors in AI/EPS format. And they’re free to use on commercial projects. Just note that the license requires a simple link back to the original website.

Shipping and Ecommerce Icons

Shipping and Ecommerce Icons

The online marketplace EpicPxls includes some really high-quality resources. It’s a great place for designers to release premium and free assets to the world – all while building a following for their work.

Take a look at this icon set created by EpicCoders. It’s been downloaded well over 2,000 times and it’s really quite unique.

One glance at the style and you’ll see what I mean. It feels vibrant, almost cartoony, yet not over-the-top.

This pack should work great for minimalist sites, along with any ecommerce shops that match the color scheme.

Hand-Drawn Icons Set

Hand-Drawn Icons Set

It can be tough designing a page with hand-drawn elements. But they do add a certain creativity into any website and that goes double for these free icons.

The entire ecommerce icon pack is focused on hand-drawn elements. From gift box icons to little shopping baskets and checkout features, all the graphics you’ll need can be found in this set.

I would recommend using this set for a landing page design rather than a checkout UI. You may have difficulty getting these icons to blend naturally for a checkout interface, but they would grab attention on a web shop’s homepage.

Credit Cards Pack

Credit Cards Pack

No ecommerce website is complete without credit card icons.

If you are designing a shop that accepts credit cards then have a look at these free CC icons released on Dribbble.

Designer Guy Levin created 9 different credit card icons – all in one Adobe Illustrator file.

They’re super clean, easy to customize and will blend anywhere on your page.

Linear Ecommerce Icons

Linear Ecommerce Icons

I do love my line icons, so they make plenty of appearances on this list.

The Pixlov website released their own pack of free linear ecommerce icons following this exact style. And the pack is just phenomenal.

You wouldn’t think 33 icons would amount to a whole lot but this set has plenty of designs to pick from. I just wouldn’t recommend them for a checkout screen, as it seems more suited for a landing page or a “features” page about the store.

These could also work well in your own newsletter to push your products even further.

Noun Project Ecommerce

Noun Project Ecommerce

If you aren’t familiar with The Noun Project, you should definitely check it out. The website curates a ton of free icon packs from around the web and from many designers worldwide. There’s a lot to go through, but for this post I would like to suggest the ecommerce collection, made by Anton Scherbik.

They are the simplest of simple line icons. The pack includes several great choices, like checkout bags and cart icons in a variety in styles.

Checkout and Delivery Icons

Checkout and Delivery Icons

The Codrops blog is simply amazing. They regularly publish high-quality tutorials with freebies you can use for your own projects.

One example is this checkout icon set created by EpicPxls.

It comes with 35 unique icons that have a fill effect that you just won’t find elsewhere. The fill colors ever-so-slightly hang outside of the line work, which is probably the first thing you’ll notice.

This set definitely provides a unique twist.

Customized Icon Set

Customized Iconset

Last but certainly not least is this awesome icon set by Graphicboat.

These icons won’t necessarily fit in everywhere. But they can draw attention fast and get people curious to learn more about your shop.

I’d say these icons would fit best in a header background, in a “features” page, or maybe somewhere near your CTA button.

That’s the list! If you still haven’t found what you’re looking for, feel free to search Google for more. New freebies come out every month, so you never know what you’ll find.


How to Improve Your Data Privacy on Facebook

Original Source: https://www.hongkiat.com/blog/how-to-improve-privacy-on-facebook/

This guide will tell you how to make necessary changes in your Facebook privacy settings to protect your data on this social network.

The post How to Improve Your Data Privacy on Facebook appeared…

Visit hongkiat.com for full content.