EVERYDAYS – Cinema 4D Free Project Files

Original Source: http://feedproxy.google.com/~r/abduzeedo/~3/RyOmE8FLF4Y/everydays-cinema-4d-free-project-files

EVERYDAYS – Cinema 4D Free Project Files
EVERYDAYS - Cinema 4D Free Project Files

abduzeedoSep 06, 2019

Constantin Paschou aka The french monkey shared an incredible 3D project titled ”EVERYDAYS”. It is an open source project, dedicated to Cinema4D users. Counting more than 800+ Free Project Files. The Everydays Open Source Project, is dedicated to all Cinema4D users wanting to learn from the artist. TFMSTYLE is providing all of the projects you’ll find below, for you to look at, learn, and help you out in your journey learning Cinema4D! All the assets you will find can be used as wanted, even commercially. 

All the project files are available on https://www.tfmstyle.com/cinema-4d

3D Scenes


The Best Free Stock Video Sites

Original Source: http://feedproxy.google.com/~r/1stwebdesigner/~3/tcL8_AjsaA4/

Free stock videos are an insanely valuable resource for web designers and video editors. A sweeping landscape shot can set the scene for a website’s animated background, or nicely fill a transition in a video. But of course, most people can’t afford the equipment to record such footage.

Stock videos are a quick and easy way to find short, high quality clips when you need them. But videography isn’t cheap, so buying footage will often cost you quite a bit.

Luckily, there are sites out there that collect free videos you can use in personal and commercial projects, and we’re going to go over the features of each today. Here are a few of the best free stock footage sites you can find.

Mixkit

Example from Mixkit

On Mixkit, you’ll find professional HD videos, all sorted and tagged so they’re easy to search for. There’s business, landscape, and lifestyle videos, alongside abstract and even animation footage. The Mixkit license has a few light stipulations, but that’s all.

Vidsplay

Example from Vidsplay.com

There’s quite the variety of unique stock footage in this modest, but quality collection. There are a few hundred videos here, and they can be used anywhere as long as you add unique value and credit the website.

Pexels Videos

Example from Pexels Videos

Pexels is jam packed with awesome stock videos that nobody will believe you downloaded for free. As far as the license goes, pretty much anything is allowed, so get as much of this great footage as your project requires.

Pixabay

Example from Pixabay

Pixabay is full of diversity, and that’s no exception in their video section. You can sort by effects, categories, resolution, or tags. Many videos on Pixabay are focused around pretty aesthetics, so try it out if you need eye-catching footage. The license here is very unrestrictive.

ISO Republic

Example from ISO Republic

If you’re looking for gorgeous CC0-licensed stock footage, ISO Republic is the first place to check. There’s not a ton here, but what exists would make a great addition to your project. You’ll love these videos. As a bonus, there is plenty of outstanding free stock photography here as well.

Coverr

Example from Coverr

Coverr was created just for web designers who need a full screen hero video for their homepage. There’s plenty of exceptional, well-sorted footage to look through, all free to use and optimized for your website.

Life of Vids

Example from Life of Vids

There’s so many HD and 4K videos to choose from here. Get lost in the collections of vivid nature- and people-focused imagery. There are absolutely no restrictions except for a 10-video redistribution limit.

SplitShire

Example from SplitShire

Looking for stunning landscape videos to beautify your video or website? Take a look through SplitShire’s collection and see if they have what you need. Though SplitShire is a stock photography website, they’ve branched out into footage and are doing awesome at it.

Videvo

Example from Videvo

With nearly 8,000 videos and more being added every day, Videvo is a great place to start in your hunt for the perfect clip. Sort by popular or recent, or check out the tags and the incredibly helpful “similar clips” on each entry. There’s a lot of licenses, so make sure to check out Licensing 101 before you download.

Videezy

Example from Videezy

Stock footage, animation, After Effects templates, and plenty of nature videography in 4K and HD are waiting to be found on Videezy. Some licenses allow commercial use while others require credit, so check the licensing page before you grab up these great free videos.

Free Videos for Your Projects

There are many places to find free stock videos on the internet, and we’ve just scratched the surface. If you need footage, one of these 10 choice collections should have what you need. Supplement your full videos, or include them in your website designs.

Just make sure you always check the site license before you download free videos. Most of these are totally free for use, but some may only be used commercially or with other stipulations. Check for a CC0 license or read the terms carefully.

If everything seems right, then you’re good to start downloading some beautiful stock videos.


Best Graphic Design Books To Spark Inspiration Right Now

Original Source: http://feedproxy.google.com/~r/Designrfix/~3/Lzb4abO6INk/best-graphic-design-books

Good graphic design can control people’s attention. But skill in the field does not come from anything. Experts practice at graphic design and study the fundamentals. As such, if you want to learn from the greats, then you should review their works and concepts until you get inspiration.  But where do you begin in the vast […]

The post Best Graphic Design Books To Spark Inspiration Right Now appeared first on designrfix.com.

97% Off: Get the Professional Graphic Designer Bundle for Only $29

Original Source: http://feedproxy.google.com/~r/Designrfix/~3/xnY2Bl1LGHY/97-off-get-the-professional-graphic-designer-bundle-for-only-29

Graphic design is a top choice job for a lot of people. It allows you to put your creative juices to good use, there are opportunities for advancement, and good pay. The downside is that the cost of training can be quite expensive. There is no guarantee that you’ll get a job after the training. […]

The post 97% Off: Get the Professional Graphic Designer Bundle for Only $29 appeared first on designrfix.com.

SitePoint Premium New Releases: Design Systems, SVG & React Native

Original Source: https://www.sitepoint.com/sitepoint-premium-new-releases-design-systems-svg-react-native/?utm_source=rss

We’re working hard to keep you on the cutting edge of your field with SitePoint Premium. We’ve got plenty of new books to check out in the library — let us introduce you to them.

Design Systems and Living Styleguides

Create structured, efficient and consistent designs with design systems and styleguides. Explore materials, typography, vertical rhythm, color, icons and more.

➤ Read Design Systems and Living Styleguides.

Build a Real-time Location Tracking App with React Native and PubNub

In this guide, we’re going to use React Native to create real-time location tracking apps. We’ll build two React Native apps — a tracking app and one that’s tracked.

➤ Read Build a Real-time Location Tracking App with React Native and PubNub.

Practical SVG

From software basics to build tools to optimization, you’ll learn techniques for a solid workflow.

Go deeper: create icon systems, explore sizing and animation, and understand when and how to implement fallbacks. Get your images up to speed and look sharp!

➤ Read Practical SVG.

Create an Offline-first React Native App Using WatermelonDB

In this tutorial we’ll create an offline-first movie search application with a title, poster image, genre, and release date. Each movie will have many reviews. We’ll use WatermelonDB to provide the database functionality for our app.

➤ Read Create an Offline-first React Native App Using WatermelonDB.

And More to Come…

We’re releasing new content on SitePoint Premium regularly, so we’ll be back next week with the latest updates. And don’t forget: if you haven’t checked out our offering yet, take our library for a spin.

The post SitePoint Premium New Releases: Design Systems, SVG & React Native appeared first on SitePoint.

95% Off: Get the Facebook Ads and Facebook Marketing Course for only $9.99

Original Source: http://feedproxy.google.com/~r/Designrfix/~3/A7AEcqUZf1c/95-off-get-the-facebook-ads-and-facebook-marketing-course-for-only-9-99

Over the last decade, there were hundreds of social media channels introduced on the market. Some have stood the test of time, while others never caught on. Despite the introduction of different social channels, Facebook still remains to be the biggest social media platform to date. In fact, this behemoth social media platform has over […]

The post 95% Off: Get the Facebook Ads and Facebook Marketing Course for only $9.99 appeared first on designrfix.com.

How to Get Your Newsletter Read

Original Source: https://www.webdesignerdepot.com/2019/09/how-to-get-your-newsletter-read/

Being in the business of building websites, it’s easy to forget that no matter how great they look, how well they perform, or how optimized they are for search, a website alone will not attract visitors back to it. You have to give them a good reason to return.

Blogging and other content generation is one way to do this. Running special promotions is another. Lead magnets are a good idea, too.

That said, we still run into the problem of how to let visitors know to return and see all of this new and awesome stuff that’s been added to the site.

A newsletter is a great way to do this. The only thing is, you have to, first, convince them to subscribe and, then, create a regular newsletter service that’s worth reading.

You also have to figure out how to make this free service one that’s worth your while. In other words, how do you get visitors to not only subscribe and open your newsletters, but to click on the links and take action on your site?

What Makes a Newsletter Successful?

Let’s start by looking at what makes a newsletter successful.

In a 2019 email marketing report by GetResponse, they revealed the average newsletter performance for all their users:

These are the metrics you must pay attention to when assessing the success of your own newsletter:

Open Rate: An email service provider will first remove the number of emails that bounced (i.e. were undeliverable) from the count. It then divides the number of opened emails by the total number of subscribers. This tells you at what percentage of subscribers opened them.

# opened emails / (# sent emails – # bounced emails) = Open Rate

Click-through Rate: A similar calculation is performed to identify the rate at which people clicked on links in your emails. This is a more important metric as it indicates that subscribers not only received the email, but cared enough about the message to take action (and go back to your site)!

# clicked emails / (# sent emails – # bounced emails) = Click-through Rate

Click-to-open Rate: This formula takes it a step further and asks you to look at how effectively you’re converting over email. In other words, for the people who were persuaded to open your newsletter, what percentage of them followed your call to action?

(# unique clicks / # unique opens) = Click-to-open Rate

Unsubscribe Rate and Spam Rate are also important to keep your eyes on. These metrics will give you a good idea of how subscribers feel about your newsletters and whether they’re missing the mark or are a valuable asset in your marketing arsenal.

How to Increase Your Newsletter Open and Click Rates

Your newsletter data can do a lot more than just tell you whether or not your email marketing efforts have been successful. You can use it to identify problem areas, too.

Learn how to read the data and you’ll be able to repair the email marketing flow to get more people to sign up for your newsletter, open it, and click back to your website.

When You Don’t Have Any Signups

There are a number of things that may be wrong here, but they all stem from your website and, more specifically, the newsletter subscription form on it. For starters, how are you serving the form to your visitors?

Is it as a pop-up? That may be your issue right there. Our visitors are inundated with pop-ups: push notification requests, lead gen giveaways, cookie consent requests, site abandonment warnings, and so on. Don’t design your form so that it’s easy to dismiss.

What about the design itself? Does it stick out on the page like a sore thumb or, conversely, get lost in the design? Are you asking for too much information? Are there any other red flags?

Scroll to the very bottom of this page and you’ll find WebDesigner Depot’s ever-present subscription form:

Not only is this form easy to fill out, but it includes all sorts of positive encouragement and trust marks around it.

Sharing the number of subscribers, promising exclusive access, and asking for explicit consent are all great ways to start a relationship with a subscriber. That way, when you do send that first newsletter their way, there’s no confusion as to what it is or what kind of value they’re going to get from it:

When There Aren’t Many Opens, But Bounces Aren’t an Excuse

Let’s say your bounce rate is low, so you know that subscribers are getting your newsletters. Yet, your open rate is abysmal (like below 5%). What’s going on here?

Something’s happening the second your email hits their inbox.

First, take a look at your sender email. Does your address match the name of your brand or is it something like jason12456@hotmail.com? If you have a website, then your email address needs to match the domain name. The same goes for the name that shows up in the “From:” field.

Another thing that could be happening is that your subject line is turning subscribers off.

This is Social Native’s newsletter:

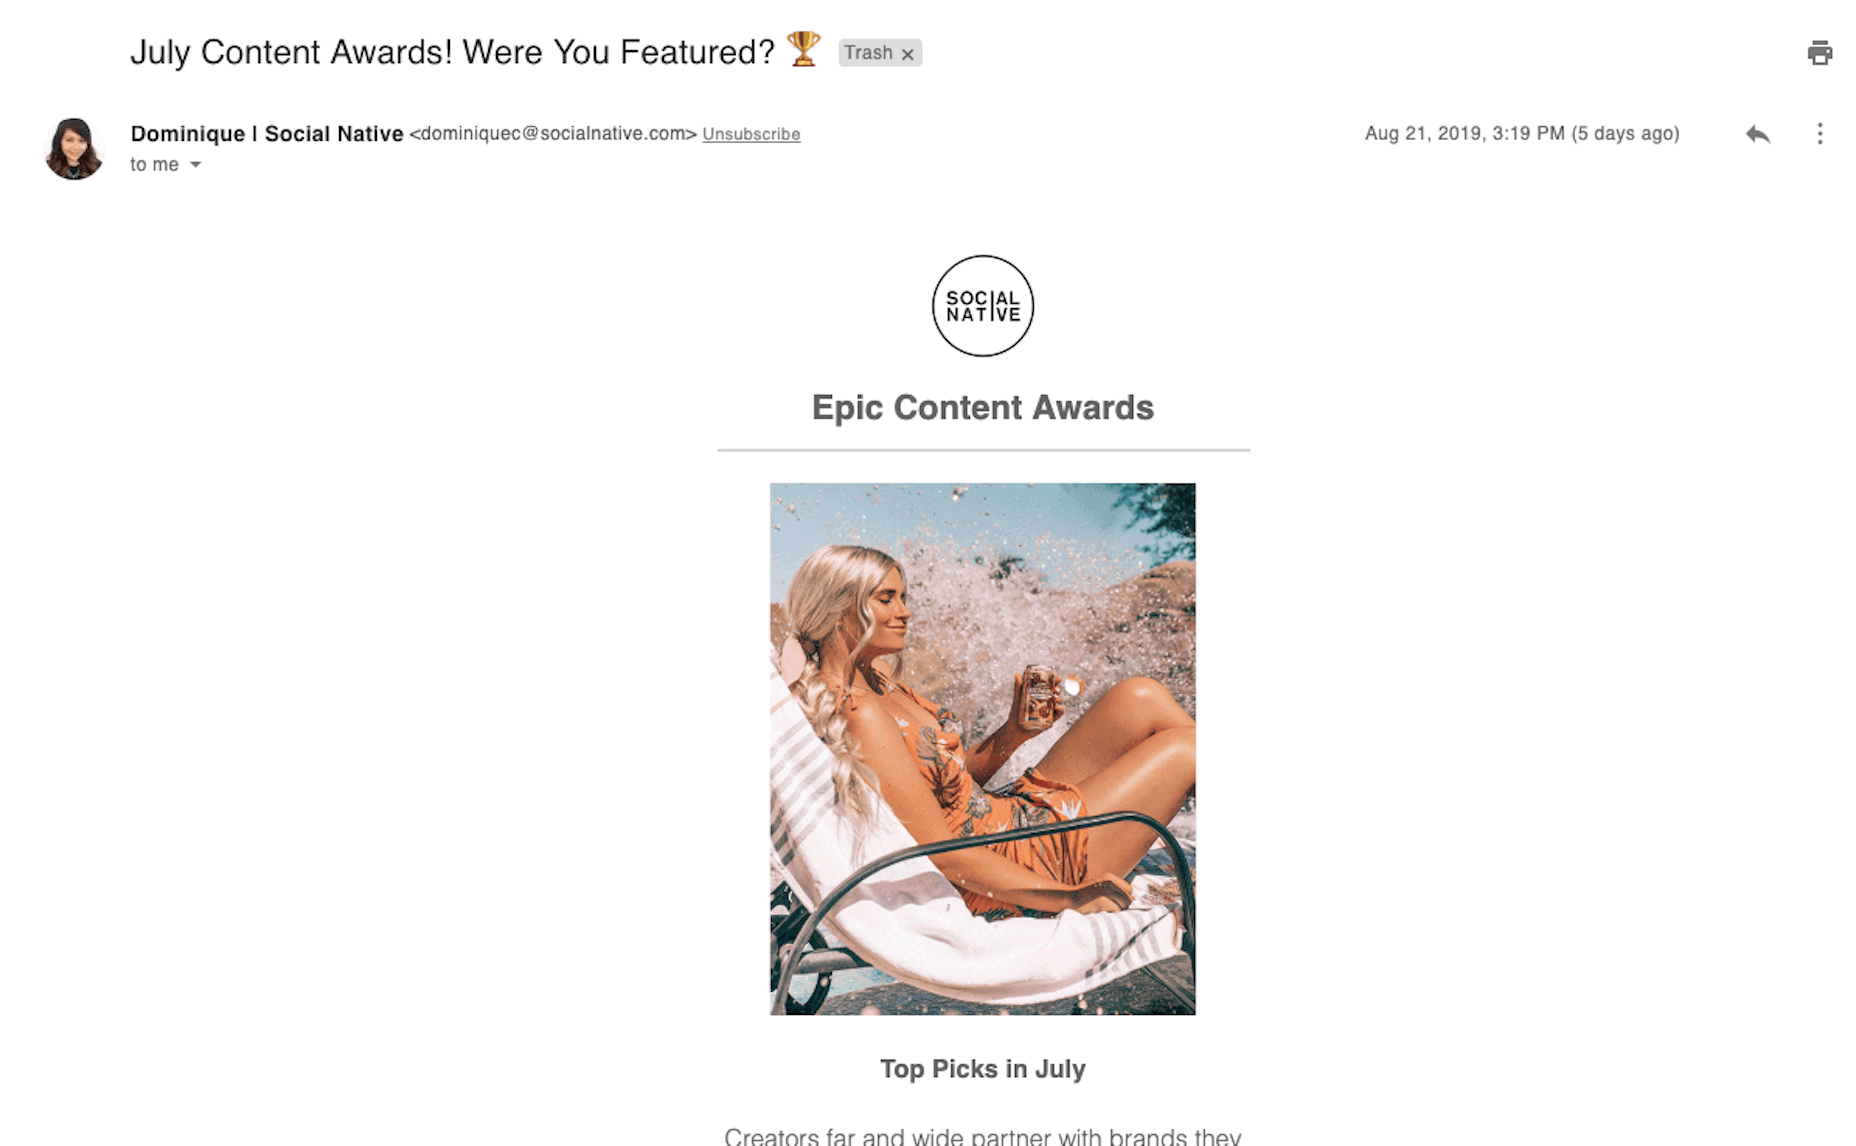
Notice how the message comes from a real person (with a photo and all) whose email address matches the domain name. That’s good. Also notice how appealing that subject line is: “July Content Awards! Were You Featured? ?” Heck, it even includes an eye-catching emoji. That’s even better.

The subject line is short, snappy, and inviting. What’s more, it tells subscribers exactly what they’re going to see in the newsletter.

While a little bit of mystery might work in some cases to increase open rates, be very careful. Unless your subscribers know you well and trust the content you send them, sending a subject line like “How many fingers am I holding up?” likely won’t help your open rates. Always err on the side of clarity and positivity if in doubt.

When Your Newsletter Is Getting Opened, But CTR Is Too Low

Like I said earlier, it’s important to know your open rate, but it doesn’t mean much if you get 40% opens but no clicks. If that’s what’s happening to you, then there are one of a few underlying issues here.

The first is that the design sucks. It could be a number of things: the color palette is jarring, the images aren’t loading, the typography is difficult to read. Or it could be because there’s no design at all, like this example from the Library of Congress:

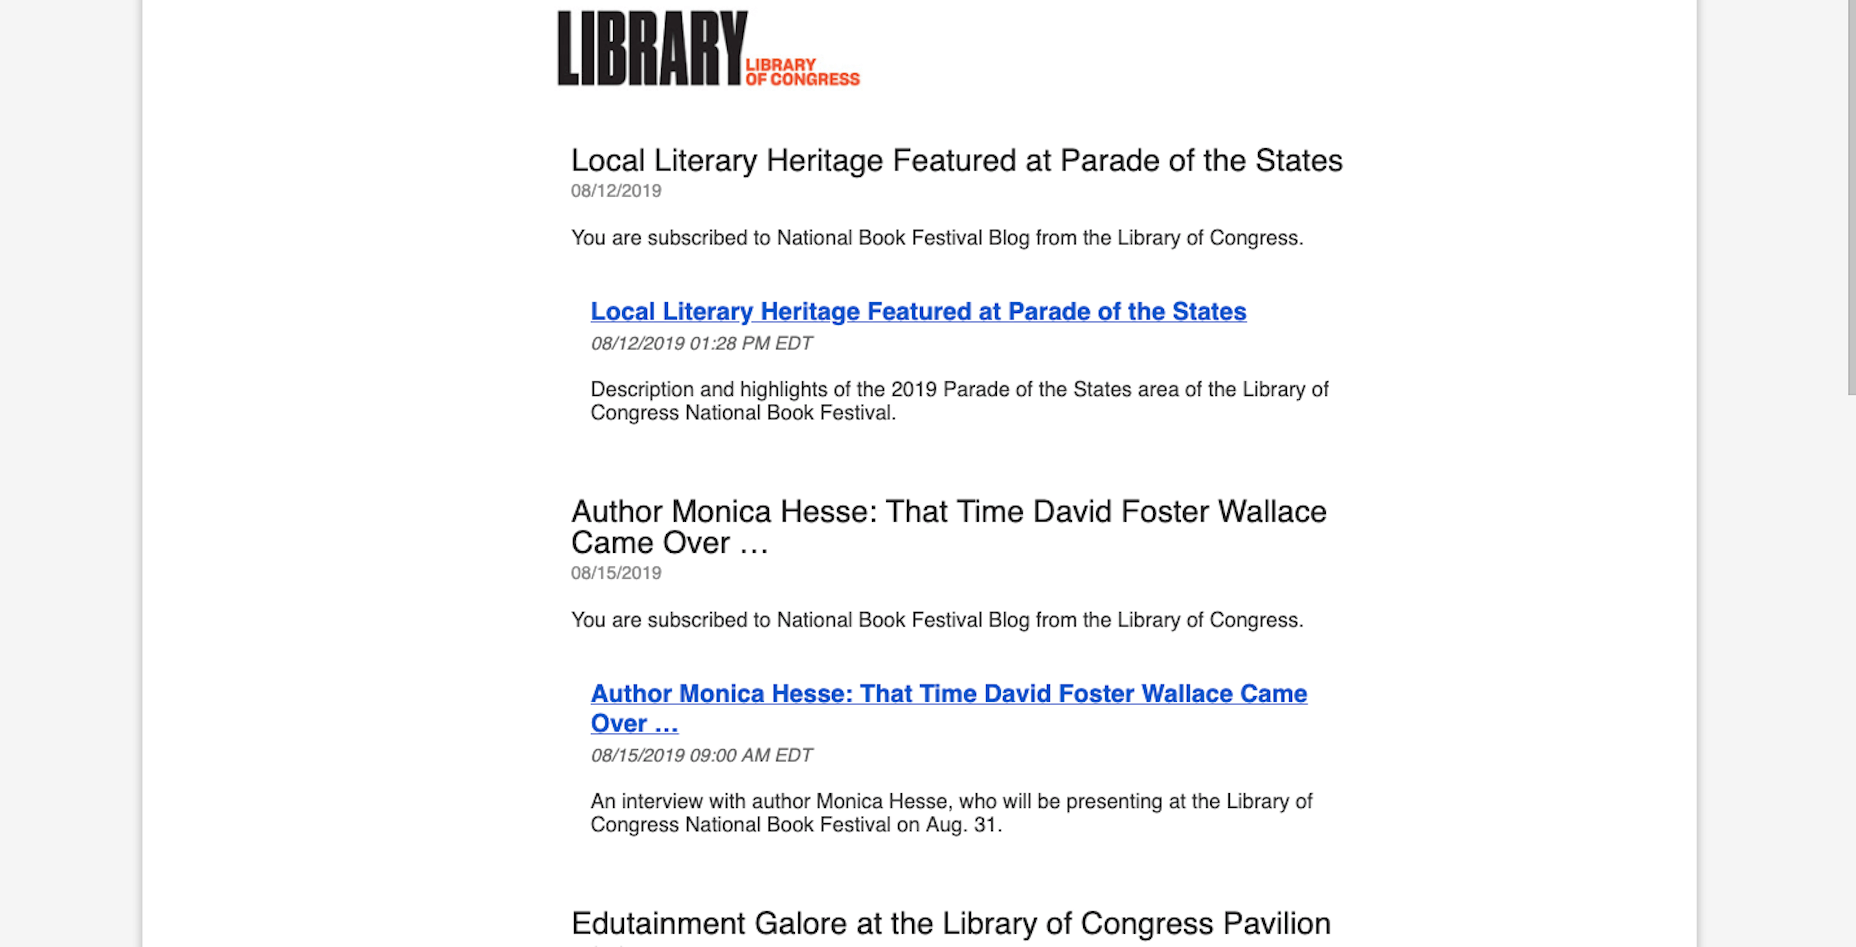
The newsletter has no visual component and the content itself is poorly composed. Notice how it says “You are subscribed…” under the first instance of each blog post title.

The second reason you might not be getting clicks is that there’s nothing of value in the message.

This is a great example of how to provide value in your newsletters. This one comes from MyEyeDr.:

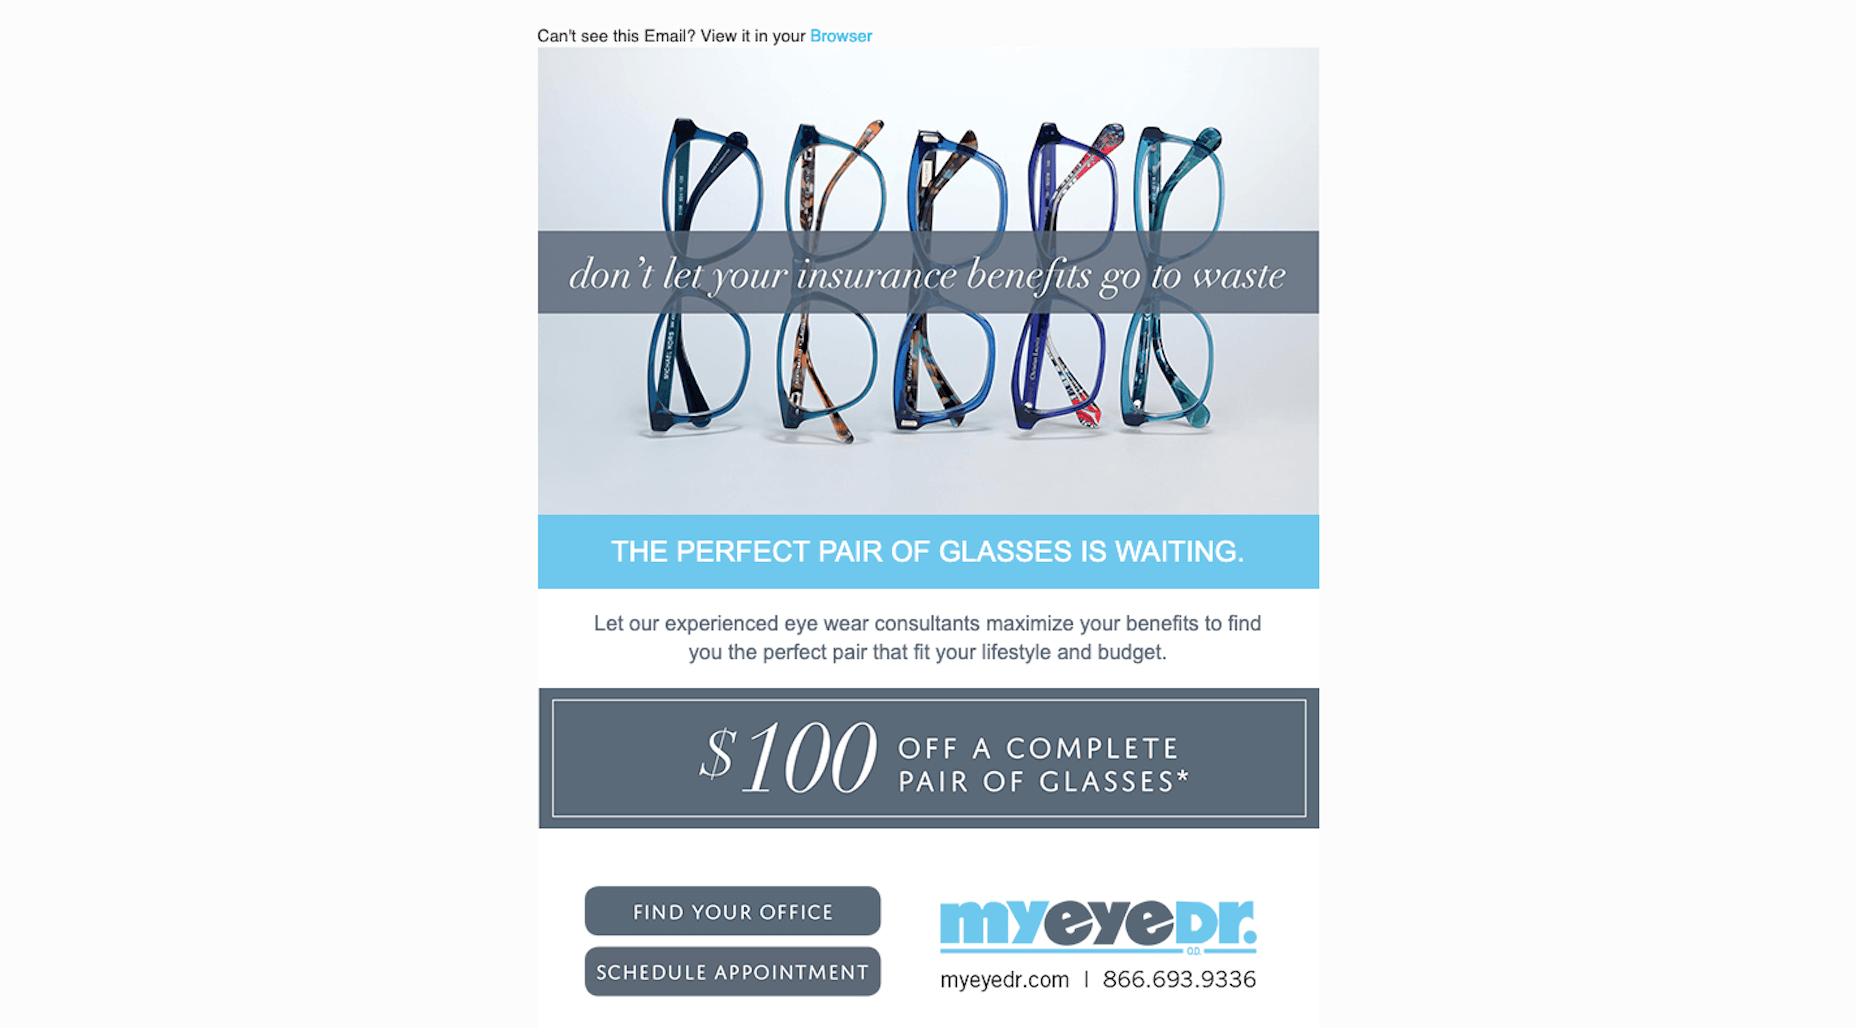
It’s beautifully designed, there’s a clear offer for $100 off what would otherwise be an expensive set of glasses, and the calls-to-action make it easy to take next steps.

Another thing to be mindful of is the length of your newsletter. Unless your subscribers signed up to receive lengthy diatribes from you every week, save those speeches for your blog. You need the content of your message to be concise, valuable, and readable if you want people to click your links.

When You Have a Good CTR, But Your Landing Page Bounce Rate Is High

Okay, so you’ve gotten your subscribers to open and click. For some reason, though, there’s nothing happening on the landing page you’ve directed them to.

The problem here is obvious: the landing page doesn’t fulfill the expectations set in the email.

If it’s a blog post you sent them to, review the content of it. Does the description match the post? Is the topic too shallowly explored? Are there broken links, missing images, or other errors on the page?

If it’s a sales landing page you sent them to, are you clear in the newsletter where you were about to send them? Does the landing page match the rest of your site or could it possibly pass for a phishing page? Is there an overwhelming amount of content to get through?

It doesn’t really matter where the link goes so long as you set the right expectations in your newsletter and then deliver on the linked page.

For example, this is a recent newsletter from Stephen King:

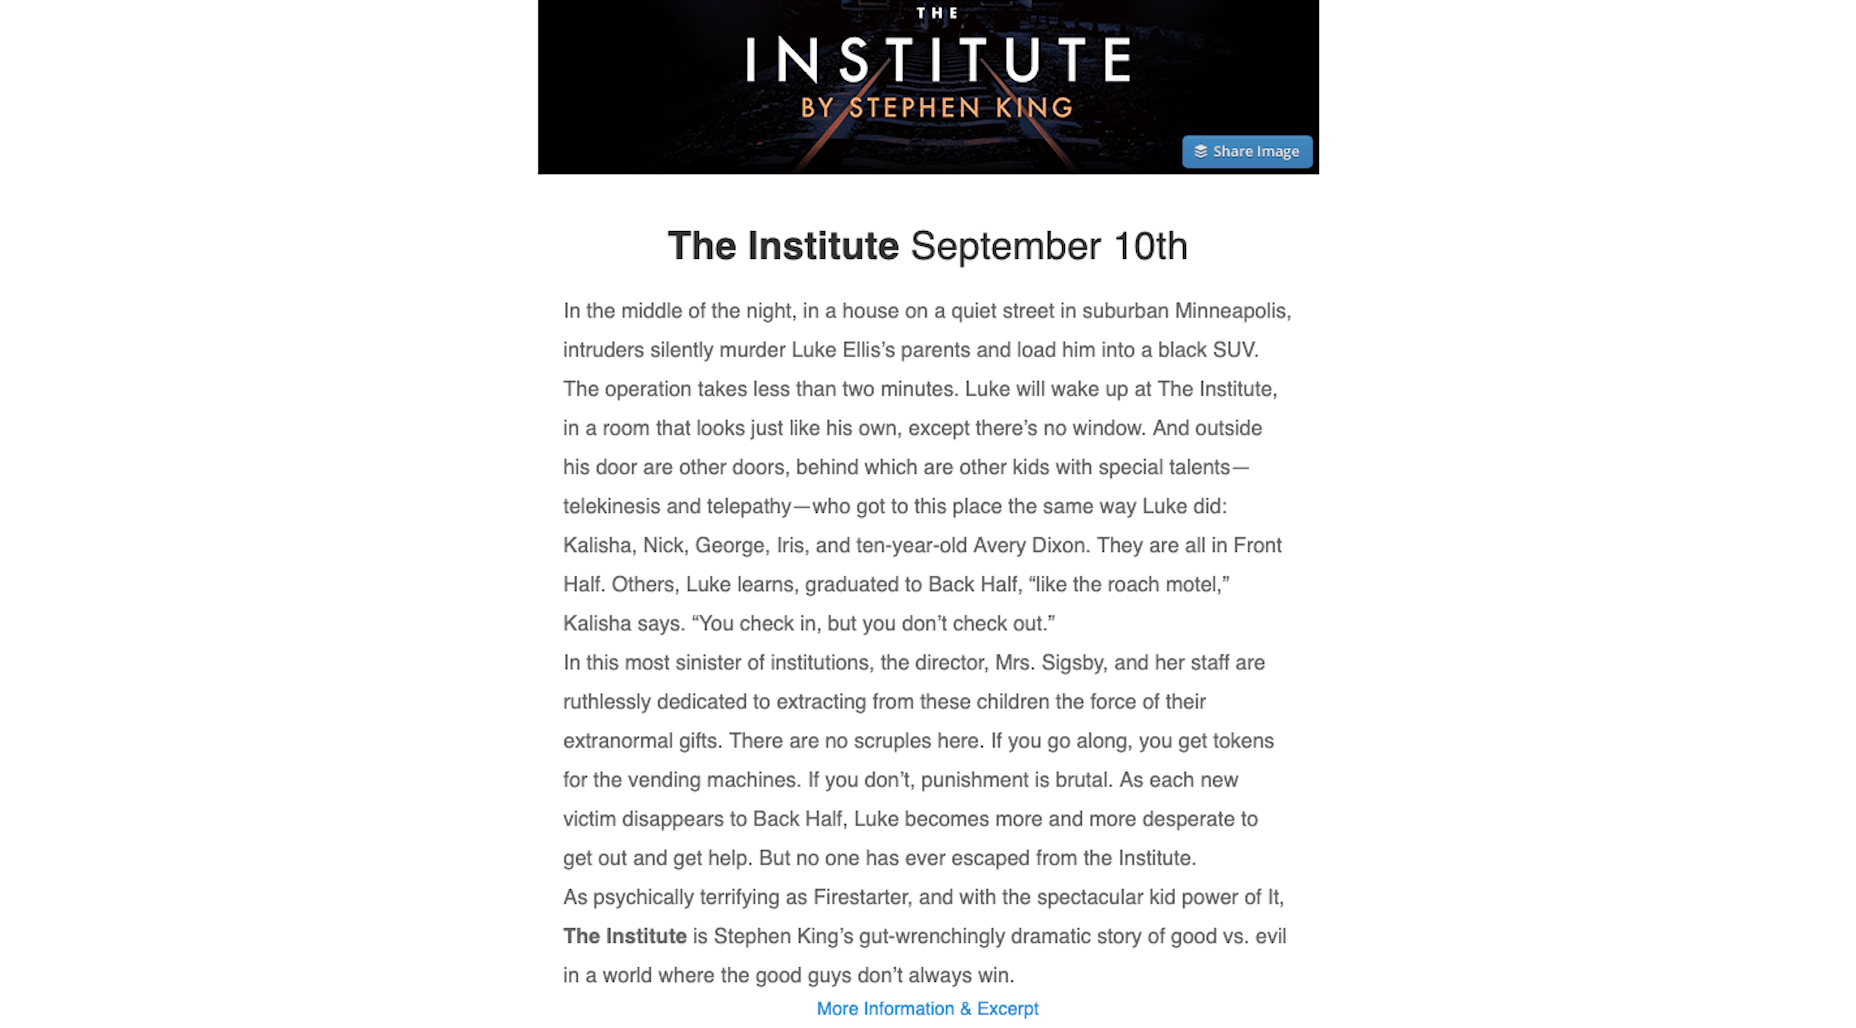
It summarizes a new book he’s about to release. The link then tells subscribers that they can get more information about the upcoming book as well as an excerpt. And that’s exactly what happens when they arrive on the beautifully designed landing page:

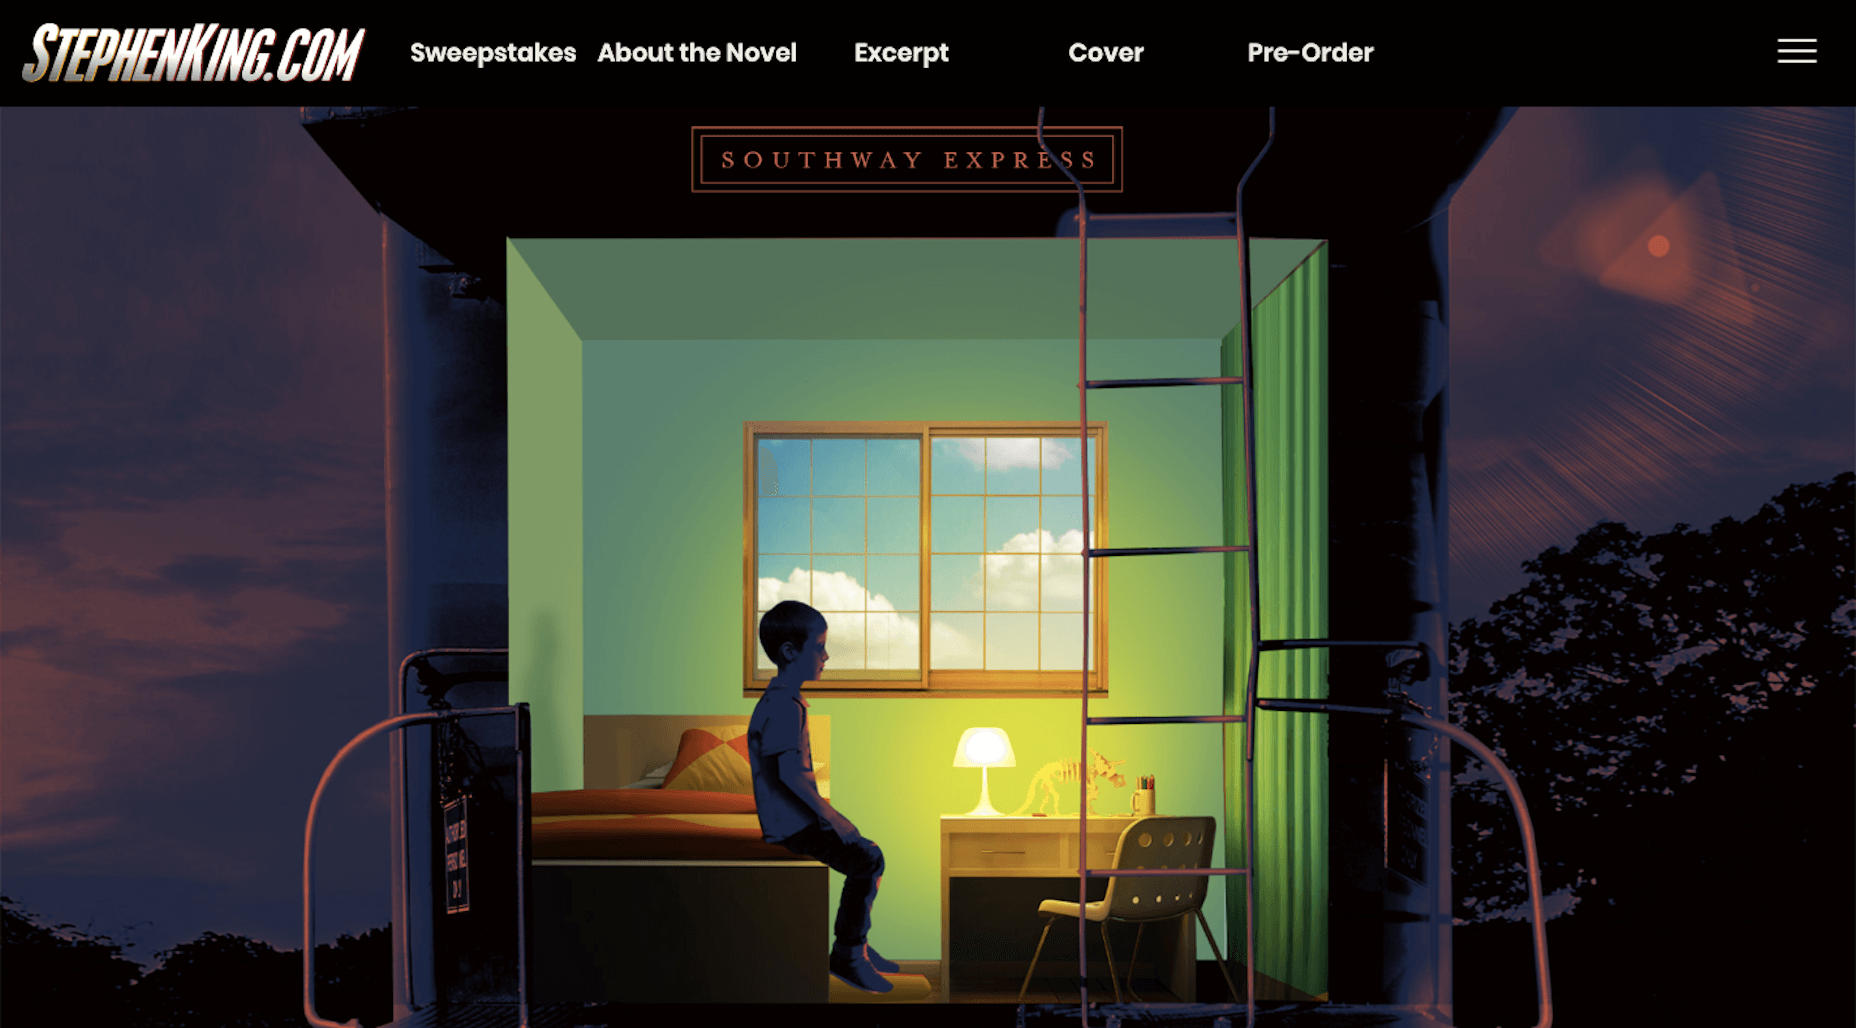
You’ve earned the trust of your website visitors for them to subscribe to your newsletter. And you’ve impressed them enough with your email to persuade them to return to your site. Don’t betray their trust by directing them somewhere that hasn’t been as well thought through as everything else until this point.

Wrap-Up

You might find after all this that your metrics are a mixed bag. Sometimes you get a lot of opens and clicks, and other times you don’t. That might just mean that your newsletter content is inconsistent and that you need to refine your strategy so you only deliver the kinds of content your subscribers find the most value in. It also might mean that you need better list segmentation.

If you suspect something is off and that your open and click-through rates should be higher, A/B test some alternative designs and content. You may be surprised by what you find.


Featured image via DepositPhotos.

Source

p img {display:inline-block; margin-right:10px;}
.alignleft {float:left;}
p.showcase {clear:both;}
body#browserfriendly p, body#podcast p, div#emailbody p{margin:0;}

50 Cool Cosplay Costumes Design, Vol. 2

Original Source: https://www.hongkiat.com/blog/amazing-cosplay-costumes/

Cosplay is a great outlet for fans to show off their awesome self-made costumes, beautiful craftsmanship, and the love for their favorite fictional characters. There is an entire spectrum of the art…

Visit hongkiat.com for full content.

The Top 5 JavaScript Frameworks for 2019

Original Source: http://feedproxy.google.com/~r/1stwebdesigner/~3/9ofTNyVzHE4/

JavaScript, as defined by Mozilla, is:

“a scripting or programming language that allows you to implement complex things on web pages — every time a web page does more than just sit there and display static information for you to look at — displaying timely content updates, interactive maps, animated 2D/3D graphics, scrolling video jukeboxes, etc. — you can bet that JavaScript is probably involved.”

Essentially JavaScript, often abbreviated as JS, is used to power the interactive content/media on a page. JS helps you do more with your content so you can provide the user with animations, content relevant to them based on certain parameters, and special graphics. This is used far and wide by websites and global companies for a variety of purposes. Some popular examples include:

Netflix distributed services
Facebook’s creation of React
Walmart marketplaces

In this article we are analyzing the top five JavaScript frameworks for 2019.

What’s a Framework?

A framework is “an abstraction in which software providing generic functionality can be selectively changed by additional user-written code, thus providing application-specific software.” Frameworks are built on top of languages to speed up processes and develop specific tools, you can see some examples of CSS frameworks for design here.

Vue.js

Example from Vue.js

Vue is a progressive framework for building user interfaces. Vue is designed from the ground up to be incrementally adoptable, making it easier for integrations and connecting to existing projects.

Vue is also super-fast, with 20KB min+gzip Runtime and minimal optimization needed to power your applications.

The way Vue works is through template styles similar to Angular. It is a fast and easy language to work with for apps, UI, and interactive interface development, and it has the ability to power single web page projects too.

One of the biggest reasons people like Vue over some of the other frameworks is because a lot of time is saved during rendering. Vue tracks the component’s dependencies so the system already knows which components need to be re-rendered when something changes.

See examples of cool websites, apps, and projects made with vue.js.

Angular

Example from Angular

Angular is built for the future. The framework is maintained by a team of engineers who share a passion for making web development feel effortless. They believe that writing beautiful apps should be joyful and fun. Learn more about Angular here.

Angular is useful today because it utilizes cutting edge Typescript for larger applications. Typescript is defined as ‘JavaScript that scales’. Because of the way Typescript was designed, millions of developers are able to use existing JavaScript code, incorporate popular JavaScript libraries, and call TypeScript code from JavaScript. This makes it a much easier process for large projects with lots of collaborators. Having Angular built on top of this is efficient and allows developers to focus more on speed and performance.

Angular follows a classic MVP (Model View Presenter) pattern for complex applications. This is a concept people use to break down large projects into specific ‘separation of concerns’ and areas to focus on developmentally. You can read more about this concept here.

Check out made with angular to see cool examples of projects built on this framework.

React

Example from React

React is a JavaScript library for building user interfaces. React was created by Facebook, initially for use in the newsfeed and Instagram applications. The framework was open-sourced at JSConf US in May 2013.

Similar to Vue, React is efficient in rendering and only changing necessary components when interacting with the state. React also changes the way people can interact with states and works to evolve the development process. It is component based, meaning each encapsulated section can manage its own state, which is important in large scale and complex UIs.

What is React?

This video does a great job breaking down exactly what React is and how it is used.

Express

Example from Express

Express is a minimalist framework that runs on top of Node.js, a JavaScript runtime built on Chrome’s V8 JavaScript engine and used by many large scale applications.

Express is a fast and minimal web app framework for both web and mobile applications. Think of it as the framework for building websites. Express helps you quickly get your apps live, while providing a number of methods for creating APIs easily, too.

A lot of other popular frameworks are built on top of Express because of the simplicity and ease of integration. You can view the full list here.

Express.js Tutorial: Build RESTful APIs with Node and Express

Recommended video from Programming with Mosh on Express:

Redux

Example from Redux

Redux is a data management system that is mainly used with React. For large scale projects with lots of moving parts, Redux helps to organize the data and keep everything running predictably even in vastly different environments.

Redux places a focus on debugging and ease of use. They write:

“The Redux DevTools make it easy to trace when, where, why, and how your application’s state changed. Redux’s architecture lets you log changes, use “time-travel debugging”, and even send complete error reports to a server.”

One important thing to note about Redux is that you should not use it unless absolutely necessary! According to the Redux FAQ, “the need to use Redux should not be taken for granted.” Multiple early contributors to the project proclaim that it is something you’ll know when you need, and that you only need when other problems arise.

Dan Abramov says: “I would like to amend this: don’t use Redux until you have problems with vanilla React.”

So just keep that in mind before jumping in full steam to this powerful, and somewhat advanced framework. It is definitely useful, but only at large scale and when dealing with large amounts of data changing over time.

Read more about recommended uses for Redux here.

Going Beyond Vanilla JS

One thing all of these frameworks have in common is that they help developers accomplish more in less time. That’s a big part of their appeal.

Each framework has its strengths, weaknesses and ideal use cases. Which one you choose really depends on the specific needs of your project.

But, now that you know a bit more about them, you’ll have a head start on picking the right one.


How to make a photo collage in Photoshop CC

Original Source: http://feedproxy.google.com/~r/CreativeBloq/~3/5nGuQVedp3c/make-a-photo-collage-in-photoshop-cc

There are several reasons to learn how to make a photo collage in Photoshop. Where individual photos capture only single moments in time, collages can be used to illustrate a whole story, celebrating anything from a partner’s birthday to archiving a treasured family holiday. Collating one is also a good way to test your composition skills.

There are a great many collage maker apps out there for assembling images (including the new auto-collate function in Photoshop Elements), but none of them will give you the same degree of control as Photoshop CC, which allows you to complete the whole process using just one app, including any image adjustments.

Photoshop is one of the most commonly used apps for this type of work. If you’re not already signed up, get Adobe Creative Cloud to access an impressive range of creative software.

In this Photoshop tutorial you will learn how to import images into Photoshop, lay them out onto a single page and border them with coloured frames.

01. Choose your images

You can use a photo organiser to make your job easier, but previewing them in Finder will work just as well.

First up, pick your images. It’s impossible to condense a whole photo collection down onto one single page, so you need to be selective, sticking to a maximum of 5-8 pictures. Image choice is important if you want to retain the interest of the viewer – collages aren’t just spreads of random images, but represent a flowing narrative, displaying a diverse range of angles, shapes and styles.

Try to use images that suit different frames sizes, picking only your best and most appropriate images. Theming the collage along the lines of one consistent colour or common element can bring the whole thing together, while contrasting images create tension and tend to draw the eye. Every image should be well-exposed and in focus.

If you aren’t sure what looks good, check out some magazine layouts for inspiration. Using a library organiser, like Lightroom or Bridge, streamlines the process, making it easier to sort through multiple photos at once, although Finder works just as well. Use this stage to make any necessary adjustments to your images before bringing them together.

My collage will feature a photoshoot of a Porsche 964 Carrera, so I have included wide, action shots as well as close-up details of the interior, showing the car off from every angle.

02. Create the document

The New Document window provides a choice of pre-loaded templates, which are a good starting point for any project

When you create your document, the size of the canvas will depend on the intended output of your collage, namely whether it’s for digital or print (most collages look better in landscape format). Photoshop’s New Document window presents a range of ‘document presets’ to make this choice easier, whether it’s page sizes for print or standard digital sizes for web and mobile. If you want a custom size, there are also options to change the width, height, resolution and colour mode. You can edit this later in Image > Canvas Size. I have used a document size of 1920px x 1080px, RGB, a standard HD screen.

03. Import images

You can drag all of your images into Photoshop, straight in from the Finder window. Holding the Alt key down will add them as linked layers

There are various methods for gathering images into one file. Perhaps the simplest is dragging and dropping images from Finder, directly onto the canvas, which imports them as smart objects. The benefit of doing this is that you can reposition and resize them without any loss of quality. 

Alternatively you can embed the images as linked layers, which means they will appear on the canvas as low-res versions, while linking back to the original files on your computer, avoiding slow rendering times. Do this by holding the Alt key down when dragging and dropping your images into the file.

Another technique is to open all the images in separate Photoshop windows, selecting each with Cmd + A, copying with Cmd + C, then pasting into the master document with Cmd + V. You can also change your window arrangement to show two files at once, then literally drag and drop layers from one to the other.

04. Roughly position images

Use the Free Transform tool to resize layers on your canvas, trying different positions for greatest visual appeal

Before spending too much time refining the collage, you need to have the right images in the right positions. Move the images around the canvas, using the Selection tool, until they all seem to roughly fit the page. You can turn layers on and off using the eye icon to the left of each layer, in the Layers panel. Scale and rotate layers using the Free Transform tool (Cmd + T), grabbing the handles of the transform frame. Holding the Shift key will maintain the proportions, while holding the Alt key will scale out from the centre. You can find further options for transforming under Edit > Transform.

05. Draw borders

how to create photo collage in Photoshop

You can change the colour of shapes in the Fill window, where you can also add new swatches and create gradients

Add a single border using either the Pen tool (with Stroke applied) or the Rectangle tool, to break up the images. I drew a long white rectangle across the canvas, duplicated it with Cmd + J, moved and rotated it with Free Transform, then repeated the process until I had all my borders laid down, including one around the outer edge as a frame.

If you’re struggling to line up your images, you can drag guides out from the rulers (turn these on with Cmd + R or under View > Rulers). You can also select multiple layers and use Layer > Align to straighten them up.

06. Mask the spare image

ow to make a Photo Collage in Photoshop

Use masks to hide unwanted areas rather than deleting them outright, since masks can be edited later if you change your mind

With the borders now placed, it will be obvious that some of your photos are overlapping. Use the Marquee Tool to select unwanted areas on each layer, inverse this selection by right-clicking and selecting ‘select inverse’, then press the mask button at the bottom of the Layers panel (this looks like a circle in a box). You can edit your masks later, if you change your mind, by painting black and white into the mask area. Repeat this step for each layer until they’re all sitting flush against the border lines.

If you imported your images as Smart Objects, you can simply delete the unwanted areas instead of masking them, since you won't be losing any of the original image. If you then want to move the image inside the frame, double click on the layer to open the smart object window and move it there.

07. Add text and export

how to make a photo collage in Photoshop

Photoshop CC has plenty of options in the Character tab, including live text which changes the typeface of your copy as you scroll down the list

When you are happy with the layout of your collage, you may wish to add a title or a message. Select the Type tool from the toolbar and draw a text box onto your canvas, preferably over an area that is either very dark or light. Select a typeface and colour from the Character tab, then insert your text. If the text is unreadable, you might need to draw a solid box behind, then soften it by reducing the opacity or changing its blending mode. I also added an underline stroke, using eyedropper to pick the yellow from the image.

Save your image as a .psd file, so you can edit it later on, then export in whatever format you need.

Read more:

The best free Photoshop actionsThe 10 best alternatives to PhotoshopThe best laptops for Photoshop right now