How to make a photo collage in Photoshop CC
Original Source: http://feedproxy.google.com/~r/CreativeBloq/~3/5nGuQVedp3c/make-a-photo-collage-in-photoshop-cc
There are several reasons to learn how to make a photo collage in Photoshop. Where individual photos capture only single moments in time, collages can be used to illustrate a whole story, celebrating anything from a partner’s birthday to archiving a treasured family holiday. Collating one is also a good way to test your composition skills.
There are a great many collage maker apps out there for assembling images (including the new auto-collate function in Photoshop Elements), but none of them will give you the same degree of control as Photoshop CC, which allows you to complete the whole process using just one app, including any image adjustments.
Photoshop is one of the most commonly used apps for this type of work. If you’re not already signed up, get Adobe Creative Cloud to access an impressive range of creative software.
In this Photoshop tutorial you will learn how to import images into Photoshop, lay them out onto a single page and border them with coloured frames.
01. Choose your images
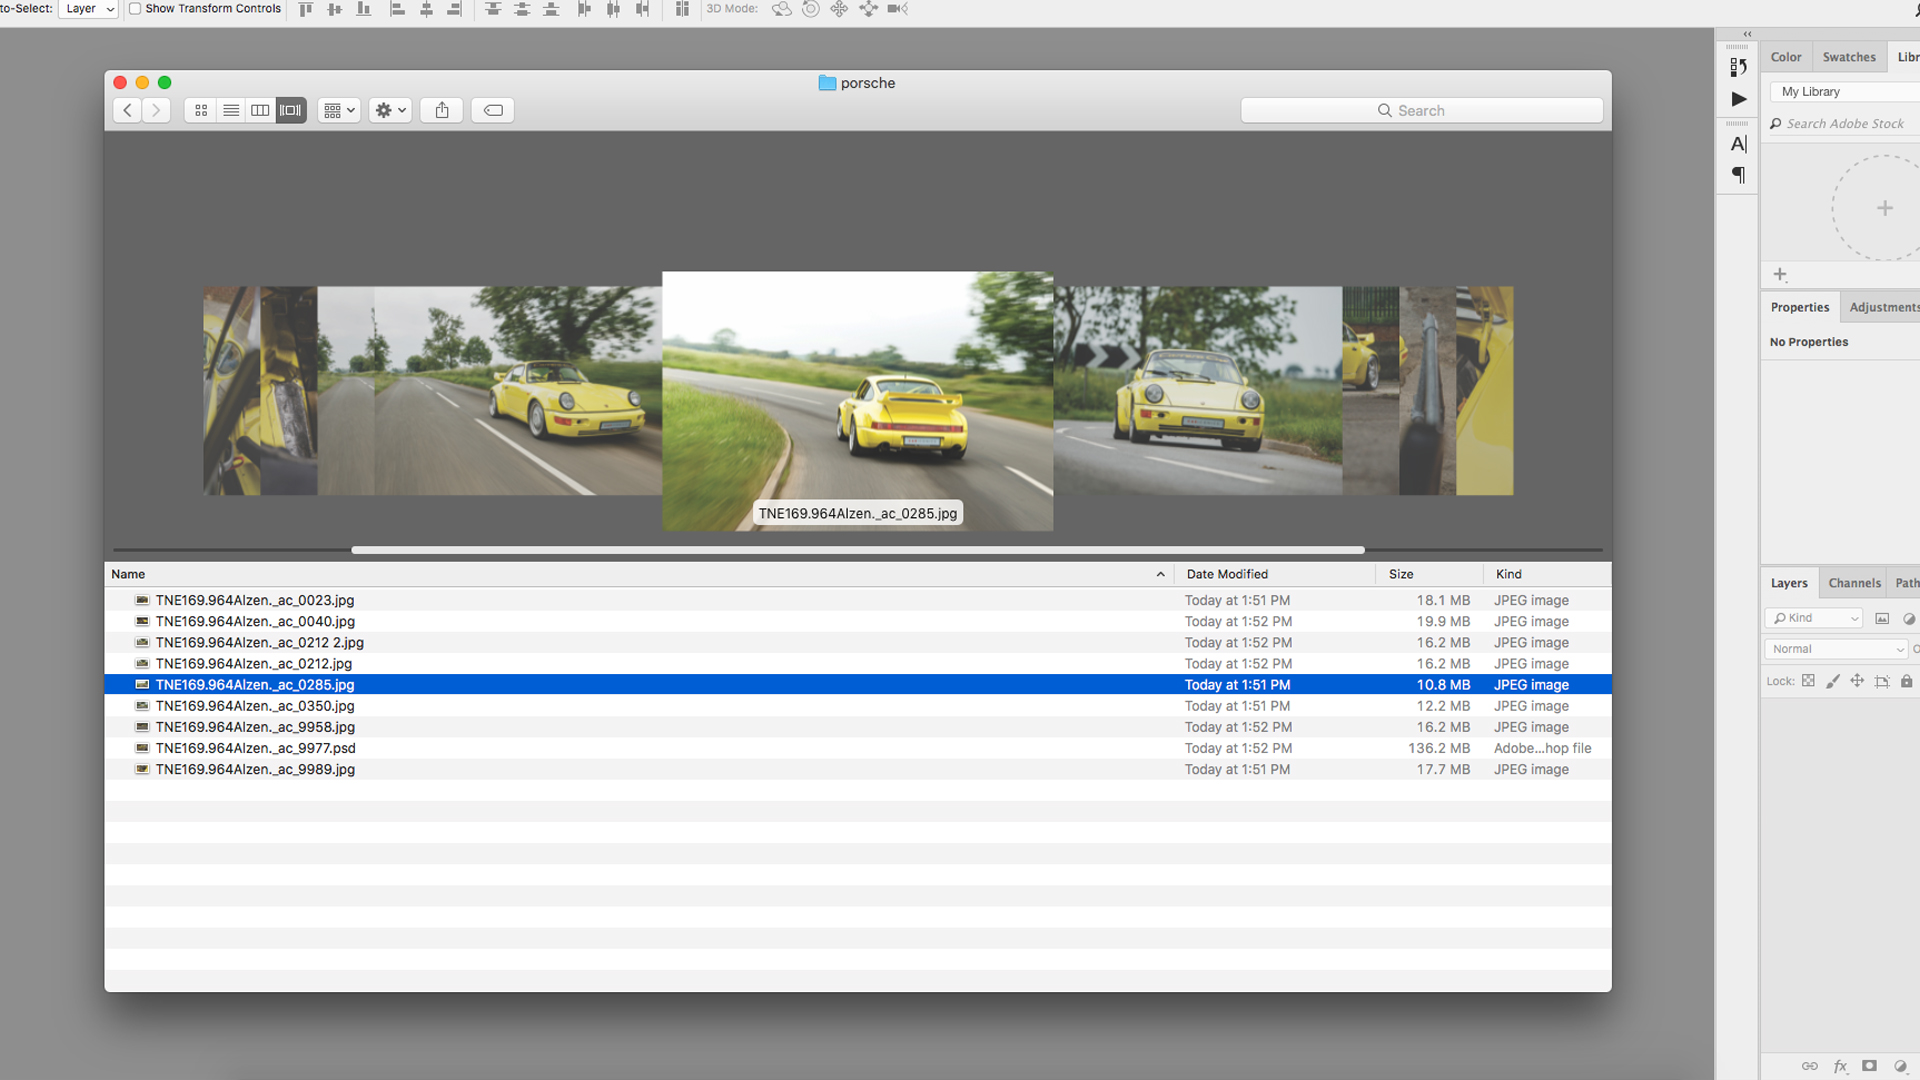
You can use a photo organiser to make your job easier, but previewing them in Finder will work just as well.
First up, pick your images. It’s impossible to condense a whole photo collection down onto one single page, so you need to be selective, sticking to a maximum of 5-8 pictures. Image choice is important if you want to retain the interest of the viewer – collages aren’t just spreads of random images, but represent a flowing narrative, displaying a diverse range of angles, shapes and styles.
Try to use images that suit different frames sizes, picking only your best and most appropriate images. Theming the collage along the lines of one consistent colour or common element can bring the whole thing together, while contrasting images create tension and tend to draw the eye. Every image should be well-exposed and in focus.
If you aren’t sure what looks good, check out some magazine layouts for inspiration. Using a library organiser, like Lightroom or Bridge, streamlines the process, making it easier to sort through multiple photos at once, although Finder works just as well. Use this stage to make any necessary adjustments to your images before bringing them together.
My collage will feature a photoshoot of a Porsche 964 Carrera, so I have included wide, action shots as well as close-up details of the interior, showing the car off from every angle.
02. Create the document
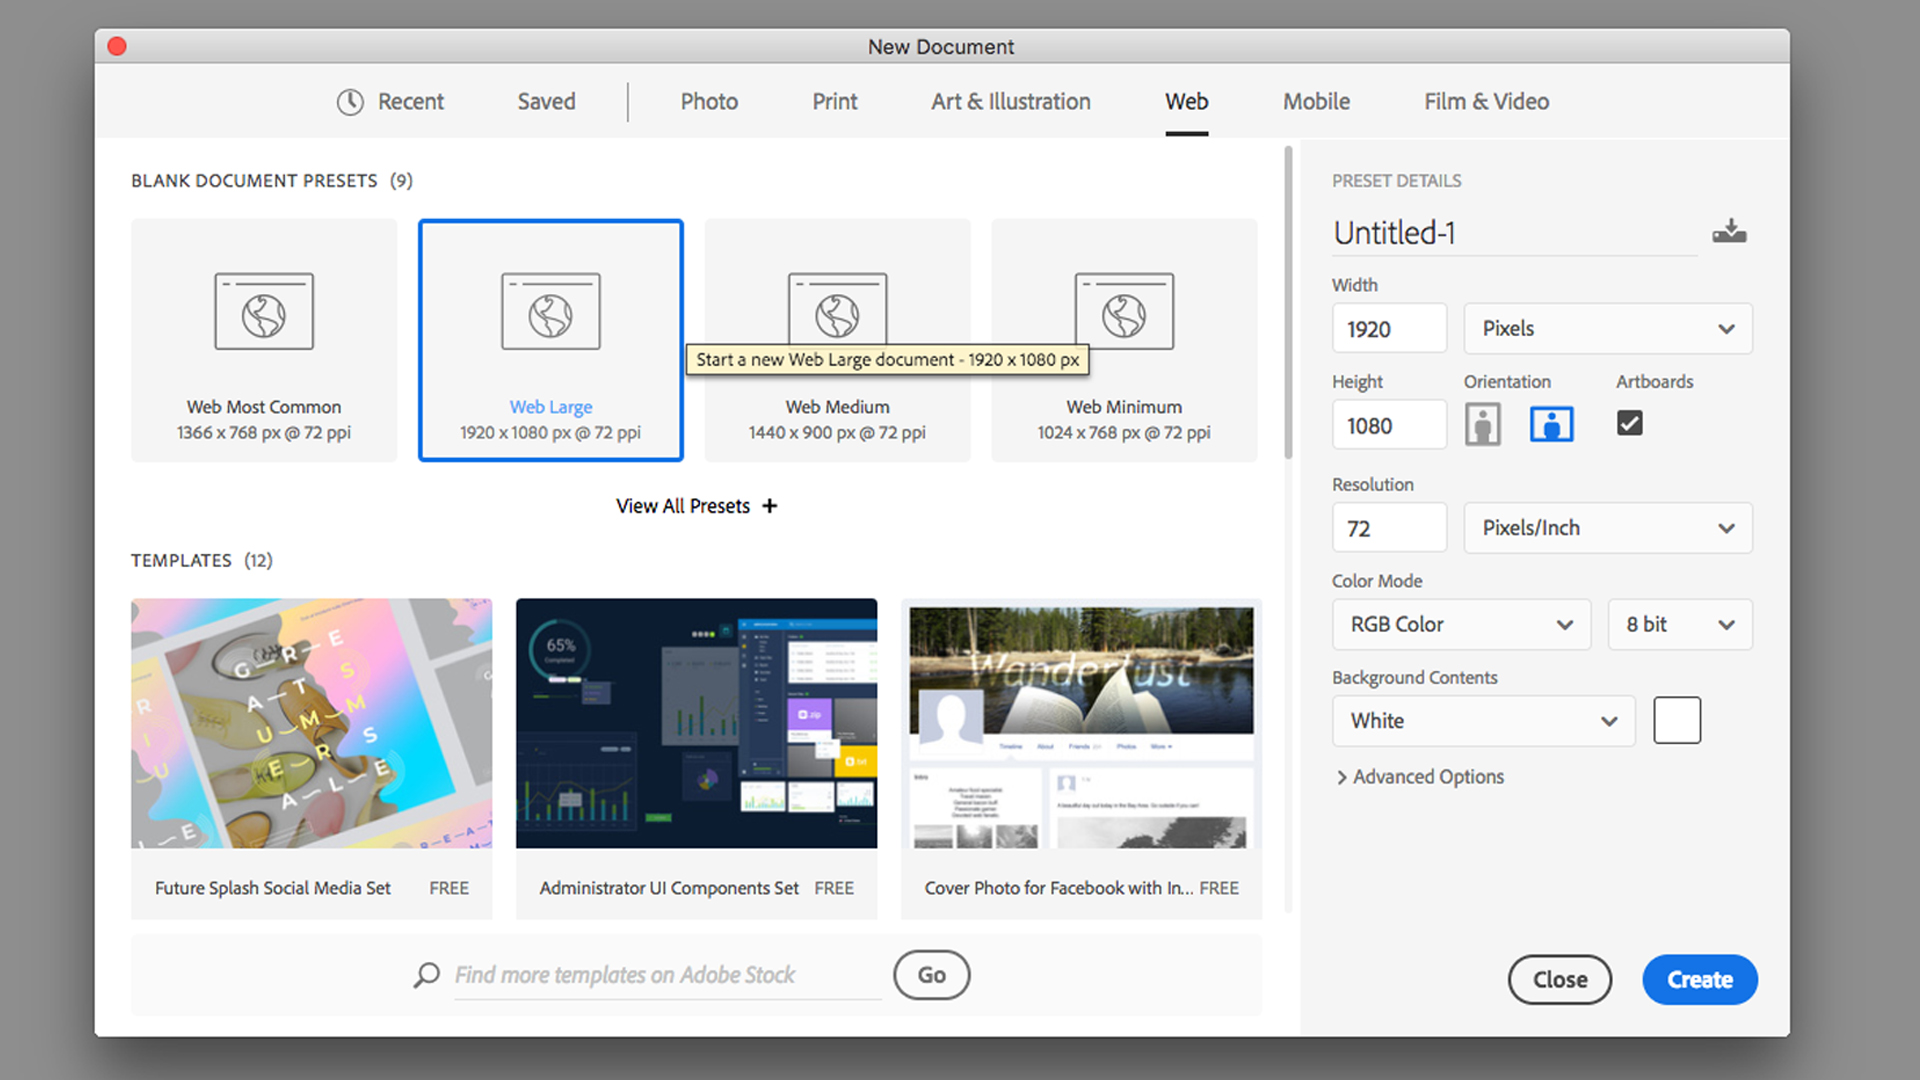
The New Document window provides a choice of pre-loaded templates, which are a good starting point for any project
When you create your document, the size of the canvas will depend on the intended output of your collage, namely whether it’s for digital or print (most collages look better in landscape format). Photoshop’s New Document window presents a range of ‘document presets’ to make this choice easier, whether it’s page sizes for print or standard digital sizes for web and mobile. If you want a custom size, there are also options to change the width, height, resolution and colour mode. You can edit this later in Image > Canvas Size. I have used a document size of 1920px x 1080px, RGB, a standard HD screen.
03. Import images
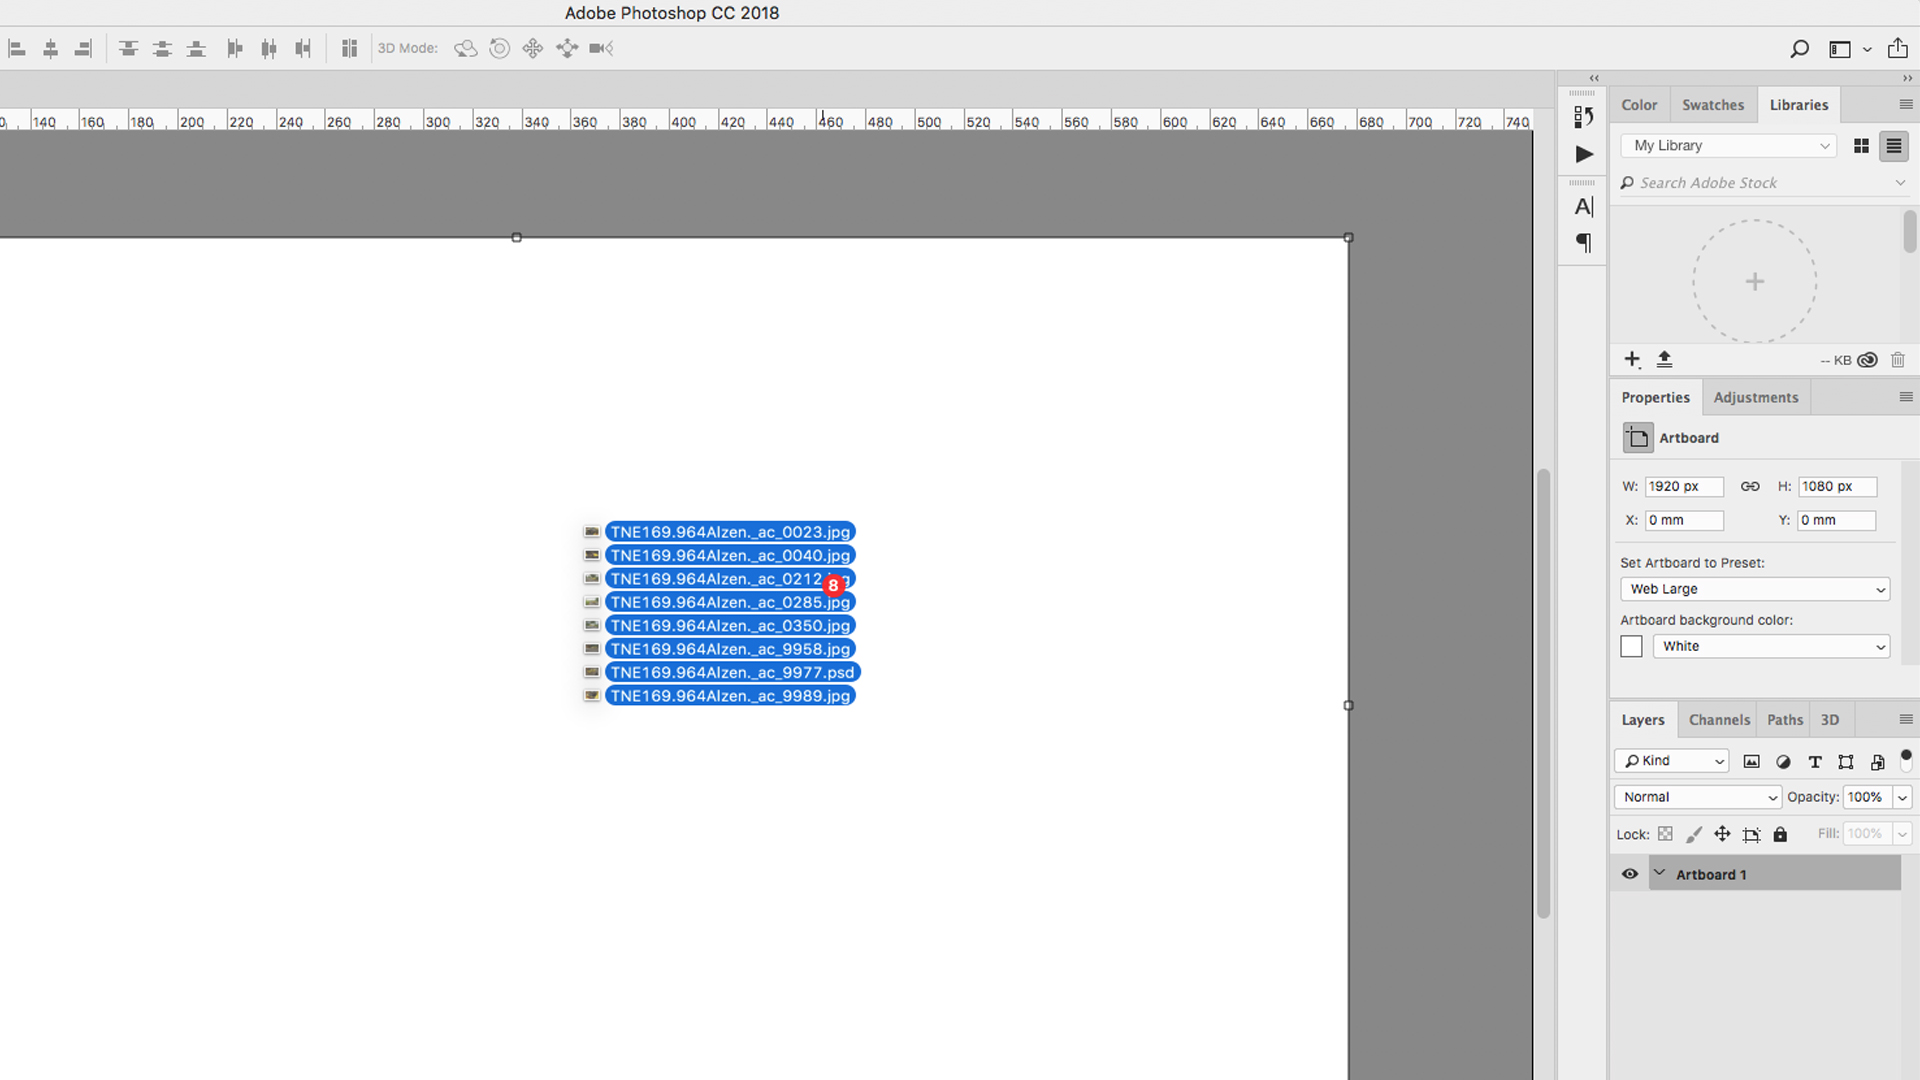
You can drag all of your images into Photoshop, straight in from the Finder window. Holding the Alt key down will add them as linked layers
There are various methods for gathering images into one file. Perhaps the simplest is dragging and dropping images from Finder, directly onto the canvas, which imports them as smart objects. The benefit of doing this is that you can reposition and resize them without any loss of quality.
Alternatively you can embed the images as linked layers, which means they will appear on the canvas as low-res versions, while linking back to the original files on your computer, avoiding slow rendering times. Do this by holding the Alt key down when dragging and dropping your images into the file.
Another technique is to open all the images in separate Photoshop windows, selecting each with Cmd + A, copying with Cmd + C, then pasting into the master document with Cmd + V. You can also change your window arrangement to show two files at once, then literally drag and drop layers from one to the other.
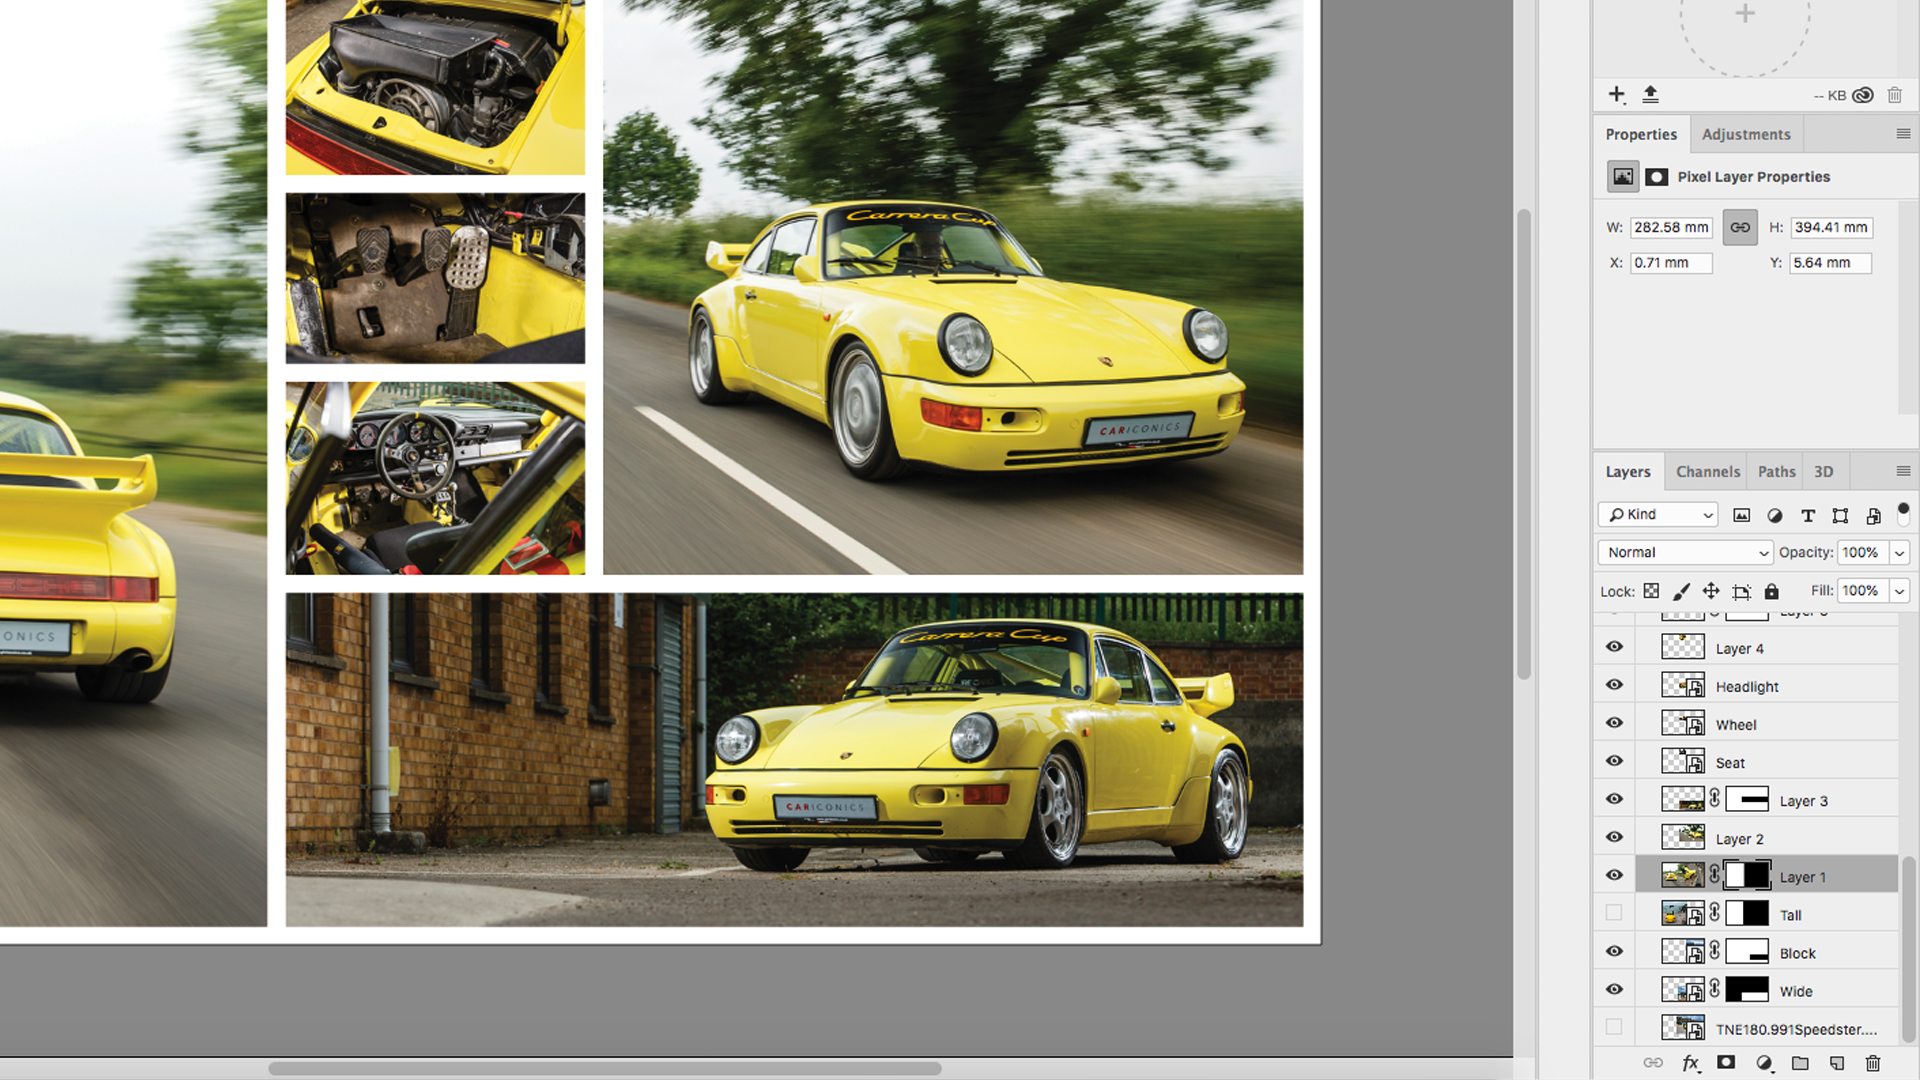
04. Roughly position images

Use the Free Transform tool to resize layers on your canvas, trying different positions for greatest visual appeal
Before spending too much time refining the collage, you need to have the right images in the right positions. Move the images around the canvas, using the Selection tool, until they all seem to roughly fit the page. You can turn layers on and off using the eye icon to the left of each layer, in the Layers panel. Scale and rotate layers using the Free Transform tool (Cmd + T), grabbing the handles of the transform frame. Holding the Shift key will maintain the proportions, while holding the Alt key will scale out from the centre. You can find further options for transforming under Edit > Transform.
05. Draw borders
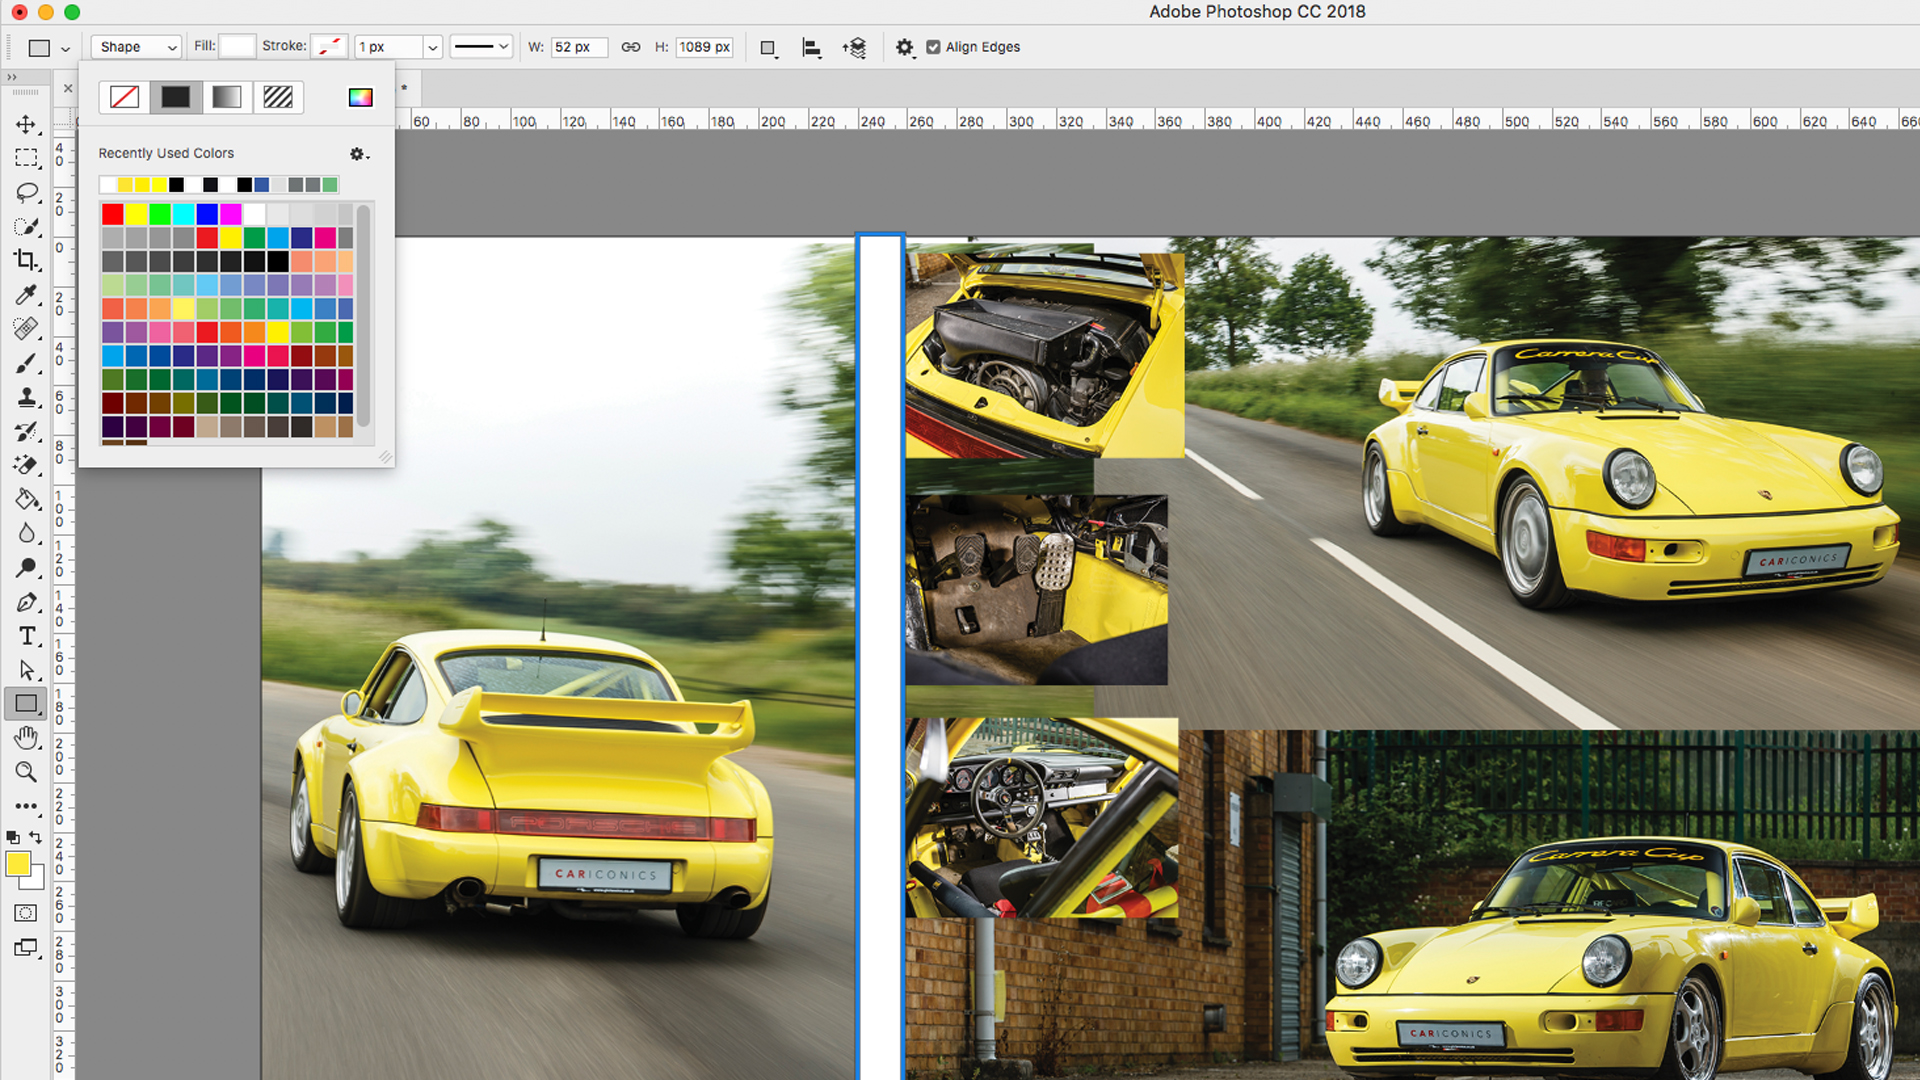
You can change the colour of shapes in the Fill window, where you can also add new swatches and create gradients
Add a single border using either the Pen tool (with Stroke applied) or the Rectangle tool, to break up the images. I drew a long white rectangle across the canvas, duplicated it with Cmd + J, moved and rotated it with Free Transform, then repeated the process until I had all my borders laid down, including one around the outer edge as a frame.
If you’re struggling to line up your images, you can drag guides out from the rulers (turn these on with Cmd + R or under View > Rulers). You can also select multiple layers and use Layer > Align to straighten them up.
06. Mask the spare image
Use masks to hide unwanted areas rather than deleting them outright, since masks can be edited later if you change your mind
With the borders now placed, it will be obvious that some of your photos are overlapping. Use the Marquee Tool to select unwanted areas on each layer, inverse this selection by right-clicking and selecting ‘select inverse’, then press the mask button at the bottom of the Layers panel (this looks like a circle in a box). You can edit your masks later, if you change your mind, by painting black and white into the mask area. Repeat this step for each layer until they’re all sitting flush against the border lines.
If you imported your images as Smart Objects, you can simply delete the unwanted areas instead of masking them, since you won't be losing any of the original image. If you then want to move the image inside the frame, double click on the layer to open the smart object window and move it there.
07. Add text and export
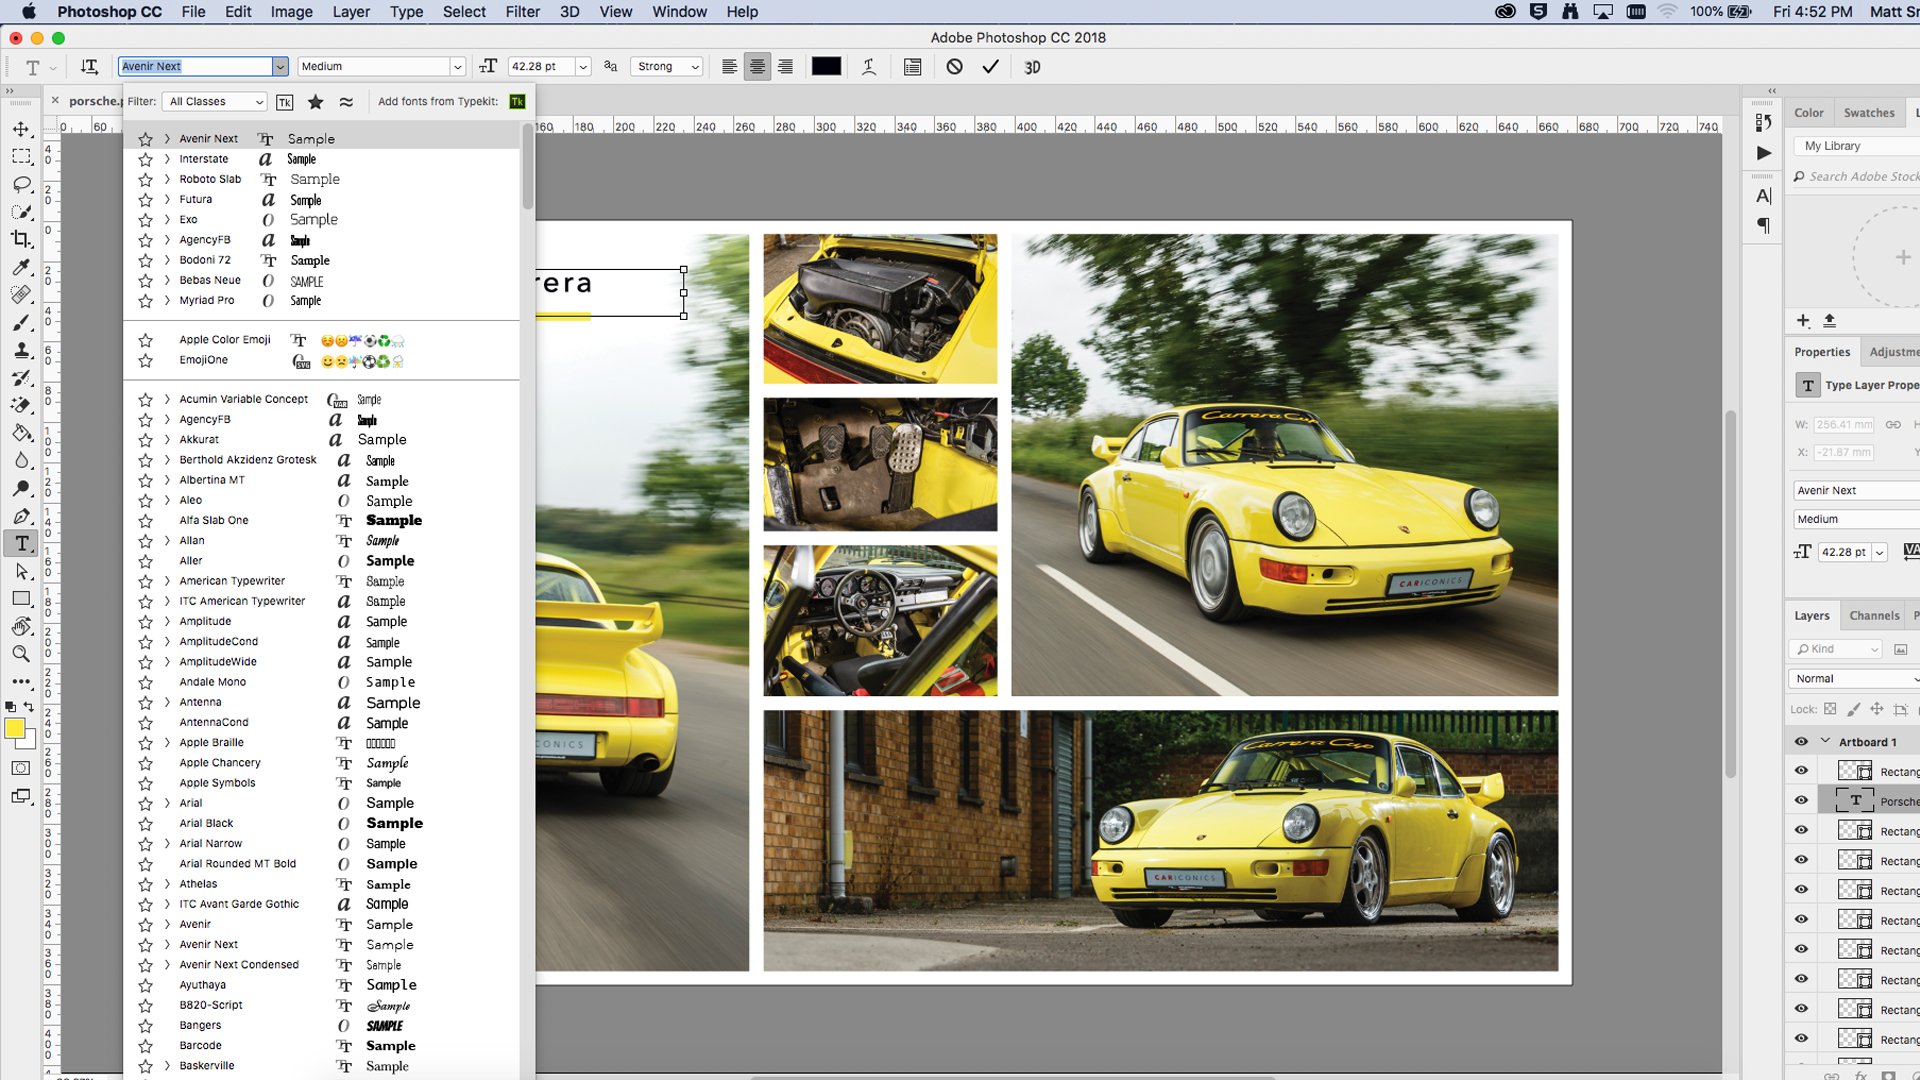
Photoshop CC has plenty of options in the Character tab, including live text which changes the typeface of your copy as you scroll down the list
When you are happy with the layout of your collage, you may wish to add a title or a message. Select the Type tool from the toolbar and draw a text box onto your canvas, preferably over an area that is either very dark or light. Select a typeface and colour from the Character tab, then insert your text. If the text is unreadable, you might need to draw a solid box behind, then soften it by reducing the opacity or changing its blending mode. I also added an underline stroke, using eyedropper to pick the yellow from the image.
Save your image as a .psd file, so you can edit it later on, then export in whatever format you need.
Read more:
The best free Photoshop actionsThe 10 best alternatives to PhotoshopThe best laptops for Photoshop right now


Leave a Reply
Want to join the discussion?Feel free to contribute!