Understanding module.exports and exports in Node.js

Original Source: https://www.sitepoint.com/understanding-module-exports-exports-node-js/

As developers, we often face situations where we need to use unfamiliar code. A question will arise during these moments. How much time should I invest in understanding the code that I’m about to use? A typical answer is learn enough to start coding; then explore that topic further when time permits. Well, the time has come to gain a better understanding of module.exports and exports in Node.js. Here’s what I have learned.

Note: this post covers using modules in Node. If you want to learn how you can use modules inside of the browser, read: Understanding JavaScript Modules: Bundling & Transpiling.

For a high-quality, in-depth introduction to Node.js, you can’t go past Canadian full-stack developer Wes Bos. Try his course here, and use the code SITEPOINT to get 25% off and to help support SitePoint.

What is a Module

A module encapsulates related code into a single unit of code. When creating a module, this can be interpreted as moving all related functions into a file. Let’s illustrate this point with an example involving an application built with Node.js. Imagine that we created a file called greetings.js and it contains the following two functions:

[js]
// greetings.js
sayHelloInEnglish = function() {
return "Hello";
};

sayHelloInSpanish = function() {
return "Hola";
};
[/js]

Exporting a Module

The utility of greetings.js increases when its encapsulated code can be utilized in other files. So let’s refactor greetings.js to achieve this goal. To comprehend what is actually happening, we can follow a three-step process:

1) Imagine that this line of code exists as the first line of code in greetings.js:

[js]
// greetings.js
var exports = module.exports = {};
[/js]

2) Assign any expression in greetings.js that we want to become available in other files to the exports object:

[js]
// greetings.js
// var exports = module.exports = {};

exports.sayHelloInEnglish = function() {
return "HELLO";
};

exports.sayHelloInSpanish = function() {
return "Hola";
};
[/js]

In the code above, we could have replaced exports with module.exports and achieved the same result. If this seems confusing, remember that exports and module.exports reference the same object.

3) This is the current value of module.exports:

[js]
module.exports = {
sayHelloInEnglish: function() {
return "HELLO";
},

sayHelloInSpanish: function() {
return "Hola";
}
};
[/js]

The post Understanding module.exports and exports in Node.js appeared first on SitePoint.

Top tips for building a WordPress theme

Original Source: http://feedproxy.google.com/~r/CreativeBloq/~3/SbhbDP7LFMA/top-tips-for-building-a-wordpress-theme

Creating your first theme is a big deal. You might know how to turn a functional site into a thing of beauty, but building a WordPress theme means acquiring a new set of skills to make it function the way you want it to. 

Here are some top tips for designers looking to build their first WordPress theme. You'll learn what makes a good theme, some of the tools you should be thinking about and what you need to know about coding. 

Not ready to build a WordPress theme yet, or looking for something different? Take a look at our roundup of great WordPress tutorials to pick up some more skills.

01. Explore existing themes first

Before you begin building your first WordPress theme, you need to have an idea of what works and what doesn’t. This is the inspiration stage. Now, that doesn't mean stealing other people’s work. 

What it means is researching into what different themes look like, how they function, and how they are put together, taking that idea, and turning it into something different. It’s all about the execution. Take a look at these WordPress portfolio themes for some inspiration.

02. Don't dilute the purpose

When it comes to building a WordPress theme, you should have the end goal in mind at all times. What do you want your site to do? Do you want to create a theme to sell products? Or maybe improve brand awareness? Or build a blogging platform? Or drive lead generation? Decide on the purpose of your theme, and keep it focused – don’t dilute things by choosing too many different aims.

03. Start with a template

You’ve got your goals in mind and the foundations for a strong theme are laid, so now you need to decide whether you are going to build your WordPress theme from scratch or customise an existing template. 

Starting with an existing template and adding your own customisation is an easy way to start. Take a look at our roundup of great free WordPress themes if you want to go down this route. Using an existing theme framework means you’ll get access to a lot of functionality and structure (which could be key if you don’t want to spend hours learning basic coding). However, you won’t have the same level of customisation you’d get if you were building a WordPress theme from scratch. 

04. … or code from scratch

To build from scratch, you need to be prepared to put in the time to learn code. If you do decide to go down this route, embrace Stack Overflow and the WordPress Codex to help you build and customise your theme. 

The WordPress Codex serves as an incredibly useful online manual from the developers of WordPress. It’s a huge resource bank of information on every template, function, plugin and feature you can think of, including tutorials on how to use and develop WordPress sites and themes. 

Stack Overflow, on the other hand, is an unofficial but trusted online community for developers to learn and share programming knowledge. Both are very useful. WordPress also has a helpful tutorial on how to develop a WordPress theme from scratch.

05. Hunt out some quality images

You want your website to look the best it can and perform to a high standard. This means you need images that will catch the eye. 

The good news is tools like Design Wizard are readily available and easy to use to help you create stunning images. Design Wizard actually has thousands of pre-made templates to suit every need. Other tools, such as Pikwizard, PixelDropr and IcoMoon allow you to gather free stock images, create buttons, icons and fonts. Check this out for more essential web design tools. 

06. Don't forget plugins

One of the best things about WordPress is the amount of tools – called plugins – that are readily available to add functionality to your site. WordPress plugins can easily be integrated with your theme to capture information, insert social posts, add Google Maps and so on. While building, you’ll need to ensure sure your theme is compatible with any major plugins you may want to include. Here are a selection of popular plugins to consider: 

Yoast SEO: An SEO plugin for improving website visibility and search rankingsContact Form 7: A customisable, flexible contact formAkismet: A spam-fighting plugin to protect against comment and contact form spamJetpack: An all-in-one plugin for analytics, design, marketing and securityWP Rocket: Rocket fuel caching for speeding up WordPress and improving web traffic
07. Don't mess with core code

Just keep in mind, everything you want to build should be done in the WordPress wp-content folder – you don’t want to be messing around with core code! There are lots of folders within WordPress, each of which are responsible for different functionalities. 

A word of caution before you make the decision to build from scratch or not – it’s fairly easy to end up building a theme that looks nice, but doesn’t work. So be careful to ensure you don’t end up with a theme that doesn’t actually function and requires hours of effort to improve the coding. 

Read more:

6 top tips for CRO success in WordPressHow to start a blog: 11 pro tipsThe 14 best iPad apps for designers

JAM Icons – Iconfont With 800+ Free Icons for Your Website

Original Source: https://www.hongkiat.com/blog/jam-iconset/

Free, high quality and unique icon pack to be used on any website.

The post JAM Icons – Iconfont With 800+ Free Icons for Your Website appeared first on Hongkiat.

Visit hongkiat.com for full content.

Elegant Brand Identity for Hairlines by BULLSEYE

Original Source: http://feedproxy.google.com/~r/abduzeedo/~3/PtBsHLwkJZw/elegant-brand-identity-hairlines-bullseye

Elegant Brand Identity for Hairlines by BULLSEYE

Elegant Brand Identity for Hairlines by BULLSEYE

abduzeedo
Aug 06, 2018

BULLSEYE – Aim on branding shared yet another beautiful brand identity project. We have featured them a few times, but they keep delivering great work. This time they worked don the hairdresser branding design, Hairlines, with a sensual and modern feel. Our challenge for this project was creating a logo and a visual identity that was expressive, yet elegant. Having in mind, the feminine world, as the brand’s target audience. 

For Hairlines brand, we’ve established a color scheme according to the space’s harmony, a deep and colored scheme, with the evidence of copper metal, which is a current trend. We strive to enhance the luxurious and sensual tone of the brand, associated with their wellness environment created to provide a unique experience to its costumers.

Brand identity

Bullseye – Aim on Branding is a multidisciplinary and creative studio based in Oporto, dedicated to create experiences and emotions in the various areas of Design, from Branding to Web and from Packaging Design to Editorial.

We are a studio, which focuses every day to help our customers to connect with their audience in an innovative, unique and effective way. We believe that design is a state of mind and that complex ideas should be transformed into simple and functional solutions, thus surpassing the expectations of our customers. We approach the challenges from several angles, betting on a team of remarkable and passionate people that make the difference creating a successful project.

Credits
Art Direction & Design: Bullseye aim on branding
Client: Hairlines*
Released in 2018


branding


We Are Just Getting Started: 1,000 Smashing Members

Original Source: https://www.smashingmagazine.com/2018/08/1000-smashing-members/

We Are Just Getting Started: 1,000 Smashing Members

We Are Just Getting Started: 1,000 Smashing Members

Vitaly Friedman

2018-08-03T13:50:31+02:00
2018-08-06T08:19:27+00:00

We’ve all been there: bringing a new product to the market is a tough nut to crack. It requires patience, commitment, and a bit of healthy stubbornness. That’s the exact attitude we started off with when we launched our shiny new Smashing Membership last October — a friendly and respectful community that keeps this website alive, along with books, webinars, discounts, networking, and a seasoned selection of fancy cats.

Thanks to the generous support of Smashing Members, we’re incredibly honored to have crossed the 1,000 members mark today. This is a very important day for us, and frankly, it’s quite flattering to see 1,000 people actively supporting our little site and sharing our goals. In fact, with Membership, sometimes it feels like walking around a small town in which everyone knows each other and their friends, and so we know many members by name, and we’ve also met some of them at Smashing Conferences. It’s a wonderful family that shares similar values and wants to get better at their work. But it’s also a family that wants to bring along a shift in the industry.

The People Behind The Scenes

When looking at obscure avatars and nicknames appearing in remote corners of the web, it’s easy to forget that there are actually real people behind them. That’s why it was important for us that the Membership experience is focused around real names and real faces of the community members — both on the new Smashing Magazine website and in our Membership Slack channel. It’s the people who shape the community and make it feel like home, and so Membership should become a humane product, with approachable and friendly authors, contributors and attendees.

We reached out to a few members to ask them why out of all the wonderful resources on the web, they chose to support the red, cat-friendly, and quirky Smashing Magazine, and what they found useful or remarkably painful during their Membership so far.

Allen Brady

Allen Brady

Allen is based in Knoxville, TN. He is passionate about building great experiences on the web for companies and their audiences. Currently he is learning to make the web more accessible with great HTML, CSS and inclusive design.

“I wanted to support Smashing Magazine as soon as they launched their membership program because not only have they been an excellent resource over the years with all the fantastic articles, books and conferences, but also because they’re so great at amplifying the voices in this industry, which is really important. I know that with my membership I’m getting a diverse range of perspectives that’s really helped shape me into a better developer.

The best part about this membership is the community. There’s a fantastic Slack group where you can talk about your projects, ask for help or just chat about whatever. The webinars have also been great. My favorite part is that we get to chat with the hosts and each other during the live recording. Involving the community in everything they can seems to be a theme with Smashing Magazine. It sets them apart from other resources out there and I love it.”

Verena Vertonghen

Verena Vertonghen

Verena’s journey in the development world started 6 years ago. She studied Multimedia Technology with a specialisation in Web&UX in Antwerp.

“Now I’m a front-end developer who also picks up some design challenges from time to time. I love creating all sorts of things and going on walks with my dogs. Because Smashing Magazine has been an invaluable learning resource for me throughout my studies and my career. I decided on membership to support the continuation of all the great work that Smashing Magazine already offers. But also because you get even more goodies when you do.

Some of the things I really like about it are the eBooks, previews to articles, webinars and the Slack channel that gives me the opportunity to connect with people that have a similar profile. The user experience is overall really great, and SmashingMag cat mascot gives a very playful and personal vibe!”

Emily Serven

Emily Serven

Emily is a recent college graduate and new member of the workforce. In her spare time, she like practicing photography, listening to foreign music, and occasionally playing Overwatch.

“I remember checking SmashingMag regularly as far back as middle school and have always loved the quality and steady quantity of content. I know I can trust the quality of writing on Smashing (especially considering there’s so much content and noise from other places to sift through nowadays)!

I’m also a cat person, for sure. I’ve found the available resources to be really useful (eBook library and book discounts), and I can’t wait for the printed magazine to come out. That’s the other thing about Smashing; even though the medium in which I express my work as a web dev is primarily digital, Smashing still recognizes the value of well-produced and attractive physical media. I love getting the physical books for that reason.

Oh, another thing. I used to freelance more back in middle school until I got my full-time position recently. When I found Smashing for the first time, I really loved how it really ‘got’ me and my job. There was coding, but also design (Photoshop, UX, etc.) and freelance articles specifically. It all felt very well balanced. I think that helped me develop my dev skills and the other auxiliary talents in a way that led to my holistic view of dev nowadays, too.

Arthur Leonov

Arthur Leonov

Arthur is a product designer that also codes front-end. He is a firm believer that merging design and technology can solve even the most difficult problems.

“I’m a designer that codes front-end. What a combo, right? I also believe that merging design and technology can solve even the most difficult problems in this world. The Smashing community keeps me inspired and informed day in and day out.

I catch up on SmashingMag every morning because it is one of the few online magazines in this industry who puts a lot of emphasis on good quality, relevant, and practical content.”

It might sound like an overstatement, but these people have already made a difference. They’ve helped us initiate projects that we wouldn’t be able to support otherwise. Now, don’t get me wrong: with dwindling ad revenues facing us, of course our aim was to earn enough with the help of the Membership to keep the magazine independent and self-funded. But that’s just one side of the story. Our aim was also to support design education and new voices in the industry; reward great people doing great work; foster open, diverse, inclusive and accessible initiatives. Last but not least, we wanted to help community events and projects, and the people behind them.

Did we achieve any of these goals with the money we’ve earned? I’m glad you asked.

So How Much Money Did We Earn? Total: $33,128

Initially, we were hoping to provide a larger financial support for new design/tech education initiatives and open-source projects, but with limited resources we had to be more realistic and pragmatic. We reached 1,013 Smashing Members in 257 days, with 30 supporters, 562 members, and 421 smashers. That makes a current total of $6,689 gross per month for August 2019.

Since the launch of the Membership, Smashing Members contributed a total of $33,128 net over the course of 10 months (including current month):

Month
Net revenue

Total
$33,128

November 2017
$1,104

December 2017
$1,530

January 2018
$2,130

February 2018
$2,181

March 2018
$2,748

April 2018
$4,015

May 2018
$4,440

June 2018
$4,750

July 2018
$4,990

August 2018
$5,240

It goes without saying that these kind contributions massively helped us cover monthly costs, from maintenance to honorarium for authors, in particular:

Honorarium for authors contributing articles and chapters for Smashing Magazine, our eBooks and printed books,
Honorarium for reviewers, editors, proofreaders, illustrator Ricardo Gimenes and front-end developer Ilya Pukhalski,
Honorarium for all webinar speakers,
All design education initiatives and community support is enabled by Smashing Membership,
All money was reinvested in the Magazine and Membership projects.

From day one, we kept things fully transparent; we’ve been sharing monthly reports on how much money we’ve earned and how we spent it. So here’s what happened since the launch of Membership last year.

Smashing TV: 24 Live Sessions

Each month, we are proud to host 2 curated webinars for Smashing Members. We’ve teamed up with active members of the community to run 1:1 interactive sessions with Smashing Members. Overall, we ran 24 Smashing TV webinars on front-end, UX, ethics, performance, accessibility and design workflow. With Marcy Sutton, Val Head, Dan Rose, Ada Rose Cannon, Martin Splitt, Michael Riethmueller, Sara Soueidan, dina Amin, Rachel Andrew and Dan Mall, among others.

The goal of every session is to be highly practical and provide actionable insights and learnings — be it in front-end or in user experience. Everyone can also suggest topics for upcoming webinars in the Membership Slack channel, and we’ll invite speakers to cover the topic. Of course, live recordings of these sessions are available as well, and are later released publicly for free for everybody.

Smashing TV: “Smashing Big Bang Redesign” with Vitaly Friedman

Design/Tech Courses And Trainings

These days there is always something to do, learn, or wrap your head around these days, and because all of us tend to get lost in small details, video tutorials and courses can be quite helpful. There are of course huge video course platforms which are wonderful, but there are also many fantastic one-man-show-teachers out there in the community who produce courses and tutorials for everybody to learn from.

That’s why we’ve teamed up with some of these teachers to provide community discounts for training and video courses. For example, for a “Debugging” course run by Remy Sharp, or “DevTools Web Performance Course” by Umar Hansa, or “CSS Layouts Course” by Rachel Andrew or “React/ES6” courses by Wes Bos — with many more courses coming up over the next months.

Supporting Community Initiatives

It’s not easy to maintain and grow a community, and we are proud to help community initiatives around the world to connect like-minded designers and developers.

Here are the projects we’ve supported so far:

Prjctr Design School (Kiev, Ukraine),
MinskCSS/MinskJS (Minsk, Belarus),
UX Salon (Tel-Aviv, Israel),
WebdeLDN (London, UK),
Osijek Digital Design Academy (Osijek, Croatia),
New Digital School (Porto, Portugal),
Ladies that UX Berlin (Berlin, Germany),
UX Day (Amsterdam, Netherlands),
ExConf Bratislava (Bratislava, Slovakia),
Kyiv ReactJS Meetup (Kyiv, Ukraine),
Ladies That UX Amsterdam (Amsterdam, Netherlands),
PiterCSS (Moscow, Russia),
DesignX (Toronto, Canada),
Local communities in Kairo, Egypt.

If you are running a meet-up or a community in your city, we’d be happy to support you as well. Just drop us a line and tell us a bit about your community, and we’ll make it happen!

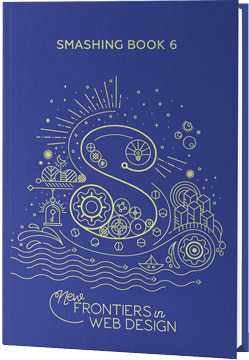
Smashing Book 6: New Frontiers In Web Design

It took us a while, but we are almost there. The brand new Smashing Book 6 is coming out early September, with contributions by Laura Elizabeth, Marcy Sutton, Rachel Andrew, Mike Riethmuller, Harry Roberts, Lyza Gardner, Yoav Weiss, Adrian Zumbrunnen, Greg Nudelman, Ada Rose Cannon, and yours truly.

It explores common pain points and solutions from real-world projects: be it accessibility in times of single-page apps, performance loading patterns, making design systems work in real-life, AR/VR, responsive art-direction, building an advanced service worker and designing for next-gen interfaces. A book packed with practical advice for designers and developers alike, designed and illustrated by Chiara Aliotta.

The cover of the Smashing Book 6, with geometric objects shaping the letter S.

Smashing Book 6 is coming. Shipping of the book will start late September, but you can already start reading the first chapters if you order your copy today. (Large preview)

The book is being finished as we speak, but we’ve been slowly releasing chapters, so Members can actually start reading the book already before its official release. All new books and eBooks — as well as upcoming Smashing Print magazine (currently in the works) — is made available for Members free of charge. But that goes without saying, doesn’t it?

Smashing Diversity Program

There is a huge amount of discrimination out there, and not everybody is getting a fair chance even though they deserve one. That’s why we’ve launched a Smashing Diversity program, providing conference and workshop tickets for students, non-profits, and people who might not be able to afford a conference ticket or attend a workshop. We also make sure that our conference volunteers can attend the sessions they’d love to see.

Beyond that, please ping us if there is a way we can help you become a better speaker. To support and encourage new voices in the industry, I’ll be heading to Paris for Mozilla’s Tech Speaker program to provide mentorship, training, and opportunities to up-and-coming speakers from all over the world.

Support New Wave Of Digital Education

Tiego Pedras and Sara Ramos run the New Digital School, a new design education initiative in Porto, Portugal. In fact, they spoke about their project at SmashingConf Freiburg last year. Their goal is to provide students with better front-end and design education to be ready for real-life world.

Each group of students had their own project to work on at The New Digital School.

Each group of students had their own project to work on at The New Digital School. (Image source: Tiago Pedras) (Large preview)

Students presented their projects and shared their results with the group.

Students presented their projects and shared their results with the group. (Image source: Tiago Pedras) (Large preview)

For two years in a row now, I was honored to be able to explore the current state of front-end, interface design, and responsive art-direction with students from all over the world. In February this year, I headed to Porto to spend a week with students from India, Malaysia, Portugal, France and USA for an entire week. Each group of students was working on their own project, ranging from interactive VR storytelling to (hello, Miguel and Sarthak!) to Olympics leaderboards (and hello to you, Prashant and Marissa!).

It might not sound like a big deal, but it was so rewarding to see the sparkle in the eyes of the students as they were working on their projects. Being able to provide an experience that hopefully many students will remember was a huge privilege and a remarkable moment in the entire experience. And it was all possible thanks to the contributions of our Smashing Members. I couldn’t be more proud of this effort.

Berlin Design Campus

Late June is usually quite slow, with most projects slowly fading into sleep mode. Well, it was quite the opposite for us. For June, we teamed up with Prjctr Design School (Kyiv, Ukraine) to run Berlin Design Campus — a week-long trip to Berlin to explore digital design agencies and studios with students from Ukraine. It was our first initiative to improve design education by setting up a project of our own.

We visited the offices of Mozilla (thanks, Emanuela and Amin!), SinnerSchrader (thanks, Martin!), EdenSpiekermann (thanks, Daniel!), Hort (thanks, Eike!), Fjord (thanks, Simon and Jake!), Contentful (thanks, Ben!), Matteo Cevucci (previously EdenSpiekermann, Thoughtworks) with hands-on workshops in those companies throughout the week.

Branding and visuals for Berlin Design Campus, designed by Prjctr Design School in Kiev, Ukraine.

We couldn’t be more proud to team up with Prjctr Design School from Kiev, Ukraine who are trying change the education landscape in Kiev, Ukraine, and London. Visuals were designed by the Prjctr team as well. (Image source) (Large preview)

We visited both design agencies and larger consultancy firms, spoke with local freelancers, artists and entrepreneurs. We’ve set up informal evening meetings in which students could ask questions, and we organized visits to offices so students could see how other professionals work. It was a fascinating week with practical insights you would never get otherwise; a look behind the scenes in actual real-life projects with early prototypes that failed and hands-on exercises to work on.

Ukrainian students visiting design agencies in Berlin.

During Berlin Design Campus, we visited a number of offices in Berlin. One of them was Mozilla’s office, with a hands-on workshop by Amin al Hazwani. (Image source) (Large preview)

You never get to visit or see how designers in those respected companies work, and what their processes look like. So happy and honored to be a part of this little initiative, and looking forward to more adventures in the future. Again, made possible through contributions of wonderful Smashing Members.

New SmashingConf Experience

With a few more resources available to us, we were able to focus on exploring new formats for Smashing Conferences. Being inspired by our Italian friends from the NoSlidesConf, we tested a brand new format in Toronto earlier this year: interactive live sessions in which speakers were not allowed to use slides (be it Powerpoint, Keynote or Reveal.js). Instead, we encouraged speakers to show how they work, how they design and build, what their setup looks like, and give audience insights into how they think as they make progress in their work.

Gemma O’Brien presenting with no slides at SmashingConf Toronto 2018

One of those unforgettable moments. When Gemma O’Brien brought her entire studio to SmashingConf Toronto, a conference where speakers weren’t allowed to use slides. We’ll be rolling out this format at all Smashing events in 2019. (Image credit: Marc Thiele) (Large preview)

Instead of speaking in front of a podium, we set up a coffee shop-alike setting with speakers sitting at the desk and literally walking the audience through their thought process. It was a quite special event. Some speakers felt challenged and excited about the new format, and attendees appreciated the fact that every session was unique and pushed the speakers outside their comfort zones. That’s why we’ll be rolling out this format for SmashingConf 2019, along with lightning talks, design nights, and a book exchange board. It goes without saying: all Smashing Members are getting a heavy discount on all Smashing Conferences.

Giving Back To The Community

Of course, Smashing Magazine has always been free, but with Rachel Andrew joining us on board last year, we now have a strong and keen Editor-in-Chief focusing on getting the best articles out there every single day. Since then, we’ve published 87 articles — all thoroughly reviewed and edited by the Smashing Editorial team. We refocus back on the heart of it all — yours truly Smashing Magazine.

We are committed to make the content we get out there accessible to as many people as possible. That goes for our eBooks as well. That’s why we also publicly released “Inclusive Design Patterns” eBook by Heydon Pickering (PDF, ePUB, Amazon Kindle), a wonderful book on inclusive design patterns — for free. Why? Because accessibility matters.

We Are Just Getting Started

1,000 is a first major milestone for us. Not many people know it, but the entire Smashing team is actually quite small, with just 13 of us floating from one project to another. Frankly, we might be a bit slow at times, but we are trying our best to bring along a positive change to our industry.

We need less craziness and narrow-mindedness around us, and we need more respect, care, and constructive help. That’s the goal we are aiming to provide with the Smashing Membership, with our next projects, and with your help. There might be something in it for you, too. We are in it for a long game. We are, after all, just getting started.

Huge thank you to Cosima Mielke for helping with preparations of this article, and Scott Whitehead for his kind support and work on the Smashing Membership. You are truly smashing!

Smashing Editorial
(cm, sw, il)

With so much happening on the web, what should we really pay attention to? At SmashingConf New York 2018 ?? we’ll explore everything from PWAs, font loading best practices, web performance and eCommerce UX optimization, to refactoring CSS, design workflows and convincing your clients. With Sarah Drasner, Dan Mall, Sara Soueidan, Jason Grigsby, and many other speakers. Oct 23–24.

Check the speakers →

SmashingConf New York 2018, with Dan Mall, Sara Soueidan, Sarah Drasner and many others.

How to illustrate animal eyes

Original Source: http://feedproxy.google.com/~r/CreativeBloq/~3/pCj04eI5SYw/how-to-illustrate-animal-eyes

When learning how to draw animals, one tricky aspect to manage is the eyes. There are some critical – yet simple – steps and techniques to follow that will improve your artwork.

Because the viewer of your image will be drawn to the animal's eyes, you need to depict them correctly. It's a good idea to practice sketching different eyes to become familiar with their structure. Draw what’s there, rather than what you think should be there.

Here we'll walk through the key considerations to make when drawing feline eyes. In this case we're drawing a leopard, using pastel pencils  on Clairefontaine Pastelmat, but these same principles will apply for drawing the eyes of most animals.

Once you've watched the video above, use our written steps below to help you draw your own realistic animal eyes.

01. Study animal anatomy

sketch of an eye with parts labelled

Getting the anatomy right will help you draw the eye correctly

Being aware of the eye’s anatomy will help you understand where everything should be and what happens to the fur or skin covering that area. For example, the lacrimal gland over this eye will cause the fur to curve up and over it, ridging slightly to form the eyebrow and giving a shadow underneath it. Reflect that when you add the fur.

02. Emphasise the eyeball

eye shaded in

Shading will help curve the eyeball

This sketch shows how the underlying structures influence form. Remember that the eyeball is a sphere, and not a flat disc with the top covered by the upper eyelid. Check the pupil placement on your reference image, as it’s tempting to place it in the centre of the eyeball portion that you can see. Here, use a paper stump to smudge shadows under the lower lid.

03. Reflect what they see

sketch of an eye with pupil coloured in

Imagine what the animal is viewing for real authenticity

You’ll only see a perfectly round white-dot reflection if the eyeball is reflecting a cloudless sky with a bright sun. Typically, the reflection will contain trees or similar structures, as is the case in the example here, where there's blue sky at the top and a band of white cloud reflected in the iris, filled in with a range of ochres.

04. Draw furry surroundings 

sketch of leopard eye next to image of a leopard

The area around the eye is important in creating a lifelike drawing

At this point you can add in the surrounding texture – in this case, the fur. The comparison helps to gauge the strength of the colours in the iris and to adjust the values correctly.

You’ll also be able to see where the shadows and highlights need to be deepened or lightened – typically on the eyeball under the brow, and in the corners.

This article originally appeared in Paint & Draw magazine. 

Related articles:

How to draw and paint – 100 pro tips and tutorialsHow to start pastel drawingHow to draw a bear

5 Ways to Keep Designing When the Power is Out

Original Source: https://www.webdesignerdepot.com/2018/08/5-ways-to-keep-designing-when-the-power-is-out/

There’s a certain peace to be found at night, when the world goes dark and silent. You might settle down on the couch for a moment, and just soak in the absence of noise and bustle. However, if you’re at work, and the world goes dark and silent, it’s a lot less comforting.

At the very least, it means a delay in your work. If you’re a freelancer, that could very well mean a delay in getting paid. It’s stressful, and it can happen anywhere, to anyone. First world countries can’t always prevent power-outs. Countries like Mexico can set their clocks by them. How do you know it’s rainy season? The power’s out. Oh, and the rain.

Now, this isn’t always a terrible thing. A break might be just what you need to gather your thoughts, relax, and get ready to work like mad when the power’s back. Or, you know, you might just relocate to a place that has power and wi-fi, if that’s an option.

But what if it isn’t? Let’s say all of your machines are desktops, and you’re expected to stay in the office. I mean, power-outs don’t usually last all day. And maybe you have a tight deadline. How can you stay busy, and perhaps actually make some progress before the lights come back? Well, let’s start with the more practical ideas:

1. Brainstorm

If you’re lucky, or at least less unlucky, then this is happening during the planning stages of your design and development cycle. So start planning. There’s nothing stopping you from grabbing your coworkers (if you’re not a one-person studio), and brainstorming the time away. Throw some ideas around!

Now, assuming you already have some plans, you could go over them. Well, if you printed them. Or, go back and revisit ideas that you might have decided to talk about later. Well, it’s later now, and you don’t have anything better to do.

Go over the core of your current plans, see how they could be improved. With the ability to jump straight into the work taken away from you, you might see something you missed, or you might come up with something better.

2. Wireframe on Paper

Now, assuming this isn’t already a part of your process, grab a pencil and some paper, and start drawing out ideas fast. If you’ve already done some of the actual mockup work, try drawing out bits of the interface from memory. Use these drawings in your brainstorming session to see if you can’t come up with something better.

If you already have some hand-drawn wireframes, haul them out and keep iterating. Even if you don’t use the new or updated designs, they might help you to remember why you made certain design decisions in the first place. If nothing else, affirmation is motivating.

3. Develop a Paper Prototype

If you have a lot of downtime, why not try your hand at some arts and crafts? Paper prototypes are basically layers of paper designed to imitate a digital interface. Putting one together will give you a prototype you can actually touch and (to a very limited extent) interact with. All you really need is a paper, a pen(cil), and some scissors. Heck, work on it enough, and perhaps you could show it to your boss or clients later, to help answer any questions they might have.

Here’s a great article on how to make paper prototypes, with examples.

4. Grab a Book

Okay, so you’ve done all the planning you’re ever going to do. Or there’s no point because the plan has gotten sign-off from above, and everything is set in corporate stone, for now at least. What next? Grab a book. Specifically grab a book on web design, typography, accessibility, branding, graphics, or anything else you can imagine!

And don’t let anyone tell you that continuing to educate yourself, grounding yourself in basic principles, or just seeking inspiration isn’t a practical thing to do. The results will show themselves when the power comes back on, and you tackle the project with new vigor, and perhaps some new insight.

5. Try your hand at predicting the future

Okay, I am not one of those guys who will tell you that visualizing success is the key to achieving it. Doing stuff and not sucking at it is mostly the key to success. However, taking some time to visualize the future of what you’re building is still a useful thing to do in small doses. Just sit there, alone or with colleagues, and imagine the thing is already built. Picture your users, and the way they might integrate your product into their lives. Make it a meditative thing.

Spend five minutes on this if you’re a normal person. If you’re an over-thinker like me, maybe schedule a solid hour. Either way, you may very well come out of this exercise with a renewed will to make it happen. Or better yet, you might identify some previously unforeseen issues, and address them before they ever become a problem.

And hey, this is something you can do even if you don’t have enough natural light for most of the other things on this list.

Conclusion

A power-out doesn’t mean your work has to come to a complete, screeching halt. Mind you, it’s not a terrible thing if it does. Unexpected breaks are good for people. But if you just have to keep going, you can often make tangible progress with a little creativity. Otherwise, you can at least make sure you’re ready to tackle your work with a vengeance as soon as the lights come back on.

Add Realistic Chalk and Sketch Lettering Effects with Sketch’it – only $5!

Source

p img {display:inline-block; margin-right:10px;}
.alignleft {float:left;}
p.showcase {clear:both;}
body#browserfriendly p, body#podcast p, div#emailbody p{margin:0;}

37 beautiful band logo designs to be inspired by

Original Source: http://feedproxy.google.com/~r/CreativeBloq/~3/P-TvMXgw3xM/band-logo-12121502

What makes a great logo design for a band? A clever concept and the ability to become just as iconic as the music is a good start, but originality is just as important.

From hard rock to pop, we've picked some of our favourite band logo designs – including some old favourites as well as some newcomers. Be inspired by these beautiful band logos, all of which boast stand-out quality.

01. Run the Jewels

Run the jewels logo

RTJ’s logo has been through a few revisions over the years

Hip hop supergroup Run the Jewels have grabbed plenty of headlines over the past few years with their first album and various tracks released for free online, all of them featuring a variation on the same logo: a pair of hands, one in the shape of a gun and the other clutching a thick gold chain. It's the work of artist Nicholas Gazin, and RTJ's El-P revealed the thinking behind it over on Instagram in 2015; he published a screenshot of an email to Gazin in which he explains that the gun hand is robbing the hand holding the chain.

02. Ho99o9

Ho9909 band logo

Ho9909 = horror

We weren't sure what to make of Ho99o9's name when we first saw it; were they supposed to be called Hoggog or something? But no, the nines in their name are there instead of the letter r, and it's really Horror. We're not sure why exactly, but we do know that it fits perfectly with their slightly terrifying DIY hardcore punk/hip hop mashup aesthetic.

03. The Monkees

Monkees logo

The classic Monkees logo still looks good, 50 years later

Infamously manufactured for TV, The Monkees still had a bunch of great tunes – thanks to a roster of top songwriters and session musicians – and a fantastic guitar-shaped logo, conceived by the show's publicity man and drawn for $75 by Nick LoBianco. It's stood the test of time, still looking fresh on the cover of 2016's Good Times, the band's first album in 20 years.

04. Unkle

Unkle band logo

Graffiti artist Futura 2000 helped define much of Unkle’s visual identity

American graffiti artist Futura 2000 (now known as plain Futura) had form as an illustrator and graphic designer for music, most notably for his work on The Clash's Combat Rock. But it was his work for James Lavelle's Mo' Wax records that really launched his design career, and which also led to him creating the logo and other imagery for Lavelle's Unkle project. The two scratchy, pointy-headed alien figures are a perfect match for the first Unkle album, Psyence Fiction.

05. Adam and the Ants

adam and the ants logo

Danny Kleinman went on to create the title sequences for James Bond films

Adam Ant, with his background of art school and the DIY punk ethos, always had a keen interest in getting his band's image right. From his early punk singles, for which he drew the cover artwork himself, through to his later chart toppers, he'd mastermind powerful, eye-catching looks, and this Adam and the Ants logo, designed by Danny Kleinman and known as the Warrior Ant, is a corker.

06. The Doors

Band logo designs - The Doors

The reflective “o” of The Doors’ typography remains iconic

Simple and iconic. This bold, geometric design with the tiny, psychedelic and italicised 'THE' is perhaps one of the most recognised band logotypes in the world. Perfectly summing up the trippy, hippie counter-culture of the late '60's, The Doors didn't need a symbol or an image. Their typographic design remains just as fresh to new eyes today as it did to the kids of the swinging sixties.

07. Dream Theater

Band logo designs - Dream Theater

Dream Theater kept hold of their majesty logo, even with a new vocalist and band name

Progressive metal band, Dream Theater's "majesty symbol" is a reimagining of Mary, Queen of Scots' mark. Designed by former vocalist, Charlie Dominici, when the band was still known as Majesty (hence the symbol's title) the band kept the logo and it has gone on to feature on nearly every Dream Theater release.

08. The Dead Kennedys

Band logo designs - Dead Kennedys

An iconic punk symbol that is as easily graffitied as an anarchy sign

Designed by artist Winston Smith, the Dead Kennedys DK logo is a perfect example of simple, easily imitable graphic design. Singer Jello Biafra is quoted as saying, "I wanted to make sure it was something simple and easy to spray-paint so people would graffiti it all over the place."

After showing it to Smith, he "came back with a bunch of designs that had the circle and slightly 3D-looking letters and he had ones with different patterns behind it. I liked the one with bricks, but ultimately I thought simple red behind it was the boldest and the best."

09. Gorillaz

Band logo designs - Gorillaz

Gorillaz are virtual, and arguably the entire band is a logo for their creators’ project

This entire band is arguably a logo, a brand and no doubt a great achievement in design. However, the graffiti-styled typeface is a recognisable testiment to how simply you can sum up your band, just by picking the right font. This typographic post-apocalyptic street art homage encapsulates the political aesthetics that Damon Albarn and Jamie Hewlett were so keen to capture.

10. Nirvana

Band logo designs - Nirvana

The Nirvana logo is easily one of the most recognisable in the music industry

One of the most recognisable logos in music history, the Nirvana logo design has been a common sight T-shirts for over two decades. Featuring an Onyx typeface and a smiley face – said to be inspired by a strip club in Seattle – the juxtaposing colours make this an iconic band logo design.

11. Weezer

Band logo designs - Weezer

The logo design was created by the band’s drummer

Designed by the band's drummer, Patrick Wilsen, in 1993, the Weezer logo was originally in lower case. The 'flying W' used the Futura Medium font before a few alterations were made. Fans are known to recreate this logo design at shows using hand signals, proving its worth and success in creating a brand for the band.

12. Jurassic 5

 35 beautiful band logo designs - J5

The band logo perfectly encorporates the ‘J’ and ‘5’ into the design

Perfectly encorporating both the 'J' and the '5' to portray Jurassic 5, this is an epic hip-hop logo that allows the design to be featured on a range of records thanks to its circular design. Designed by band member Charlie "Chali 2na" Stewart, it's been produced in a wide range of colours for much of the band's merchandise and remains a strong contender as one of the best band logos.

13. Public Image Ltd

 35 beautiful band logo designs - Public Image Limited

Dennis Morris created the logo for the band back in 1979

Renowned photographer Dennis Morris was responsible for the design of Public Image Ltd's logo. Known for photographing The Sex Pistols and Bob Marley, Morris created this band logo design back in 1979. He also produced the iconic Metal Box packaging for the band, which is still regarded as one of the best album artworks of all time.

14. The KLF

 35 beautiful band logo designs - The KLF

Perfectly shaped for vinyl, this is the perfect logo for the acid house group

Situationist pranksters and acid house pioneers, the KLF also had a razor-sharp eye for iconography, which manifested itself in their record covers, their videos, their legendary Top of the Pops performances and, of course, their logos. Their pyramid blaster logo, perfectly shaped for vinyl, is a masterpiece; naturally, both Bill Drummond and Jimmy Cauty of the KLF now work as artists.

15. Metallica

 35 beautiful band logo designs - Metallica

The Metallica logo showcases everything that a metal logo should be

Created by Turner Duckworth, the famous Metallica logo got a redesign back in 2008. Based on the band's original version from 1981, Duckworth also designed the identity and packaging for the band's album Death Magnetic. Like countless other metal bands, Metallica's own take on the metal aesthetic is something that their fans cherish; whether it be in the form of tattoos or scrawlings on school books.

16. Sunn O)))

 35 beautiful band logo designs - Sunn

A member of Sunn is responsible for the band’s art direction

As one half of the seismic drone-rock band Sunn O))), not only does Stephen O'Malley help to make some fantastic music – he also oversees the design and art direction of their releases. The visual is an important component to Sunn's music and O'Malley has certainly triumphed with this long-standing, striking logo.

17. Kavinsky

 35 beautiful band logo designs - Kavinsky

Kavinsky is known for his electro 80s-inspired music

Making music reminiscent of '80s film soundtracks, French producer Vincent Belorgey – quite aptly – appeared on the opening credits for Nicolas Winding Refn’s movie Drive. It's easy to see why then, that his logo also evokes the sense of '80s movies; with it's retro-like font, it's the perfect accompaniment to his music.

18. Foo Fighters

 35 beautiful band logo designs - Foo Fighters

Another instantly recognisable band logo from The Foo Fighters

Another perfect example of a band logo that has proved popular with fan's tattoos, The Foo Fighters logo comprises of a circle motif containing two interlocking 'Fs' and the band's name in a slightly rounded and compact typeface. This is among the most popular and instantly recognisable logos in rock music.

19. The Ramones

 35 beautiful band logo designs - The Ramones

A longtime friend of the band designed the iconic logo

The Ramones' logo was designed by New York City artist Arturo Vega, a longtime friend who lived with several members of the band. It's proof that when you get a band logo right, it can go on to become one of the most iconic brands in the world. Basing it on The Presidential Seal, Vega wanted the design to portray an 'All-American Band’.

20. The XX

 35 beautiful band logo designs -The XX

The logo was created by one-time art student and band member Romy Madley Croft

This is a relatively new kid on the block, but boy, does it work. Bursting onto the music scene in 2009 with their self-titled debut album, the black and white 'X' across the front sleeve was just as eye-catching as the music was enticing.

This latest variation of the logo was designed by band member Romy Madley Croft; a one-time art student who used oil imagery to create the affect within the letter. This band logo is a perfect example branding that will continue to work through each album release.

21. Black Flag

 35 beautiful band logo designs - Black Flag

The logo was designed by Raymond Pettibon, who also came up with the band’s name

This has to be one of the most iconic band logos of all time. Created for Black Flag by guitarist and chief songwriter Greg Ginn's brother Raymond Pettibon, he once stated in an interview that the black flag design was designed to represent anarchy. The four black bars combined with the bold typography make for a solid band logo.

22. Run DMC

 35 beautiful band logo designs - Run DMC

The infamous logo is one of the only band logos to feature on a pair of Adidas sneakers

Run DMC broke barriers in music, which almost everyone in music today benefits from. Their logo is still one of the most prolific to ever grace the music industry and continues to adorn the chests and feet of hip-hop lovers across the globe. The solid typography and three-part colour scheme makes it infinitely timeless and it's also one of the only band logos to feature on a pair of Adidas sneakers.

23. Nine Inch Nails

 35 beautiful band logo designs - Nine Inch Nails

The typography is said to be inspired by a Talking Heads album cover

Designed by frontman Trent Reznor and Gary Talpas, the Nine Inch Nails logo is simplicity at its best. Featuring the letters set inside a thick border, the black and white creation first appeared on the band's debut album Down in it, which was released in 1989.

It's said to be inspired by Tibor Kalman's typography on the Talking Heads album Remain in Light.

24. Daft Punk

 35 beautiful band logo designs - Daft Punk

Daft Punk use some punky influence for their logo design

Evoking an extremely ‘punky’ look, the electronic duo produced one of the most well-known logos within the dance music scene. Designed by band member Guillaume Emmanuel “Guy-Manuel” de Homem-Christo, the logo ties in with the stand-out ethos of the pair. Using bold colours and textures, Daft Punk’s visuals are just as important as their tunes.

25. Public Enemy

 35 beautiful band logo designs - Public Enemy

It was announced today that the group are to be inducted into the Rock & Roll hall of fame

Another hip-hop gem in our list, this logo for Public Enemy was designed by Chuck D back in 1986. It was tightened up ahead of the release of Yo! Bum Rush The Show in 1987 by New York artist Eric Haze.

Many claim the target to be a state trooper but it is in fact a silhouette of a B-boy. It was also announced in 2013 that the group were to be added to the Rock & Roll hall of fame.

26. The Streets

 35 beautiful band logo designs - The Streets

The gritty typography effortlessly complements the lighter image

It may not be as iconic as our other inclusions but we just had to feature this logo from British group The Streets. Evoking the exact feel and message of their debut album Original Pirate Material, the gritty typography effortlessly complements the lighter image. There's been a few variations throughout their career but we love this original design.

27. Rolling Stones

 35 beautiful band logo designs - The Rolling Stones

The logo is said to be influenced by Mick Jagger’s huge lips

How could we not include this infamous logo from the rock legends themselves, The Rolling Stones? Created by John Pasche in 1971, the designer is said to have been influenced by Mick Jagger's appearance for the logo, stating that his lips were the first thing you noticed about him. The eye-popping offering has continued to work well for the band, who have been working in music for over 50 years.

28. Wu-Tang Clan

 35 beautiful band logo designs - Wu Tang Clan

By sticking with their original band logo, the group are instantly recognisable

The Wu-Tang ‘W’ is one of the most distinguishable logos in hip-hop culture, with its members adorning the ‘W’ on everything from clothing to chains, but it is most prominent on dozens of their album covers. Created by DJ and producer Mathematics, the band have stuck by the original design throughout their expansive career.

29. Yes

 35 beautiful band logo designs - Yes

A logo that perfectly sums up the music scene in the ’70s

English artist and graphic designer Roger Dean created this iconic, bubbly logo, which first debuted on the band's 1972 LP Close to the Edge. He also crafted Yes' album artwork and stage shows; solidifying the band's brand throughout the ages. It has had a variant of colours but that never makes the typography any less engaging. This is a logo that perfectly sums up the 1970s.

30. Buzzcocks

 35 beautiful band logo designs - The Buzzcocks

Malcolm went on to work with the band for several years after designing the logo in 1977

An simple yet instantly recognisable band logo, this one was created by Malcolm Garrett in early 1977. He went on to work with the band for several years throughout their career, creating visuals for promotional material. The fast, edgy and disjointed typography is the perfect personification of one of the greatest British bands.

31. Aphex Twin

 35 beautiful band logo designs - Aphex Twin

Paul ‘Terratag’ Nicholson was working with alien ‘vibes’ at the time of this logo creation

First appearing on the 1992 release of Xylem Tube, Richard D. James aka Aphex Twin has continued to use the logo throughout his impressive career. Designed by Paul 'Terratag' Nicholson, the logo evokes an unsettling yet beautiful image that wholly coincides with the impeccable music of Aphex Twin.

32. Death From Above 1979

 35 beautiful band logo designs - Death From Above

There’s no need for a name with this bold band logo design

An eye-popping and graphic design delight, this logo for Death From Above 1979 has graced the covers, stage shows, banners and posters for the noise rock duo since the beginning of their career. The bold choice of colour makes it a logo with a difference, with no need for a name as the logo is instantly recognisable.

33. Justice

 35 beautiful band logo designs - Justice

Choosing such a universal image for your band’s logo is a dangerous path!

Choosing to use such a universal symbol as your band's logo is a dangerous path. However, this creation for French electronic duo Justice just seems to work.

Band member Gaspard Augé once stated that the influence for the decision was 'that a music venue is like a church in that everyone is gathering together and focusing on one point.' The logo has adorned the band's live shows and album covers, becoming almost as synonymous as their songs.

34. Radiohead

 35 beautiful band logo designs - Radiohead

The logo was created for the release of Kid A

Radiohead haven't really had a regular band logo throughout their career but this is one that truly stands out (and adorns many a fan's body.) Designed by artist Stanley Donwood and Thom Yorke, the 'modified bear' was created for the release of Kid A.

The name of the bear either ironically or purposely contributes to the influx of modern art without meaning, without complexity, and without use. If Radiohead's career is anything to go by, we're guessing it's on the ironic side of things.

35. Devin Townsend Project

 35 beautiful band logo designs - Devin Townsend

Less is more with this band logo design

A simple, typography-based logo design, this creation for the Devin Townsend Project combines the three initials of the band's name in two swoops. This band logo was added to the list on the suggestion of one of our Twitter followers. It was designed by Travis Smith and show us that sometimes less is more when it comes to band logos.

36. Outkast

 35 beautiful band logo designs - Outkast

The band refer to their logo in their song Morris Brown

The final hip-hop logo in our list, this creation for the duo evokes the fun aspect of their music. Featuring graffiti-like font complete with a crest and crown, the pair even comment on the logo during their song Morris Brown, stating "OutKast royalty by design of logo. Wanna count it out loud?"

37. Misfits

 35 beautiful band logo designs - Misfits

This is a band logo that has stood the test of time

The Misfits' skull logo first appeared on the Horror Business single, based on a poster for The Crimson Ghost. It proved so popular that the image quickly became the mascot for the band and has been used frequently on the band's releases and merchandise ever since. 

Related articles:

Quiz – guess the logo, can you identify these brands?The 27 greatest animated music videosThe best logos of all time

How to Build a Coach Holiday Showcase with WRLD

Original Source: https://www.sitepoint.com/how-to-build-a-coach-holiday-showcase-with-wrld/

This article was created in partnership with WRLD. Thank you for supporting the partners who make SitePoint possible.

Since the late 2000s, maps have been a staple of the web, and today are more ubiquitous than ever. They have a variety of uses, from complementing a company’s contact page to plotting places of interest across a geographic region. As computing power is becoming more affordable, 3D maps have gained popularity, demonstrating the scale of buildings and the nature of the surrounding terrain, adding a touch of novelty to such experiences, as well as providing practical benefits.

One such provider of 3D maps is WRLD. Major cities such as New York, London, Paris and Bangkok have been generated in 3D using real geographic data. This data can be used to author custom maps containing points of interest and other useful metadata, and thanks to their Leaflet-driven JavaScript library, it’s possible to drop them into a web page with a few lines of code; this workflow will be the focus of our article.

Using WRLD’s map designer, we will build a map for a coach holiday, which we will then integrate into a Node.js-powered website.

Getting Started

Before we can use WRLD’s map designer, we must register. Sign in once you’ve created and verified your account.

Navigate to the Map Designer. This page will list any maps that you have created, as well as allowing you to create new ones. Click on Create Map to launch the designer.

Together, we’re going to create a map for a Dundee food tour. Click New Map on the left and in the resultant New Map modal, enter a title of Dundee Food Tour and then hit Confirm New Map.

Specifying the map's title

Now that we’ve created our map, we need to choose a starting location. Click the menu button next to the search input, click Locations, and choose Dundee.

Selecting a location

Adding Our First Place

To add locations to our map, we have to use WRLD’s Places Designer, which facilitates the creation of place sets that can then be imported and reused.

On the right, click the place marker icon, followed by Manage Place Collections. This will open the designer at the same geographical location. Let’s add our first places collection by clicking New Places Collection. Set the title to Dundee Food Tour and then add a reference to our Dundee Food Tour app, which will link the places collection with our map. Finalise this with Confirm New Collection.

Creating a new place collection

Click New Place Marker next to the search box. A marker should appear on the Googleplex building, but it can be dragged into place if necessary. In the pane on the right, enter a title of Googleplex — this will save automatically.

Adding a new place marker

Add as many places as you’d like following this approach, and return to the Map Designer once you feel that you have enough. Our new collection should have been detected and automatically included in our map, but we can configure this manually by clicking the places marker on the right and selecting our place set.

Configuring our places collection for inclusion

Before we display the map on our website, we should set a starting point. Drag and zoom the map until you’ve found an optimal view, then, using the crosshair icon on the right, open the Opening Map View form and click Use Current Map View.

Setting the opening map view

Including the Map on a Website

Despite the impressively-detailed 3D modelling provided by WRLD, the real power of this platform is the ability to embed maps into websites and other applications. As well as exposing a variety of HTTP APIs for directly querying data, there are libraries for rendering maps on many platforms, including iOS, Android, and the web. We will use the wrld.js library, which is also available on npm.

Setting Up

The boilerplate website to which we will add our map can be found at GitHub. Please clone this repository and install the required dependencies:

git clone https://github.com/jamesseanwright/wrld-tours.git
cd wrld-tours
nvm install # this will install the version of Node.js found in .nvmrc. Make sure nvm is installed
npm i

To verify that the project works as expected, run npm run watch; this will start the project using nodemon, restarting automatically when any changes are made. Upon opening http://localhost:8001/trips in your browser, you should see a list of trips with a sole item.

Grabbing and Configuring your Developer Token

Our application will consume data from two of WRLD’s HTTP APIs, which are protected by developer tokens. To acquire your token, sign in and head over to the My Account section, and click the Developer Token tab; make sure you copy it.

Grabbing the developer token via the My Account page

In our app’s codebase, open config.json in the server directory, and paste your token as the value of devToken; this property will be used to make the aforemntioned API calls covered in the next step.

{
“devToken”: “insert your dev token here”
}

Calling WRLD’s HTTP APIs

Open the project in your editor, and head to the trips.json file in the server directory. This is a hash map of all of the available trips listed on our website, keyed by a hyphen-separated slug. These are accessible via the /trips route, so we can reach the Dundee Food Tour via /trips/dundee-food-tour. You’ll notice that the entry for the Dundee Food Tour has two empty properties, mapSceneId and poiSetId. We will return to this shortly.

Let’s take a look at the client-side code that fetches the map data. Open TripView.js (not TripViews.js) in the client/views directory and study the onNavigatedTo method. This calls two endpoints that are provided to the client by the server:

const [mapScene, poiSet] = await Promise.all([
callEndpoint(endpoints.mapScene),
callEndpoint(endpoints.poiSet),
]);

These don’t directly point to the WRLD APIs. Rather, they are exposed by our own server so that our developer token is not leaked to the browser. Let’s take a look at these routes in server/apiRouter.js:

router.get(‘/mapscenes/:id’, (req, res) => {
res.status(404).send();
});

router.get(‘/pois/:poiSetId’, (req, res) => {
res.status(404).send();
});

Currently, they behave as if they do not exist. To implement them, we can use the already-imported request module to forward our requests to the respective WRLD APIs and stream this back to the browser:

router.get(‘/mapscenes/:id’, (req, res) => {
request.get(`https://wrld.mp/v1.1/mapscenes/${req.params.id}?token=${config.devToken}`)
.pipe(res);
});

router.get(‘/pois/:poiSetId’, (req, res) => {
request.get(`https://poi.wrld3d.com/v1.1/poisets/${req.params.poiSetId}/pois/?token=${config.devToken}`)
.pipe(res);
});

Whenever the client-side JavaScript is evaluated for a trip, it will call these endpoints with the relevant IDs, keeping the developer token away from the browser.

Verifying Our Endpoints

To check that this has worked, we can call our own API endpoints directly. To get the respective IDs for our mapscene and place collection, we can call the WRLD APIs directory with our developer token, i.e.:

https://wrld.mp/v1.1/mapscenes/?token=[your dev token]
https://poi.wrld3d.com/v1.1/poisets/?token=[your dev token]

We can then take the id properties and pass them to our own local endpoints e.g. http://localhost:8001/api/mapscenes/10786 and http://localhost:8001/api/pois/4149. If we have implemented these routes correctly, then we should receive data from the WRLD APIs.

Updating the Trip Definition

Return to the trips.json file. Remember the two empty properties, mapSceneId and poiSetId? Set their respective values to the IDs you took for the mapscene and place collection e.g.:

“mapSceneId”: “10597”,
“poiSetId”: “4160”

Rendering the Map

We’re now ready to plot the API data onto a browser-rendered map. Let’s return to the TripView.js file.

The post How to Build a Coach Holiday Showcase with WRLD appeared first on SitePoint.

How to create a 3D effect with occlusion shadows

Original Source: http://feedproxy.google.com/~r/CreativeBloq/~3/c1Rs3-ufnn4/occlusion-shadows-121518571

occlusion main image

Occlusion shadows help to push the three-dimensional feeling of what you’re painting. Look for areas enclosed by surfaces and notice how the shadows are always darker there

When doing detailed lighting work I’ve gotten into the habit of simplifying each step of the painting process as much as possible. Focusing my attention on one aspect at a time helps to not become overwhelmed and almost always results in a much more thorough job.

One step in that process is concentrating on occlusion shadows, which occur where surfaces come together. A basic rule of thumb is that wherever areas are closed in by surfaces, shadows will occur. The inside of a mouth or an eye socket for instance will almost always be darker than the top of the nose or the forehead.

They’re a form of shadows best noticeable when there’s no directional light present. So you can paint them on a separate layer without having to worry about the direction of the overall lighting, and then set that layer to Multiply to have it distribute the shadows on the objects below. In my example however, I do have a lighting scheme in mind with directional lights and cast shadows, but these build upon the occlusion shadows rather than replacing them.

01. Start simple

occlusion layers step 1

 Every good painting starts with a good foundation. In this case it’s a quick line drawing that looks very simple, but has all the information in it I need to finish the painting. It shows the placing of all the facial features, but also where the cast shadows will fall and how the back lighting will push the silhouette forward.

02. Use occlusion layer

occlusion in photoshop

Built upon the previous sketch is the occlusion layer. You’ll notice that it’s a very bright layer with light greyish tones in it, and the reason for that is that we don’t want to overdo the shadows in the image. By keeping this layer light the Multiply layer won’t ‘burn’ my friendly-looking orc character below.

03. Build it up

building up occlusion layers

With the occlusion layer in Multiply I paint over the line drawing with larger strokes to erase the big lines while keeping the major volumes. The lines aren’t really needed since the layout of the elements is present in the occlusion layer, too. The heavy lifting is now mostly done and all that remains is adding colour and effects.

Words: Bram Sels

Bram is a freelance illustrator and concept designer. He has worked for companies such as Ubisoft, Axis Animation, 3DTotal and Wideshot Entertainment. This article originally appeared in ImagineFX issue 128.

Like this? Read these!

Free Photoshop brushes every creative must haveHow to create an orc in ZBrushHow to create dynamic lighting in Photoshop