The best social media schedulers in 2020

Original Source: http://feedproxy.google.com/~r/CreativeBloq/~3/e4_-5iyo8s0/best-social-media-schedulers

If you promote your creative work via social media, the best social media schedulers could relieve you of a significant chunk of your weekly workload.  Users who share upwards of seven posts a week gain the most engagement across their social media pages, and you could be spending that time working on creative projects instead of staring at social media platforms. This is where a social media management tool, or scheduler, steps in. You can plan your content in advance and then schedule posts to be sent out automatically.

There are a host of other features built into these programs, all designed to help you understand what audiences respond to across different platforms, increase engagement and build a bigger following. Some contain a variation of analytical tools to help you understand optimum times to post, or what content is working best for you. This post mostly focuses on schedulers, so keep in mind that there are loads of other options if you need a tool that does it all.

Remember, scheduling content is helpful but it isn't the best way to increase engagement with your social media accounts. Instead of simply putting out content, you need to deploy a well-rounded set of strategies. For more on this, see our post on how to boost Instagram engagement. You may also want to try simple tricks such as how to change the font in your Instagram bio.

Social media schedulers: Smarter Queue

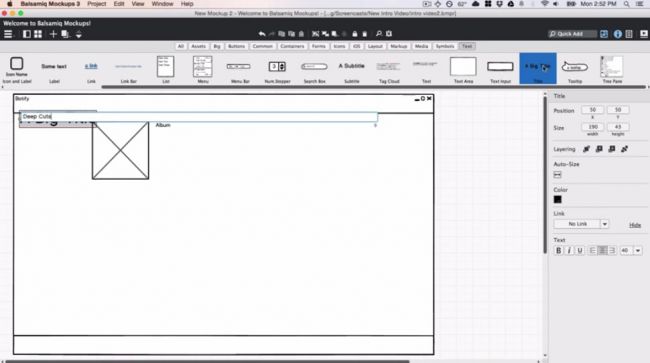
Smarter Queue is just coming out of Beta, and it's shaping up to be a fierce contender in the social media tools space. The platform is category-led, which means you set up multiple categories each with different posting plans, such as which profiles are to be posted to, and add content to each category as you create or find it (including directly from your Twitter feed). You do this by inputting urls or dragging and dropping into the visual calendar so your plan is laid out clearly in front of you. 

Smarter Queue's analytics are pretty powerful and will give you information on optimum posting times, enable you to compare engagement between content types and analyse your social history plus your competitors. The evergreen content recycler keeps your repeated content going on a cycle, with no ending (unless you ask it to stop). There are engagement tools such as sharing or retweeting from within the platform, and content curation and editing tools, too. 

One downside is that the mobile app is very limited. Its only purpose at the moment is to remind you when to publish content on Instagram (which doesn't have an auto-post function), and to bookmark content. However, the product roadmap details some great future features for the platform, which could outweigh this negative point.

This scheduler boasts that it saves you over eight hours a week, and indeed it is a great choice if you want to be totally hands-off (remember, this won't necessarily create the most engagement). Establishing your content settings is the only time-consuming part, but once that is done, you can let it tick over. 

Social media schedulers: Later

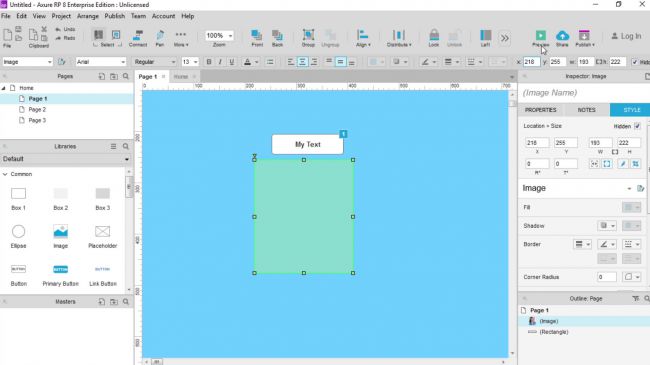
Later is unapologetic about being mostly for Instagram, in fact it tags itself as the number one Instagram scheduler. And it does that job really well. Due to Instagram's regulations, you can't auto post content on the site unless you're a business page (and even then, only on single image posts), so bear in mind that if you're not, you'll only be able to schedule posts then publish them manually. But, you'll get notifications from Later at the specified times, and all you need to do at that point is press publish on the content you've already created. 

The fact that the platform is so image-led means Later works incredibly well with Instagram, but not so well with Twitter or Facebook, which aren't so focused on the visuals. The grid layout within Later displays your content just as you would see it on Instagram, so you can curate brand consistency at a glance, as well as check you're posting a mix of content. There's also a handy hashtag search which allows you to repost content based on specific keywords.

Later provides stats on your account that become more detailed as you move up the price plans, but these are pretty limited at the lower price points, and even the most in-depth analysis doesn't match that of other schedulers. 

If you're a visual content creator, focused on Instagram, this is an easy-to-use scheduler that doesn't overcomplicate things. But it's not the best choice for writers, or anyone wanting to delve deep into stats across social channels.

Social media schedulers: Sendible

A powerhouse of a social media management tool, Sendible really does do it all. Aimed at increasing productivity for agencies managing multiple clients, the platform has a slick dashboard interface that allows you to switch between clients easily, and the facility to collaborate with teams/clients on content and campaigns. 

Functions for scheduling and auto-posting are included in the toolkit, alongside powerful analytics via reports, automation tools (like automatic replies), grouping posts by teams, and content libraries that house all your evergreen content for reuse. 

This is a serious choice for larger outfits, but the app can be somewhat unstable. This isn't something we'd expect from such a professional program so it's a niggle, but the other tools definitely have the goods to back up the price.

Social media schedulers: Postcron

If you're looking for a scheduler that does just what it says on the tin, this is your best bet. Postcron is ridiculously simple in its focus: it schedules and auto posts, and that's it. (As with most other apps, it won't auto post to Instagram, you'll need to respond to the notification.) You can bulk upload, which saves time, and the ability to add a watermark is a nice touch. 

There are no extras here – there are zero analytics, and no editing or curation tools. But if you just want to be able to schedule, for a reasonable price and with a clean, useable UI, this is a safe choice.

Social media schedulers: Hootsuite

Hootsuite is one of the leading social media management tools, and it truly does do it all. It offers a free forever plan that will do the job well if you just want to schedule content. It can be hard to find a decent free scheduler that works this well across all channels, and Hootsuite's free plan even has basic analytics. 

The Streams tool is a clear winner, allowing you to schedule, manage and sort your posts (and your followers' posts/mentions) across social media channels without having to log in to your separate accounts. Bear in mind that you are limited to scheduling only 30 posts at one time, and to three user profiles, but this should be enough to get you started if you're a single user.

If you choose to upgrade your plan, Hootsuite's wealth of features won't leave you wanting in any area – it offers functions we didn't know we needed. We were particularly impressed with the Hootlet – the browser extension. It helps with topic searches, retweets and replies and more. However, it's worth mentioning that the UI does feel a bit dated, especially compared to other platforms.

Social media schedulers: TweetDeck

TweetDeck is a pretty basic scheduler that was bought by Twitter, and, unsurprisingly, it only encompasses Twitter itself. However, though there are not many other features, it does do Twitter scheduling well, in an uncomplicated way. It may only be a browser platform but it has a clean, bright UI, plus there are a few nifty tricks that will improve your experience immensely. 

Content is organised through custom columns, which you can create yourself to track pretty much anything you like through targeted streams. Think keyword mentions, lists and saved searches. You can filter searches (to track whenever someone mentions your business, or your competitors), and all this can be done with up to 200 Twitter accounts at once. You can also manage multiple accounts from one dashboard. TweetDeck will not provide enough functionality for power users, but it is a solid option for a single user, or a small team. 

Social media schedulers: Loomly

Recurpost has found a niche in its approach to recycling evergreen content, so if you have content that you want to resurface and recycle, it could be particularly useful as part of a wider social media strategy. The content variation tool automatically suggests alternative wording to your existing content, potentially saving you a lot of time when trying to mix things up for Twitter's reposting rules. 

Other than that, it is a simple scheduler. The free plan means you could use this platform for recycling content alongside something more heavy hitting. It would also be useful for testing the strategy of automated recycled content, or for people who don't have a huge amount of content to push and purely want to post recycled content regularly. The free plan allows you three profiles and 100 pieces of content.

Loomly is a calendar-based tool with a useful angle. The software will help keep your ideas and content fresh with its content creation toolkit, and make it easy to collaborate. Loomly uses AI to generate dynamic suggestions based on time of day, location and what is currently trending on Twitter. Its calendar view contains key dates and events to help you out, and you can also connect your RSS feeds to generate further content. 

The collaboration aspects are also a massive plus. Posts can be set up and shared with team members or clients for approval and edits, and the post view function saves all previous versions of a post. This includes who has made edits and what they were, which is great for feedback and accountability. Slack integration is also great for workflow. The fine-tune each channel tool allows you to tweak posts for each social media channel individually, enabling you to perfect format, picture, links and so on.

Loomly's main function is to be a calendar-based scheduling tool with a focus on content creation assistance and collaboration, and it does these things very well.

Read more:

The best Instagram font generatorsThe ultimate guide to social media for creativesBrands that rule at social media

3D Animal Portraits by Maxim Shkret

Original Source: http://feedproxy.google.com/~r/abduzeedo/~3/fPwHVlkUkJw/3d-animal-portraits-maxim-shkret

3D Animal Portraits by Maxim Shkret

AoiroStudioMar 23, 2020

This is the best opportunity to share some colours into your feed. Nothing to bring joy and inspiration than the work of Maxim Shkret with our constant admiration of his 3D animal series. Maxim is a digital artist that is super-talented and it’s always refreshing. We pleasurably featured his work before and it’s what we all needed right now, at this time in the World.

About Maxim Shkret

Maxim is a digital artist that has more than 10+ years in the industry of advertising, graphic design and art directing. His work is filled of 3D works made with AutoDesk 3Ds and more.

Personal Site
Behance


Photos of the Week – Lake Tahoe and Oakland

Original Source: http://feedproxy.google.com/~r/abduzeedo/~3/UQHoAbMs2eg/photos-week-lake-tahoe-and-oakland

Photos of the Week – Lake Tahoe and Oakland
Photos of the Week - Lake Tahoe and Oakland

abduzeedoMar 23, 2020

Continuing with our series of free high-resolution photos I have been taking and sharing on Unsplash. This week I’d like to share some photos I took in the Bay Area and Lake Tahoe.

The photos were taken with the Sony A7 III with the cheap (not so great) Sony FE 50mm F1.8 as well as with the amazing Sony FE 85mm F1.8. I will talk a bit more about these lenses in a future post.

For more information make sure to visit my Unsplash page at https://unsplash.com/@abduzeedo

Photography


Creating Sortable Tables With React

Original Source: https://www.smashingmagazine.com/2020/03/sortable-tables-react/

Creating Sortable Tables With React

Creating Sortable Tables With React

Kristofer Giltvedt Selbekk

2020-03-20T12:30:00+00:00
2020-03-20T19:06:51+00:00

Table sorting has always been a pretty hard issue to get right. There’s a lot of interactions to keep track of, extensive DOM mutations to do and even intricate sorting algorithms, too. It’s just one of those challenges that are hard to get right. Right?

Instead of pulling in external libraries, let’s try to make stuff ourselves. In this article, we’re going to create a reusable way to sort your tabular data in React. We’ll go through each step in detail, and learn a bunch of useful techniques along the way.

We won’t go through basic React or JavaScript syntax, but you don’t have to be an expert in React to follow along.

Creating A Table With React

First, let’s create a sample table component. It’ll accept an array of products, and output a very basic table, listing out a row per product.

function ProductTable(props) {
const { products } = props;
return (
<table>
<caption>Our products</caption>
<thead>
<tr>
<th>Name</th>
<th>Price</th>
<th>In Stock</th>
</tr>
</thead>
<tbody>
{products.map(product => (
<tr key={product.id}>
<td>{product.name}</td>
<td>{product.price}</td>
<td>{product.stock}</td>
</tr>
))}
</tbody>
</table>
);
}

Here, we accept an array of products and loop them out into our table. It’s static and not sortable at the moment, but that’s fine for now.

Sorting The Data

If you’d believe all the whiteboard interviewers, you’d think software development was almost all sorting algorithms. Luckily, we won’t be looking into a quick sort or bubble sort here.

Sorting data in JavaScript is pretty straightforward, thanks to the built-in array function sort(). It’ll sort arrays of numbers and strings without an extra argument:

const array = [‘mozzarella’, ‘gouda’, ‘cheddar’];
array.sort();
console.log(array); // [‘cheddar’, ‘gouda’, ‘mozzarella’]

If you want something a bit more clever, you can pass it a sorting function. This function is given two items in the list as arguments, and will place one in front of the other based on what you decide.

Let’s start by sorting the data we get alphabetically by name.

function ProductTable(props) {
const { products } = props;
let sortedProducts = […products];
sortedProducts.sort((a, b) => {
if (a.name < b.name) {
return -1;
}
if (a.name > b.name) {
return 1;
}
return 0;
});
return (
<Table>
{/* as before */}
</Table>
);
}

So what’s going on here? First, we create a copy of the products prop, which we can alter and change as we please. We need to do this because the Array.prototype.sort function alters the original array instead of returning a new sorted copy.

Next, we call sortedProducts.sort, and pass it a sorting function. We check if the name property of the first argument a is before the second argument b, and if so, return a negative value. This indicates that a should come before b in the list. If the first argument’s name is after the second argument’s name, we return a positive number, indicating that we should place b before a. If the two are equal (i.e. both have the same name), we return 0 to preserve the order.

Making Our Table Sortable

So now we can make sure the table is sorted by name — but how can we change the sorting order ourselves?

To change what field we sort by, we need to remember the currently sorted field. We’ll do that with the useState hook.

A hook is a special kind of function that lets us “hook” into some of React’s core functionality, like managing state and triggering side effects. This particular hook lets us maintain a piece of internal state in our component, and change it if we want to. This is what we’ll add:

const [sortedField, setSortedField] = React.useState(null);

We start by not sorting anything at all. Next, let’s alter the table headings to include a way to change what field we want to sort by.

const ProductsTable = (props) => {
const { products } = props;
const [sortedField, setSortedField] = React.useState(null);
return (
<table>
<thead>
<tr>
<th>
<button type=”button” onClick={() => setSortedField(‘name’)}>
Name
</button>
</th>
<th>
<button type=”button” onClick={() => setSortedField(‘price’)}>
Price
</button>
</th>
<th>
<button type=”button” onClick={() => setSortedField(‘stock’)}>
In Stock
</button>
</th>
</tr>
</thead>
{/* As before */}
</table>
);
};

Now, whenever we click a table heading, we update the field we want to sort by. Neat-o!

We’re not doing any actual sorting yet though, so let’s fix that. Remember the sorting algorithm from before? Here it is, just slightly altered to work with any of our field names.

const ProductsTable = (props) => {
const { products } = props;
const [sortedField, setSortedField] = React.useState(null);
let sortedProducts = […products];
if (sortedField !== null) {
sortedProducts.sort((a, b) => {
if (a[sortedField] < b[sortedField]) {
return -1;
}
if (a[sortedField] > b[sortedField]) {
return 1;
}
return 0;
});
}
return (
<table>

We first make sure we’ve chosen a field to sort by, and if so, we sort the products by that field.

Ascending vs Descending

The next feature we want to see is a way to switch between ascending and descending order. We’ll switch between ascending and descending order by clicking the table heading one more time.

To implement this, we’ll need to introduce a second piece of state — the sort order. We’ll refactor our current sortedField state variable to keep both the field name and its direction. Instead of containing a string, this state variable will contain an object with a key (the field name) and a direction. We’ll rename it to sortConfig to be a bit clearer.

Here’s the new sorting function:

sortedProducts.sort((a, b) => {
if (a[sortConfig.key] < b[sortConfig.key]) {
return sortConfig.direction === ‘ascending’ ? -1 : 1;
}
if (a[sortConfig.key] > b[sortConfig.key]) {
return sortConfig.direction === ‘ascending’ ? 1 : -1;
}
return 0;
});

Now, if the direction is ‘ascending’, we’ll do as we did previously. If it’s not, we’ll do the opposite, giving us descending ordering.

Next up, we’ll create a new function — requestSort — which will accept the field name, and update the state accordingly.

const requestSort = key => {
let direction = ‘ascending’;
if (sortConfig.key === key && sortConfig.direction === ‘ascending’) {
direction = ‘descending’;
}
setSortConfig({ key, direction });
}

We’ll also have to change our click handlers to use this new function!

return (
<table>
<thead>
<tr>
<th>
<button type=”button” onClick={() => requestSort(‘name’)}>
Name
</button>
</th>
<th>
<button type=”button” onClick={() => requestSort(‘price’)}>
Price
</button>
</th>
<th>
<button type=”button” onClick={() => requestSort(‘stock’)}>
In Stock
</button>
</th>
</tr>
</thead>
{/* as before */}
</table>
);

Now we’re starting to look pretty feature-complete, but there’s still one big thing left to do. We need to make sure that we only sort our data when we need to. Currently, we’re sorting all of our data on every render, which will lead to all sorts of performance issues down the line. Instead, let’s use the built-in useMemo hook to memoize all the slow parts!

const ProductsTable = (props) => {
const { products } = props;
const [sortConfig, setSortConfig] = React.useState(null);

React.useMemo(() => {
let sortedProducts = […products];
if (sortedField !== null) {
sortedProducts.sort((a, b) => {
if (a[sortConfig.key] < b[sortConfig.key]) {
return sortConfig.direction === ‘ascending’ ? -1 : 1;
}
if (a[sortConfig.key] > b[sortConfig.key]) {
return sortConfig.direction === ‘ascending’ ? 1 : -1;
}
return 0;
});
}
return sortedProducts;
}, [products, sortConfig]);

If you haven’t seen it before, useMemo is a way to cache — or memoize — expensive computations. So given the same input, it doesn’t have to sort the products twice if we re-render our component for some reason. Note that we want to trigger a new sort whenever our products change, or the field or direction we sort by changes.

Wrapping our code in this function will have huge performance implications for our table sorting!

Making It All Reusable

One of the best things about hooks is how easy it is to make logic reusable. You’ll probably be sorting all types of tables throughout your application, and having to reimplement the same stuff all over again sounds like a drag.

React has this feature called custom hooks. They sound fancy, but all they are are regular functions that use other hooks inside of them. Let’s refactor our code to be contained in a custom hook, so we can use it all over the place!

const useSortableData = (items, config = null) => {
const [sortConfig, setSortConfig] = React.useState(config);

const sortedItems = React.useMemo(() => {
let sortableItems = […items];
if (sortConfig !== null) {
sortableItems.sort((a, b) => {
if (a[sortConfig.key] < b[sortConfig.key]) {
return sortConfig.direction === ‘ascending’ ? -1 : 1;
}
if (a[sortConfig.key] > b[sortConfig.key]) {
return sortConfig.direction === ‘ascending’ ? 1 : -1;
}
return 0;
});
}
return sortableItems;
}, [items, sortConfig]);

const requestSort = key => {
let direction = ‘ascending’;
if (sortConfig && sortConfig.key === key && sortConfig.direction === ‘ascending’) {
direction = ‘descending’;
}
setSortConfig({ key, direction });
}

return { items, requestSort };
}

This is pretty much copy and paste from our previous code, with a bit of renaming thrown in. useSortableData accepts the items, and an optional initial sort state. It returns an object with the sorted items, and a function to re-sort the items.

Our table code now looks like this:

const ProductsTable = (props) => {
const { products } = props;
const { items, requestSort } = useSortableData(products);
return (
<table>{/* … */}</table>
);
};

A Last Touch

There’s one tiny piece missing — a way to indicate how the table is sorted. In order to indicate that in our design, we need to return the internal state as well — the sortConfig. Let’s return that as well, and use it to generate styles we can apply to our table headings!

const ProductTable = (props) => {
const { items, requestSort, sortConfig } = useSortableData(props.products);
const getClassNamesFor = (name) => {
if (!sortConfig) {
return;
}
return sortConfig.key === name ? sortConfig.direction : undefined;
};
return (
<table>
<caption>Products</caption>
<thead>
<tr>
<th>
<button
type=”button”
onClick={() => requestSort(‘name’)}
className={getClassNamesFor(‘name’)}
>
Name
</button>
</th>
{/* … */}
</tr>
</thead>
{/* … */}
</table>
);
};

And with that, we’re done!

Wrapping Up

As it turns out, creating your own table sorting algorithm wasn’t an impossible feat after all. We found a way to model our state, we wrote a generic sorting function, and we wrote a way to update what our sorting preferences are. We made sure everything was performant and refactored it all into a custom hook. Finally, we provided a way to indicate the sort order to the user.

You can see a demo of the table in this CodeSandbox:

Smashing Editorial
(ra, yk, il)

Illustrator gives free drawing lessons to inspire kids stuck at home

Original Source: http://feedproxy.google.com/~r/CreativeBloq/~3/op7OtP-7trk/free-kids-drawing-lessons

With children now stuck at home across the world, parents will be wondering how to keep them busy over the coming weeks. That's why illustrator Rob Biddulph has taken to Twitter to offer a series of draw-along videos for kids.

Using the hashtag #DrawWithRob, budding young artists can share their responses to Biddulph's tutorials, which he plans to share every Tuesday and Thursday at 10am GMT on Twitter. We love a good drawing lesson (check out our list of the best how to draw tutorials), and Biddulph's animal designs are a super fun example.

Sausage Dog

From tutorial 2: ‘Sausage dog’

"[Draw-alongs] are something I have been doing for years at my live events," Biddulph told BBC Breakfast, but with so many kids now stuck at home, "this is something I can do for those parents and those kids." As well as being posted to Twitter, the videos will have a permanent home on the illustrator's website. Below is the first tutorial, 'Gregosaurus'.

Biddulph is quick to point at that the draw-along is not a competition. "I've seen thousands [of entries] now, and every single picture is different and charming in its own way." We completely agree – here are some delightful #DrawWithRob examples from Twitter:

While the world is a strange place right now, we're seeing lots of heartening examples of community in the world of art online. These include Noel Fielding's online art club and French artists creating a giant collaborative artwork. 
Visit Biddulph's Twitter page on Tuesday and Thursday mornings for the latest draw-alongs. "All you need," he says, "is a piece of paper and a pencil, and maybe some colouring pencils". And with that, we're off to draw Gregosaurus. 

Related articles:

Drawings of mythical Amabie flood social mediaArt terms: The ultimate artist's glossary4 tips for your first year as a freelance illustrator

Get $50 off the Wacom One until 22 March

Original Source: http://feedproxy.google.com/~r/CreativeBloq/~3/ezOyQD35awU/get-dollar50-off-the-wacom-one-until-22-march

Are you looking to upgrade your digital art arsenal? Well, you're in luck as Wacom has launched its spring sale in the US, and it includes some pretty tidy discounts. With offers covering top tablets and accessories, you could get kitted out for the new season at a lower price. 

To kick things off, Wacom is offering $50 off the Wacom One for its US customers. With a 13.3-inch screen, the ability to connect to Android devices and compatibility with other styluses, this amazing graphics tablet features in our guide to the best drawing tablets of 2020. 

The usual price of $399.99 is knocked down to $349.99, which is not to be sniffed at. But you'll want to hurry as the deal ends on 22 March.

And UK customers don't need to miss out. They can get 10 per cent off the Wacom One, which brings the price down from £359.99 to £323.99 until 29 March. Hardly earth-shattering but nice, nonetheless. 

Get Creative Cloud

Other US offers include up to $200 off the Wacom MobileStudio Pro 16 and discounts on the Intuos Pro models, too. You can shop the US sale here.

Not in the US? Check out these Wacom deals near you.

Read more:

The best computer for graphic design in 2020Graphic design history: 25 landmark design events16 essential tools for graphic designers

ABACERIA Branding and Visual Identity

Original Source: http://feedproxy.google.com/~r/abduzeedo/~3/QHIRa4bZ1LY/abaceria-branding-and-visual-identity

ABACERIA Branding and Visual Identity

abduzeedoMar 19, 2020

Brand Identity design for the artisanal food store and restaurant in Goiânia, Goiás. The founders of the reputed Las Nenas Bistro in Goiania, idealized bringing innovation in the production and presentation of artisan foods, creating Abaceria. With a different vision about the market and the segment, they were inspired by South American Gastronomy, bringing a blend of kitchens to Abaceria without sticking to an image of “thematic cuisine”. 

Deliverables
Brand Identity
Packaging

Even though the name and processes refer to Argentine meat consumption (Parrilha), the brand also produces and sells handcrafted products such as seasonings, sauces, breads and cheeses. BR /BAUEN challenge was to unify this whole experience through one identity, making it cohesive with the idea of creating a unique, pleasant and different environment.

We materialized the brand positioning in its assets, with an identity characterized by handcrafted elements and applications. The almost aggressive looking logotype is based on the font family “Cortez” and carries most of the personality need to convey the place’s approach to food. A blackletter inspired monogram was also created for smaller signatures, joining “A” + “B” + “C” and applied with rustic and strong visual memories that the brand carries throughout all its applications in applications on wood, embroidery and overall store front and interior usage.

Branding and Visual Identity

Credits

Design Direction: Rodrigo Francisco
Brand Research & Strategy: Luís Feitoza
Design Development: Rodrigo Francisco, Felipe Carneiro, Luís Feitoza
Storefront & Food Photography: Emmanuel Gonçalves
Agency: Traço Negócios
Follow us: facebook.com/brbauen  |  instagram.com/brbauen


Dave Pollot: Bringing New Life to Old Art

Original Source: http://feedproxy.google.com/~r/abduzeedo/~3/-DLxd9hloXg/dave-pollot-bringing-new-life-old-art

Dave Pollot: Bringing New Life to Old Art

ibbyMar 19, 2020

As we’re all living in a current reality that feels more like a fictional book or movie we’re doing our best to share content that we hope will help uplift spirits, if even for a brief moment. We’re amongst those sheltering in place here in the Bay Area and concurrently I’ve been researching more good news to share with our readers. Thanks to my friend Erica over at HonestlyWTF I came across the work of a unique artistic talent named Dave Pollot, a former software engineer bringing new life to old art. Dave finds inspiration by way of unwanted thrift shop art, bringing a whole new meaning to the piece oftentimes influenced by pop culture or current events. For example, Dave uses popular food items inserted into still life paintings to represent the distractions (both mental and material) that prevent us from being present and focused on where we are and what we’re doing. Please enjoy just a smattering of this creative talent’s work here.

“Painting has always been something of a hobby to me, but it wasn’t until I started repurposing thrift art in 2012 that I did it with any real consistency.  The idea actually began as a joke between my wife (who loves to shop at thrift stores) and I, but it quickly evolved into an attempt to answer a question: Could I take a piece of unwanted art, and without changing its aesthetic, change its meaning by painting into it some bit of pop culture/nostalgia and make it desirable in the modern world?

About Dave Pollot 

Dave Pollot is a New York based artist who is known for his altered thrift art paintings.  He finds unwanted artwork and adds his own touch – most often pop culture parodies – and in doing so, bridges the divide between classic and pop art.

His artwork has been displayed and found homes in galleries, businesses, and private collections in all 50 states and in over 40 countries around the globe.  His work has attracted attention from the media both in the U.S. and abroad, including Business Insider, Instagram, and the SyFy Channel, and his corporate clients include SONY, Instagram, and Troegs Brewing Company among others.   When he’s not painting, he can be found spending time with his wife and two dogs.


Cyber crime is on the rise: how can you protect your business?

Original Source: http://feedproxy.google.com/~r/Designrfix/~3/qavNuIqiqaA/cyber-crime-is-on-the-rise-how-can-you-protect-your-business

Free image taken from https://unsplash.com/photos/y-wjLDbPNGM  Statistically, 70% of senior business managers rate cybersecurity as a high priority but only 30% have a solid cybersecurity policy in place and most businesses invest less than $500/year in security products. If you’re worried that your business is vulnerable, the time to act is now because the numbers don’t […]

The post Cyber crime is on the rise: how can you protect your business? appeared first on designrfix.com.

Enhance Your Business with a Professional Website

Original Source: http://feedproxy.google.com/~r/Designrfix/~3/dn4PUMDXhs0/enhance-your-business-with-a-professional-website

In this world of social and online media significance, it is a must for organizations to have an online presence to be noticed and taken seriously  by potential clients. Despite the significance of an online presence, shockingly, a huge number of independent ventures are yet to get on the web. They are passing up a […]

The post Enhance Your Business with a Professional Website appeared first on designrfix.com.