The best iPad stylus in 2019: top iPad styluses for drawing and note-taking

Original Source: http://feedproxy.google.com/~r/CreativeBloq/~3/2tklqxlfueg/best-ipad-stylus

If you want to use one of the many fantastic iPads available now as a tool for drawing, you're going to need a stylus. Your impulse may well be to simply pick up the Apple Pencil, and while this is a great buy and you won't go wrong with it, we'd recommend taking a moment to consider some of the alternative options out there. 

There are many iPad-compatible styluses available from other manufacturers, and many of them are extra-attractive by virtue of the fact that they cost considerably less than Apple's version. We've picked out the best of the best styluses available right now, for all iPad users and all budgets, so you can find which one is right for you and get to drawing.

The best tablets with a stylus for drawing and note-taking

In the following guide, we'll walk you through the best iPad styluses with integrated buttons that you can customise for different functions, and we'll help you decide whether an iPad stylus with a hard nib or soft nib is likely to be better for your requirements. Read on to find out exactly what stylus for your iPad you should buy – and where to buy it for the best price.

Apple Pencil next to two iPads showing artwork

The new Apple Pencil (2018) works with the third-generation 12.9-inch iPad Pro or the 11-inch iPad Pro. The original Apple Pencil works with iPad Pro 12.9-inch (second and first generation), iPad Pro 10.5-inch, iPad Pro 9.7-inch and iPad (6th generation).

The Apple Pencil is, of course, the natural choice of stylus for iPad – but only if you own one of the two iPad models that are compatible with it: an iPad Pro or sixth-generation iPad (2018). If you do, there isn't a better stylus to write and draw with on the market. Not only is it exceptionally comfortable to use, Apple has eliminated many of the issues that can dog other styluses – such as inadequate palm rejection and clear lag that instantly makes you feel disconnected to what you're producing on the screen. The astonishing pressure levels mean that the Apple Pencil reproduces your movements perfectly, at even the most acute angles, and it enhances all your favourite creative iOS apps. The bottom line is that if you've forked out the cash for an iPad Pro, you'd be daft not to swallow the extra expense and go straight for an Apple Pencil.

Also read: Apple Pencil review

Wacom boasts an industry-leading reputation thanks to its fabulous range of dedicated drawing tablets. So it's only natural that the company produces an attractive line of styluses as well. As well as being our favourite iPad stylus for artists, the Wacom Bamboo Sketch also takes the plaudits for general use on the iPad Air and iPad Mini series thanks to its compatibility with iOS devices. Rather than trying to exactly mimic a traditional rounded pen, the Bamboo Sketch favours an ergonomic triangular design for better grip. It's an excellent all-rounder, but its fine tip and pressure-sensitive nibs make it just about as close an experience to sketching on paper as you can get. With an epic battery life (recharged via USB) it uses Bluetooth to connect to your iPad, which brings the integrated shortcut buttons into play, too, enabling you to set up handy shortcuts within your chosen iOS apps.

Despite the fact that you can snag one for less than £30, the Hahakee iPad stylus does a good job of feeling like a premium product, thanks to an aluminium alloy build with a polished finish. It's pleasant to hold and use, and thanks to the healthy forty-hour battery life, you'll find yourself easily getting lost in your projects before it needs a charge. Charging is accomplished via the micro-USB port concealed in the top. With a fine tip, the Hahakee stylus is pleasingly precise, and spare nibs in the box ensure it'll keep on being usable for a long time (indeed, probably considerably longer than the iPad you're drawing on). It's no Apple Pencil, but for the money, it's a great buy.

Adonit has been refining its stylii for more than eight years now, and the Pixel is still one of its best for drawing on iPad. Bluetooth enabled and compatible with many of the sorts of apps creatives will likely be using on their tablets, the Pixel boasts 2048 levels of pressure sensitivity and a range of function buttons on its body that can be assigned to the user's preferred tools (though be warned these can be easy to knock accidentally if you're not paying attention). The battery should last for about 15 hours of use, allowing you to get really stuck into your projects, and the sleek design makes the Pixel stylus genuinely enjoyable to use.

If you're not sold on the idea of spending upwards of $20/£20 on a simple pointing device, and don't need the specialised functioning of the iPad styluses above, then Adonit's budget option – the Adonit Mark – is worth considering. Despite its cheap price tag, this stylus has been designed to feel as comfortable as possible in your hand, with its triangular anti-roll design. It retains the precision you'd expect from the sole-purpose stylus manufacturer, largely thanks to its smudge-free mesh tip. The Adonit Mark won't win any innovation awards, but if you just want a stylus for navigating around your iPad, you won't find a better cheaper iPad stylus than this. 

Related articles:

The best tablets with styluses10 top new best tools for traditional artists Best cheap Wacom tablets you can buy

9 Time Tracking Apps for Freelancers

Original Source: http://feedproxy.google.com/~r/1stwebdesigner/~3/Bdbz1qkfd8s/

When you’re not working on the typical schedule of a nine-to-five job, it’s easy to lose track of all those hours. Where is all that time going? If you’re struggling to stay on task, or just want to make the most of your hours, one of these time tracking apps is just the thing. It’s time to reclaim your work life!

Toggl

Toggl

How does free/cheap time tracking software sound? Toggl is flexible and designed for teams of any size. One-click timers turn into valuable insight and business statistics, so you can reclaim those lost hours. Super affordable per-user billing means you don’t need to pay more than the app is worth, and teams up to five can use Toggl for free!

Harvest

Harvest

Harvest is a business-oriented time tracking app, rich with features and loaded with everything you need to keep you and your team on target. The program works by letting you set timers or fill out a timesheet yourself – super simple. Manage projects, see how your team is doing and bill clients from your phone, desktop or browser.

Clockify

Clockify

A simple time tracker, 100% free with no strings attached. Clockify was created because every team and freelancer should have an easy way to track their time. It may not have the flashy features of other apps, but it does exactly what you need. Individual, team and project tracking, hassle-free.

DropTask

DropTask

Made for visual thinkers, DropTask is the free management software for those looking for something a little more flexible. If other software is too restrictive, you’ll be pleased with this app. Work alone or together in real time with two teammates, or try the business version if you need even more control.

RescueTime

RescueTime

Time to create a balanced work-life schedule! RescueTime runs in the background and creates a report on what apps and websites you’ve spent your time on, letting you accurately identify distractors.

The software is free, but the premium version lets you block websites or set up alerts. RescueTime for organizations offers insight into your employees’ habits while allowing them to keep their privacy with generalized reports.

Hubstaff

Hubstaff

Running a freelancing team? Hubstaff is made for businesses and freelancers who need a way to track employees’ time spent. You can also use it for free by yourself! This is an all-in-one program that includes time tracking features as well as payroll, invoicing, scheduling, and more.

Billings Pro

Billings Pro

The no-nonsense slogan sums it up pretty well: “Track, invoice, and get paid”. Send clients quotes, track your billable time while creating helpful reports and send an invoice when you’re done. Simple and to the point. The cross-platform app even has Apple Watch support!

Hours

Hours

Hours is easy to sign up for, easier to use, and lets you switch between timers with just a tap. The app’s timeline feature allows you to easily adjust your logged hours when there’s a mistake and get more accurate reports. You can use it on any device or right in the browser.

TimeCamp

TimeCamp

Need a free way to track what you’re doing on your computer? Try TimeCamp. For one user, the app is free forever. And its reports are super detailed, down to logging when you turn your PC on or off. With the paid versions, you get team support and access to dozens of helpful addons.

Eliminate Distractions

Time is money. How much is yours worth? When work isn’t getting done and you’re not sure why, it’s time to turn to one of these awesome time tracking apps. It can really be enlightening to learn how much time you spend on distractions throughout the day. And, armed with this knowledge, you’ll be able to cut out those wasteful hours and stay productive.


Managing Z-Index In A Component-Based Web Application

Original Source: https://www.smashingmagazine.com/2019/04/z-index-component-based-web-application/

Managing Z-Index In A Component-Based Web Application

Managing Z-Index In A Component-Based Web Application

Pavel Pomerantsev

2019-04-03T14:00:08+02:00
2019-04-03T16:05:46+00:00

If you’ve done any complex web UI development, you must have at least once furiously tried driving an element’s z-index up to thousands, only to see that it’s not helping position it on top of some other element, whose z-index is lower or even not defined at all.

Why does that happen? And more importantly, how to avoid such issues?

In this article, I’ll recap what z-index actually is and how you can stop guessing whether it might work in any specific case and start treating it just like any other convenient tool.

The Hierarchy Of Stacking Contexts

If you imagine the webpage as having three dimensions, then z-index is a property that defines the z coordinate of an element (also called its “stacking order”): the larger the value, the closer the element is to the observer. You can also think of it as a property affecting paint order, and this will in fact be more correct since the screen is a two-dimensional grid of pixels. So, the larger the z-index value, the later the element is painted on the page.

There is, however, one major complication. The z-index value space is not flat — it’s hierarchical. An element can create a stacking context which becomes the root for z-index values of its descendants. It would be best to explain the concept of stacking contexts by using an example.

The document body has five div descendants: div1, div2, div3, div1-1, and div2-1. They’re all absolutely positioned and overlap with each other. div1-1 is a child of div1, and div2-1 is a child of div2.

See the Pen stacking-contexts by Pavel Pomerantsev.

Let’s try to understand why we see what we see. There are quite elaborate rules to determine paint order, but here we only need to compare two things:

z-index Values
If an element has a higher z-index, it’s painted later.
Source Order
If z-index values are the same, then the later it’s in the source, the later it’s painted.

So if we don’t take stacking contexts into account, the order should be as follows:

div1
div2
div3
div1-1
div2-1

Note that div2-1 is in fact overlapped by div3. Why is that happening?

If an element is said to create a stacking context, it creates a basis for its children’s z-index values, so they’re never compared with anything outside the stacking context when determining paint order. To put it another way, when an element creating a stacking context is painted, all its children are painted right after it and before any of its siblings.

Going back to the example, the actual paint order of body’s descendant divs is:

div1
div2
div3
div1-1

Notice the absence of div2-1 in the list — it’s a child of div2 which creates a stacking context (because it’s an absolutely positioned element with a z-index other than the default value of auto), so it’s painted after div2, but before div3.

div1 doesn’t create a stacking context, because its implicit z-index value is auto, so div1-1 (its child) is painted after div2 and div3 (since its z-index, 10, is larger than that of div2 and div3).

Don’t worry if you didn’t fully grasp this on first reading. There’s a bunch of online resources that do a great job in explaining these concepts in more detail:

“The Stacking Context,” MDN web docs, Mozilla
“What No One Told You About Z-Index,” Philip Walton

Note: It’s also great to be familiar with general paint order rules (which are actually quite complex).

The main point of this piece, however, is how to deal with z-index when your page is composed of dozens and hundreds of components, each potentially having children with z-index defined.

One of the most popular articles on z-index proposes grouping all z-index values in one place, but comparing those values doesn’t make sense if they don’t belong to the same stacking context (which might not be easy to achieve in a large application).

Here’s an example. Let’s say we have a page with header and main sections. The main section for some reason has to have position: relative and z-index: 1.

See the Pen z-index-step1 by Pavel Pomerantsev.

We’re using a component architecture here, so CSS for the root component and every child component is defined in dedicated sections. In practice, components would live in separate files, and the markup would be generated using a JavaScript library of your choice, like React, but for demonstration purposes it’s fine to have everything together.

Now, imagine we’re tasked with creating a dropdown menu in the header. It has to be stacked on top of the main section, of course, so we’ll give it a z-index of 10:

See the Pen z-index-step2 by Pavel Pomerantsev.

Now, a few months later, in order to make something unrelated work better, we apply the translateZ hack to the header.

See the Pen z-index-step3 by Pavel Pomerantsev.

As you can see, the layout is now broken. An element with z-index: 1 sits on top of an element with z-index: 10, in the absence of any other z-index rules. The reason is that the header now creates a stacking context — it’s an element with a transform property whose value is anything other than none (see full rules) and its own z-index (0 by default) is lower than that of the main section (1).

The solution is straightforward: give the header a z-index value of 2, and it’ll be fixed.

See the Pen z-index-step4 by Pavel Pomerantsev.

The question is, how are we supposed to come to this solution if we have components within components within components, each having elements with different z-indices? How can we be sure that changing z-index of the header won’t break anything else?

The answer is a convention that eliminates the need for guesswork, and it’s the following: changing z-indices within a component should only affect that component, and nothing else. To put it differently, when dealing with z-index values in a certain CSS file, we should ideally only concern ourselves with other values in that same file.

Achieving it is easy. We should simply make sure that the root of every component creates a stacking context. The easiest way to do it is to give it position and z-index values other than the default ones (which are static and auto, respectively).

Here’s one of the ways to structure the application. It uses more elements than the previous one, but computation associated with extra DOM elements is cheap whereas developer’s time (a lot of which can sometimes be spent on debugging stacking issues) is definitely not.

See the Pen z-index-step5 by Pavel Pomerantsev.

header__container and main__container both have position: relative and z-index: 0;
header__overlay now has z-index: 1 (we don’t need a large value since it’s only going to compete for stacking order with other elements within the header);
root__header now has z-index: 2, whereas root__main keeps its z-index: 1, and this is what makes the two siblings stack correctly.

(Note also that both have position: relative since z-index doesn’t apply to statically positioned elements.)

If we look at the header code now, we’ll notice that we can remove the z-index property from both the container and the overlay altogether because the overlay is the only positioned element there. Likewise, the z-index is not required on the main container. This is the biggest benefit of the proposed approach: when looking at z-indices, it’s only the component itself that matters, not its context.

See the Pen z-index-step6 by Pavel Pomerantsev.

Such an architecture is not without its drawbacks. It makes the application more predictable at the expense of some flexibility. For example, you won’t be able to create such overlays inside both the header and the main section:

See the Pen z-index-step7 by Pavel Pomerantsev.

In my experience, however, this is rarely a problem. You could make the overlay in the main section go down instead of up, in order for it to not intersect with the header. Or, if you really needed it to go up, you could inject the overlay HTML at the end of the body and give it a large z-index (“large” being whatever’s larger than those of other sections at the top level). In any case, if you’re not in a competition to build the most complicated layout, you should be fine.

To recap:

Isolate components in terms of z-index values of elements by making the root of each component a stacking context;
You don’t have to do it if no element within a component needs a z-index value other than auto;
Within a component’s CSS file, maintain z-index values any way you like. It might be consecutive values, or you could give them a step of 10, or you can use variables — it all depends on your project’s conventions and the size of the component (although making components smaller is never a bad thing). Preferably, only assign z-index to sibling elements. Otherwise, you may inadvertently introduce more stacking contexts within a component, and you’re faced with the same issue again, luckily on a smaller scale;
Debugging becomes easy. Find the first ancestor component of the two elements that are not stacked correctly, and change z-indices within that component as necessary.

This approach will hopefully bring back some sanity to your development process.

Smashing Editorial
(dm, ra, il)

The best tablets with a stylus for drawing and note-taking in 2019

Original Source: http://feedproxy.google.com/~r/CreativeBloq/~3/4-zu1wyOKKM/the-best-tablets-with-a-stylus-for-drawing-and-note-taking

We're sure that as a creative you love notepads, pencils and everything else that's stationery-tastic. However, even if you're the biggest stationery nerd on the planet, a tablet with a stylus is a fantastic thing to buy and can be a real asset to your creative work. A tablet with a stylus is a hugely useful tool for getting your work done, and it's well worth looking into getting hold of one.

What's best of all is that you absolutely do not need to spend a fortune on a tablet with a stylus. Whether you're looking to work with an iOS, Android, Mac or Windows operating system, there are plenty of options available for knock-down prices. We've scoured the internet to suss out which are the best of the best, and present to you the best tablets with a stylus that money can buy right now, so that you can make the right decision for what you need. And if you're after a bargain, we've included some bargain options too.

Let's get started…

Apple iPad Pro 12.9 (2018)

The iPad Pro has received a big makeover for 2018, with a new edge-to-edge liquid retina LCD display, an A12X Bionic chip (which can outperform Intel-based laptops) and a new version of the Apple Pencil that attaches to the side of the iPad magnetically, with wireless charging. The result? Our pick for the best tablet with a stylus on the market right now. 

The iPad Pro has dropped Apple’s Lightning connector for USB-C, meaning it now works with a range of peripherals, including external displays.

With the 12.9-inch screen, this is one of the largest tablets on the market, and that means it’s a brilliant digital canvas for you to sketch out your ideas, using one of the brilliant drawing apps for the iPad in the App Store.

So what's the downside? Well, this laptop-like performance means laptop-like prices. You won’t see much change from £1000 for the smallest 64GB storage, and you’re certain to want more. Add on the additional expense of the Pencil and this is the most expensive iPad ever made by some margin.

Read more: iPad Pro review

Microsoft Surface Pro 6

The 2018 Surface Pro is a small update over the Pro 2017 model, with a slightly better screen and battery life, but it remains our top choice for a Windows tablet. Unlike Android or iOS devices, you’re getting a tablet that will run full-fat desktop software – so think Creative Cloud  apps such as Photoshop CC without any compromise on features or performance – and use it with Microsoft’s excellent Surface Pen stylus.

In fact the Surface Pro has an Intel quad-core chip, of the same variety that you might find in a laptop. So you can expect it to sail swiftly through tricky filters and have no problem loading complex designs.

And being a Windows PC at its core, it will have no problem connecting to any peripheral you could think of. That said, Microsoft hasn’t yet bestowed a faster USB 3.1 Gen 2 port on the Surface, a missed opportunity for 2018. 

Read more: Microsoft Surface Pro review

Samsung Galaxy Tab S4

If iOS leaves you cold, or you’re already heavily invested in Android software, then the Galaxy Tab S4 is a welcome update to Samsung’s tablet line, and brings in some great new features.

It has an upgraded 10.5-inch screen with a 2560 x 1600 resolution and thinner bezels. A new 2.1 lockable mode uses the DeX software to mimic a PC interface when connected to Samsung’s Book Keyboard Cover, complete with resizable windows and a task bar.

12 essential tools for graphic designers

Being free from Apple’s grasp, there are some advantages to going with Android over iOS. The Galaxy Tab S4 bundles a Samsung S Pen with the device, and it'll set you back around $660/£600, making it much better value for money. And thank the heavens, you can expand the internal storage with SD cards.

Wacom Cintiq 22HD touch pen display

If you're primarily looking for a tablet with a stylus for drawing, consider investing in a dedicated drawing tablet. Our favourite is the Wacom Cintiq 22HD: its large dimensions (it's not really one for shoving in your bag too often) mean that you get a total of 50cm x 30cm of total drawing area – perfect if you want a more detailed design than most normal tablets allow you to execute. The super sensitive stylus won't hurt to this end, either – we can't think of another drawing tablet out there that will give you more accurate results.

The integrated stand means that you can adjust the angle of the tablet to suit your preferred stance and the full HD display boasts over 16 million colours. If you can afford it, the Wacom Cintiq 22HD could have a major impact on the quality of your work.

Read more: The best drawing tablet

Lenovo Yoga Book

We eyed the Lenovo Yoga Book with a combination of intrigue and suspicion when it was first announced. It's a kind of tablet-laptop hybrid with a digital, capacitive keyboard that doubles up as a handwriting or drawing surface. But the result is a tablet with a stylus that's well worth owning. 

The traditional surface is 10.1-inch 1,920 x 1,200 resolution screen, which again hits that magic number of 16.7 million colours. The second surface is that capacitive Halo Keyboard, which – despite the lack of digital keys – is accurate enough to take quick notes straight to your chosen word-processing app. Prefer the old-fashioned method? Then you can utilise the included Real Pen stylus instead and use the Halo surface as a digital notebook, with the added bonus of seeing your scribblings saved immediately into your onboard storage.

We know the Yoga Book won't be for everyone (the 180-degree fold back screen means it's much chunkier than most other traditional tablets), but Lenovo's unique proposition means its well worth considering if you can't decide between a laptop and a tablet.

Huawei MediaPad M5 Pro

Huawei seems to have an army of tablets in its arsenal, ranging from the basic MediaPad M3 model, which is super-affordable and can do simple note taking, to this Pro model, with some real performance under the hood. This tablet still won't set you back anywhere nearly as much as the iOS or Windows tablets, and is a genuinely good option.

Despite the relatively low price point, you still get an excellent screen and sufficient power for most tasks. The sleek, light aluminium frame is practical and won't embarrass you if you pull it out at a coffee shop.

It's also worth noting that if you've got little ones, Huawei recently unveiled a 'Lite' version that's lower-specced, (slightly) lower-priced and designed for younger users. You can head over to TechRadar to read a hands-on review of the Lite tablet – while it's a nice addition to the range, the kid-friendly focus means the M5 Pro is very much still the better buy for creatives.

The best stylus to buy for your tablet

If you choose one of the tablets above that doesn't come with a stylus in the box, then we can help you pick out a pencil to purchase:

Related articles:

The best drawing tablets money can buy4 alternatives to traditional sketchbooksHow to draw: 100 tutorials

Create perfect user flows

Original Source: http://feedproxy.google.com/~r/CreativeBloq/~3/o4K3CZxkUDc/create-perfect-user-flows

What exactly is a user flow? Visually, it's a bit like a dance mat. Right foot here. Left foot over there. Now bring them together, turn and repeat. Without knowing how to dance, you're still able to stand on this mat and move along with your feet stepping in the right places in the right order. A user flow is just that. A loose but coordinated dance with your website. It's important that you know where a user will step and in what order for that dance to go well.

Working through the expectations of users and crafting an overall positive user experience can be a complicated mixture of data points, use cases, wireframes and prototypes to connect the dots before the project is fully built out. With so many moving parts, it's easy to get tripped up or have a stakeholder misunderstand the vision. 

The 20 best wireframe tools

Unlike a design showcasing what a user will interact with after development, the role of a user flow is to set the ground rules for what the subsequent wireframes and designs will represent. It's the strategy document to design how the user flows from point to point.

What you need for a user flow

Apply user flows to work out how navigation will work in apps, as well as websites

Whether you work for an agency or directly with a client as a freelancer, you're probably no stranger to the confusion that comes with sharing early designs with a client. In your head, you understand the intricacies of how each block of content fits into the overall experience and it's glorious. Then you show someone else or, even worse, the client and they don't get it. They get hung up on the wrong details, often because they don't have the full vision in front of them yet. Which is where strategy documents that outline purpose – like a user flow – come in handy to keep things moving forward.

To do that, you'll need the following:

Business goals
Why do you want someone to visit your website? You can typically get these from your point of contact with a brief conversation. Are they launching a new service, product or trying to generate traffic for a specific area of the site? The more granular you can get the better. Goals lead to accountability from all sides and will benefit the users.

User goals
Why is someone actually visiting your website? Be hesitant to take these directly from the client unless they have done user testing or some kind of data-driven research to support it. Otherwise you'll end up with the same business goals with a different twist. 

Entry points and user types
Based on the data, where are users landing right now? Do users typically land on a blog post? On a portfolio piece or a featured product? More importantly, how are they getting there? If organic traffic is driving mostly to the blog, those users may flow between secondary or tertiary pages differently than someone coming in from a referring website, social media or an email campaign. You may need to map them out differently to properly showcase the flow.

Yellow Brick Roads (YBRs)
What is the ideal path for users to travel between pages to meet both the business and user goals? To get them from the entry point to the results-driven destination? As users flow in non-linear ways, what are the edge cases that users may flow into? For example, if your YBR is a blog post landing page that clicks through to a service page and then the contact page, where might some users get lost? Do some users end up on the about page? Where do they go from there? Map out those edge cases and how they branch off from your ideal scenarios.

A lo-fi wireframe is useful for getting a rough idea of how a page works

You can extract the last two points with Google Analytics and the User Explorer feature for individual user flow paths or the Users Flow section to see a 10,000 foot view of trending paths for all users on the site. Both are worth getting familiar with (see our top tools in Google Analytics post). 

Think of the dance mat. Where do users place their feet first (landing page)? Where does each foot go next (page two, three, four, etc)? Show that in a flow chart for each user type or goal. 

There are plenty of plugins, frameworks or software solutions that can be used to create diagrams; let's look at what the deliverable should be in a user flow.

Easily shared and printed. This may seem like a no-brainer but you'd be surprised how often people bring printouts for diagrams that are unreadable. If there are too many steps or too much text to fit clearly on an 8.5 x 11-inch printout, you're overcomplicating things.Bridge the communication gap between clients, stakeholders, designers and developers. Flows show how a user will navigate and interact with the site jumping between pages. This is important to give a framework for everyone to unify their understanding moving forward.Showcase the path(s) toward each priority business and customer goal, common entry point pathways and a streamlined YBR pathway that offers up missed opportunities for key content. For clarity, this does not happen in a single flow. This will be multiple stand-alone flows.

With buy-in from stakeholders, you can take these user flow documents and use them to inform the designers creating wireframes to ensure they follow the core user experience strategies. They can be treated like a check list to validate the project is meeting the goals at each step.

 generate New York 2019

Learn more about UX and more at generate New York 2019. Click the image to book your ticket

Expand user flows into wireframes

Map out edge cases and consider how they branch off from your ideal scenarios

Most of us have experience with wireframes in some form. Wireframes are used to represent the strategy behind a website layout. Sometimes they will be handed off to developers to begin building the bones of the infrastructure. They're the blueprint to the home. They help stakeholders understand the 'why' of the strategy without getting roped into details like fonts, colours or content. 

Many times someone responsible for the user experience or design of a project will jump directly into the wireframe because they construct their own mental model of a user flow. The problem with that is they run the risk of internalising strategy, applying unforeseen bias, repurposing old ideas and may become a bottleneck between the design and the communication of the design. Clear communication is paramount.

User flows will help mitigate those risks because they pass down structured communication. It adds a layer of checkpoints.

There are various levels of visual fidelities when it comes to wireframing. Some prefer low-fidelity templated wireframes they can drop into place to represent the general information architecture of a given page. Others prefer high-fidelity wireframes that are very much designs but without the proper font, copy, colours and imagery in place. It's important to know your audience and what to use when. Realistically, if you are working from user flows you should move into a higher-fidelity wireframe that then grows into a prototype more easily. 

It’s a good idea to start on paper, whiteboard or some tablet sketching tool

It's a good idea to start on paper, whiteboard or some tablet sketching tool. This enables you to focus on the quick ideation of potential solutions to problem areas and keeping the user on the ideal pathway. 

To get started, you will need a list of each page to design and build into the website: home, about, service listing, etc. That acts as your checklist to ensure you don't miss anything. Start with rough sketches for each of those based on the goals you've uncovered previously. 

Where does the navigation go? How are you going to convey the business goals on the home page? Are you following a 12-column grid for speed of understanding the structure with a certain demographic or is it a more progressive interactive site that can exude a bit more expressive freedom? This is where you determine the best way to achieve the goals and build on top of a strong base.

User flow documents can inform the creation of wireframes , as in this example for Sullair

Once those rough sketches are complete, select one of your user flows. For example, if the ideal pathway is a blog post landing page that the user clicks through to a service page and then the contact page, test that out with your wireframes. Look at your blog post landing page: how would a user find the service page based on your structure? Is it clear? Is it truly a priority on that page's layout or is it just another link tucked away on the sidebar, footer or navigation?

The user flow becomes an auditor to your work, the unbiased fact checker to your wireframes. Even better, when you can show a client you've connected all of the dots they deemed a priority, they become very satisfied with the work at each step. It reminds them of why they hired you to do this in the first place. It's a relief and they will likely begin to settle into your full process. 

If you don't show you've provided a solution for those goals or a way to alleviate the existing pain points, each phase of your project will rely heavily on trust. Even with the best of us, that can only take you so far until comments like 'why didn't we catch that?' sneak into your conversations. The later those pop up, the more expensive they are to fix. The more often they pop up, the more that trust erodes. That's why following a process like this and supporting decisions with data and focus is so crucial.

Interactive prototypes

Showcase the path(s) toward each priority business and customer goal

Now you've validated the wireframe implementation with user flows, it's time to turn them into interactive prototypes. These are basically clickable static image files that enable you to jump to another image file to give the impression of navigating a website. Not only are these great for clients to experience, it's also very important to ensure your developers and designers are on the same page. That great layout idea may actually add 100 hours of development time and be out of scope. This kick-starts those conversations before time is wasted.

You or your design team may have a very clear vision for what this set of wireframes will evolve into in the weeks ahead. Maybe you're even taking the wireframes into a full design and prototyping that. That's not uncommon. But one problem persists. Those subtle hover states and microinteractions that support an intuitive user experience are hidden away inside of someone's mind. A stakeholder doesn't see that vision yet but prototypes can help.

Much like wireframing, prototypes can come in various fidelities. At Candorem we have used InVision for years because of the simplicity of creating sharable prototypes that focus on the user pathways between pages and key interactions or overlays. Drop in existing images and draw hot spots over links. Creating low-fidelity interactions then enables you to share a prototype within an hour, depending on complexity.

Bring out the hi-fidelity wireframes when you want to drill down into content in detail

Others may suggest using Adobe XD, which is far more robust in showcasing interactive elements of a design beyond page transitions. It's like if you combined Adobe's Creative Suite (get Adobe Creative Cloud here) with InVision as a single product. You could create your wireframes, full design concepts and prototypes in one fell swoop if you're organised enough. The important part is connecting the pages to craft an experience someone can click through and understand the vision.

It’s important to set expectations

Again, know your audience. Even with basic click-throughs in InVision, some clients confuse it with a built-out website. It's important to set expectations. Communicate exactly what it is you're showing a client with the prototype and, more importantly, what kind of feedback you are looking for at this stage. Are you looking for feedback on flow between those key pages in the user flow? Are you looking for feedback on the page transition animations in the prototype? The content that fits into the spaces and where it will come from? Communicate that. It will help you grow as a professional very quickly and the quality of your work will increase exponentially. 

You can judge the success of this process by beginning the prototype review on a key landing page like the blog from earlier. Ask someone in the review from the stakeholder team to click through to a specific page on the prototype and see what paths they take. Even in edge cases where the user travels down another path, as users travel in non-linear fashion, they should be able to locate the key pages that reflect a business goal. Your work must be accountable to that.

Your ability to showcase the critical thinking and implementation behind key decisions, as well as how you or your team have adapted your goals into an intuitive experience, is crucial. That's what enables you to reframe perspectives, move away from short-term trends and obtain support from the otherwise loudest people in the room. Strategy at every step.

This article was originally published in issue 315 of net, the world's best-selling magazine for web designers and developers. Buy issue 315 here or subscribe here.

Related articles:

10 rules for making user-friendly web formsPerformance UX: A primer10 steps to an engaging user experience

SitePoint Premium New Releases: DevOps Security, jQuery & Vue Projects

Original Source: https://www.sitepoint.com/sitepoint-premium-new-releases-devops-security-jquery-vue-projects/

We’re working hard to keep you on the cutting edge of your field with SitePoint Premium. We’ve got plenty of new books and mini-books to check out in the library — let us introduce you to them.

Learning jQuery 3 Fifth Edition

A step-by-step, practical tutorial on creating efficient and smart web apps and high-performance interactive pages with jQuery 3.0. Create a fully featured and responsive client-side app using jQuery. Explore jQuery 3.0 features and code examples updated to reflect modern JS environments.

Read Learning jQuery 3 Fifth Edition.

How to Develop and Test Vue Components with Storybook

Learn Storybook, an interactive environment for developing and testing UI components. It allows you to build components and play with them in isolation from the app that you’re building.

Read How to Develop and Test Vue Components with Storybook.

Build a Shopping List App with Vue, Vuex and Bootstrap Vue

Build a simple shopping list app using Vue, Vuex and Bootstrap. Along the way, you’ll discover how Vue’s official state management solution can help you manage state throughout your app as it grows.

Read Build a Shopping List App with Vue, Vuex and Bootstrap Vue.

Hands-On Security in DevOps

Protect your organization’s security at all levels with the latest strategies for securing DevOps at each layer of the pipeline. Discover security practices to protect your cloud services by detecting fraud and intrusion. Explore solutions to infrastructure security using DevOps principles.

Read Hands-On Security in DevOps.

Building a Vue Front End for a Headless CMS

Learn how to build a modern blog site using Vue.js and GraphCMS, a headless CMS platform that delivers content via GraphQL, for a faster and more customizable website than using WordPress.

Read Building a Vue Front End for a Headless CMS.

A New Library Interface

If you’re a Premium member, take our new library for a spin. We’ve launched a cleaner, faster library interface that makes tracking and resuming your current books much quicker.

And More to Come…

We’re releasing new content on SitePoint Premium almost every day, so we’ll be back next week with the latest updates. And don’t forget: if you haven’t checked out our offering yet, take our 7 day free trial for a spin.

The post SitePoint Premium New Releases: DevOps Security, jQuery & Vue Projects appeared first on SitePoint.

Collective #504

Original Source: http://feedproxy.google.com/~r/tympanus/~3/_SjP5P-Abek/

C504_responsiblejs

Responsible JavaScript: Part I

Jeremy Wagner plots a course to avoid the unnecessary bloat and inaccessible patterns of current JavaScript trends.

Read it

C504_mason

This content is sponsored via Thought Leaders
Core, a front-end feature kit by Mason, free!

Grab the free feature kit that made it to #1 on Product Hunt and start building front-end features faster than you ever thought possible!

Get Core free

C504_codesandbox

Announcing CodeSandbox v3

Read all about this major CodeSandbox update that includes VSCode extensions, many design tweaks, and a new devtool pane.

Read it

C504_id

Enforcing Accessibility Best Practices with Automatically-Generated IDs

Brad Frost describes a useful technique for auto-generating IDs to help with accessibility.

Read it

C504_aligning

How To Align Things In CSS

Rachel Andrew shows different ways of aligning elements in CSS.

Read it

C504_dan

Name It, and They Will Come

An interesting read by Dan Abramov on the importance of telling a story when sharing a new project.

Read it

C504_font

Free Font: En Garde

Andros Souza shares his first font project.

Get it

C504_michelle

Building a dependency-free site in 2019

Michelle Barker shares how she built her site in HTML, CSS and nothing else.

Read it

C504_JSGrammar

JavaScript Grammar

Get the PDF version of this JavaScript book by Greg Sidelnikov for a retweet.

Check it out

C504_talks

codetalks.tv

Codetalks.tv puts together the best dev talks in a categorized video platform, made by developers for developers.

Check it out

C504_designing

Designing And Building For Systems

Daniel Eden gives some advice on building for design systems.

Read it

C504_generative

Generative Poster

Create a generative art poster in this demo by David A.

Check it out

C504_server

code-server

Code-server is VS Code running on a remote server, accessible through the browser.

Check it out

C504_terminal

UITerminal

UITerminal is a Terminal-style CSS framework.

Check it out

C504_chords

VexChords

A JavaScript guitar chord renderer.

Check it out

C504_oneliners

oneliners.js

Some useful coding one-liners put together by Mike Skowronek.

Check it out

C504_anchor

Scroll Anchoring in Firefox 66

Ryan Hunt writes about the new scroll anchoring feature in Firefox.

Read it

C504_codemit

How an MIT Research Group Turned Computer Code Into a Modern Design Medium

The fascinating story of how code became a design medium.

Read it

C504_aliens

Alien Invasion by Gal Shir: Web Animation by Kono

A CSS-only implementation of the “Alien Invasion” animation by Gal Shir. Made by Kono.

Check it out

C504_vued3

Vue.js and D3: A Chart Waiting To Happen

Simon Wuyts shares this summary of a talk he gave at the Vue.js Antwerp meetup.

Read it

C504_freelance

Everything I know about freelancing

Andy Adams offers some valuable insights to freelancing.

Read it

Collective #504 was written by Pedro Botelho and published on Codrops.

How to Use Selenium WebDriver for Cross Browser Testing

Original Source: https://www.sitepoint.com/how-to-use-selenium-webdriver-for-cross-browser-testing/

This article was originally published on LambdaTest. Thank you for supporting the partners who make SitePoint possible.

Selenium is a popular automation testing framework that is primarily used for cross browser testing. It is open source and is ideal for automating testing of web applications across different browsers like Firefox, Chrome, Internet Explorer, and Microsoft Edge. Selenium has become a renowned framework and is giving stiff competition to other test frameworks such as HP QTP (Quick Test Professional) and AKA HP UFT (Unified Functional Testing). This tutorial for Selenium WebDriver will help you develop a basic understanding of the components of the Selenium suite, the Selenium WebDriver architecture and will show you how to run automation to test a website for cross browser compatibility using Selenium WebDriver for Google Chrome, Mozilla Firefox and Internet Explorer.

Selenium is a combination of different tools and each tool plays a critical role in automating web testing. Let’s dive into the WebDriver tutorial.

The post How to Use Selenium WebDriver for Cross Browser Testing appeared first on SitePoint.

Web Design & Development Games to Test Your Skills

Original Source: http://feedproxy.google.com/~r/1stwebdesigner/~3/unF2fSeq_vE/

There are a ton of ways to learn web design and development. Some people prefer video courses, while others love reading books and webpages and applying the knowledge themselves.

Another way to learn is through online games! These will test your design skills, correct you when you’re wrong, and teach you basic concepts. If you love learning through doing, make sure to try these games!

Can’t Unsee

Can't Unsee

This game walks you through various simple design choices, prompting you to pick the one that looks correct and explaining why one is wrong and one is right. You can click a button to directly compare the images, making it easy to understand the difference. This will test your eye for subtle designs. At the end, see how you rank against other players!

Kern Type

Kern Type

Kerning is the spacing between letters, and an important skill for typographers and designers to learn. This kerning minigame will let you drag around the letters, then compare them to the solutions of a pro designer.

Shape Type

Shape Type

Another one for typographers, Shape Type tests your ability to accurately and beautifully shape letters in a design. You can easily compare your work to the designer’s with fluid transition animations that show you where you might have gone wrong.

The Bezier Game

The Bezier Game

If you make vector graphics, fonts, or CSS animations, you might have encountered Bezier curves. The Bezier Game will help teach you to work with this tool by taking you through various shapes, lines, and circles to fill out with curves. By the end you should have a better understanding of how Bezier curves work.

Color

Color

Ready to brush up on your color identification skills? This tests your ability to distinguish hues, saturation, complementary, analogous, triadic, and tetradic colors.

Pixactly

Pixactly

How good are you at measuring pixels by instinct? Pixactly helps you measure lengths and widths in pixels by prompting you to draw boxes of a specified height. Anyone who works with HTML and CSS will like this tool.

Hex Invaders

Hex Invaders

Do you know your hex codes? With all the online hex generator tools, many people neglect the learning their hex codes, but it’s still a good skill to have. Hex Invaders teaches you hex color codes by having you shoot the alien that corresponds to the color code shown on the screen.

Flexbox Froggy

Flexbox Froggy

Time to brush up on some CSS. With the justify-content property, you need to guide the frogs to their lily pads, all while learning more about CSS in real time. With twenty-four levels, you’ll come out of this with a full understanding of this CSS code.

Flexbox Defense

Flexbox Defense

Still having trouble with flexboxes? Flexbox Defense is a tower defense game where you must position your towers using CSS. After playing Flexbox Froggy, reinforce your skills with this more difficult game.

Grid Garden

Grid Garden

Here’s a relaxing game that will teach you how to use CSS Grid, specifically the grid-column-start property. Grow your own carrot garden, water plants, kill weeds, and learn new CSS tricks and tips in this unorthodox gardening game.

Flukeout

Flukeout

Ready to learn about CSS Selectors? Use the code window to select the correct objects and learn how to select them in all kinds of situations and unique placements. This one is great for people who are new to CSS.

Learning Design with Online Games

Whether you’re a brand-new designer/developer or just brushing up on what you’ve learned, online educational games are a great way to cement your skills. It’s always good to bring a little fun into your learning process. Let us know which game was your favorite!


The best VPN service in 2019

Original Source: http://feedproxy.google.com/~r/CreativeBloq/~3/X3Ig6nl1dDs/best-vpn

Choosing the best VPN service can be tricky, but it has clear benefits for designers of all kinds. Whether you’re based in your local coffee shop and need to keep your work secure, or are working remotely abroad and having trouble accessing the sites you need, a VPN can help you out. 

To help, we've researched and tested all the major services. Read on for our ranking of the best VPN services for creative professionals, plus detailed notes to help you choose the one that's right one for you.

VPN stands for virtual private network, and they're used for a number of things. Primarily, they keep your internet browsing anonymous and secure, and enable you to get around blocked websites. You can also use them to watch shows on foreign streaming services including country-specific Netflix and BBC iPlayer. 

At the bottom of the page you'll find a more in-depth look at what a VPN is and why you might need one. For now, let's get get started with our guide to the best VPN services right now…

What's the best VPN service in 2019?

Our pick for the best VPN service right now is ExpressVPN, thanks to impressive speed, unblocking, privacy options and excellent customer service. The second best VPN is IPVanish – a reliable option that handles P2P and torrenting particularly well. NordVPN earns third place for its speedy performance and strong security. For a closer look at our picks for the best VPNs, read on.

The best VPN service: ExpressVPN logo

ExpressVPN is the best VPN service right now. This super-fast service offers enterprise-standard encryption, excellent customer service and over 3,000 servers spread across 94 countries. 

It boasts perhaps the widest platform support you'll find from any VPN. As well as native apps for Mac, Windows, Linux, iOS, Android and BlackBerry (!), ExpressVPN offers custom firmware for some routers, and a MediaStreamer option for consoles and smart TVs including PlayStation, XBox and Apple TV. Finally there are very capable VPN browser extensions for Firefox, Safari and Chrome.

What really makes ExpressVPN stand out is its customer support. Although it’s not alone in offering live chat, 365 days a year, 24 hours a day, its agents have a great reputation for sorting problems quickly, efficiently and with a smile in their voice. And while that’s not often our main consideration when selecting a provider of any service, it does help. On the downside, it only offers three simultaneous connections per user, where most services offer five (and IPVanish, at number 2 in this list, will support up to 10).

best VPN service: IPVanish logo

The second best VPN service comes from IPVanish. This VPN owns and manages its own servers, of which there are over 1,200 in more than 60 countries; has a strict zero-logs policy to preserve your privacy; and offers up to 10 simultaneous connections per user – well above what most services offer.

In our real-world tests, IPVanish performed well. The servers connected quickly and were always up, download speeds were above average, torrents are supported on all servers, and we were able to unblock BBC iPlayer and US Netflix.

Where IPVanish really shines is with its apps. There are dedicated apps for Windows, Linux, macOS, iOS, Android, Fire TV, Windows Phone and Chromebook. Unlike competitors' efforts, these are powerful and configurable, with plenty of different features and settings to explore. 

There's a slight downside here: there's a bit of a learning curve to get the best from the apps, and there are some small usability issues. A few servers didn't appear to be in the advertised locations, and there are no kill switches on the mobile apps. 

Price-wise, you're at the premium end of the VPN range with IPVanish. While there are no free trials available, there is a 7-day money-back guarantee if it turns out to be not quite what you want.

The best VPN service: NordVPN logo

In all the areas that count, NordVPN beats or matches what's offered by the competition. The service has over 5,300 servers in over 60 countries, offers 2048-bit encryption, secure DNS leak protection, and app-specific and system-wide kill switches. It supports up to six devices simultaneously and there are proxy extensions for Chrome and Firefox. 

NordVPN's SmartPlay feature is useful for getting round geo-restrictions and can be used to unblock a whole host of streaming services. NordVPN offers four different subscription choices: a monthly plan or one, two or three year plans (the final of which is really excellent value). There's also a 30-day moneyback guarantee.

In our performance tests, download speeds were well above average on almost all connections (although we did run into difficulties when trying to connect to a small number of servers). 

Where NordVPN falls behind slightly is with its customer support. The site is relatively weak, and unlike many of the services on this list, there's no live chat feature. However, the email support is perfectly acceptable – we got a helpful, accurate reply to our query within 12 hours. 

Best VPN: HotSpot shield

HotSpot Shield offers a couple of VPN services: free and a paid Premium version. What you're paying for is full access to over 2500 servers in 25 countries, use on up to five devices, unlimited bandwidth, no ads, and 24/7 support. The free option is pretty good, but it's worth shelling out the (very reasonable) price for Premium. When we took it for a spin, we experienced impressively quick upload and download speeds when transferring big image files, even from the most distant locations.

Hotspot Shield Premium's high speeds and low prices have clear appeal, and the seven-day trial makes it easy to test the service for yourself. As you'd expect, the best value for money is the one-year subscription, unless you want to commit to the lifetime plan. 

So what are the downsides? HotSpot Shield is based in California, making it subject to US law enforcement. It uses its own proprietary Catapult Hydra protocol, which some people are suspicious of because it hasn’t been widely analysed externally. It no longer supports standards like OpenVPN, and the service can only be used on devices that are able to run its apps (Windows, Mac, Android or iOS). 

It also doesn’t let you pay for the service with Bitcoin, the apps are lacking in configuration options, and during testing we weren't able to unblock US Netflix.

Best VPN: CyberGhost

CyberGhost is the best VPN for you if you're looking for a service you can configure to your liking, but has a helpful interface and avoids jargon. 

There are apps for Windows, Mac, iOS and Android, the service allows torrents and there's live chat support if you need it. Extras include the ability to block ads, trackers and malicious websites, and automated HTTPS redirection helps keep browsing as secure as possible. 

The interface is organised according to the task you're trying to complete. The main window offers six options: Surf Anonymously, Unblock Streaming, Protect Network, Torrent Anonymously, Unblock Basic Websites, and Choose My Server. There are helpful touches, too. For example, you can choose a geo-blocked service (Netflix, iPlayer, etc.) from a list, and the app will automatically connect you to the best server and open a new window at the target site. 

CyberGhost has a ton of easy-to-follow guides that explain everything in basic English that anyone can follow. These are handily divided up by device, so you don’t have to cross-reference all over the place. And they explain everything from how to surf anonymously and how to block ads to more advanced fare, such as how to configure a Raspberry Pi as a web proxy with OpenVPN, or how to share a VPN connection over Ethernet.

And it’s good that these guides exist, because CyberGhost does offer a large number of configuration options, such as setting it to automatically run on Windows startup, assigning specific actions for different Wi-Fi networks, and making CyberGhost automatically run when you use certain apps, such as Facebook. 

So what's wrong with it? Performance was patchy in our tests – while speeds in the US and Europe were good, some long-distance connections were poor. 

All in all though, CyberGhost is a great VPN service for anyone who’s not a total newbie and wants to push what their VPN is capable of, but doesn’t want to go wading too deep into the techie weeds. 

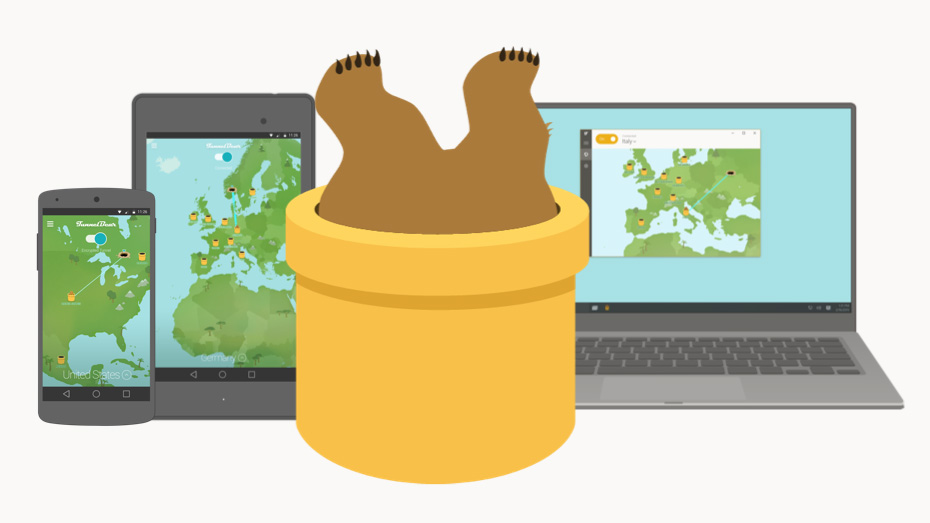
Canadian VPN service TunnelBear is aimed squarely at non-techies and VPN newbies. It’s incredibly easy to use, and there are apps for Windows, Mac, iOS and Android, as well as Chrome, Opera and Firefox extensions. Setting up the TunnelBear VPN takes a matter of minutes, via a much simpler process than other VPN services. Explanations are jargon-free and written in the kind of plain English everyone can understand. 

The flipside of that, of course, is that options are limited compared to other VPNs (you can't even change protocol, for example), so more advanced users looking for high levels of configuration will be better off with a rival service. There are also only around 20 server locations, and the website is not terribly helpful at all.  

But that aside, what TunnelBear does, it does very well. It's easy to connect, and offers strong performance overall (although those speeds do drop a little over long-distance connections). It's also gone where few other services dare to go by getting a independent, public security audit on its servers, code and systems. 

Paid plans give you unlimited data and for a very reasonable per-month cost, and there's also free plan that limits you to just 500MB of traffic per month.

Best VPN: Windscribe

Windscribe offers a decent VPN that has one main benefit over rivals: its commercial Pro plan allows for unlimited connections. That means you can use it on as many devices as you want simultaneously. The only other service in this list to currently offer that is Surfshark, at number 9. 

The network is a decent size (locations in 110 cities across over 60 countries). There are clients for Windows, Mac, Android, iOS and Linux, plus Chrome, Firefox and Opera extensions. You'll also find guides if you want to manually set up the service on routers, Kodi and more.

Another plus point is the high level of privacy it offers. The company policy is clear and detailed, and you don’t have to use your real name or provide an email address to sign up. And if you want to stay totally anonymous you can (as with most VPNs) pay with Bitcoin. Plus, being based in Canada, it’s nicely out of reach of US law enforcement agents.

If those things aren't big selling points for you, though, then it probably shouldn’t be your first choice. The service as a whole is fairly average, and our tests threw up some issues. While performance was generally good, some long-distance severs were very slow. Connection times could also be slow, we couldn't view BBC iPlayer, and there's no 24/7 support.

It might be a good idea to start out with Windscribe's free VPN, which offers a very generous 10GB data per month.

Best VPN service: Private Internet Access

Private Internet Access offers slightly limited (although actually still pretty good) features for a super-cheap price. There are custom clients for Windows, Mac, iOS, Android and Linux, as well as open source extensions for the big browsers. There's also built-in blockers for ads, malicious sites and trackers, and torrents available on all servers. 

With 32 server locations, it's a relatively small network, but sufficient for most users' requirements. In our tests, performance wasn't the best but definitely wasn't the worst, with Private Internet Access offering good speeds in the US and Europe, and slightly less reliable performance over long-distance connections. There isn't live chat support, but we got a helpful response to our email query within two hours, which is fair. 

If those low, low prices are raising some security concerns, fear not. While some companies sell user data to enable them to cut their prices, Private Internet Access' privacy policy does not allow any kind of session or activity logging.  And you can pay via Bitcoin if you want to be really anonymous, too.

Surfshark serves up a good value, if a little basic, VPN service. In fact, there's a lot going for this VPN. Unlike many of the services on this list, Surfshark supports an unlimited number of devices. There are apps for iOS, macOS, Android, Windows, Linux and FireTV plus Chrome and Firefox extensions (note the Android app can be a little unstable). The pricing is very reasonable indeed, and there's a 30-day moneyback guarantee if you don't like what you see. 

There's OpenVPN UDP and TCP, IKEv2 security protocols, AES-256 encryption, a kill switch, a private DNS and a double VPN hop for extra security. Performance is good across the board too. 

The user interface clean and stripped back, the only minimal options displayed (we'll leave you to decide whether that's a drawback or benefit.

Best VPN: VYPR VPN

VyprVPN is a very fast, highly secure service without third parties. If you’re looking for privacy, then a service based in Switzerland – known throughout history for obsessive levels of discretion within its banking system – has to be a good start. But while Vypr is keen to trumpet its service’s ability to provide privacy and security, it’s really the speed of the thing that’s the most impressive. 

VyprVPN is hardly alone in claiming to offer 'the world’s most powerful VPN'. However, it backs up this statement on the basis that, unlike many of its rivals, it owns its own hardware and runs its network. VyprVPN has its own zero-knowledge DNS service and its Chameleon protocol could get you online in countries that block VPN. 

Either way, it was pretty nifty when we took it for spin. Download speeds were mostly good. They slowed a little in a few of the most remote locations (although not beyond an acceptable level). Platform support is also wider than most, taking in Blackphone, QNAP and Anonabox as well as the usuals (Windows, Mac, Android, iOS, router).

So what are the downsides? VyprVPN logs session details (connection times and IP addresses) for 30 days, and you could have your account locked if your IP is found downloading illegal torrents. In our tests, four servers wouldn't accept connections, and a further four didn't appear to be where Vypr said they were.

So it's not perfect, but if the session logging isn't a problem for you, and your work involves uploading and downloading a lot of hefty files, VyprVPN should help you shave time off that process.

What is a VPN and why do I need it?

VPN, which stands for virtual private network, is a service that encrypts your internet communications. It enables users to securely access a private network, and safely send and receive data.

Using a VPN, you can remotely connect to an office network as though you were working in the building – which is handy if you're a freelancer, or working abroad. You can also securely send confidential material to a client, or do your banking from an unsecured public network, such as a coffee shop Wi-Fi spot.

Another useful feature is that a VPN can keep your internet browsing anonymous. And it can make you appear to be located in another country, too – which is helpful if you work with global clients that have IP-based restrictions on their sites. “I often have to fire up the VPN to make myself appear as if I’m in different EU territories,” says London-based web designer Robert Fenech. “A quick 'turn on and select country', and voila.” 

Sometimes it’s not the website protocols themselves that you have to get round, but government censorship. Just imagine you’re visiting Beijing and needed to download some Photoshop files from a service that the ‘Great Firewall of China’ has blocked. A VPN can help you get around that too.

Related articles:

The best free fonts for designersTop CSS animation examples to recreateThe best painting and drawing apps