Original Source: https://www.sitepoint.com/keras-face-detection-recognition/?utm_source=rss

If you’re a regular user of Google Photos, you may have noticed how the application automatically extracts and groups faces of people from the photos that you back up to the cloud.
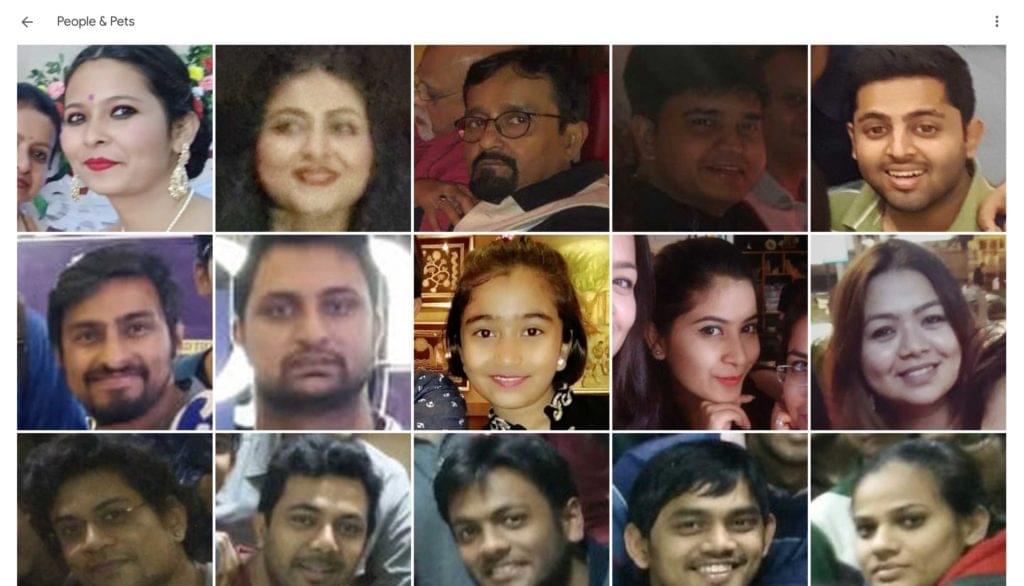 Face Recognition in the Google Photos web application
A photo application such as Google’s achieves this through the detection of faces of humans (and pets too!) in your photos and by then grouping similar faces together. Detection and then classification of faces in images is a common task in deep learning with neural networks.
In the first step of this tutorial, we’ll use a pre-trained MTCNN model in Keras to detect faces in images. Once we’ve extracted the faces from an image, we’ll compute a similarity score between these faces to find if they belong to the same person.
Prerequisites
Before you start with detecting and recognizing faces, you need to set up your development environment. First, you need to “read” images through Python before doing any processing on them. We’ll use the plotting library matplotlib to read and manipulate images. Install the latest version through the installer pip:
pip3 install matplotlib
To use any implementation of a CNN algorithm, you need to install keras. Download and install the latest version using the command below:
pip3 install keras
The algorithm that we’ll use for face detection is MTCNN (Multi-Task Convoluted Neural Networks), based on the paper Joint Face Detection and Alignment using Multi-task Cascaded Convolutional Networks (Zhang et al., 2016). An implementation of the MTCNN algorithm for TensorFlow in Python3.4 is available as a package. Run the following command to install the package through pip:
pip3 install mtcnn
To compare faces after extracting them from images, we’ll use the VGGFace2 algorithm developed by the Visual Geometry Group at the University of Oxford. A TensorFlow-based Keras implementation of the VGG algorithm is available as a package for you to install:
pip3 install keras_vggface
While you may feel the need to build and train your own model, you’d need a huge training dataset and vast processing power. Since this tutorial focuses on the utility of these models, it uses existing, trained models by experts in the field.
Now that you’ve successfully installed the prerequisites, let’s jump right into the tutorial!
Step 1: Face Detection with the MTCNN Model
The objectives in this step are as follows:
retrieve images hosted externally to a local server
read images through matplotlib’s imread() function
detect and explore faces through the MTCNN algorithm
extract faces from an image.
1.1 Store External Images
You may often be doing an analysis from images hosted on external servers. For this example, we’ll use two images of Lee Iacocca, the father of the Mustang, hosted on the BBC and The Detroit News sites.
To temporarily store the images locally for our analysis, we’ll retrieve each from its URL and write it to a local file. Let’s define a function store_image for this purpose:
import urllib.request
def store_image(url, local_file_name):
with urllib.request.urlopen(url) as resource:
with open(local_file_name, ‘wb’) as f:
f.write(resource.read())
You can now simply call the function with the URL and the local file in which you’d like to store the image:
store_image(‘https://ichef.bbci.co.uk/news/320/cpsprodpb/5944/production/_107725822_55fd57ad-c509-4335-a7d2-bcc86e32be72.jpg’,
‘iacocca_1.jpg’)
store_image(‘https://www.gannett-cdn.com/presto/2019/07/03/PDTN/205798e7-9555-4245-99e1-fd300c50ce85-AP_080910055617.jpg?width=540&height=&fit=bounds&auto=webp’,
‘iacocca_2.jpg’)
After successfully retrieving the images, let’s detect faces in them.
1.2 Detect Faces in an Image
For this purpose, we’ll make two imports — matplotlib for reading images, and mtcnn for detecting faces within the images:
from matplotlib import pyplot as plt
from mtcnn.mtcnn import MTCNN
Use the imread() function to read an image:
image = plt.imread(‘iacocca_1.jpg’)
Next, initialize an MTCNN() object into the detector variable and use the .detect_faces() method to detect the faces in an image. Let’s see what it returns:
detector = MTCNN()
faces = detector.detect_faces(image)
for face in faces:
print(face)
For every face, a Python dictionary is returned, which contains three keys. The box key contains the boundary of the face within the image. It has four values: x- and y- coordinates of the top left vertex, width, and height of the rectangle containing the face. The other keys are confidence and keypoints. The keypoints key contains a dictionary containing the features of a face that were detected, along with their coordinates:
{‘box’: [160, 40, 35, 44], ‘confidence’: 0.9999798536300659, ‘keypoints’: {‘left_eye’: (172, 57), ‘right_eye’: (188, 57), ‘nose’: (182, 64), ‘mouth_left’: (173, 73), ‘mouth_right’: (187, 73)}}
1.3 Highlight Faces in an Image
Now that we’ve successfully detected a face, let’s draw a rectangle over it to highlight the face within the image to verify if the detection was correct.
To draw a rectangle, import the Rectangle object from matplotlib.patches:
from matplotlib.patches import Rectangle
Let’s define a function highlight_faces to first display the image and then draw rectangles over faces that were detected. First, read the image through imread() and plot it through imshow(). For each face that was detected, draw a rectangle using the Rectangle() class.
Finally, display the image and the rectangles using the .show() method. If you’re using Jupyter notebooks, you may use the %matplotlib inline magic command to show plots inline:
def highlight_faces(image_path, faces):
# display image
image = plt.imread(image_path)
plt.imshow(image)
ax = plt.gca()
# for each face, draw a rectangle based on coordinates
for face in faces:
x, y, width, height = face[‘box’]
face_border = Rectangle((x, y), width, height,
fill=False, color=’red’)
ax.add_patch(face_border)
plt.show()
Let’s now display the image and the detected face using the highlight_faces() function:
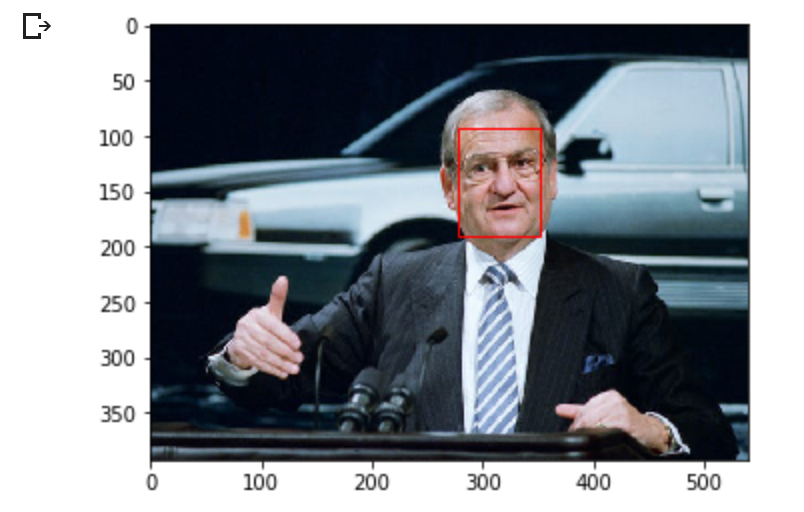
highlight_faces(‘iacocca_1.jpg’, faces)
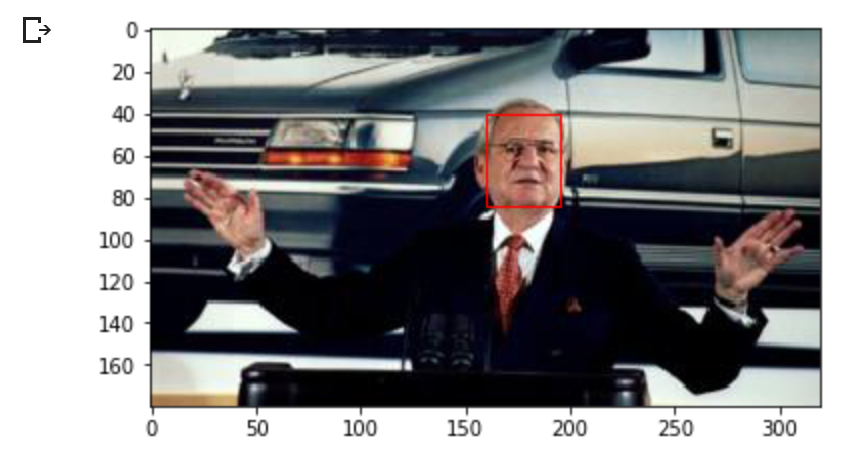 Detected face in an image of Lee Iacocca. Source: BBC
Let’s display the second image and the face(s) detected in it:
image = plt.imread(‘iacocca_2.jpg’)
faces = detector.detect_faces(image)
highlight_faces(‘iacocca_2.jpg’, faces)
 The Detroit News
In these two images, you can see that the MTCNN algorithm correctly detects faces. Let’s now extract this face from the image to perform further analysis on it.
1.4 Extract Face for Further Analysis
At this point, you know the coordinates of the faces from the detector. Extracting the faces is a fairly easy task using list indices. However, the VGGFace2 algorithm that we use needs the faces to be resized to 224 x 224 pixels. We’ll use the PIL library to resize the images.
The function extract_face_from_image() extracts all faces from an image:
from numpy import asarray
from PIL import Image
def extract_face_from_image(image_path, required_size=(224, 224)):
# load image and detect faces
image = plt.imread(image_path)
detector = MTCNN()
faces = detector.detect_faces(image)
face_images = []
for face in faces:
# extract the bounding box from the requested face
x1, y1, width, height = face[‘box’]
x2, y2 = x1 + width, y1 + height
# extract the face
face_boundary = image[y1:y2, x1:x2]
# resize pixels to the model size
face_image = Image.fromarray(face_boundary)
face_image = face_image.resize(required_size)
face_array = asarray(face_image)
face_images.append(face_array)
return face_images
extracted_face = extract_face_from_image(‘iacocca_1.jpg’)
# Display the first face from the extracted faces
plt.imshow(extracted_face[0])
plt.show()
Here is how the extracted face looks from the first image.
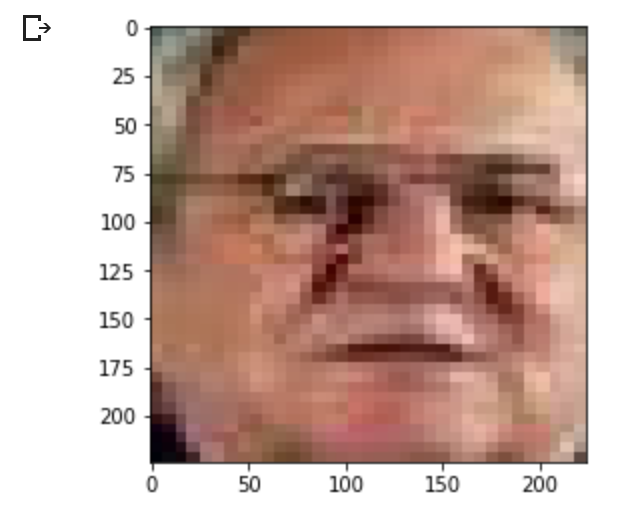 Extracted and resized face from first image
The post Face Detection and Recognition with Keras appeared first on SitePoint.
 You’re sure to find some tools and resources that will help you save time as we enter what is often one of the most hectic seasons of the year. Here’s what’s new for designers this month.