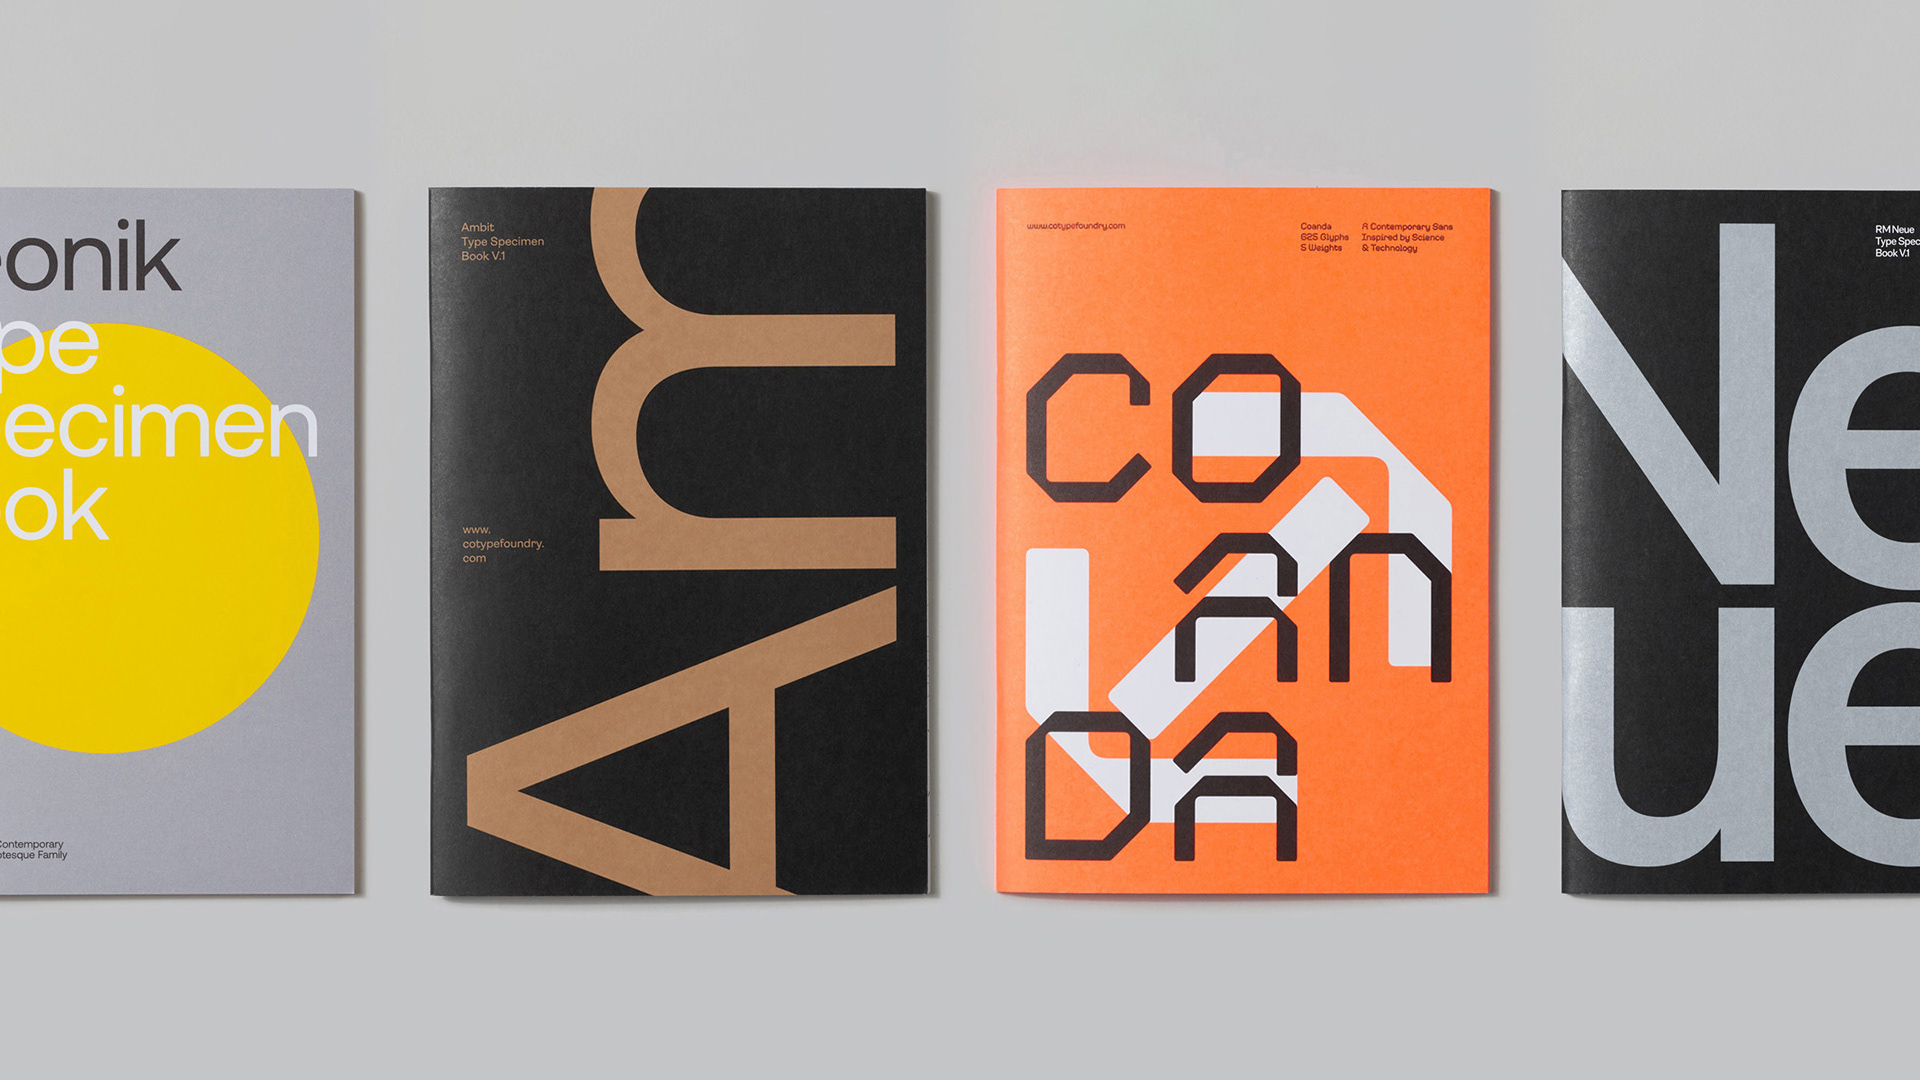
Branding and Graphic Design for CoType™

Original Source: http://feedproxy.google.com/~r/abduzeedo/~3/spXqSD9CE08/branding-and-graphic-design-cotypetm

Branding and Graphic Design for CoType™

abduzeedoDec 04, 2019

CoType™ is the London based type foundry of Mark Bloom and Co. They design contemporary typefaces for use in digital and print applications. In addition to their retail offerings, they also offer design of bespoke typefaces and modifications of their existing font library. All of their typefaces support Latin Extended-A, Western European, Central European & Southeastern European languages. They also offer free trials across their entire font library, allowing you to try before you buy. For more information visit www.cotypefoundry.com

Branding

Credits:

Additonal Font Engineering: Diana Oveza at Acute Studio — www.acutestudio.nl
Website Development: Hambly Freeman — www.hamblyfreeman.com
Type Specimen Book Printing: Identity Print — www.identityprint.co.uk
Paper Supplied by: Fedrigoni UK — www.fedrigoni.co.uk


Harley Quinn posters take it back to the 1480s

Original Source: http://feedproxy.google.com/~r/CreativeBloq/~3/BvUy59okKzQ/harley-quinn-posters

A bit of a retro feel is always a good way to get people's attention. Nostalgia's an easy button to press; that's why people are guaranteed to lose it for shows like Stranger Things and Mad Men, and why each year's design trends are almost certain to incorporate elements from bygone decades.

If you really want a vintage twist to hit home, though, you need to aim for an era that's not being milked to death already; does anyone really want to see another 1980s-inspired design at the moment? So we're delighted to see the new poster designs  for DC's upcoming Harley Quinn movie, Birds of Prey, which take nostalgia to a new level. 

Forget the 1980s; these posters, revealed on the Birds of Prey Twitter account, are rocking a killer 1480s vibe. Respect.

Is this the defining movie poster trend of the decade?

The main poster's inspired by Botticelli's most famous work, The Birth of Venus. Painted at some point in the 1480s, it depicts the Greek goddess Venus emerging from the sea in a giant scallop shell, fully-grown and completely nude. If you want to see the original it can be found in the Uffizi Gallery in Florence, Italy,

Botticelli's The Birth of Venus

Botticelli’s The Birth of Venus is the clear inspiration here

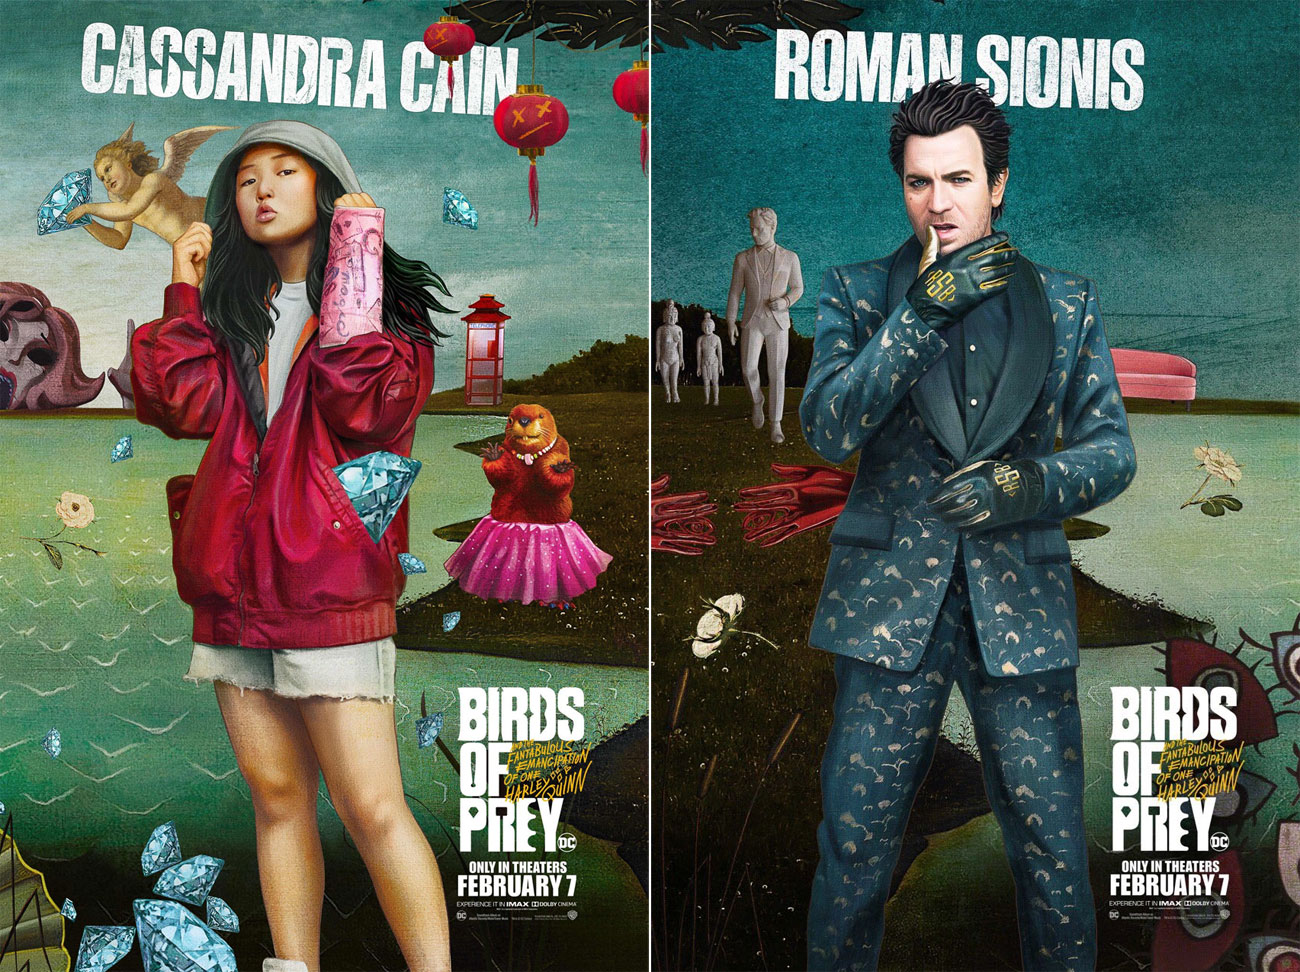
Harley, played by Margot Robbie, isn't nude in this poster, but the look clearly comes from the Botticelli original. There's the giant scallop shell (adorned with chunky diamonds) and the sea, and while Venus is attended by the got Zephyr and other minor deities, here Harley is backed up by the likes of Black Canary, Huntress and Cassandra Cain. Oh, and a beaver in a pink tutu, because why not?

It's a strong look that's quite unlike the current trend in movie posters for a moody extreme close-up of the main character with a bunch of text plastered over it; we'd much rather look at something colourful with plenty of details to pore over. 

Birds of Prey poster

Supplementary posters feature other characters, as well as that tutu-sporting beaver

As well as the gorgeous main posters, DC has also released a series of supporting posters featuring individual characters from Birds of Prey, again carried off in that Botticelli style and giving you a closer look at everyone already mentioned as well as Victor Szasz and Roman Sionis (played by Ewan McGregor), all backed up with more bits of weird pre-Renaissance iconography to ponder over.

There's no word from DC on who's responsible for these fantastically weird illustrations; whoever it is, though, we like their style. And after the massive success of this year's Joker movie, it's good to have another Batman spin-off to look forward to. Birds of Prey is scheduled for release on 7 February 2020; there's no official site yet, but you can find out more on its Twitter account.

Related articles:

Check out these incredible posters for movies that never happenedA designer's guide to printing a poster39 stunning poster designs to inspire you

40+ Best eCommerce WordPress Themes for 2019

Original Source: http://feedproxy.google.com/~r/1stwebdesigner/~3/ap79kedNz7g/

Whatever you are selling, eCommerce WordPress themes will suit perfectly with your brand. WP themes will make sure that your products are always available to the customers with a single click.

The internet has proven to be a very convenient place to shop. People have now started to buy almost everything with the click of their mouse. Because of this, websites are becoming more responsive to their customers.

We have also published these collections of Premium WordPress Themes and Free WordPress Themes.

UNLIMITED DOWNLOADS: 500,000+ WordPress & Design Assets

DOWNLOAD NOW

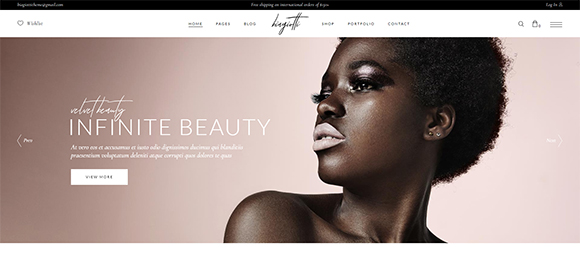
Biagiotti – Beauty and Cosmetics Shop theme

Biagiotti WordPress eCommerce Theme

This gorgeous eCommerce theme is specifically designed to fit every cosmetics shop and beauty website out there. Not only does it come with complete WooCommerce compatibility, but it also contains all-encompassing homepage and shop layouts ideal for showcasing all your products and services. Plus, the theme’s elegant inner pages will allow you to introduce your brand, your team, pricing plans, and anything else you think would be relevant to your future customers in a clean and streamlined manner. In short, Biagiotti is just the theme you need to emphasize all the strengths and professionalism of your beauty business.

Some of Biagiotti’s most important features:

Big custom shortcode collection
Simple One-Click Import of Demo Content
Slider Revolution Responsive WordPress Plugin included ($26 value)
WPBakery Page Builder Plugin for WordPress included ($64 value)
Compatible with YITH WooCommerce Quick View, Wishlist and Color and Label Variations plugin

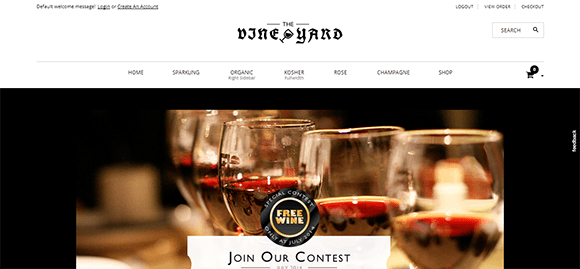
WineStore

WineStore

Mega menu
Demo content
Unlimited colors
Nivo Slider with new style
500+ fonts with Google Font

Mr. Tailor

Mr Tailor

Sharp Retina graphics
Powerful Theme Options panel
Integrated Font Awesome Icons (369)
Child theme included
Sticky header navigation

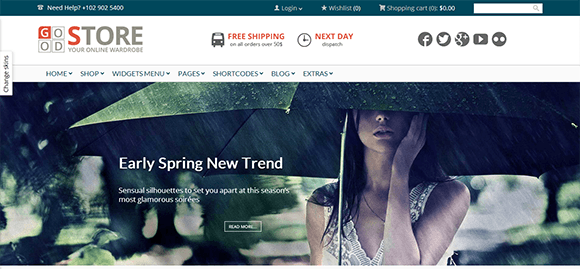
GoodStore

GoodStore

Tested for WordPress 3.6+
Catalog mode
Fullwidth and boxed variation
Powerful & detailed styling options
2 types of mobile menu

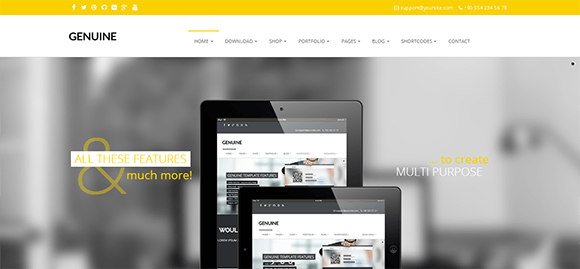
Genuine

Genuine

WordPress 3.8+ compatible
Build in HTML5 CSS3 and Bootstrap Twitter
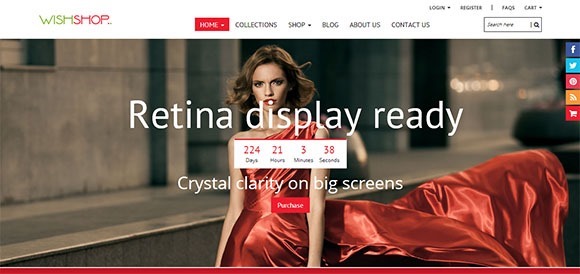
Retina display ready
Shortcode Elements
Social Media Friendly

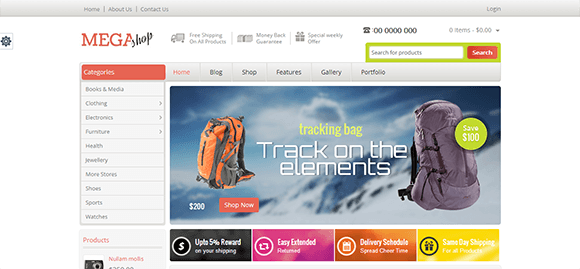
Mega Shop

Mega Shop

Google-rich Snippet
SEO ready
Applicable for Multilanguage
Smart responsive product grid
Free lifetime support

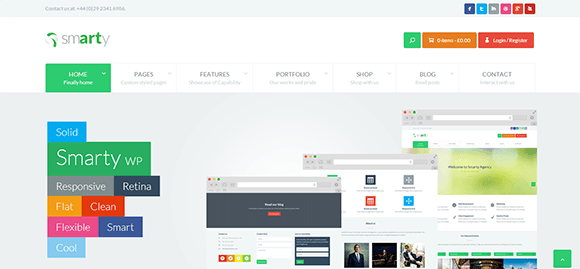
Smarty

Smarty

Full width and sidebar layout
Possibility to show or hide
15 widgets available
Detailed sales, customer and stock reports
Coupon management system

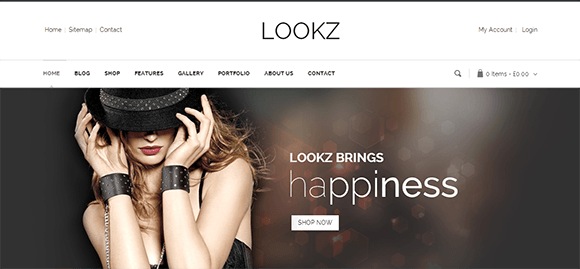
Lookz

Lookz

4 Pre-Defined Homepages Included
Fully responsive theme
45+ Visual Page Builder Components
No core modifications
Different gallery layouts

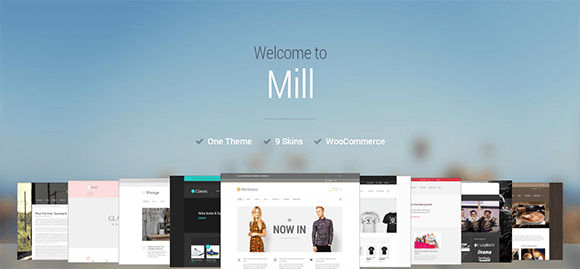
Mommerce

Mommerce

9 Awesome skins
WooCommerce support
Parallax bands
Slick animations
Highly customizable pages

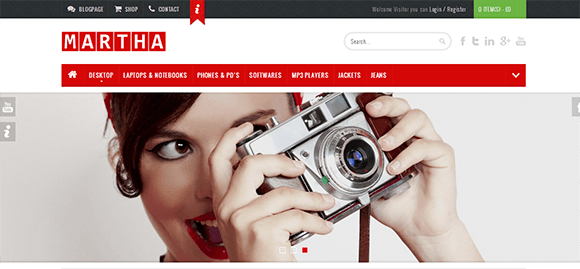
Martha

Martha

Unlimited colors
Font icons in menu
Product zoom
Latest Carousel-integrated
Scroll to top button

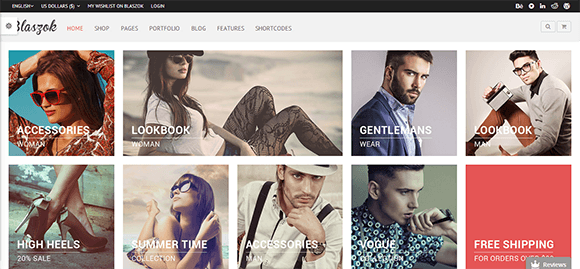
Blaszok

Blaszok

Responsive and retina display
WPML ready
Easy customization
Shortcodes/Addons
Multiple portfolio

Computer

Computer

Pre-Defined page layouts
Build with Bootstrap
Font Awesome icons
Custom Layout
Unlimited Sidebar

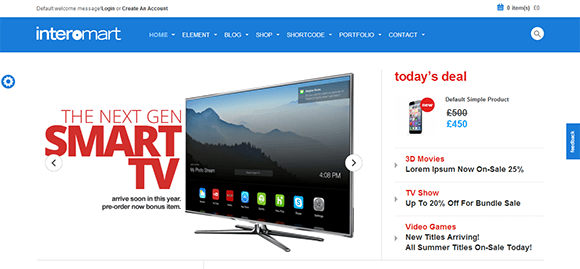
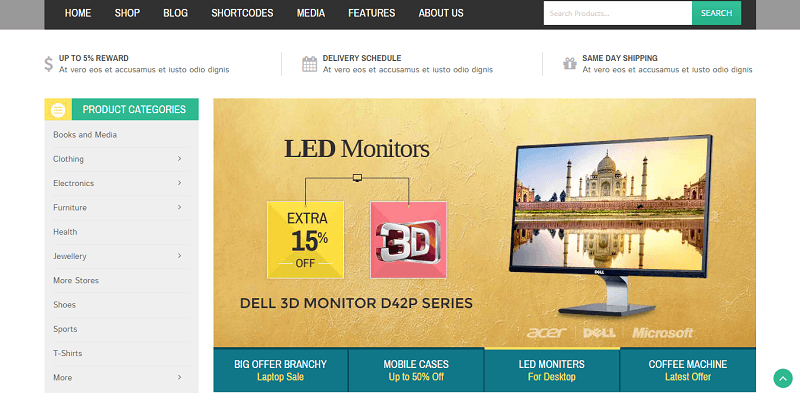
Branchy – WooCommerce Responsive Theme

2015_06_15_13_22_29_Home_Demo_Store

Branchy is based on WooCommerce plugin. It is a multi-purpose theme ideal for mobile, electronics, cosmetics, and other types of eStores. It uses HTML5 and CSS3 and is fully responsive adapting to any types of devices and platforms. It is compatible with different types of browsers as well as with WooCommerce 2.3 version.

Branchy Theme Best Features:

No Core Modifications needed
More than 1500 Font Awesome Icons
Optimized for fast loading using CSS Sprite
Different portfolio and gallery layouts
Supports multiple language
Full PSD files

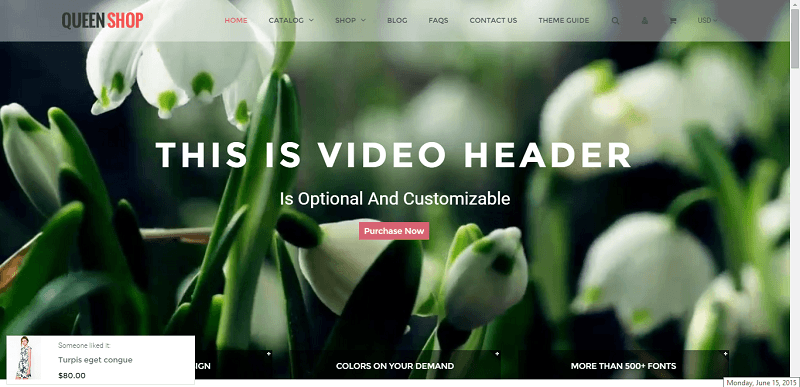
Queen – Responsive Shopify Theme

queen

This theme truly deserves its name – graceful, beautiful, and high resolution. As one customer says,

The features, customer support, documentation, flexibility, the powerful ability to customise, design/code quality are all A+ rating. If you are selling a small range, large range, or single range product, try this theme out.

Queen Theme Best Features

Responsive layout
Mega menu
Theme internationalization
QuickShop
Power admin panel
Bootstrap v.3

Granada – Responsive Magento Theme

2015_06_17_09_13_07_Granada_Home_One

Granada is a fully responsive theme based on Bootstrap 3, and compatible with any types of devices. It is one of the themes with the highest quality of graphics, which displays well even in ultra-high Retina display. With 35 different PSDs, six different layouts, and unlimited color options, you can make your own unique website even without coding knowledge.

Granada Theme Best Features:

Blog Extension Ready
Magento 1.7 – 1.9 Ready
Unlimited Header Types
Touch Friendly to All Mobile Devices
Social Bookmarks for Products
More than 300 Admin Features
Compatible with Zeon Manufacturer Extension

Organic Web Shop – A Responsive WooCommerce Theme

2015_06_17_10_27_33_Organic_Web_Shop_A_Premium_WordPress_Theme_with_WooCommerce_Webshop_integratio

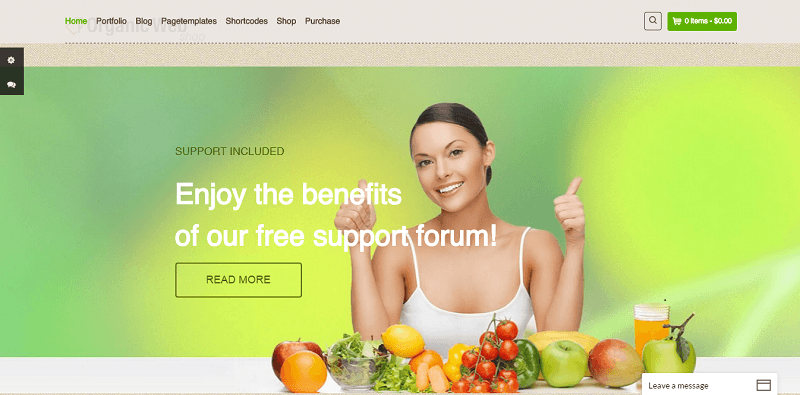
Designed by Colibri Interactive, Organic is optimized for iPad and iPhone. It has WooCommerce Webshop Integration with features and options for easy customization. This is an ideal theme for eStores which sell coffee, farm products, cosmetics, food, and many more. It also contains an extensive them option panel so you can easily choose from an unlimited number of colors as well as change the background image and other elements.

Organic Theme Best Features:

A lot of extra plugins
Extensive theme option panel
WooCommerce 2.3 compatible
Multilingual including .mo & .po files

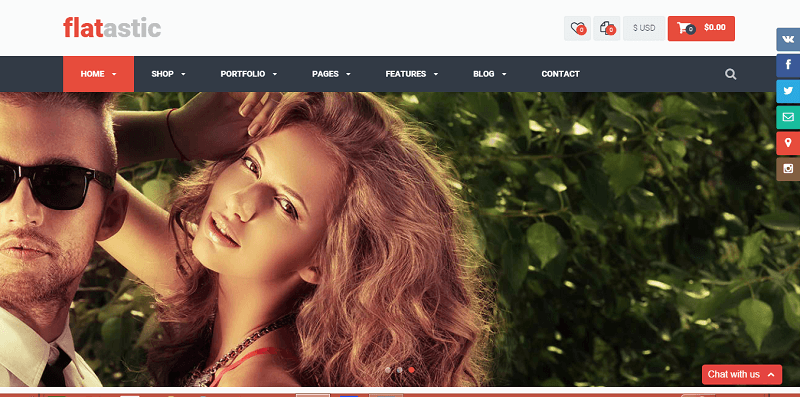
Flatastic – Versatile WordPress Theme

flatastic

Flatastic has a modern and clean design coupled with powerful layouts, color settings, easy-to-use visual composer, and advanced WooCommerce platform. The theme is available in four different versions – Drupal, VirtueMart, Magento, and HTML/CSS3.

The theme is Retina-ready with multiple and powerful plugins to make your online store more customer-friendly. Other features include child theme support, slider revolution and layer slider, Google Rich Snippets plugin, and unlimited footers together with a variety of header styles and layouts.

Flatastic Theme Best Feature

One Click Theme Install
One Page and Multiple Pages Layouts
Mega Menu
4 Different Color Schemes
Unlimited Portfolios
Contact 7 Form
Attractive CSS3 animation

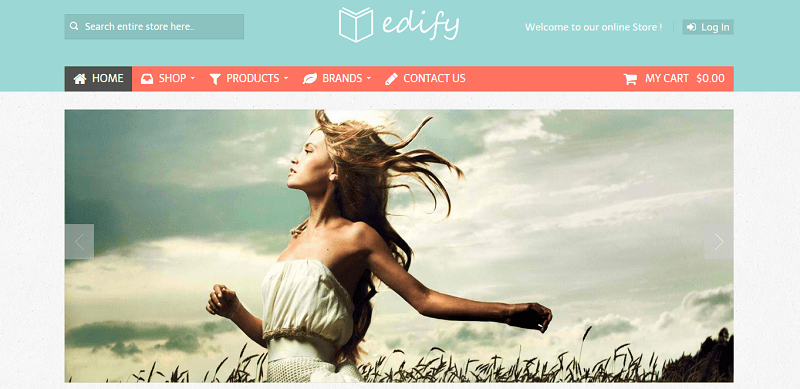
Edify – Responsive Zen Cart Theme

2015_06_17_13_17_09_Home

This is a modern and stylish Zencart theme based on Bootstrap 3 and compatible with a number of browsers. You can choose from the three layout versions, which are easy to install and customize. One of the best-rated themes on ThemeForest, Edify is also a winner when it comes to customer service. As one client says,

Edify Theme Best Feature:

Compatible with latest Zencart v1.5.4
Easy Install Sample Data
Three Homepage layout
Cloud Zoom 1.0.3
Font Awesome Icon Fonts
Lightbox for Product Images
Google Web Fonts
Mailchimp Integrated

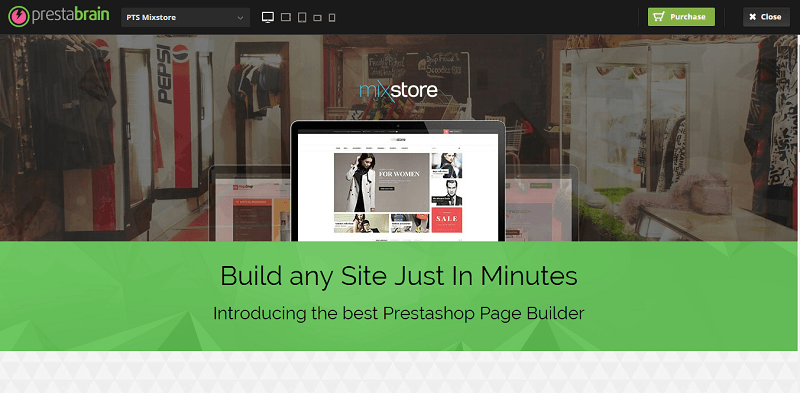
Pts Mixstore – Multiple-Purpose Prestashop Theme

2015_06_17_14_00_26_Theme_Demo_PTS_Mixstore_Prestshop_Theme

Pts Mixstore is a multi-purpose Prestashop theme with five pre-built sites. Powered by Prestashop Page Builder and a new web-only technology, the theme is easy to install and maintain. It has an admin panel filled with features, which include a mega menu, live theme customization, custom font, layout configuration.

It also contains a powerful and well-structured code base for better programming, customization, and performance. These codes are also built with an anti-hacking system to protect your online store as well as the security of your customers.

PTS Mixtore Theme Best Features:

First Page Builder tool for Prestashop
One Click Installation
Powerful Grid System
Multiple Header Types
Flexible Layout System
CSS and JS compression
Custom font
Support CSS development

Unicon | Design-Driven Multipurpose Theme

2015_06_17_19_24_43_UNICON_Design_Driven_WordPress_Theme

Developed by Minti, Unicon is marketed as the first design-driven multi-purpose WordPress theme filled with powerful features and intuitive user interface. Unicon is not only ideal for building an online store, but also for your portfolio, blog, or business website. Its professional and amazing design is coupled with powerful features to help you design your website and keep it running smoothly.

Unicon Theme Best Features:

Drag and Drop Page Builder
Full WooCommerce Support
Boxed and Wide Layout
50 Page Builder Elements
More than 650 ultra sharp icons
WPML Ready
Multiple Header Designs

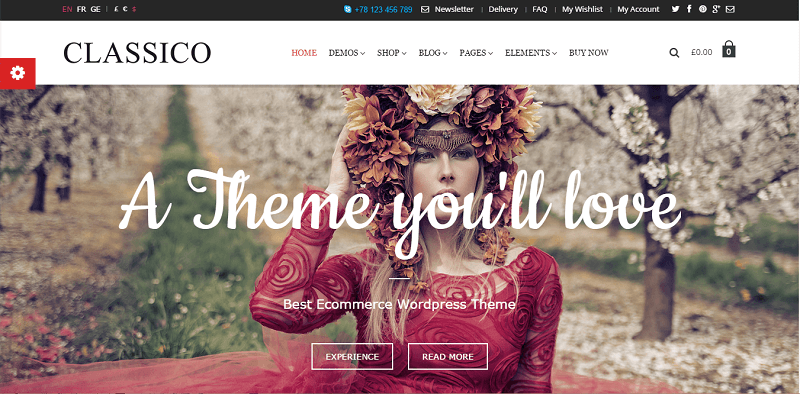
Classico – Responsive WooCommerce WordPress Theme

classico

Classico is an elegant and modern theme with a wide collection of variants and layouts that suit your preferences. It allows you to combine themes using different layouts, structure, headers, and sidebars. Other features this theme has included an improved admin module which allows you to edit your portfolio and other pages easily. There is also a lot of options to your product page for customization and modification, such as the sidebar position, layout, wishlist option, and hover effects.

Classico Theme Best Features:

Visual Composer Plugin
Wide, Boxed, or Framed Layout Option
SEO Optimized
Different Footer and Header Combinations
24/7 Support
WPML Ready
Portfolio Functionality

Regolith — Responsive Horizontal Shopify Theme

2015_06_18_14_41_50_Unique_Horizontal_Theme_Regolith

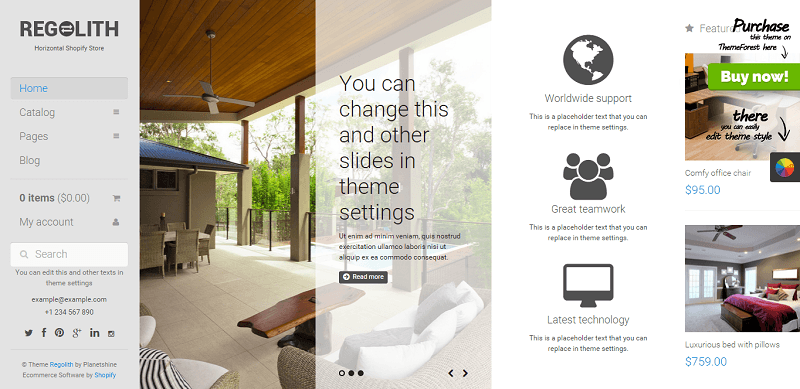
Regolith is a unique theme because of its horizontal orientation. Built with the latest technologies, you have a wide range of options to choose from to make the products in your website stand out as well as providing you more screen space to utilize. Regolith is easy to customize and has beautiful parallax effects to make your posts and products look even better. Products are automatically split into clean and even newspaper-style columns, which automatically reshapes itself to fit your screen.

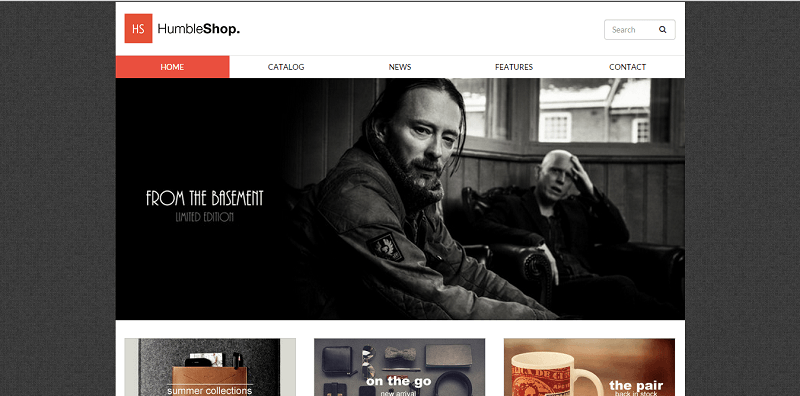
Humbleshop – Minimal Retina Shopify Theme

2015_06_18_15_15_39_The_Humble_Shop

The Humbleshop theme is a play on words reflecting what it offers – clean, minimal, and simple. However, it has all the necessary features you need to create a modern and unique online boutique or store. Living up to its name, its Theme Settings are easy to configure allowing you to customize within five minutes. If you are after a simple and clean store which effectively showcases your product, Humbleshop is definitely for you.

Humbleshop Theme Best Features:

Retina Theme
Minimalist, and clean design concept
Responsive design, built based on mobile-first theory.
Automated meta open graph tag and SEO ready
Unlimited Google Font
Two preset theme as a base to start; light and dark version
Rich snippets ready for products

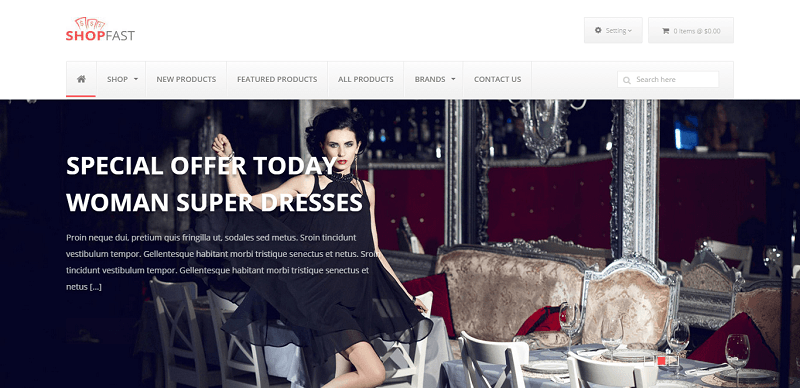
Shopfast – Responsive Zencart Template

2015_06_18_15_46_34_Zen_Cart_The_Art_of_E_commerce

Shopfast is a Zencart template with features, such as unlimited color options and multiple language support. It also uses the lates technology including HTML5, CSS3, jQuery, and Ultimate SEO URL Ready.

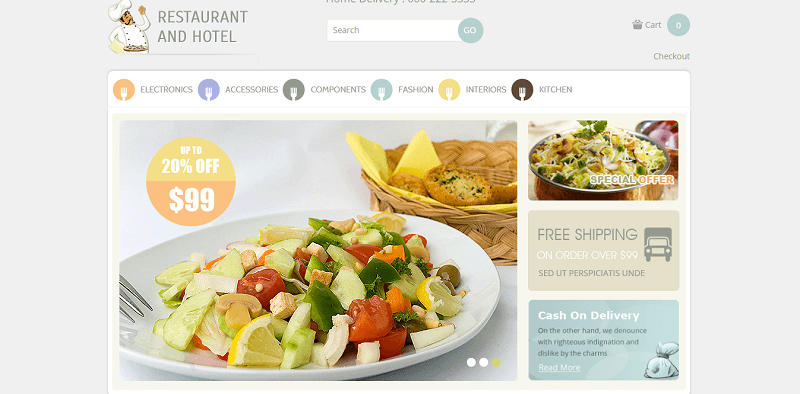
Restaurant – Responsive OpenCart Theme

2015_06_18_16_08_53_Your_Store

Restaurant theme, as the name suggest, is a perfect theme for any restaurant or food business with its clean and professional look as well as its great color combinations. Set in a white background and with Cloud Zoom to enlarge the products, your food presentations will surely look delectable using this theme. It is also optimized for fast loading to give your customers and visitors a truly enjoyable user experience.

Restaurant Theme Best Features:

Flex Slider
Cloud Zoom
Unlimited Banners and Sliders
CMS Blocks module
Full PSD files included
Related Product Scroller
Featured Products Slider Show
No core modifications needed

View Demo and Purchase Theme Here

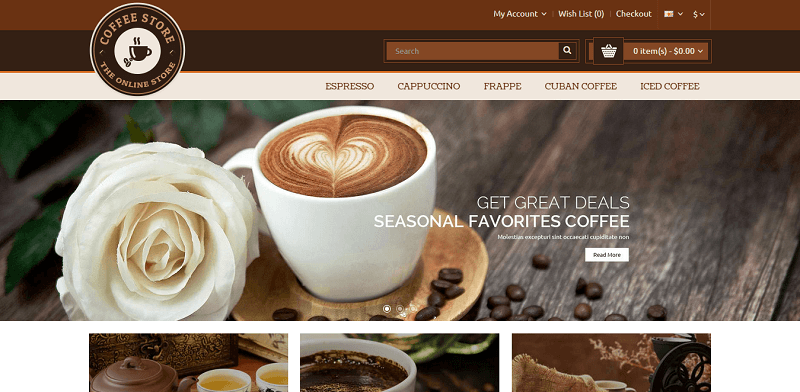
Coffee – Opencart Responsive Theme

2015_06_18_16_25_00_Your_Store

Own a cafe or coffee shop? The Coffee theme is the perfect theme to use when you want to showcase your products and business online. It has all the right color combinations which seem to capture the strong aroma of various coffee blends as well as the mouth-watering cakes that go along with your java.

Coffee Theme Best Features:

HTML5 and CSS3
Support Multiple Language
Included RTL Language Support
Optimized for Fast Loading + CSS Sprite
Smart Responsive Product Grid
Unlimited Banners + Sliders
Featured Products Slider Show
Easy Shopping Cart Drop down from header
Avoid Javascript Conflict

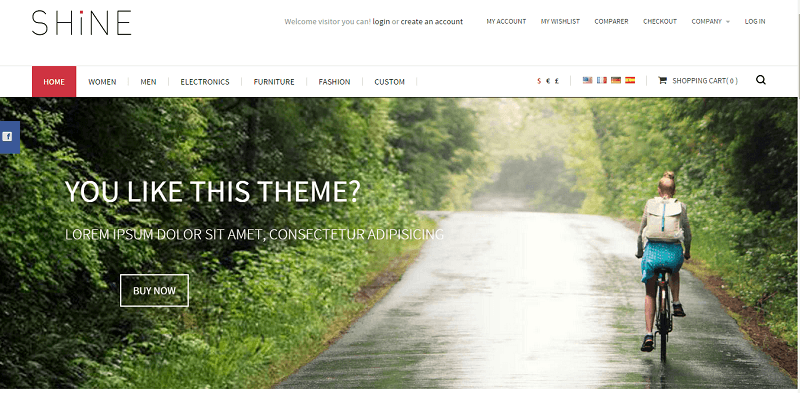
Shine – Responsive Multipurpose PrestaShop Theme

2015_06_18_16_36_16_Shine_Responsive_Multipurpose_PrestaShop_Theme

Shine is a fully responsive theme filled with features, some of which allows you to change the color of almost every element. A PrestaShop theme, it is compatible with any PrestaShop store and displays flawlessly across all types of devices and browsers. It has a simple way to configure how your product detail page looks and what they have on them.

Shine Theme Best Features:

Powerful admin panel
Integrated Google fonts
Unlimited Colors
Custom Slide Show
Drop-down shopping cart
Product detail page
Lightbox or CloudZoom integration

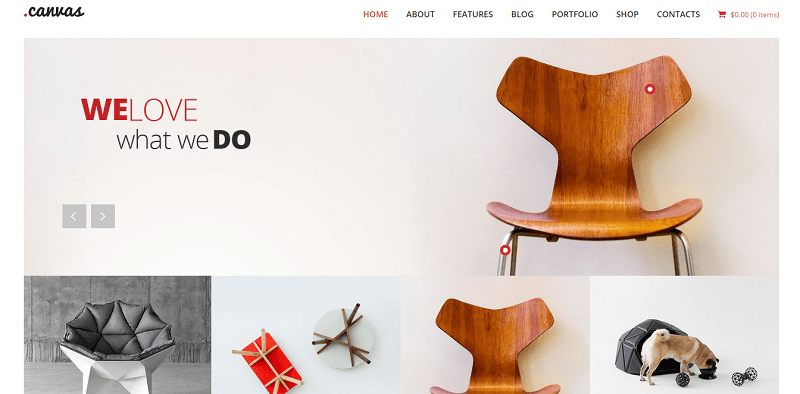
Canvas Interior & Furniture Portfolio WP Theme

2015_06_18_16_48_38_Canvas_Affordable_Solutions_for_Better_Living

Canvas theme is specially designed for furniture and interior design portfolio and stores. Canvas developers understand that interior designers need a website filled with features that enhance and showcases the works of interior designers to impress clients and visitors. The theme has a clean and simple design as well as helpful features, such as full catalog, detailed portfolio item page, and eCommerce support.

Canvas Theme Best Features:

WordPress v4.1
High speed and extra optimized
WooCommerce support
One click demo import
Color management
More than 600 Google font support
Gallery Albums

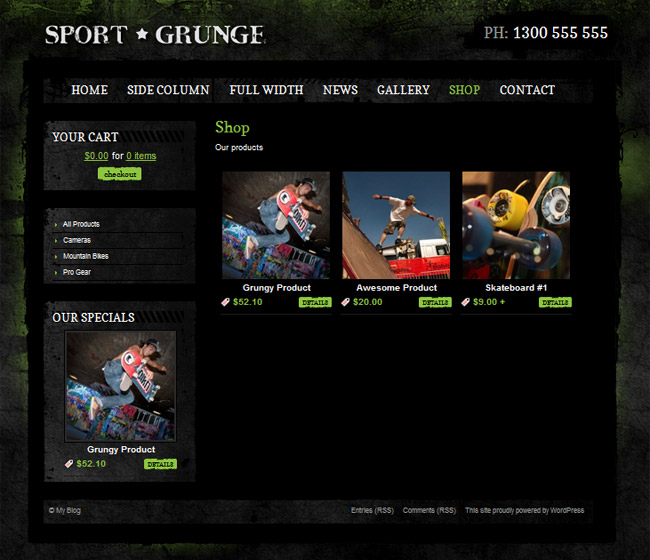
Sport and Grunge

4

Some features:

Built-in simple shopping cart (PHP script)
Google Map and driving directions on the contact page
Working contact form
Photos in this website are using Javascript and CSS classes to apply a pre-made grunge border to your plain rectangle images.

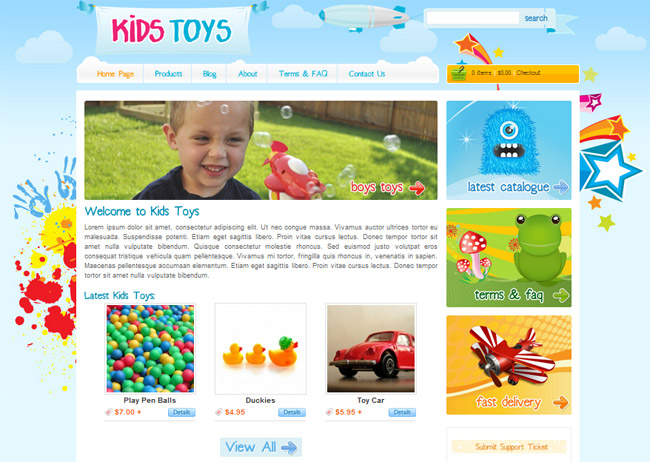
Kids Toys

6

Some features:

WordPress shop payment methods: PayPal, Bank Transfer and Google Checkout
Unlimited number of products
5 widget areas

Quickshop – Responsive Shopify Theme

Quickshop

Count-down on the slider
Discount exchange
Single product support
Responsive layout
Zoom Box

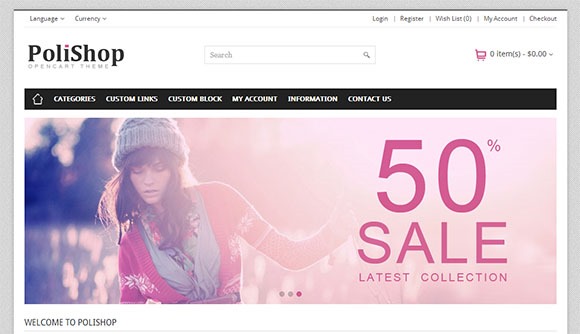
Polihop – Responsive OpenCart Theme

Polishop

Auto complete field
2-product grid view style
350+ Google fonts
Cloud Zoom plugin
Boxed and full-width layout

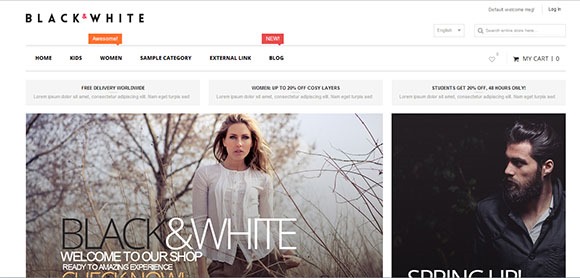
Black&White – Responsive & Retina Magento Theme

Black And White

Retina-ready Display
One-page checkout
Currency switcher as select box and flag bar
‘Sale’ label for special priced products
Slider for displaying ‘Related products’

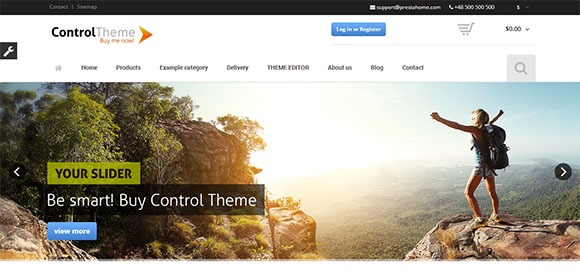
Control – Flexible Responsive PrestaShop Theme

Control

Detailed design of all pages
Google Fonts integration
Ajaxed search with product thumbnails
Includes SimpleBlog ($17 worth)
Unlimited colors

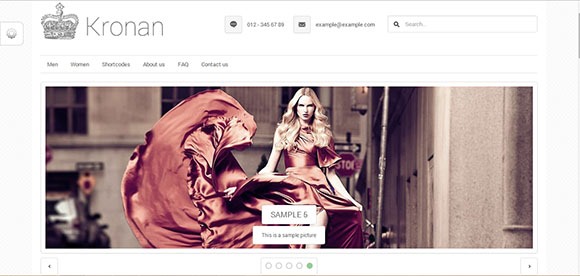
Kronan – Responsive PrestaShop Theme

Kronan

List and Grid views
Extended search with image and product price
Swipe on products at front-page for smartphones
Brand logo module
5 built-in color themes and 16 patterns

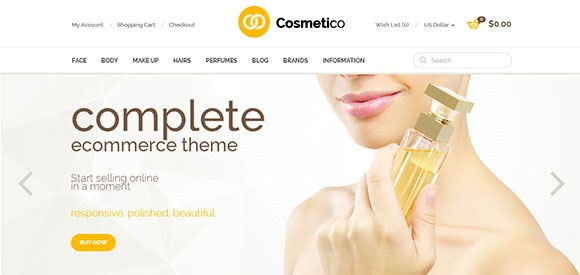
Cosmetico – Responsive OpenCart Template

Cosmetico

Based on Bootstrap 3
Single or multi-column theme layout
Product ‘Sale’ badge
Refine search engine
Unlimited colors and patterns

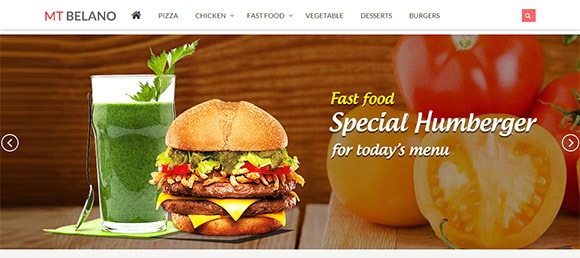
MT Belano Responsive Parallax Magento Theme

MT Belano

Ajax shop by price slider
Custom layout and check-out pages
Customizable product image size
Different layouts for categories
Ajax add to cart, wishlist and compare

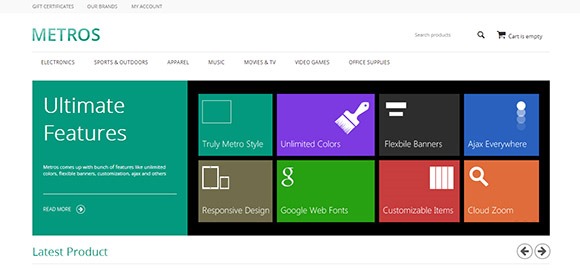
METROS – Minimalist Responsive CS-Cart Theme ($63)

METROS

Multi-store-ready
Fluid grid system based on Bootstrap framework
Unlimited colors, backgrounds, fonts
Flexible banners
One-click install including sample data

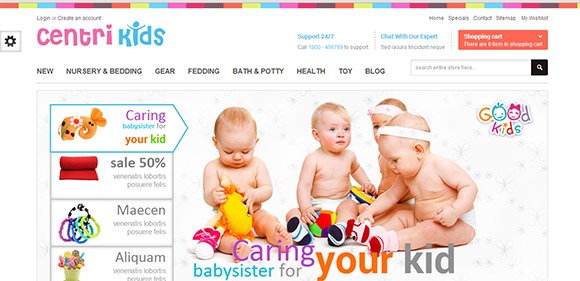
Kids Store Responsive Prestashop – CentriKids

CentriKids

Responsive Web design
Quickshop
Products in Grid and List view
Module CS theme editor
CS Quick search

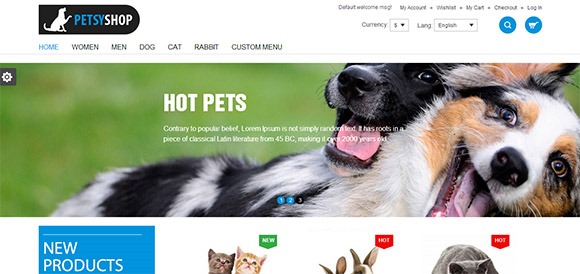
Petsy Shop Responsive Magento Theme

Petsy

Ajax layer navigation
Featured Products Slider home page
Back to top button
Additional Navigation Link
Cloud zoom Images with Lightbox

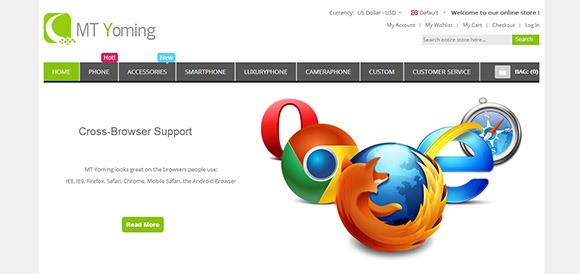
Yoming – Technology Responsive Magento Theme

Yoming

Two layouts for main page
Flexible slideshow
Different layouts for categories
Previous/next navigation for product page
Custom layout and check-out pages


How To Design Profitable Sales Funnels On Mobile

Original Source: https://www.smashingmagazine.com/2019/12/design-profitable-sales-funnels-mobile/

How To Design Profitable Sales Funnels On Mobile

How To Design Profitable Sales Funnels On Mobile

Suzanne Scacca

2019-12-06T11:00:00+00:00
2019-12-06T15:07:36+00:00

A sales funnel is a set of invisible steps you lay before visitors that takes them from the point of entry to the desired action. There are three stages in a sales funnel:

Top of the funnel (TOF),
Middle of the funnel (MOF),
Bottom of the funnel (BOF).

Why do we call these three stages a funnel? Because, together, they form a funnel-like shape:
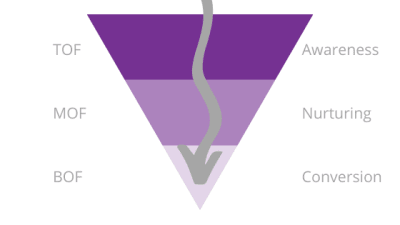
Sales funnel drawing

A sales funnel and its three key stages: top-of-funnel, middle-of-funnel, bottom-of-funnel marketing. (Large preview)

At the top are all the people who enter your website or PWA. At the bottom are those who’ve bought something. The reason it tapers off is because your funnel sheds visitors and leads along the way who aren’t a good fit.

This process actually occurs with or without your help. (It’s just more effective if you take the time to carefully construct it.) Open Google Analytics and locate the tab called “Users Flow” under “Audience” or “Behavior Flow” under “Behavior”.

You’ll see something like this:

Google Analytics Users Flow

An example of using Google Analytics to chart the natural flow of visitors through a website. (Source: Google Analytics) (Large preview)

In this particular user flow, we’re looking at how traffic from various mediums (e.g. organic search, third party referrals, social media) moves through the website.

The shape isn’t as explicit as a funnel, but you can see that’s exactly what’s happening with the numbers. There were 4500 sessions to start. By the second interaction, only 143 remained.

By actually designing your sales funnels, though, you can improve your results and make them more predictable. You’ll do this by driving the right kind of leads into your website, laying down a clear set of steps for them to take and, hopefully, maximizing the number of them that convert.

To do this, you’ll need to understand what’s going on in the minds of your leads at every part of the funnel and then design an experience that caters to that exact mindset.

Let’s look at some examples.

Designing For Top Of The Funnel

Someone discovers your website or brand on Google, through a social media post or from a personal referral. So, they visit the website on a fact-finding mission.

TOF marketing is all about discovery. You want to take visitors from:

Sounds interesting.

To:

This is promising! I should [subscribe to the newsletter/like them on Facebook/grab this free downloadable].

Here is an example of how you might build out the Awareness part of the funnel:

Step 1: Show Up in the Right Places

Your sales funnel doesn’t begin on your website or app. It begins in places like Google search results, like this example for the Atlassian enterprise software company:

Google search results kick off TOF marketing

This is the first step of the TOF funnel: a Google search result for Atlassian. (Source: Atlassian) (Large preview)

In order for visitors to enter the funnel, you have to increase the exposure of your brand in places like:

Organic Google search results,
Social media posts,
Review site recommendations,
Content like blog posts and podcasts.

You can also use paid search and social ads to boost brand awareness, but be careful. As this WordStream infographic demonstrates:
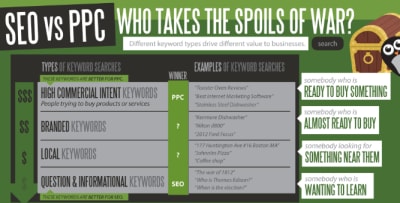
WordStream infographic SEO vs. PPC

The WordStream infographic shows how different keywords perform better in SEO vs. PPC placements. (Source: WordStream infographic) (Large preview)

Paid placements are much more attractive to consumers who are ready to buy (i.e. at the bottom of the funnel). Top of the funnel consumers, however, are simply on a fact-finding mission, which is why you’d be best off finding organic placements (in search and elsewhere) to put in front of them.

Step 2: Help Them Learn More

Once visitors enter your website, you want to make it as easy as possible for them to get the information they need. On mobile, that means giving them a shortcut above the fold:
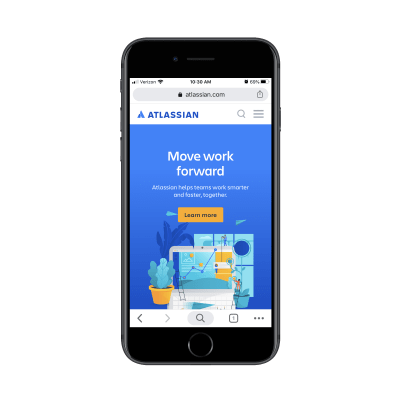
Atlassian Learn More button

The Atlassian home page invites visitors to ‘Learn more’. (Source: Atlassian) (Large preview)

There’s nothing complicated about what the CTA button is asking visitors to do. No pressure to buy. No snarkiness or attitude. Just a straight-forward, “Let us help you discover our products.”

Step 3: Give Them a Little Room

It’s not as though Atlassian is some unknown brand. It’s the developer of products like Jira, Trello, and Bitbucket. And, yet, its first step is to invite visitors to take time to learn more. More websites would be better off if it had as welcoming of an approach.

The next step in this process gives visitors the time and space to research Atlassian’s products:

Atlassian products

Atlassian encourages visitors to take time learning about all of the software available. (Source: Atlassian) (Large preview)

There are no pesky pop-ups on this page to distract visitors from the list of products. There are no ads or banners drawing attention to special offers or anything like that. There aren’t even any “Buy Now” buttons. Each product description is followed by a “Learn more” button.

This is perfect for the business owner or CTO who simply wants to gather up facts on software options before making any buying decisions.

Step 4: Make a Connection

Because these are top-of-funnel visitors, there’s no way you’re going to get them to convert on the spot — especially for enterprise software. So, your best bet is to throw a soft pitch their way.

In the case of Atlassian, it offers a free trial:
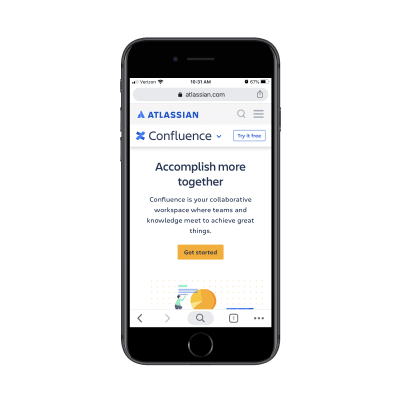
Atlassian 'Try it free'

Atlassian doesn’t push TOF visitors to buy right away. A free trial is offered instead. (Source: Atlassian) (Large preview)

No credit card is required at this time. This is simply about letting prospective users learn even more about the product without the pressure of a price tag.

If you have a product that they can discover first-hand, this is a great way to earn the trust of TOF consumers and fast-track them to conversion.

If you don’t have a product that can be tested, that’s fine. There are other ways to help your users learn more and stay connected through email. A lead magnet like a downloadable checklist or ebook is one way to do it. A subscription to your blog is another. Or you might just invite them to follow you on social.

However you make that connection, make sure you’re only asking for the bare minimum:
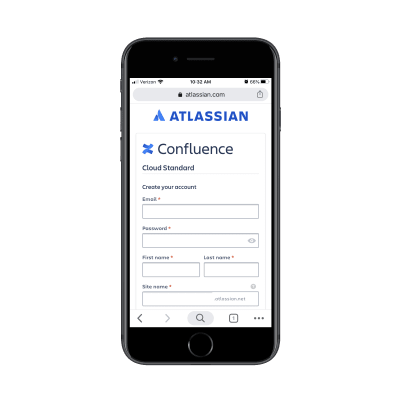
Atlassian free trial form

Atlassian free trial form asks for only required user data. (Source: Atlassian) (Large preview)

If you’re thinking of going the route of a lead magnet, read this guide for tips on designing the lead gen landing page.

Designing For Middle Of The Funnel

For businesses with shorter sales cycles (i.e. ones with less complicated and cheaper products), this part of the funnel doesn’t usually exist. For those that do need it (like service providers and SaaS companies), though, it’s a critical part of the sales process.

We’ve already established that leads that get to this stage are interested since they shared their email address or connected with you in some other manner. Now, it’s your job to feed them with free value and insights so they go from:

This is promising!

To:

This is exactly what I’ve been looking for.

MOF marketing is all about building relationships and nurturing trust while you give your prospects time to consider whether the purchase is worth it.

Here is an example of how you might build out the Nurturing part of the funnel:

Step 1: Keep in Touch

Your website has successfully educated visitors enough to become interested leads. Now, you have to actually do something with that connection.

If they subscribed by email, started a free trial or downloaded a lead magnet, they should begin receiving email communications.

If they followed your brand on social, then they should start seeing your posts on a regular basis.

Just keep in mind that these messages shouldn’t be about the hard sell. At this stage, all you’re doing is providing extra value and building trust in the process. If you contact them at the right frequency and with the right kind of content, though, they’ll eventually get to a point where there’s no doubt in their minds that they want to buy from you.

For example, I was on Google recently looking for “spas near Providence” (where I’m moving to early next year). I always book a spa session for my birthday and was just curious what kind of options I’d be working with.

In my Google Maps results, I discovered The Bodhi Spa. It had great reviews, it was close to where I was moving and it had the kind of spa services I was interested in. So, I figured, why not click and learn more?

I was happy with what I saw, so I decided to follow them on Instagram so they could stay top-of-mind until I move to Providence. This is the exact thing you want to happen with your TOF prospects.

And the way the spa continues to stay in touch is the exact thing you (or whoever handles the marketing for the website you built) should be doing in the MOF:
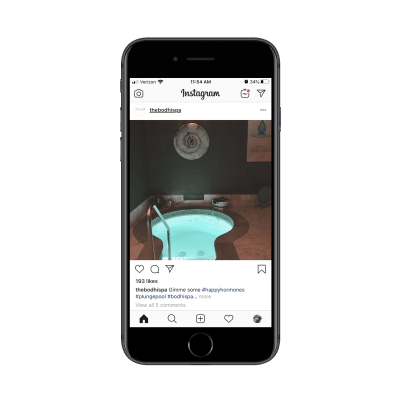
The Bodhi Spa Instagram post

A recent Instagram post from The Bodhi Spa. (Source: The Bodhi Spa) (Large preview)

What’s great about this example is that the spa doesn’t overdo it. They only post once every week or two — just enough to keep followers (and interested prospects) engaged:

The Bodhi Spa image posts

The Bodhi Spa posts enticing photos on Instagram every week or two. (Source: The Bodhi Spa) (Large preview)

Another nice tip you can leverage from this example is how the posts are written.

Sure, the Instagram page is meant to be promotional. However, the posts themselves aren’t written in a sales-centric tone. For instance, the last post that went up simply says:

Gimme some #happyhormones #plungepool #bodhispa #heatupcooldownrelaxrepeat

The enticing image and the relaxed message work well for MOF marketing. It’s like, “Hey, we’re here whenever you’re ready.” And, for my own purposes, that’s perfect. As an interested prospect, I’m glad I’ll have these kinds of updates to remind me to book a session once I’m in town.

Step 2: Always Include Your Link

When you get close to the bottom of the funnel, your links should go deeper into the site. For instance, let’s say you were to run a Google ad for a specific product or sale. The link in that ad wouldn’t go to your home page. It would go to a targeted landing page that would shortcut the whole process.

MOF prospects aren’t at that stage yet, so you should still send them to your home page or some other top-level page on your website (just not a navigation-less landing page).

The Bodhi Spa, for example, points all Instagram visitors to its home page:
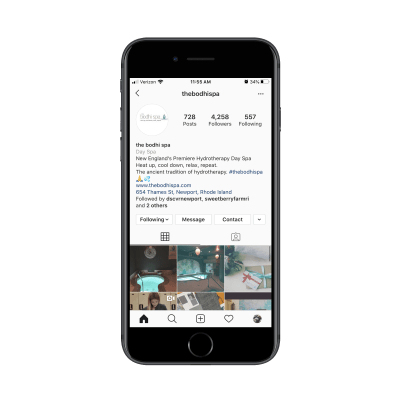
The Bodhi Spa Instagram link

The Bodhi Spa includes a link to its home page on Instagram. (Source: The Bodhi Spa) (Large preview)

Most newsletters and email communications will do the same, with a link at the very top or bottom of the email pointing to the home page.

Just make sure the link you send them to naturally directs them through the middle-of-funnel steps.

Step 3: Point Them in the Right Direction

For longer sales cycles, make sure your website is fully prepared to provide answers to interested prospects — both directly and indirectly.

As far as the direct approach goes, a contact form and live chat would be useful. You should exhaust the indirect options before you go too crazy with setting up contact channels though.

As far as the indirect approach goes, your website should be like a self-guided journey. That way, when they land on the home page, it’s clear which directions they can go in:

The Bodhi Spa 'Begin Your Journey'

The home page of The Bodhi Spa has a ‘Begin Your Journey’ button. (Source: The Bodhi Spa) (Large preview)

The home page gives visitors two ways to go:

Begin your journey,
Or access the menu.

Now, as a first-time visitor at the top of the funnel, the prospective customer likely scrolled through the home page to look for an opportunity to quickly learn more:
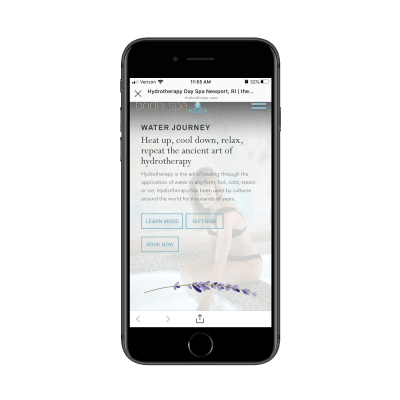
Bodhi Spa 'Learn More'

The home page of The Bodhi Spa PWA points visitors to ‘Learn More’. (Source: The Bodhi Spa) (Large preview)

As a return visitor, however, this part of the home page opens up a new pathway that they likely hadn’t considered the first time around: “Book Now”. Even the order in which the buttons appears suggests that that’s the order in which visitors should interact with them.

That said, MOF prospects aren’t necessarily ready to buy on a second, third or even fourth visit. While they’re not in the initial “Is this worth it?” discovery phase, they’re still trying to gather all the facts and make up their mind.

(And if they are sold on your offer that quickly, that’s great! You have the button there, ready for them to click.)

Step 4: Reinforce Your Value

Even though this is a mobile website (or PWA) where content should be kept to a minimum, it’s important to include all details that will make-or-break their decision to buy. Don’t stuff them into the home page or a single services or products page though.

Lay it out in your navigation like this:
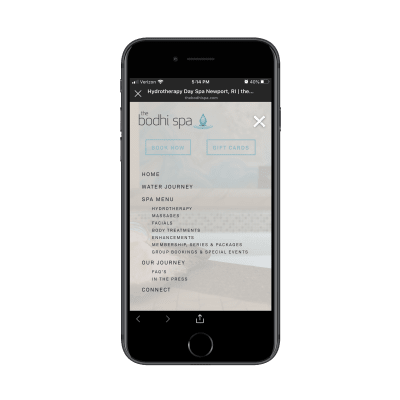
The Bodhi Spa navigation

The Bodhi Spa has a dedicated page for each of its services and its company story. (Source: The Bodhi Spa) (Large preview)

At first glance, you might not think this website has that much information since the home page is so straight and to the point. However, this navigation digs deep into the spa’s offerings along with the company’s story.

Also, take note of the FAQs included under “Our Journey”. That’s a great touch. If you know that prospects tend to come to you with the same questions, don’t make them use the “Connect” or “Contact” page to fill out a form. It not only clogs up your inbox with questions, but it forces them to do extra work.

Make your website do most of the work instead.

And if it’s not prepared to answer all of the questions and ease all of their doubts, then it’s time to revisit the structure, content and design of your site. The MOF is the trickiest part of the sales funnel. If you can successfully bring prospects back to the site from your mobile marketing efforts, don’t let it go to waste.

Designing For Bottom Of The Funnel

Okay, so your prospects know what you’re offering and they’re ready to buy. All they need is one last push through a seamless and effortless checkout so that they go from:

This is exactly what I’ve been looking for.

To:

Where’s my credit card?

Here is an example of how you might build out the Conversion part of the funnel:

Step 1: Make Your Offer Clear

If your website were a flesh-and-blood salesperson, this is the point of the call or meeting where they’d ask, “Can I have your business?” There’s no point in beating around the bush on your website or your marketing either.

For MOF visitors who’ve finished checking up on you and your offering, you’ll want to boldly make your offer where they’ll easily see it, just as the Boston Calling Music Festival does:

Boston Calling Music Festival tickets

The Boston Calling Music Festival website clearly and boldly published its tickets. (Source: Boston Calling Music Festival) (Large preview)

For TOF visitors who don’t need much convincing or nurturing, you can directly post your offer to them over email or social media:
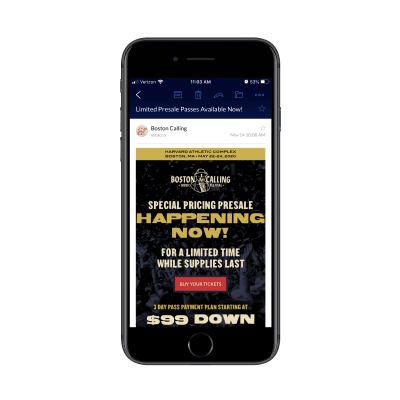
Boston Calling Music Festival email

An email for tickets to the Boston Calling Music Festival. (Source: Boston Calling Music Festival) (Large preview)

Just make sure your sales funnel can be truncated into TOF and BOF in that case.

For something like a concert where the offer is clear-cut, going this route would be fine. However, think about something like a professional conference or retreat where tickets run upwards of $1000 and the cost of travel adds even more weight to that total. If you’re asking for a huge commitment of time, money or effort from your customers, don’t skip the MOF marketing steps.

Once you’re in this stage, though, you can put aside all of that education you did earlier. All you need to do now is sell, so make sure the “Buy” button is as clear as day wherever you put it.

Step 2: Summarize Their Purchase in the Cart

Whether customers are putting products into a shopping cart, purchasing tickets to an event or signing up for your SaaS, it’s a good idea to quickly remind them of what they’re about to buy before you hop into checkout.

On the Cart page, provide a summary like this:

Boston Calling ticket summary

The Boston Calling tickets page reminds visitors what they’re buying before they check out. (Source: Boston Calling Music Festival) (Large preview)

The Cart page makes sure that buyers fully understand what it is they’re buying. That way, they don’t go through checkout, only to realize at the email confirmation stage that they bought something they can’t use or on dates they’re unavailable. This’ll reduce the numbers of emails, calls or refund requests you have to handle post-sale.

Step 3: Streamline Checkout

Last but not least, make it easy for your customers to get through checkout.

The first thing to do is simplify the sign-in/sign-up process:
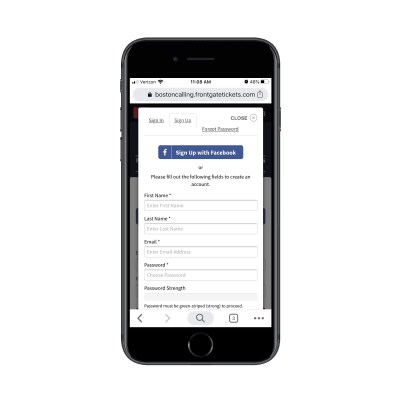
Boston Calling sign-in process

The Boston Calling Music Festival website provides multiple options to sign in or up for tickets. (Source: Boston Calling Music Festival) (Large preview)

Customers can sign in with an existing account or they can sign up for a new one. And the sign-up process has two options as well:

Create an account with Facebook,
Create an account from-scratch.

You can’t see it here, but the form is enabled with autofill technology, which made filling it out lightning-fast.

The rest of the checkout process should be as easy to get through. One way to do this is by using dropdowns with the most popular options already selected (when it makes sense). That’ll save customers time having to manually enter their data:
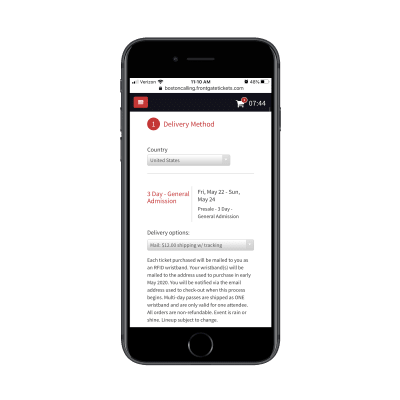
Boston Calling auto-fill

Boston Calling auto-fills some checkout fields to speed up the process. (Source: Boston Calling Music Festival) (Large preview)

That said, even the most streamlined of checkout processes can get tiresome if there’s a lot of data to collect. But Boston Calling does a nice job of this, always giving customers a look at how many more steps are to come:

Boston Calling ticket checkout steps

The Boston Calling checkout process clearly lays out each step of the process. (Source: Boston Calling Music Festival) (Large preview)

Even though there are four steps customers have to complete to get their music festival tickets, the last two steps are easy. Secure Ticket provides information on how their tickets are protected in case of inclement weather, disaster or some other reason for cancellation. And the last one is a final check to ensure they purchased the right ticket and are ready to submit their payment information.

It’s a beautiful system from start to finish and ensures that as many interested concert-goers book their tickets as possible.

Wrapping Up

Building a sales funnel into a website can be a huge relief for the people who run it. That’s because a carefully designed pathway can usher your visitors from the point of entry to conversion without much oversight or intervention from you at all.

Aside from some email or social marketing along the way (which can be automated), the rest of the work is done by your website to convert the best-fit customers. Plus, by building your sales funnels for mobile, you’ll ensure that you’ve created the most efficient pathways for your visitors regardless of which device they’re on.

Smashing Editorial
(ra, yk, il)
Get Started With UI Design With These Tips To Speed Up Your Workflow

Original Source: https://www.smashingmagazine.com/2019/12/ui-design-tips-speed-up-workflow/

Get Started With UI Design With These Tips To Speed Up Your Workflow

Get Started With UI Design With These Tips To Speed Up Your Workflow

Tomáš Čakloš

2019-12-04T10:00:00+00:00
2019-12-05T19:37:35+00:00

This article is about creating limits and rules to follow throughout the entire design process. There is an unlimited number of ways in which you can combine elements in a user interface — and so you’ll need to set some rules and boundaries, or else the design workflow might become an unpleasant chore. You might be struggling with all of the possibilities and trying to pick the best option among many “correct” options. By setting (and following) some basic rules, you will make your design look more consistent, too.

This article is intended for beginner UI designers. You don’t need a lot of experience in order to be able to follow the tips and tricks shared in it.

setting limits and rules helps designing

Having a system is important!

The Importance of Making Your User-Interface Design Consistent

Let’s start at the very beginning. You want your design to look good and trustworthy, and you need to avoid chaos at all costs. For this to happen, it’s very important to have a system for your design work.

Your developers will appreciate a system, too — they’ll love the fact that your design has order, and that you are making their work easier.

A System Of Resizing By A Predetermined Size

It doesn’t matter whether you want to resize a text block, resize an image, or adjust some white space. You need to decide how big each element will be. And I’ll bet you have been in this situation: Have you ever chosen a size for an element, and after five minutes, you change it, and then again, and maybe again and again?

Which size is perfect? It could be one of the ones you tried, right? You need to avoid this endless time-wasting trap!

Start By Choosing The Basic Unit: The 8-Pixel Grid

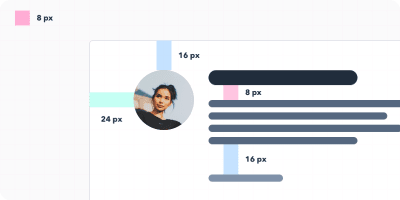
To make the whole design look cleaner, it’s helpful to first set the measurement value that will then determine all of the sizes. It is completely up to you what value you choose, but quite often, the best option is to stick to a few proven rules. And one of these rules is to resize and move elements by exactly eight pixels. This rule will streamline your decision-making.

Aside on px versus dp: In addition to pixels (px), you may have heard of the term dp being used in screen design and prototyping. The dp unit is short for “density-independent pixel.” The unit is relative to a 160-dpi screen, so 1 dp is equal to 1 pixel on a 160-dpi screen, and equal 2 pixels on a 320-dpi screen, and so on. The numeric value formula is px = dp * (dpi/160).

Note: If you work with smaller elements or objects, it’s also OK to use 4-pixel increments, instead of 8 — occasionally, you can make further adjustments, when required.)

But Why Exactly 8 Pixels?

There are a few reasons why eight often works like a “magic number” here:

Eight pixels is a sufficient minimum “jump”.
Eight is a great number because it is divisible by four and two.
If you use eight, you can easily resize any element without ending up with half pixels, as 8 / 2 = 4, 4 / 2 = 2, and 2 / 2 = 1. If, on the other hand, you start with 10, you’ll end up with 5 pixels, then 2.5 pixels, then 1.25 pixels. When designing for screen, you’d like to avoid half pixels as much as possible. By using whole pixels, elements in the design will align to precise pixel boundaries, and so will look crisper.
Multiples of eight (8, 16, 24, 32, 40, 48, 56, 64, 72, 80, etc.) are intertwined with binary values (1, 2, 4, 8, 16, 32, 64, 128, 256, 512, etc.).
Finally, the numbers are easy to remember.

What Are The Advantages Of Using An 8-Pixel Grid?

As a designer, your decision time is precious. This will make you faster and more efficient.
If you are working with a developer, you can create a system that will help you and your team. If the developer needs to make some quick changes, he can adjust the values by 8-pixel increments. This will ensure consistency and order.
People using your website will feel comfortable when they visit it. They will trust the website, and it’ll be easier for them to use the interface.

8 pixel grid

An effective way of using the 8px grid

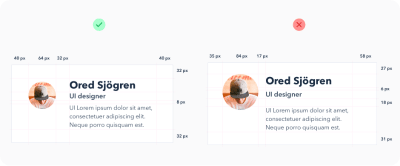
using an 8 pixel grid

The result of using an 8px grid

Work With A Grid To Lay Out All Elements

Horizontal Harmony

I’m sure you have already used a grid when designing websites. Using a grid helps you to accurately place all elements on the digital canvas.

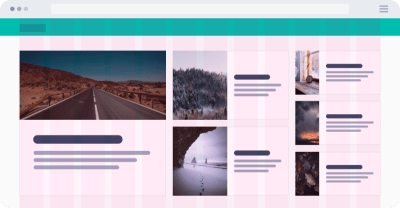
The grid forms the skeleton of your interface and determines where you can place elements. The template holds the composition, and it defines clear boundaries so that your design will be more consistent. Now it will be easier for you to decide where to put the elements. As you gain more experience, you can update the boundaries as needed.

But how do you create this grid? We will cover the specifics next. Basically, the number and size of columns may be random and depends on your needs. The more detailed your design, the more columns the grid will require. If you’re hesitant, ask an experienced colleague for assistance.

Also, I recommend that you read “A Comprehensive Guide to UI Design”, which should help you understand user-interface design a bit more in depth.

horizontal harmony

Horizontal harmony

Vertical Harmony

Similar to maintaining horizontal harmony, it is important to keep vertical distances consistent in a design as well. Like the rows in a spreadsheet, they help you to keep text at evenly spaced intervals.

How big should these rows be? Again, it’s up to you. However, I recommend using 8 pixels or multiples of 8 (such as 16). Redefine boundaries where elements or text are to be aligned.

vertical harmony

Vertical harmony

Picking Font Sizes The Right Way

If you look at some well-crafted designs, you will see consistency in font sizes. This is for a reason.

Note: Keep in mind also that you need only two, maybe three, fonts in your design. However, selecting the right typefaces and making them work together is beyond the scope of this tutorial.

Begin by defining a few key font sizes to use throughout the project. (For example, it would be foolish to use 30, 31, and 32 pixels. Rather, combine these three very similar sizes into one.)

Standard Font Sizes Bring Two Benefits:

Your design will be more consistent and more elegant.
It will speed up the design process and make you more efficient.

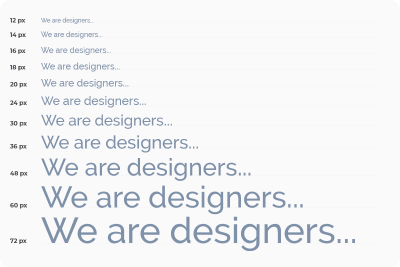
Font Sizes

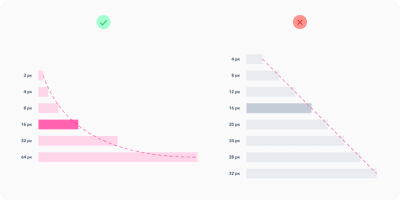
When you are defining font sizes, make sure not to increase sizes by the same increment. When you are enlarging text, it should be non-linear. This means that the larger the text you are creating, the larger the increment should be.

system in font sizes

Having a system in font sizes

Let’s say you have a text block with a 12-pixel font size, and you want to enlarge it. You try 14 pixels, and you are satisfied. But then imagine that you have a large headline (40 pixels) and you want to make it bigger. Would you increase the size by only 2 pixels, from 40 to 42? Of course not. Optically, the text requires a much bigger change. You might need to increase it by 24 pixels, giving you a bigger 64-pixel headline.

In short, this means that the bigger you want the text to be, the larger the increment you will need to use. This very simple principle applies not only to text, but also to the size of buttons, white space, and everything else.

It is typically based on a geometric progression. Here is a very useful chart demonstrating font scale:

geometric progression

Geometric progression

However, for typography, one proven scale is used with font sizes that you will want to stick with forever. The scale is 12, 14, 16, 18, 20, 24, 30, 36, 48, 60, and 72 pixels.

typography scale

Proven typography scale for sizes

Text Line Height

Once you have defined all font sizes, you will want to take care of line spacing. For line height, use increments of 4 pixels again. For example, for 16-pixel text, let’s set the line height to 24 pixels. If you want the text to breathe more, then increase the row height by 4 pixels to 28.

Define Your Project’s Colors

Do you know how many color combinations exist? A lot! You will waste too much time if you don’t predefine shades of color. You can’t limit yourself to black, white, and, say, blue. For each color, you will need other shades, and it is important to set them in advance, so that the shades are consistent throughout your design project. We don’t want to create chaos in the design. Aim for 5 to 10 shades for each color. I prefer to define 9 shades for each color.

Let’s take a closer look at color shades.

Why 9 Shades Of Each Color?

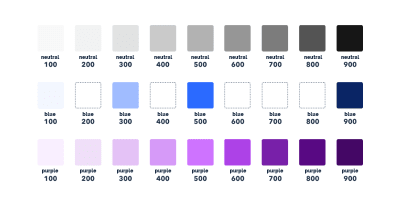
The first advantage is color naming. Whether you are using a graphics editor or CSS code, you will definitely benefit from this tip. Each shade would be assigned a number, such as 100, 200, 300, 400, 500, 600, 700, 800, and 900. (Why hundreds? Typically, this is how cuts of typefaces are also organized.)

Secondly, 9 is a handy number for defining colors. The best way to prepare these shades is to prepare a row of 9 squares and fill the squares with colors. The one in the middle will be the base color. Then, you define the lightest shade (at the far left) and the darkest shade (at the far right). The next step is to select the hues in between.

nine shades of each color

Nine shades of each color

Prepare The Different Sizes, Types, And States Of Elements

When working on a design, you will usually work with a countless number of icons, buttons, and other components. Again, it’s a good idea to prepare in advance several sizes for them, and limit the options to as few as possible. During the design process, do not add other sizes, and don’t try to adjust the size of components to suit your needs. Instead, just use the ones you have already defined, and the whole design will be more consistent and clean.

Let’s look at buttons as an example. When you begin, you’ll need to define their hierarchical structure. To do so, make a button with a primary action, a button with a secondary action, and perhaps another button with a less important action. For each button, specify its status (active, inactive) and the color variant. Always try to reduce the number of elements to the most important ones.

button styles

An example of button styles

Define Other Elements’ Properties

User interface designers often use shadows in their design work. However, for less-experienced designers, shadows can sometimes be a struggle. When creating a shadow, you must set the shadow’s distance along the x-axis and y-axis, and also the blur radius, color, and transparency. Shadows can take a lot of time to fine-tune, which is why you’ll want to prepare them before diving into the design. It is helpful to prepare a set of shadows (using the same method as for colors), and then just apply them throughout the design process.

Also, be aware of all the other properties of elements that you will be working with, such as corner radius, transparency, and color gradients.

shadow styles

An example of shadow styles

White Space

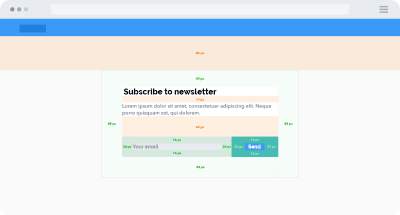
Properly adjusting white space is important. Whether you offset elements from the outside (margin) or from the inside (padding), you should rely on the magic number of 8 again. Increase the offset by 8 pixels (4 for small elements). As with font size, the larger the gap you want, the larger the increment will have to be (again, you’ll need to define these increments in advance).

white space

White space

Conclusion

To make your designs clean and consistent, define some boundaries and a clear path through the process.

When working on each element of your design, keep in mind the following:

See whether you have used it already somewhere in your design. If so, you can simply copy that element.
Follow a horizontal and vertical rhythm, and adjust the size of elements using the steps that you defined at the very beginning.
Avoid complicated decisions and never-ending battles with pixels. Have a system in place.
Do not create the same element twice. If there is order in your design, your work will be better and more efficient, you will be able to iterate faster, and you will be able to communicate with the developers more easily. The developers will set variables that follow your styles, so define them clearly. You’ll get a clean design, and the developers will be able to create better and more sustainable code. Everyone will be happy.

Related Reading

“Building Better UI Designs With Layout Grids,” Nick Babich, Smashing Magazine
“What Is The Difference Between “px”, “dip”, “dp” And “sp”?,” Stack Overflow
“Why UI Designers Are Using “dp” Instead Of “pixel” As The Unit To Design Mobile Apps?,” Kikahola, Medium
“font-weight CSS property,” Mozilla Developer Network web docs
“Step Up Your Design Game By Using Fewer Fonts,” Jacci Howard Bear, Lifewire
“Creating UI Shadows That Don’t Suck,” Anastasia Kas, Medium
“10 Golden Rules You Should Live By When Combining Fonts: Tips From A Designer,” Janie Kliever , Canva
“Material Design: 8 dp Grid, 4 dp Grid,” Google Help
“Why Some Designs Look Messy, And Others Don’t,” Reinoud Schuijers, UX Collective

Smashing Editorial
(mb, il)
How To Build A Real-Time Multiplayer Virtual Reality Game (Part 2)

Original Source: https://www.smashingmagazine.com/2019/12/real-time-multiplayer-virtual-reality-game-part-2/

How To Build A Real-Time Multiplayer Virtual Reality Game (Part 2)

How To Build A Real-Time Multiplayer Virtual Reality Game (Part 2)

Alvin Wan

2019-12-05T11:00:00+00:00
2019-12-05T19:08:09+00:00

In this tutorial series, we will build a web-based multiplayer virtual reality game, where players will need to collaborate to solve a puzzle. In the first part of this series, we designed the orbs featured in the game. In this part of the series, we will add game mechanics and setup communication protocols between pairs of players.

The game description here is excerpted from the first part of the series: Each pair of players is given a ring of orbs. The goal is to “turn on” all orbs, where an orb is “on” if it’s elevated and bright. An orb is “off” if it’s lower and dim. However, certain “dominant” orbs affect their neighbors: if it switches state, its neighbors also switch state. Player 2 can control even-numbered orbs, and player 1 can control odd-numbered orbs. This forces both players to collaborate to solve the puzzle.

The 8 steps in this tutorial are grouped into 3 sections:

Populating User Interface (Steps 1 and 2)
Add Game Mechanics (Steps 3 to 5)
Setup Communication (Steps 6 to 8)

This part will conclude with a fully functioning demo online, for anyone to play. You will use A-Frame VR and several A-Frame extensions.

You can find the finished source code here.

The finished multiplayer game, synchronized across multiple clientsThe finished multiplayer game, synchronized across multiple clients. (Large preview)

1. Add Visual Indicators

To start, we will add visual indicators of an orb’s ID. Insert a new a-text VR element as the first child of #container-orb0, on L36.

<a-entity id=”container-orb0″ …>
<a-text class=”orb-id” opacity=”0.25″ rotation=”0 -90 0″ value=”4″ color=”#FFF” scale=”3 3 3″ position=”0 -2 -0.25″ material=”side:double”></a-text>

<a-entity position…>

</a-entity>
</a-entity>

An orb’s “dependencies” are the orbs it will toggle, when toggled: for example, say orb 1 has as dependencies orbs 2 and 3. This means that if orb 1 is toggled, orbs 2 and 3 will be toggled too. We will add visual indicators of dependencies, as follows, directly after .animation-position.

<a-animation class=”animation-position” … />
<a-text class=”dep-right” opacity=”0.25″ rotation=”0 -90 0″ value=”4″ color=”#FFF” scale=”10 10 10″ position=”0 0 1″ material=”side:double” ></a-text>
<a-text class=”dep-left” opacity=”0.25″rotation=”0 -90 0″ value=”1″ color=”#FFF” scale=”10 10 10″ position=”0 0 -3″ material=”side:double” ></a-text>

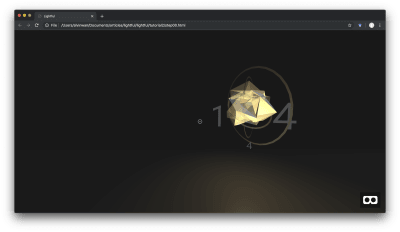
Verify that your code matches our source code for Step 1. Your orb should now match the following:

Orb with visual indicators for the orb’s ID and IDs of the orbs it will trigger

Orb with visual indicators for the orb’s ID and IDs of the orbs it will trigger (Large preview)

This concludes the additional visual indicators we will need. Next, we will dynamically add orbs to the VR scene, using this template orb.

2. Dynamically Add Orbs

In this step, we will add orbs according to a JSON-esque specification of a level. This allows us to easily specify and generate new levels. We will use the orb from the last step in part 1 as a template.

To start, import jQuery, as this will make DOM modifications, and thus modifications to the VR scene, easier. Directly after the A-Frame import, add the following to L8:

<script src=”https://code.jquery.com/jquery-3.3.1.min.js”></script>

Specify a level using an array. The array will contain object literals that encode each orb’s “dependencies”. Inside the <head> tag, add the following level configuration, :

<script>
var orbs = [
{left: 1, right: 4},
{},
{on: true},
{},
{on: true}
];
</script>

For now, each orb can only have one dependency to the “right” of it and one to the “left” of it. Immediately after declaring orbs above, add a handler that will run on page load. This handler will (1) duplicate the template orb and (2) remove the template orb, using the provided level configuration:

$(document).ready(function() {

function populateTemplate(orb, template, i, total) {}

function remove(selector) {}

for (var i=0; i < orbs.length; i++) {
var orb = orbs[i];
var template = $('#template').clone();
template = populateTemplate(orb, template, i, orbs.length);
$('#carousel').append(template);
}

remove('#template');
}

function clickOrb(i) {}

Next, populate the remove function, which simply removes an item from the VR scene, given a selector. Fortunately, A-Frame observes changes to the DOM, and thus, removing the item from the DOM suffices to remove it from the VR scene. Populate the remove function as follows.

function remove(selector) {
var el = document.querySelector(selector);
el.parentNode.removeChild(el);
}

Populate the clickOrb function, which simply triggers the click action on an orb.

function clickOrb(i) {
document.querySelector(“#container-orb” + i).click();
}

Next, begin writing the populateTemplate function. In this function, begin by getting the .container. This container for the orb additionally contains the visual indicators we added in the previous step. Furthermore, we will need to modify the orb’s onclick behavior, based on its dependencies. If a left-dependency exists, modify both the visual indicator and the onclick behavior to reflect that; the same holds true for a right-dependency:

function populateTemplate(orb, template, i, total) {
var container = template.find(‘.container’);
var onclick = ‘document.querySelector(“#light-orb’ + i + ‘”).emit(“switch”);’;

if (orb.left || orb.right) {
if (orb.left) {
onclick += ‘clickOrb(‘ + orb.left + ‘);’;
container.find(‘.dep-left’).attr(‘value’, orb.left);
}
if (orb.right) {
onclick += ‘clickOrb(‘ + orb.right + ‘);’;
container.find(‘.dep-right’).attr(‘value’, orb.right);
}
} else {
container.find(‘.dep-left’).remove();
container.find(‘.dep-right’).remove();
}
}

Still in the populateTemplate function, set the orb ID correctly in all of the orb and its container’s elements.

container.find(‘.orb-id’).attr(‘value’, i);
container.attr(‘id’, ‘container-orb’ + i);
template.find(‘.orb’).attr(‘id’, ‘orb’ + i);
template.find(‘.light-orb’).attr(‘id’, ‘light-orb’ + i);
template.find(‘.clickable’).attr(‘data-id’, i);

Still in the populateTemplate function, set the onclick behavior, set the random seed so that each orb is visually different, and finally, set the orb’s rotational position based on its ID.

container.attr(‘onclick’, onclick);
container.find(‘lp-sphere’).attr(‘seed’, i);
template.attr(‘rotation’, ‘0 ‘ + (360 / total * i) + ‘ 0’);

At the conclusion of the function, return the template with all the configurations above.

return template;

Inside the document load handler and after removing the template with remove(‘#template’), turn on the orbs that were configured to be on initially.

$(document).ready(function() {

setTimeout(function() {
for (var i=0; i < orbs.length; i++) {
var orb = orbs[i];
if (orb.on) {
document.querySelector("#container-orb" + i).click();
}
}
}, 1000);
});

This concludes the Javascript modifications. Next, we will change the template’s default settings to that of an ‘off’ orb. Change the position and scale for #container-orb0 to the following:

position=”8 0.5 0″ scale=”0.5 0.5 0.5″

Then, change intensity for #light-orb0 to 0.

intensity=”0″

Verify that your source code matches our source code for Step 2.

Your VR scene should now feature 5 orbs, dynamically populated. One of the orbs should furthermore have visual indicators of dependencies, like below:

All orbs are populated dynamically, using the template orbAll orbs are populated dynamically, using the template orb (Large preview)

This concludes the first section in dynamically adding orbs. In the next section, we will spend three steps adding game mechanics. Specifically, the player will only be able to toggle specific orbs depending on the player ID.

3. Add Terminal State

In this step, we will add a terminal state. If all orbs are turned on successfully, the player sees a “victory” page. To do this, you will need to track the state of all orbs. Every time an orb is toggled on or off, we will need to update our internal state. Say that a helper function toggleOrb updates state for us. Invoke the toggleOrb function every time an orb changes state: (1) add a click listener to the onload handler and (2) add a toggleOrb(i); invocation to clickOrb. Finally, (3) define an empty toggleOrb.

$(document).ready(function() {

$(‘.orb’).on(‘click’, function() {
var id = $(this).attr(‘data-id’)
toggleOrb(id);
});
});

function toggleOrb(i) {}

function clickOrb(i) {

toggleOrb(i);
}

For simplicity, we will use our level configuration to indicate game state. Use toggleOrb to toggle the on state for the ith orb. toggleOrb can additionally trigger a terminal state if all orbs are turned on.

function toggleOrb(i) {
orbs[i].on = !orbs[i].on;
if (orbs.every(orb => orb.on)) console.log(‘Victory!’);
}

Double-check that your code matches our source code for Step 3.

This concludes the “single-player” mode for the game. At this point, you have a fully functional virtual reality game. However, you will now need to write the multiplayer component and encourage collaboration via game mechanics.

4. Create Player Object

In this step, we will create an abstraction for a player with a player ID. This player ID will be assigned by the server later on.

For now, this will simply be a global variable. Directly after defining orbs, define a player ID:

var orbs = …

var current_player_id = 1;

Double-check that your code matches our source code for Step 4. In the next step, this player ID will then be used to determine which orbs the player can control.

5. Conditionally Toggle Orbs

In this step, we will modify orb toggling behavior. Specifically, player 1 can control odd-numbered orbs and player 2 can control even-numbered orbs. First, implement this logic in both places where orbs change state:

$(‘.orb’).on(‘click’, function() {
var id = …
if (!allowedToToggle(id)) return false;

}

function clickOrb(i) {
if (!allowedToToggle(id)) return;

}

Second, define the allowedToToggle function, right after clickOrb. If the current player is player 1, odd-numbered ids will return a truth-y value and thus, player 1 will be allowed to control odd-numbered orbs. The reverse is true for player 2. All other players are not allowed to control the orbs.

function allowedToToggle(id) {
if (current_player_id == 1) {
return id % 2;
} else if (current_player_id == 2) {
return !(id % 2);
}
return false;
}

Double-check that your code matches our source code for Step 5. By default, the player is player 1. This means that you as player 1 can only control odd-numbered orbs in your preview. This concludes the section on game mechanics.

In the next section, we will facilitate communication between both players via a server.

6. Setup Server With WebSocket

In this step, you will set up a simple server to (1) keep track of player IDs and (2) relay messages. These messages will include game state, so that players can be certain each sees what the other sees.

We will refer to your previous index.html as the client-side source code. We will refer to code in this step as the server-side source code. Navigate to glitch.com, click on “new project” in the top-right, and in the dropdown, click on “hello-express”.

From the left-hand panel, select “package.json,” and add socket-io to dependencies. Your dependencies dictionary should now match the following.

“dependencies”: {
“express”: “^4.16.4”,
“socketio”: “^1.0.0”
},

From the left-hand panel, select “index.js,” and replace the contents of that file with the following minimal socket.io Hello World:

const express = require(“express”);
const app = express();

var http = require(‘http’).Server(app);
var io = require(‘socket.io’)(http);

/**
* Run application on port 3000
*/

var port = process.env.PORT || 3000;

http.listen(port, function(){
console.log(‘listening on *:’, port);
});

The above sets up socket.io on port 3000 for a basic express application. Next, define two global variables, one for maintaining the list of active players and another for maintaining the smallest unassigned player ID.

/**
* Maintain player IDs
*/

var playerIds = [];
var smallestPlayerId = 1;

Next, define the getPlayerId function, which generates a new player ID and marks the new player ID as “taken” by adding it to the playerIds array. In particular, the function simply marks smallestPlayerId and then updates smallestPlayerId by searching for the next smallest non-taken integer.

function getPlayerId() {
var playerId = smallestPlayerId;
playerIds.push(playerId);

while (playerIds.includes(smallestPlayerId)) {
smallestPlayerId++;
}
return playerId;
}

Define the removePlayer function, which updates smallestPlayerId accordingly and frees the provided playerId so that another player may take that ID.

function removePlayer(playerId) {
if (playerId < smallestPlayerId) {
smallestPlayerId = playerId;
}
var index = playerIds.indexOf(playerId);
playerIds.splice(index, 1);
}

Finally, define a pair of socket event handlers that register new players and un-register disconnected players, using the above pair of methods.

/**
* Handle socket interactions
*/

io.on(‘connection’, function(socket) {
socket.on(‘newPlayer’, function() {
socket.playerId = getPlayerId();
console.log(“new player: “, socket.playerId);
socket.emit(‘playerId’, socket.playerId);
});

socket.on(‘disconnect’, function() {
if (socket.playerId === undefined) return;
console.log(“disconnected player: “, socket.playerId);
removePlayer(socket.playerId);
});
});

Double-check that your code matches our source code for Step 6. This concludes basic player registration and de-registration. Each client can now use the server-generated player ID.

In the next step, we will modify the client to receive and use the server-emitted player ID.

7. Apply Player ID

In these next two steps, we will complete a rudimentary version of the multiplayer experience. To start, integrate the player ID assignment client-side. In particular, each client will ask the server for a player ID. Navigate back to the client-side index.html we were working within Steps 4 and before.

Import socket.io in the head at L7:

<script src=”https://cdnjs.cloudflare.com/ajax/libs/socket.io/2.1.1/socket.io.js”></script>

After the document load handler, instantiate the socket and emit a newPlayer event. In response, the server-side will generate a new player ID using the playerId event. Below, use the URL for your Glitch project preview instead of lightful.glitch.me. You are welcome to use the demo URL below, but any code changes you make will of course not be reflected.

$(document).ready(function() {

});

socket = io(“https://lightful.glitch.me”);
socket.emit(‘newPlayer’);
socket.on(‘playerId’, function(player_id) {
current_player_id = player_id;
console.log(” * You are now player”, current_player_id);
});

Verify that your code matches our source code for Step 7. Now, you can load your game on two different browsers or tabs to play two sides of a multiplayer game. Player 1 will be able to control odd-numbered orbs and player 2 will be able to control even-numbered orbs.

However, note that toggling orbs for player 1 will not affect orb state for player 2. Next, we need to synchronize game states.

8. Synchronize Game State

In this step, we will synchronize game states so that players 1 and 2 see the same orb states. If orb 1 is on for player 1, it should be on for player 2 as well. On the client-side, we will both announce and listen for orb toggles. To announce, we will simply pass the ID of the orb that is toggled.

Before both toggleOrb invocations, add the following socket.emit call.

$(document).ready(function() {

$(‘.orb’).on(‘click’, function() {

socket.emit(‘toggleOrb’, id);
toggleOrb(id);
});
});

function clickOrb(i) {

socket.emit(‘toggleOrb’, i);
toggleOrb(i);
}

Next, listen for orb toggles, and toggle the corresponding orb. Directly underneath the playerId socket event listener, add another listener for the toggleOrb event.

socket.on(‘toggleOrb’, function(i) {
document.querySelector(“#container-orb” + i).click();
toggleOrb(i);
});

This concludes modifications to the client-side code. Double-check that your code matches our source code for Step 8.

Server-side now needs to receive and broadcast the toggled orb ID. In the server-side index.js, add the following listener. This listener should be placed directly underneath the socket disconnect listener.

socket.on(‘toggleOrb’, function(i) {
socket.broadcast.emit(‘toggleOrb’, i);
});

Double-check that your code matches our source code for Step 8. Now, player 1 loaded in one window and player 2 loaded in a second window will both see the same game state. With that, you have completed a multiplayer virtual reality game. The two players, furthermore, must collaborate to complete the objective. The final product will match the following.

The finished multiplayer game, synchronized across multiple clientsThe finished multiplayer game, synchronized across multiple clients. (Large preview)

Conclusion

This concludes our tutorial on creating a multiplayer virtual reality game. In the process, you’ve touched on a number of topics, including 3-D modeling in A-Frame VR and real-time multiplayer experiences using WebSockets.

Building off of the concepts we’ve touched on, how would you ensure a smoother experience for the two players? This could include checking that the game state is synchronized and alerting the user if otherwise. You could also make simple visual indicators for the terminal state and player connection status.

Given the framework we’ve established and the concepts we’ve introduced, you now have the tools to answer these questions and build much more.

You can find the finished source code here.

Smashing Editorial
(dm, il)
Collective #571

Original Source: http://feedproxy.google.com/~r/tympanus/~3/F55jaj7OXKA/

WOTW

Inspirational Website of the Week: Esperanto

A fantastic interactive design that celebrates an exciting journey. Our pick this week.

Get inspired

C571_css

CSS: An Art, a Science, a Nightmare (Everything You Should Know)
In this excellent guide, Tania Rascia covers the practical parts of CSS that are important on a daily basis.

Read it

Divi

Our Sponsor
Work with the Powerful Divi Theme Builder

Learn how you can enjoy complete control over your entire website with the new and powerful Divi Theme Builder.

Check it out

C571_csslayout

CSS Layout

A fantastic collection of popular layouts and patterns made with CSS. Made by Phuoc Nguyen.

Check it out

C571_adventcode

Advent of Code 2019

Advent of Code is an Advent calendar of small programming puzzles for a variety of skill sets and skill levels that can be solved in any programming language you like.

Check it out

C571_subgrid

Use CSS Subgrid to layout full-width content stripes in an article template

Learn how to augment a Grid-infused article layout that allows for certain sections of content to break out into full-width areas.

Read it

An Introduction to Variable Fonts

An Introduction to Variable Fonts

An excellent guide to variable fonts by Jason Pamental.

Read it

C571_music

Music and Web Design

Brad Frost’s interesting thoughts on the parallels between Music and Web Design.

Read it

C571_aom

Web Components and the Accessibility Object model (AOM)
Léonie Watson writes about the AOM, an experimental JavaScript API that proposes several new features intended to solve existing accessibility use cases.

Read it

C571_drum

DrumBot

Play real-time music with a machine learning drummer that drums based on your melody. Read more about it in this article.

Check it out

C571_binary

Binary Music Player

A musical player, with a binary twist. Built by Tim Holman using Tone.JS.

Check it out

C571_posdcast

Smashing Podcast Episode 4 With Heydon Pickering: What Are Inclusive Components?

Drew McLellan talks to Smashing author Heydon Pickering about Inclusive Components.

Check it out

C571_StateofUX

The State of UX in 2020

An insightful list of what to expect for User Experience (UX) Design in the next year.

Check it out

C571_boxshadows

Make a smooth shadow, friend

A smooth shadow generator inspired by Tobias Ahlin’s article. By Philipp Brumm.

Check it out

C571_darkmaterials

Re-creating the ‘His Dark Materials’ Logo in CSS

Michelle Barker re-creates an interesting typographic logo with CSS.

Read it

C571_ff71

Firefox 71: A year-end arrival

A plethora of new developer tools features including the web socket message inspector, console multi-line editor mode and more are coming in the new Firefox version.

Check it out

C571_sweater

Holiday CSSweater Generator

A great CSS pattern generator with a geeky Christmas theme. By Adam Kuhn.

Check it out

C571_hippo

Interactive Hippo Button

A fun button that looks like a hungry Hippo. By Mariusz Dabrowski. Check out the written and video tutorial.

Check it out

C571_demosroundup

From Our Blog
Awesome Demos Roundup #11

A hand-picked collection of fantastic web experiments from the past weeks.

Check it out

C571_keys

Piano keyboard

An awesome Codevember demo by Ricardo Oliva Alonso.

Check it out

C571_motionpath

From Our Blog
Motion Paths – Past, Present and Future | Codrops

An article by Cassie Evans that explores a few ways of moving an element along a path, including the upcoming CSS motion path module and the newly released GSAP3.

Read it

Collective #571 was written by Pedro Botelho and published on Codrops.

The Ultimate Collection of Free Texture Downloads

Original Source: http://feedproxy.google.com/~r/1stwebdesigner/~3/hDIhS7_uMck/

Every designer could use some high-quality textures for their projects. You can use them as backgrounds, overlays, or just to make your graphics a little more interesting. And they look great in posters, banners, or even as part of a website.

But free, high quality textures can be hard to come by. That’s why we’ve put together this huge collection of texture downloads, free for use by any designer. Some require an email subscription to download, but that’s all.

Altogether there are nearly 300 textures and brushes here, sorted into three categories: nature and materials, abstract, and brushes.

Your Designer Toolbox
Unlimited Downloads: 500,000+ Web Templates, Icon Sets, Themes & Design Assets


DOWNLOAD NOW

Nature and Materials

These photorealistic textures draw from nature, as well as man-made materials like brick and plastic. You’ll find woods, stones, paper, and dirt that make great natural backgrounds or overlays.

7 Plywood Textures

Example of 7 Plywood Textures

Crumpled Paper Textures Set

Example of Crumpled Paper Textures Set

5 Stone Wall Textures Vol.2

Example of 5 Stone Wall Textures Vol.2

24 Free Dirt Textures

Example of 24 Free Dirt Textures

Brick Wall Textures Vol.2

Example of Brick Wall Textures Vol.2

Plastic Transparent Textures

Example of Plastic Transparent Textures

Arctic Frost Textures

Example of Arctic Frost Textures

6 Weathered Textures Vol.1

Example of 6 Weathered Textures Vol.1

Vintage Paper Textures Set

Example of Vintage Paper Textures Set

Abstract

Rather than drawing from nature, these textures are more abstract and random. They make great background textures for websites and posters, or pretty overlays for objects. You’ll find noise, splatters, foil, and watercolors mixed in here.

10 Free Textures To Simulate Holographic Foil Print Effects

Example of 10 Free Textures To Simulate Holographic Foil Print Effects

Dust & Noise Overlay Textures

Example of Dust & Noise Overlay Textures

Free Ink Stamp Texturizer Smart PSD for Adobe Photoshop

Example of Free Ink Stamp Texturizer Smart PSD for Adobe Photoshop

6 Watercolor Textures Vol.2

Example of 6 Watercolor Textures Vol.2

Rose Gold Foil Textures

Example of Rose Gold Foil Textures

25 Free Speckle Textures

Example of 25 Free Speckle Textures

Voyager Textures Background Set

Example of Voyager Textures Background Set

Brushes

Last but not least we have textured brushes. These make it super easy to add shading, splatters, or grain to any image; just use the brush to draw it on, and add a little realism to your graphics.

Stipple Shading Brushes for Adobe Photoshop

Example of Stipple Shading Brushes for Adobe Photoshop

10 Free Grain Shader Brushes for Adobe Photoshop

Example of 10 Free Grain Shader Brushes for Adobe Photoshop

10 Free Halftone Texture Brushes for Adobe Photoshop

Example of 10 Free Halftone Texture Brushes for Adobe Photoshop

30 Free Vintage Shading Brushes for Adobe Illustrator

Example of 30 Free Vintage Shading Brushes for Adobe Illustrator

14 Free Subtle Grunge Texture Brushes for Adobe Photoshop

Example of 14 Free Subtle Grunge Texture Brushes for Adobe Photoshop

10 Free Ink Splatter Photoshop Brushes and PNG Textures

Example of 10 Free Ink Splatter Photoshop Brushes and PNG Textures

15 Free Grit & Grain Texture Brushes for Adobe Photoshop

Example of 15 Free Grit & Grain Texture Brushes for Adobe Photoshop

Beautiful High-Resolution Textures

Whether you’re using a brush to carefully draw realistic grain on an image, adding a pretty foil overlay to an object, or downloading a futuristic texture to use as a background, there’s something for every designer here.

Most of these are totally free for use, but make sure to check the licenses before you include any of these in a commercial project. Once you have the go-ahead, go crazy using these gorgeous high-res textures in your web and graphic designs.


3 Essential Design Trends, December 2019

Original Source: https://www.webdesignerdepot.com/2019/12/3-essential-design-trends-december-2019/

This month’s collection of design trends is a gift to behold. Each of the trends are highly usable options that are versatile, giving you plenty of room to play and make them your own. That’s the best kind of trend, right?
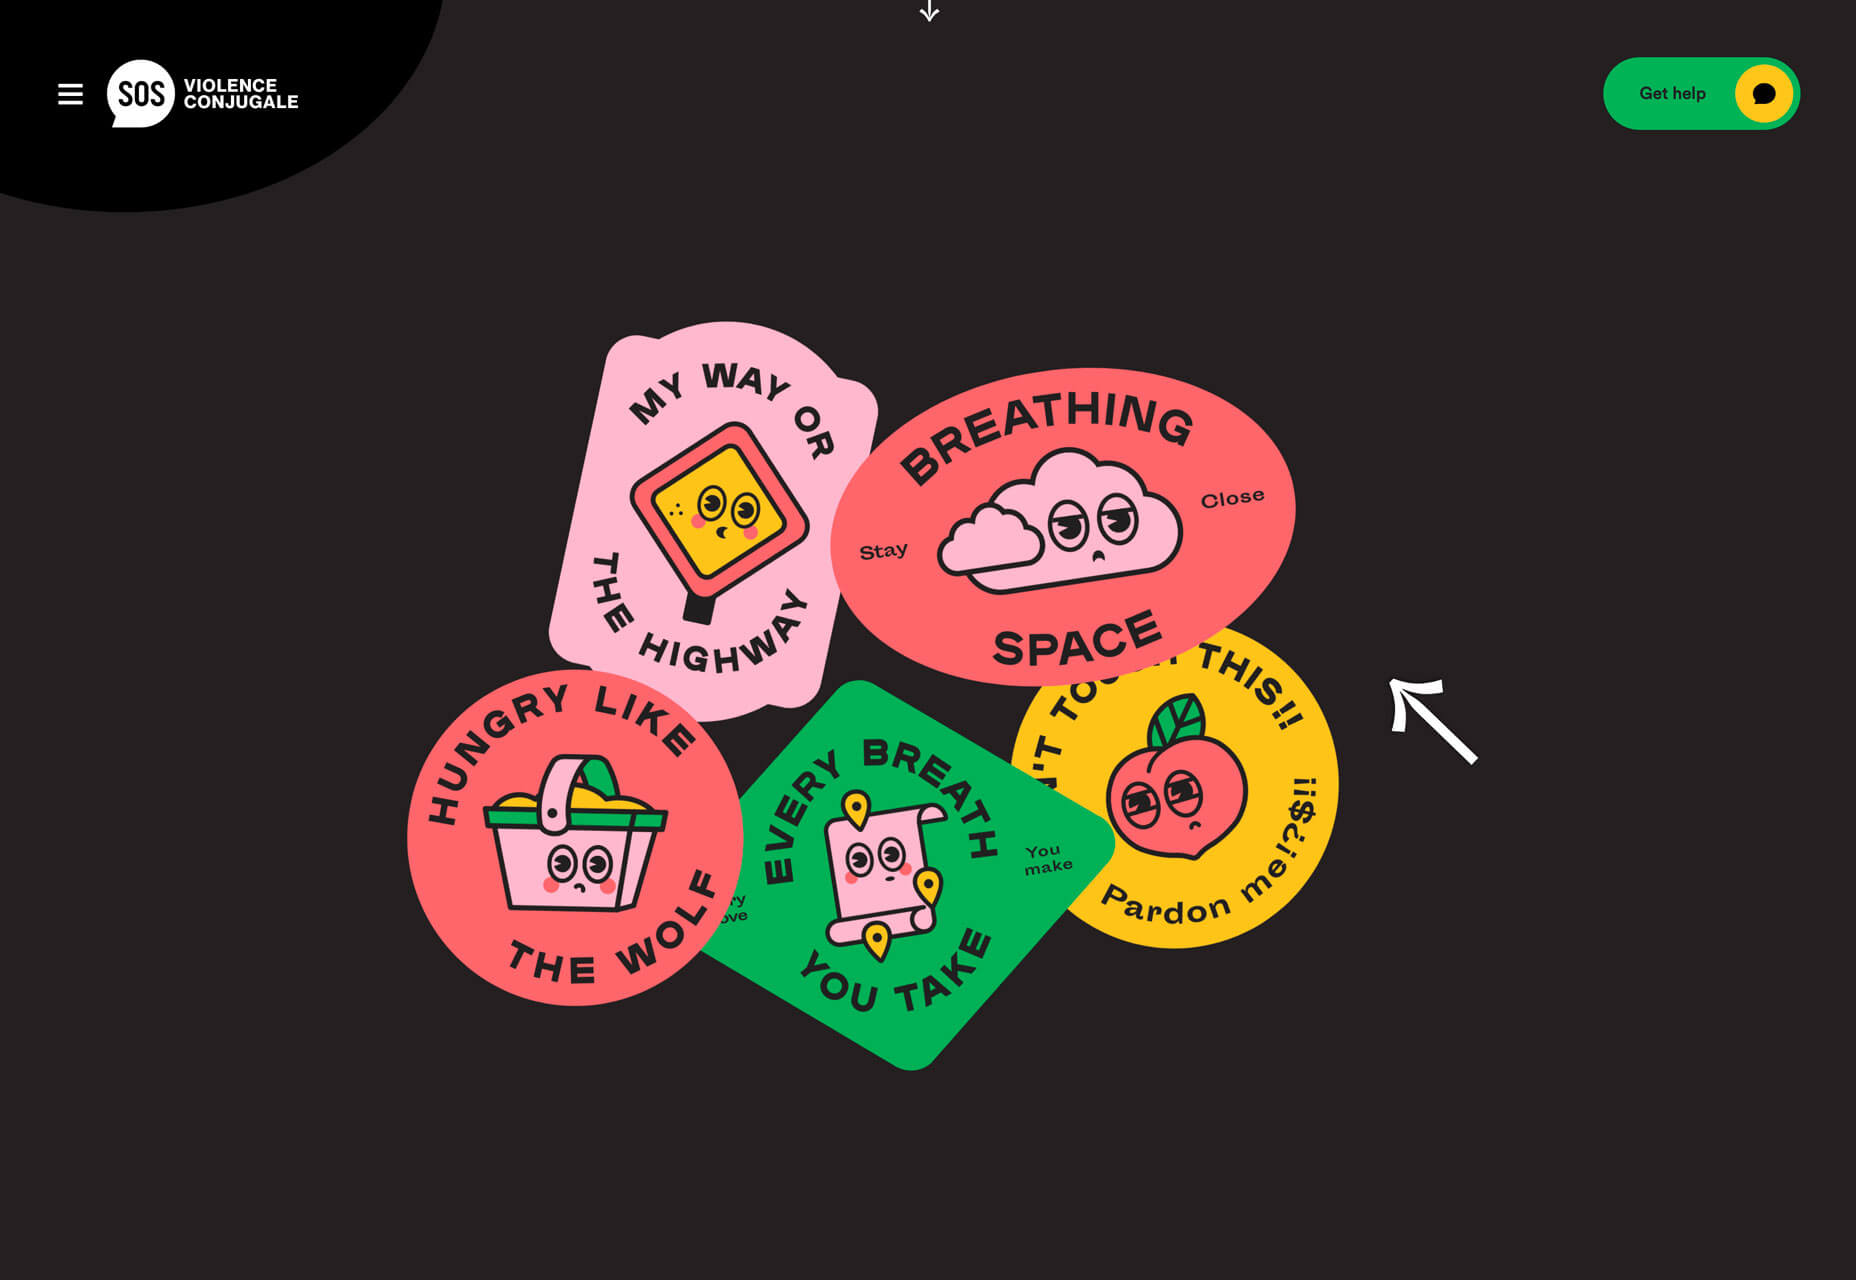
Here’s what’s trending in design this month.

Whimsical Illustrations

It seems like whimsical illustrations are practically everywhere. Fun drawings that can be anything from line-style illustrations to full-color pieces of art are popping up in all kinds of projects – even for brands, companies, of business types that you might not expect. Whimsical illustrations are trending for a number of reasons:

They create just the right feel for a project that doesn’t need to be heavy;
You can design the main imagery to be whatever you want;
They provide a source of delight for users;
Every project using illustrations looks a little different, creating a custom design;
The proliferation of illustration kits has made creating this style easier than ever.

The thing that might be best about using whimsical illustrations is the personality they bring to a project. The right illustrated element – or series of elements – can emotionally tie users to the project while setting a scene. The possibilities are almost endless. Illustrations don’t have to apply only to lighthearted projects, even though “whimsical” might imply it. The illustrations for Violence Conjugale feature a sense of whimsy for a serious topic, and it works. (Maybe we all need a little more whimsy in our life?)

Black and Blue

It’s a classic color combination that’s making a big return to projects – black and blue palettes.

The contrast of a dark background and blue accents is eye-appealing and creates a harmonious and pleasing visual aesthetic. The projects below use this color trend in different ways, all with the same cool result.

Arm Yourself uses a black background with a black and white illustration to make bright blue lettering and accents pop off the screen. Color draws users into the interactive part of the homepage design with a drag to the bullseye instruction.

Carey uses a lighter, more teal blue on a charcoal black background for a lighter feel. The blue color pulls from the logo and brand mark with buttons that have a lot of contrast from the background and brighter elements in the design. The blue continues on the scroll with bold text on a fully black background, showing the versatility of this color choice.

Adera uses a simple blue button on a black and white image to create contrast and draw the eye to the active part of the design. The color palette flips on the scroll to a blue background with darker elements on top. Contrast is a vital factor here, helping dictate user flow and how to digest and interact with information on the screen.

Anything-But-Flat Scroll Transitions

Disclaimer: I am totally in love with this trend and can’t get enough of it.

Anything-but-flat scroll transitions is a versatile design trend that’s visually interesting and contributes to usability. (It’s a win-win!) This trend is exemplified by a transition element between “screens” or “scrolls” with a visual that isn’t just a box or flat line. Think of how most parallax designs or screen-based vertical viewpoints advance from one box to another. With this trend the transition is more fluid. The examples below do this in different ways:

Oroscopo takes advantage of the blobs trend that’s been popular all year with blob elements that create waves between content elements. Contrast between light and dark backgrounds magnify this effect, while other blog shapes create visual consistency.

MAHA Agriculture Microfinance uses a simple line between scroll elements but it’s got a texture to it that makes it just a little more visually interesting that having a flat line between the hero image area at the top and the secondary content block.

Akaru uses a pretty amazing animated fluid design to offset the branding in the center of the screen. The animation carries into the background of the content below the scroll. (You’ll want to scroll all the way to the bottom of this one to see the transition from the dark animation back to white.) The effect is stunning.

Here’s why this trend works so beautifully: The fluid transition is somewhat disruptive because the user doesn’t expect this visual and seeing the edge of a transitional element encourages scrolling. Whether the user scrolls to see how the transition changes or to preview more content is irrelevant as long as the interaction happens. It’s brilliant and beautiful, especially on desktop screens.

Conclusion

The best design trends are versatile enough that you can use them in new projects or incorporate them into websites that are already live for a little refresh.

A custom illustration can add extra interest to a hero area or page within your website, a tweak to the color palette can create a brilliant black and blue combination, or a neat transition can help users engage with the scroll.

If you want to spice up a project, these trends fit the bill for sure.

Source

p img {display:inline-block; margin-right:10px;}
.alignleft {float:left;}
p.showcase {clear:both;}
body#browserfriendly p, body#podcast p, div#emailbody p{margin:0;}

Motion Paths – Past, Present and Future

Original Source: http://feedproxy.google.com/~r/tympanus/~3/NVxaS65ELcc/

Making animations that “feel right” can be tricky.

When I’m stuck, I find Disney’s 12 principles of animation useful. They’re from the book ‘The Illusion of Life’ and although the book was written about hand-drawn character animation, a lot of the principles are relevant for animation on the web.

The 7th principle of animation is about arcs:

Most natural action tends to follow an arched trajectory, and animation should adhere to this principle by following implied “arcs” for greater realism.

In other words, animating along a curved path can make movement feel more realistic.

Straight lines are what browsers do best though. When we animate an element from one place to another using a translation the browser doesn’t take realism into account. It’ll always take the fastest and most efficient route.

This is where motion paths can come in handy. Motion paths give us the ability to move an element along a predefined path. They’re great for creating trajectories to animate along.

Use the toggle to see the paths.

See the Pen Alien Abduction- toggle by Cassie Evans (@cassie-codes) on CodePen.default

As well as being useful, they’re quite a lot of fun to play around with.

See the Pen Loop by Cassie Evans (@cassie-codes) on CodePen.default

So, how do you animate along a motion path?

I use GreenSock (GSAP) for most of my SVG animation and I made these demos using the newly released GSAP 3 and their MotionPathPlugin. So, if you want to skip to that bit, go ahead!

Otherwise let’s take a little journey through the past, present and future of motion path animation.

(Did someone say CSS motion paths?)

First, a little setup tip.

Make sure to keep the path and element you’re animating in the same SVG and co-ordinate space, otherwise things get a bit messy.

<svg xmlns=”http://www.w3.org/2000/svg” viewBox=”0 0 1300 800″>
<path class=”path” d=”M1345.7 2.6l2.4-4.4″/>
<g class=”rocket”>

</g>
</svg>
SMIL

If you google “SVG motion path animation”, you’re going to get a lot of hits talking about SMIL.

SMIL was the original proposed method for SVG animation. It included the ability to animate along a path using the <animatemotion> element.

It’s nice and declarative and currently the browser support is surprisingly good, covering all modern browsers except Edge and Opera Mini.

But, and this is a big but, the future of SMIL is uncertain, and has been for a while.

It was deprecated by Chrome a few years back and although they’ve now suspended that deprecation, implementations still vary and there’s no clear path towards cross-browser support.

Although it’s fun to play around with, SMIL isn’t very future-proof, so I’m only going to touch on it.

In order to animate along a path with the animateMotion element, you reference the path you want to animate along using path=”…” and define the element you want to animate using xlink:href=”#…”:

<animateMotion
path=”M20.2…”
xlink:href=”#rocket”
dur=”10s”
rotate=”auto”

/>

See the Pen loop SMIL by Cassie Evans (@cassie-codes) on CodePen.default

With SMIL effectively out of the picture, browser vendors are now focused on supporting modern alternatives like the CSS Motion Path Module.

CSS Motion Path Module
Attention: As of the time of writing, the examples in this section are experimental and best viewed in Chrome.

You can check out which features your browser supports in the demo below.

See the Pen Browser Support – CSS motion path module by Cassie Evans (@cassie-codes) on CodePen.default

If you’ve got all green smiley faces, you’re good to go. But you may have a sad face for offset-anchor. This is because this property is currently still experimental. It’s behind a flag in Chrome, meaning it’s not turned on by default.

You can choose to enable it by going to this URL in Chrome:

chrome://flags/#enable-experimental-web-platform-features

and enabling experimental web platform features.

This module is joint work by the SVG and CSS working groups, so unlike SMIL, we’ll be able to use CSS motion paths to animate both, HTML and SVG DOM elements. I love a CSS-only solution, so although it’s not ready to use in production (yet), this is pretty exciting stuff.

The motion path module consists of five properties:

offset (shorthand property for the following)
offset-path
offset-distance
offset-anchor
offset-rotate

offset-path

offset-path defines the path that we can place our element on. There are a few proposed values but path() seems to be the only one supported right now.

.rocket {
offset-path: path(‘M1345.7 2.6l2.4-4.4’);
}

path() takes a path string with SVG coordinate syntax, which may look scary, but you don’t have to write this out. You can create a path in a graphics editing program and copy and paste it in.

offset-distance

offset-distance specifies the position along an offset-path for an element to be placed. This can be either in pixels or as a percentage of the length of the path.

See the Pen Rocket – CSS motion path – offset-distance by Cassie Evans (@cassie-codes) on CodePen.default

offset-anchor

By default the element’s top left corner will be aligned with the path, but we can change this with offset-anchor.
offset-anchor behaves a lot like transform-origin. In fact if set to auto, it’s given the same value as the element’s transform-origin, so we can optionally use transform-origin for the same results.

Like transform-origin it accepts a position with x and y values, either as a percentage or a keyword like bottom or left.

Have a play with the values:

See the Pen Rocket – CSS motion path – offset anchor by Cassie Evans (@cassie-codes) on CodePen.default

offset-rotate

offset-rotate defines the direction the element faces on the path.

By default it’s set to auto and will rotate with the path. You can pass in an optional second value in degrees in order to tweak the direction of this rotation.

See the Pen Rocket – CSS motion path – offset-rotate – auto deg by Cassie Evans (@cassie-codes) on CodePen.default

If you want your element to face the same direction throughout, and not rotate with the path, you can leave out auto and pass in a value in degrees.

See the Pen Rocket – CSS motion path – offset-rotate – deg by Cassie Evans (@cassie-codes) on CodePen.default

These properties were renamed from motion to offset since this spec was proposed. This is because alone, these properties just provide another way to set the position and rotation of absolutely positioned elements. But we can create motion by using them in conjunction with CSS animations and transitions.

.rocket {
offset-path: path(‘M20.2…’);
offset-anchor: 50% 50%;
offset-rotate: auto;
/* if offset anchor isn’t supported we can use transform-origin instead */
transform-origin: 50% 50%;
animation: move 8s forwards linear;
transform-box: fill-box;
}

@keyframes move {
from {
offset-distance: 0%;
}
to {
offset-distance: 100%;
}
}

See the Pen Rocket – CSS motion path by Cassie Evans (@cassie-codes) on CodePen.default

Attention: SVG transform-origin quirks.

In this demo, I’m using a relatively new CSS property, transform-box.

This is to avoid a browser quirk that’s caught me out a few times. When calculating transforms and transform-origin, some browsers use the element’s bounding box as the reference box and others use the SVG viewbox.

If you set the value to fill-box the objects bounding box is used as the reference box.

And if you set the value to view-box the nearest SVG viewbox is used as the reference box.

You can see what happens to the center of rotation when we change it here:

See the Pen Rocket – CSS motion path – transform-box by Cassie Evans (@cassie-codes) on CodePen.default

GreenSock Animation Platform (GSAP)

While we wait for the CSS solution to be more widely implemented we’re in a bit of a motion path limbo. Thankfully there’s some JavaScript animation libraries that are bridging this gap.

I usually use GreenSock for SVG animation for a few reasons.

There are some cross browser quirks with SVG, especially with how transforms are handled. The folks at GreenSock go above and beyond to handle these inconsistencies.

Animation can also be a bit fiddly, especially when it comes to fine-tuning timings and chaining different animations together. GreenSock gives you a lot of control and makes creating complex animations fun.

They also provide some plugins that are great for SVG animation like DrawSVG, MorphSVG and MotionPathPlugin.

They’re all free to experiment with on Codepen, but some of the plugins are behind a membership fee. MotionPathPlugin is one of the free ones, and part of the new GSAP 3 release.

MotionPathPlugin gives you the ability to turn an SVG path into a motion path, or specify your own path manually. You can then animate SVG or DOM elements along that path, even if those elements are in a completely different coordinate space.

Here’s a demo with the necessary libraries added to start you off.

In order to use a plugin we have to register it, like this:

gsap.registerPlugin(MotionPathPlugin);

Then we can start animating. This is what a tween using the simplified GSAP 3 syntax looks like:

gsap.to(“.rocket”, {
motionPath: …
duration: 5,
});

The name ‘tween’ comes from the world of hand-drawn animation, too.

Tweening is the process of generating intermediate frames between two images to give the appearance that the first image evolves smoothly into the second image.

That’s pretty much what a GSAP tween does. You feed in the element you want to animate, the duration, and the properties you want to target and the tween will figure out the in-between states.

The motionPath attribute can be used shorthand, and passed a path:

gsap.to(“.rocket”, {
motionPath: “#path”,
duration: 5,
});

Or, if we want more control over the settings we can pass it an object of options:

gsap.to(“.rocket”, {
motionPath: {
path: “#path”,
align: “#path”,
autoRotate: true,
},
duration: 5,
});

See the Pen Rocket – GSAP motion path by Cassie Evans (@cassie-codes) on CodePen.default

Here are some of the properties we can control.

path

This defines the motion path we’re animating along, we can reference a path that exists in the document by using a selector,

motionPath: {
path: “#path”,
}

a string that contains SVG path data,

motionPath: {
path: ‘M125.7 655a9.4 9.4…’,
}

an object containing an array of x and y co-ordinates to move between,

motionPath: {
path: [{x: 100, y: 100}, {x: 300, y: 20}]
}

or a variable referring to one of these options:

const myPath = ‘M125.7 655a9.4 9.4…’

motionPath: {
path: myPath,
}
align

We can use this to align the element to the path, or other elements in the document by passing in a selector:

motionPath: {
path: “#path”,
align: “#path”
}

We can also align the element to itself if we want the animation to start from the element’s current position.

motionPath: {
path: “#path”,
align: “self”
}

In the next demo, the purple rocket is aligned to self and the green rocket is aligned to the path.

align: “self” is like moving the path to the element, rather than the element to the path.

See the Pen Rocket – GSAP motion path – align by Cassie Evans (@cassie-codes) on CodePen.default

By default, the element’s top left corner will be the center of rotation and alignment. In order to align the element accurately on the path you’ll need to set the element’s center of rotation, like this:

gsap.set(“.rocket”, {
xPercent: -50,
yPercent: -50,
transformOrigin: “50% 50%”
});
autoRotate

This is how we get our element to rotate along with the curvature of the path:

motionPath: {
path: “#path”,
align: “#path”
autoRotate: true,
}

We can also provide a number value. This will rotate along with the path, but maintain that angle relative to the path.

motionPath: {
path: “#path”,
align: “#path”
autoRotate: 90,
}
start & end

These properties let us define where on the path the motion should begin and end.

By default, it starts at 0 and ends at 1, but we can provide any decimal number:

motionPath: {
path: “#path”,
align: “#path”
autoRotate: true,
start: 0.25,
end: 0.75,
}

If you want the element to go backwards along the path, you can provide negative numbers.

See the Pen Rocket – GSAP motion path – align by Cassie Evans (@cassie-codes) on CodePen.default

immediateRender

If your element is starting off at a different position in the document and you want it to align with the path you might notice a jump as it moves from its position to the path.

See the Pen Rocket – GSAP motion path – align by Cassie Evans (@cassie-codes) on CodePen.default

You can fix force it to render immediately upon instantiation by adding immediateRender:true to the tween.

// animate the rocket along the path
gsap.to(“.rocket”, {
motionPath: {
path: “#path”,
align: “#path”,
autoRotate: true,
},
duration: 5,
ease: “power1.inOut”,
immediateRender: true,
});
MotionPathHelper

Another super cool feature of the GSAP 3 release is the MotionPathHelper.

It enables you to edit paths directly in the browser! I found this really helpful, as I’m always going back and forth between the browser and my graphics editor.

Give it a go in the demo below. When you’re done, click “copy motion path” to copy the SVG path data to your clipboard. Paste the new path data into the d=”” attribute in the SVG code to update your path.

There are instructions on how to edit the path in the GSAP docs.

See the Pen Rocket – GSAP motion path – helper by Cassie Evans (@cassie-codes) on CodePen.default

GreenSock is a ton of fun to play around with!

There are a bunch of other features and plugins that when paired with motion path animation can be used to create really cool effects.

In this demo, DrawSVG is progressively showing the text path as some staggered elements animate along the path using MotionPathPlugin:

See the Pen Squiggle text animation by Cassie Evans (@cassie-codes) on CodePen.default

If you’ve had fun with these examples and want to explore GreenSock some more, Christina Gorton has written The New Features of GSAP 3 providing a practical overview.

GreenSock also have a great getting started guide.

Happy animating!

Motion Paths – Past, Present and Future was written by Cassie Evans and published on Codrops.