30 (Really) Cool Iron Man Merchandise You Can Buy

Original Source: https://www.hongkiat.com/blog/iron-man-merchandise/

Though every superhero has its own fandom, however, Iron Man enjoys the biggest share of fans all around the world. The charisma of Robert Downey Jr. combined with that of Tony Stark’s and you…

Visit hongkiat.com for full content.

Never Forget a TODO Comment with tickgit, Your Repo’s Project Manager

Original Source: https://www.sitepoint.com/never-forget-a-todo-comment-with-tickgit-your-repos-project-manager/?utm_source=rss

How Tickgit Helps to Manage To-Do Comments in Git Projects

tickgit is a command-line tool and web application that helps developers do project management in their code, through the use of TODO comments and other plain-text markers. It’s a low-overhead way of managing your backlog without switching contexts.

tickgit scans source code for TODO markers (and HACK, FIXME, XXX, etc.) and presents those code comments as tickets, with a fuller context derived from Git history (who added it, when, where etc.).

I am a solo developer building tickgit and tickgit.com to help software engineers be more productive in their code. I hope you find this project interesting and useful!

the tickgit interface

Why?

Project management is an essential part of software development, even for solo developers building a side-project. Plenty of existing ticketing and task management systems help teams and individuals track pending work really thoroughly. Sometimes, though, using TODO comments and other markers within a codebase ends up being a more efficient way of keeping tabs on what needs to get done.

Why // TODO Comments?

TODO comments (or FIXME, HACK, OPTIMIZE, XXX, etc.) are a common way developers indicate that an area of code is worth addressing and returning to. The Linux codebase has 4k+ of these types of comments, Kubernetes has 2k+.

If this sort of thing is a familiar sight, you’ve no doubt seen or used them before:

// TODO: Get rid of this condition somehow. Perhaps with a dynamic version
// of the @gate pragma.

TODOs Are Easy

To-dos are easy to add and remove. You don’t need to leave your editor. They’re plaintext. You can include links to additional information. They’re flexible. You can even use emojis ?✏️. You’re not constrained by the field requirements of an external ticketing system. You can be as thorough or succinct as you’d like in describing why you’re annotating an area of code.

No Context Switching

To-dos are right next to the code they’re describing, which means you don’t lose the context of the codebase: the surrounding classes, functions, variables, etc. Using an external ticketing system requires you to either switch focus when trying to understand a ticket and the relevant pieces of code, or do a great deal of context-copying to help clarify your task.

To-dos allow you to maintain your flow when writing code, and are often a lower mental burden than switching to and from tickets in an external system. To-dos, of course, can link back to an existing ticket for additional information if necessary.

Trackable with Your Code

Since TODO comments are part of your code, they’re stored in version control. They can undergo code-review in your PRs. They have a history and can be attributed to authors, versions, and commits. This can enable project management aware reports about burndown, team responsibilities, tech debt, development efficiency, etc.

The Command-line Tool

The tickgit command-line tool is an open-source project that scans a Git codebase for TODO comments. It runs a Git blame and outputs results with references to file paths and line numbers.

It can be used to query ad-hoc for open TODO comments, and supports CSV output for consumption by other tools (spreadsheets, text processors, etc.).

Here’s an example output:

example output

The CLI is currently pretty simple, but with plans to improve to enable more use cases, including:

Customization of phrases to match (don’t match XXX but match @TODO in comments)
Querying and filtering (show me all to-dos added this week, show me only mine, etc.)
Aggregation queries count by author, average age by author, etc.
A CI mode to fail with an error if certain criteria are met (no to-dos in certain branches, max 5 to-dos per author, etc.)
Extract links and customized parsing of comments (extract an assignee, a due date, etc.)

Continue reading
Never Forget a TODO Comment with tickgit, Your Repo’s Project Manager
on SitePoint.

Collective #614

Original Source: http://feedproxy.google.com/~r/tympanus/~3/KVq6Uq4Sg7U/

Inspirational Website of the Week: Anastasiia Afanasieva

So many engaging details, fantastic motion and superb typography! Without a doubt, our pick for you this week.

Get inspired

Our Sponsor
Instant websites for your clients with Divi Layout Packs

With the Divi Layout Packs you’ll get world-class designs ready to be used for your client projects.

Check it out

The WET Codebase

Dan Abramov shares his talk where he shows “why strict adherence to writing code that is free of duplication inevitably leads to software we can’t understand”.

Check it out

Style Stage from Modern CSS Solutions

A modern CSS showcase styled by community contributions. Maintained by Stephanie Eckles of ModernCSS.dev.

Check it out

30 Great Websites with Parallax Scrolling

A great collection of websites with interesting parallax effects.

Check it out

How To Create A GitHub Profile README

Learn how to access GitHub’s new profile level README feature.

Read it

Awesome Github Profile README

A curated list of awesome Github Profile READMEs.

Check it out

zerodivs.com

An experimental UI editor for creating illustrations with single-element CSS. By Joan Perals.

Check it out

Tabler Icons

In case you missed it: 550+ customizable free SVG icons.

Check it out

Super Expressive

Super Expressive is a lightweight JavaScript library that allows you to build regular expressions in almost natural language.

Check it out

Webwaste

An excerpt from Chapter 9 of Gerry McGovern’s Book World Wide Waste, from Silver Beach.

Check it out

Grids Part 1: To grid or not to grid

Sarah Higley’s first article in a series on interactive grid accessibility.

Read it

Zettlr

Zettlr is an open source Markdown editor with many advanced features.

Check it out

The State Of Pixel Perfection

An interesting article on pixel perfection and why the modern web should overcome the concept.

Read it

Scrollable sidebar with sticky footer using Flexbox

Learn how to use Flexbox to create a scrollable sidebar with a sticky footer in this great video by CodyHouse.

Watch it

Foam

Foam is a personal knowledge management and sharing system for VSCode.

Check it out

What is CSS Specificity?

Sarah Chima explains CSS specificity, an important topic to understand if you want to get better at CSS.

Read it

Clipped Image Reveal on Hover

A very nice clipped hover effect by Katherine Kato.

Check it out

3D Radio

An interactive 3D radio made by Ricardo Oliva Alonso.

Check it out

GUI Sites

Simone Marzulli’s curated list of sites that look like desktop graphical user interfaces.

Check it out

127 design websites

An extensive list of websites to show off your design. Made by the content team at lemon.io.

Check it out

AudioMass

In case you missed it: AudioMass is a free full-featured web-based audio and waveform editing tool in just 65kb of vanilla JavaScript.

Check it out

form-validation.js

The most customizable validation framework for JavaScript.

Check it out

Button state and accessibility

Chris Fernandi looks at button state and the [aria-pressed] attribute.

Read it

The post Collective #614 appeared first on Codrops.

Popular Design News of the Week: July 13, 2020 – July 19, 2020

Original Source: https://www.webdesignerdepot.com/2020/07/popular-design-news-of-the-week-july-13-2020-july-19-2020/

Every week users submit a lot of interesting stuff on our sister site Webdesigner News, highlighting great content from around the web that can be of interest to web designers.

The best way to keep track of all the great stories and news being posted is simply to check out the Webdesigner News site, however, in case you missed some here’s a quick and useful compilation of the most popular designer news that we curated from the past week.

Squircley – All You Need to Start Creating Beautiful Squircles


Tabler Icons – 550+ Highly Customizable Free SVG Icons


Puppertino – A CSS Framework Based on Apple’s Design and Human Guidelines


We are Going to Need Bigger Screens


Coronavirus Changed Everything Including these Logo Designs


This Technique was Supposed to Replace Passwords. Turns Out it’s Surprisingly Easy to Hack


The Web Design Hack Hall of Fame


61 UI/UX Resources for Web Designers


Don’t Quit, Create


BF Tiny Hand: A Free Donald Trump’s Handwriting Font


Dunder Mifflin Identity


16 Examples of Large Typography in Web Design


Style Stage


Spaceboard – Pinterest for Markdown Notes


Flowyak – High-converting Webflow Templates for Bootstrapped Startups


The State of Pixel Perfection


The Best Tools for Checking your Website’s Speed


12 Screen Reader Facts for Accessible Web Design


Why You Should Build your Blog on WordPress Vs. Squarespace


127 Websites to Show Off your Design


Modern Web Development on an 8 Year Old Mac – Music, Design and Stories by Nigel Bunner


Website Best Practices Checklist: 9 Web Design Best Practices


Design Ethnography


Minimum Viable UX: A Guide for SaaS Design


How to Think Smart About your Downtime


Want more? No problem! Keep track of top design news from around the web with Webdesigner News.

Source

p img {display:inline-block; margin-right:10px;}
.alignleft {float:left;}
p.showcase {clear:both;}
body#browserfriendly p, body#podcast p, div#emailbody p{margin:0;}

20 Creative Uses of Lego You Need To See

Original Source: https://www.hongkiat.com/blog/creative-uses-lego/

The world will probably never get tired of the wonders of Lego, even if it definitely hurts when you step on one. Painful feet massage aside, the popular brick toy continues to astound us with the…

Visit hongkiat.com for full content.

Bringing You The Best Of Smashing

Original Source: https://www.smashingmagazine.com/2020/07/monthly-roundup-07-2020/

Bringing You The Best Of Smashing

Bringing You The Best Of Smashing

Iris Lješnjanin

2020-07-17T11:00:00+00:00
2020-07-17T20:34:15+00:00

Well, I guess we can all agree that this year has been quite something. We’ve all been challenged in one way or the other, and the new normal is not quite the old normal. Still, the overriding emphasis remains on safety and everyone’s wellbeing, as well as the importance on sharing thoughts and feelings on creative wellness within the community.

Unfortunately, the effects of COVID-19 are still so wide-reaching throughout the world, so that the Smashing team has had to make big changes to our plans this year. As Rachel Andrew, editor-of-chief of Smashing Magazine, nicely puts it:

“The pandemic has made life unpredictable and scary for many people. At Smashing, we’ve had to very quickly figure out new ways of delivering great content — in a way that supports the business but also our speakers and workshop leaders. We have been encouraged by the enthusiasm from the community, the messages of support, and the willingness to try these new formats.”

On that note, we have decided to take all 2020 dates online. We hope to see you there!

August 20–21
SmashingConf Live
Tell me more →

September 7–8
SmashingConf Freiburg
Tell me more →

October 13–14
SmashingConf Austin
Tell me more →

November 10–11
SmashingConf San Francisco
Tell me more →

We’re able to do these all these wonderful things because of your support, and we truly and sincerely appreciate it.

Interactive Workshops To Help You Boost Your Skills

With online workshops, we aim to give you the same experience and access to experts as in an in-person workshop, without needing to leave your desk. So you can learn at your own pace, in your own time, and follow interactive exercises along the way.

We’ve done our best to provide you with a mix of both design- and frontend-related workshops:

July 28–29
Designing For Emotion
Aarron Walter
Design

August 6–14
Web Application Security
Scott Helme
Front-end

August 17–31
Behavioral Design
Susan and Guthrie Weinschenk
Design

Aug. 19 – Sept. 3
Front-End Testing
Umar Hansa
Front-end

Aug. 20 – Sept. 4
Designing For A Global Audience
Yiying Lu
Design

September 1–16
Jamstack!
Jason Lengstorf
Front-end

September 10–11
The CSS Layout Masterclass
Rachel Andrew
Front-end

Sept. 17 – Oct. 2
Vue.js: The Practical Guide
Natalia Tepluhina
Front-end

Sept. 22 – Oct. 6
Smart Interface Design Patterns, 2020 Edition
Vitaly Friedman
Design & UX

Attending a Smashing online event means that you’ll be taking part in live sessions, Q&As, discussion zones, challenges, and so much more! See all schedules and events →

Sit Back, Relax, And Tune In!

The Smashing Podcast is the perfect way to take a little bit of Smashing along with you on your morning commute, when working out at the gym, or just washing the dishes. Every two weeks, Drew McLellan talks to design and development experts about their work on the web. You can subscribe in your favorite app to get new episodes as soon as they’re ready.

1. What Is Art Direction?
2. What’s So Great About Freelancing?

3. What Are Design Tokens?
4. What Are Inclusive Components?

5. What Are Variable Fonts?
6. What Are Micro-Frontends?

7. What Is A Government Design System?
8. What’s New In Microsoft Edge?

9. How Can I Work With UI Frameworks?
10. What Is Ethical Design?

11. What Is Sourcebit?
12. What Is Conversion Optimization?

13. What Is Online Privacy?
14. How Can I Run Online Workshops?

15. How Can I Build An App In 10 Days?
16. How Can I Optimize My Home Workspace?

17. What’s New In Drupal 9?
18. How Can I Learn React?

19. What Is CUBE CSS?
20. What Is Gatsby?

Is there a topic that you’d love to hear and learn more about? Or perhaps you or someone you know would like to talk about a web- and design-related topic that is dear to your hearts? We’d love to hear from you! Feel free to reach out to us on Twitter and we’ll do our best to get back to you as soon as possible.

Catching up with what’s new in the web industry doesn’t mean you have to be tied up to a chair and desk! Do as Topple the Cat does it: grab your headphones and stretch those legs! You can subscribe and tune in anytime with any of your favorite apps.

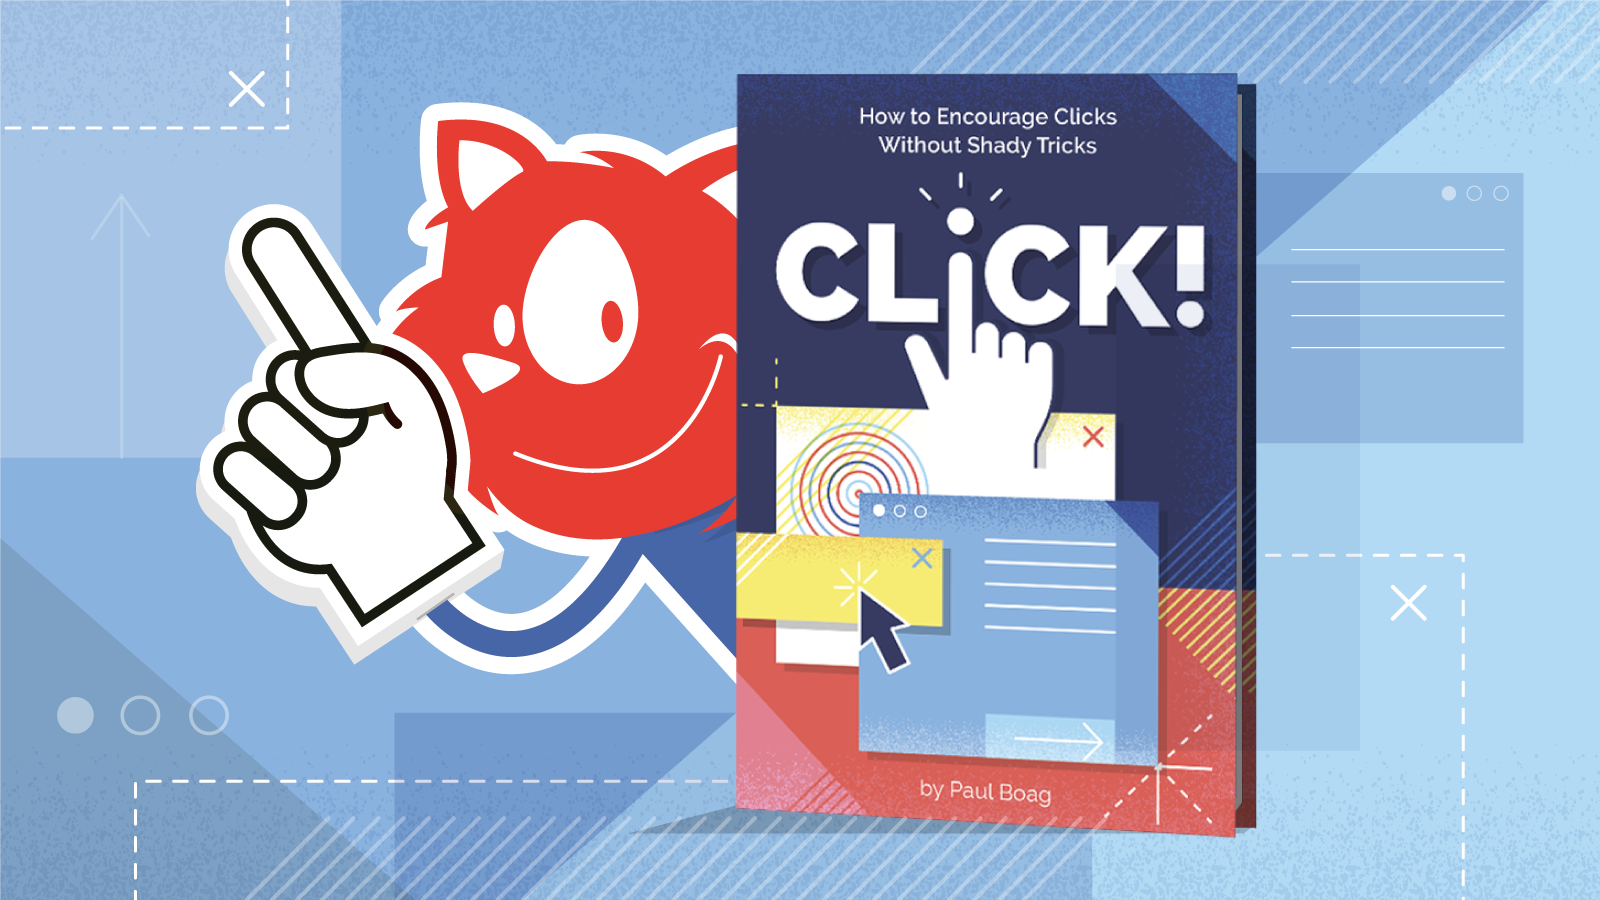
Our Most Recent Addition To The Smashing Bookshelf

We shipped the first copies of Click! How to Encourage Clicks Without Shady Tricks a few weeks ago, and if you pre-ordered a copy of the book, you must have received a personal note from the author himself, Paul Boag. It was fun to follow the reactions pop up on social media — Ari Stiles shared some tweets in her recent post.

Click! comes along at a time when many of us need a creative “nudge.” The book inspires us to think differently about our routines for building online sites and services—what works, and what doesn’t. You can jump to the table of contents, or if you’d like to take a peek first, you can download a free PDF excerpt right away (17.3 MB). Happy reading!

Print + eBook

eBook

Print + eBook

{
“sku”: “click”,
“type”: “Book”,
“price”: “39.00”,

“prices”: [{
“amount”: “39.00”,
“currency”: “USD”,
“items”: [
{“amount”: “29.00”, “type”: “Book”},
{“amount”: “10.00”, “type”: “E-Book”}
]
}, {
“amount”: “39.00”,
“currency”: “EUR”,
“items”: [
{“amount”: “29.00”, “type”: “Book”},
{“amount”: “10.00”, “type”: “E-Book”}
]
}
]
}

$
39.00

Get Print + eBook

Quality hardcover. Free worldwide shipping. 100 days money-back-guarantee.

eBook

{
“sku”: “click”,
“type”: “E-Book”,
“price”: “19.00”,

“prices”: [{
“amount”: “19.00”,
“currency”: “USD”
}, {
“amount”: “19.00”,
“currency”: “EUR”
}
]
}

$
19.00

Free!

Get the eBook

DRM-free, of course.

ePUB, Kindle, PDF.
Included with Smashing Membership.

Get the eBook

Download PDF, ePUB, Kindle.
Thanks for being smashing! ❤️

Trending Topics On Smashing Magazine

As you may already know, we aim to publish a new article every single day that is dedicated to various topics current in the web industry. Here are some that our readers enjoyed most and have recommended further:

“CSS News July 2020,” Rachel Andrew
“An Introduction To React’s Context API,” Yusuff Faruq
“How To Pass Data Between Components In Vue.js,” Matt Maribojoc
“Setting Height And Width On Images Is Important Again,” Barry Pollard
“Differences Between Static Generated Sites And Server-Side Rendered Apps,” Timi Omoyeni

Best Picks From Our Newsletter

We’ll be honest: Every second week, we struggle with keeping the Smashing Newsletter issues at a moderate length — there are just so many talented folks out there working on brilliant projects! Kudos to everyone involved!

Interested in sponsoring? Feel free to check out our partnership options and get in touch with the team anytime — they’ll be sure to get back to you right away.

P.S. A huge thank you to Cosima Mielke for writing and preparing these posts!

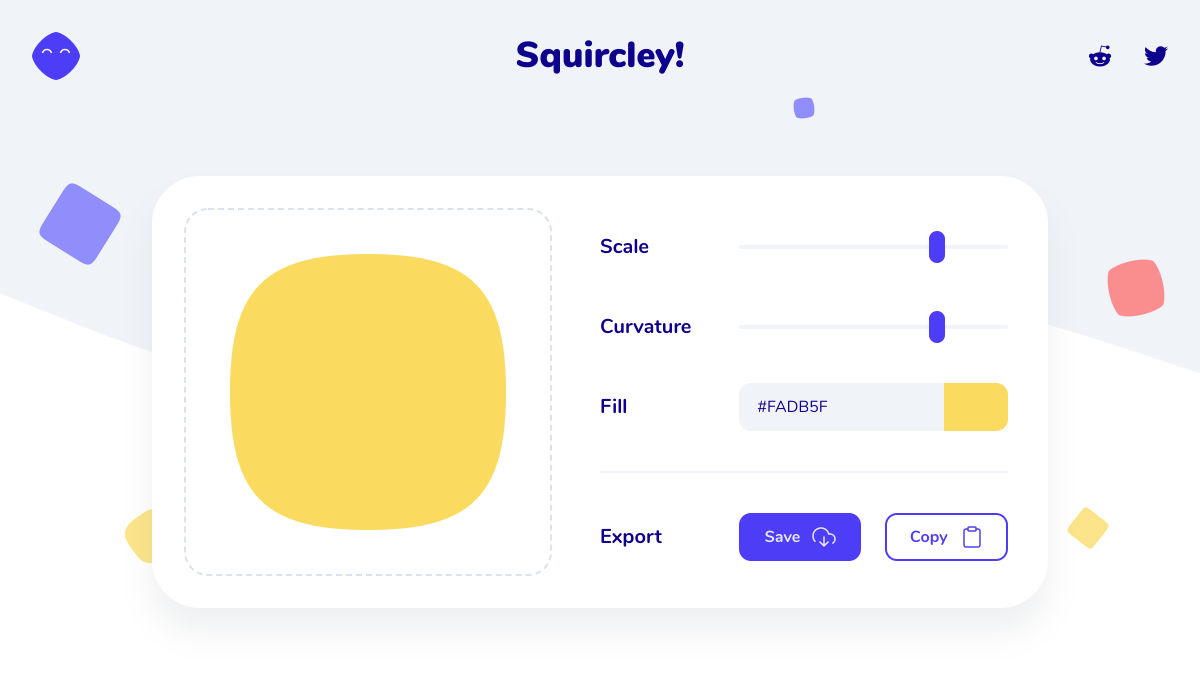
Free Fonts With Personality

Typography is a powerful communication tool, a way to express ideas, and a trigger for creativity. Based on this understanding, the Argentinian-based type foundry Rostype creates fonts that are free to use for anyone, in personal and commercial projects.

Rostype

There are currently 15 fonts available, and each one of them shines with a unique personality. Some are designed with a special focus on readability, others are the perfect display typefaces, made to stand out, some are retro-inspired, others more futuristic and dynamic. There’s even a typeface inspired by the coronavirus lockdown. A treasure chest if you’re looking for a typeface that is a bit more distinctive.

The Making Of A Typeface

It’s always insightful to sneak a peek behind the scenes of how other design teams work and think. Chris Bettig, Design Director at YouTube, now shares an interesting case study on how he and his team created YouTube Sans, a tailor-made font that doubles as a brand ambassador.

YouTube Sans

Before the new typeface made its appearance, YouTube used the iconic play button and a modified version of Alternate Gothic for the wordmark. However, as Chris Bettig explains, there was no clear typographical guidance. Designed to work across the entire range of YouTube’s products and reflecting the platform’s worldview as well as the community of creators who use it, YouTube Sans changed that. For more insights into how the font came to life and the challenges the design team faced along the way, be sure to check out the case study.

Dealing With Browser Font Rendering Inconsistencies

We all know those moments when a bug literally bugs us but we can’t seem to figure out how to solve it. Stephanie Stimac recently came across such an issue: When she opened her personal website in Safari, she noticed how drastically different the title of her page was rendering compared to other browsers. It appeared much bolder than expected.

Browser Font Rendering Inconsistencies

To find the reason for these rendering inconsistencies, Stephanie started to dissect differences between the user agent style sheet and the computed CSS properties and soon found herself far down the rabbit hole, comparing the confusing behavior with Chrome, Firefox, and Edge. There’s no simple answer to the question which browser is actually handling the styling correctly, but after running a number of tests, Stephanie found out how to prevent the browser from deciding how to bold font-weights: you need to explicitly define the font weight with numerical values. A small detail that makes a significant difference.

Continuous Performance Measurements Made Easy

When launching a website, it’s common to run performance tests to ensure the site is fast and follows best practices. But how do we keep it fast as soon as deploys are happening every day? Speedlify is Zach Leatherman’s answer to this question.

Speedlify

Speedlify is a static site published as an open-source repository that uses Lighthouse and Axe to continuously measure performance and publish the performance statistics — at most once an hour and automatically once a day. You can run it manually, locally on your computer and check in the data to your repo, or, if you’re using Netlify, it can run entirely self-contained. A great way to keep performance always in sight.

The Anatomy Of A Push Notification

Push notifications were first introduced on iOS back in 2009, web push followed five years later. Today, they are supported across a lot of platforms and browsers — from iOS and Android to Amazon Echo, Windows, Chrome, Safari, Firefox, Edge, and more. Each one of these platforms is a bit different, though, making it complicated for designers to wrap their heads around what exactly goes into a push notification.

Design and Anatomy of a Push Notification 2020

A useful reminder comes from Lee Munroe. He summarized how many lines of text you need on which platform, requirements for images, if there are character restrictions, and other details that can be hard to remember. The overview also comes in handy to assess what your notification will look like on operating systems you don’t have access to. One for the bookmarks.

Editing Keyframe Animations Live

When you’re creating animations, it’s always helpful to see the animation in action as you tweak it. Unfortunately, that also involves a lot of switching back and forth between your text editor and the browser. Mitch Samuels was tired of doing that, so he built a tool to save him time: Keyframes.app.

Keyframes.app

The tool lets you create a CSS keyframe animation with a visual timeline editor. You can add steps to a timeline, use the simple UI to adjust the CSS properties you want your target element to have at each step, and the animated preview will update live. Once you’re happy with the result, you can copy the CSS and use it in your project right away. Keyframe.app is also available as a Chrome extension. A real timesaver.

Determining The Best Build Tool For Your Project

Build tools aim to make the lives of developers easier by streamlining workflows and codifying best practices. However, picking the right build tool for a project can be a challenge. To help you make a more informed decision, folks from the Google Chrome developer relations team built Tooling.Report.

Tooling Report

Based on a suite of tests to assess how well a build tool adheres to best practices, Tooling.Report gives you an overview of various bundlers and the features they support. It’s not only a quick way to determine the best tool for a project but also a reference for incorporating best practices into existing codebases — with the long-term goal of improving all build tools and, thus, the health of the web.

Turning A Flat Image Into A Folded Poster

Some coding experiments leave even the most experienced developers in awe. And even if it’s something you won’t be using every day, it’s always inspiring to see fellow developers think outside the box and explore what’s possible with web technologies. The folded poster effect that Lynn Fisher created with pure CSS is such an experiment.

CSS Folded Poster Effect

With a bit of CSS, Lynn makes your average image look like a folded poster. With paper creases running over the image horizontally and vertically and a background shadow that gives the poster a 3D effect. A cool little project that beautifully shows what can be achieved with CSS.

Striking A Balance Between Native And Custom Select Elements

How do you build a styled select element that is not only styled on the outside but on the inside, too? In her article “Striking a Balance Between Native and Custom Select Elements”, Sandrina Pereira shares her attempt to create a good-looking, accessible select that benefits from as many native features as possible.

Striking A Balance Between Native And Custom Select Elements

The idea is to make the select “hybrid”, which means that it’s both a native <select> and a styled alternate select in one design pattern. Users of assistive technology will get a native <select> element, but when a mouse is being used, the approach relies on a styled version that is made to function as a select element. Clever!

Hybrid Positioning With CSS Variables And max()

Some ideas require you to think outside the box and explore new paths to make them happen. Imagine this example: You want to have a page navigation on the side, right under the header when it’s scrolled all the way to the top. It is supposed to scroll with the page when the header is out of view and stay at the top for the rest of the scrolling. That’s exactly what Lea Verou wanted to achieve in a recent project.

Hybrid positioning with CSS variables and max()

You might say, that’s a case of position: sticky, but there’s a more finely-tuned approach to getting the job done, as Lea shows. Without any JavaScript. Her solution relies on CSS variables and the new max() function that lets you apply min/max constraints to CSS properties. A fallback helps in browsers that don’t support max() yet. Clever!

Stories From The Dark Side Of The Web

Hackers, data breaches, shadow government activities, cybercrime, hacktivism — a lot is going on on the dark side of the web. But who are the people behind these activities? And what’s their “mission”? Jack Rhysider dedicated a podcast to the stories that happen on the hidden parts of the network: Darknet Diaries.

Darknet Diaries

No matter if it’s the story of a gambler who finds a bug in a video poker machine that lets him win excessive amounts of money, the story of a penetration tester breaking into buildings, or a nation state hacking into a company within another nation, the Darknet Diaries is full of gripping insights into a secret world. The podcast adheres to journalistic standards by fact-checking and ethical sourcing of information, and while all of this is great entertainment, it also aims at explaining the culture around cybersecurity to make listeners more responsive, informed citizens of their digital lives. Be sure to tune in.

With Smashing Newsletter, it always feels like home. A cat with slippers reading the newsletter edition.

Smashing Newsletter

Every second Tuesday, we send a newsletter with useful techniques on front-end and UX. Subscribe and get Smart Interface Design Checklists PDF in your inbox.

Your (smashing) email

Subscribe →

Front-end, design and UX. Sent 2× a month.
You can always unsubscribe with just one click.

Smashing Editorial
(cm, vf, ra)

WD My Passport deals: The best prices in 2020

Original Source: http://feedproxy.google.com/~r/CreativeBloq/~3/rW52E2pMBCA/wd-my-passport-deals

WD (or Western Digital) My Passport portable storage devices are a must-have for creatives. These unassuming products might look small, but they're mighty when it comes to storing image, video and audio files. In this guide, you'll find a selection of Western Digital's best external hard drives – from the smaller, lower-priced WD My Passport SSD, to the larger WD My Passport 4TB hard drive.

One thing that all of the external hard drives below have in common is that they all have super-fast data transfer speeds and are easy to use. And the best bit? Our clever price comparison tool has found the best deals on each model. Not sure which one is right for you? Jump to the what model should you buy section. And if you can't find what you're looking for here, don't miss our guide to the best external hard drives available right now.

See WD's weekly sales here!
The best WD My Passport deals in 2020

WD My Passport 4TB

The 4TB iteration of the Western Digital My Passport is a top choice. In fact, we rate it so highly, it takes the top spot in our round up of the best external hard drives (mentioned above). You can also get it in 1TB, 2TB and 5TB iterations, but for value for money, this is our choice. It's got a huge capacity to store all your favourite media – perfect for creatives that deal in massive digital files. 

With the 4TB version, you'll get cloud storage and 256-AES encryption, plus Western Digital's own backup software. Best of all is its great data transfer speeds and, though this hard disc drive (HDD) doesn't offer the speed of a solid state drive (SSD) device (see WD My Passport SSD below), the Western Digital My Passport offers a great balance of quick transfer speeds and massive storage without a huge price tag.

The difference between HDD and SSD

WD My Passport SSD

As detailed below on this page, there are some key differences between a solid state drive (SSD) like this one, and a hard disc drive (HHD). In short, the SSD version of WD's My Passport is far faster at transferring data, and it comes in a smaller shell. You'll have to pay a little more to get the storage up to 1TB or 2TBs,  but if you value speed and portability over all else, it'll be worth it. 

Built for both PC and Mac, the My Passport SSD is compatible with a range of ports – both the USB Type-A and Type-C ports, with the latter able to reach speeds of up to 540MB a second. It's also a sturdy model, made to stand a drop of up to two metres. And it's as compact and portable as they come, proving that great things really can come in small packages. 

WD Passport Ultra

The WD My Passport Ultra 4TB stands out from the My Passport crowd by offering a three-year warranty – a nice addition if you aim to get a lot of use out of it and want peace of mind – and also having a Mac-specific version of the hard drive available (all the models on this page can be reformatted to work with Macs, but this version is ready out of the box).

Ever so slightly wider than the WD My Passport 4TB, but a little shallower, the Ultra comes with a metal cover and WD Discovery software for WD Backup, WD Security and WD Drive Utilities. It is USB-C ready, and USB 3.0 compatible with an adapter provided, and there are a range of storage sizes, including the huge 5TB option. 

Can't find a portable storage device to suit above? Here are some more great WD My Passport deals available now.

WD My Passport: Which model should you buy?

When choosing the right one for you, foremost on your mind should be its storage capability. Even though many come in massive multi-terabyte iterations, 500GB is plenty to get you started. But if you want to store lots of large video and/or RAW files, or you want to use your external hard drive for housing  games, investing in few more terabytes is a good idea. 

Other important information to consider before making a purchase is the hard drive's connectivity. The rectangular USB-A ports are slowly being replaced by the newer, smaller reversible USB-C ports, found in all newer generation Macs and PCs. 

The difference between HDD and SSD

There are two types of external hard drive: hard disk drives (HDD, also known as mechanical or traditional hard drives) or solid state drives (SSD). An SSD is faster, lighter and less power-hungry, whereas an HDD drive will be cheaper and slower than an SSD. HDDs are also good for storing lots of data as they often have a high capacity. 

So, if you want to store huge amounts of data while keeping prices low, a HDD is the way to go. But if speed is your top priority – for example, if you move a lot of large files, or want to run programs off the drive – then choose an SSD. Or, you can always use a smaller SSD for files that you need to access or move around often, and then store the other data that you use less often on a higher capacity HDD.

Related articles:

The best graphics cardsThe best usb-c monitorsThe best 4K monitors

The Easiest Way To Collect and Manage Website Feedback

Original Source: http://feedproxy.google.com/~r/1stwebdesigner/~3/26qE_TzoUUo/

Whether you work for an agency or you are a freelance web designer, developer or both, you are undoubtedly familiar with the common nightmare of getting feedback and tracking bugs and issues on your projects, especially from clients who do not possess technical skills. There are various ways that we try to get input from clients while we work on their projects, but most of them – like support tickets, long email chains, spreadsheets, or an even more frustrating combination of all of the above – do not provide the tools or centralization we need to have an effective, streamlined way to collect website feedback. In those instances we usually end up with important information we need quick access to stored in numerous different places where it can get lost, overlooked, or forgotten.

So how can we save time, money, and anxiety when we’re working on client projects and need their input? Fortunately there is a tool that is made for just such a solution! BugHerd takes care of all of these issues and puts them in one, simple, easy-to-access place, where you and your clients can comment on and resolve issues right on top of your website project. As they say, it’s like sticky notes on a website. What could be more intuitive?

In this article we’ll take a look at some of the key features BugHerd has to offer, what it takes to set up, and how you can start using BugHerd today. Best of all, Bugherd offers a FREE 14-day trial with no credit card required upfront, so you can take it for a test run and decide for yourself without any risk. Let’s take a look!

Bugherd - Turn this website feedback into this

Flexible setup. Install in minutes.

You can use BugHerd as a browser extension or a JavaScript snippet or both together for maximum flexibility. The browser extension takes 2 minutes to install, and you can simply copy the JS snippet into your website’s code to make it work across all browsers on desktop and mobile. Once installed, BugHerd acts like a transparent layer on your website that only your team, and your clients, can see. Website feedback and tasks are pinned directly on the page to an element, complete with metadata like screenshots, CSS selector data, Operating System & Browser Data. Users can also annotate screenshots with design feedback if they wish, and only those who have been invited to give feedback can see the BugHerd sidebar when visiting the website.

How It Works

Simply point & click on any element to report an issue or provide website feedback, then it is “pinned” directly to the website issue. Designers and developers can then access the issue and its details directly on the site, so you’re not having to dig through emails or spreadsheets to find any outstanding tasks.

Bugherd noise - easiest website feedback tool

Tasks and the technical details are also sent to a Task Board (a kanban board with a customizable workflow) where they can be assigned to team members and tracked to completion. This makes BugHerd perfect for using with remote teams and clients to ensure everyone is on the same page.

Imagine eliminating those emails back and forth where the client is giving website feedback and requests a change, describing where they want it on the page in such a way that you have to send them a screenshot with arrows asking, “Is this what you were talking about?” Instead, the client (or your team) “pins” their website feedback directly on the page in the exact location they want to discuss! No more back and forth, and no more digging through spreadsheets or other tools trying to find something.

Bugherd technical feedback - easiest website feedback tool

Additional Features

Automatically attach screenshots with every bug report.
3rd-Party integrations with services like Zapier, GitHub, Slack, Basecamp and more.
Version control sync that lets you update tasks with commit messages.
Unlimited projects.
Inline tagging.
Upload additional files like specs, logs or mockups and attach them to website feedback and issues.
Real-time comment feed.
Permission management lets you control who has access to what.

Looking For The Easiest Tool To Collect and Manage Website Feedback? Give BugHerd a try!

BugHerd is a must-have tool for web designers and developers, with a variety of affordable pricing plans that make it an invaluable tool to add to your team’s arsenal. You get contextualized website feedback directly on your project’s pages. Your tasks can easily be delegated, prioritized, tracked, and stay organized both on the project itself and on the taskboard, which is easy to sort, search, and filter through to find what you need. Your productivity will be increased dramatically, as you will be spending far less time on miscommunications with clients. And finally, it’s quick, easy, and FREE to set up and try it out for yourself! So give BugHerd a try – we’re confident you will thank us later.


Methods Of Improving And Optimizing Performance In React Apps

Original Source: https://www.smashingmagazine.com/2020/07/methods-performance-react-apps/

Methods Of Improving And Optimizing Performance In React Apps

Methods Of Improving And Optimizing Performance In React Apps

Shedrack Akintayo

2020-07-16T11:00:00+00:00
2020-07-16T20:34:27+00:00

React enables web applications to update their user interfaces (UIs) quickly, but that does not mean your medium or large React application will perform efficiently. Its performance will depend on how you use React when building it, and on your understanding of how React operates and the process through which components live through the various phases of their lifecycle. React offers a lot of performance improvements to a web app, and you can achieve these improvements through various techniques, features, and tools.

In this tutorial, we will discuss various methods of optimizing performance in React applications, and also the features of React that we can use to improve performance.

Where To Start Optimizing Performance In A React Application?

We can’t begin to optimize an app without knowing exactly when and where to optimize. You might be asking, “Where do we start?”

During the initial rendering process, React builds a DOM tree of components. So, when data changes in the DOM tree, we want React to re-render only those components that were affected by the change, skipping the other components in the tree that were not affected.

However, React could end up re-rendering all components in the DOM tree, even though not all are affected. This will result in longer loading time, wasted time, and even wasted CPU resources. We need to prevent this from happening. So, this is where we will focus our optimization effort.

In this situation, we could configure every component to only render or diff when necessary, to avoid wasting resources and time.

Measuring Performance

Never start the optimization process of your React application based on what you feel. Instead, use the measurement tools available to analyze the performance of your React app and get a detailed report of what might be slowing it down.

Analyzing React Components With Chrome’s Performance Tab

According to React’s documentation,, while you’re still in development mode, you can use the “Performance” tab in the Chrome browser to visualize how React components mount, update, and unmount.
For example, the image below shows Chrome’s “Performance” tab profiling and analyzing my blog in development mode.

Performance profiler summary

Performance profiler summary (Large preview)

To do this, follow these steps:

Disable all extensions temporarily, especially React Developer Tools, because they can mess with the result of the analysis. You can easily disable extensions by running your browser in incognito mode.
Make sure the application is running in development mode. That is, the application should be running on your localhost.
Open Chrome’s Developer Tools, click on the “Performance” tab, and then click the “Record” button.
Perform the actions you want to profile. Don’t record more than 20 seconds, or else Chrome might hang.
Stop the recording.
React events will be grouped under the “User Timing” label.

The numbers from the profiler are relative. Most times and components will render more quickly in production. Nevertheless, this should help you to figure out when the UI is updated by mistake, as well as how deep and how often the UI updates occur.

React Developer Tools Profiler

According to React’s documentation, in react-dom 16.5+ and react-native 0.57+, enhanced profiling capabilities are available in developer mode using React Developer Tools Profiler. The profiler uses React’s experimental Profiler API to collate timing information about each component that’s rendered, in order to identify performance bottlenecks in a React application.

Just download React Developer Tools for your browser, and then you can use the profiler tool that ships with it. The profiler can only be used either in development mode or in the production-profiling build of React v16.5+. The image below is the profiler summary of my blog in development mode using React Developer Tools Profiler:

React Developer Tools Profiler flamegraph

React Developer Tools Profiler flamegraph (Large preview)

To achieve this, follow these steps:

Download React Developer Tools.
Make sure your React application is either in development mode or in the production-profiling build of React v16.5+.
Open Chrome’s “Developer Tools” tab. A new tab named “Profiler” will be available, provided by React Developer Tools.
Click the “Record” button, and perform the actions you want to profile. Ideally, stop recording after you have performed the actions you want to profile.
A graph (known as a flamegraph) will appear with all of the event handlers and components of your React app.

Note: See the documentation for more information.

Memoization With React.memo()

React v16 was released with an additional API, a higher-order component called React.memo(). According to the documentation, this exists only as a performance optimization.

Its name, “memo” comes from memoization, which is basically a form of optimization used mainly to speed up code by storing the results of expensive function calls and returning the stored result whenever the same expensive function is called again.

Memoization is a technique for executing a function once, usually a pure function, and then saving the result in memory. If we try to execute that function again, with the same arguments as before, it will just return the previously saved result from the first function’s execution, without executing the function again.

Mapping the description above to the React ecosystem, the functions mentioned are React components and the arguments are props.

The default behavior of a component declared using React.memo() is that it renders only if the props in the component have changed. It does a shallow comparison of the props to check this, but an option is available to override this.

React.memo() boosts the performance of a React app by avoiding re-rendering components whose props haven’t changed or when re-rendering is not needed.

The code below is the basic syntax of React.memo():

const MemoizedComponent = React.memeo((props) => {
// Component code goes in here
})

When To Use React.memo()

Pure functional component
You can use React.memo() if your component is functional, is given the same props, and always renders the same output. You can also use React.memo() on non-pure-functional components with React hooks.
The component renders often
You can use React.memo() to wrap a component that renders often.
The component re-renders with same props
Use React.memo() to wrap a component that is usually provided with the same props during re-rendering.
Medium to high elements
Use it for a component that contains a medium to high number of UI elements to check props for equality.

Note: Be careful when memoizing components that make use of props as callbacks. Be sure to use the same callback function instance between renderings. This is because the parent component could provide different instances of the callback function on every render, which will cause the memoization process to break. To fix this, make sure that the memoized component always receives the same callback instance.

Let’s see how we can use memoization in a real-world situation. The functional component below, called “Photo”, uses React.memo() to prevent re-rendering.

export function Photo({ title, views }) {
return (
<div>
<div>Photo title: {title}</div>
<div>Location: {location}</div>
</div>
);
}
// memoize the component
export const MemoizedPhoto = React.memo(Photo);

The code above consists of a functional component that displays a div containing a photo title and the location of the subject in the photo. We are also memoizing the component by creating a new function and calling it MemoizedPhoto. Memoizing the photo component will prevent the component from re-rendering as long as the props, title, and location are the same on subsequent renderings.

// On first render, React calls MemoizedPhoto function.
<MemoizedPhoto
title=”Effiel Tower”
location=”Paris”
/>

// On next render, React does not call MemoizedPhoto function,
// preventing rendering
<MemoizedPhoto
title=”Effiel Tower”
location=”Paris”
/>

Here, React calls the memoized function only once. It won’t render the component in the next call as long as the props remain the same.

Bundling And Minification

In React single-page applications, we can bundle and minify all our JavaScript code into a single file. This is OK, as long as our application is relatively small.

As our React application grows, bundling and minifying all of our JavaScript code into a single file becomes problematic, difficult to understand, and tedious. It will also affect the performance and loading time of our React app because we are sending a large JavaScript file to the browser. So, we need some process to help us split the code base into various files and deliver them to the browser in intervals as needed.

In a situation like this, we can use some form of asset bundler like Webpack, and then leverage its code-splitting functionality to split our application into multiple files.

Code-splitting is suggested in Webpack’s documentation as a means to improve the loading time of an application. It is also suggested in React’s documentation for lazy-loading (serving only the things currently needed by the user), which can dramatically improve performance.

Webpack suggests three general approaches to code-splitting:

Entry points
Manually split code using entry configuration.
Duplication prevention
Use SplitChunksPlugin to de-duplicate and split chunks.
Dynamic imports
Split code via inline function calls within modules.

Benefits Of Code Splitting

Splitting code assists with the browser’s cache resources and with code that doesn’t change often.
It also helps the browser to download resources in parallel, which reduces the overall loading time of the application.
It enables us to split code into chunks that will be loaded on demand or as needed by the application.
It keeps the initial downloading of resources on first render relatively small, thereby reducing the loading time of the app.

Bundling and minification process

Bundling and minification process (Large preview)

Immutable Data Structures

React’s documentation talks of the power of not mutating data. Any data that cannot be changed is immutable. Immutability is a concept that React programmers should understand.

An immutable value or object cannot be changed. So, when there is an update, a new value is created in memory, leaving the old one untouched.

We can use immutable data structures and React.PureComponent to automatically check for a complex state change. For example, if the state in your application is immutable, you can actually save all state objects in a single store with a state-management library like Redux, enabling you to easily implement undo and redo functionality.

Don’t forget that we cannot change immutable data once it’s created.

Benefits Of Immutable Data Structures

They have no side effects.
Immutable data objects are easy to create, test, and use.
They help us to write logic that can be used to quickly check for updates in state, without having to check the data over and over again.
They help to prevent temporal coupling (a type of coupling in which code depends on the order of execution).

The following libraries help to provide a set of immutable data structures:

immutability-helper
Mutate a copy of data without changing the source.
Immutable.js
Immutable persistent data collections for JavaScript increase efficiency and simplicity.
seamless-immutable
Immutable data structures for JavaScript become backwards-compatible with normal JavaScript arrays and objects.
React-copy-write
This gives immutable state with a mutable API.

Other Methods Of Improving Performance

Use A Production Build Before Deployment

React’s documentation suggests using the minified production build when deploying your app.

React Developer Tools’ “production build” warning

React Developer Tools’ “production build” warning (Large preview)

Avoid Anonymous Functions

Because anonymous functions aren’t assigned an identifier (via const/let/var), they aren’t persistent whenever a component inevitably gets rendered again. This causes JavaScript to allocate new memory each time this component is re-rendered, instead of allocating a single piece of memory only once, like when named functions are being used.

import React from ‘react’;

// Don’t do this.
class Dont extends Component {
render() {
return (
<button onClick={() => console.log(‘Do not do this’)}>
Don’t
</button>
);
}
}

// The better way
class Do extends Component {
handleClick = () => {
console.log(‘This is OK’);
}
render() {
return (
<button onClick={this.handleClick}>
Do
</button>
);
}
}

The code above shows two different ways to make a button perform an action on click. The first code block uses an anonymous function in the onClick() prop, and this would affect performance. The second code block uses a named function in the onClick() function, which is the correct way in this scenario.

Mounting And Unmounting Components Often Is Expensive

Using conditionals or tenaries to make a component disappear (i.e. to unmount it) is not advisable, because the component made to disappear will cause the browser to repaint and reflow. This is an expensive process because the positions and geometries of HTML elements in the document will have to be recalculated. Instead, we can use CSS’ opacity and visibility properties to hide the component. This way, the component will still be in the DOM but invisible, without any performance cost.

Virtualize Long Lists

The documentation suggests that if you are rendering a list with a large amount of data, you should render a small portion of the data in the list at a time within the visible viewport. Then, you can render more data as the list is being scrolled; hence, the data is displayed only when it is in the viewport. This process is called “windowing”. In windowing, a small subset of rows are rendered at any given time. There are popular libraries for doing this, two of which are maintained by Brian Vaughn:

react-window
react-virtualized

Conclusion

There are several other methods of improving the performance of your React application. This article has discussed the most important and effective methods of performance optimization.

I hope you’ve enjoyed reading through this tutorial. You can learn more via the resources listed below. If you have any questions, leave them in the comments section below. I’ll be happy to answer every one of them.

References And Related Resources

“Optimizing Performance”, React Docs
“Use React.memo Wisely”, Dmitri Pavlutin
“Performance Optimization Techniques in React”, Niteesh Yadav
“Immutability in React: There’s Nothing Wrong With Mutating Objects”, Esteban Herrera
“10 Ways to Optimize Your React App’s Performance”, Chidume Nnamdi
“5 Tips to Improve the Performance of Your React Apps”, William Le

Smashing Editorial
(ks, ra, al, il)