Coding the Mouse Particle Effect from Mark Appleby’s Website

Original Source: http://feedproxy.google.com/~r/tympanus/~3/9CocKkBrCVQ/

Editor’s note: We want to share more of the web dev and design community directly here on Codrops, so we’re very happy to start featuring Yuriy’s newest live coding sessions plus the demo!

In this episode of ALL YOUR HTML, I decompile the particles effect from Mark Appleby’s website and show you how you can create a particle system from scratch, using no libraries at all. I also address some performance tips, and ideas about SDF in the 2D world.

This coding session was streamed live on Oct 11, 2020.

Check out the live demo.

Original website: Mark Appleby

Support: https://www.patreon.com/allyourhtml

Setup: https://gist.github.com/akella/a19954…

The post Coding the Mouse Particle Effect from Mark Appleby’s Website appeared first on Codrops.

React Hooks: How to Get Started & Build Your Own

Original Source: https://www.sitepoint.com/react-hooks/?utm_source=rss

Hooks have been taking the React world by storm. In this tutorial, we’ll take a look at what hooks are and how you use them. I’ll introduce you to some common hooks that ship with React, as well as showing you how to write your own. By the time you’ve finished, you’ll be able to use hooks in your own React projects.

What Are React Hooks?

React Hooks are special functions that allow you to “hook into” React features in function components. For example, the useState Hook allows you to add state, whereas useEffect allows you to perform side effects. Previously, side effects were implemented using lifecycle methods. With Hooks, this is no longer necessary.

This means you no longer need to define a class when constructing a React component. It turns out that the class architecture used in React is the cause of a lot of challenges that React developers face every day. We often find ourselves writing large, complex components that are difficult to break up. Related code is spread over several lifecycle methods, which becomes tricky to read, maintain and test. In addition, we have to deal with the this keyword when accessing state, props and methods. We also have to bind methods to this to ensure they’re accessible within the component. Then we have the excessive prop drilling problem — also known as wrapper hell — when dealing with higher-order components.

In a nutshell, Hooks are a revolutionary feature that will simplify your code, making it easy to read, maintain, test in isolation and re-use in your projects. It will only take you an hour to get familiar with them, but this will make you think differently about the way you write React code.

React Hooks were first announced at a React conference that was held in October 2018, and they were officially made available in React 16.8. The feature is still under development; there are still a number of React class features being migrated into Hooks. The good news is that you can start using them now. You can still use React class components if you want to, but I doubt you’ll want to after reading this introductory guide.

If I’ve piqued your curiosity, let’s dive in and see some practical examples.

Prerequisites

This tutorial is intended for people who have a basic understanding of what React is and how it works. If you’re a React beginner, please check out our getting started with React tutorial before proceeding here.

If you wish to follow along with the examples, you should have a React app already set up. The easiest way to do this is with the Create React App tool. To use this, you’ll have Node and npm installed. If you haven’t, head to the Node.js download page and grab the latest version for your system (npm comes bundled with Node). Alternatively, you can consult our tutorial on installing Node using a version manager.

With Node installed, you can create a new React app like so:

npx create-react-app myapp

This will create a myapp folder. Change into this folder and start the development server like so:

cd myapp
npm start

Your default browser will open and you’ll see your new React app. For the purposes of this tutorial, you can work in the App component, which is located at src/App.js.

You can also find the code for this tutorial on GitHub, as well as a demo of the finished code at the end of this tutorial.

The useState Hook

Now let’s look at some code. The useState Hook is probably the most common Hook that ships with React. As the name suggests, it lets you use state in a function component.

Consider the following React class component:

import React from “react”;

export default class ClassDemo extends React.Component {
constructor(props) {
super(props);
this.state = {
name: “Agata”
};
this.handleNameChange = this.handleNameChange.bind(this);
}

handleNameChange(e) {
this.setState({
name: e.target.value
});
}

render() {
return (
<section>
<form autoComplete=”off”>
<section>
<label htmlFor=”name”>Name</label>
<input
type=”text”
name=”name”
id=”name”
value={this.state.name}
onChange={this.handleNameChange}
/>
</section>
</form>
<p>Hello {this.state.name}</p>
</section>
);
}
}

If you’re following along with Create React App, just replace the contents of App.js with the above.

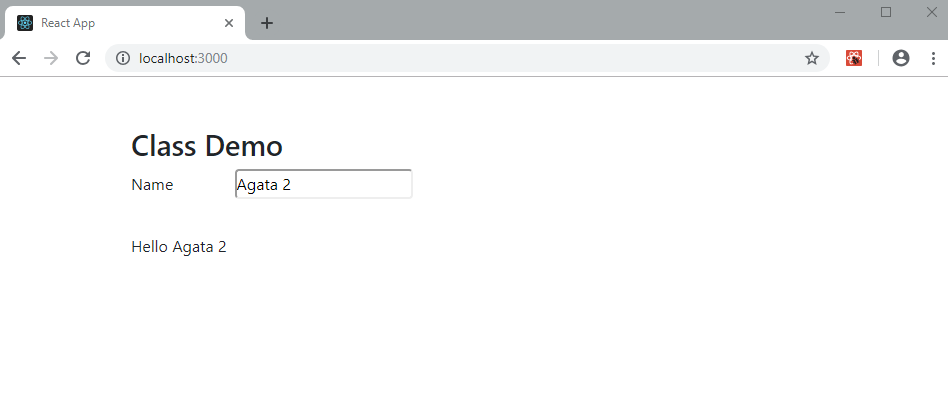
This is how it looks:

React Hooks Class Name

Give yourself a minute to understand the code. In the constructor, we’re declaring a name property on our state object, as well as binding a handleNameChange function to the component instance. We then have a form with an input, whose value is set to this.state.name. The value held in this.state.name is also output to the page in the form of a greeting.

When a user types anything into the input field, the handleNameChange function is called, which updates state and consequently the greeting.

Now, we’re going to write a new version of this code using the useState Hook. Its syntax looks like this:

const [state, setState] = useState(initialState);

When you call the useState function, it returns two items:

state: the name of your state — such as this.state.name or this.state.location.
setState: a function for setting a new value for your state. Similar to this.setState({name: newValue}).

The initialState is the default value you give to your newly declared state during the state declaration phase. Now that you have an idea of what useState is, let’s put it into action:

import React, { useState } from “react”;

export default function HookDemo(props) {
const [name, setName] = useState(“Agata”);

function handleNameChange(e) {
setName(e.target.value);
}

return (
<section>
<form autoComplete=”off”>
<section>
<label htmlFor=”name”>Name</label>
<input
type=”text”
name=”name”
id=”name”
value={name}
onChange={handleNameChange}
/>
</section>
</form>
<p>Hello {name}</p>
</section>
);
}

Take note of the differences between this function version and the class version. It’s already much more compact and easier to understand than the class version, yet they both do exactly the same thing. Let’s go over the differences:

The entire class constructor has been replaced by the useState Hook, which only consists of a single line.
Because the useState Hook outputs local variables, you no longer need to use the this keyword to reference your function or state variables. Honestly, this is a major pain for most JavaScript developers, as it’s not always clear when you should use this.
The JSX code is now cleaner as you can reference local state values without using this.state.

I hope you’re impressed by now! You may be wondering what to do when you need to declare multiple state values. The answer is quite simple: just call another useState Hook. You can declare as many times as you want, provided you’re not overcomplicating your component.

Note: when using React Hooks, make sure to declare them at the top of your component and never inside a conditional.

Multiple useState Hooks

But what if we want to declare more than one property in state? No problem. Just use multiple calls to useState.

Here’s an example of a component with multiple useState Hooks:

import React, { useState } from “react”;

export default function HookDemo(props) {
const [name, setName] = useState(“Agata”);
const [location, setLocation] = useState(“Nairobi”);

function handleNameChange(e) {
setName(e.target.value);
}

function handleLocationChange(e) {
setLocation(e.target.value);
}

return (
<section>
<form autoComplete=”off”>
<section>
<label htmlFor=”name”>Name</label>
<input
type=”text”
name=”name”
id=”name”
value={name}
onChange={handleNameChange}
/>
</section>
<section>
<label htmlFor=”location”>Location</label>
<input
type=”text”
name=”location”
id=”location”
value={location}
onChange={handleLocationChange}
/>
</section>
</form>
<p>
Hello {name} from {location}
</p>
</section>
);
}

Quite simple, isn’t it? Doing the same thing in the class version would require you to use the this keyword even more.

Now, let’s move on to the next basic React Hook.

Continue reading
React Hooks: How to Get Started & Build Your Own
on SitePoint.

The Ultimate 10 UX Influencers to Follow

Original Source: https://www.webdesignerdepot.com/2020/10/the-ultimate-10-ux-influencers-to-follow/

The digital world is a place of constant change. Just as you get used to a new design trend, another one appears, forcing you to rethink the way that you approach each client project. 

As a web designer, it’s up to you to make sure that you have your finger on the pulse on the latest transformations in the industry. However, it can be challenging to know for sure which trends you should be taking seriously, and which you can simply ignore. 

One option to refine and enhance your design journey is to pay attention to influencers. 

Influencers aren’t just there to guide customers into making purchasing decisions. These people are thought-leaders in their field. They spend all of their time tracking down ideas and concepts that really work. That way, they can maintain a successful reputation online.

Sourcing information and motivation from the following UX influencers could help you to create some truly amazing websites in 2020: 

1. Andrew Kucheriavy 

Andrew Kucheriavy is the phenomenal co-founder and CEO of a company named Intechnic. Andrew was one of the first people in the world to be given the “Master in User Experience” award. This means that he’s an excellent person to pay attention to if you want help understanding the ins and outs of user experience design. 

As one of the leading visionaries in UX, business strategy, and inbound marketing, Andrew has a lot of useful information to offer professionals and learners alike. Andrew is particularly active on Twitter, where he’s constantly sharing insights on design and marketing. You can also find input from Andrew on the Intechnic blog. 

2. Jeff Veen 

Another must-follow for designers who want to learn more about understanding their audience and their position in the marketplace, Jeff Veen is a leader in UX and product design. Veen got his start with the founding team for Wired, before he created the Adaptive Path company for UX consulting. Jeff Veen is also known for being responsible for various aspects of Google Analytics. 

Over the years, Jeff has expanded his knowledge in the design space, and mentored various companies, from WordPress to Medium. He also has a fantastic podcast that you can listen to for guidance when you’re on the go. 

3. Jared Spool 

Jared Spool has been tackling the most common issues of user experience since before the term “UX” was even a thing. Excelling in the design world since 1978, Jared has become one of the biggest and most recognizable names in the user experience environment. He’s the founder of the User Interface Engineering consulting firm. The company concentrates on helping companies to improve their site and product usability. 

Jared offers plenty of handy information to stock up on in his Twitter feed. Additionally, you can find plenty of helpful links to blogs and articles that he has published around the web on Twitter too. He’s followed by Hubgets, PICUS, and many other leading brands. Make sure that you check out his collection of industry-leading talks on UIE. 

4. Jen Romano Bergstrom

An experimental psychologist, User Experience Research coach, and UX specialist, Jen is one of the most impressive women in the web design world. She helped to create the unique experiences that customers can access on Instagram and Facebook. Additionally, she has a specialist knowledge of eye-tracking on the web. You can even check out Jen’s books on eye-tracking and usability testing. 

When she’s not writing books or researching user experience, Jen is blogging and tweeting about usability and researching new strategies in the web design space. It’s definitely worth keeping up with Jen on Twitter, particularly if you want to be the first to know about her upcoming seminars and learning sessions. 

5. Katie Dill 

Katie Dill is the former Director of Experience for Airbnb, so you know that she knows her way around some unique experiences. With an expertise in working with companies that harness new technologies and UX design, Katie Dill is at the forefront of the user experience landscape. Dill attends various UX conferences throughout the year, and publishes a range of fantastic videos on YouTube. 

You can find blogs and articles from Katie published on the web; however, you’ll be able to get the most input from her by following Katie on her Twitter account. 

6. Khoi Vinh 

Khoi Vinh is one of the most friendly and unique UX bloggers and influencers on the market today. He knows how to talk to people in a way that’s interesting and engaging – even about more complicated topics in UX design. Vinh is a principle designer at Adobe, and he has his own podcast called Wireframe. However, he still finds time to keep his followers engaged on Twitter. 

Over the years, Khoi has worked as a Design Director for Etsy and the New York Times. Vinh also wrote a book called “Ordering Disorder” which examines grid principles in web design. According to Fast Company, he’s one of the most influential designers in America. Additionally, Khoi has a brilliant blog where you can check out all of his latest insights into UX design. 

7. Cory Lebson

Cory Lebson is a veteran in the world of web design and user experience. With more than 2 decades of experience in the landscape, Cory has his own dedicated UX consulting firm named Lebsontech. Lebson and his company concentrate on offering UX training, mentoring, and user experience strategy support to customers. Cory also regularly speaks on topics regarding UX career development, user experience, information architecture and more. 

Cory is an excellent influencer to follow on Twitter, where you’ll find him sharing various UX tricks and tips. You can also check out Cory’s handbook on UX careers, or find him publishing content on the Lebsontech blog too. 

8. Lizzie Dyson

Another amazing woman in the industry of UX, Lizzie Dyson is changing the experience landscape as we know it. Although she’s a relatively new figure in the web design world, she’s recognized world-wide for her amazing insights into the world of web development. Lizzie also helped to create a new group specifically for women that want to get involved in web design. 

The Ladies that UX monthly meet-up welcomes a community of women into the digital landscape, helping them to learn and expand their skills. Lizzie regularly publishes content online as part of Ladies that UX. Additionally, she appears on the Talk UX feed – an annual design and tech conference held for women around the world. 

9. Chris Messina 

Chris Messina is a product designer and a technical master who understands what it takes to avoid disappointing your users. With more than a decade of experience in the UX design landscape, Messina has worked for a variety of big-name brands, including Google and Uber. He is best known as the inventor of the hashtag!

Chris is a highly skilled individual who understands the unique elements that engage customers and keep people coming back for more on a website. You can see Chris speaking at a selection of leading conferences around the world. Check out some of his talks on YouTube or track down his schedule of upcoming talks here. Chris also has a variety of fantastic articles on Medium to read too. 

10. Elizabeth Churchill

Last, but definitely not least, Elizabeth Churchill is a UX leader with an outstanding background in psychology, research science, psychology, artificial intelligence, cognitive science, human interaction with computers and more. She knows her way around everything from cognitive economics, to everyday web design. Churchill also acts as the director of UX for Google Material Design. 

A powerhouse of innovation and information, Churchill has more than 50 patents to her name. She’s also the vice president of the Association for Computing Machinery too. When she’s not sharing information on Twitter, Elizabeth also has a regular column that you can tune into on the ACM Interactions magazine. 

Who Are You Following in 2020?

Whether you’re looking for inspiration, guidance, or information, the right influencers can deliver some excellent insights into the world of web design. There are plenty of thought leaders out there in the realm of user experience that can transform the way that you approach your client projects. You might even discover a new favourite podcast to listen to, or an amazing series of videos that help you to harness new talents. 

Influencers are more than just tools for digital marketing; they’re an excellent source of guidance for growing UX designers too.


Featured image via Pexels.

Source

p img {display:inline-block; margin-right:10px;}
.alignleft {float:left;}
p.showcase {clear:both;}
body#browserfriendly p, body#podcast p, div#emailbody p{margin:0;}

Build a Node.js CRUD App Using React and FeathersJS

Original Source: https://www.sitepoint.com/crud-app-node-react-feathersjs/?utm_source=rss

An operator sat at an old-fashioned telephone switchboard

Building a modern project requires splitting the logic into front-end and back-end code. The reason behind this move is to promote code re-usability. For example, we may need to build a native mobile application that accesses the back-end API. Or we may be developing a module that will be part of a large modular platform.

An operator, sitting at an old-fashioned telephone switchboard - Build a CRUD App Using React, Redux and FeathersJS

The popular way of building a server-side API is to use Node.js with a library like Express or Restify. These libraries make creating RESTful routes easy. The problem with these libraries is that we’ll find ourselves writing a ton of repetitive code. We’ll also need to write code for authorization and other middleware logic.

To escape this dilemma, we can use a framework like Feathers to help us generate an API in just a few commands.

What makes Feathers amazing is its simplicity. The entire framework is modular and we only need to install the features we need. Feathers itself is a thin wrapper built on top of Express, where they’ve added new features — services and hooks. Feathers also allows us to effortlessly send and receive data over WebSockets.

Prerequisites

To follow along with this tutorial, you’ll need the following things installed on your machine:

Node.js v12+ and an up-to-date version of npm. Check this tutorial if you need help getting set up.
MongoDB v4.2+. Check this tutorial if you need help getting set up.
Yarn package manager — installed using npm i -g yarn.

It will also help if you’re familiar with the following topics:

How to write modern JavaScript
Flow control in modern JavaScript (e.g. async … await)
The basics of React
The basics of REST APIs

Also, please note that you can find the completed project code on GitHub.

Scaffold the App

We’re going to build a CRUD contact manager application using Node.js, React, Feathers and MongoDB.

In this tutorial, I’ll show you how to build the application from the bottom up. We’ll kick-start our project using the popular Create React App tool.

You can install it like so:

npm install -g create-react-app

Then create a new project:

# scaffold a new react project
create-react-app react-contact-manager
cd react-contact-manager

# delete unnecessary files
rm src/logo.svg src/App.css src/serviceWorker.js

Use your favorite code editor and remove all the content in src/index.css. Then open src/App.js and rewrite the code like this:

import React from ‘react’;

const App = () => {
return (
<div>
<h1>Contact Manager</h1>
</div>
);
};

export default App;

And in src/index.js, change the code like so:

import React from ‘react’;
import ReactDOM from ‘react-dom’;
import ‘./index.css’;
import App from ‘./App’;

ReactDOM.render(
<React.StrictMode>
<App />
</React.StrictMode>,
document.getElementById(‘root’)
);

Run yarn start from the react-contact-manager directory to start the project. Your browser should automatically open http://localhost:3000 and you should see the heading “Contact Manager”. Quickly check the console tab to ensure that the project is running cleanly with no warnings or errors, and if everything is running smoothly, use Ctrl + C to stop the server.

Build the API Server with Feathers

Let’s proceed with generating the back-end API for our CRUD project using the feathers-cli tool:

# Install Feathers command-line tool
npm install @feathersjs/cli -g

# Create directory for the back-end code
# Run this command in the `react-contact-manager` directory
mkdir backend
cd backend

# Generate a feathers back-end API server
feathers generate app

? Do you want to use JavaScript or TypeScript? JavaScript
? Project name backend
? Description Contacts API server
? What folder should the source files live in? src
? Which package manager are you using (has to be installed globally)? Yarn
? What type of API are you making? REST, Realtime via Socket.io
? Which testing framework do you prefer? Mocha + assert
? This app uses authentication No
? Which coding style do you want to use? ESLint

# Ensure Mongodb is running
sudo service mongod start
sudo service mongod status

● mongod.service – MongoDB Database Server
Loaded: loaded (/lib/systemd/system/mongod.service; disabled; vendor preset: enabled)
Active: active (running) since Fri 2020-09-18 14:42:12 CEST; 4s ago
Docs: https://docs.mongodb.org/manual
Main PID: 31043 (mongod)
CGroup: /system.slice/mongod.service
└─31043 /usr/bin/mongod –config /etc/mongod.conf

# Generate RESTful routes for Contact Model
feathers generate service

? What kind of service is it? Mongoose
? What is the name of the service? contacts
? Which path should the service be registered on? /contacts
? What is the database connection string? mongodb://localhost:27017/contactsdb

# Install email and unique field validation
yarn add mongoose-type-email

Let’s open backend/config/default.json. This is where we can configure our MongoDB connection parameters and other settings. Change the default paginate value to 50, since front-end pagination won’t be covered in this tutorial:

{
“host”: “localhost”,
“port”: 3030,
“public”: “../public/”,
“paginate”: {
“default”: 50,
“max”: 50
},
“mongodb”: “mongodb://localhost:27017/contactsdb”
}

Open backend/src/models/contact.model.js and update the code as follows:

require(‘mongoose-type-email’);

module.exports = function (app) {
const modelName = ‘contacts’;
const mongooseClient = app.get(‘mongooseClient’);
const { Schema } = mongooseClient;
const schema = new Schema({
name : {
first: {
type: String,
required: [true, ‘First Name is required’]
},
last: {
type: String,
required: false
}
},
email : {
type: mongooseClient.SchemaTypes.Email,
required: [true, ‘Email is required’]
},
phone : {
type: String,
required: [true, ‘Phone is required’],
validate: {
validator: function(v) {
return /^+(?:[0-9] ?){6,14}[0-9]$/.test(v);
},
message: ‘{VALUE} is not a valid international phone number!’
}
}
}, {
timestamps: true
});

// This is necessary to avoid model compilation errors in watch mode
// see https://mongoosejs.com/docs/api/connection.html#connection_Connection-deleteModel
if (mongooseClient.modelNames().includes(modelName)) {
mongooseClient.deleteModel(modelName);
}

return mongooseClient.model(modelName, schema);
};

Mongoose introduces a new feature called timestamps, which inserts two new fields for you — createdAt and updatedAt. These two fields will be populated automatically whenever we create or update a record. We’ve also installed the mongoose-type-email plugin to perform email validation on the server.

Now, open backend/src/mongoose.js and change this line:

{ useCreateIndex: true, useNewUrlParser: true }

to:

{
useCreateIndex: true,
useNewUrlParser: true,
useUnifiedTopology: true,
useFindAndModify: false,
}

This will squash a couple of annoying deprecation warnings.

Open a new terminal and execute yarn test inside the backend directory. You should have all the tests running successfully. Then, go ahead and execute yarn start to start the back-end server. Once the server has initialized, it should print ‘Feathers application started on localhost:3030’ to the console.

Launch your browser and access the URL http://localhost:3030/contacts. You should expect to receive the following JSON response:

{“total”:0,”limit”:50,”skip”:0,”data”:[]}

Test the API with Hoppscotch

Now let’s use Hoppscotch (formerly Postwoman) to confirm all of our endpoints are working properly.

First, let’s create a contact. This link will open Hoppscotch with everything set up to send a POST request to the /contacts endpoint. Make sure Raw input is set to on, then press the green Send button to create a new contact. The response should be something like this:

{
“_id”: “5f64832c20745f4f282b39f9”,
“name”: {
“first”: “Tony”,
“last”: “Stark”
},
“phone”: “+18138683770”,
“email”: “tony@starkenterprises.com”,
“createdAt”: “2020-09-18T09:51:40.021Z”,
“updatedAt”: “2020-09-18T09:51:40.021Z”,
“__v”: 0
}

Now let’s retrieve our newly created contact. This link will open Hoppscotch ready to send a GET request to the /contacts endpoint. When you press the Send button, you should get a response like this:

{
“total”: 1,
“limit”: 50,
“skip”: 0,
“data”: [
{
“_id”: “5f64832c20745f4f282b39f9”,
“name”: {
“first”: “Tony”,
“last”: “Stark”
},
“phone”: “+18138683770”,
“email”: “tony@starkenterprises.com”,
“createdAt”: “2020-09-18T09:51:40.021Z”,
“updatedAt”: “2020-09-18T09:51:40.021Z”,
“__v”: 0
}
]
}

We can show an individual contact in Hoppscotch by sending a GET request to http://localhost:3030/contacts/<_id>. The _id field will always be unique, so you’ll need to copy it out of the response you received in the previous step. This is the link for the above example. Pressing Send will show the contact.

We can update a contact by sending a PUT request to http://localhost:3030/contacts/<_id> and passing it the updated data as JSON. This is the link for the above example. Pressing Send will update the contact.

Finally we can remove our contact by sending a DELETE request to the same address — that is, http://localhost:3030/contacts/<_id>. This is the link for the above example. Pressing Send will delete the contact.

Hoppscotch is a very versatile tool and I encourage you to use it to satisfy yourself that your API is working as expected, before moving on to the next step.

Build the User Interface

Originally, I had wanted to use Semantic UI for the styling, but at the time of writing, it hasn’t been updated in over two years. Fortunately, the open-source community has managed to keep the project alive by creating a popular fork, Fomantic-UI, and this is what we’ll use. There are plans to merge one back into the other when active development of Semantic UI resumes.

We’ll also use Semantic UI React to quickly build our user interface without having to define lots of class names. Fortunately, this project has been kept up to date as well.

Finally, we’ll be using React Router to handle the routing.

With that out of the way, open a new terminal in the react-contact-manager directory and enter the following commands:

# Install Fomantic UI CSS and Semantic UI React
yarn add fomantic-ui-css semantic-ui-react

# Install React Router
yarn add react-router-dom

Update the project structure by adding the following directories and files to the src directory:

src
├── App.js
├── App.test.js
├── components #(new)
│ ├── contact-form.js #(new)
│ └── contact-list.js #(new)
├── index.css
├── index.js
├── pages #(new)
│ ├── contact-form-page.js #(new)
│ └── contact-list-page.js #(new)
├── serviceWorker.js
└── setupTests.js

From the terminal:

cd src
mkdir pages components
touch components/contact-form.js components/contact-list.js
touch pages/contact-form-page.js pages/contact-list-page.js

Let’s quickly populate the JavaScript files with some placeholder code.

The ContactList component will be a functional component (a plain JavaScript function which returns a React element):

// src/components/contact-list.js

import React from ‘react’;

const ContactList = () => {
return (
<div>
<p>No contacts here</p>
</div>
);
}

export default ContactList;

For the top-level containers, I’m using pages. Let’s provide some code for the ContactListPage component:

// src/pages/contact-list-page.js

import React from ‘react’;
import ContactList from ‘../components/contact-list’;

const ContactListPage = () => {
return (
<div>
<h1>List of Contacts</h1>
<ContactList />
</div>
);
};

export default ContactListPage;

The ContactForm component will need to be smart, since it’s required to manage its own state, specifically form fields. We’ll be doing this with React hooks:

// src/components/contact-form.js

import React from ‘react’;

const ContactForm = () => {
return (
<div>
<p>Form under construction</p>
</div>
)
}

export default ContactForm;

Populate the ContactFormPage component with this code:

// src/pages/contact-form-page.js

import React from ‘react’;
import ContactForm from ‘../components/contact-form’;

const ContactFormPage = () => {
return (
<div>
<ContactForm />
</div>
);
};

export default ContactFormPage;

Now let’s create the navigation menu and define the routes for our App. App.js is often referred to as the “layout template” for a single-page application:

// src/App.js

import React from ‘react’;
import { NavLink, Route } from ‘react-router-dom’;
import { Container } from ‘semantic-ui-react’;
import ContactListPage from ‘./pages/contact-list-page’;
import ContactFormPage from ‘./pages/contact-form-page’;

const App = () => {
return (
<Container>
<div className=”ui two item menu”>
<NavLink className=”item” activeClassName=”active” exact to=”/”>
Contacts List
</NavLink>
<NavLink
className=”item”
activeClassName=”active”
exact
to=”/contacts/new”
>
Add Contact
</NavLink>
</div>
<Route exact path=”/” component={ContactListPage} />
<Route path=”/contacts/new” component={ContactFormPage} />
<Route path=”/contacts/edit/:_id” component={ContactFormPage} />
</Container>
);
};

export default App;

The above code uses React Router. If you’d like a refresher on this, please consult our tutorial.

Finally, update the src/index.js file with this code, where we import Formantic-UI for styling and the BrowserRouter component for using the HTML5 history API, which will keep our app in sync with the URL:

// src/index.js

import React from ‘react’;
import ReactDOM from ‘react-dom’;
import { BrowserRouter } from ‘react-router-dom’;
import App from ‘./App’;
import ‘fomantic-ui-css/semantic.min.css’;
import ‘./index.css’;

ReactDOM.render(
<BrowserRouter>
<App />
</BrowserRouter>,
document.getElementById(‘root’)
);

Make sure that the create-react-app server is running (if not, start it using yarn start), then visit http://localhost:3000. You should have a similar view to the screenshot below:

Screenshot of the empty list of contacts

Manage State with React Hooks and the Context API

Previously, one might have reached for Redux when tasked with managing state in a React app. However, as of React v16.8.0, it’s possible to manage global state in a React application using React Hooks and the Context API.

Using this new technique, you’ll write less code that’s easier to maintain. We’ll still use the Redux pattern, but just using React Hooks and the Context API.

Next, let’s look at hooking up the Context API.

Define a Context Store

This will be like our store for handling global state for contacts. Our state will consist of multiple variables, including a contacts array, a loading state, and a message object for storing error messages generated from the back-end API server.

In the src directory, create a context folder that contains a contact-context.js file:

cd src
mkdir context
touch context/contact-context.js

And insert the following code:

import React, { useReducer, createContext } from ‘react’;

export const ContactContext = createContext();

const initialState = {
contacts: [],
contact: {}, // selected or new
message: {}, // { type: ‘success|fail’, title:’Info|Error’ content:’lorem ipsum’}
};

function reducer(state, action) {
switch (action.type) {
case ‘FETCH_CONTACTS’: {
return {
…state,
contacts: action.payload,
};
}
default:
throw new Error();
}
}

export const ContactContextProvider = props => {
const [state, dispatch] = useReducer(reducer, initialState);
const { children } = props;

return (
<ContactContext.Provider value={[state, dispatch]}>
{children}
</ContactContext.Provider>
);
};

As you can see, we’re using the useReducer hook, which is an alternative to useState. useReducer is suitable for handling complex state logic involving multiple sub-values. We’re also using the Context API to allow sharing of data with other React components.

Continue reading
Build a Node.js CRUD App Using React and FeathersJS
on SitePoint.

Getting Started with React: A Beginner’s Guide

Original Source: https://www.sitepoint.com/getting-started-react-beginners-guide/?utm_source=rss

React is a remarkable JavaScript library that’s taken the development community by storm. In a nutshell, it’s made it easier for developers to build interactive user interfaces for web, mobile and desktop platforms. Today, thousands of companies worldwide are using React, including big names such as Netflix and Airbnb.

In this guide, I’ll introduce you to React and several of its fundamental concepts. We’ll get up and running quickly with the Create React App tool, then we’ll walk step-by-step through the process of building out a simple React application. By the time you’re finished, you’ll have a good overview of the basics and will be ready to take the next step on your React journey.

Prerequisites

Before beginning to learn React, it makes sense to have a basic understanding of HTML, CSS and JavaScript. It will also help to have a basic understanding of Node.js, as well as the npm package manager.

To follow along with this tutorial, you’ll need both Node and npm installed on your machine. To do this, head to the Node.js download page and grab the version you need (npm comes bundled with Node). Alternatively, you can consult our tutorial on installing Node using a version manager.

What is React?

React is a JavaScript library for building UI components. Unlike more complete frameworks such as Angular or Vue, React deals only with the view layer, so you’ll need additional libraries to handle things such as routing, state management, and so on. In this guide, we’ll focus on what React can do out of the box.

React applications are built using reusable UI components that can interact with each other. A React component can be class-based component or a so-called function component. Class-based components are defined using ES6 classes, whereas function components are basic JavaScript functions. These tend to be defined using an arrow function, but they can also use the function keyword. Class-based components will implement a render function, which returns some JSX (React’s extension of Regular JavaScript, used to create React elements), whereas function components will return JSX directly. Don’t worry if you’ve never heard of JSX, as we’ll take a closer look at this later on.

React components can further be categorized into stateful and stateless components. A stateless component’s work is simply to display data that it receives from its parent React component. If it receives any events or inputs, it can simply pass these up to its parent to handle.

A stateful component, on the other hand, is responsible for maintaining some kind of application state. This might involve data being fetched from an external source, or keeping track of whether a user is logged in or not. A stateful component can respond to events and inputs to update its state.

As a rule of thumb, you should aim to write stateless components where possible. These are easier to reuse, both across your application and in other projects.

Understanding the Virtual DOM

Before we get to coding, you need to be aware that React uses a virtual DOM to handle page rendering. If you’re familiar with jQuery, you know that it can directly manipulate a web page via the HTML DOM. In a lot of cases, this direct interaction poses few if any problems. However, for certain cases, such as the running of a highly interactive, real-time web application, performance can take quite a hit.

To counter this, the concept of the Virtual DOM (an in-memory representation of the real DOM) was invented, and is currently being applied by many modern UI frameworks including React. Unlike the HTML DOM, the virtual DOM is much easier to manipulate, and is capable of handling numerous operations in milliseconds without affecting page performance. React periodically compares the virtual DOM and the HTML DOM. It then computes a diff, which it applies to the HTML DOM to make it match the virtual DOM. This way, React ensures that your application is rendered at a consistent 60 frames per second, meaning that users experience little or no lag.

Start a Blank React Project

As per the prerequisites, I assume you already have a Node environment set up, with an up-to-date version of npm (or optionally Yarn).

Next, we’re going to build our first React application using Create React App, an official utility script for creating single-page React applications.

Let’s install this now:

npm i -g create-react-app

Then use it to create a new React app.

create-react-app message-app

Depending on the speed of your internet connection, this might take a while to complete if this is your first time running the create-react-app command. A bunch of packages get installed along the way, which are needed to set up a convenient development environment — including a web server, compiler and testing tools.

If you’d rather not install too many packages globally, you can also npx, which allows you to download and run a package without installing it:

npx i -g create-react-app

Running either of these commands should output something similar to the following:


Success! Created react-app at C:Usersmikeprojectsgithubmessage-app
Inside that directory, you can run several commands:

yarn start
Starts the development server.

yarn build
Bundles the app into static files for production.

yarn test
Starts the test runner.

yarn eject
Removes this tool and copies build dependencies, configuration files
and scripts into the app directory. If you do this, you can’t go back!

We suggest that you begin by typing:

cd message-app
yarn start

Happy hacking!

Once the project setup process is complete, execute the following commands to launch your React application:

cd message-app
npm start

You should see the following output:

….

Compiled successfully!

You can now view react-app in the browser.

Local: http://localhost:3000
On Your Network: http://192.168.56.1:3000

Note that the development build is not optimized.
To create a production build, use yarn build.

Your default browser should launch automatically, and you should get a screen like this:

Create React App

Now that we’ve confirmed our starter React project is running without errors, let’s have a look at what’s happened beneath the hood. You can open the folder message-app using your favorite code editor. Let’s start with package.json file:

{
“name”: “message-app”,
“version”: “0.1.0”,
“private”: true,
“dependencies”: {
“@testing-library/jest-dom”: “^4.2.4”,
“@testing-library/react”: “^9.3.2”,
“@testing-library/user-event”: “^7.1.2”,
“react”: “^16.13.1”,
“react-dom”: “^16.13.1”,
“react-scripts”: “3.4.3”
},
“scripts”: {
“start”: “react-scripts start”,
“build”: “react-scripts build”,
“test”: “react-scripts test”,
“eject”: “react-scripts eject”
},
“eslintConfig”: {
“extends”: “react-app”
},
“browserslist”: {
“production”: [
“>0.2%”,
“not dead”,
“not op_mini all”
],
“development”: [
“last 1 chrome version”,
“last 1 firefox version”,
“last 1 safari version”
]
}
}

As you can see, Create React App has installed several dependencies for us. The first three are related to the React Testing Library which (as you might guess) enables us to test our React code. Then we have react and react-dom, the core packages of any React application, and finally react-scripts, which sets up the development environment and starts a server (which you’ve just seen).

Then come four npm scripts, which are used to automate repetitive tasks:

start starts the dev server
build creates a production-ready version of your app
test runs the tests mentioned above
eject will expose your app’s development environment

This final command is worth elaborating on. The Create React App tool provides a clear separation between your actual code and the development environment. If you run npm run eject, Create React App will stop hiding what it does under the hood and dump everything into your project’s package.json file. While that gives you a finer grained control over your app’s dependencies, I wouldn’t recommend you do this, as you’ll have to manage all the complex code used in building and testing your project. If it comes to it, you can use customize-cra to configure your build process without ejecting.

Create React App also comes for support with ESLint (as can be seen from the eslintConfig property) and is configured using react-app ESLint rules.

The browserslist property of the package.json file allows you to specify a list of browsers that your app will support. This configuration is used by PostCSS tools and transpilers such as Babel.

One of the coolest features you’ll love about Create React App is that it provides hot reloading out of the box. This means any changes we make on the code will cause the browser to automatically refresh. Changes to JavaScript code will reload the page, while changes to CSS will update the DOM without reloading.

For now, let’s first stop the development server by pressing Ctrl + C. Once the server has stopped, delete everything except the serviceWorker.js and setupTests.js files in the src folder. If you’re interested in finding out what service workers do, you can learn more about them here.

Other than that, we’ll create all the code from scratch so that you can understand everything inside the src folder.

Introducing JSX Syntax

Defined by the React docs as a “syntax extension to JavaScript”, JSX is what makes writing your React components easy. Using JSX we can pass around HTML structures, or React elements as if they were standard JavaScript values.

Here’s a quick example:

import React from ‘react’;

export default function App() {
const message = <h1>I’m a heading</h1>; //JSX FTW!
return ( message );
}

Notice the line const message = <h1>I’m a heading</h1>;. That’s JSX. If you tried to run that in a web browser, it would give you an error. However, in a React app, JSX is interpreted by a transpiler, such as Babel, and rendered to JavaScript code that React can understand.

Note: you can learn more about JSX in our tutorial “An Introduction to JSX”.

In the past, React JSX files used to come with a .jsx file extension. Nowadays, the Create React App tool generates React files with a .js file extension. While the .jsx file extension is still supported, the maintainers of React recommend using .js. However, there’s an opposing group of React developers, including myself, who prefer to use the .jsx extension, for the following reasons:

In VS Code, Emmet works out of the box for .jsx files. You can, however, configure VS Code to treat all .js files as JavaScriptReact to make Emmet work on those files.
There are different linting rules for standard JavaScript and React JavaScript code.

However, for this tutorial, I’ll abide by what Create React App gives us and stick with the .js file ending.

Hello, World! in React

Let’s get down to writing some code. Inside the src folder of the newly created message-app, create an index.js file and add the following code:

import React from ‘react’;
import ReactDOM from ‘react-dom’;

ReactDOM.render(<h1>Hello World</h1>, document.getElementById(‘root’));

Start the development server again using npm start or yarn start. Your browser should display the following content:

Hello React

This is the most basic “Hello World” React example. The index.js file is the root of your project where React components will be rendered. Let me explain how the code works:

Line 1: The React package is imported to handle JSX processing.
Line 2: The ReactDOM package is imported to render the root React component.
Line 3: Call to the render function, passing in:

<h1>Hello World</h1>: a JSX element
document.getElementById(‘root’): an HTML container (the JSX element will be rendered here).

The HTML container is located in the public/index.html file. On line 31, you should see <div id=”root”></div>. This is known as the root DOM node because everything inside it will be managed by the React virtual DOM.

While JSX does look a lot like HTML, there are some key differences. For example, you can’t use a class attribute, since it’s a JavaScript keyword. Instead, className is used in its place. Also, events such as onclick are spelled onClick in JSX. Let’s now modify our Hello World code:

const element = <div>Hello World</div>;
ReactDOM.render(element, document.getElementById(‘root’));

I’ve moved the JSX code out into a constant variable named element. I’ve also replaced the h1 tags with div tags. For JSX to work, you need to wrap your elements inside a single parent tag.

Take a look at the following example:

const element = <span>Hello,</span> <span>Jane</span>;

The above code won’t work. You’ll get a syntax error indicating you must enclose adjacent JSX elements in an enclosing tag. Something like this:

const element = <div>
<span>Hello, </span>
<span>Jane</span>
</div>;

How about evaluating JavaScript expressions in JSX? Simple. Just use curly braces like this:

const name = “Jane”;
const element = <p>Hello, {name}</p>

… or like this:

const user = {
firstName: ‘Jane’,
lastName: ‘Doe’
}
const element = <p>Hello, {user.firstName} {user.lastName}</p>

Update your code and confirm that the browser is displaying “Hello, Jane Doe”. Try out other examples such as { 5 + 2 }. Now that you’ve got the basics of working with JSX, let’s go ahead and create a React component.

Declaring React Components

The above example was a simplistic way of showing you how ReactDOM.render() works. Generally, we encapsulate all project logic within React components, which are then passed to the ReactDOM.render function.

Inside the src folder, create a file named App.js and type the following code:

import React, { Component } from ‘react’;

class App extends Component {

render(){
return (
<div>
Hello World Again!
</div>
)
}
}

export default App;

Here we’ve created a React Component by defining a JavaScript class that’s a subclass of React.Component. We’ve also defined a render function that returns a JSX element. You can place additional JSX code within the <div> tags. Next, update src/index.js with the following code in order to see the changes reflected in the browser:

import React from ‘react’;
import ReactDOM from ‘react-dom’;

import App from ‘./App’;

ReactDOM.render(<App/>, document.getElementById(‘root’));

First we import the App component. Then we render App using JSX format, like so: <App/>. This is required so that JSX can compile it to an element that can be pushed to the React DOM. After you’ve saved the changes, take a look at your browser to ensure it’s rendering the correct message.

Next, we’ll look at how to apply styling.

Continue reading
Getting Started with React: A Beginner’s Guide
on SitePoint.

Astounding Examples Of Three.js In Action

Original Source: http://feedproxy.google.com/~r/1stwebdesigner/~3/Z7vNm8Ml_Yw/

Three.js is a cross-browser JavaScript library and API used to create and display animated 3D computer graphics in a web browser using WebGL. You can learn more about it here. In today’s post we are sharing some amazing examples of this library in action for your inspiration and learning. Let’s get to it!

Your Web Designer Toolbox
Unlimited Downloads: 500,000+ Web Templates, Icon Sets, Themes & Design Assets


DOWNLOAD NOW

Particles & Waves

A very nicely done animation that responds to the mouse position.

See the Pen three.js canvas – particles – waves by deathfang (@deathfang) on CodePen.dark

Procedurally Generated Minimal Environment

A rotating mountain terrain grid animation.

See the Pen Procedurally generated minimal environment by Marc Tannous (@marctannous) on CodePen.dark

Particle Head

Similar to the particles and waves animation above, this one shows particles in the 3D shape of a head that moves with your mouse.

See the Pen WebGL particle head by Robert Bue (@robbue) on CodePen.dark

The Cube

Try to not spend hours playing this addictive game!

See the Pen The Cube by Boris Šehovac (@bsehovac) on CodePen.dark

Three.js Particle Plane and Universe

Here’s another one to play with using mouse movements, clicks and arrow keys.

See the Pen Simple Particle Plane & Universe 🙂 by Unmesh Shukla (@unmeshpro) on CodePen.dark

Text Animation

A somewhat mind-boggling text animation that can also be controlled by your mouse.

See the Pen THREE Text Animation #1 by Szenia Zadvornykh (@zadvorsky) on CodePen.dark

Distortion Slider

Cool transition animation between slides. Click on the navigation dots to check it out.

See the Pen WebGL Distortion Slider by Ash Thornton (@ashthornton) on CodePen.dark

Torus Tunnel

This one will probably hurt your eyes if you look too long.

See the Pen Torus Tunnel by Mombasa (@Mombasa) on CodePen.dark

Three.js Round

This one is a beautifully captivating animation.

See the Pen three.js round 1 by alex baldwin (@cubeghost) on CodePen.dark

3D Icons

Nice animation of icons flying into becoming various words.

See the Pen Many Icons in 3D using Three.js by Yasunobu Ikeda a.k.a @clockmaker (@clockmaker) on CodePen.dark

WormHole

A great sci-fi effect featuring an infinite worm hole.

See the Pen WormHole by Josep Antoni Bover (@devildrey33) on CodePen.dark

Three.js + TweenMax Experiment

Another captivating animation that is difficult to walk away from.

See the Pen Three.js + TweenMax (Experiment) by Noel Delgado (@noeldelgado) on CodePen.dark

Three.js Point Cloud Experiment

Another particle-type animation that responds to mouse movements.

See the Pen Three Js Point Cloud Experiment by Sean Dempsey (@seanseansean) on CodePen.dark

Gravity

More 3D particles in a hypnotizing endless movement.

See the Pen Gravity (three.js / instancing / glsl) by Martin Schuhfuss (@usefulthink) on CodePen.dark

Rushing rapid in a forest by Three.js

For our last example, check out this somewhat simple geometric scene with an endlessly flowing waterfall.

See the Pen 33 | Rushing rapid in a forest by Three.js by Yiting Liu (@yitliu) on CodePen.dark

Are You Already Using Three.js In Your Projects?

Whether you are already using Three.js in your projects, are in the process of learning how to use it, or have been inspired to start learning it now, these examples should help you with further inspiration or to get a glimpse of how it can be done. Be sure to check out our other collections for more inspiration and insight into web design and development!


Windows 10 PowerToys: 8 Must-have Tools for Power Users

Original Source: https://www.hongkiat.com/blog/windows-10-powertoys-for-powerusers/

PowerToys was first released for Windows 95 as a collection of free tools for power users. It was later released for Windows XP, which offered new and better utilities for customizing the operating…

Visit hongkiat.com for full content.

Getting Started with Gatsby: Build Your First Static Site

Original Source: https://www.sitepoint.com/gatsby-guide/?utm_source=rss

Thinking about getting on the Jamstack bandwagon? If your answer is Yes, then Gatsby, one of the hottest platforms around, could be just what you’re looking for.

JAM stands for JavaScript, APIs, and Markup. In other words, while the dynamic parts of a site or app during the request/response cycle are taken care of by JavaScript in the client, all server-side processes take place using APIs accessed over HTTPS by JavaScript, and templated markup is prebuilt at deploy time, often using a static site generator. That’s the Jamstack. It’s performant, inexpensive to scale and offers better security and a smooth developer experience.

Why Use a Static Site

The static site model doesn’t fit all kinds of projects, but when it does it has a number of advantages. Here are a few of them.

Speed

The time it takes a website to load in the browser as the request is made for the first time is an important factor for user experience. Users get impatient very quickly, and things can only get worse on slow connections. A lack of database calls and the content being pre-generated make static sites really fast-loading.

A static site is made of static files which can be easily served all over the world using content delivery networks (CDNs). This makes it possible to leverage the data center that’s closer to where the request is being made.

Simplified Hosting

Hosting for static sites can be set up in a snap. Because there’s no database or server-side code, special languages or frameworks to support, all the hosting has to do is to serve static files.

Better Security

Without server-side code or a database, there isn’t anything for hackers to hack. There’s no hassle keeping the server up to date with security fixes and patches. All this means a lot more peace of mind when it comes to the security of your website.

Better Developer Experience

Setting up your static website with a hosting company like Netlify or Vercel is straightforward and, with continuous deployment, you just push your changes to your code repo of choice and they’re immediately reflected in the live version.

What Is Gatsby?

Gatsby is one of the most popular tools for building websites today. It’s more than a static site generator. In fact, it is a “React-based, open-source framework for creating websites and apps.” As Gatsby is built on top of React, all the React goodness is at your fingertips, which enables you to take advantage of this powerful library to build interactive components right into your static website. Gatsby is also built with GraphQL, so you can query data and display it on your website any way you want.

Installing Gatsby and Creating Your Project

Gatsby is put together using webpack, but you don’t need to worry about complicated set-up maneuvers; Gatsby CLI will take care of everything for you.

For this tutorial, I’ll assume you have Node.js installed locally. If this isn’t the case, then head over to the Node home page and download the correct binaries for your system. Alternatively, you might consider using a version manager to install Node. We have a tutorial on using a version anager here.

Node comes bundled with npm, the Node package manager, which we’re going to use to install some of the libraries we’ll be using. You can learn more about using npm here.

You can check that both are installed correctly by issuing the following commands from the command line:

node -v
> 12.18.4

npm -v
> 6.14.8

The first thing you need to do is install the Gatsby CLI. This is an npm package that lets you create a Gatsby site in a few seconds. In your terminal, write:

npm install -g gatsby-cli

With the Gasby CLI installed on your machine, you can go ahead and create your website. I’ll call it sitepoint-demo, but you’re free to call it whatever you like. In your terminal, type:

gatsby new sitepoint-demo

Once Gatsby CLI has installed all the necessary files and configured them appropriately, you’ll have a fully functioning Gatsby website ready for you to customize and build upon. To access it, move into the sitepoint-demo folder:

cd sitepoint-demo

and start the local server:

gatsby develop

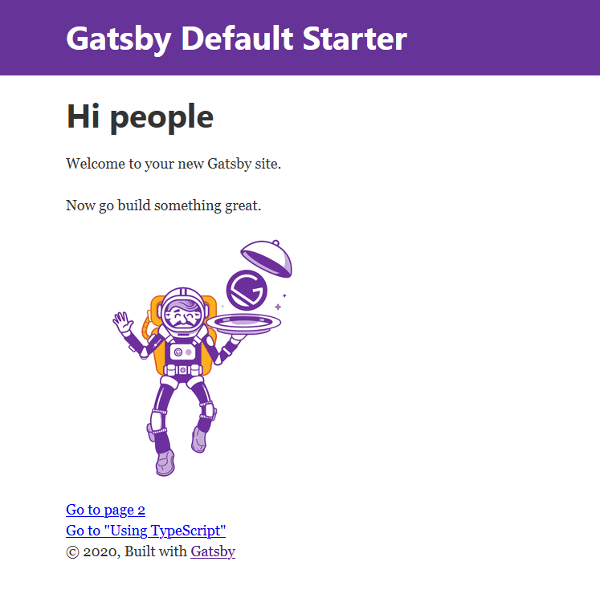
Finally, open a window on http://localhost:8000 where you’ll find your shiny Gatsby site looking something like this:

Gatsby default template

To quickly get a website up and running, Gatsby takes advantage of several official starter boilerplates as well as starters offered by the strong community around it. The site you’ve just created uses Gatsby default starter, but you can find plenty more on the Gatsby website.

If you’d like to use a different starter from the default one, you need to specify its URL in the command line, following this pattern:

gatsby new [SITE_DIRECTORY_NAME] [URL_OF_STARTER_GITHUB_REPO]

For instance, let’s say you’d like a Material Design look and feel for your site. The quickest way to create it is to use Gatsby Material Starter by typing the following command in your terminal:

gatsby new sitepoint-demo https://github.com/Vagr9K/gatsby-material-starter

Great! Now let’s take a look at the files inside your brand new Gatsby project.

A Tour Inside Your Gatsby Site

A good place to start is the /src/ directory. Here’s what you’ll find.

pages Directory

The /src/pages/ directory contains your site’s pages. Each page is a React component. For instance, your site’s home-page code is located in /pages/index.js and looks like this:

import React from “react”
import { Link } from “gatsby”
import Layout from “../components/layout”
import Image from “../components/image”
import SEO from “../components/seo”

const IndexPage = () => (
<Layout>
<SEO title=”Home” />
<h1>Hi people</h1>
<p>Welcome to your new Gatsby site.</p>
<p>Now go build something great.</p>
<div style={{ maxWidth: `300px`, marginBottom: `1.45rem` }}>
<Image />
</div>
<Link to=”/page-2/”>Go to page 2</Link>
<Link to=”/using-typescript/”>Go to “Using TypeScript”</Link>
</Layout>
)

export default IndexPage

That’s the typical code for a React component.

Components let you split the UI into independent, reusable pieces, and think about each piece in isolation. … Conceptually, components are like JavaScript functions. They accept arbitrary inputs (called “props”) and return React elements describing what should appear on the screen. — React docs.

components Directory

The /src/components/ directory is where you find general components for your website. The default starter comes with the following components: Header (header.js), Image (image.js), Layout (layout.js), and SEO (seo.js). You’re free to customize these components and add your own to the same directory.

Now you’re ready to start making changes to your new site and customize it to your taste.

How to Make Changes to Your Gatsby Site

Let’s have a go at modifying the message displayed on the home page. Open pages/index.js in your code editor and replace the two paragraphs below the <h1> tag with this paragraph:

<p>Welcome to my SitePoint Demo Site!</p>

Of course, you can add any text you want ibetween the <p> tags.

As soon as you hit Save, your changes are displayed in the browser thanks to Gatsby’s hot reloading development environment. This means that when you develop a Gatsby site, pages are being watched in the background so that when you save your work, changes will be immediately visible without needing a page refresh or a browser restart.

Gatsby makes it easy to add new pages. For instance, let’s add an About page by creating a new file, about.js, inside the /pages/ directory and enter this content:

import React from “react”

const AboutPage = () => <h1>About Me</h1>

export default AboutPage

The code above is a React functional component which displays some text.

Save your work and navigate to http://localhost:8000/about and you should see the About Me <h1> title on your screen.

You can quickly link to your new About page from the home page using the Gatsby Link component. To see how it works, open index.js in your code editor and locate this bit of code just before the </Layout> closing tag:

<Link to=”/page-2/”>Go to page 2</Link>

Next, replace the value of the to property with /about/ and the Go to page 2 text with About:

<Link to=”/about/”>About</Link>

Save your work and you should see your new link on the screen. Click on the About link and instantly you’re on the About page.

Gatsby uses the Link component for internal links. For external links, you should use the good old <a> tag, like you would on a regular vanilla HTML website.

Now, let’s experiment with your Gatsby site’s look and feel by changing a few styles.

Styling Your Gatsby Site

Gatsby offers a number of options for applying style rules to your website.

Global Stylesheet

A familiar choice is to use a global .css file which contains rules that apply to the entire website. To get started, add a /styles/ directory inside the /src/ directory and add a global.css file to it: /src/styles/global.css . You’re free to choose any name you like both for the directory and the style-sheet file. Inside global.css, add the following CSS declaration, which is going to be applied to the entire website:

body {
background-color: yellow;
}

Now, save your work. Oops, nothing happened! Not yet, anyway. To make it work you need to take an extra step. Open gatsby-browser.js in your code editor and import the stylesheet you’ve just created:

import “./src/styles/global.css”

Head back to your browser and you should see that the background color of your website has turned into a bright yellow. Not ideal as a color choice, but it works!

Continue reading
Getting Started with Gatsby: Build Your First Static Site
on SitePoint.

Recreating the “100 Days of Poetry” Effect with Shader, ScrollTrigger and CSS Grid

Original Source: http://feedproxy.google.com/~r/tympanus/~3/Y5DrGJdHHmo/

Editor’s note: We want to share more of the web dev and design community directly here on Codrops, so we’re very happy to start featuring Yuriy’s newest live coding sessions that he records twice a month plus the demo he creates during the session!

For this episode of ALL YOUR HTML, I decided to replicate the effect seen on 100 DAYS OF POETRY with the technologies I know. So I did a fragment shader for the background effect, then coded a dummy CSS grid, and connected both of them with the power of GSAP’s ScrollTrigger plugin. This is of course a really simplified version of the website, but I hope you will learn something from the process of recreating this.

This coding session was streamed live on Oct 4, 2020.

Check out the live demo.

Original website: https://100daysofpoetry.gallery/

By Keita Yamada https://twitter.com/p5_keita

Support: https://www.patreon.com/allyourhtml

Setup: https://gist.github.com/akella/a19954…

The post Recreating the “100 Days of Poetry” Effect with Shader, ScrollTrigger and CSS Grid appeared first on Codrops.

Collective #625

Original Source: http://feedproxy.google.com/~r/tympanus/~3/_Wvt5il7qJc/

Collective 625 Item image

Inspirational Website of the Week: Celebrating 10 Years with Blind Barber

A design celebration with compelling layouts and individual effects. Our pick this week.

Get inspired

Collective 625 Item image

Our Sponsor
Bring Your Vision To Life With a Design-Oriented Website Builder

Turn your vision into a stunning reality with Elementor – a super-efficient, design-oriented WordPress website builder.

Try for Free

Collective 625 Item image

The failed promise of Web Components

Lea Verou explains why the potential of Web Components got lost in practice and shows a way this could be fixed.

Read it

Collective 625 Item image

Emulate vision deficiencies in DevTools

Addy Osmani shows how you can emulate vision deficiencies in Chrome DevTools to see how users who experience color blindness or blurred vision might see your site.

Read it

Collective 625 Item image

a11yresources

The Accessibility Resources is a growing list of more than 200+ hand-curated accessibility plugins, tools, articles, case studies, design patterns, assistive technologies, design resources and accessibility standards.

Check it out

Collective 625 Item image

Declarative Shadow DOM

DLearn about Dclarative Shadow DOM, which is a new way to implement and use Shadow DOM directly in HTML.

Read it

Collective 625 Item image

Keyboard Simulator

Design and test virtual keyboards with this wonderful Three.js based tool.

Check it out

Collective 625 Item image

Accessible Animation

Una Kravets demonstrates how to use the “prefers-reduced-motion” media query to progressively enhance animation on your website and shows how to build a simple “reduce animation” switch.

Watch it

Collective 625 Item image

urlcat

A URL builder library for JavaScript that makes building URLs very convenient and prevents common mistakes.

Check it out

Collective 625 Item image

IconPark

Transform an SVG icon into multiple themes, and generate React icons or Vue icons easily.

Check it out

Collective 625 Item image

Galaxy Simulation

A colliding galaxy simulation using direct and Barnes-Hut algorithms and built with Rust, ThreeJS, and WebAssembly. Check out the GitHub repo.

Check it out

Collective 625 Item image

HitCount

HitCount lets you add a hit counter as simply as adding an image to your website.

Check it out

Collective 625 Item image

3 things about CSS variables you might not know

Some interesting things about CSS variables that will come in handy.

Check it out

Collective 625 Item image

Introducing visx from Airbnb

Read about the collection of expressive, low-level visualization primitives for React from Airbnb.

Read it

Collective 625 Item image

Dreaming of Jupiter

A beautiful Three.js demo by isladjan.

Check it out

Collective 625 Item image

Ballpoint

Ballpoint is an experimental new vector graphics editor. It’s available as a free to use web application.

Check it out

Collective 625 Item image

Modfy

A purely browser-based privacy-first video tool capable of performing tasks like converting, compression, etc without uploading your files.

Check it out

Collective 625 Item image

Checkboxes make excellent buttons

Christian Heilmann explains why he likes to use checkboxes as buttons.

Read it

Collective 625 Item image

Detached window memory leaks

Learn how to find and fix tricky memory leaks caused by detached windows.

Check it out

Collective 625 Item image

From Our Blog
Creating Mirrors in React-Three-Fiber and Three.js

A brief walk-through of how to create a mirror scene based on the react-three-fiber ecosystem.

Check it out

The post Collective #625 appeared first on Codrops.