Understand Web Development in Less than 1 Hour
Original Source: https://www.sitepoint.com/understand-web-development-less-1-hour/
This article was created in partnership with KTree. Thank you for supporting the partners who make SitePoint possible.
This article explains what web development is, by exploring how it started and how it evolved. This is not an exact chronicle of the web’s evolution, but focuses more on what the needs for this evolution were, so we can understand the technology.
It all started with information. Humans have always needed to find ways to share information with others. As you are aware, before the internet, information was shared via letters, newspapers, radio and television. Each had its own disadvantages, which allowed the internet’s information highway to come to the forefront.
1. What is the Web?
What if you can publish information in a place where whoever is interested can go and read that information? That’s exactly what the web does. You keep the information on a web server, and people can read that information using clients (browsers). This architecture is called ‘server-client architecture’.
Why HTTP?
Initially, this information was all stored as text — that’s why the name hyper-text transfer protocol has stuck even though now text, media and files are all exchanged via this protocol.
2. How Is Information Kept, Retrieved and Saved?
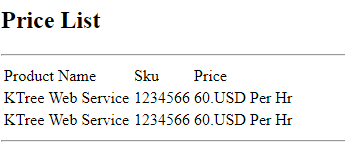
The most basic and long-lived way of storing information on the web is in HTML files. To better understand, let's take a simple example of company publishing its price information so its vendors can download and view the list, which consists of products with a price and effective date. This was kept as a HTML file on the server, which can be viewed using a web browser. The browser requests the file from the sever, and the server serves it up and closes the connection.
HTML is a standard markup language used to create web pages. In other words, it’s a simple text file with tags that help the browser figure out how to display the information.
<!DOCTYPE html>
<html>
<body>
<h2>Price List</h2>
<hr>
<table>
<tr>
<td>Product Name</td>
<td>Sku</td>
<td>Price</td>
</tr>
<tr>
<td>KTree Web Service</td>
<td>1234566</td>
<td>60.USD Per Hr</td>
</tr>
<tr>
<td>KTree Web Service</td>
<td>1234566</td>
<td>60.USD Per Hr</td>
</tr>
</table>
<hr>
</body>
</html>
CSS
Cascading Style Sheets (CSS) is a style sheet language used for describing the presentation of a document written in a markup language. Basic formatting and styling can be done via HTML, but it’s better to use CSS for this.
A web application contains many pages, either dynamic or static. If we use HTML tags for styling the information we have to repeat this information in every page. Suppose we want to change the background color — we have to edit the HTML for every page that is part of the site.
Instead, we can use CSS to store our style definitions in one location, and refer each HTML page to that location. By changing the CSS file, we can change the background color on every page that looks to the stylesheet for style defintions.
CSS does more than just setting the background color, of course: it allows us to set colors for all sorts of elements, fonts, page layouts, and much more.
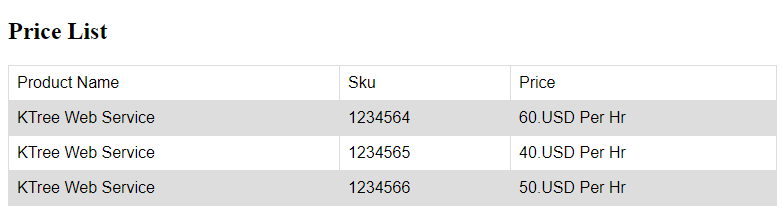
We have styled our previous example using CSS. Let’s say we are using tables on different pages, but using the same CSS styles. We can move all this style information out to its own file.
<!DOCTYPE html>
<html>
<head>
<!–– for simplicity we have kept the CSS in inline in the HTML – you can keep the css in any file with a .css extension and include it using <link rel=”stylesheet” href=”styles.css”> –>
<style>
table {
font-family: arial, sans-serif;
border-collapse: collapse;
width: 100%;
}
td, th {
border: 1px solid #dddddd;
text-align: left;
padding: 8px;
}
tr:nth-child(even) {
background-color: #dddddd;
}
</style>
</head>
<body>
<h2>Price List</h2>
<table>
<tr>
<td>Product Name</td>
<td>Sku</td>
<td>Price</td>
</tr>
<tr>
<td>KTree Web Service</td>
<td>1234564</td>
<td>60.USD Per Hr</td>
</tr>
<tr>
<td>KTree Web Service</td>
<td>1234565</td>
<td>40.USD Per Hr</td>
</tr>
<tr>
<td>KTree Web Service</td>
<td>1234566</td>
<td>50.USD Per Hr</td>
</tr>
</table>
</body>
</html>
JavaScript
JavaScript is the third pillar of the web, alongside HTML and CSS, and it is normally used to make web pages interactive. To understand JavaScript (JS), we need to know what the DOM is.
The Document Object Model (DOM) is a language-independent application programming interface that turns the HTML document into a tree structure. The nodes of every document are organized in that tree structure, called the DOM tree, with the topmost node called the “Document Object.”
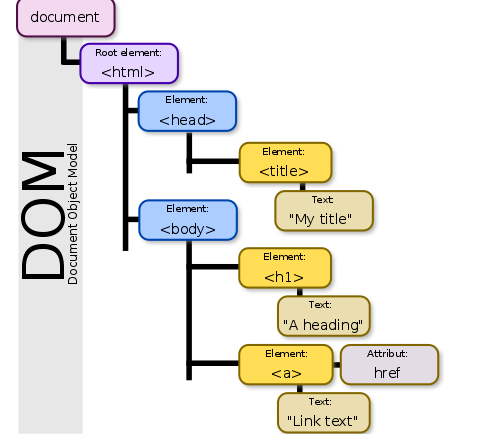
Sample DOM Tree (Source: Wikimedia Commons)
When an HTML page is rendered in the browser, the browser downloads the HTML into local memory and creates a DOM tree to display the page on screen.
Using JS, we can manipulate the DOM tree in several ways:
JS can modify the DOM tree by adding, changing, and removing all of the HTML elements and attributes in the page.
JS can change all of the CSS styles on the page.
JS can react to all of the existing events on the page.
JS can create new events within the page and then react to all of those events.
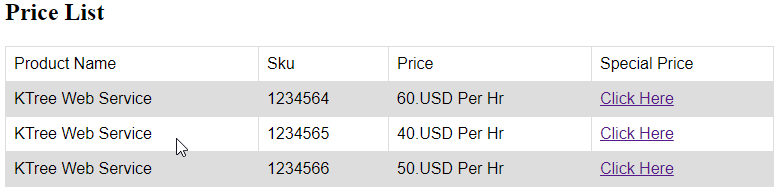
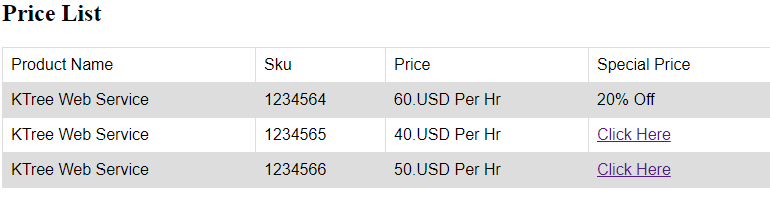
In our JavaScript example, we continue with our price list example by adding another column — Special Price — which is hidden by default. We’ll show it once the user clicks on it. In technical terms, we use a click event attached to the web element (anchor tag) and change the existing text of the web element, in other words manipulating the DOM. To do this, we have to use the browser’s accepted scripting language, which is always JavaScript.
<!DOCTYPE html>
<html>
<head>
<!–– for simplicity we have kept the CSS in inline in the HTML – you can keep the css in any file with a .css extension and include it using <link rel=”stylesheet” href=”styles.css”> –>
<style>
table {
font-family: arial, sans-serif;
border-collapse: collapse;
width: 100%;
}
td, th {
border: 1px solid #dddddd;
text-align: left;
padding: 8px;
}
tr:nth-child(even) {
background-color: #dddddd;
}
#specialprice {
}
</style>
</head>
<body>
<h2>Price List</h2>
<table>
<tr>
<td>Product Name</td>
<td>Sku</td>
<td>Price</td>
<td>Special Price</td>
</tr>
<tr>
<td>KTree Web Service</td>
<td>1234564</td>
<td>60.USD Per Hr</td>
<td id=”specialprice”> <a href=”” onclick=”return false;”> Click Here </a> </td>
</tr>
<tr>
<td>KTree Web Service</td>
<td>1234565</td>
<td>40.USD Per Hr</td>
<td id=”specialprice2″> <a href=”” onclick=”return false;”> Click Here </a> </td>
</tr>
<tr>
<td>KTree Web Service</td>
<td>1234566</td>
<td>50.USD Per Hr</td>
<td id=”specialprice3″> <a href=”” onclick=”return false;”> Click Here </a> </td>
</tr>
</table>
<script>
document.getElementById(“specialprice”).onclick = function() {myFunction()};
function myFunction() {
document.getElementById(“specialprice”).innerHTML = “20% Off”;
}
</script>
</body>
</html>
Forms
Up til now, we’ve only discussed getting data from the server. Forms are the other side of HTML, which allows us to send information to the server. We can use forms to either update existing information or add new information. The most commonly used methods in HTML forms are GET and POST.
Continue reading %Understand Web Development in Less than 1 Hour%


Leave a Reply
Want to join the discussion?Feel free to contribute!