Top 12 Productivity Tips for WebStorm and Angular – Part 1
Original Source: https://www.sitepoint.com/productivity-tips-for-webstorm-and-angular-part-1/
This article was sponsored by JetBrains. Thank you for supporting the partners who make SitePoint possible.
In this 2-part series, Google Developer Experts Jurgen Van de Moere and Todd Motto share their favorite productivity tips for developing Angular applications using WebStorm.
In this first part, Jurgen shares his personal top 5 WebStorm features that allow him to increase his productivity on a daily basis:
Use Angular CLI from within WebStorm
Navigate like a pro
Take advantage of Angular Language Service
Auto format your code
Optimize your imports
Each tip can tremendously increase your development productivity, so let’s dig into them a little deeper one by one.
Tip 1: Use Angular CLI from Within WebStorm
Angular CLI is a Command Line Interface (CLI), written and maintained by the Angular team, to help automate your development workflow. You can use it to quickly create new Angular projects and add new features such as components, services and directives to existing Angular projects.
WebStorm’s integration with Angular CLI provides you with all its power right from within WebStorm, without using the terminal.
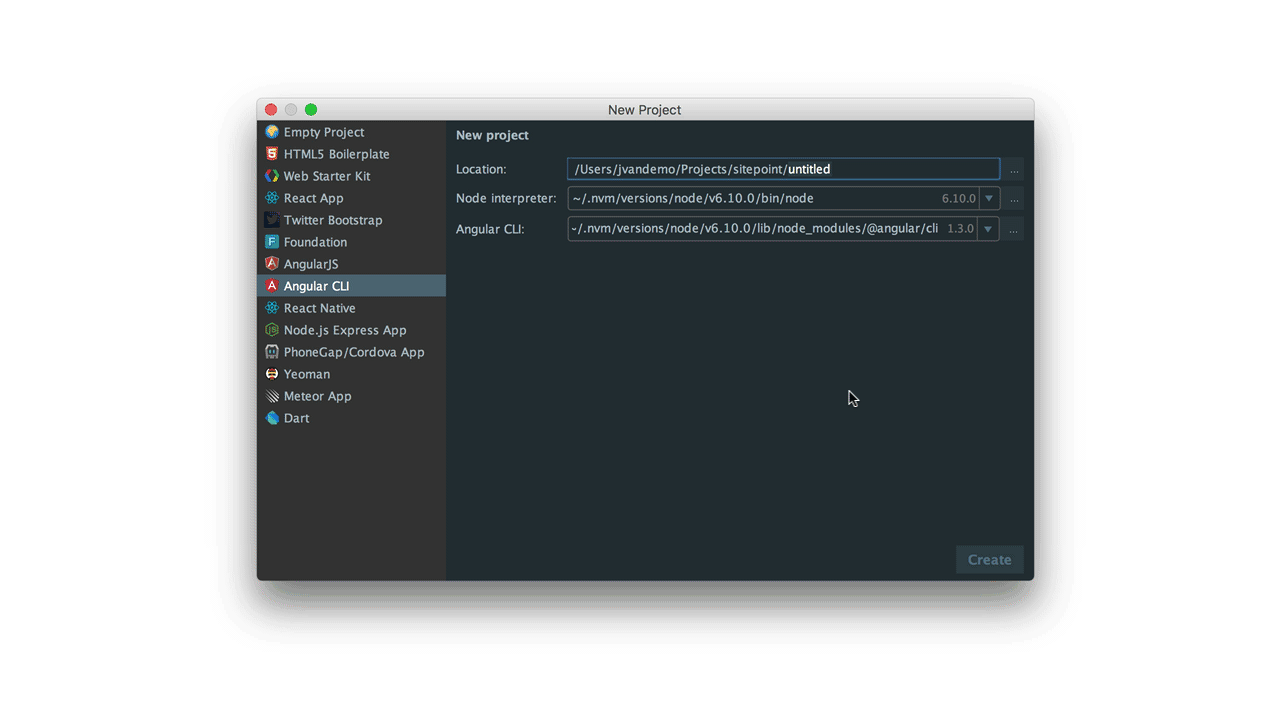
To create a new Angular Project, choose File | New | Project and select Angular CLI.
Enter a project location and hit the Create button. WebStorm uses Angular CLI to create a new Angular project and install dependencies.
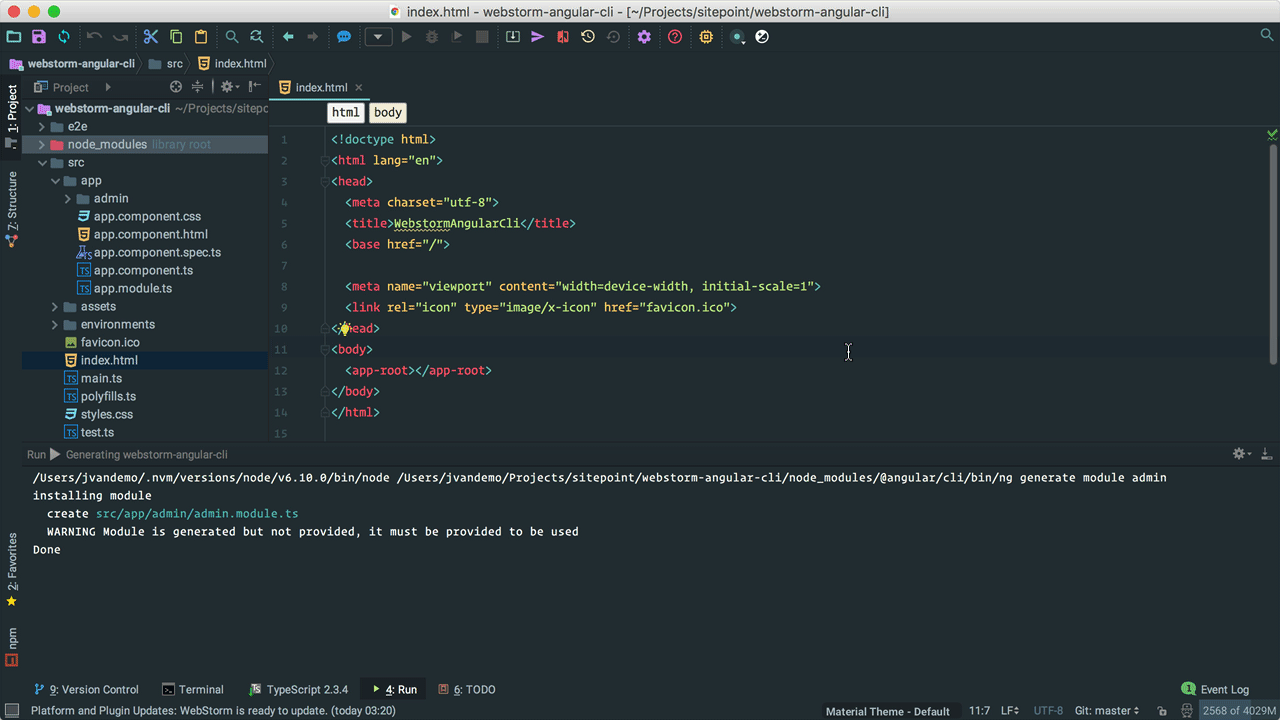
When your new Angular application is in place, you can easily add new Angular features. Right click on src/app and choose New | Angular CLI to pick the type of feature you wish to add.
Once you’ve selected a feature, you can specify the name and optional parameters, just as you would with Angular CLI on the command line:
To learn more about Angular CLI options and parameters, make sure to check out The Ultimate Angular CLI Reference.
What’s really awesome is that WebStorm automatically adds the component to the right Angular module for you, in this case AppModule.
If your application has multiple Angular modules, right click on the module you wish to add the feature to and choose New | Angular CLI. WebStorm will make sure the new files are created in the right location and that the new feature is added to the correct Angular module.
How sweet is that!
Tip 2: Navigate Like a Pro
Use cmd-click or cmd-B to easily jump to any definition within your project.
If you are a keyboard user, just put your cursor on a term and hit cmd-B. If you are a mouse user, hold down the cmd button and all terms you hover will turn into links to their definition.
WebStorm automatically recognizes Angular components and directives in your HTML, links to stylesheets, links to templates, classes, interfaces and much more.
No need to open file(s) manually, just jump to any definition you need:
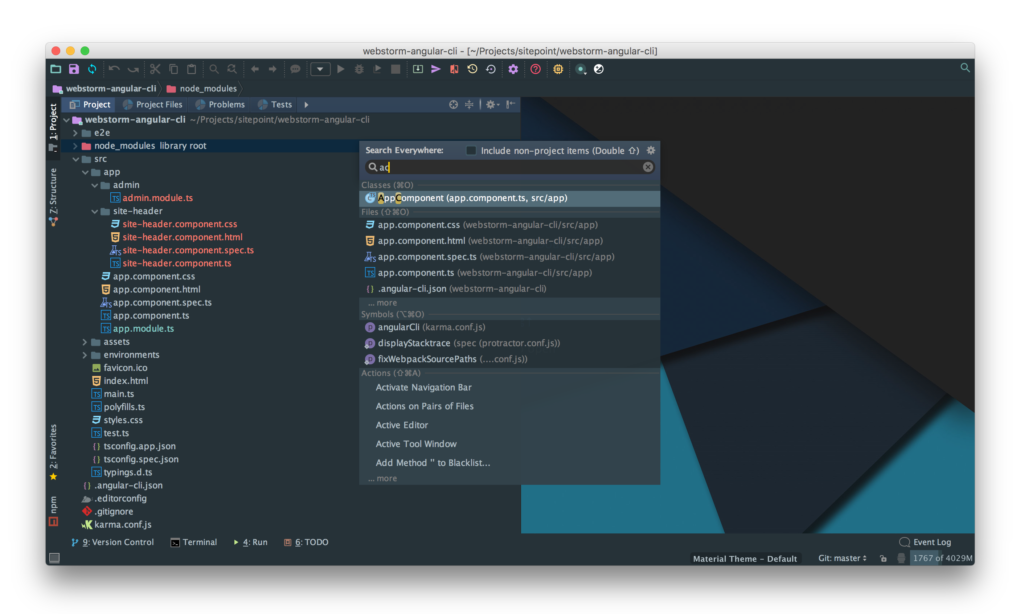
When looking for a file that you don’t have an immediate reference to, hit shift twice to open the Search everywhere dialog. You don’t have to type the entire search string. If you want to open AppComponent, just type the first letter of each part — i.e. ac — and WebStorm will immediately narrow down the result list for you, so you can quickly pick the suggestion you wish to open:
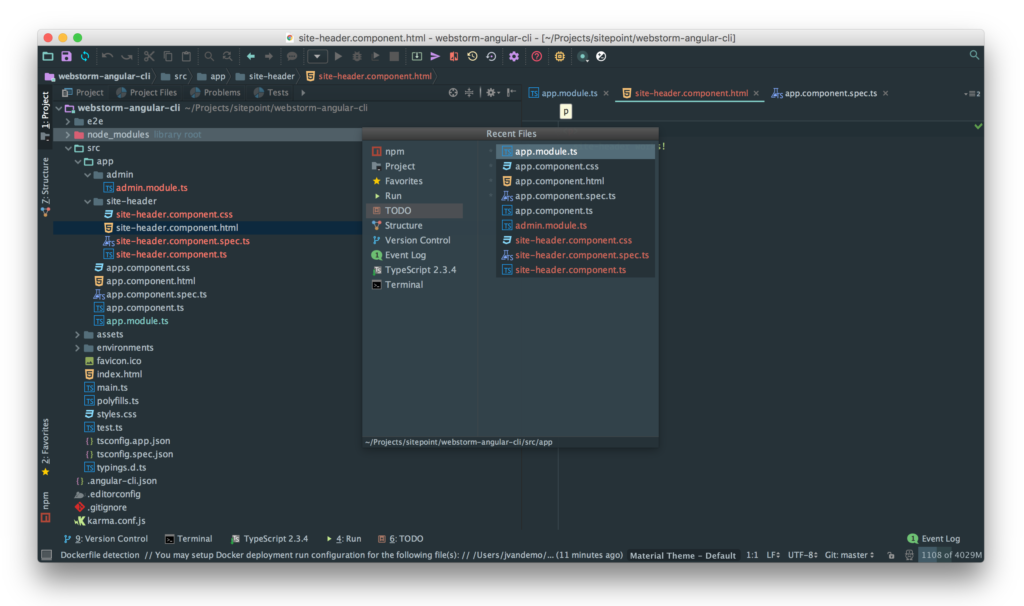
Another super useful navigation shortcut is cmd-E, which presents you with a list of recently edited files so you can easily navigate back and forth between them.
Knowing how to quickly navigate to the code you need will save you a tremendous amount of time every single day.
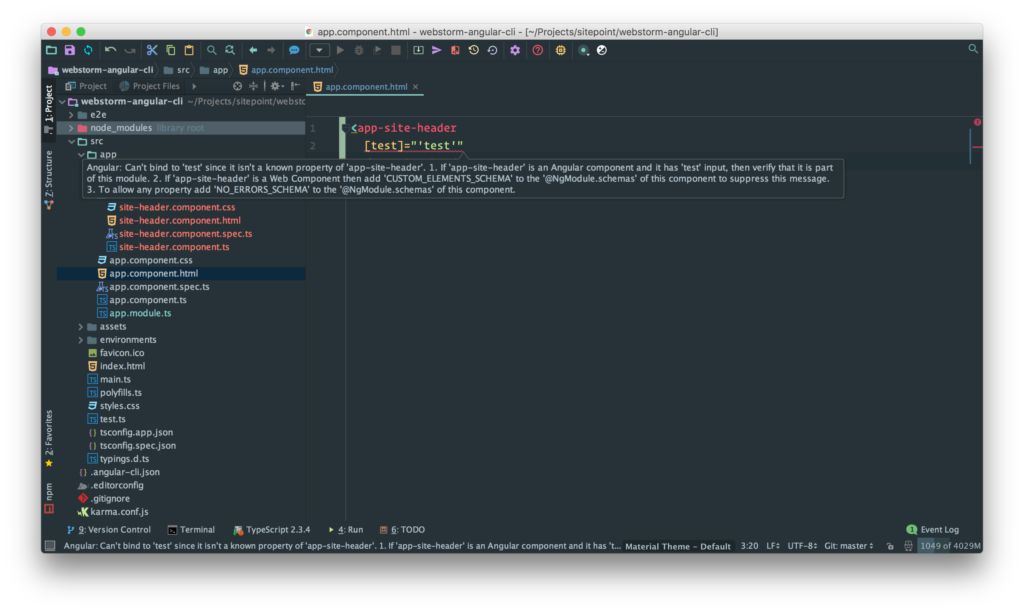
Tip 3: Take Advantage of Angular Language Service
Angular Language Service is a service, designed by the Angular Team, to provide IDEs with error checking and type completion within Angular templates.
WebStorm integrates with Angular Language Service to better understand your code. To enable Angular Language Service, first make sure it is installed:
npm install @angular/language-service –save-dev
If you use Angular CLI to generate an Angular application, Angular Language Service is automatically installed.
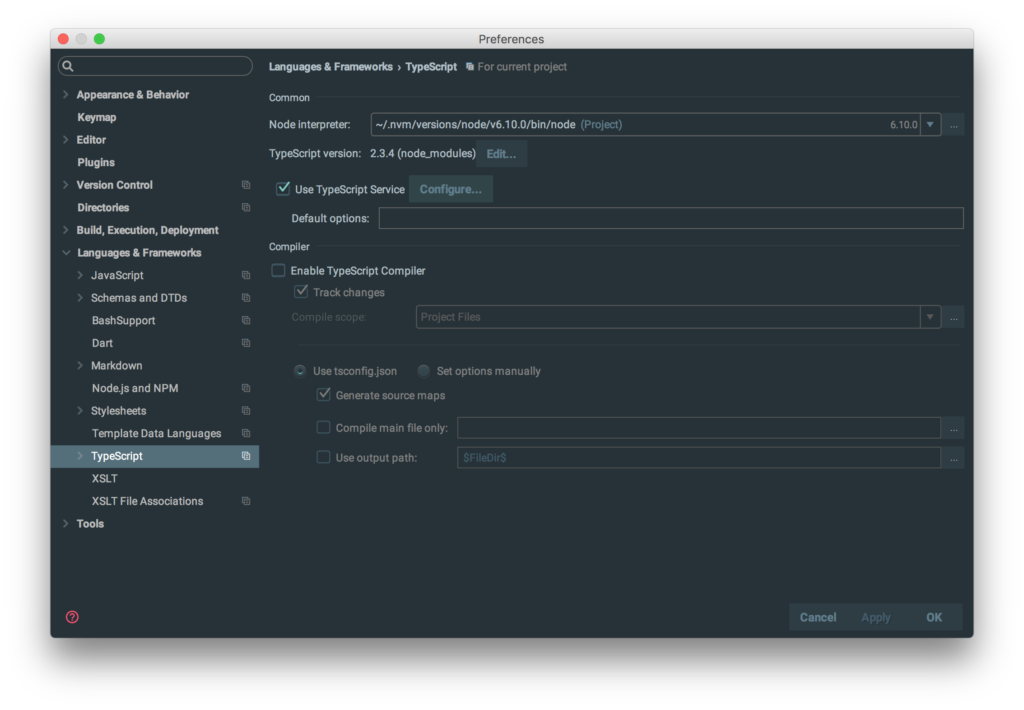
Next, go to Preferences | Languages & Frameworks | TypeScript, make sure Use TypeScript Service is checked and click Configure…:
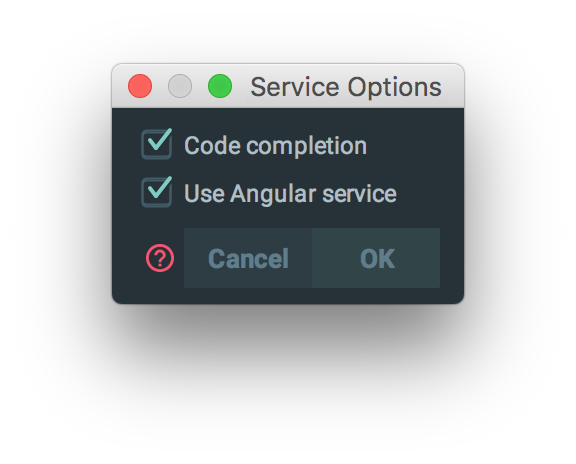
The Service Options modal will pop up. Enable Use Angular service and apply the changes:
By default, WebStorm already provides great assistance for writing Angular code.
When editing a script, WebStorm automatically imports the required JavaScript modules so you don’t have to import them manually.
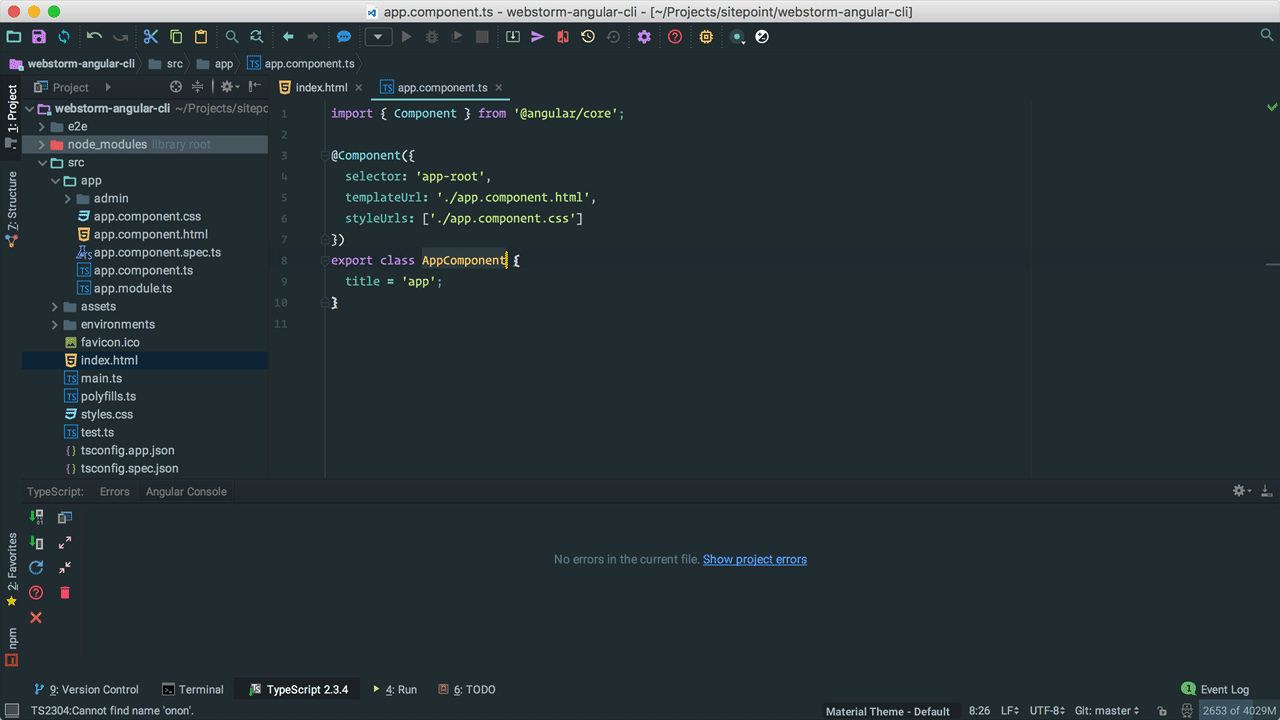
If you open up the TypeScript panel, WebStorm provides you with immediate feedback on the validity of your code, so you can quickly resolve issues before having to compile your project.
Watch how the OnInit interface is automatically imported and how the live TypeScript feedback immediately tells you whether or not your TypeScript code is valid:
When you edit a template, WebStorm provides you with smart code completion that recognizes components, directives and even input and output properties:

With Angular Language Service enabled, WebStorm is able to improve code completion in template expressions:
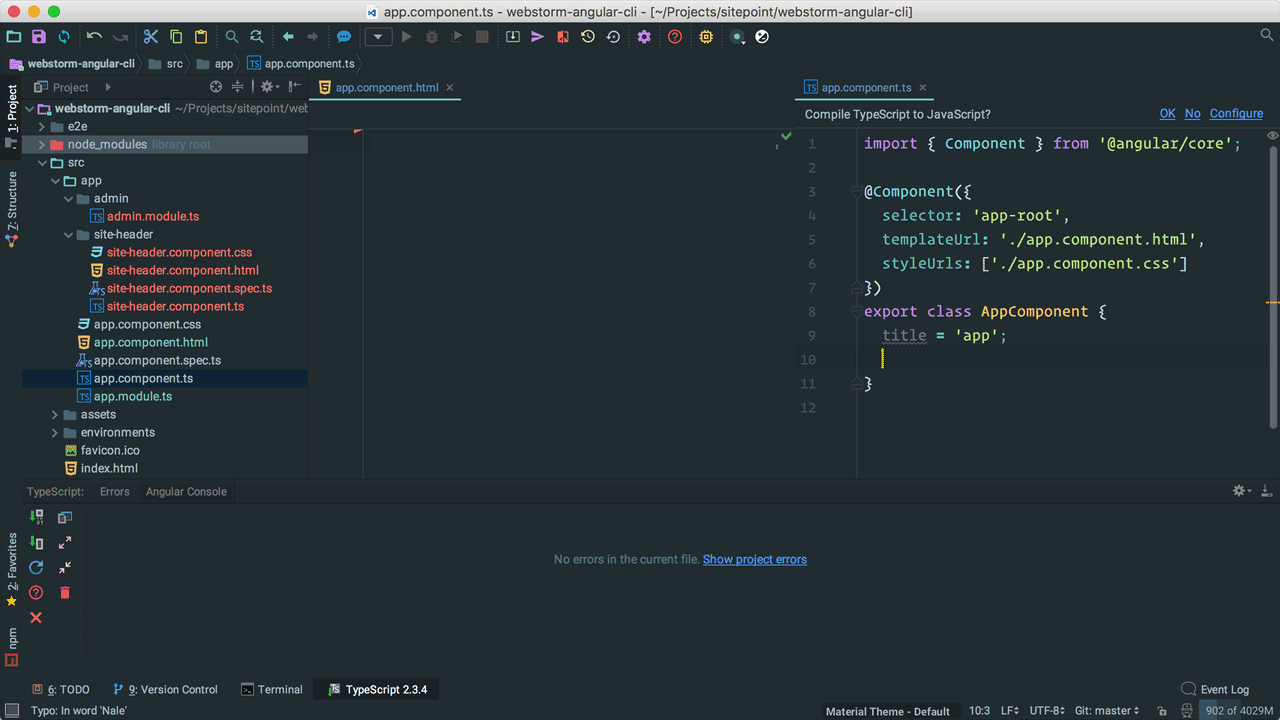
… and report template errors more precisely right inside your editor:
Catching errors without having to compile your project saves you incredible amounts of time.
Tip 4: Auto-format Your Code
Don’t worry about formatting your code manually. WebStorm has you covered.
Whether your are in a template, a script, a stylesheet or even a JSON file, just hit cmd-option-L and WebStorm will automatically format all code for you:
Continue reading %Top 12 Productivity Tips for WebStorm and Angular – Part 1%


Leave a Reply
Want to join the discussion?Feel free to contribute!