Project Management Templates: The Key to Improving Your Workflow
Original Source: https://www.webdesignerdepot.com/2018/10/project-management-templates-the-key-to-improving-your-workflow/
 Last year, Rachel McPherson shared 9 ways to organize successful creative projects. It’s a very useful article that highlights the main things to do if you want to bring greater control and organization to your web design workflow.
Tip #2: Take Advantage of a Project Management Tool, is the one I want to focus on today. Specifically, I want to look at some of the best tools for web designers, how to choose the right one for you, as well as give you a quick lesson on how to use project management templates to improve your workflow.
How to Choose the Best Project Management Tool for You
When considering a project management platform for your web design business, here are some things to pay attention to:
Generic vs. Web Design Tools
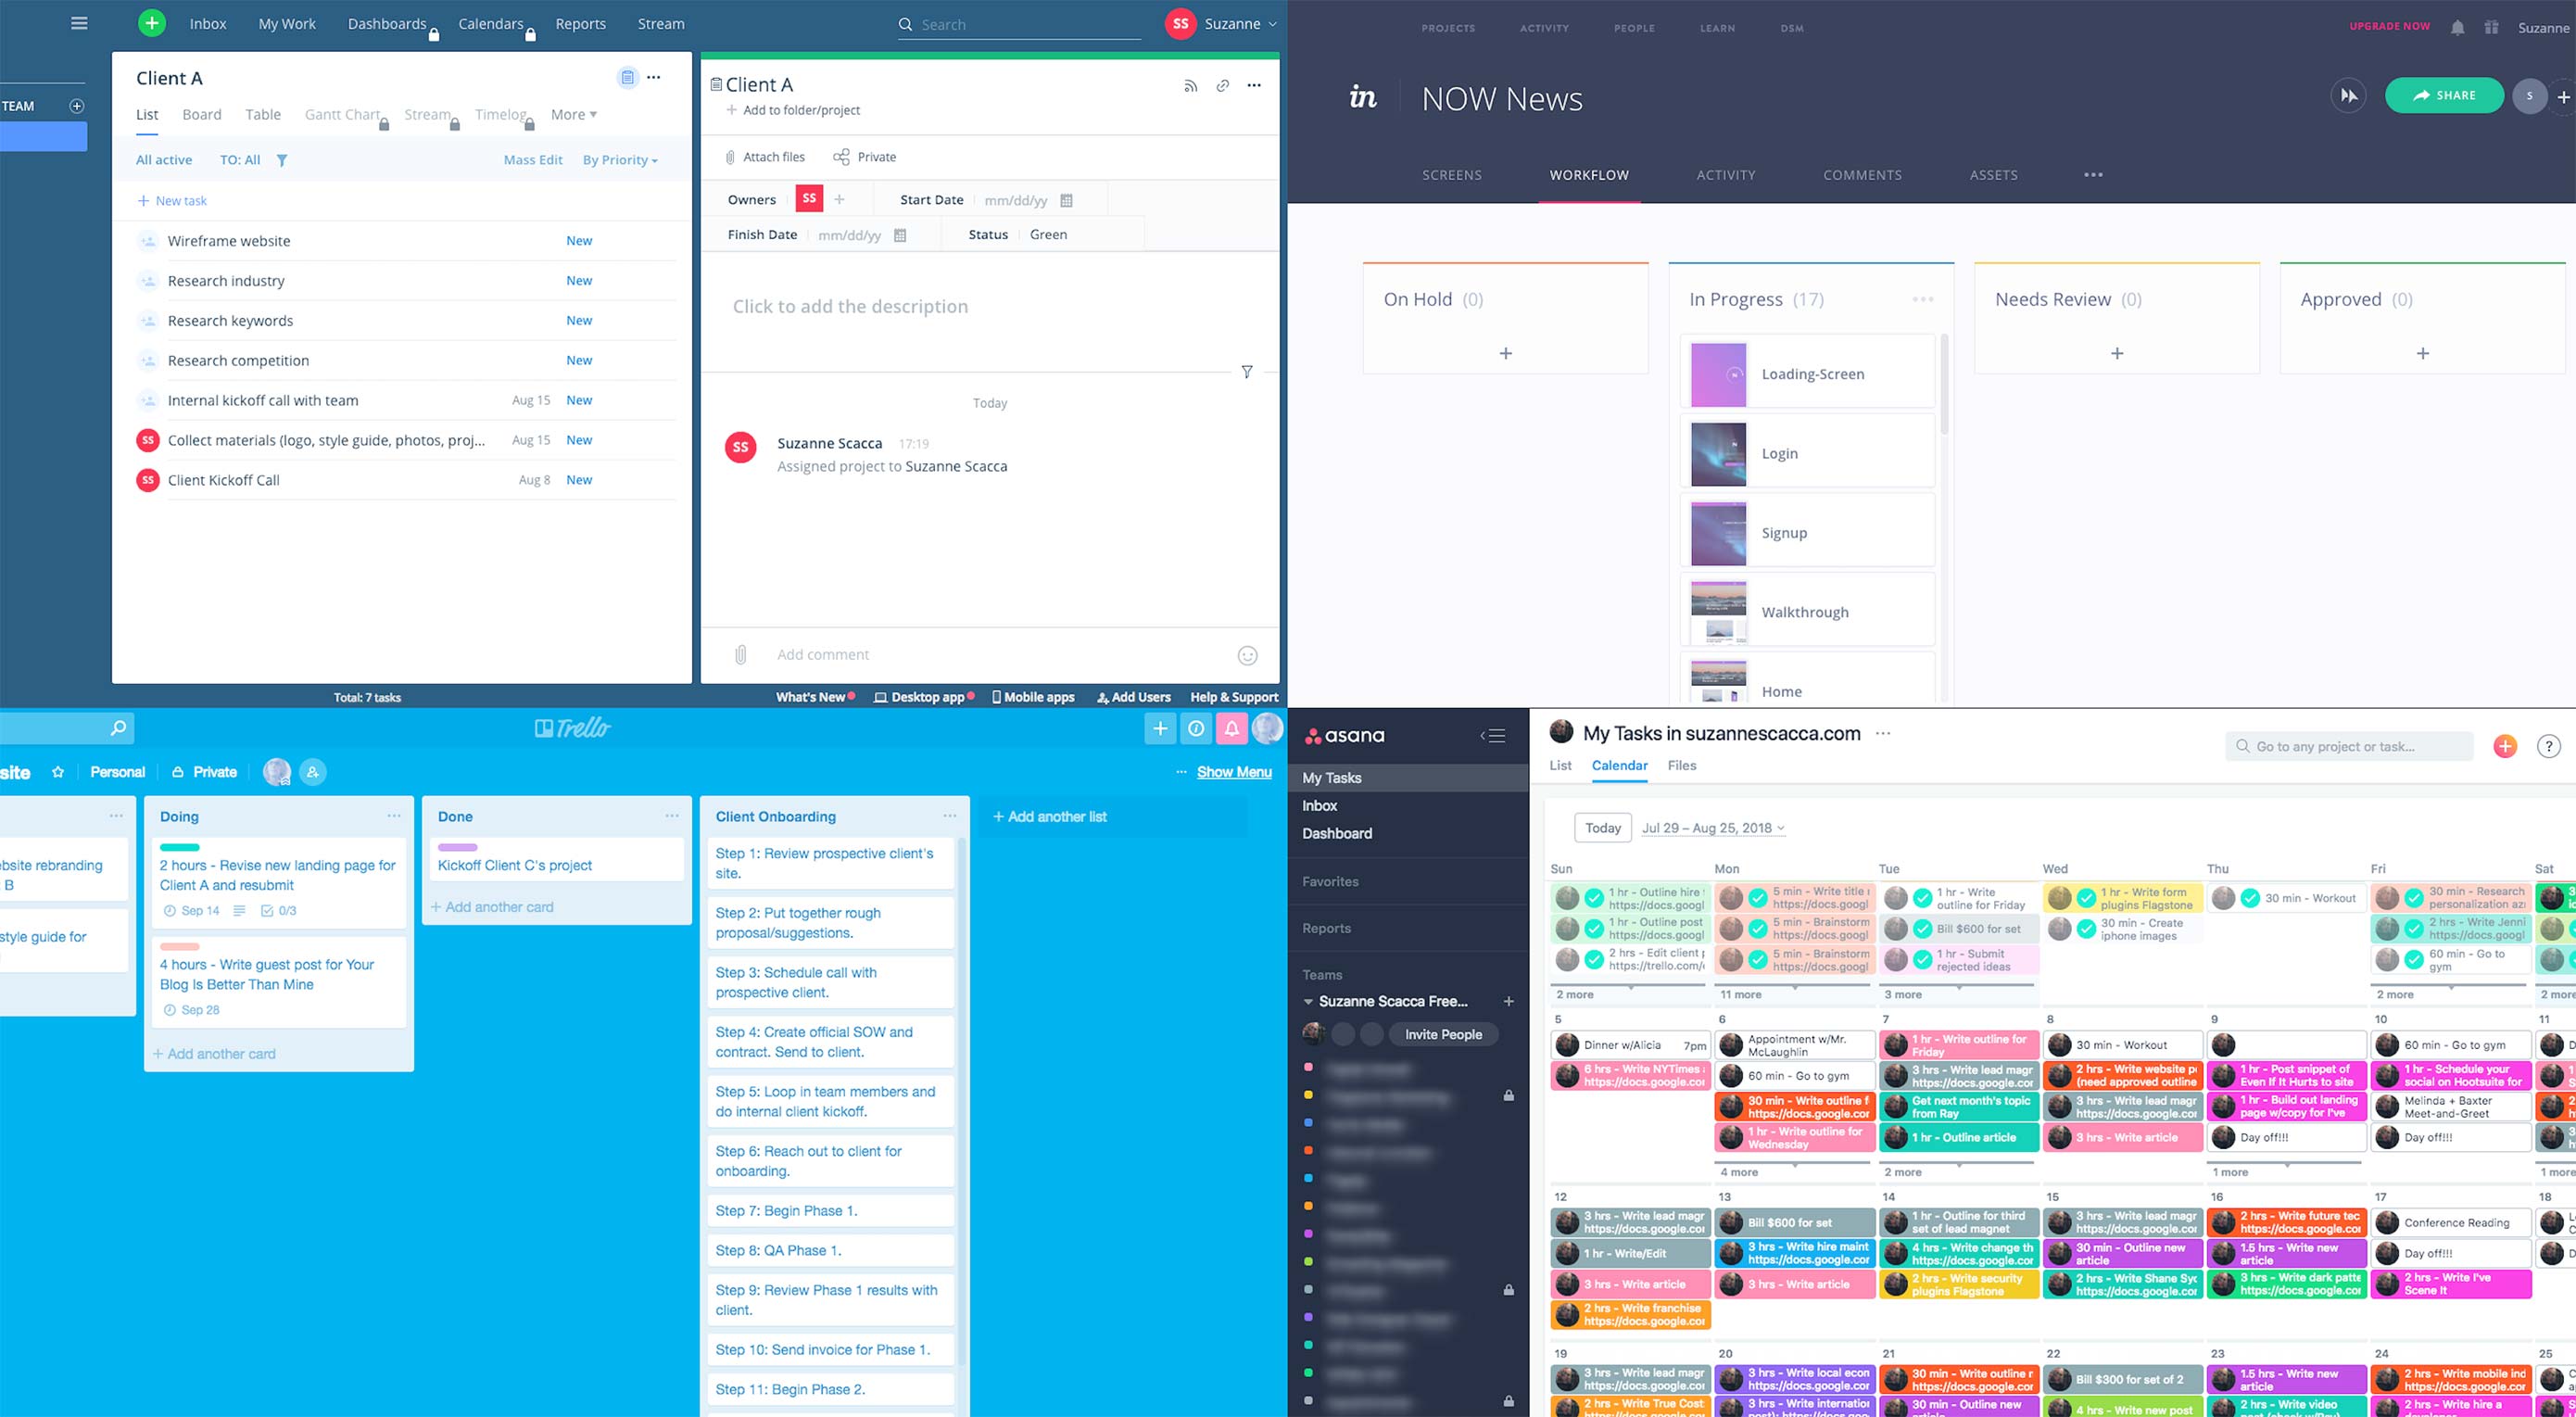
These are four project management tools I would recommend you start with:
Asana
Trello
Wrike
InVision
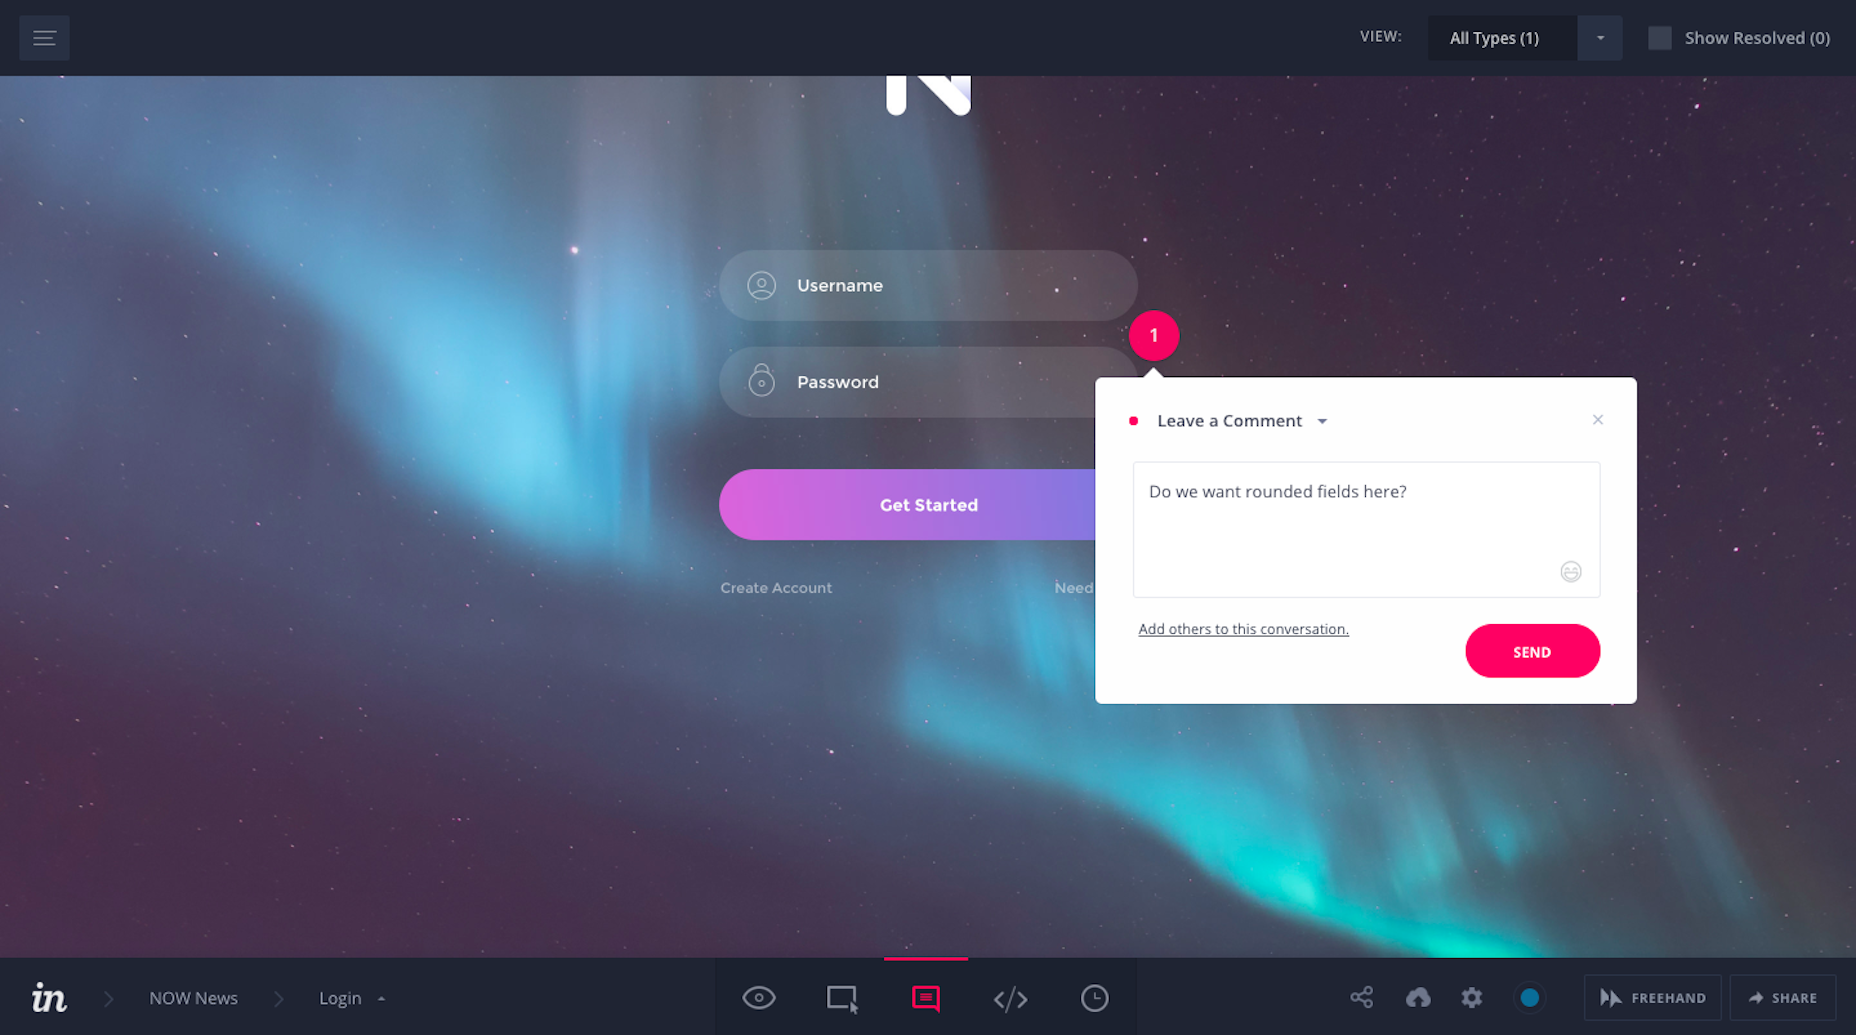
Of the four, InVision is the only one strictly made for the web design process. As such, there’s a greater emphasis on managing design work.
Here, you can see how to collaborate within uploaded designs, prototypes, wireframes, etc.:
And this is an example of how InVision enables you to create design-specific workflows for yourself:
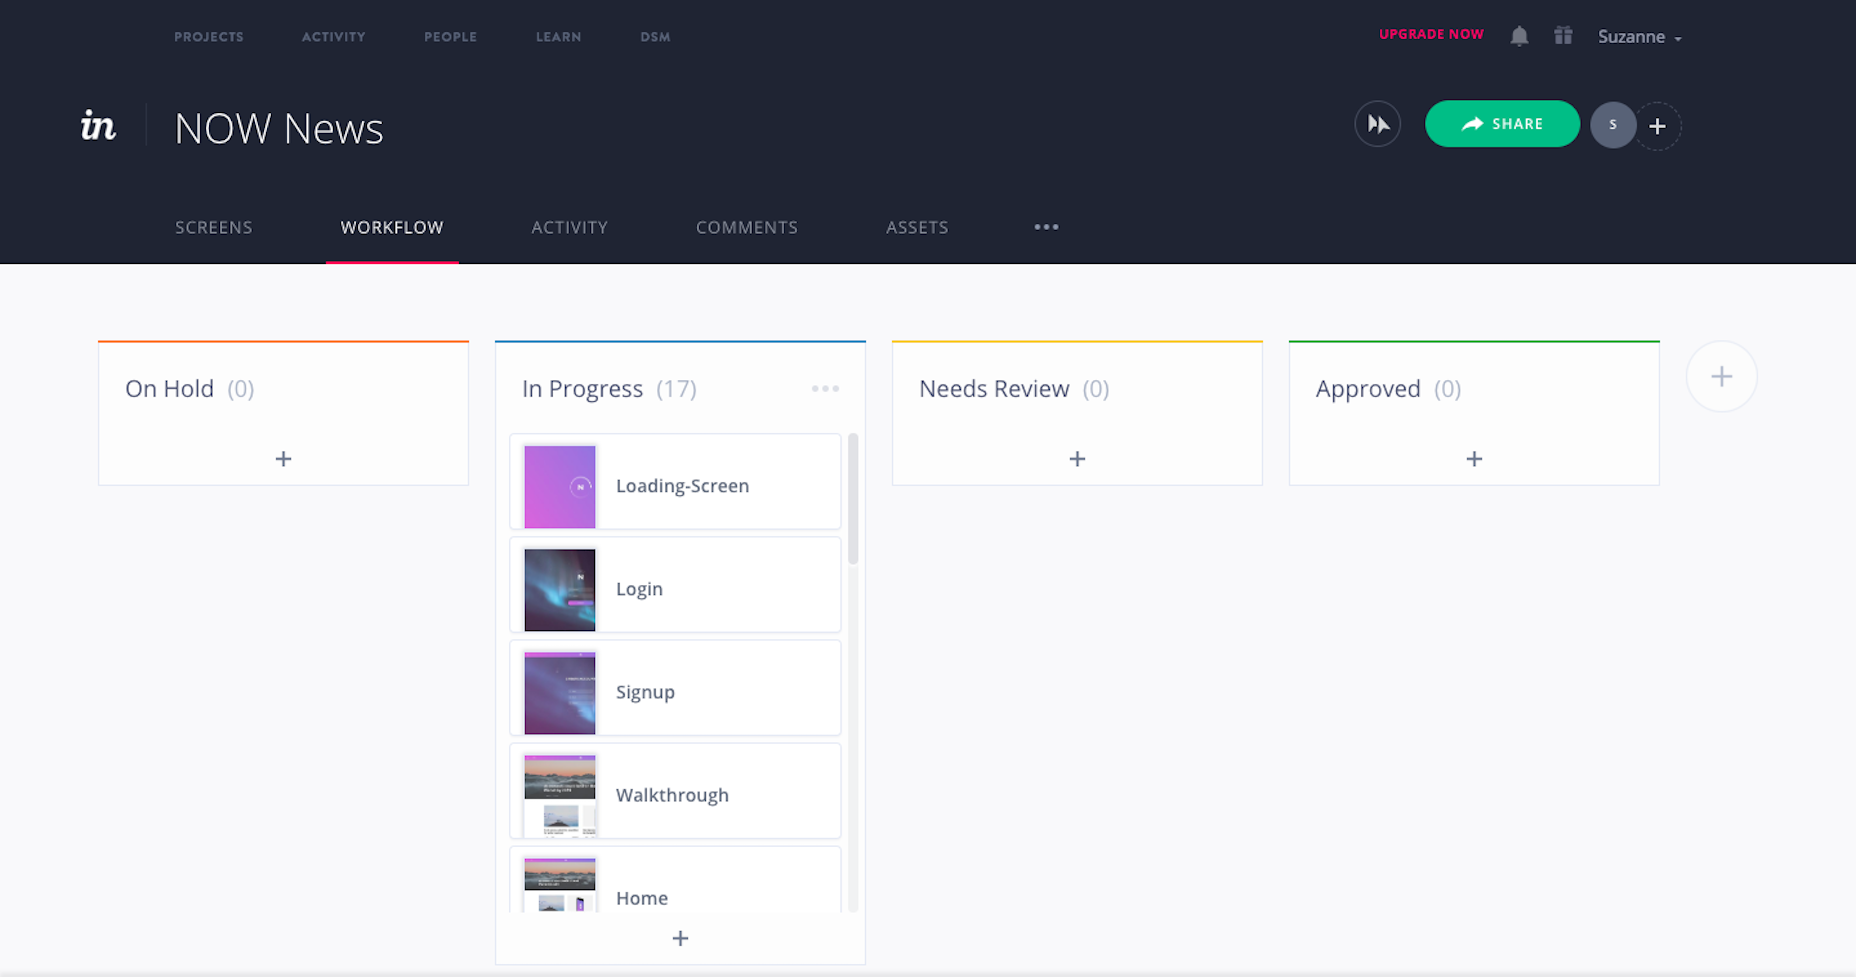
There are limitations to what you can do with a design task management tool, so you may find one of the other options a better choice if your goal is to bring greater control to projects, client communication, and team collaboration.
Free vs. Paid
Most task management software you’ll find comes either with a free plan—typically for one person or a strict limitation on the number of projects—or with a free trial.
Here is an example from Teamwork:
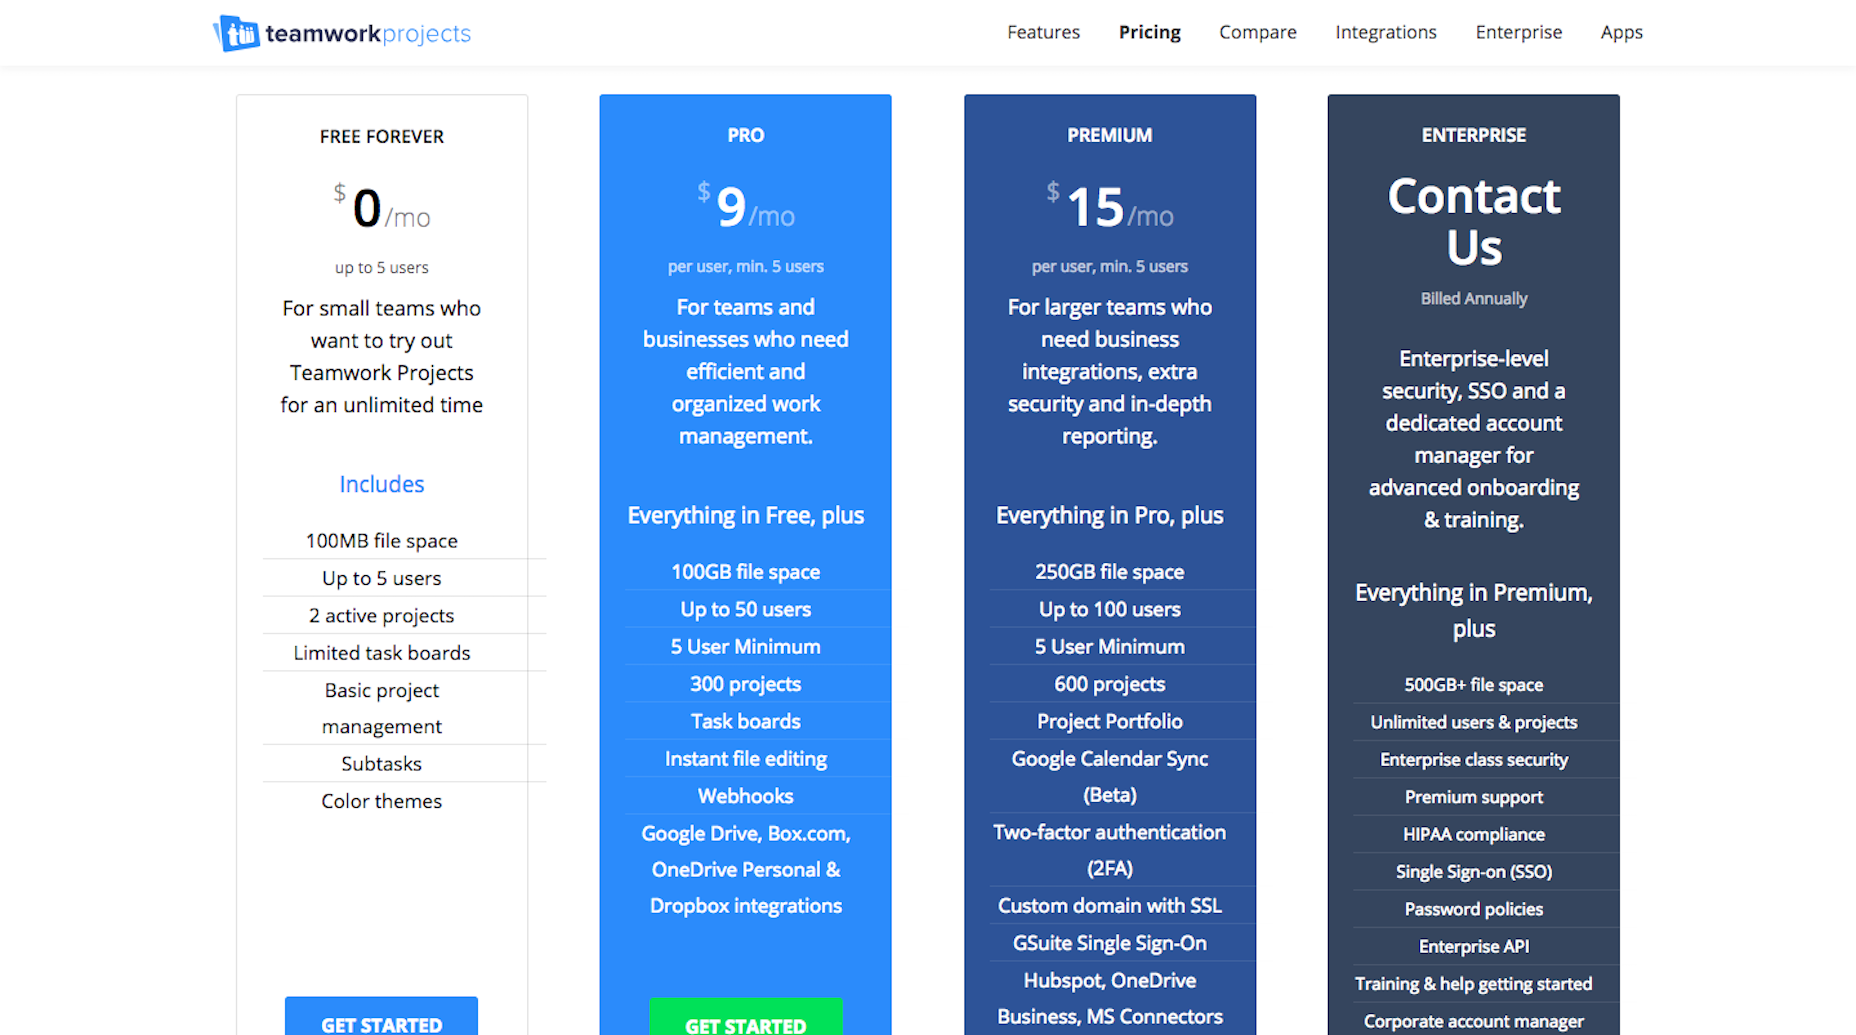
Typically, you can get a good sense for whether a platform will be a good fit for you or not within 15 minutes. This is nice as it allows you to try a tool before adding on another business expense.
Workflow View
Project management tools offer a variety of workflow styles and views.
Here is an example from Asana of a calendar view:
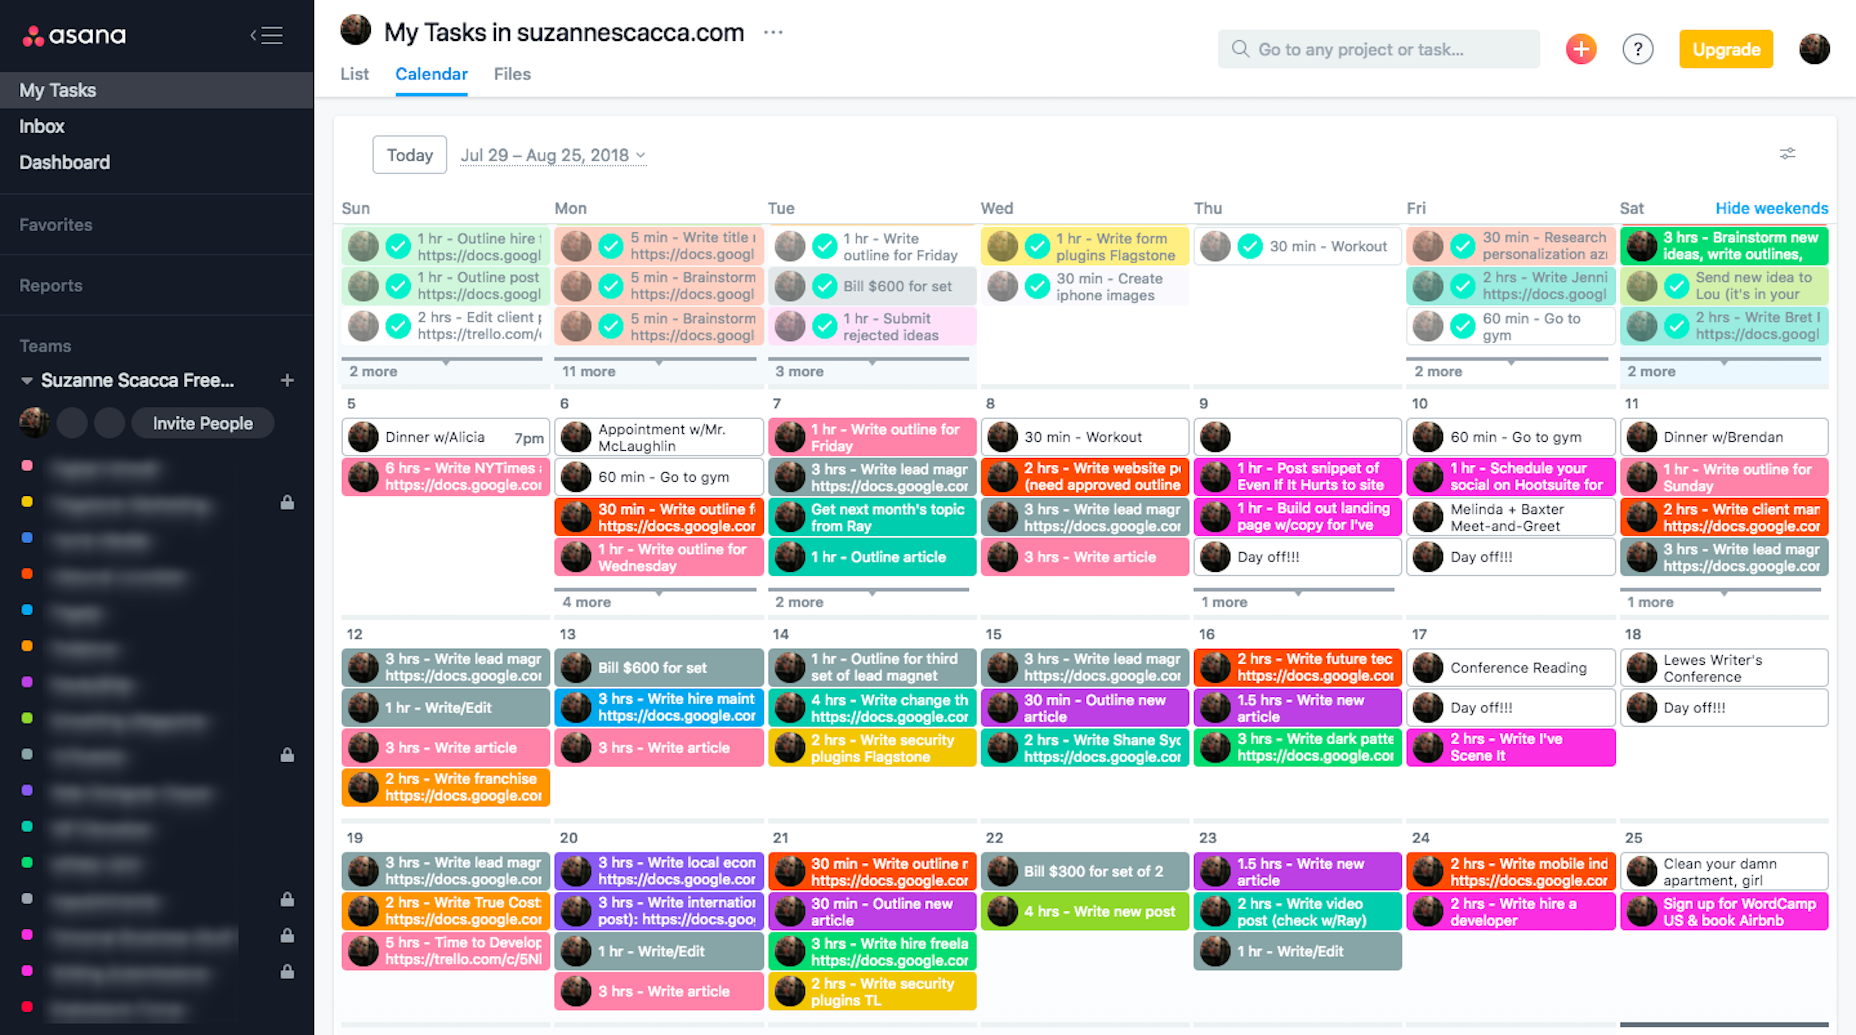
This happens to be my preferred style since I work on shorter-term and one-off assignments as opposed to longer jobs that require greater organization of tasks, sub-tasks, and timelines. Asana has list views and kanban boards, too.
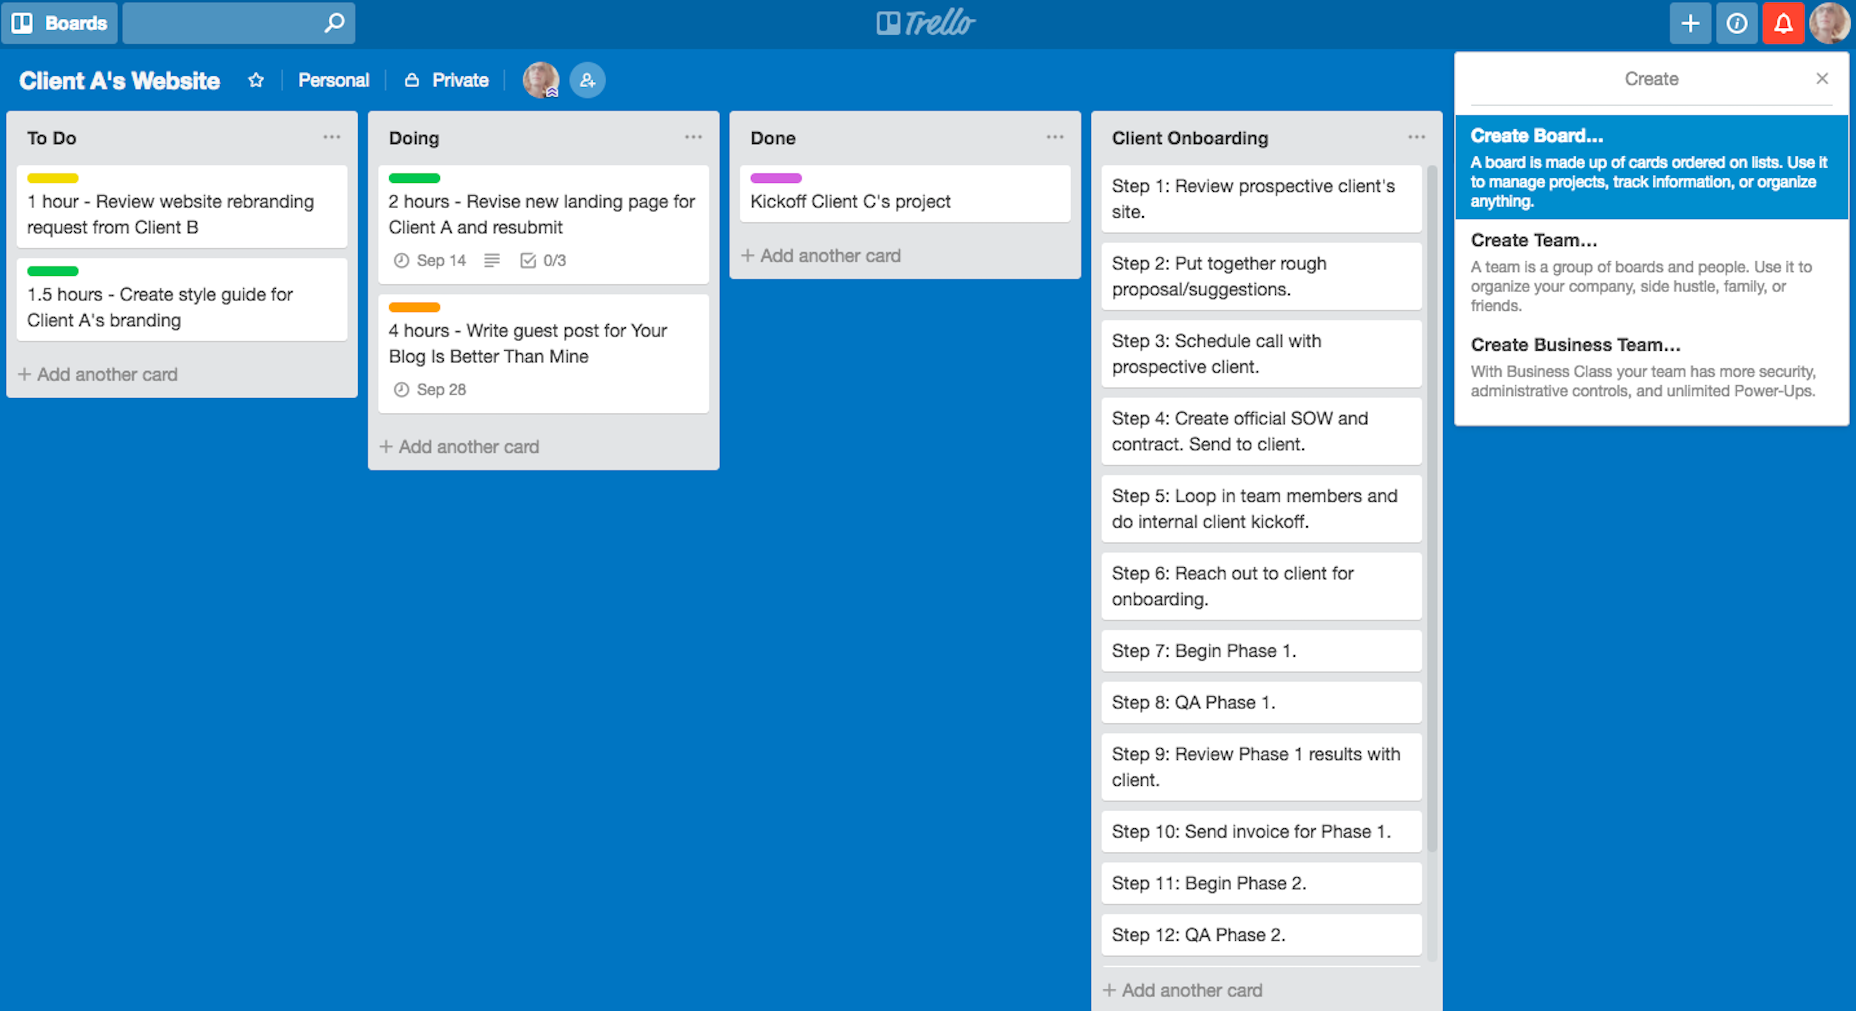
Here is an example from Trello of a kanban board:
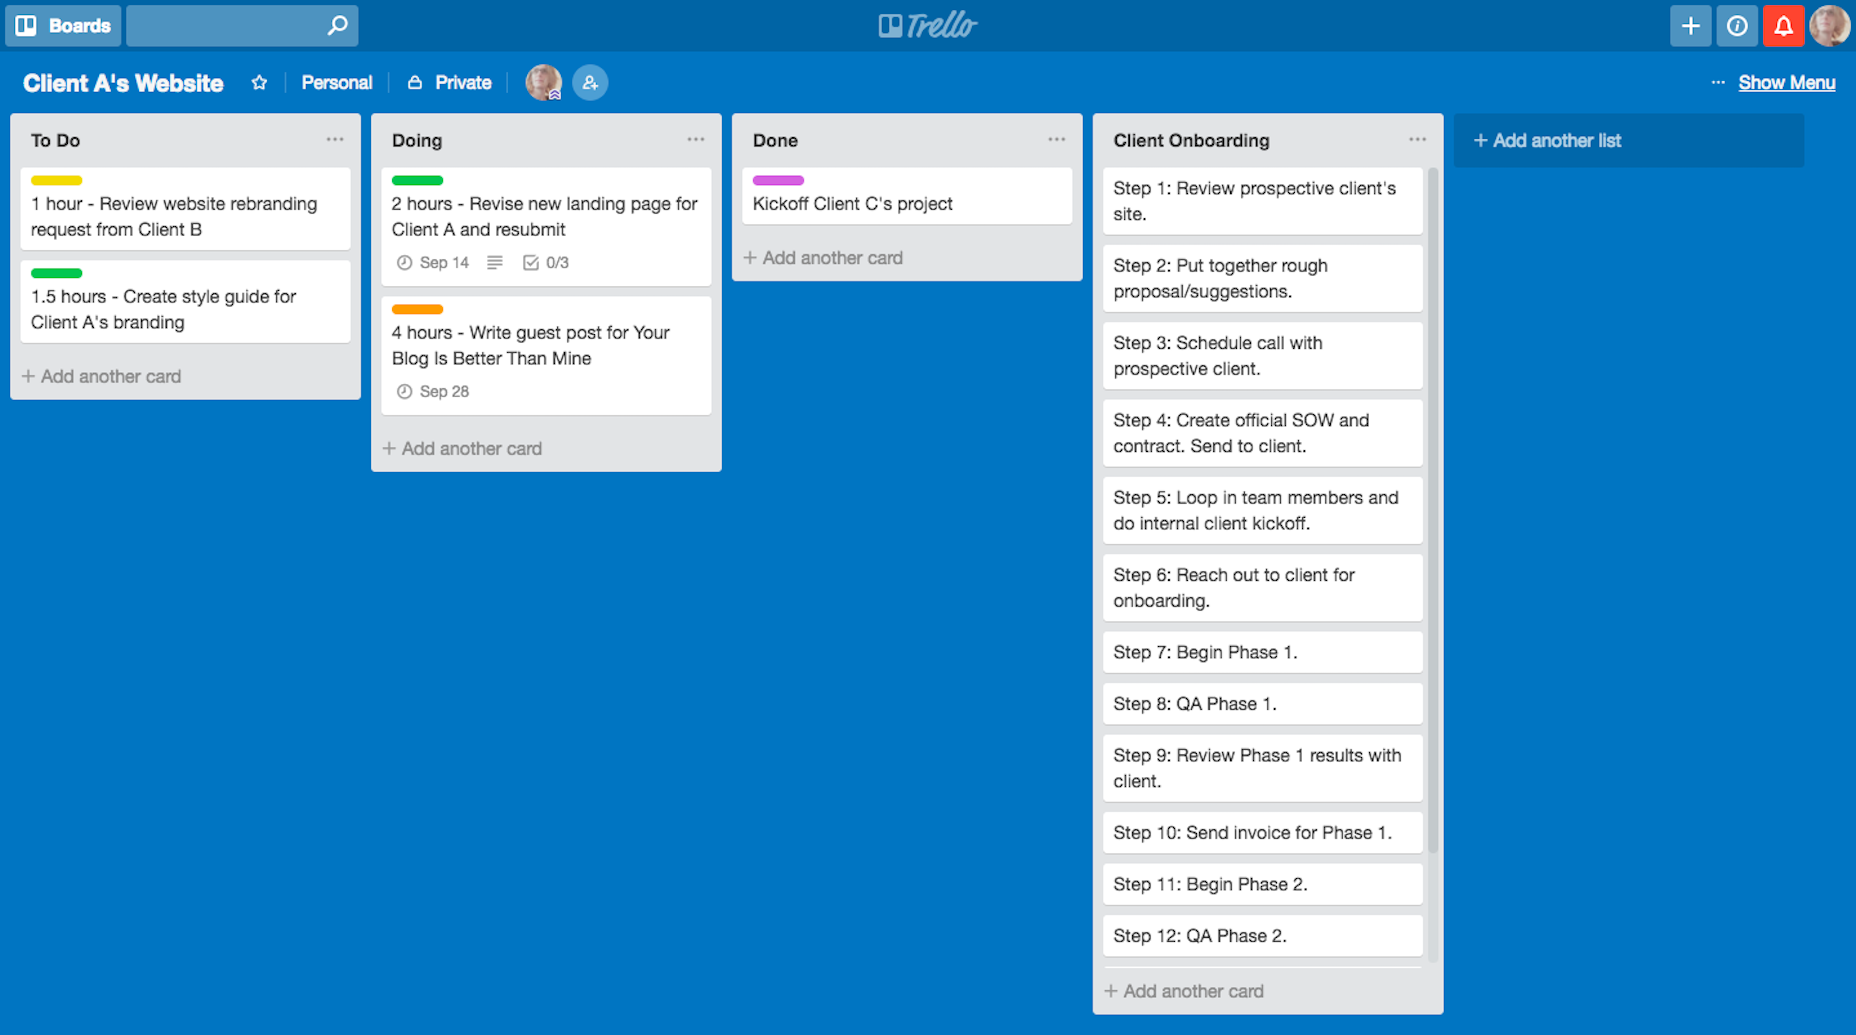
Basically, you create high-level folders dedicated to each client (you can also break them up at the project level). Within each board, create columns for each phase of your project. The cards that fall below them are then dedicated to each of your tasks. If you prefer this type of card-sorting system and visualization, Trello is a great choice.
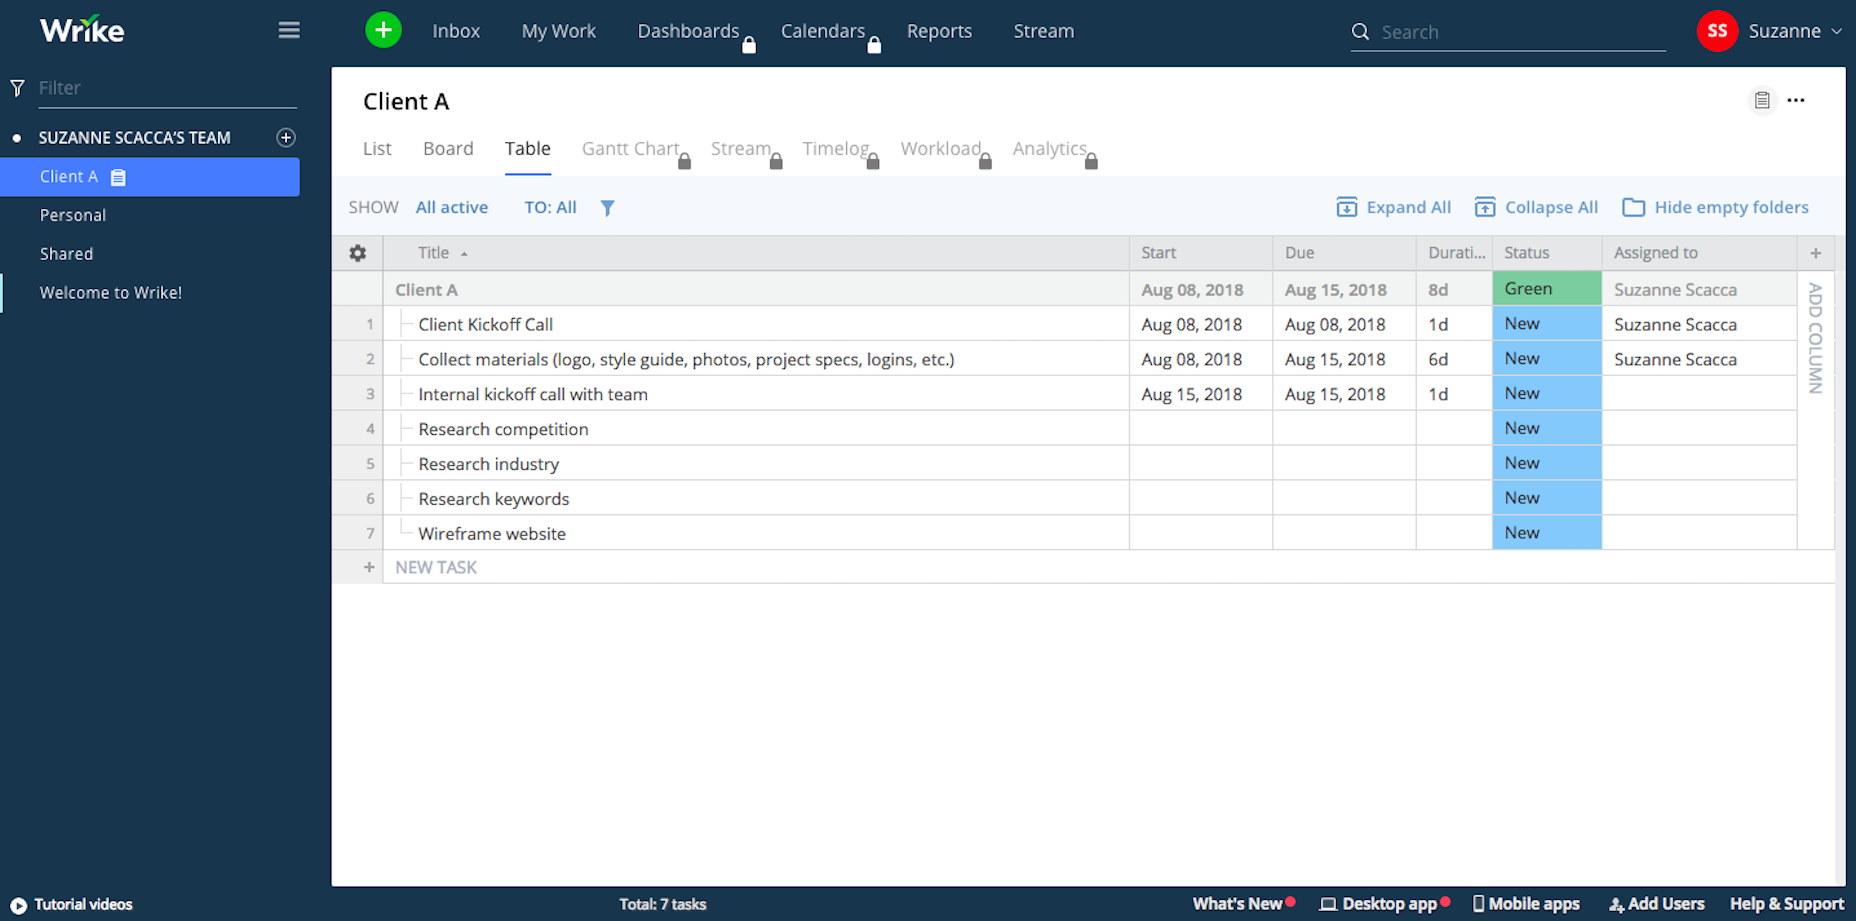
One other platform I’d strongly recommend looking at is Wrike and it’s because of its flexibility in workflow views:
Tables:
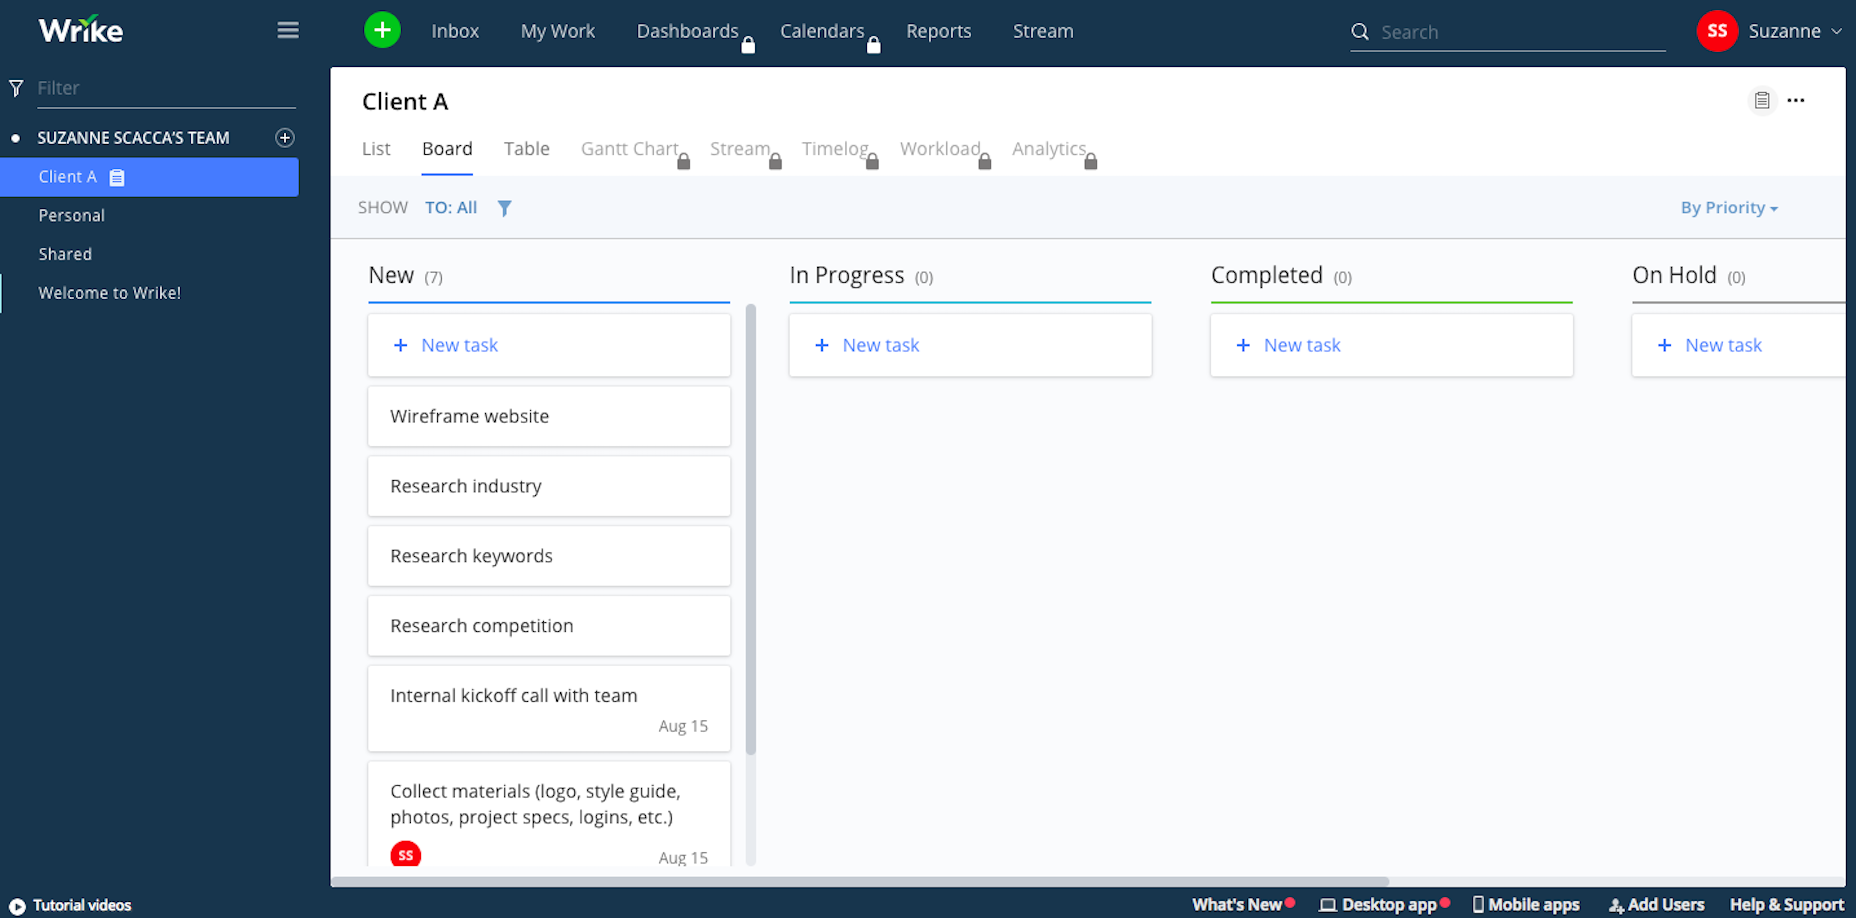
Boards:
Lists:
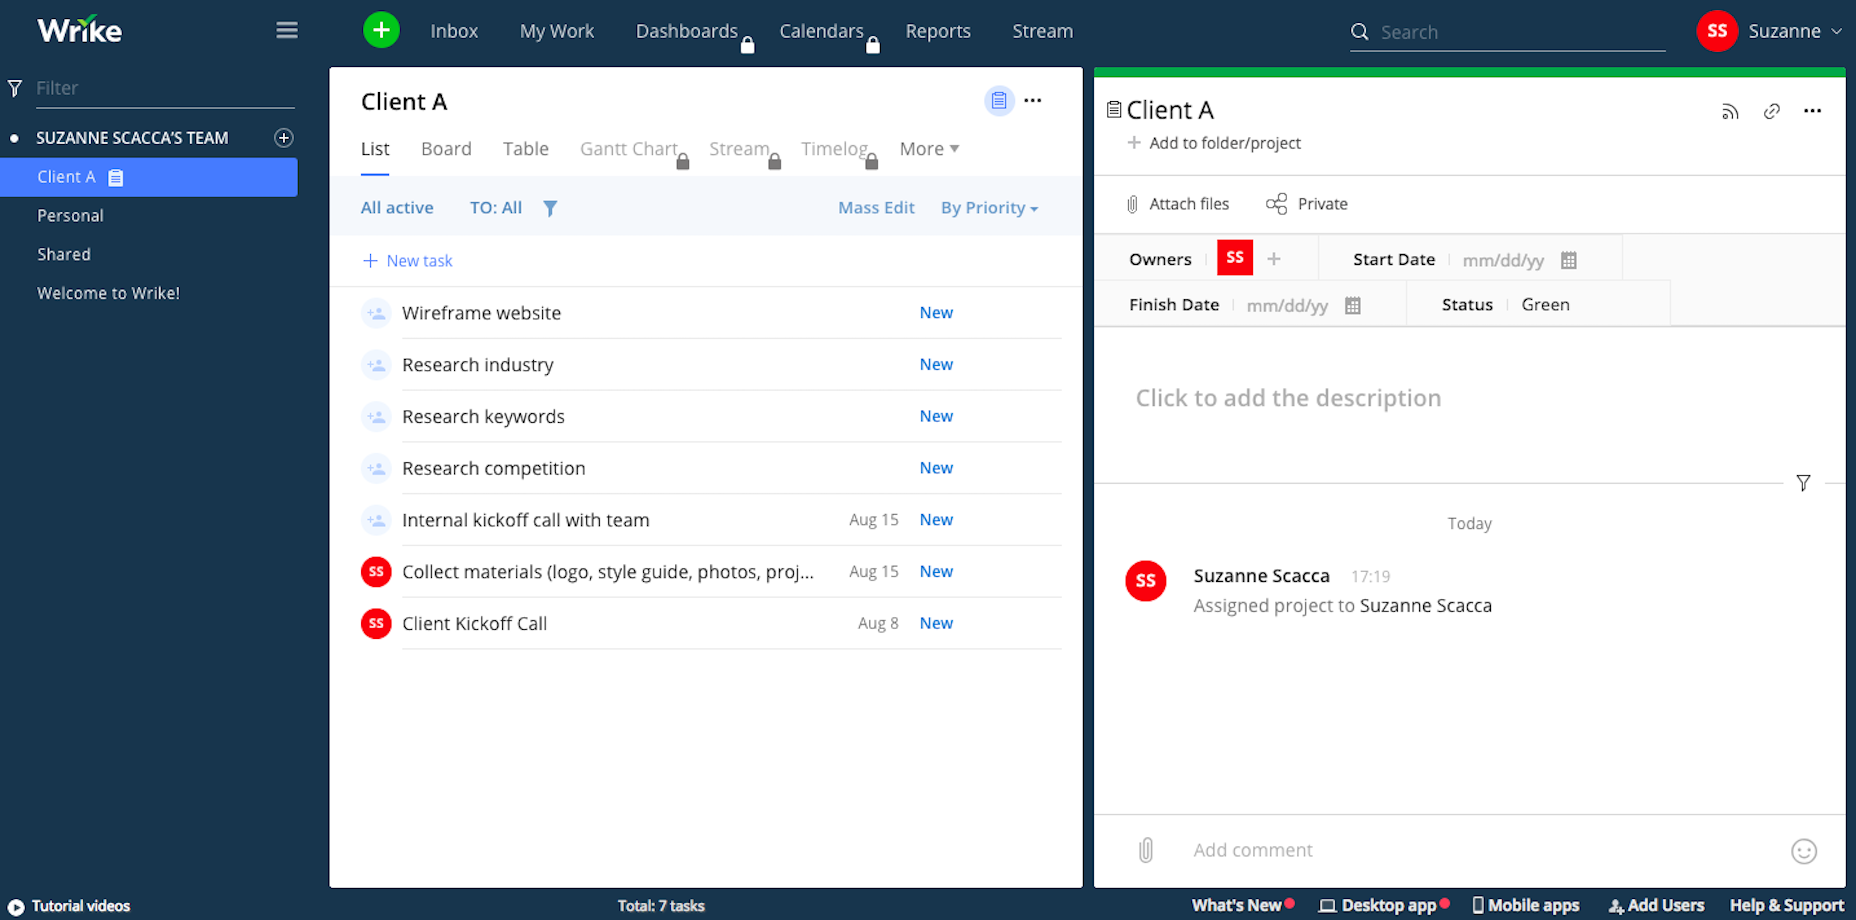
All the same tasks are present; they’re just displayed differently.
In summary, I’d suggest:
Asana for designers that work on smaller or shorter jobs.
Trello for designers that need greater control over lengthier project phases.
Wrike for designers that have a growing team and client list and want to offer more flexibility to them.
Features
Be sure to think through the features that matter most to you and will help you acquire the degree of control you want over projects. Here are some noteworthy features from these project management platforms:
Asana
Calendar, list, and kanban views
Internal chat area
Task and sub-task creation
Cloning of tasks and projects
Organization by color
Drag-and-drop task management
Integrate time-tracking software
Trello
Kanban view
Chat directly within cards
Use cards to create tasks or add checklists to individual cards
Drag-and-drop organization
Cloning of cards and lists
Wrike
Table, list, and kanban board views
Internal inbox for direct communications with team and clients
List of personal tasks or access to full projects
Set full timelines for each task
Customize status of tasks
Export lists and use as re-importable templates
Before upgrading to any premium tools, take some time to get acquainted with the base (free) product. Once you’ve found one that fits you well, you can upgrade when the time is right.
Templatization for Improved Workflows
There are so many great things that come out of using project management tools for a web design workflow:
Centralization of communication, files, status updates, etc.
Greater control over projects and all associated tasks
Better adherence to schedules
Improved communication with clients and teams
More efficient collaboration
Increased accountability from all involved parties
More consistent and higher quality of results
Automation of workflow
I think each of the points above—except for maybe the last one—are obvious when you look at how these project management tools work. However, if you’ve ever dreamed of working less while making more money, you really should be taking advantage of automation.
Specifically, I’m talking about project management templates.
To demonstrate this point, I’m going to use Trello to create pre-configured project boards, workflows, and checklists. Follow along to see how easy it is to do this with project management tools:
1. Create a New Board
In the top right corner, select “Create Board”.
Name it, add your team, and create.
2. Create Project Phases
This is what you will start with:
![]()
To create your phases (known as “Lists” in Trello), start typing.
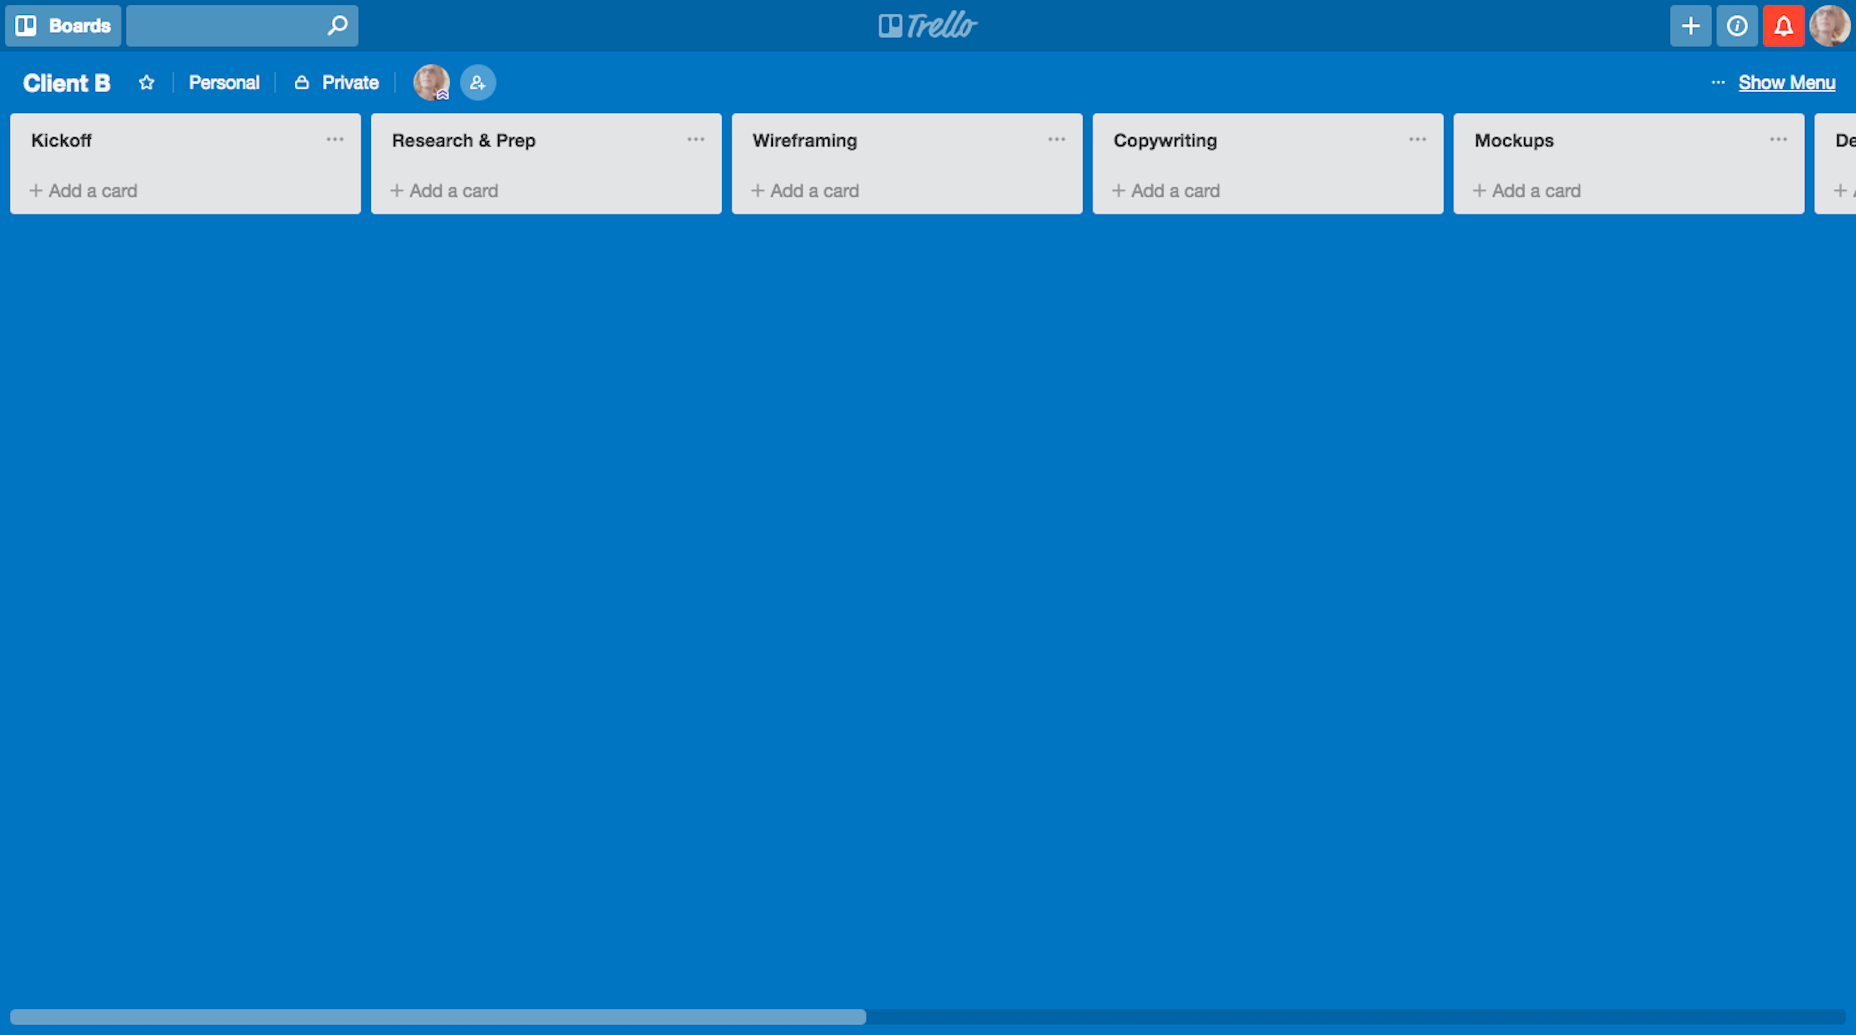
Make the buckets as big or as small as you want. The organizational structure and workflow are up to you.
3. Add Tasks to the Phases
In this next part, you can decide how broad or specific you want each task (or card) to be. For my own organization, I allocate one task to one card:
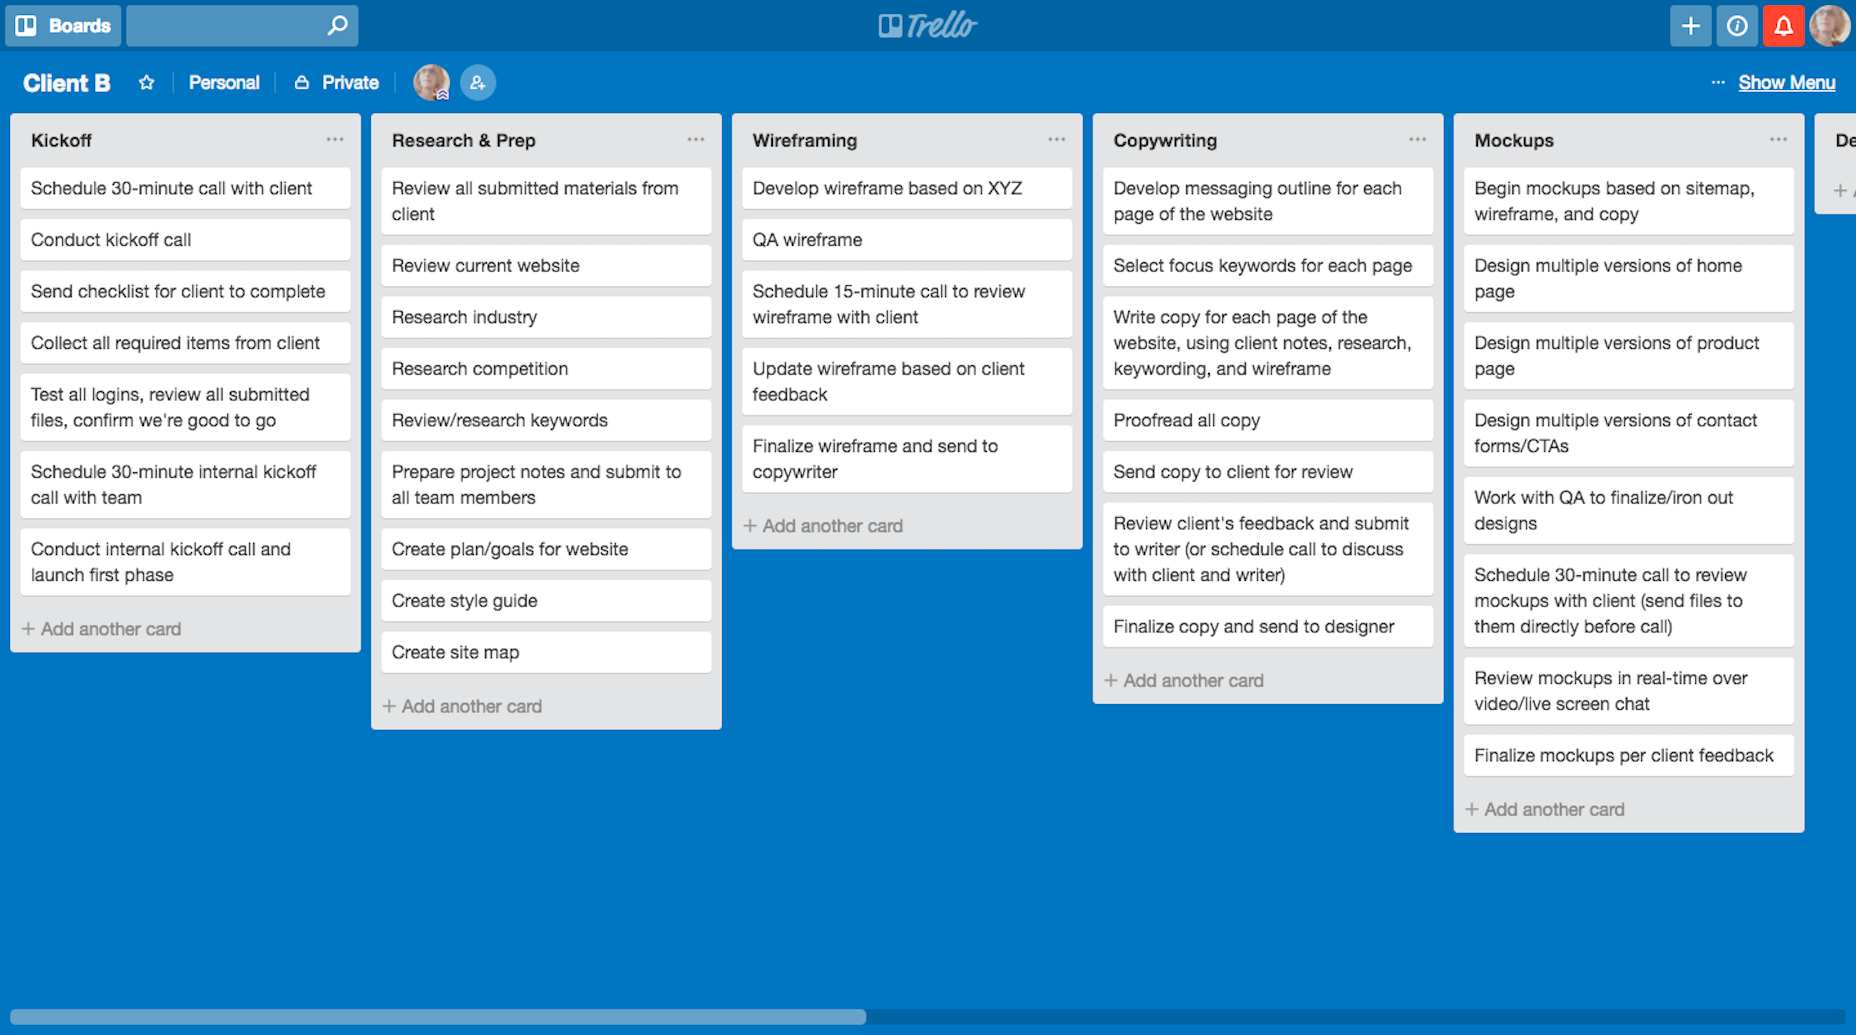
However, you might prefer to create one broad task and then divvy up steps within the card using the checklist feature:
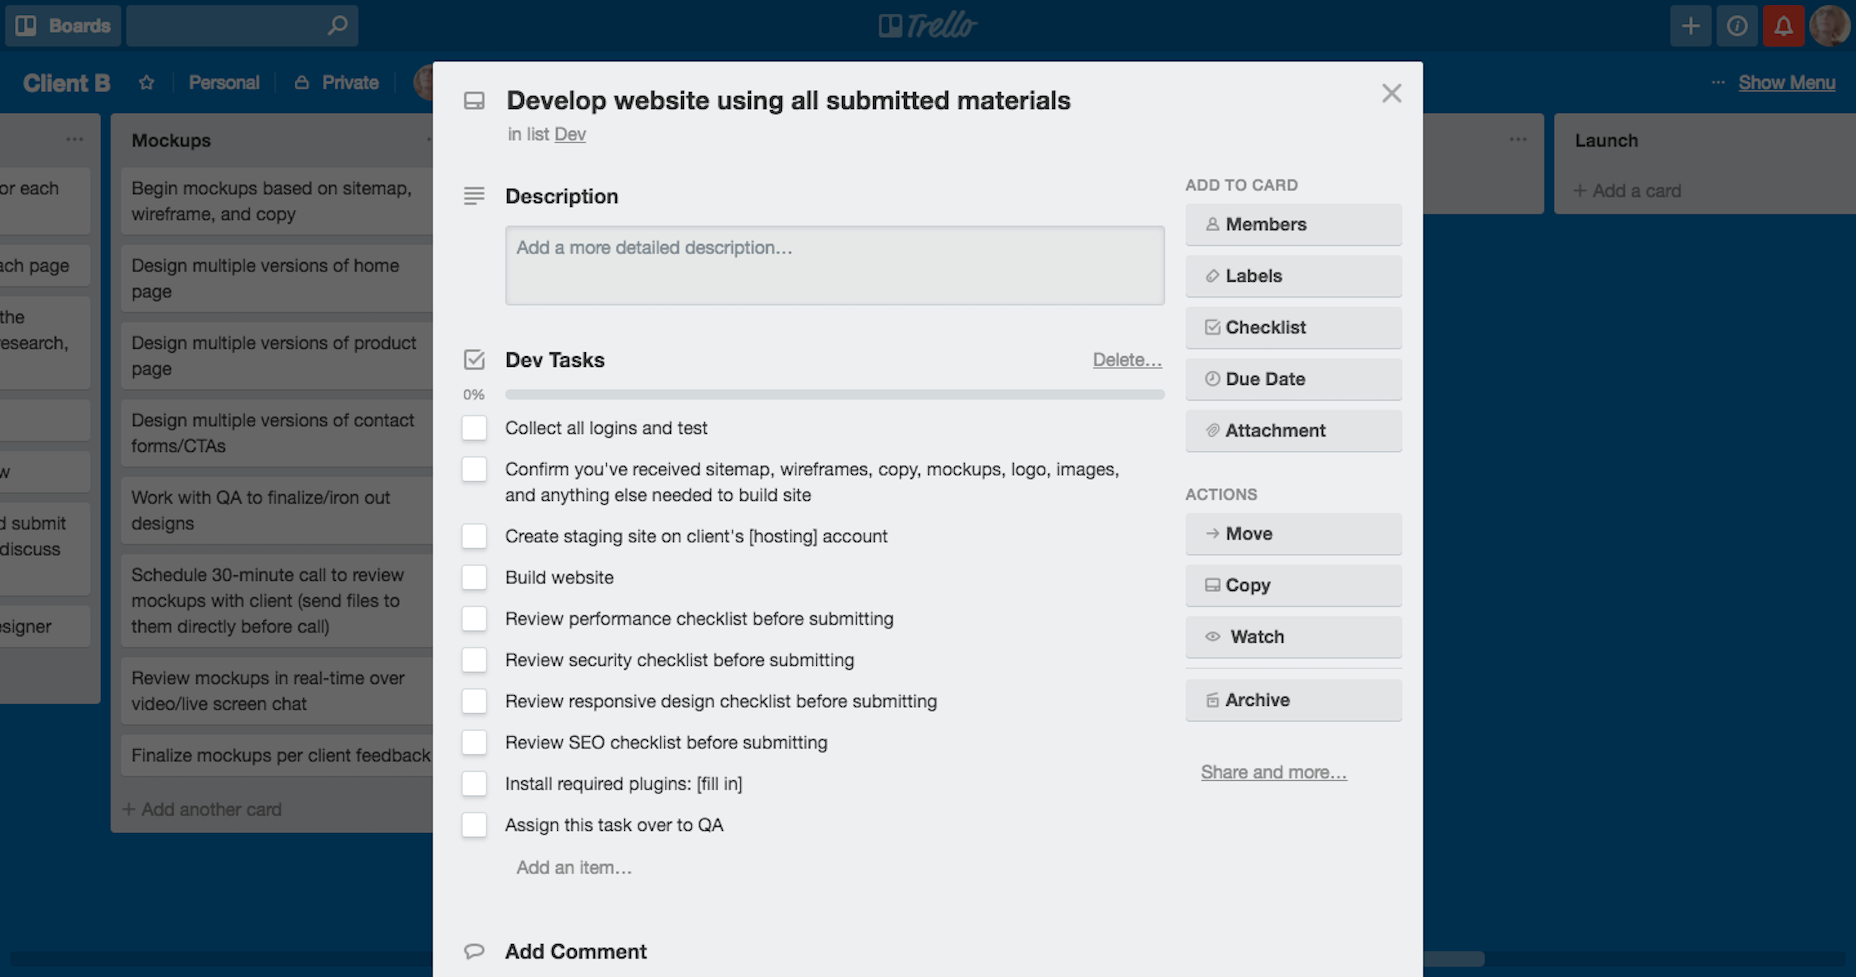
Again, it’s up to you to decide how you want to manage your projects here.
4. Copy the Template
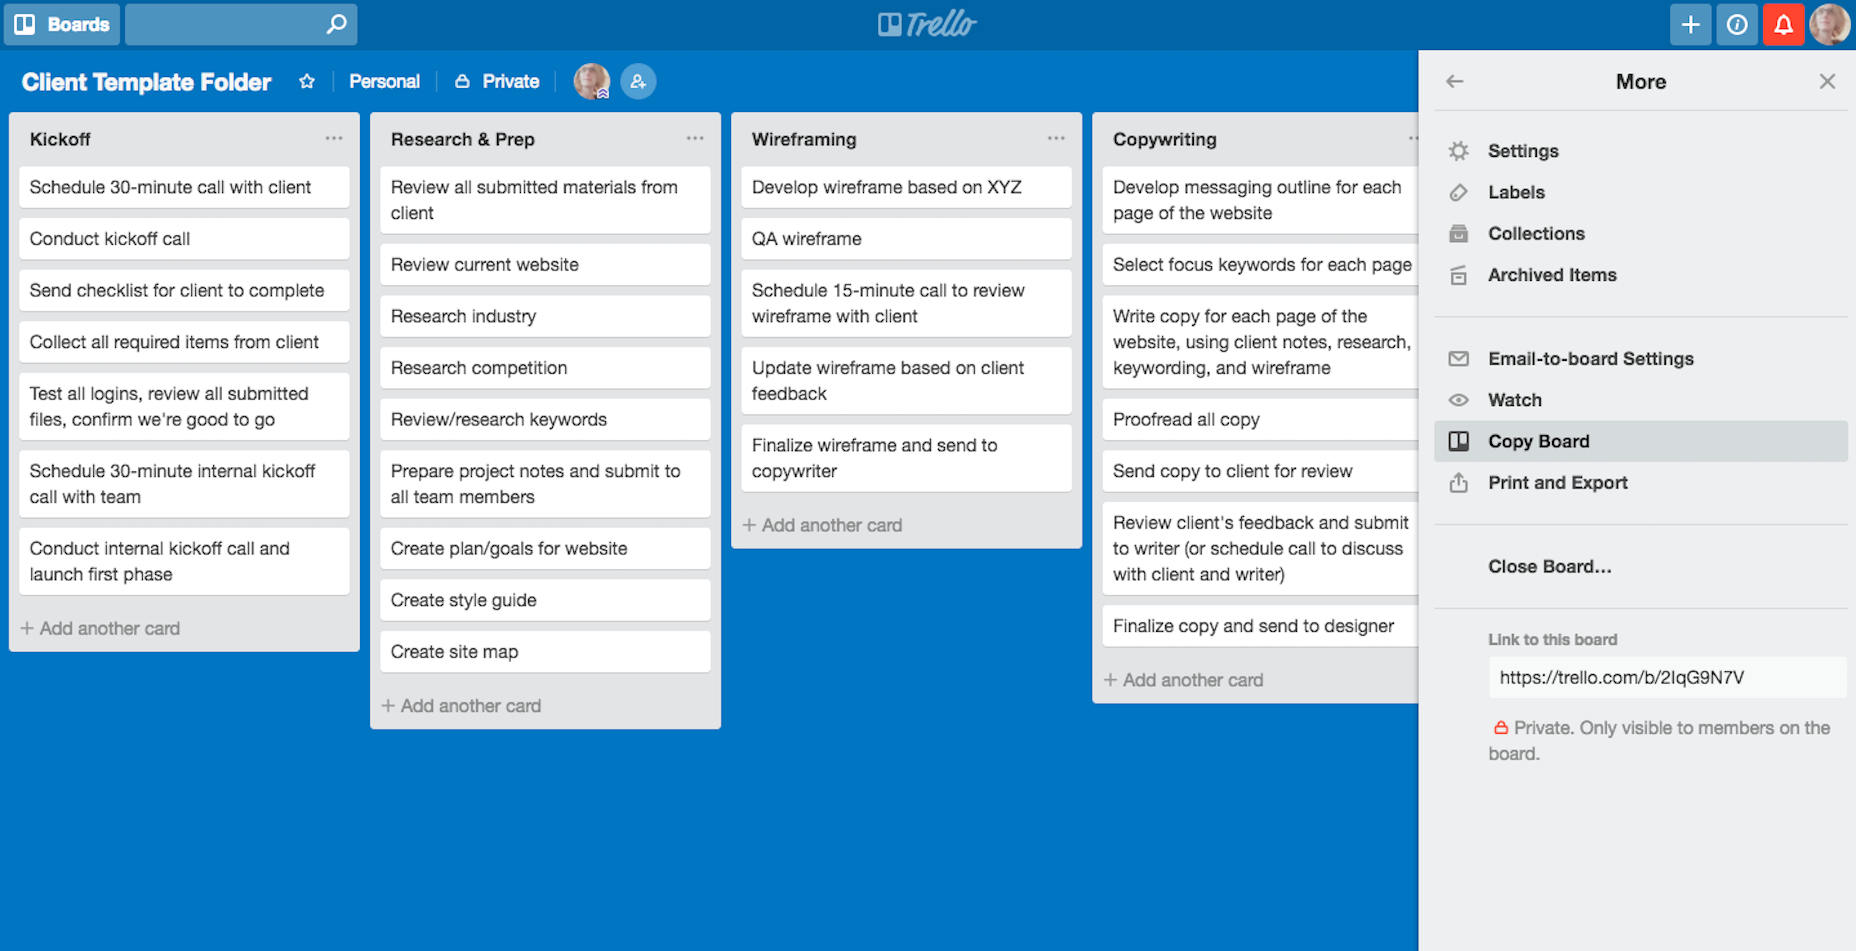
With your project folder, phases, and tasks all broken out, this template is now ready for you to use.
To copy a project (board), click on “…Show Menu” in the top-right. Expand the “…More” option. Then, select “Copy Board”.
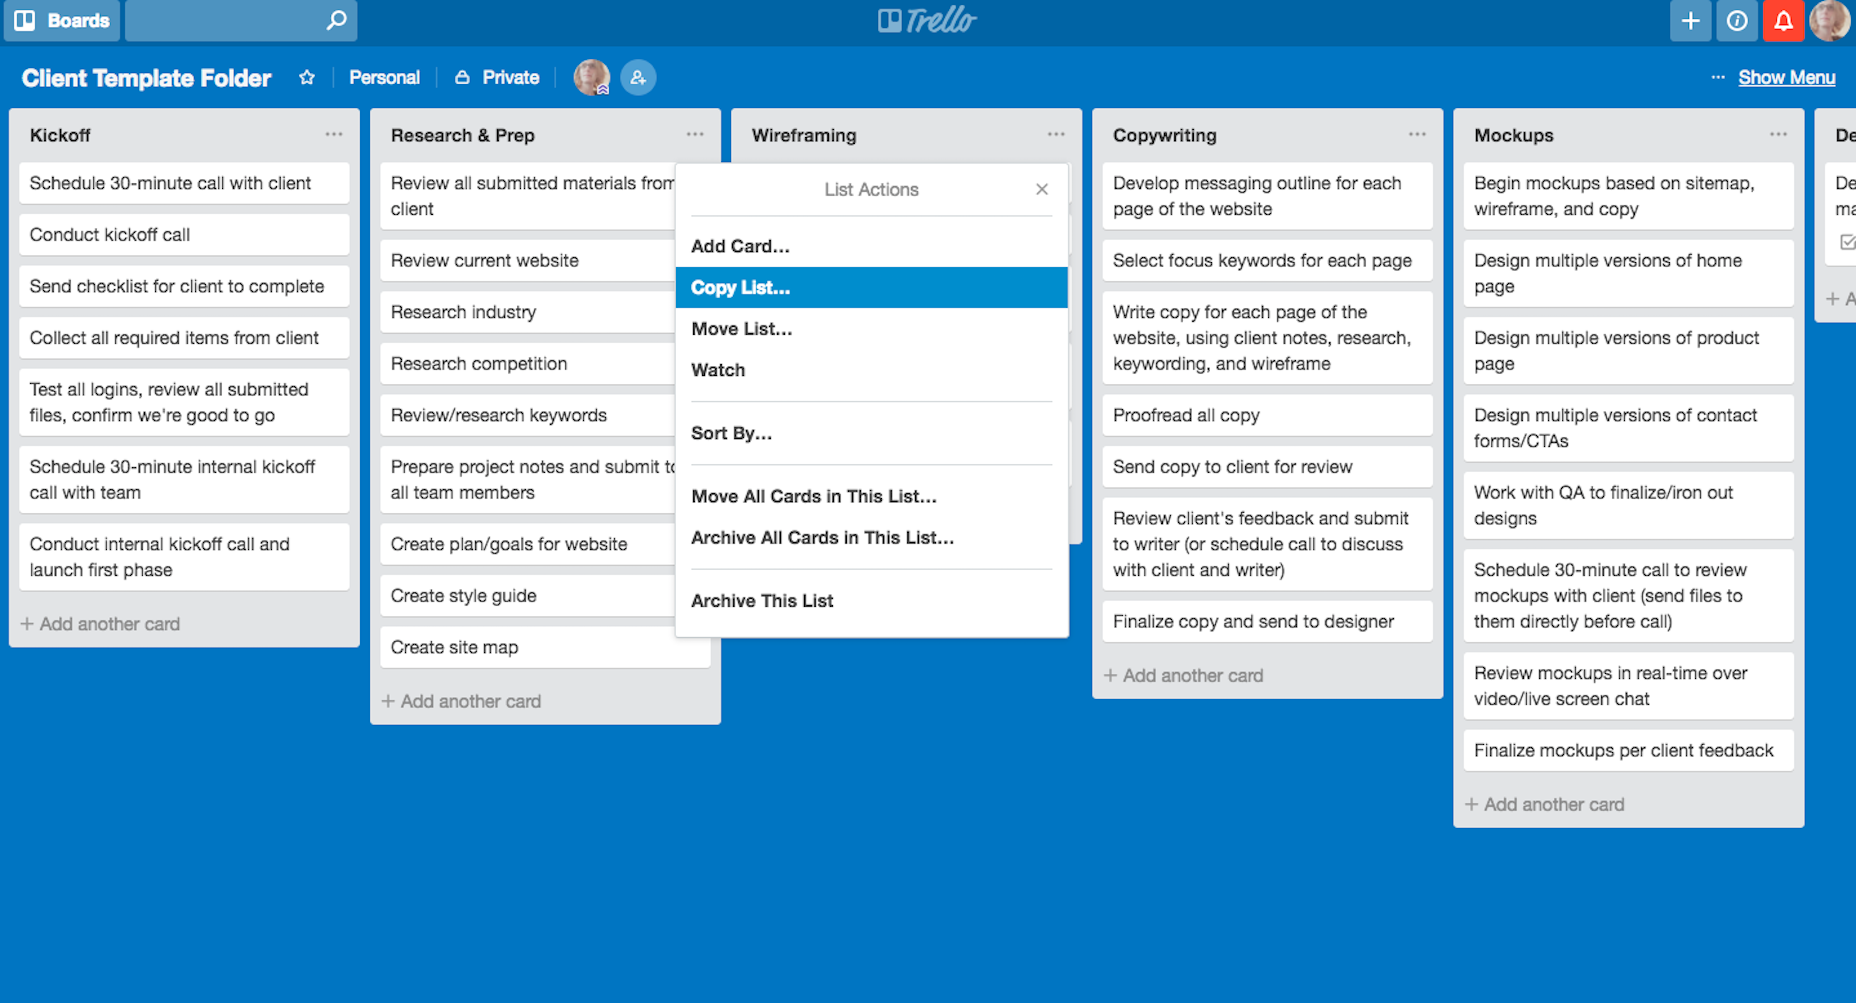
To copy just one of your project phases (lists), click on the “…” in the top-right corner of the list. Select “Copy List”.
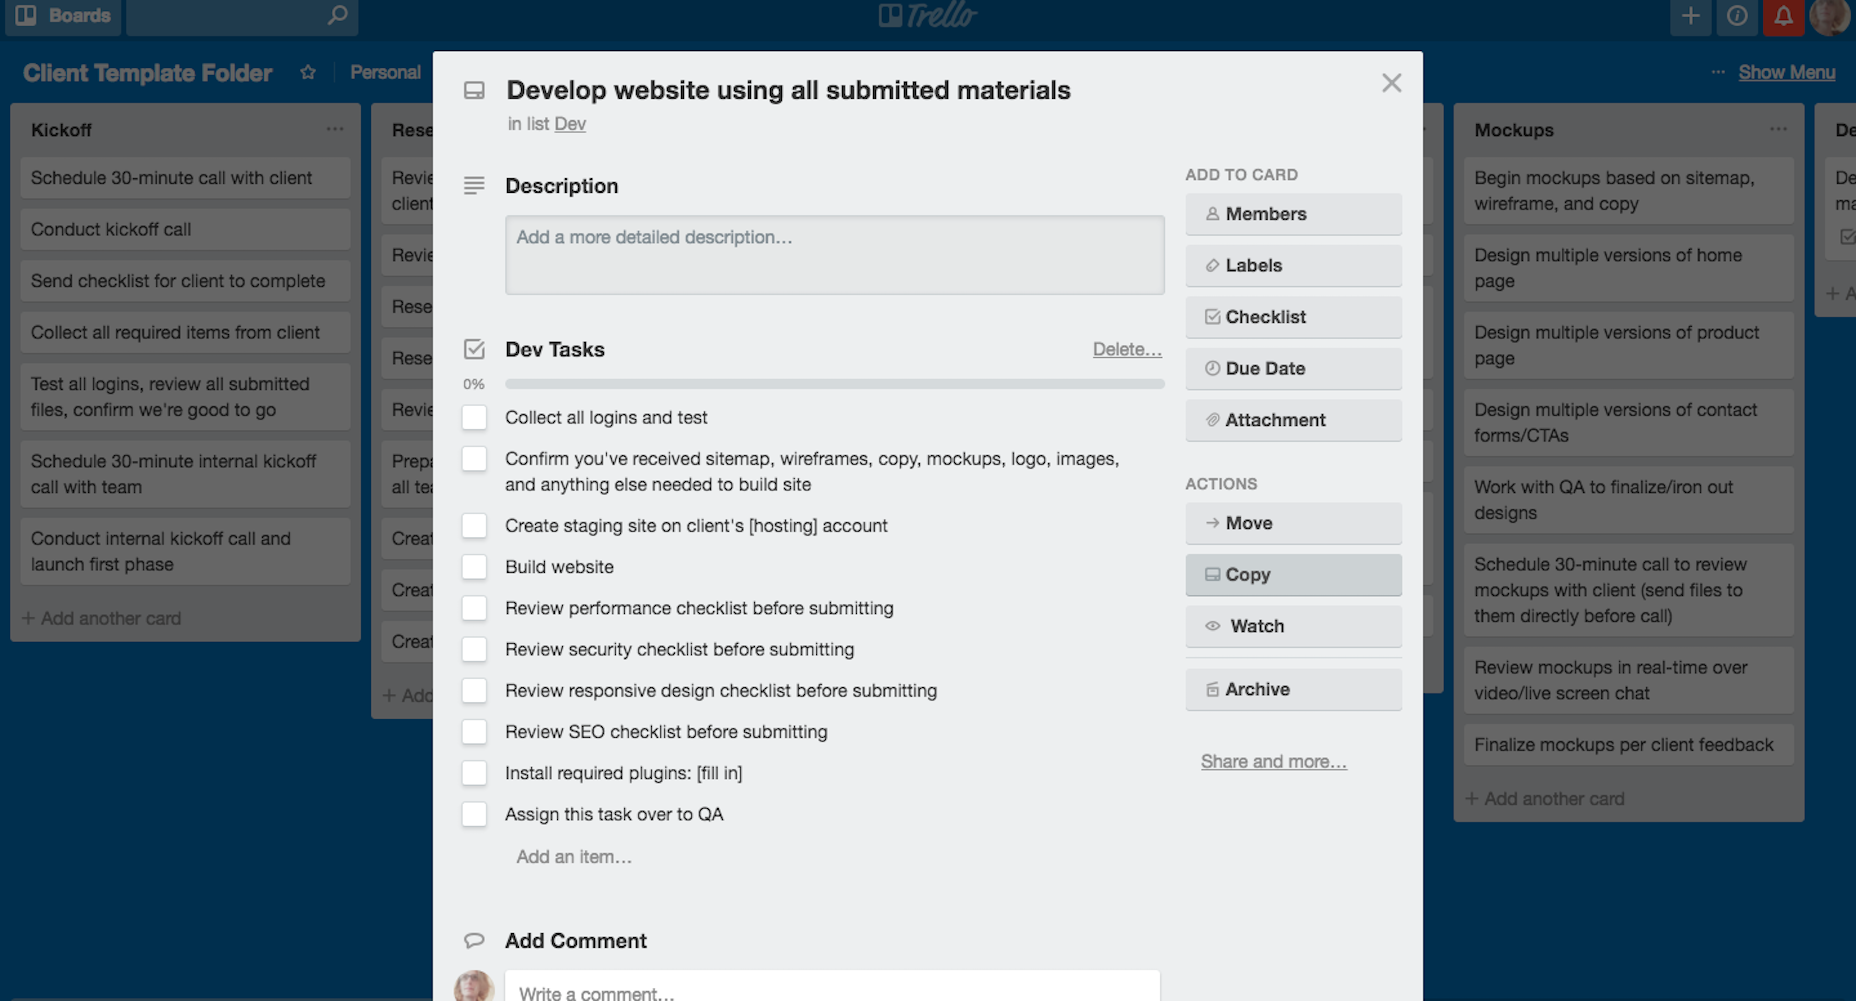
And to copy an individual task (card), click on the “Copy” button under Actions.
If you can believe it, it’s really as easy as that. Simply break down your workflow however you best can manage it. Then, copy it!
Wrapping Up
If you’ve been using inefficient project management tools or have been relying on too many spreadsheets to keep everything in line until now, it’s time for a change. There’s so much you can do with the right project management tool, not to mention the time-saving and profit-boosting benefits that come from templatizing your process with them!
Add Realistic Chalk and Sketch Lettering Effects with Sketch’it – only $5!
![]()
Source
p img {display:inline-block; margin-right:10px;}
.alignleft {float:left;}
p.showcase {clear:both;}
body#browserfriendly p, body#podcast p, div#emailbody p{margin:0;}


Leave a Reply
Want to join the discussion?Feel free to contribute!