How to Build a File Upload Form with Express and DropzoneJS
Original Source: https://www.sitepoint.com/file-upload-form-express-dropzone-js/?utm_source=rss

Let’s face it, nobody likes forms. Developers don’t like building them, designers don’t particularly enjoy styling them, and users certainly don’t like filling them in.
Of all the components that can make up a form, the file control could just be the most frustrating of the lot. It’s a real pain to style, it’s clunky and awkward to use, and uploading a file will slow down the submission process of any form.
That’s why a plugin to enhance them is always worth a look, and DropzoneJS is just one such option. It will make your file upload controls look better, make them more user-friendly, and by using AJAX to upload the file in the background, it will at the very least make the process seem quicker. It also makes it easier to validate files before they even reach your server, providing near-instantaneous feedback to the user.
We’re going to take a look at DropzoneJS in some detail. We’ll show how to implement it. and look at some of the ways in which it can be tweaked and customized. We’ll also implement a simple server-side upload mechanism using Node.js.
As ever, you can find the code for this tutorial on our GitHub repository.
Introducing DropzoneJS
DropzoneJS allows users to upload files using drag and drop. Whilst the usability benefits could justifiably be debated, it’s an increasingly common approach and one which is in tune with the way a lot of people work with files on their desktop. It’s also pretty well supported across major browsers.
DropzoneJS isn’t simply a drag and drop based widget, however. Clicking the widget launches the more conventional file chooser dialog approach.
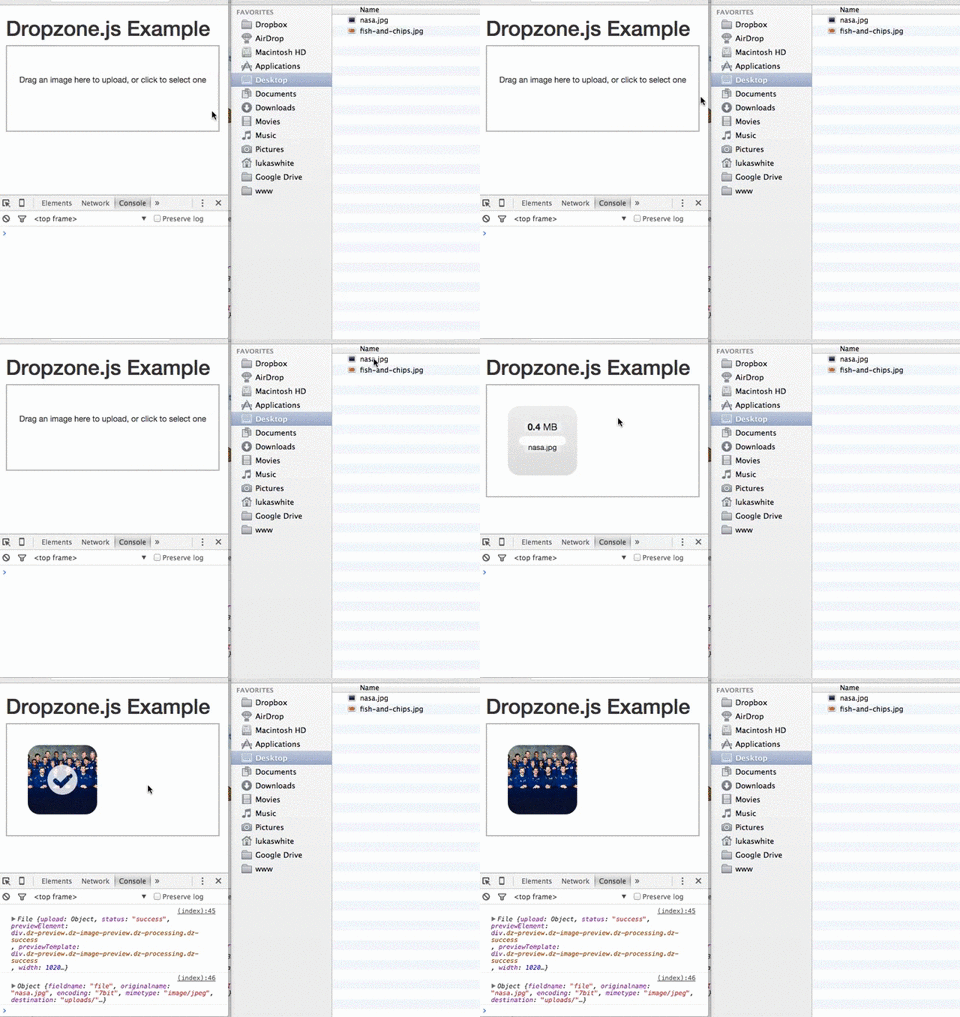
Here’s an animation of the widget in action:

Alternatively, take a look at this most minimal of examples.
You can use DropzoneJS for any type of file, though the nice little thumbnail effect makes it ideally suited to uploading images in particular.
Features
To summarize some of the plugin’s features and characteristics, DropzoneJS:
can be used with or without jQuery
has drag and drop support
generates thumbnail images
supports multiple uploads, optionally in parallel
includes a progress bar
is fully themeable
includes extensible file validation support
is available as an AMD module or RequireJS module
comes in at around 43KB when minified and 13KB when gzipped
Browser Support
Taken from the official documentation, browser support is as follows:
Chrome 7+
Firefox 4+
IE 10+
Opera 12+ (Version 12 for macOS is disabled because their API is buggy)
Safari 6+
There are a couple of ways to handle fallbacks for when the plugin isn’t fully supported, which we’ll look at later.
Getting Set Up
The simplest way to get started with DropzoneJS is to include the latest version from a CDN. At the time of writing, this is version 5.5.1.
Alternatively, you can download the latest release from the project’s GitLab page. There’s also a third-party package providing support for ReactJS.
Then, make sure you include both the main JavaScript file and the CSS styles in your page. For example:
<!DOCTYPE html>
<html lang=”en”>
<head>
<meta charset=”UTF-8″>
<title>File Upload Example</title>
<link
rel=”stylesheet”
href=”https://cdnjs.cloudflare.com/ajax/libs/dropzone/5.5.1/min/dropzone.min.css”>
</head>
<body>
<script src=”https://cdnjs.cloudflare.com/ajax/libs/dropzone/5.5.1/min/dropzone.min.js”></script>
</body>
</html>
Note that the project supplies two CSS files — a basic.css file with some minimal styling, and a more extensive dropzone.css file. Minified versions of dropzone.css and dropzone.js are also available.
Basic Usage
The simplest way to implement the plugin is to attach it to a form, although you can use any HTML such as a <div>. Using a form, however, means fewer options to set — most notably the URL, which is the most important configuration property.
You can initialize it simply by adding the dropzone class. For example:
<form id=”upload-widget” method=”post” action=”/upload” class=”dropzone”></form>
Technically, that’s all you need to do, though in most cases you’ll want to set some additional options. The format for that is as follows:
Dropzone.options.WIDGET_ID = {
//
};
To derive the widget ID for setting the options, take the ID you defined in your HTML and camel-case it. For example, upload-widget becomes uploadWidget:
Dropzone.options.uploadWidget = {
//
};
You can also create an instance programmatically:
const uploader = new Dropzone(‘#upload-widget’, options);
Next up, we’ll look at some of the available configuration options.
Basic Configuration Options
The url option defines the target for the upload form, and is the only required parameter. That said, if you’re attaching it to a form element then it’ll simply use the form’s action attribute, in which case you don’t even need to specify that.
The method option sets the HTTP method and again, it will take this from the form element if you use that approach, or else it’ll simply default to POST, which should suit most scenarios.
The paramName option is used to set the name of the parameter for the uploaded file. If you’re using a file upload form element, it will match the name attribute. If you don’t include it, it defaults to file.
maxFiles sets the maximum number of files a user can upload, if it’s not set to null.
By default, the widget will show a file dialog when it’s clicked, though you can use the clickable parameter to disable this by setting it to false, or alternatively you can provide an HTML element or CSS selector to customize the clickable element.
Those are the basic options, but let’s now look at some of the more advanced options.
Enforcing Maximum File Size
The maxFilesize property determines the maximum file size in megabytes. This defaults to a size of 1000 bytes, but using the filesizeBase property, you could set it to another value — for example, 1024 bytes. You may need to tweak this to ensure that your client and server code calculate any limits in precisely the same way.
Restricting to Certain File Types
The acceptedFiles parameter can be used to restrict the type of file you want to accept. This should be in the form of a comma-separated list of MIME types, although you can also use wildcards.
For example, to only accept images:
acceptedFiles: ‘image/*’,
Modifying the Size of the Thumbnail
By default, the thumbnail is generated at 120x120px. That is, it’s square. There are a couple of ways you can modify this behavior.
The first is to use the thumbnailWidth and/or the thumbnailHeight configuration options.
If you set both thumbnailWidth and thumbnailHeight to null, the thumbnail won’t be resized at all.
If you want to completely customize the thumbnail generation behavior, you can even override the resize function.
One important point about modifying the size of the thumbnail is that the dz-image class provided by the package sets the thumbnail size in the CSS, so you’ll need to modify that accordingly as well.
Additional File Checks
The accept option allows you to provide additional checks to determine whether a file is valid before it gets uploaded. You shouldn’t use this to check the number of files (maxFiles), file type (acceptedFiles), or file size (maxFilesize), but you can write custom code to perform other sorts of validation.
You’d use the accept option like this:
accept: function(file, done) {
if (!someCheck()) {
return done(‘This is invalid!’);
}
return done();
}
As you can see, it’s asynchronous. You can call done() with no arguments and validation passes, or provide an error message and the file will be rejected, displaying the message alongside the file as a popover.
We’ll look at a more complex, real-world example later, when we look at how to enforce minimum or maximum image sizes.
Sending Additional Headers
Often you’ll need to attach additional headers to the uploader’s HTTP request.
As an example, one approach to CSRF (cross-site request forgery) protection is to output a token in the view, then have your POST/PUT/DELETE endpoints check the request headers for a valid token. Suppose you outputted your token like this:
<meta name=”csrf-token” content=”CL2tR2J4UHZXcR9BjRtSYOKzSmL8U1zTc7T8d6Jz”>
Then, you could add this to the configuration:
headers: {
‘x-csrf-token’: document.querySelector(‘meta[name=csrf-token]’).getAttributeNode(‘content’).value,
},
Alternatively, here’s the same example but using jQuery:
headers: {
‘x-csrf-token’: $(‘meta[name=”csrf-token”]’).attr(‘content’)
},
Your server should then verify the x-csrf-token header, perhaps using some middleware.
Handling Fallbacks
The simplest way to implement a fallback is to insert a <div> into your form containing input controls, setting the class name on the element to fallback. For example:
<form id=”upload-widget” method=”post” action=”/upload” class=”dropzone”>
<div class=”fallback”>
<input name=”file” type=”file” />
</div>
</form>
Alternatively, you can provide a function to be executed when the browser doesn’t support the plugin using the fallback configuration parameter.
You can force the widget to use the fallback behavior by setting forceFallback to true, which might help during development.
Handling Errors
You can customize the way the widget handles errors by providing a custom function using the error configuration parameter. The first argument is the file, the error message the second, and if the error occurred server-side, the third parameter will be an instance of XMLHttpRequest.
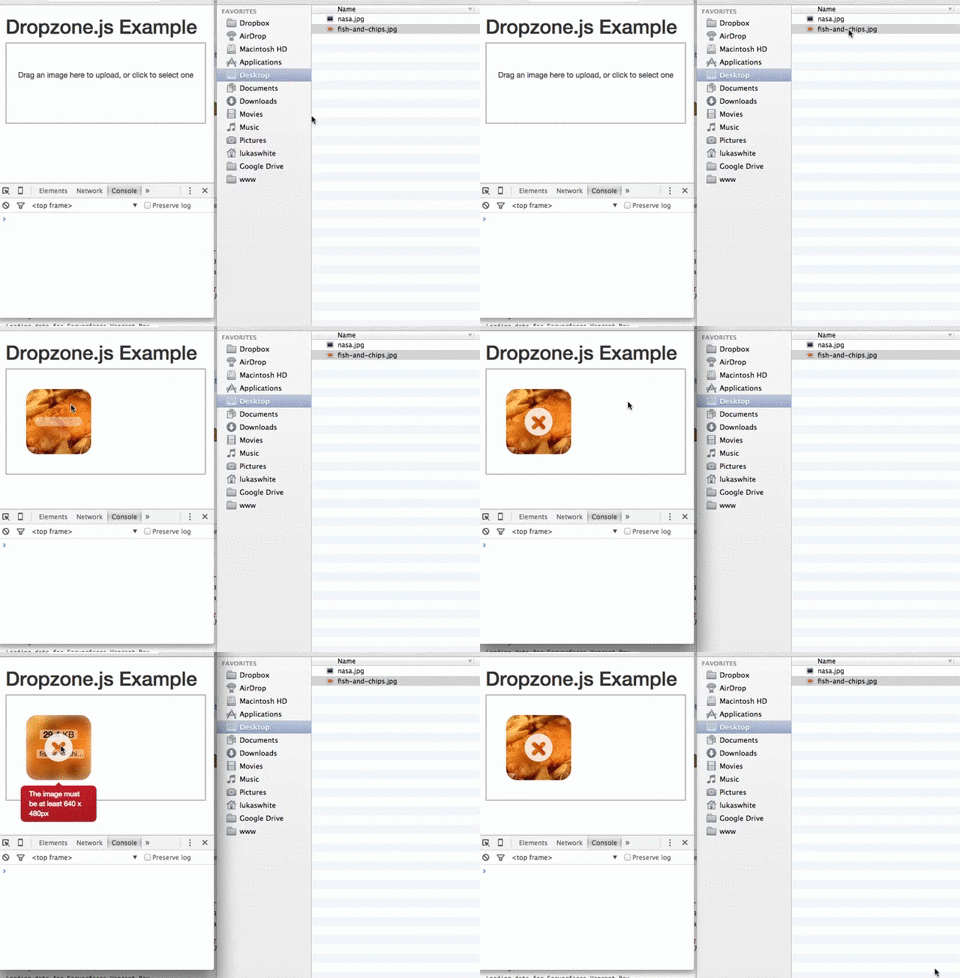
As always, client-side validation is only half the battle. You must also perform validation on the server. When we implement a simple server-side component later, we’ll look at the expected format of the error response, which when properly configured will be displayed in the same way as client-side errors (illustrated below).

Overriding Messages and Translation
There are a number of additional configuration properties which set the various messages displayed by the widget. You can use these to customize the displayed text, or to translate them into another language.
Most notably, dictDefaultMessage is used to set the text which appears in the middle of the dropzone, prior to someone selecting a file to upload.
You’ll find a complete list of the configurable string values — all of which begin with dict — in the documentation.
Events
There are a number of events you can listen to in order to customize or enhance the plugin.
There are two ways to listen to an event. The first is to create a listener within an initialization function:
Dropzone.options.uploadWidget = {
init: function() {
this.on(‘success’, function(file, resp){
…
});
},
…
};
This is the alternative approach, which is useful if you decide to create the Dropzone instance programatically:
const uploader = new Dropzone(‘#upload-widget’);
uploader.on(‘success’, function(file, resp){
…
});
Perhaps the most notable aspect is the success event, which is fired when a file has been successfully uploaded. The success callback takes two arguments: the first a file object, and the second an instance of XMLHttpRequest.
Other useful events include addedfile and removedfile, for when a file has been added or removed from the upload list; thumbnail, which fires once the thumbnail has been generated; and uploadprogress, which you might use to implement your own progress meter.
There are also a bunch of events which take an event object as a parameter and which you could use to customize the behavior of the widget itself — drop, dragstart, dragend, dragenter, dragover and dragleave.
You’ll find a complete list of events in the relevant section of the documentation.
The post How to Build a File Upload Form with Express and DropzoneJS appeared first on SitePoint.


Leave a Reply
Want to join the discussion?Feel free to contribute!