A Splash Of Color For Misty Days (November 2021 Desktop Wallpapers Edition)

Original Source: https://smashingmagazine.com/2021/10/desktop-wallpaper-calendars-november-2021/

A bit of colorful inspiration is always a good thing, don’t you think so? Especially in November, when the days tend to be rather gray in many parts of the world. To bring a splash of color and some good vibes to your desktops and home screens, artists and designers from across the globe once again tickled their creativity and designed beautiful and inspiring wallpapers to welcome the new month.

This monthly wallpapers challenge has been going on for more than ten years already, and we are very thankful to everyone who has put their creative skills to the test and contributed their artworks to it — back in the early days, just like today.

In this collection, you’ll find their wallpaper designs for November 2021. All of them come in versions with and without a calendar and can be downloaded for free. As a little bonus goodie, we also compiled some timeless treasures from past November editions at the end of this post for you. Enjoy!

You can click on every image to see a larger preview,
We respect and carefully consider the ideas and motivation behind each and every artist’s work. This is why we give all artists the full freedom to explore their creativity and express emotions and experience through their works. This is also why the themes of the wallpapers weren’t anyhow influenced by us but rather designed from scratch by the artists themselves.

Submit a wallpaper!

Did you know that you could get featured in our next wallpapers post, too? We are always looking for creative talent! Join in! →

No-Shave November

“This November, say goodbye to your trimmer, scissors, and razors, and join the No-Shave November, a global movement dedicated to raising cancer awareness. Let your beard, mustache, and any other body hair free, and donate the money you would spend on grooming to help those battling.” — Designed by PopArt Studio from Serbia.

preview
with calendar: 320×480, 640×480, 800×480, 800×600, 1024×768, 1024×1024, 1152×864, 1280×720, 1280×800, 1280×960, 1280×1024, 1366×768, 1400×1050, 1440×900, 1600×1200, 1680×1050, 1680×1200, 1920×1080, 1920×1200, 1920×1440, 2560×1440
without calendar: 320×480, 640×480, 800×480, 800×600, 1024×768, 1024×1024, 1152×864, 1280×720, 1280×800, 1280×960, 1280×1024, 1366×768, 1400×1050, 1440×900, 1600×1200, 1680×1050, 1680×1200, 1920×1080, 1920×1200, 1920×1440, 2560×1440

Winter Is Here

Designed by Ricardo Gimenes from Sweden.

preview
with calendar: 640×480, 800×480, 800×600, 1024×768, 1024×1024, 1152×864, 1280×720, 1280×800, 1280×960, 1280×1024, 1366×768, 1400×1050, 1440×900, 1600×1200, 1680×1050, 1680×1200, 1920×1080, 1920×1200, 1920×1440, 2560×1440, 3840×2160
without calendar: 640×480, 800×480, 800×600, 1024×768, 1024×1024, 1152×864, 1280×720, 1280×800, 1280×960, 1280×1024, 1366×768, 1400×1050, 1440×900, 1600×1200, 1680×1050, 1680×1200, 1920×1080, 1920×1200, 1920×1440, 2560×1440, 3840×2160

Go To Japan

“November is the perfect month to go to Japan. Autumn is beautiful with its brown colors. Let’s enjoy it!” — Designed by Veronica Valenzuela from Spain.

preview
with calendar: 640×480, 800×480, 1024×768, 1280×720, 1280×800, 1440×900, 1600×1200, 1920×1080, 1920×1440, 2560×1440
without calendar: 640×480, 800×480, 1024×768, 1280×720, 1280×800, 1440×900, 1600×1200, 1920×1080, 1920×1440, 2560×1440

Holiday Season Is Approaching

Designed by ActiveCollab from the United States.

preview
with calendar: 1080×1920, 1400×1050, 1440×900, 1600×1200, 1680×1200, 1920×1080, 1920×1200, 1920×1440, 2560×1440
without calendar: 1080×1920, 1400×1050, 1440×900, 1600×1200, 1680×1200, 1920×1080, 1920×1200, 1920×1440, 2560×1440

Be Still And Know

“We to be still in our mind, at peace in our heart and spirit, regardless of what’s going on around us.” — Designed by Hitesh Puri from Delhi, India.

preview
with calendar: 1280×720, 1280×800, 1280×960, 1280×1024, 1366×768, 1400×1050, 1440×900, 1600×1200, 1680×1050, 1680×1200, 1920×1080, 1920×1200, 1920×1440, 2560×1440
without calendar: 1280×720, 1280×800, 1280×960, 1280×1024, 1366×768, 1400×1050, 1440×900, 1600×1200, 1680×1050, 1680×1200, 1920×1080, 1920×1200, 1920×1440, 2560×1440

Mac OldS

Designed by Ricardo Gimenes from Sweden.

preview
with calendar: 640×480, 800×480, 800×600, 1024×768, 1024×1024, 1152×864, 1280×720, 1280×800, 1280×960, 1280×1024, 1366×768, 1400×1050, 1440×900, 1600×1200, 1680×1050, 1680×1200, 1920×1080, 1920×1200, 1920×1440, 2560×1440, 3840×2160
without calendar: 640×480, 800×480, 800×600, 1024×768, 1024×1024, 1152×864, 1280×720, 1280×800, 1280×960, 1280×1024, 1366×768, 1400×1050, 1440×900, 1600×1200, 1680×1050, 1680×1200, 1920×1080, 1920×1200, 1920×1440, 2560×1440, 3840×2160

Farewell To Autumn

“We say goodbye to autumn and welcome winter together without limitations and fears thanks to the effects of mass immunization. Enjoy the rest of the beautiful autumn days.” — Designed by LibraFire from Serbia.

preview
with calendar: 320×480, 640×480, 800×480, 800×600, 1024×768, 1024×1024, 1152×864, 1280×720, 1280×800, 1280×960, 1280×1024, 1366×768, 1400×1050, 1440×900, 1600×1200, 1680×1050, 1680×1200, 1920×1080, 1920×1200, 1920×1440, 2560×1440
without calendar: 320×480, 640×480, 800×480, 800×600, 1024×768, 1024×1024, 1152×864, 1280×720, 1280×800, 1280×960, 1280×1024, 1366×768, 1400×1050, 1440×900, 1600×1200, 1680×1050, 1680×1200, 1920×1080, 1920×1200, 1920×1440, 2560×1440

Oldies But Goodies

World Kindness Day, mushroom season, or a simple peanut butter and jelly sandwich — a lot of things have inspired the community to design a November wallpaper in all those years that we’ve been running this monthly series. Below you’ll find a little wallpapers best-of from past editions. Maybe you’ll spot one of your almost-forgotten favorites in there, too? (Please note that these designs don’t come with a calendar.)

International Civil Aviation Day

“On December 7, we mark International Civil Aviation Day, celebrating those who prove day by day that the sky really is the limit. As the engine of global connectivity, civil aviation is now, more than ever, a symbol of social and economic progress and a vehicle of international understanding. This monthly calendar is our sign of gratitude to those who dedicate their lives to enabling everyone to reach their dreams.” — Designed by PopArt Studio from Serbia.

preview
without calendar: 320×480, 640×480, 800×480, 800×600, 1024×768, 1024×1024, 1152×864, 1280×720, 1280×800, 1280×960, 1280×1024, 1400×1050, 1440×900, 1600×1200, 1680×1050, 1680×1200, 1920×1080, 1920×1200, 1920×1440, 2560×1440

Mushroom Season!

“It is autumn! It is raining and thus… it is mushroom season! It is the perfect moment to go to the forest and get the best mushrooms to do the best recipe.” — Designed by Verónica Valenzuela from Spain.

preview
without calendar: 800×480, 1024×768, 1152×864, 1280×800, 1280×960, 1440×900, 1680×1200, 1920×1080, 2560×1440

The Kind Soul

“Kindness drives humanity. Be kind. Be humble. Be humane. Be the best of yourself!” — Designed by Color Mean Creative Studio from Dubai.

preview
without calendar: 320×480, 640×480, 800×480, 800×600, 1024×768, 1024×1024, 1152×864, 1280×720, 1280×800, 1280×960, 1280×1024, 1366×768, 1400×1050, 1440×900, 1600×1200, 1680×1050, 1680×1200, 1920×1080, 1920×1200, 1920×1440, 2560×1440

Time To Give Thanks

Designed by Glynnis Owen from Australia.

preview
without calendar: 320×480, 640×480, 800×600, 1024×768, 1152×864, 1280×720, 1280×960, 1600×1200, 1920×1080, 1920×1440, 2560×1440

Tempestuous November

“By the end of autumn, ferocious Poseidon will part from tinted clouds and timid breeze. After this uneven clash, the sky once more becomes pellucid just in time for imminent luminous snow.” — Designed by Ana Masnikosa from Belgrade, Serbia.

preview
without calendar: 320×480, 640×480, 800×480, 800×600, 1024×768, 1024×1024, 1152×864, 1280×720, 1280×800, 1280×960, 1280×1024, 1400×1050, 1440×900, 1600×1200, 1680×1050, 1680×1200, 1920×1080, 1920×1200, 1920×1440, 2560×1440

Curious Squirrel

Designed by Saul Wauters from Belgium.

preview
without calendar: 320×480, 1920×1080, 2560×1440

Outer Space

“This November, we are inspired by the nature around us and the universe above us, so we created an out-of-this-world calendar. Now, let us all stop for a second and contemplate on preserving our forests, let us send birds of passage off to warmer places, and let us think to ourselves — if not on Earth, could we find a home somewhere else in outer space?” — Designed by PopArt Studio from Serbia.

preview
without calendar: 320×480, 640×480, 800×480, 800×600, 1024×768, 1024×1024, 1152×864, 1280×720, 1280×800, 1280×960, 1280×1024, 1366×768, 1400×1050, 1440×900, 1600×1200, 1680×1050, 1680×1200, 1920×1080, 1920×1200, 1920×1440, 2560×1440

Simple Leaves

Designed by Nicky Somers from Belgium.

preview
without calendar: 320×480, 640×480, 800×600, 1280×1024, 1600×1200, 2560×1440

November Ingredients

“Whether or not you celebrate Thanksgiving, there’s certain things that always make the harvest season special. As a Floridian, I’m a big fan of any signs that the weather might be cooling down soon, too!” — Designed by Dorothy Timmer from the United States.

preview
without calendar: 320×480, 640×480, 800×480, 800×600, 1024×768, 1024×1024, 1152×864, 1280×720, 1280×800, 1280×960, 1280×1024, 1400×1050, 1440×900, 1600×1200, 1680×1050, 1680×1200, 1920×1080, 1920×1200, 1920×1440, 2560×1440

Deer Fall, I Love You!

Designed by Maria Porter from the United States.

preview
without calendar: 320×480, 800×600, 1280×800, 1280×1024, 1440×900, 1680×1050, 2560×1440

Peanut Butter Jelly Time!

“November is the Peanut Butter Month so I decided to make a wallpaper around that. As everyone knows peanut butter goes really well with some jelly so I made two sandwiches, one with peanut butter and one with jelly. Together they make the best combination. I also think peanut butter tastes pretty good so that’s why I chose this for my wallpaper.” — Designed by Senne Mommens from Belgium.

preview
without calendar: 320×480, 1280×720, 1280×800, 1280×1024, 1920×1080, 2560×1440

Branches

“The design of trees has always fascinated me. Each one has it’s own unique entanglement of branches. With or without leaves they are always intriguing. Take some time to enjoy the trees around you — and the one on this wallpaper if you’d like!” — Designed by Rachel Litzinger from Chiang Rai, Thailand.

preview
without calendar: 1080×1920, 1280×800, 1280×960, 1440×900, 1680×1200, 1920×1200, 2560×1440, 1600×900, 2560×2560

Real Artists Ship

“A tribute to Steve Jobs, from the crew at Busy Building Things.” Designed by Andrew Power from Canada.

preview
without calendar: 1024×768, 1024×1024, 1280×800, 1440×900, 1920×1080, 2560×1440

Running Through Autumn Mist

“A small tribute to my German Shepherd who adds joy to those grey November days.” — Designed by Franke Margrete from the Netherlands.

preview
without calendar: 320×480, 360×480, 376×668, 768×1024, 1024×1024, 1280×720, 1280×800, 1280×1024, 1366×768, 1366×1050, 1440×900, 1536×864, 1600×900, 1920×1080, 1920×1440, 2560×1440, 2560×1600, 3840×2160, 5120×2880

Little Mademoiselle P

“Black-and-white drawing of a little girl.” Designed by Jelena Tšekulajeva from Estonia.

preview
without calendar: 320×480, 1024×1024, 1280×800, 1440×900, 1680×1050

November Nights On Mountains

“Those chill November nights when you see mountain tops covered with the first snow sparkling in the moonlight.” — Designed by Jovana Djokic from Serbia.

preview
without calendar: 320×480, 640×480, 800×480, 800×600, 1024×768, 1024×1024, 1152×864, 1280×720, 1280×800, 1280×1024, 1366×768, 1400×1050, 1440×900, 1600×1200, 1680×1050, 1680×1200, 1920×1080, 1920×1200, 1920×1440, 2560×1440

Hello World, Happy November!

“I often read messages at Smashing Magazine from the people in the southern hemisphere ‘it’s spring, not autumn!’ so I’d liked to design a wallpaper for the northern and the southern hemispheres. Here it is, northerners and southerns, hope you like it!” — Designed by Agnes Swart from the Netherlands.

preview
without calendar: 640×480, 800×480, 800×600, 1024×768, 1024×1024, 1152×864, 1280×720, 1280×800, 1280×960, 1280×1024, 1400×1050, 1440×900, 1600×1200, 1680×1050, 1680×1200, 1920×1080, 1920×1200, 1920×1440, 2560×1440

Moonlight Bats

“I designed some Halloween characters and then this idea came to my mind — a bat family hanging around in the moonlight. A cute and scary mood is just perfect for autumn.” — Designed by Carmen Eisendle from Germany.

preview
without calendar: 640×480, 800×600, 1024×768, 1280×800, 1280×960, 1440×900, 1600×1200, 1680×1050, 1680×1260, 1920×1200, 1920×1440, 2560×1440, 2560×1600

Welcome Home Dear Winter

“The smell of winter is lingering in the air. The time to be home! Winter reminds us of good food, of the warmth, the touch of a friendly hand, and a talk beside the fire. Keep calm and let us welcome winter.” — Designed by Acodez IT Solutions from India.

preview
without calendar: 640×480, 800×480, 800×600, 1024×768, 1024×1024, 1152×864, 1280×720, 1280×960, 1280×1024, 1366×768, 1400×1050, 1440×900, 1600×1200, 1680×1050, 1680×1200, 1920×1080, 1920×1200, 1920×1440, 2560×1440

Stars

“I don’t know anyone who hasn’t enjoyed a cold night looking at the stars.” — Designed by Ema Rede from Portugal.

preview
without calendar: 1600×1200, 1680×1050, 1680×1200, 1920×1080, 1920×1200, 1920×1440

Me And The Key Three

“This wallpaper is based on screenshots from my latest browser game (I’m an indie games designer).” — Designed by Bart Bonte from Belgium.

preview
without calendar: 640×480, 800×480, 800×600, 1024×768, 1024×1024, 1152×864, 1280×720, 1280×800, 1280×960, 1280×1024, 1400×1050, 1440×900, 1600×1200, 1680×1050, 1680×1200, 1920×1080, 1920×1200, 1920×1440, 2560×1440

Apple iPhone 14: from design to specs, everything we know so far

Original Source: http://feedproxy.google.com/~r/CreativeBloq/~3/MyFousnK2Jc/iphone-14

2022 could be a big year for the iPhone.

Facebook Goes All Meta

Original Source: https://www.webdesignerdepot.com/2021/10/facebook-goes-all-meta/

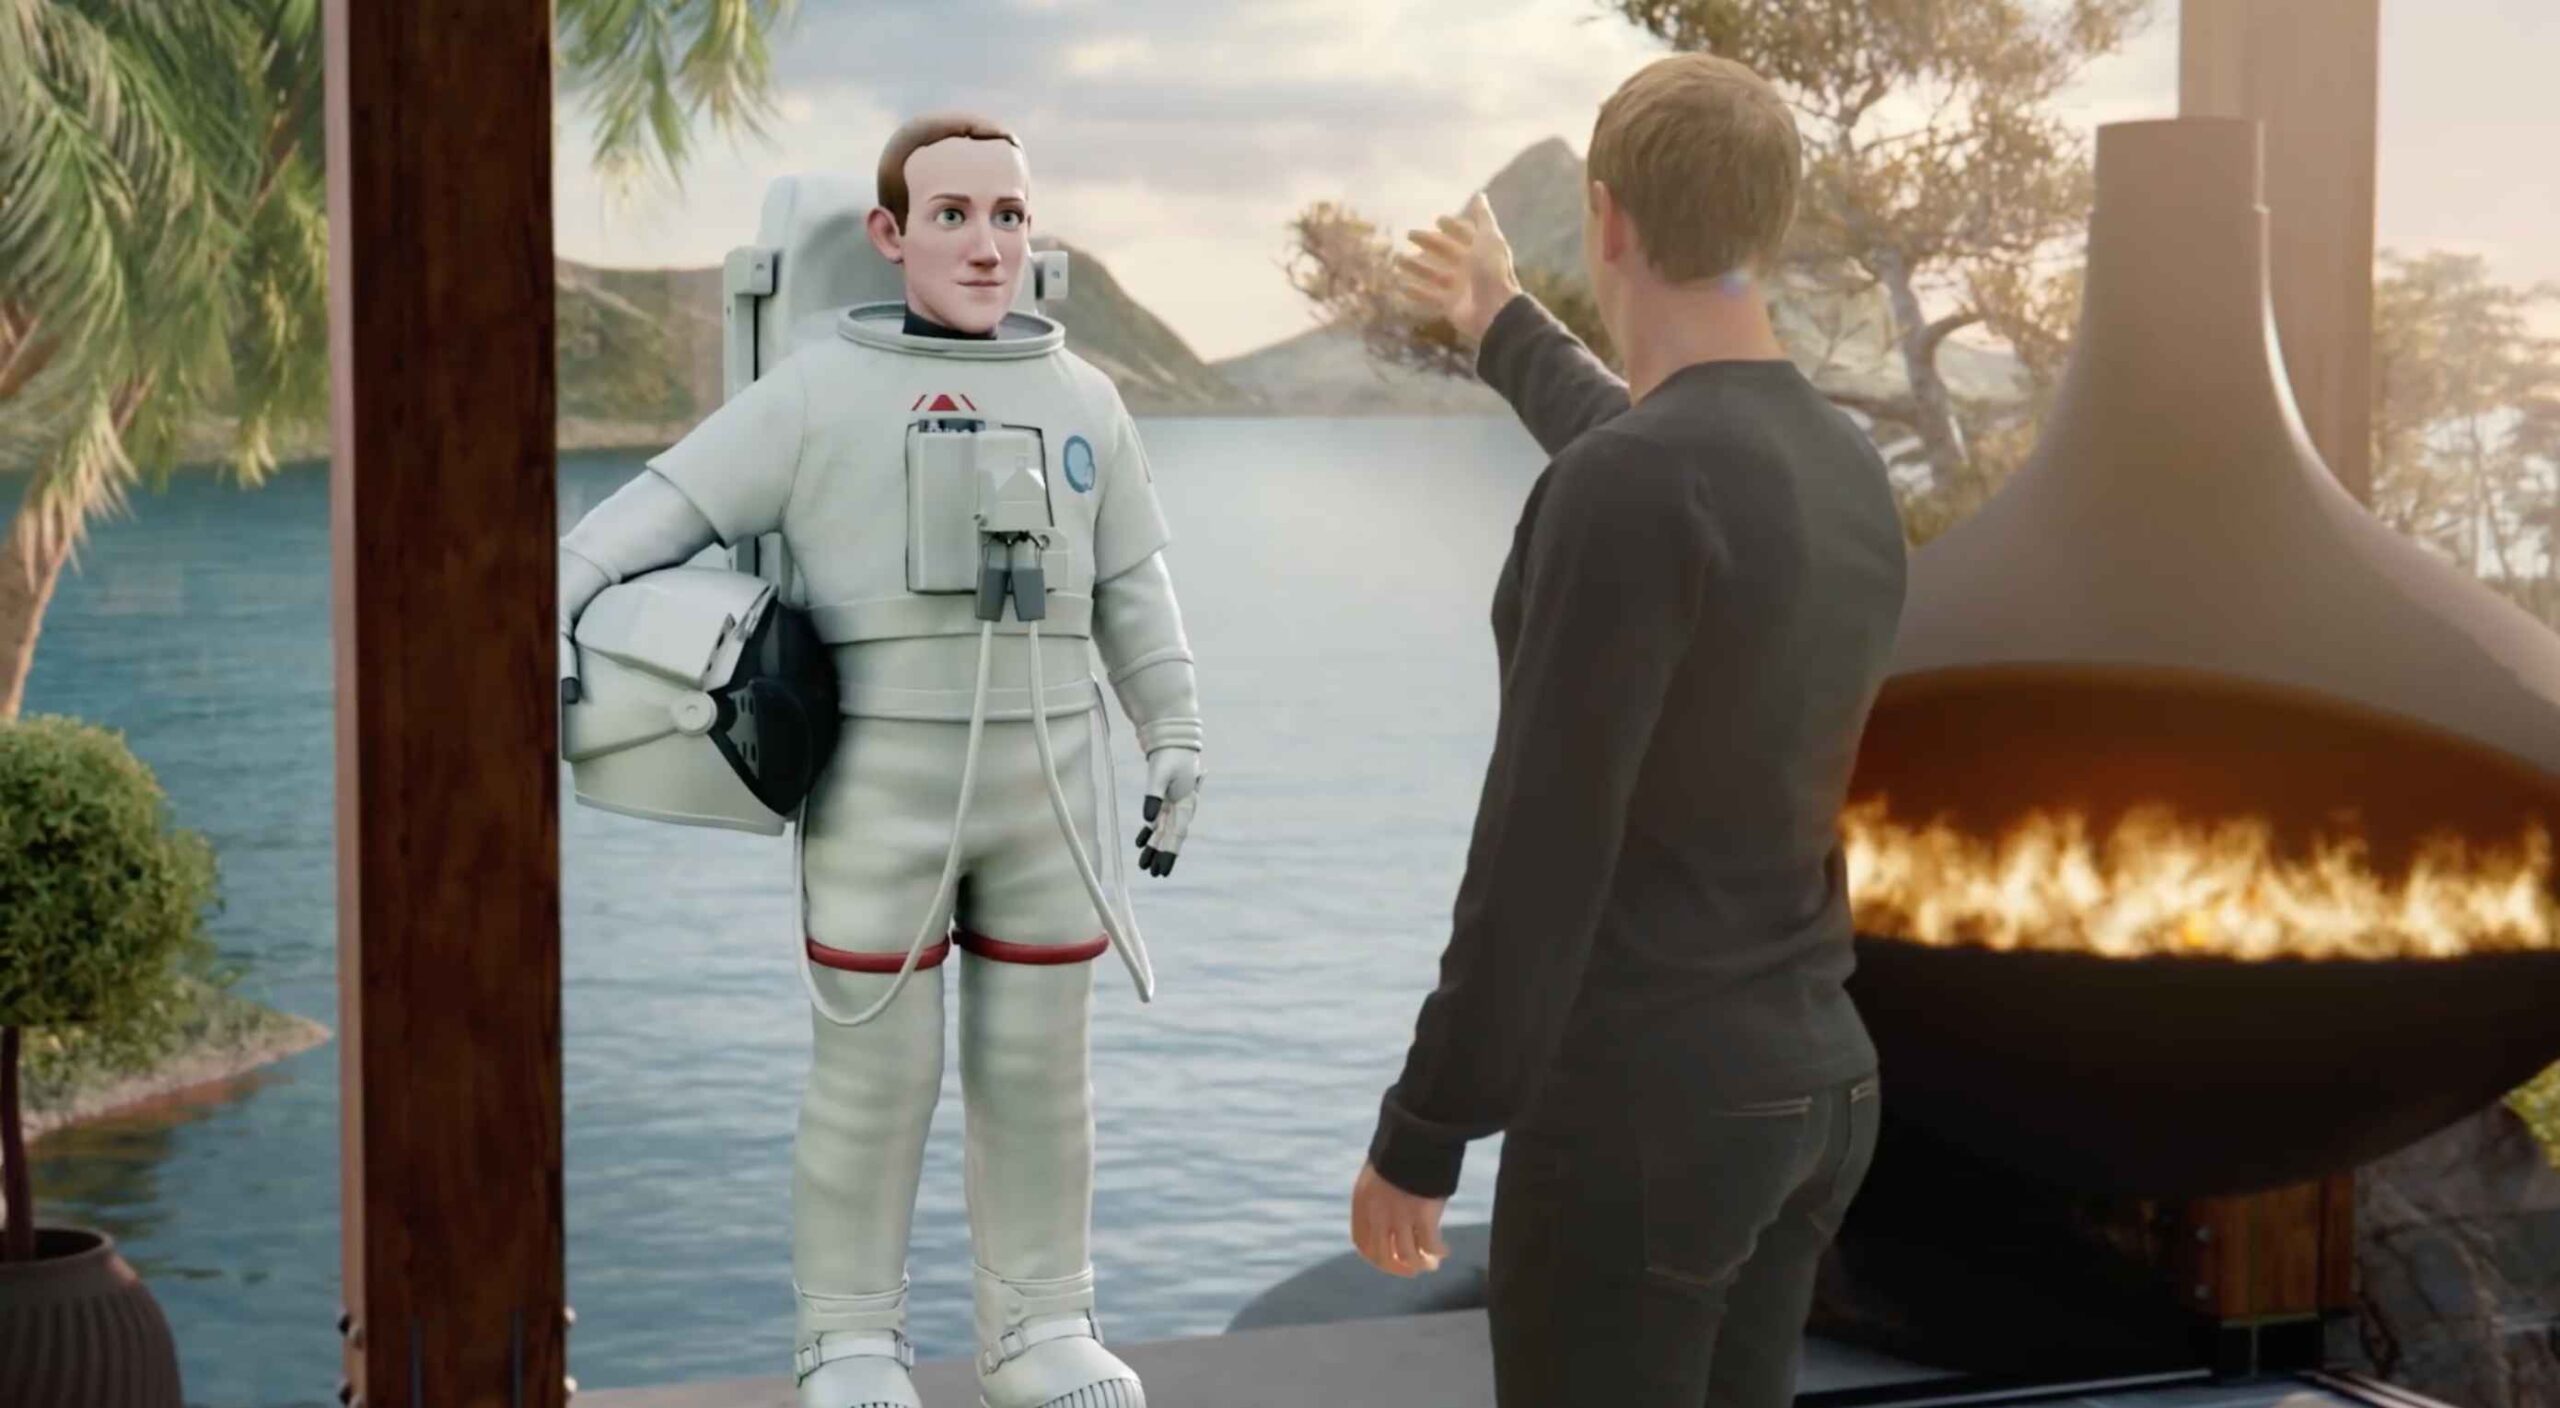
It’s almost Halloween, so we were all expecting the odd scare, but little could have prepared us for the blood-chilling horror of Facebook CEO Mark Zuckerberg ‘acting’ amazed in front of a green-screened mockup of The Metaverse, during his keynote at the company’s Connect event.

Zuckerberg — or The Zuckster, as I imagine he introduces himself when arriving uninvited to your birthday drinks — was in the process of announcing that the company formally known as Facebook would from now on be known simply as Meta.

Facebook, the social network, will remain Facebook, but it will be one product among many. Or, as The Zuckster clearly hopes, one among all.

Meta logo reveal.

With the new name comes a new visual identity, one so bland that I need to go full-on Clockwork Orange just to critique it. Eyes pinned open, you’ll see an elongated infinity wave in an inoffensive tech-blue gradient and a generic geometric sans logotype. You could throw $5 at a sweat-shop style freelance site and receive a more ambitious, inspiring design than this. It is utterly bland.

If I try really, really hard to find something wrong, I might suggest the M feels a little too large, the single-story a is a little too open compared to the spacing elsewhere, and the wave is a little unbalanced and a little too small. But that is being super-picky because just as there’s little to get excited about, there’s little to be offended by either. It’s a logo fit to adorn a mid-range domestic router.

The Zuckster’s faith in himself as a positive brand ambassador means that he takes full credit for the new direction. The small team involved was reportedly required to sign extensive NDAs, and there’s no credit being given to any external agency.

Of course, it’s very easy to point out what Meta (née Facebook) gets wrong. What it doesn’t get wrong is making money. And this is a sensible business decision from a company that has watched Google extricate itself from algorithm-related ethics allegations with its Alphabet rebrand.

Leaked internal research suggests that Facebook is extremely concerned about its ability to maintain its position in the social media landscape. The app is in sharp decline. It’s no longer the most installed app, and even for those who still have an account, it’s used weekly rather than hourly. Most worrying of all, the average age of its userbase is steadily increasing.

Strategically, it’s a good design direction for Facebook. The most significant benefit is that absolutely none of the insidious, anti-democratic crimes that Facebook has been accused of can be associated with Meta; Meta is a blank slate.

In a press release that echoed The Zuckster’s keynote, Meta notes that it will begin trading under the stock ticker MVRS from December 1, staking a claim as the Metaverse business entity.

The Metaverse — and let’s be clear, this is not The Zuckster’s concept — is a so far ill-defined collection of ideas that will potentially coalesce over the next few years into some form of virtual reality web. It’s almost as if someone over at Facebook HQ said, “If only we could name ourselves ‘Inter,’ then we’d own the whole Internet!” And everyone cheered.

So yes, there is the sickening reality that we’re going to spend the rest of our careers trying to find a less tainted name for metadata. But that’s nothing to the amount of time we’ll devote explaining to future generations that Meta is not The Metaverse.

From now on, I’ll be referring to all Web 3.0 as the Geoverse and see if I can’t revive the fortunes of Geocities. Ah, now there’s a social network worth raising from the dead. Happy Halloween.

Source

p img {display:inline-block; margin-right:10px;}
.alignleft {float:left;}
p.showcase {clear:both;}
body#browserfriendly p, body#podcast p, div#emailbody p{margin:0;}

The post Facebook Goes All Meta first appeared on Webdesigner Depot.

Collection of Innovative Kitchen Tools & Gadgets

Original Source: https://www.hongkiat.com/blog/innovative-kitchen-tools-gadgets/

Cooking is one of the many splendors of life. At least, if you know your way around the kitchen, it would be. Not a fan of cooking because you hate chopping up ingredients? Maybe these gadgets will…

Visit hongkiat.com for full content.

Collective #685

Original Source: http://feedproxy.google.com/~r/tympanus/~3/1ca3kHO8-n8/

Inspirational Website of the Week: Miranda

A true masterpiece with a playful editorial look, unique layouts and a hot page transition!

Get inspired

Our Sponsor
Be: The WordPress Theme that follows the latest eCommerce design trends

Build stunning eCommerce websites with Live search or bottom sticky menu on mobile which makes mobile sites act more like apps! All wrapped in outstanding eCommerce performance.

Discover more

Building an effective Image Component

An image component encapsulates performance best practices and provides an out-of-the-box solution to optimize images.

Read it

Front End Tables: Sorting, Filtering, and Pagination

Tania Rascia shows how to code a table that has sorting, filtering, and pagination using React.

Read it

Skeletonise yourself with pose detection

Learn how to create a fun Halloween AI based experience entirely in the browser with TensorFlow.js.

Read it

Prevent Scroll Chaining With Overscroll Behavior

Ahmad Shadeed shows how to prevent scroll chaining with overscroll-behavior property in CSS.

Read it

My Little Storybook

My Little Storybook is a wonderful Lusion Monthly Experiment. It is a story of a bird family crossing the river.

Check it out

Next.js 12

Next.js 12 introduces a brand-new Rust compiler, Middleware (beta), React 18 Support, Native ESM Support, URL Imports, React Server Components (alpha), and more!

Check it out

Cleanup.pictures

A free tool to remove objects, people, text and defects from any picture. It works really well!

Check it out

CookLang

CookLang is a markup language for recipes. Create a recipe file, where each line is a step in the recipe.

Check it out

Flatmap

A fast and flexible tool to build vector tiles from OpenStreetMap data.

Check it out

We Analyzed 425,909 Favicons

A super-interesting analysis of almost half a million favicons.

Check it out

20 Years of G2K

G2K creative Agency’s celebration with an exciting scroll experience.

Check it out

Obsidian

Obsidian is a powerful knowledge base on top of a local folder of plain text Markdown files. Free for personal use.

Check it out

Photoshop’s journey to the web

Read how by using various new standardized web technologies, Adobe has brought a public beta of Photoshop to the web.

Read it

New HTTP standards for caching on the modern web

Learn about the recent work to launch two new HTTP header draft standards intended to make debugging your caching easier, and to provide more control over your cache configuration.

Read it

Johanna Jaskowska

An amazing interactive gooey effect by Johanna Jaskowska.

Check it out

Life of Discipline

A free habit tracker using GitHub-style calendar heat maps to help you track anything.

Check it out

The Button Cheat Sheet

Do you need a button for your next project but you’re not sure about the right markup? This cheatsheet has got you covered!

Check it out

Localstack

A fully functional local AWS cloud stack. Develop and test your cloud and Serverless apps offline.

Check it out

This sneaker does not exist

A fun project where you can customize your AI-generated sneakers.

Check it out

Compatlib

With these Python utilities you can easily write cross-version compatible libraries.

Check it out

Sparse vs Dense Arrays in JavaScript

Learn about the difference between sparse and dence arrays in JavaScript in this article by Dmitri Pavlutin.

Read it

Release Notes for Safari Technology Preview 134

Some important updates for Safari are coming.

Check it out

From Our Blog
The Process of Building a CSS Framework

A behind-the-scenes look at making a CSS framework and a tutorial on how to build a website with it.

Check it out

From Our Blog
Creating the Effect of Transparent Glass and Plastic in Three.js

Learn how to create convincing transparent, glass-like and plastic-like materials in Three.js using MeshPhysicalMaterial.

Check it out

The post Collective #685 appeared first on Codrops.

Pricing Tables: Best Designs and WordPress Plugins

Original Source: http://feedproxy.google.com/~r/1stwebdesigner/~3/tiXnOsrCxWk/

If you’re a regular online shopper, you’ve definitely come across pricing tables before. Pricing tables are an important feature of websites that sell online. These tables help customers compare product features and prices.

Pricing tables need to be simple and easy to understand because they help users make an informed buying decision. A lot of information is likely to overwhelm the customer while too little or unclear information can be ineffective.

Other benefits of pricing tables include:

Tables help remove unnecessary clutter.
They save on space.
Provide a clear call to action.
Can attract more clients and generate more sales.

Now, it is important to note that not all WordPress themes have pre-built pricing tables, so you might need to download a plugin to integrate this feature.

UNLIMITED DOWNLOADS: 1,500,000+ Icons & Design Assets

DOWNLOAD NOW


What To Look For In A WordPress Table Plugin

Before we get to the list, let’s first pause to discuss what features are a must-have for any pricing table plugin you decide to use.

1. Pricing Table Templates

Look for plugins that offer several pricing table templates. This will help you in customizing your designs according to exactly what you’re looking for.

2. Price

If your website is small and you’re just looking for something simple, be sure to check the available free plugins before purchasing one. There are so many free plugins, many with a bunch of cool features.

3. Customization

You should look for a plugin that will allow you to customize your table according to your branding. That means custom colors, fonts, etc.

4. Integrations

Look for a plugin that can easily integrate with your WordPress theme so it works seamlessly.

WordPress Pricing Table Plugins

Below, we have identified some of the best pricing table plugins available and we hope you’ll find one that best suits your needs.

1. Go Pricing

Go Pricing - WordPress Pricing Table Plugins

Go Pricing is a table plugin that offers you almost 200 table designs. Its modern and stylish features will help you create the perfect pricing table for your website.

The plugin will help you customize your table without having to code. This is perfect for someone who isn’t familiar with web design.

It also offers you 200 templates, 2,000+ font icons, over 600 fonts, an unlimited color selection, modern media options, and more.

Some of its pros and cons include:

Pros

Has extensive customization options and is feature-rich.
Has a live preview option that allows you to see how your table will look at the end.
Popular with page builders like Elementor, WP Bakery, and Beaver Builder.
Has a column animation feature.

Cons

You have to be on a paid subscription to download table templates.

2. Responsive Pricing Table

Responsive Pricing Table

Responsive Pricing Table is a free WordPress plugin that has a shortcode that allows you to show your table anywhere on the website. It adds a pricing table tab in the admin section which makes adding a pricing table easy.

With the many features it offers, you’re able to: add different colors to your table, choose unique fonts, and more.

Some of its pros and cons include:

Pros

Easy to create and customize.
Can be used to compare products.
You can change the currency sign.
You can highlight any plan.

Cons

Poor customer support.

3. CSS3 Responsive WordPress Compare Tables

CSS3 Responsive WordPress Compare Tables

The CSS3 Responsive pricing table is a premium plugin with several customization features. It comes with two table styles and 20 predefined color options.

It also offers a number of features that will help you create the best tables for your site such as hover animations, pop-ups, and ribbons. This plugin is perfect for creating beautiful pricing tables.

Some of its pros and cons include:

Pros

Allows you to see your changes in real-time.
Can highlight columns and customize fonts.

Cons

You need CSS if you wish to access more customization features.
Comes with only two table styles and 20 color themes.
Can be time-consuming to set up.

4. ArPrice Pricing Tables

ArPrice Pricing Tables

This is a free and premium WordPress plugin that allows you to make responsive pricing tables that can be used on multiple devices. Some of its features include the ability to create an animated pricing table.

With ArPrice you have a selection of over 170 already made templates to choose from. You can also use the drag and drop editor to adjust and resize columns as needed.

ArPrice has a real time editor feature that will make the customization of your site easier.

Some of its pros and cons include:

Pros

Allows language translation.
It’s lightweight.
Easy to use.
Offers a variety of colors.

Cons

Can be slow at times.

5. Easy Pricing Tables

Easy Pricing Tables WordPress Plugin

Easy Pricing Tables is a WordPress plugin that lets you create your tables with ease. The plugin is easy to use and gets the job done quickly. It includes predefined colors and themes. With this plugin you get 120+ ribbons, a live preview, 100+ content elements, and more.

Some of its pros and cons include:

Pros

Easy to use.
Has the drag and drop feature.
Gutenberg compatible.
Compatible with all WordPress themes.

Cons

No cons found.

Best Pricing Table Designs

So, you now know about a few pricing table plugins that can help you display pricing information in a straightforward way. But if you’re stumped on design inspiration, we’ve compiled a shortlist of some top designs to add some fuel to your design fire.

1. Shopify

Shopify pricing table

The Shopify pricing table is one of the best around because its layout makes it easy to compare different plans. And the prominent Free Trial buttons encourage conversions.

2. Dropbox

Dropbox pricing table

The Dropbox table layout makes it easy for buyers to compare pricing and features. This helps users get to know what exactly they are purchasing and decide on what works better for them.

3. Slack

Slack pricing table

Slack’s pricing table uses different colors to highlight different available plans. This makes the table more eye-catching and is likely to grab the customer’s attention. Each plan comes with a description of how they are billed and also includes a call-to-action.

4. Airtable

Airtable pricing table

Airtable is another great example of a pricing table that uses colors to grab attention. It has a simple design that draws focus to the features available on each plan.

There’s also a monthly or yearly option at the top of the table that helps you select your preferred plan.

5. LightCMS

LightCMS pricing table

LightCMS is another great example of a well designed pricing table. They have incorporated different colors to grab attention and to highlight the different available plans. They’ve also used different font sizes for comparison.

Conclusion

A well designed pricing table is likely to grab the consumer’s attention. If you’re looking for a good pricing table for your website, we hope this list of plugins and designs has helped you figure out what will work best for your site. Best of luck! Be sure to check out our other articles about WordPress plugins while you’re at it.


How To Build An Amazon Product Scraper With Node.js

Original Source: https://smashingmagazine.com/2021/10/building-amazon-product-scraper-nodejs/

Have you ever been in a position where you need to intimately know the market for a particular product? Maybe you’re launching some software and need to know how to price it. Or perhaps you already have your own product on the market and want to see which features to add for a competitive advantage. Or maybe you just want to buy something for yourself and want to make sure you get the best bang for your buck.

All these situations have one thing in common: you need accurate data to make the correct decision. Actually, there’s another thing they share. All scenarios can benefit from the use of a web scraper.

Web scraping is the practice of extracting large amounts of web data through the use of software. So, in essence, it’s a way to automate the tedious process of hitting ‘copy’ and then ‘paste’ 200 times. Of course, a bot can do that in the time it took you to read this sentence, so it’s not only less boring but a lot faster, too.

But the burning question is: why would someone want to scrape Amazon pages?

You’re about to find out! But first of all, I’d like to make something clear right now — while the act of scraping publicly available data is legal, Amazon has some measures to prevent it on their pages. As such, I urge you always to be mindful of the website while scraping, take care not to damage it, and follow ethical guidelines.

Recommended Reading: “The Guide To Ethical Scraping Of Dynamic Websites With Node.js And Puppeteer” by Andreas Altheimer

Why You Should Extract Amazon Product Data

Being the largest online retailer on the planet, it’s safe to say that if you want to buy something, you can probably get it on Amazon. So, it goes without saying just how big of a data treasure trove the website is.

When scraping the web, your primary question should be what to do with all that data. While there are many individual reasons, it boils down to two prominent use cases: optimizing your products and finding the best deals.

Let’s start with the first scenario. Unless you’ve designed a truly innovative new product, the chances are that you can already find something at least similar on Amazon. Scraping those product pages can net you invaluable data such as:

The competitors’ pricing strategy
So, that you can adjust your prices to be competitive and understand how others handle promotional deals;
Customer opinions
To see what your future client base cares about most and how to improve their experience;
Most common features
To see what your competition offers to know which functionalities are crucial and which can be left for later.

In essence, Amazon has everything you need for a deep market and product analysis. You’ll be better prepared to design, launch, and expand your product lineup with that data.

The second scenario can apply to both businesses and regular people. The idea is pretty similar to what I mentioned earlier. You can scrape the prices, features, and reviews of all the products you could choose, and so, you’ll be able to pick the one that offers the most benefits for the lowest price. After all, who doesn’t like a good deal?

Not all products deserve this level of attention to detail, but it can make a massive difference with expensive purchases. Unfortunately, while the benefits are clear, many difficulties go along with scraping Amazon.

The Challenges Of Scraping Amazon Product Data

Not all websites are the same. As a rule of thumb, the more complex and widespread a website is, the harder it is to scrape it. Remember when I said that Amazon was the most prominent e-commerce site? Well, that makes it both extremely popular and reasonably complex.

First off, Amazon knows how scraping bots act, so the website has countermeasures in place. Namely, if the scraper follows a predictable pattern, sending requests at fixed intervals, faster than a human could or with almost identical parameters, Amazon will notice and block the IP. Proxies can solve this problem, but I didn’t need them since we won’t be scraping too many pages in the example.

Next, Amazon deliberately uses varying page structures for their products. That is to say, that if you inspect the pages for different products, there’s a good chance that you’ll find significant differences in their structure and attributes. The reason behind this is quite simple. You need to adapt your scraper’s code for a specific system, and if you use the same script on a new kind of page, you’d have to rewrite parts of it. So, they’re essentially making you work more for the data.

Lastly, Amazon is a vast website. If you want to gather large amounts of data, running the scraping software on your computer might turn out to take way too much time for your needs. This problem is further consolidated by the fact that going too fast will get your scraper blocked. So, if you want loads of data quickly, you’ll need a truly powerful scraper.

Well, that’s enough talk about problems, let’s focus on solutions!

How To Build A Web Scraper For Amazon

To keep things simple, we’ll take a step-by-step approach to writing the code. Feel free to work in parallel with the guide.

Look for the data we need

So, here’s a scenario: I’m moving in a few months to a new place, and I’ll need a couple of new shelves to hold books and magazines. I want to know all my options and get as good of a deal as I can. So, let’s go to the Amazon market, search for “shelves”, and see what we get.

The URL for this search and the page we’ll be scraping is here.

Ok, let’s take stock of what we have here. Just by glancing at the page, we can get a good picture about:

how the shelves look;
what the package includes;
how customers rate them;
their price;
the link to the product;
a suggestion for a cheaper alternative for some of the items.

That’s more than we could ask for!

Get the required tools

Let’s ensure we have all the following tools installed and configured before continuing to the next step.

Chrome
We can download it from here.
VSCode
Follow the instructions on this page to install it on your specific device.
Node.js
Before starting using Axios or Cheerio, we need to install Node.js and the Node Package Manager. The easiest way to install Node.js and NPM is to get one of the installers from the Node.Js official source and run it.

Now, let’s create a new NPM project. Create a new folder for the project and run the following command:

npm init -y

To create the web scraper, we need to install a couple of dependencies in our project:

Cheerio
An open-source library that helps us extract useful information by parsing markup and providing an API for manipulating the resulting data. Cheerio allows us to select tags of an HTML document by using selectors: $(“div”). This specific selector helps us pick all <div> elements on a page. To install Cheerio, please run the following command in the projects’ folder:

npm install cheerio

Axios
A JavaScript library used to make HTTP requests from Node.js.

npm install axios

Inspect the page source

In the following steps, we will learn more about how the information is organized on the page. The idea is to get a better understanding of what we can scrape from our source.

The developer tools help us interactively explore the website’s Document Object Model (DOM). We will use the developer tools in Chrome, but you can use any web browser you’re comfortable with.

Let’s open it by right-clicking anywhere on the page and selecting the “Inspect” option:

This will open up a new window containing the source code of the page. As we have said before, we are looking to scrape every shelf’s information.

As we can see from the screenshot above, the containers that hold all the data have the following classes:

sg-col-4-of-12 s-result-item s-asin sg-col-4-of-16 sg-col sg-col-4-of-20

In the next step, we will use Cheerio to select all the elements containing the data we need.

Fetch the data

After we installed all the dependencies presented above, let’s create a new index.js file and type the following lines of code:

const axios = require(“axios”);
const cheerio = require(“cheerio”);

const fetchShelves = async () => {
try {
const response = await axios.get(‘https://www.amazon.com/s?crid=36QNR0DBY6M7J&k=shelves&ref=glow_cls&refresh=1&sprefix=s%2Caps%2C309’);

const html = response.data;

const $ = cheerio.load(html);

const shelves = [];

$(‘div.sg-col-4-of-12.s-result-item.s-asin.sg-col-4-of-16.sg-col.sg-col-4-of-20’).each((_idx, el) => {
const shelf = $(el)
const title = shelf.find(‘span.a-size-base-plus.a-color-base.a-text-normal’).text()

shelves.push(title)
});

return shelves;
} catch (error) {
throw error;
}
};

fetchShelves().then((shelves) => console.log(shelves));

As we can see, we import the dependencies we need on the first two lines, and then we create a fetchShelves() function that, using Cheerio, gets all the elements containing our products’ information from the page.

It iterates over each of them and pushes it to an empty array to get a better-formatted result.

The fetchShelves() function will only return the product’s title at the moment, so let’s get the rest of the information we need. Please add the following lines of code after the line where we defined the variable title.

const image = shelf.find(‘img.s-image’).attr(‘src’)

const link = shelf.find(‘a.a-link-normal.a-text-normal’).attr(‘href’)

const reviews = shelf.find(‘div.a-section.a-spacing-none.a-spacing-top-micro > div.a-row.a-size-small’).children(‘span’).last().attr(‘aria-label’)

const stars = shelf.find(‘div.a-section.a-spacing-none.a-spacing-top-micro > div > span’).attr(‘aria-label’)

const price = shelf.find(‘span.a-price > span.a-offscreen’).text()

let element = {
title,
image,
link: https://amazon.com${link},
price,
}

if (reviews) {
element.reviews = reviews
}

if (stars) {
element.stars = stars
}

And replace shelves.push(title) with shelves.push(element).

We are now selecting all the information we need and adding it to a new object called element. Every element is then pushed to the shelves array to get a list of objects containing just the data we are looking for.

This is how a shelf object should look like before it is added to our list:

{
title: ‘SUPERJARE Wall Mounted Shelves, Set of 2, Display Ledge, Storage Rack for Room/Kitchen/Office – White’,
image: ‘https://m.media-amazon.com/images/I/61fTtaQNPnL._AC_UL320_.jpg’,
link: ‘https://amazon.com/gp/slredirect/picassoRedirect.html/ref=pa_sp_btf_aps_sr_pg1_1?ie=UTF8&adId=A03078372WABZ8V6NFP9L&url=%2FSUPERJARE-Mounted-Floating-Shelves-Display%2Fdp%2FB07H4NRT36%2Fref%3Dsr_1_59_sspa%3Fcrid%3D36QNR0DBY6M7J%26dchild%3D1%26keywords%3Dshelves%26qid%3D1627970918%26refresh%3D1%26sprefix%3Ds%252Caps%252C309%26sr%3D8-59-spons%26psc%3D1&qualifier=1627970918&id=3373422987100422&widgetName=sp_btf’,
price: ‘$32.99’,
reviews: ‘6,171’,
stars: ‘4.7 out of 5 stars’
}

Format the data

Now that we have managed to fetch the data we need, it’s a good idea to save it as a .CSV file to improve readability. After getting all the data, we will use the fs module provided by Node.js and save a new file called saved-shelves.csv to the project’s folder. Import the fs module at the top of the file and copy or write along the following lines of code:

let csvContent = shelves.map(element => {
return Object.values(element).map(item => “${item}”).join(‘,’)
}).join(“n”)

fs.writeFile(‘saved-shelves.csv’, “Title, Image, Link, Price, Reviews, Stars” + ‘n’ + csvContent, ‘utf8’, function (err) {
if (err) {
console.log(‘Some error occurred – file either not saved or corrupted.’)
} else{
console.log(‘File has been saved!’)
}
})

As we can see, on the first three lines, we format the data we have previously gathered by joining all the values of a shelve object using a comma. Then, using the fs module, we create a file called saved-shelves.csv, add a new row that contains the column headers, add the data we have just formatted and create a callback function that handles the errors.

The result should look something like this:

Bonus Tips!
Scraping Single Page Applications

Dynamic content is becoming the standard nowadays, as websites are more complex than ever before. To provide the best user experience possible, developers must adopt different load mechanisms for dynamic content, making our job a little more complicated. If you don’t know what that means, imagine a browser lacking a graphical user interface. Luckily, there is ✨Puppeteer✨ — the magical Node library that provides a high-level API to control a Chrome instance over the DevTools Protocol. Still, it offers the same functionality as a browser, but it must be controlled programmatically by typing a couple of lines of code. Let’s see how that works.

In the previously created project, install the Puppeteer library by running npm install puppeteer, create a new puppeteer.js file, and copy or write along the following lines of code:

const puppeteer = require(‘puppeteer’)

(async () => {
try {
const chrome = await puppeteer.launch()
const page = await chrome.newPage()
await page.goto(‘https://www.reddit.com/r/Kanye/hot/’)
await page.waitForSelector(‘.rpBJOHq2PR60pnwJlUyP0’, { timeout: 2000 })

const body = await page.evaluate(() => {
return document.querySelector(‘body’).innerHTML
})

console.log(body)

await chrome.close()
} catch (error) {
console.log(error)
}
})()

In the example above, we create a Chrome instance and open up a new browser page that is required to go to this link. In the following line, we tell the headless browser to wait until the element with the class rpBJOHq2PR60pnwJlUyP0 appears on the page. We have also specified how long the browser should wait for the page to load (2000 milliseconds).

Using the evaluate method on the page variable, we instructed Puppeteer to execute the Javascript snippets within the page’s context just after the element was finally loaded. This will allow us to access the page’s HTML content and return the page’s body as the output. We then close the Chrome instance by calling the close method on the chrome variable. The resulted work should consist of all the dynamically generated HTML code. This is how Puppeteer can help us load dynamic HTML content.

If you don’t feel comfortable using Puppeteer, note that there are a couple of alternatives out there, like NightwatchJS, NightmareJS, or CasperJS. They are slightly different, but in the end, the process is pretty similar.

Setting user-agent Headers

user-agent is a request header that tells the website you are visiting about yourself, namely your browser and OS. This is used to optimize the content for your set-up, but websites also use it to identify bots sending tons of requests — even if it changes IPS.

Here’s what a user-agent header looks like:

Mozilla/5.0 (Windows NT 10.0; Win64; x64) AppleWebKit/537.36 (KHTML, like Gecko) Chrome/93.0.4577.82 Safari/537.36

In the interest of not being detected and blocked, you should regularly change this header. Take extra care not to send an empty or outdated header since this should never happen for a run-fo-the-mill user, and you’ll stand out.

Rate Limiting

Web scrapers can gather content extremely fast, but you should avoid going at top speed. There are two reasons for this:

Too many requests in short order can slow down the website’s server or even bring it down, causing trouble for the owner and other visitors. It can essentially become a DoS attack.
Without rotating proxies, it’s akin to loudly announcing that you’re using a bot since no human would send hundreds or thousands of requests per second.

The solution is to introduce a delay between your requests, a practice called “rate limiting”. (It’s pretty simple to implement, too!)

In the Puppeteer example provided above, before creating the body variable, we can use the waitForTimeout method provided by Puppeteer to wait a couple of seconds before making another request:

await page.waitForTimeout(3000);

Where ms is the number of seconds you would want to wait.

Also, if we would want to do the same thig for the axios example, we can create a promise that calls the setTimeout() method, in order to help us wait for our desired number of miliseconds:

fetchShelves.then(result => new Promise(resolve => setTimeout(() => resolve(result), 3000)))

In this way, you can avoid putting too much pressure on the targeted server and also, bring a more human approach to web scraping.

Closing Thoughts

And there you have it, a step-by-step guide to creating your own web scraper for Amazon product data! But remember, this was just one situation. If you’d like to scrape a different website, you’ll have to make a few tweaks to get any meaningful results.

Related Reading

If you’d still like to see more web scraping in action, here is some useful reading material for you:

“The Ultimate Guide to Web Scraping with JavaScript and Node.Js,” Robert Sfichi
“Advanced Node.JS Web Scraping with Puppeteer,” Gabriel Cioci
“Python Web Scraping: The Ultimate Guide to Building Your Scraper,” Raluca Penciuc

Creating the Effect of Transparent Glass and Plastic in Three.js

Original Source: http://feedproxy.google.com/~r/tympanus/~3/HMKYObAHg48/

In a recent release of Three.js (r129 and beyond) some fabulous new features to MeshPhysicalMaterial were merged. The new features allow us to create convincing transparent, glass-like and plastic-like materials that refract and diffuse the content behind them, and are as easy-to-use as adding a couple of material properties!

About this article

This article explores some advanced properties of materials. While the results are very technically impressive, the new features that enable them are simple to use! Some experience with three and an intermediate understanding of the concept of “materials” in 3D graphics is ideal. Code examples are written for brevity, so it’s best to dive into the sandbox code (provided with each screenshot) if you’re interested in the gritty implementation details.

The physics of optics, light, reflection and refraction are not discussed in-depth here. This article approaches these effects through an aesthetic lens: aiming for convincing and visually pleasing results, even if they are not scientifically accurate.

Rather than introducing new concepts, this is primarily a walkthrough of features that exist within three and its MeshPhysicalMaterial class. I’d like to gush and shower praise upon the contributors and maintainers of three. It continues to be a core pillar of 3D in the browser. It has a vibrant community and extremely talented contributors who continue to push the boundaries of what’s possible on a humble web page.

Prior Art

Creating transparent materials, especially with texture and diffusion, has for a long time required deep technical expertise and creative problem solving. Some projects have achieved an impressive and convincing effect in WebGL through bespoke techniques:

A screenshot from Make Me Pulse’s 2018 Wishes, showcasing frosted glass materials in WebGL

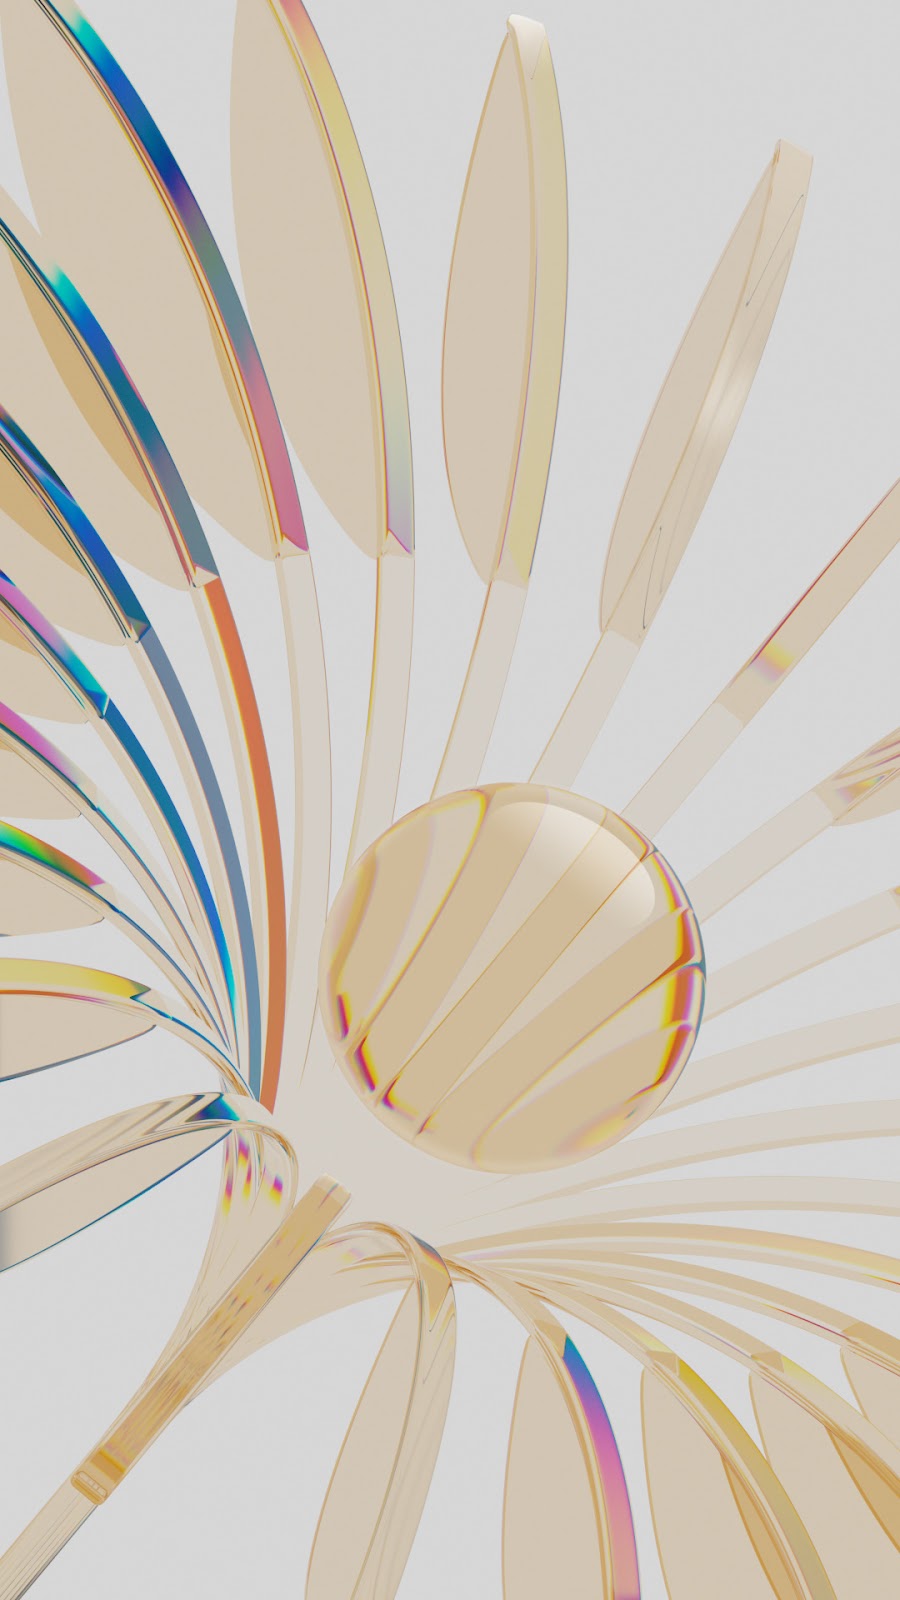
The Jam3 FWA 100 project, showcasing glass-like orbs

Jesper Vos published an incredible tutorial here on Codrops: Real-time Multiside Refraction in Three Steps, which includes some great insights into the science and simulation of refraction.

In addition, these excellent technical examples provided the inspiration for writing this article, and further exploring what’s possible with these new features.

Three.js

three is an open-source javascript library for rendering 3D graphics in the browser. It provides a friendly API and abstractions that make working with WebGL more palatable and expressive. three has been around since 2010, is extremely well battle-tested, and is the de-facto standard for rendering 3D content on the internet. See the list of case studies on the home page, docs, examples, or source.

MeshPhysicalMaterial

MeshPhysicalMaterial is a relatively recent Physically-Based Rendering (PBR) built-in material for three. It’s an evolution and extension of the already impressive MeshStandardMaterial, providing additional features to pump the photo-realism.

This visual fidelity comes at a cost, from the docs:  As a result of these complex shading features, MeshPhysicalMaterial has a higher performance cost, per pixel, than other Three.js materials. Most effects are disabled by default, and add cost as they are enabled.

Beyond the properties offered in MeshStandardMaterial, it introduces some new ones:

Transmission

transmission is the key to transparent glass-like and plastic-like effects. Traditionally when we adjust the opacity of an element to make it transparent, its visual presence is diluted as a whole. The object appears ghostly, uniformly transparent, and not realistic as a see-through object. In the real-world, transparent objects reflect light and show glare. They have a physical presence even though they may be perfectly clear.

Reflectivity properties

MeshPhysicalMaterial includes some properties that estimate refraction through the transmissible object: thickness, ior (Index-of-refraction) and reflectivity. We’ll mostly ignore ior and reflectivity (which changes ior too, but is mapped to a 0-1 range) as the defaults work great!

thickness is the magic here, as we’ll see shortly.

Clearcoat

Like a layer of lacquer, clearcoat provides an additional thin reflective layer on the surface of objects. Previously this would require a second version of the object, with a separate material, and with different parameters.

Other

There are some other additional properties on MeshPhysicalMaterial like sheen and attenuationTint which I won’t be touching on in this article.

We can expect to see more and more features added to this material in future releases.

First steps

First things first, let’s create a scene and pop something in it! We’ll start with an Icosahedron because hey, they just look cool.

I’m skipping the basic scene setup stuff here, I recommend diving into the sandbox source or three docs if you’re unfamiliar with this.

const geometry = new THREE.IcosahedronGeometry(1, 0);
const material = new THREE.MeshNormalMaterial();
const mesh = new THREE.Mesh(geometry, material)
scene.add(mesh);

An Icosahedron with normal shading in a blank scene
View on CodeSandbox

Looks like an Icosahedron! Let’s apply our MeshPhysicalMaterial:

const material = new THREE.MeshPhysicalMaterial({
metalness: 0,
roughness: 0
});

The options metalness and roughness are the two primary handles with PBR materials (they are on MeshStandardMaterial too). They can be used to set the stage for how our material responds to lighting and environment. Having both set at zero describes something like “A non-metallic object with a highly polished surface”.


View on CodeSandbox

Doesn’t look like much! Physically-based materials need light to reflect, so let’s add some light:

const light = new THREE.DirectionalLight(0xfff0dd, 1);
light.position.set(0, 5, 10);
scene.add(light);


View on CodeSandbox

Cool, there it is again… Now let’s make it transparent!

Call the Glazier

The transmission option is responsible for applying our transparency. It makes the “fill” or “body” of the object transparent, while leaving all lighting and reflections on the surface in-tact.

Note that we’re not using the opacity option, which applies a uniform transparency to the material as a whole. We also don’t need to include the transparent option on the material for it to appear transparent through transmission.

const material = new THREE.MeshPhysicalMaterial({
roughness: 0,
transmission: 1, // Add transparency
});


View on CodeSandbox

I think that’s transparent, we can see the background colour through it. Let’s pop something else behind it to be sure. We’ll add a textured plane as our “backdrop”:

const bgTexture = new THREE.TextureLoader().load("src/texture.jpg");
const bgGeometry = new THREE.PlaneGeometry(5, 5);
const bgMaterial = new THREE.MeshBasicMaterial({ map: bgTexture });
const bgMesh = new THREE.Mesh(bgGeometry, bgMaterial);
bgMesh.position.set(0, 0, -1);
scene.add(bgMesh);


View on CodeSandbox

It’s transparent! It’s lacking something though. There’s nothing but a tiny flicker of movement on the corners of our geometry; as if our material is made from the most delicate and fragile of super-thin, super-clear glass.

Now here’s the magic part!

const material = new THREE.MeshPhysicalMaterial({
roughness: 0,
transmission: 1,
thickness: 0.5, // Add refraction!
});


View on CodeSandbox

By adding a single option: thickness to our material, we’ve now been given the gift of refraction through our object! Our background plane, which is a completely separate object, simply sitting behind our Icosahedron in the scene, now gets refracted.

This is incredible! Previous methods of achieving this required much more work and intense technical understanding. This has immediately democratised refractive materials in WebGL.

The effect is especially impressive when viewed in motion, and from an angle:

Swooping around our glass object to see it refracting the rest of the scene

Have a play by dragging around in this sandbox:

Diverse objects

While the sharp facets of our Icosahedron show a nice “cut-gem” style of refraction, we rarely see such precisely cut glass objects at any size other than tiny. This effect is greatly enhanced when geometries with smoother edges are used.
Let’s increase the detail level of our Icosahedron to form a sphere:

const geometry = new THREE.IcosahedronGeometry(1, 15);


View on CodeSandbox

This shows some optical distortion in addition to the refraction based on the shape of the geometry!

Hot tip: with all of the PolyhedronGeometry types in three, any detail level above zero is rendered as a sphere, rather than a faceted polyhedron as far as transmission is concerned.

You may notice that the distorted content is a little pixelated, this is due to the material upscaling what’s transmitted through it to perform the distortion. We can mitigate this a bit with some other effects which we’ll cover later.

Let’s explore adding some texture to our glass material:

const material = new THREE.MeshPhysicalMaterial({
roughness: 0.7,
transmission: 1,
thickness: 1
});

The roughness option on our transmissible material provides us with a “frosting” level, making light that passes through the material more diffuse.


View in CodeSandbox

This becomes immediately recognisable as a frosted glass object, with a fine powdery texture.

Notes on roughness:

The middle of the roughness range can display some quite noticeably pixelated transmitted content (at the time of writing). In my experience the best results are found in the low (0-0.15) and higher (0.65+) ends of the range. This can also be quite successfully mitigated with some of the things we’ll add shortly.The distance of the transmissible object from the camera affects how roughness is rendered. It’s best to tweak the roughness parameter once you’ve established your scene

Hot tip: Using a small amount of roughness (0.05 – 0.15) can help soften aliasing on the transmitted content at the cost of a bit of sharpness.

For the rest of our examples we’ll include two additional geometries for reference: a RoundedBoxGeometry and a 3D model of a dragon (loaded as a GLTF, but only used for the geometry):


View on CodeSandbox

Through the lens

While the transmission effect is already appealing, there’s so much more we can do to make this appear truer-to-life.

The next thing we’ll do is add an environment map. It’s recommended that you always include an envMap when using MeshPhysicalMaterial, as per the docs: For best results, always specify an environment map when using this material.

Highly reflective objects show reflections, and glare, and glimpses of their surrounding environment reflected off their surface. It’s unusual for a shiny object to be perfectly unreflective; as they have been in our examples so far.

We’ll use a high quality High Dynamic Range Image (HDRI) environment map. I’ve chosen this one for its bright fluorescent overhead lighting:

const hdrEquirect = new THREE.RGBELoader().load(
"src/empty_warehouse_01_2k.hdr",
() => {
hdrEquirect.mapping = THREE.EquirectangularReflectionMapping;
}
);
const material = new THREE.MeshPhysicalMaterial({

envMap: hdrEquirect
});


View on CodeSandbox

NICE! Now that looks more realistic. The objects glint and shimmer in our bright environment; much more like the lighting challenges faced by a photographer of shiny things.

This is where our rounded geometries really shine too. Their smoother curves and edges catch light differently, really amplifying the effect of a highly polished surface.

Hot tip: Adding an envMap texture of some sort helps to resolve some rendering artifacts of this material. This is why it’s always recommended to include one (beyond the fact that it looks great!).

If you adjust the roughness level upward, you’ll notice that the reflections are diffused by the rougher frosted texture of the surface; however, we may want an object that’s semi-transparent while still having a shiny surface.

The clearcoat options allow us to include an additional reflective layer on the surface of our object (think lacquered wood, powder coatings, or plastic films). In the case of our transparent objects, we can make them from semi-transparent glass or plastic which still has a polished and reflective surface.


View on CodeSandbox

Adjusting the clearcoatRoughness option adjusts how highly polished the surface is; visually spanning the range from highly-polished frosted glass through to semi-gloss and matte frosted plastics. This effect is pretty convincing! You can almost feel the tack and texture of these objects.

So far we’ve been exploring objects with perfectly smooth surfaces. To really bring some texture to them, we can add a normal map:

const textureLoader = new THREE.TextureLoader();
const normalMapTexture = textureLoader.load("src/normal.jpg");
normalMapTexture.wrapS = THREE.RepeatWrapping;
normalMapTexture.wrapT = THREE.RepeatWrapping;
const material = new THREE.MeshPhysicalMaterial({

normalMap: normalMapTexture,
clearcoatNormalMap: normalMapTexture,
});


View on CodeSandbox

The interplay between the normalMap and clearcoatNormalMap is interesting. By setting the normalMap we affect the transmission through the object, adding a textured frosting that refracts light differently. By setting the clearcoatNormalMap we affect the finish on the surface of the object.

Hot tip: The additional texture added by the normalMap greatly reduces the visible pixelation on the transmitted content, effectively solving this issue for us.

As a final touch, we’ll add a post-processing pass to apply bloom to our scene. Bloom adds that extra little bit of photographic appeal by simulating volumetric glare from the bright overhead lighting bathing our objects.

I’ll leave information around implementation post-processing within three to the docs and examples. In this sandbox I’ve included the UnrealBloomPass.

Bloom always looks good.

There we have it! Convincingly transparent, textured and reflective 3D objects, rendered in real-time, and without much effort. This deserves to be celebrated, what an empowering experience it is working with MeshPhysicalMaterial.

Drippin ice

Just for fun, let’s crank the dial on this by rendering many of our transparent objects using three‘s InstancedMesh (link).


View on CodeSandbox

OOOUF! YES.
Instances can’t be seen through each other, which is a general limitation of transmission on MeshPhysicalMaterial (current as of r133); but in my opinion the effect is still very cool.

Explore for yourself

Finally, here’s our dragon model with a bunch of material options enabled in the GUI:


View on CodeSandbox

Have a play, check out metalness, play around with color to explore colourful tinted glass, tweak the ior to change our glass into crystal!

Sign-off

I’ve really only scratched the surface of what can be achieved with MeshPhysicalMaterial. There are even more options available within this material, sheen, roughnessMap, transmissionMap, attenuationTint and all sorts of other things provide inroads to many more effects. Dig deep into the docs and source if you’re interested!

This is an enabler, given the creative vision for a transparent object you can use these tools to work towards a convincing result. Transparent materials in three are here, you can start using them in your projects today.

Attributions

Environment map: Empty Warehouse 01 HDRI by Sergej Majboroda, via Poly Haven3D model: Dragon GLB by Stanford University and Morgan McGuire’s Computer Graphics Archive, via KhronosGroupNormal map: Packed Dirt normal by Dim, via opengameart.orgSandboxes: Hosted on CodeSandbox and running in canvas-sketch by @MattDesl.

© 2021 Kelly Milligan

The post Creating the Effect of Transparent Glass and Plastic in Three.js appeared first on Codrops.

Botanical Glassworks in Blender 3D

Original Source: http://feedproxy.google.com/~r/abduzeedo/~3/dFu1ww92b6s/botanical-glassworks-blender-3d

Botanical Glassworks in Blender 3D

abduzeedo1027—21

Calvin Sprague shared a 3D project using Blender, Octane, Adobe Illustrator & Photoshop for Botanical Glassworks. The project is a selection of personal works experimenting with flat illustrated botanical shapes transformed into a three-dimensional space. As a beginner using 3d software, Calving found the process quite challenging but that gave him a new appreciation towards 3d artists and how they work with cameras and lighting.

3D abstract botanical glass octane plants3D abstract botanical glass octane plants3D abstract botanical glass octane plants3D abstract botanical glass octane plants3D abstract botanical glass octane plants3D abstract botanical glass octane plants

To see more work follow Calvin on

Behance
Instagram
Website


4 Ways to Create an Email Testing Strategy

Original Source: https://www.hongkiat.com/blog/email-testing-strategy/

(Guest writer: Téa Liarokapi) A great email message consists of a plethora of things that, upon testing, could or could not work out. Maybe you’ve got the perfect copy for your email marketing…

Visit hongkiat.com for full content.