Collective #774
Original Source: https://tympanus.net/codrops/collective/collective-774/
Scroll progress animations in CSS * Pines * Immich * Web-Check
Original Source: https://tympanus.net/codrops/collective/collective-774/
Scroll progress animations in CSS * Pines * Immich * Web-Check
Original Source: https://ecommerce-platforms.com/articles/how-to-price-print-on-demand-products-2
Figuring out how to price your print on demand products can be complex.
Choose a price that’s too high, and you risk scaring off potential customers. Pick a price that’s too low, and you could harm your profit margins, and even your business credibility.
The good news is that the evolving print on demand market does give countless creators and would-be business owners a great way to earn a consistent income, with minimal risk. However, if you want to get the most out of your business, you need to get your pricing right.
Here’s your step-by-step guide to pricing your print on demand products.
Step 1: Understanding Your Costs
Choosing the right price for your print on demand products starts with assessing your expenses. The right pricing structure should ensure you can cover al the costs associated with running your business, while still making a decent profit.
Compared to other business models, print-on-demand can be a relatively low-cost way to launch a business. There are no inventory costs to worry about, as you only purchase products when your customers place an order. Plus, you don’t have to buy machines or pay for labor to produce your products yourself, as that’s all handled by a third-party vendor.
However, there are still a few expenses every POD company will encounter, such as:
Design Costs
Success in the print on demand world relies heavily on your ability to produce designs that appeal to your target audience. There are two ways to create your designs. The first option is to design patterns and images yourself if you have the right creative skills.
If you’re producing your own designs, it’s easy to assume you can just overlook design costs, particularly if you’re using free tools to help your creative process. However, you’re still spending valuable time on your product, and you should be compensated for your work. Choose a reasonable hourly rate for your skills, and use that to estimate your design costs for each product.
If you outsource your design services to another company or freelancer, you’ll have a more exact number to work with. A good way to keep design costs in mind is to divide the cost of hiring your designer, by the number of products you expect to sell. This gives you a design cost per product.
If you’re not sure how many products you’ll sell, simply determine how many items you’ll need to sell in order to “break even” on your design costs.
Production Costs
As mentioned above, the production costs for print on demand companies are usually quite low. You won’t need to pay for machinery or labor, but you will still need to pay a fee to have your vendor create your products for you. The price of production can vary for each POD company.
When assessing production costs for each item, make sure you consider the cost of the materials (the base products you’re going to customize), and the printing or customization services.
You’ll also need to think about the cost of packaging your products and branding your items with custom labels, packing slips, and other assets.
Shipping Costs
Although you won’t be directly responsible for shipping products to your customers yourself with print on demand, you’ll still need to pay the price for shipping. Most POD companies will charge you directly for shipping, based on pre-set or variable rates.
You can usually find information about the kinds of shipping fees you can expect to pay on the website or app of your POD service. Keep in mind, costs can vary depending on the size or weight of the item, the delivery location for the package, the logistics provider, and the speed of shipping.
You can either add the costs of shipping to the overall price of your product, to entice customers with a “free shipping” offer. Or you can charge them directly for shipping as an added-on price.
Taxes and Transaction fees
The cost of creating your product may also include taxes and certain “transaction fees”. Some POD vendors will charge taxes on your orders depending on where your customers are located. For instance, you may need to pay sales tax in the US or Canada, or VAT in the UK, and EU.
You can usually collect taxes from your customers by bundling it into the cost of your products, but it’s up to you to determine how you handle these fees. Make sure you consider the fees associated with accepting payments through processing tools, and platforms too.
Some ecommerce platforms and marketplaces also have their own add-on fees to consider whenever you accept a payment or convert a currency.
Go to the top

Step 2: Research Your Market
Once you’ve assessed all of your business running or operating costs, the next step is to dive into market research. This should give you an insight into the kind of prices competitors are charging for similar products, and the level of “demand” available for your items.
The higher the demand for your products, and the less competition you have in your market, the more you can potentially charge. Based on your market research, you can decide which strategy is most likely to work for your brand. The most common options include:
Above market average pricing: If your products have features or benefits that other companies can’t provide, you may be able to charge a higher price for them. You could also validate higher pricing with personalized customer service or faster shipping.
Market pricing: If you want to ensure you can reach a wide target audience and still make a decent profit, you can consider using the same pricing strategy as your competitors. This should ensure your customers don’t see your items as too expensive.
Below market average pricing: Pricing your products at below market average rates is a good way to initially attract new customers. You can even steal customers from competitors with this strategy. However, if you severely underprice your products, this could harm your profit margins, and make your brand appear less trustworthy.
Go to the top
Step 3: Select Your Profit Margin
Now you have an idea of your marketplace, and your operating costs, you can begin to think about profit margins. Calculating your production costs (per month), and dividing them by the number of items you expect to sell in the same time period can give you an idea of the price you need to charge to “break even”. However, you still want to make a profit.
Your profit margin is where you’ll need to experiment a little in your pricing structure. You can choose a margin that matches competitors, or goes above what your competitors earn.
Ultimately, your profit margin needs to be low enough that you can keep your product price within the “acceptable” segment for your target market. If you’re trying to sell at extremely high prices, you could struggle to attract the right audience.
At the same time, however, you also shouldn’t undervalue the work and time you’re putting into your store. A good profit margin for a POD clothing company will usually fall somewhere between 20 and 30%, but it’s up to you to experiment and find out what works.
Keep in mind, you might adjust your profit margin and pricing strategies from time to time as you continue to run your business.
Go to the top
Step 4: Consider Print-on-Demand Marketplaces
Notably, there are a few different ways to “go to market” with your print on demand products. If you choose to launch your own ecommerce website, you’ll be mostly competing against other companies in the same niche that customers can find by searching online.
However, if you’re hoping to immediately increase your visibility to an existing audience, you might choose to use a print-on-demand marketplace. Channels like Etsy, Amazon Merch, Society6, and RedBubble can all boost your chances of finding buyers immediately.
However, they do have some downsides when it comes to profit margins. First, some solutions won’t give you complete control over your profit. Some require you to stick to specific percentages or pricing strategies. Secondly, since you’ll only be earning a “commission” on your sales, you’ll need to be particularly cautious with your pricing choices.
What’s more, because there’s already a huge number of sellers active on these markets, you’ll need to think carefully about how you can make your products stand out. While choosing a lower price may help to increase your visibility and sales, don’t make the mistake of pricing too low.
Check the suggested “margins” on each site, and experiment to find out which options help you reach the most customers, without missing out on profits.
Go to the top
Step 5: Implement Pricing Optimization Techniques
Crucially, pricing your products for the print on demand market isn’t something you do once and forget about. Market trends, customer behaviors, and economic conditions are constantly changing, which means you’ll need to be ready to adapt consistently.
After implementing your first pricing structure, commit to constantly monitoring your sales, competitors, and the wider market. Watch to see whether your competitors reduce or increase their prices over time. Look at how demand shifts in your industry, and whether your sales dip or increase at certain times of the year.
The best ways to optimize your pricing strategy include:
Diving into data: Collect as much information as you can about your competitors, your market, and your audience. Find out what customers are actually willing to pay for your products, and how valuable they consider them to be. You can use your sales metrics, competitor analysis, and even customer surveys to guide you.
Experimenting with strategies: Explore different pricing strategies. For instance, you could use dynamic pricing to change your price structure at different times of the year, based on seasonal changes or events. You could also think about “penetrative” pricing, which involves pricing your products at a lower cost to begin with, to help you access the market.
A/B test your strategies: Run comprehensive A/B tests on a regular basis to help you make informed decisions about what to do with your pricing strategy next. Focus on getting the right balance between customer satisfaction, and a reasonably high profit margin.
Go to the top
Step 6: Address Pricing Challenges
Finally, it’s worth making sure you’re prepared to handle the challenges you might face with pricing in the print-on-demand industry. Like any industry, print-on-demand is subject to a number of changes which can occur based on macro and micro events.
One of the biggest issues you’re likely to face is “price sensitivity”. This basically means ensuring your pricing adapts to the expectations of your customers. Demand or dynamic pricing structures will allow you to alter your pricing based on what your customers expect. If a high or low price begins to alter your customer’s behavior, you’ll need to adapt to keep generating sales.
You may also find you need to adapt when new competitors enter your market. There’s a good chance other companies may enter the industry and attempt to target the same customers as you. Initially, they may choose a cheaper price for their products. To avoid getting caught in a “race to the bottom”, avoid constantly reducing your prices, and focus on drawing attention to your unique selling points instead.
Additionally, make sure you’re prepared to offer discounts and sales at the right times – when your customers expect them. Choosing a slightly higher “initial” price for your products will leave you some room in your profit margin for discounts in the future.
Pricing Your Print on Demand Products
Choosing the right pricing strategy for your print on demand products can be a complicated process. There are numerous factors to consider, from your target audience to your competition. Always start with thorough research, and be ready to adapt your pricing over time.
Pay attention to the industry, and constantly test and experiment to ensure you’re capturing the widest audience share, and the best possible profit margins.
The post How to Price Your Print-on-Demand Products in 6 Simple Steps appeared first on Ecommerce Platforms.
Original Source: https://www.creativebloq.com/reviews/sihoo-doro-c300
The SIHOO Doro-C300 offers cloud-like comfort at a mid-range price.
Original Source: https://abduzeedo.com/revamping-diesel-car-oil-branding-visual-identity-janiczak
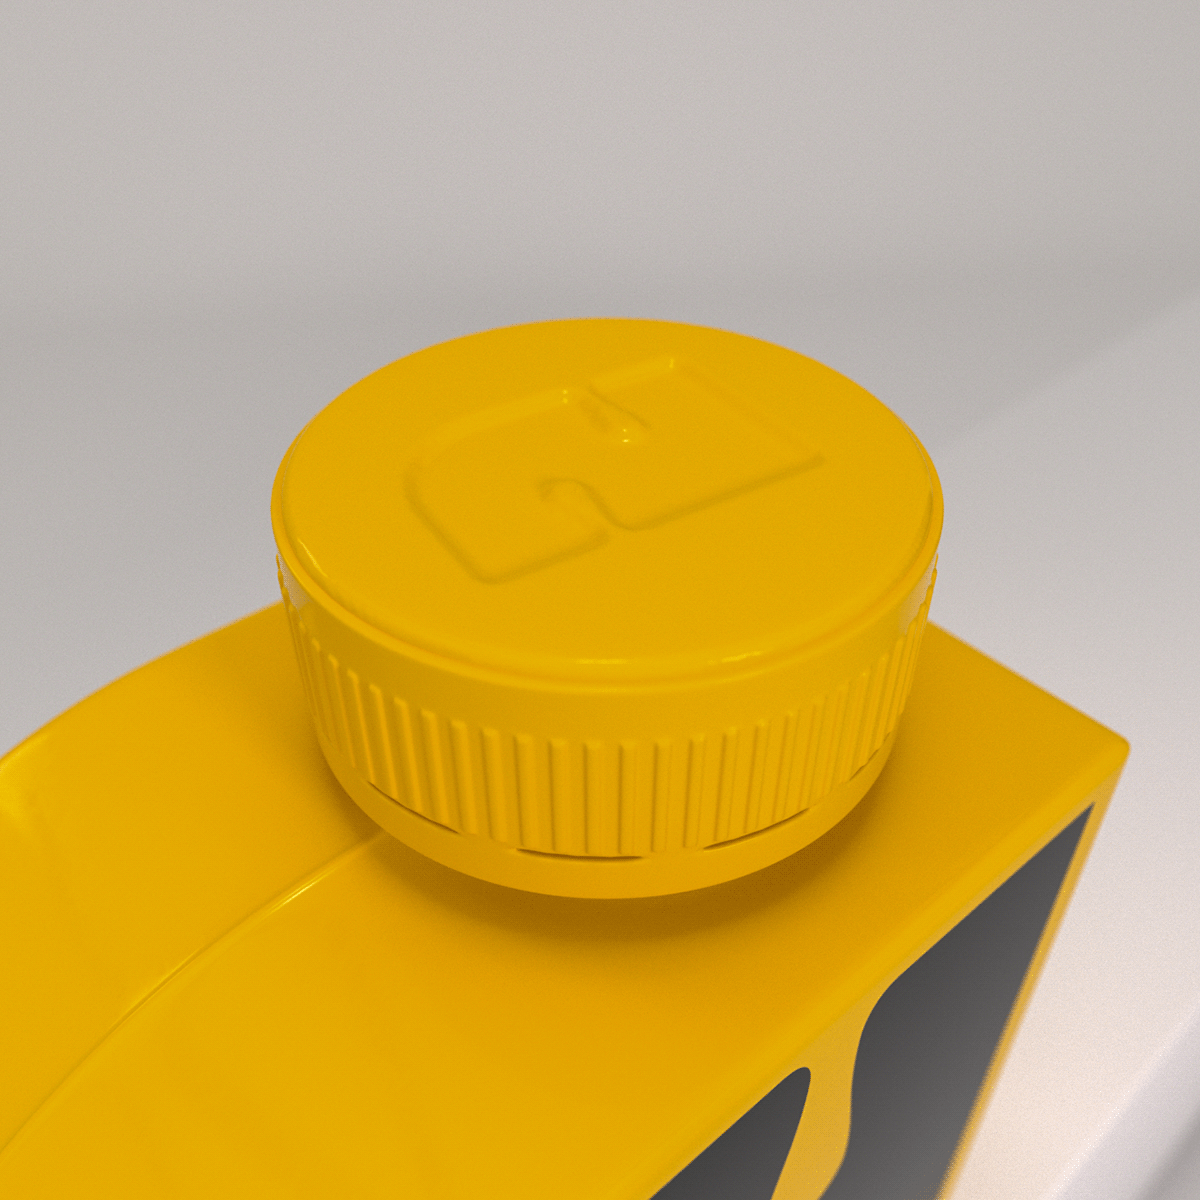
Revamping Diesel Car Oil: Branding & Visual Identity by Janiczak

abduzeedo0718—23
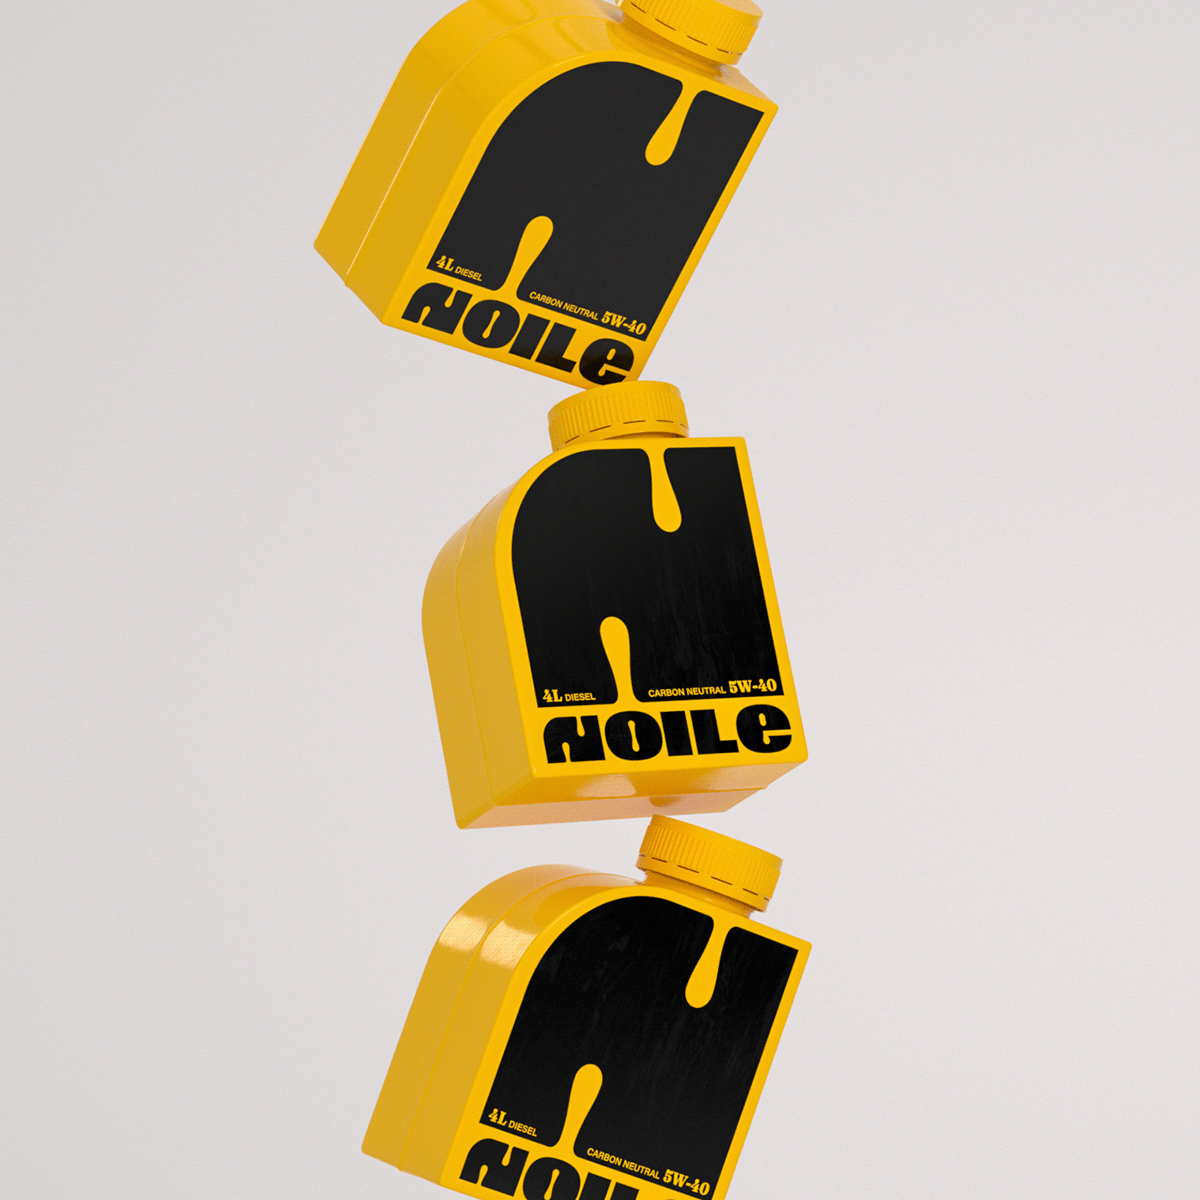
The project spearheaded by Jack Janiczak is centered around the development of an all-encompassing branding and packaging design for Diesel Car Oil. The target demographic consists of automobile owners and enthusiasts who prioritize top-tier lubricants for their diesel-fueled vehicles. The intent behind this endeavor is to craft a striking and visually compelling visual identity that underscores the product’s trustworthiness, operational excellence, and commitment to superior engine preservation.
This undertaking encapsulates the creation of a visual identity and packaging design for Diesel Car Oil. The chief deliverables incorporated into this assignment include:
Packaging Design: The aim here is to concoct an appealing yet practical packaging solution that boosts product visibility on shelves, transmits critical product data effectively, and reinforces the branding. Factors like the shape of the bottle, design of the label, hierarchy of information, and material choice are taken into account to guarantee an upscale and eco-friendly packaging solution.
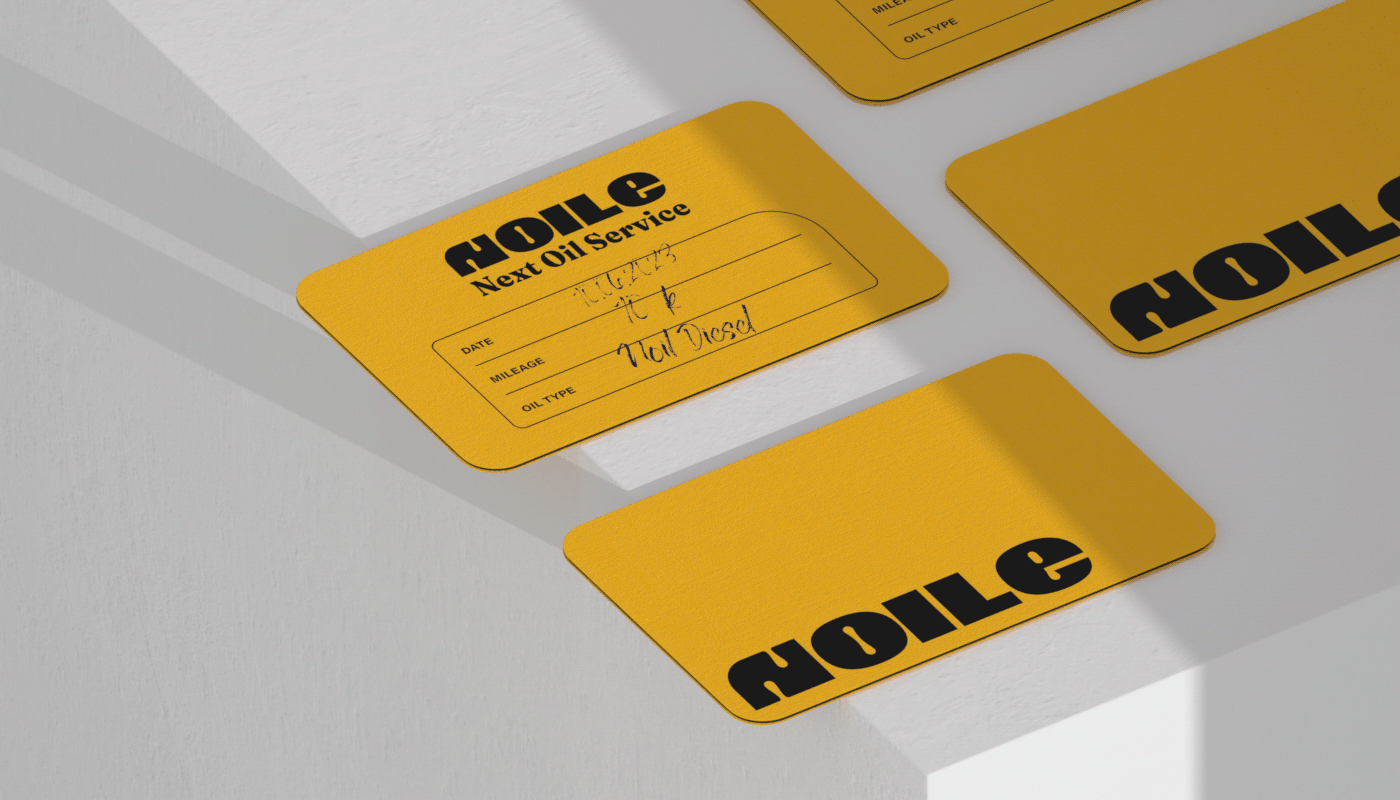
Brand Guidelines: The project is set to formulate an exhaustive set of branding guidelines that illustrate the correct application of the logo, color palette, typography, and other visual elements across diverse marketing collateral. These guidelines are instrumental in ensuring uniformity in brand depiction, thus helping to maintain a robust visual identity across various touchpoints.
Branding and visual identity
For more information make sure to check out Jacek Janiczak’s website or follow him on Dribbble and Instagram.
Original Source: https://1stwebdesigner.com/retro-css-text-effect/
CSS offers an array of tools that, when used correctly, can improve the visual experience on your website. In this tutorial, we’ll explore a straightforward way to design a retro text effect with pure CSS. The approach, while not overly complex, yields a visually appealing result and serves as a foundation for further customization.
Your Web Designer Toolbox
Unlimited Downloads: 500,000+ Web Templates, Icon Sets, Themes & Design Assets
DOWNLOAD NOW
The HTML Setup
We’ll begin with our markup, containing the text we’ll be styling – “1stWebDesigner“.
<div class="retro-text"> 1stWebDesigner</div>
The div class .retro-text will be the hook for our CSS styling.
Designing the Retro Style with CSS
Next, let’s move on to our CSS file to create the retro text effect.
@import url('https://fonts.googleapis.com/css2?family=Lobster+Two:wght@700&display=swap');
body {
background: #6868AC; /* Retro background color */
}
.retro-text {
font-family: 'Lobster Two', serif; /* Stylish, retro font */
font-size: 10vw; /* Responsive font size */
position: relative; /* Enables use of z-index */
color: #F9f1cc; /* Primary color of the text */
text-shadow: -2px 2px 0 #FFB650, /* Orange shadow */
-4px 4px 0 #FF80BF, /* Pink shadow */
-6px 6px 0 #6868AC; /* Dark blue shadow */
transform: skewX(-10deg); /* Skew the text on the X-axis */
transition: all 0.5s ease; /* Smooth transition for hover effects */
z-index: 2; /* Ensures text is layered above any potential background or border */
}
.retro-text:hover {
color: #FFFFFF; /* Brighter color on hover */
font-size: 15vw; /* Slightly larger text on hover */
text-shadow: -2px 2px 0 #FFC162, /* Brighter orange shadow on hover */
-4px 4px 0 #FF92D0, /* Brighter pink shadow on hover */
-6px 6px 0 #8888D3; /* Brighter blue shadow on hover */
}
To explain our CSS setup:
font-family: ‘Lobster Two’, serif;: We’re using Lobster Two, a stylish retro font.
font-size: 10vw;: Sets a responsive font size that adapts to the viewport width.
position: relative;: The relative positioning is necessary for the use of the z-index property.
color: #F9f1cc;: This determines the primary color of the text. Here, we’re using #F9f1cc, a light cream color.
text-shadow: -2px 2px 0 #FFB650, -4px 4px 0 #FF80BF, -6px 6px 0 #6868AC;: Three layers of text-shadow (orange, pink, and dark blue) are added, creating a 3D effect that enhances the retro feel.
transform: skewX(-10deg);: The text is skewed on the X-axis to add a dynamic touch.
transition: all 0.5s ease;: Smooth transition for hover effects.
z-index: 2;: A z-index of 2 ensures the text is always layered above any potential background or border.
:hover: The hover state includes a brighter color, slightly larger text size, and brighter shadows.
The Result
Here’s how the above code renders:
See the Pen
Retro CSS Text Effects by 1stWebDesigner (@firstwebdesigner)
on CodePen.0
Final Thoughts
As you can see, CSS provides numerous opportunities to enhance your design. Using our retro text effect as a launching pad, you could experiment with further tweaks like altering text shadows, adjusting opacities or incorporating gradient backgrounds to intensify the retro vibe.
However, it’s crucial to remember the function of your text. The aim is to create a visually engaging site while maintaining readability. This is particularly important when using viewport units like vw for font sizes, which we used in our example. These units allow your text to adjust with the viewport size, ensuring a responsive design.
Yet, care is required. In some contexts, such as headings, vw units could cause your text to appear disproportionately large or small. To prevent this, consider using a mix of viewport and fixed units like em or rem, or setting max/min font sizes with media queries. Always remember: while design is important, it should never compromise the user’s ability to comfortably read and understand your content.
So, whether you’re introducing new elements, tweaking existing ones, or harnessing advanced techniques, every step you take helps you create unique styles that reflect your design aspirations.
Original Source: https://tympanus.net/codrops/collective/collective-773/
New Viewport Units * Plate * Invisible Details of Interaction Design
Original Source: https://www.hongkiat.com/blog/fix-mac-unresponsive-apps/
Nothing grinds your gears quite like a spinning beach ball cursor on your Mac, signaling a frozen or unresponsive application. It’s a sight no one likes to see, because it means the application has ceased to respond to your inputs, leaving you in a state of technological limbo.
Maybe it’s just the app that’s not responding, or perhaps it’s the entire system that’s slowed down to a crawl. In any case, it’s frustrating, annoying, and disrupts your flow of work or play.
But what causes this to happen? And more importantly, how can you fix it?

In this post, we look into the causes and solutions for unresponsive applications on your Mac, providing you with tips to bring your system back to life.
The Causes of Unresponsive Apps in Mac
Several factors can lead to applications becoming unresponsive:
1. Insufficient System Resources
Your Mac uses RAM (Random Access Memory) and processing power (CPU) to run applications. RAM is like your computer’s short-term memory, temporarily storing data that the CPU uses to perform tasks.
When your Mac doesn’t have enough RAM or CPU power to support all the applications you’re running, some may become unresponsive. This scenario often occurs when you have multiple applications open at the same time, especially if they’re resource-intensive like video editing software or complex games.
Additionally, a single application can hog resources if it’s poorly optimized or has a memory leak, a situation where it uses more and more memory over time without releasing it back to the system.
2. Software Bugs
Software bugs or errors can also cause an application to freeze. These bugs can be coding errors or unforeseen circumstances that the developers didn’t account for during the application’s development. Sometimes, these bugs cause the application to enter a state from which it cannot recover, causing it to freeze.
Bugs can occur in any application, from the smallest utility apps to the most complex professional software suites. The likelihood of encountering a bug can increase with newly released software or versions, as developers may not have fully tested every possible scenario before release.
3. Incompatible Software
Software compatibility is crucial for smooth operations on your Mac. Each application you use is designed to work with specific versions of macOS. If the application is not compatible with your current macOS version, it may not run correctly and could freeze or become unresponsive.
This incompatibility is often seen when you update your macOS to a new version and continue using older software versions not optimized for the new system. Similarly, using very new software on an outdated macOS can also lead to problems.
4. Corrupted Files
If an application tries to open a file that is corrupted or damaged, it may freeze. A file can become corrupted for various reasons such as system crashes, power failures, or disk write errors. When an application attempts to read a corrupted file, it may not understand the file’s content, leading it to freeze or crash.
This is particularly common in applications that heavily rely on external files, such as media players, image editors, or document processing software.
Solutions for Unresponsive Apps in Mac
Here are some steps to resolve issues with unresponsive applications:
1. Force Quit the App
When an application freezes, the first and most straightforward solution is to force quit the application. This action essentially commands the operating system to immediately cease all of the app’s processes.
You can do this by pressing Command + Option + Esc on your keyboard.

This will bring up the “Force Quit Applications” window, which you’ll see a list of all currently active applications. Simply select the unresponsive app and click “Force Quit”.

This action should terminate the frozen app, allowing you to restart it and hopefully continue with your work uninterrupted.
2. Restart Your Mac
If force quitting the application doesn’t work or if you have multiple applications that have become unresponsive, the next step is to restart your Mac. Restarting your system can resolve many issues, as it clears your system’s RAM and stops all processes. This allows your system to start afresh, free from any minor glitches that might have accumulated over time.
To restart, go to the Apple logo in the top-left corner of your screen, click “Restart…”, and then confirm when prompted.
Note: Make sure save any unsaved work in other apps before restarting.
3. Update Your Software
Keeping your macOS and all your applications up-to-date is crucial for the smooth operation of your system. Software updates often contain bug fixes that can solve unresponsiveness and other issues.
To check for updates, go to the Apple menu, select “System Settings…”, then go to “General” > “Software Update”. If updates are available, click “Update Now”.

For individual applications, you can usually find an update option in the menu bar under the application name. Remember to back up your data before installing any major updates, just in case.
4. Monitor System Resources
It’s important to understand what’s happening under the hood of your Mac. If your system is running low on memory or processing power, applications may become unresponsive.
The “Activity Monitor”, found in your “Utilities” folder, provides real-time information about how your system resources are being used. It shows which applications and processes are using the most memory, CPU, energy, disk, and network resources.

If you notice an application is consistently using a large amount of resources, you may want to close it or find a more resource-efficient alternative.
Related: 100 Free Useful Mac Apps You Should Know
5. Reinstall the App
If a specific application is repeatedly unresponsive, it could be due to corrupted application files. In such cases, uninstalling and then reinstalling the application can often help. This process removes the application’s files and then reinstalls them from scratch, which can fix any issues caused by file corruption.
Most Mac applications can be uninstalled by dragging them from the “Applications” folder to the “Trash”, and then downloading and installing a new copy from the App Store or the developer’s website.
6. Contact the Software Developer
If none of the above steps work, it might be time to reach out to the developer of the unresponsive application for further assistance.
Most developers have support channels, such as email or online forums, where you can describe your issue and ask for help. They may be able to provide specific troubleshooting steps, or they might release a software patch to fix the issue if it’s a known bug.
Keep in mind that developers can’t fix issues they don’t know about, so reporting the problem can also help improve the application for other users.
The post How to Resolve Frozen or Unresponsive Applications on Your Mac appeared first on Hongkiat.
Original Source: https://www.hongkiat.com/blog/chalk-fonts/
Chalk fonts bring a touch of nostalgia and creativity to any design. In this article, we’ve compiled a list of over 20 chalk fonts that you can download for free. These fonts mimic the texture and spontaneity of chalk writing, adding a playful and creative touch to your projects.
Whether you’re working on a restaurant menu, a classroom-themed design, or a creative project, these chalk fonts will add a unique and fun element to your work. With their varied styles and textures, these fonts offer a wide range of possibilities for both digital and print designs.
#1. Appleberry
Created by: Brittney Murphy Design

Download
#2. Chalk Hand Lettering Shaded
Created by: Fontscafe.com

Download
#3. Chalk Line Outline
Created by: JLH Fonts

Download
#4. Clementine Sketch
Created by: Teagan White

Download
#5. Denne Milk Tea
Created by: Denise Bentulan

Download
#6. Denne Shuffle Euro Hollow
Created by: Denise Bentulan

Download
#7. Denne Threedee
Created by: Denise Bentulan

Download
#8. Hand Shop Typography A20
Created by: Fontscafe.com

Download
#9. Janda Apple Cobbler
Created by: Kimberly Geswein

Download
#10. KG Second Chances
Created by: Kimberly Geswein

Download
#11. Pea-ellie-bellie
Created by: kevinandamanda.com

Download
#12. Sketch College
Created by: Galdino Otten

Download
#13. Sketch Nice
Created by: Galdino Otten

Download
#14. Sketch Serif
Created by: Galdino Otten

Download
#15. Tequilla Sunrise
Created by: imagex

Download
#16. Universal College Draft
Created by: Fontscafe.com

Download
#17. Sandwich Paper
Created by: Janam

Download
#18. Villa Didot
Created by: artill.de

Download
#19. Vintage One
Created by: Jake Luedecke

Download
#20. WC RoughTrad Bta
Created by: WC Fonts

Download
#21. Reed of Love
Created by: Jonathan S. Harris

Download
#22. Return To Sender
Created by: Tom Kolter

Download
#23. School Book New
Created by: Galdino Otten

Download
The post 20+ Free Chalk Fonts to Download appeared first on Hongkiat.
Original Source: https://www.hongkiat.com/blog/linux-command-sudo/
The sudo command in Linux stands for “SuperUser DO”. It’s a powerful command that allows users to run programs or other commands with the security privileges of another user, typically the “superuser”. This can be particularly useful when certain operations require higher-level permissions than those granted to standard user accounts.
The superuser, also known as the root user in Linux, has the highest level of access to the system, being able to read, write, and modify any file. However, running commands as a superuser can potentially be risky as it could inadvertently lead to system-wide changes or data loss if a command is misused or a mistake is made.
So, to protect the system, most Linux distributions restrict direct access to the superuser account. That’s where sudo comes into play. It serves as a gatekeeper, allowing authorized users to execute sensitive operations or modify system settings while logging all commands and their respective outcomes. This can be useful for system audits and to identify how certain changes were made.
When you type sudo before a command, the system checks a special file called the sudoers file to see if the user has permission to run the command as a superuser. If they do, they might be prompted to enter their password (depending on the system settings). After authentication, the system will execute the command with superuser privileges.
Here are some ways to use the sudo command:
1. Run Command as Root
The basic usage of sudo is to run a command as the root user.
Example:
To run the ls command as root, you would use:
sudo ls
2. Switch to Root User
You can switch to the root user using sudo su. This will prompt you for your password, not the root password.
sudo su
3. Run Command as a Different User
You can use sudo to run a command as a different user using the -u option followed by the username.
Example:
To run ls as user john, you would use:
sudo -u john ls
4. Edit Files as Root
You can use sudo to edit files as the root user.
Example:
To edit the /etc/hosts file using nano as the root user, you would use:
sudo nano /etc/hosts
5. Run a Command without a Password
You can configure sudo to run specific commands without a password by adding a line to the sudoers file (use sudo visudo to edit this file).
Example:
To allow all users to run ls without a password, you would add:
ALL ALL = NOPASSWD: /bin/ls
6. Update sudo Cached Credentials
By default, sudo caches your password for 15 minutes. If you want to update the cached credentials before they expire (for example, if you’re about to leave your computer), you can use sudo -v.
sudo -v
7. Invalidate sudo Cached Credentials
If you want to manually invalidate sudo’s cached credentials (for example, if you’re done performing administrative tasks), you can use sudo -k.
sudo -k
The post How to Use sudo in Linux appeared first on Hongkiat.
Original Source: https://www.sitepoint.com/an-introduction-to-native-css-nesting/?utm_source=rss

Now that CSS nesting has started to land in browsers, learn how you can use it to write more efficient CSS without using a preprocessor.
Continue reading
An Introduction to Native CSS Nesting
on SitePoint.