Are movie posters finally becoming beautiful again?
Original Source: https://www.creativebloq.com/news/painted-movie-posters
From The Killer to Zombie Town, some delightful designs just dropped.
Original Source: https://www.creativebloq.com/news/painted-movie-posters
From The Killer to Zombie Town, some delightful designs just dropped.
Original Source: https://smashingmagazine.com/2023/08/oklch-color-spaces-gamuts-css/
I woke up one morning in early 2022 and caught an article called “A Whistle-Stop Tour of 4 New CSS Color Features” over at CSS-Tricks.
Wow, what a gas! A new and wider color gamut! New color spaces! New color functions! New syntaxes! It is truly a lot to take in.
Now, I’m no color expert. But I enjoyed adding new gems to my CSS toolbox and made a note to come back to that article later for a deeper read. That, of course, led to a lot of fun rabbit holes that helped put the CSS Color Module Level 4 updates in a better context for me.
That’s where Oklch comes into the picture. It’s a new color space in CSS that, according to experts smarter than me, offers upwards of 50% more color than the sRGB gamut we have worked with for so long because it supports a wider gamut of color.
Color spaces? Gamuts? These are among many color-related terms I’m familiar with but have never really understood. It’s only now that my head is wrapping around these concepts and how they relate back to CSS, and how I use color in my own work.
That’s what I want to share with you. This article is less of a comprehensive “how-to” guide than it is my own personal journey grokking new CSS color features. I actually like to this of this more as a “love story” where I fall for Oklch.
The Deal With Gamuts And Color Spaces
I quickly learned that there’s no way to understand Oklch without at least a working understanding of the difference between gamuts and color spaces. My novice-like brain thinks of them as the same: a spectrum of colors. In fact, my mind goes straight to the color pickers we all know from apps like Figma and Sketch.
I’ve always assumed that gamut is just a nerdier term for the available colors in a color picker and that a color picker is simply a convenient interface for choosing colors in the gamut.
(Assumed. Just. Simply. Three words you never want to see in the same sentence.)
Apparently not. A gamut really boils down to a range of something, which in this case, is a range of colors. That range might be based on a single point if we think of it on a single axis.

Or it might be a range of multiple coordinates like we would see on a two-axe grid. Now the gamut covers a wider range that originates from the center and can point in any direction.

The levels of those ranges can also constitute an axis, which results in some form of 3D space.

sRGB is a gamut with an available range of colors. Display P3 is another gamut offering a wider range of colors.
So, gamuts are ranges, and ranges need a reference to determine the upper and lower limits of those axes. That’s where we start talking about color spaces. A color space is what defines the format for plotting points on the gamut. While more trained folks certainly have more technical explanations, my basic understanding of color spaces is that they provide the map — or perhaps the “shape” — for the gamut and define how color is manipulated in it. So, sRGB is a color gamut that spans a range of colors, and Hex, RGB, and HSL (among others, of course) are the spaces we have to explore the gamut.
That’s why you may hear a color space as having a “wider” or “narrower” gamut than another — it’s a range of possibilities within a shape.
If I’ve piqued your interest enough, I’ve compiled a list of articles that will give you more thorough definitions of gamuts and color spaces at the end of this article.
Why We Needed New Color Spaces
The short answer is that the sRGB gamut serves as the reference point for color spaces like Hex, RGB, and HSL that provide a narrower color gamut than what is available in the newer Display P3 gamut.
We’re well familiar with many of sRGB-based color notations and functions in CSS. The values are essentially setting points along the gamut space with different types of coordinates.
/* Hex */ #f8a100
/* RGB */ rgb(248, 161, 2)
/* HSL */ hsl(38.79 98% 49%)
For example, the rgb() function is designed to traverse the RGB color space by mixing red, blue, and green values to produce a point along the sRGB gamut.

If the difference between the two ranges in the image above doesn’t strike you as particularly significant or noticeable, that’s fair. I thought they were the same at first. But the Display P3 stripe is indeed a wider and smoother range of colors than the sRGB stripe above it when you examine it up close.
The problem is that Hex, RGB, and HSL (among other existing spaces) only support the sRGB gamut. In other words, they are unable to map colors outside of the range of colors that sRGB offers. That means there’s no way to map them to colors in the Display P3 gamut. The traditional color formats we’ve used for a long time are simply incompatible with the range of colors that has started rolling out in new hardware. We needed a new space to accommodate the colors that new technology is offering us.
Dead Grey Zones
I love this term. It accurately describes an issue with the color spaces in the sRGB gamut — greyish areas between two color points. You can see it in the following demo.

Oklch (as well as the other new spaces in the Level 4 spec) doesn’t have that issue. Hues are more like mountains, each with a different elevation.

That’s why we needed new color spaces — to get around those dead grey zones. And we needed new color functions in CSS to produce coordinates on the space to select from the newly available range of colors.
But there’s a catch. That mountain-shaped gamut of Oklch doesn’t always provide a straight path between color points which could result in clipped or unexpected colors between points. The issue appears to be case-specific depending on the colors in use, but that also seems to indicate that there are situations where using a different color space is going to yield better gradients.
Consistent Lightness
It’s the consistent range of saturation in HSL muddying the waters that leads to another issue along this same train of thought: inconsistent levels of lightness between colors.
The classic example is showing two colors in HSL with the same lightness value:

The Oklab and Oklch color spaces were created to fix that shift. Black is more, well, black because the hues are more consistent in Oklab and Oklch than they are in LAB and LCH.
So, that’s why it’s likely better to use the oklch() and oklab() functions in CSS than it is to use their lch() and lab() counterparts. There’s less of a shift happening in the hues.
So, while Oklch/LCH and Oklab/LAB all use the same general color space, the Cartesian coordinates are the key difference. And I agree with Sitnik and Turner, who make the case that Oklch and LCH are easier to understand than LAB and Oklab. I wouldn’t be able to tell you the difference between LAB’s a and b values on the Cartesian coordinate system. But chroma and hue in LCH and Oklch? Sure! That’s as easy to understand as HSL but better!
The reason I love Oklch over Oklab is that lightness, chroma, and hue are much more intuitive to me than lightness and a pair of Cartesian coordinates.
And the reason I like Oklch better than HSL is because it produces more consistent results over a wider color gamut.
OKLCH And CSS
This is why you’re here, right? What’s so cool about all this is that we can start using Oklch in CSS today — there’s no need to wait around.
“Browser support?” you ask. We’re well covered, friends!

In fact, Firefox 113 shipped support for Oklch a mere ten days before I started writing the first draft of this article. It’s oven fresh!
Using oklch() is a whole lot easier to explain now that we have all the context around color spaces and gamuts and how the new CSS Color Module Level 4 color functions fit into the picture.
I think the most difficult thing for me is working with different ranges of values. For example, hsl() is easy for me to remember because the hue is measured in degrees, and both saturation and lightness use the same 0% to 100% range.
oklch() is different, and that’s by design to not only access the wider gamut but also produce perceptively consistent results even as values change. So, while we get what I’m convinced is a way better tool for specifying color in CSS, there is a bit of a learning curve to remembering the chroma value because it’s what separates OKLCH from HSL.
The oklch() Values
Here they are:
l: This controls the lightness of the color, and it’s measured in a range of 0% to 100% just like HSL.
c: This is the chroma value, measured in decimals between 0 and 0.37.
h: This is the same ol’ hue we have in HSL, measured in the same range of 0deg to 360deg.
Again, it’s chroma that is the biggest learning curve for me. Yes, I had to look it up because I kept seeing it used somewhat synonymously with saturation.
Chroma and saturation are indeed different. And there are way better definitions of them out there than what I can provide. For example, I like how Cameron Chapman explains it:
“Chroma refers to the purity of a color. A hue with high chroma has no black, white, or gray added to it. Conversely, adding white, black, or gray reduces its chroma. It’s similar to saturation but not quite the same. Chroma can be thought of as the brightness of a color in comparison to white.”
— Cameron Chapman
I mentioned that chroma has an upper limit of 0.37. But it’s actually more nuanced than that, as Sitnik and Turner explain:
“[Chroma] goes from 0 (gray) to infinity. In practice, there is actually a limit, but it depends on a screen’s color gamut (P3 colors will have bigger values than sRGB), and each hue has a different maximum chroma. For both P3 and sRGB, the value will always be below 0.37.”
— Andrey Sitnik and Travis Turner
I’m so glad there are smart people out there to help sort this stuff out.
The oklch() Syntax
The formal syntax? Here it is, straight from the spec:
oklab() = oklab( [ <percentage> | <number> | none]
[ <percentage> | <number> | none]
[ <percentage> | <number> | none]
[ / [<alpha-value> | none] ]? )
Maybe we can “dumb” it down a bit:
oklch( [ lightness ] [ chroma ] [ hue ] )
And those values, again, are measured in different units:
oklch( [ lightness = <percentage> ] [ chroma <number> ] [ hue <degrees> ] )
Those units have min and max limits:
oklch( [ lightness = <percentage (0%-100%)> ] [ chroma <number> (0-0.37) ] [ hue <degrees> (0deg-360deg) ] )
An example might be the following:
color: oklch(70.9% 0.195 47.025);
Did you notice that there are no commas between values? Or that there is no unit on the hue? That’s thanks to the updated syntax defined in the CSS Color Module Level 4 spec. It also applies to functions in the sRGB gamut:
/* Old Syntax */
hsl(26.06deg, 99%, 51%)
/* New Syntax */
hsl(26.06 99% 51%)
Something else that’s new? There’s no need for a separate function to set alpha transparency! Instead, we can indicate that with a / before the alpha value:
/* Old Syntax */
hsla(26.06deg, 99%, 51%, .75)
/* New Syntax */
hsl(26.06 99% 51% / .75)
That’s why there is no oklcha() function — the new syntax allows oklch() to handle transparency on its own, like a grown-up.
Providing A Fallback
Yeah, it’s probably worth providing a fallback value for oklch() even if it does enjoy great browser support. Maybe you have to support a legacy browser like IE, or perhaps the user’s monitor or screen simply doesn’t support colors in the Display P3 gamut.
Providing a fallback doesn’t have to be hard:
color: hsl(26.06 99% 51%);
color: oklch(70.9% 0.195 47.025);
There are “smarter” ways to provide a fallback, like, say, using @supports:
.some-class {
color: hsl(26.06 99% 51%);
}
@supports (oklch(100% 0 0)) {
.some-class {
color: oklch(70.9% 0.195 47.025);
}
}
Or detecting Display P3 support on the @media side of things:
.some-class {
color: hsl(26.06 99% 51%);
}
@media (color-gamut: p3) {
.some-class {
color: oklch(70.9% 0.195 47.025);
}
}
Those all seem overly verbose compared to letting the cascade do the work. Maybe there’s a good reason for using media queries that I’m overlooking.
There’s A Polyfill
Of course, there’s one! There are two, in fact, that I am aware of: postcss-oklab-function and color.js. The PostCSS plugin will preprocess support for you when compiling to CSS. Alternatively, color.js will convert it on the client side.
That’s Oklch 🥰
O, Oklch! How much do I love thee? Let me count the ways:
You support a wider gamut of colors that make my designs pop.
Your space transitions between colors smoothly, like soft butter.
You are as easy to understand as my former love, HSL.
You are well-supported by all the major browsers.
You provide fallbacks for handling legacy browsers that will never have the pleasure of knowing you.
I know, I know. Get a room, right?!
Resources
CSS Color Module Level 4, W3C
W3C Workshop on Wide Color Gamut and High Dynamic Range for the Web, Chris Lilley (W3C)
“OKLCH in CSS: why we moved from RGB and HSL,” Andrey Sitnik and
Travis Turner
“Color Formats in CSS,” Joshua Comeau
“High Definition CSS Color Guide,” Adam Argyle
“LCH colors in CSS: what, why, and how?,” Lea Verou
“OK, OKLCH 👑,” Chris Coyier
“It’s Time to Learn oklch Color,” Keith J. Grant
“Color Theory For Designers, Part 2: Understanding Concepts And Color Terminology,” Cameron Chapman (Smashing Magazine)
HSL and HSV, Wikipedia
Original Source: https://ecommerce-platforms.com/articles/best-ecommerce-platforms-for-printful
The best ecommerce platforms for Printful users, leverage native integrations and APIs to ensure you can easily automate various aspects of your print-on-demand business model.
Printful is easily one of the most popular print on demand solutions in the market today, with more than 200,000 customers, and a host of amazing products to choose from.
Printful offers ecommerce store owners, creators, and would-be vendors an excellent opportunity to start selling custom products online, with minimal effort.
Not only does the company handle all of the fulfillment and logistics elements of selling custom products for you, but it integrates directly with some of the world’s leading platforms and sales channels.
Today, we’re looking at just some of the best ecommerce platforms and integration worth considering if you’re thinking of launching a store with Printful.
What are The Best Ecommerce Platforms for Printful?
Shopify
Squarespace
Wix
Square Online
Ecwid
WooCommerce
Adobe Commerce
Big Cartel
Amazon
eBay
Etsy
Notably, we’ll be looking at a range of different options here, to suit different kinds of merchants, including software-as-a-service platforms like Shopify, open-source solutions like WooCommerce, and even popular marketplaces like Etsy.
Let’s dive in.
1. Shopify
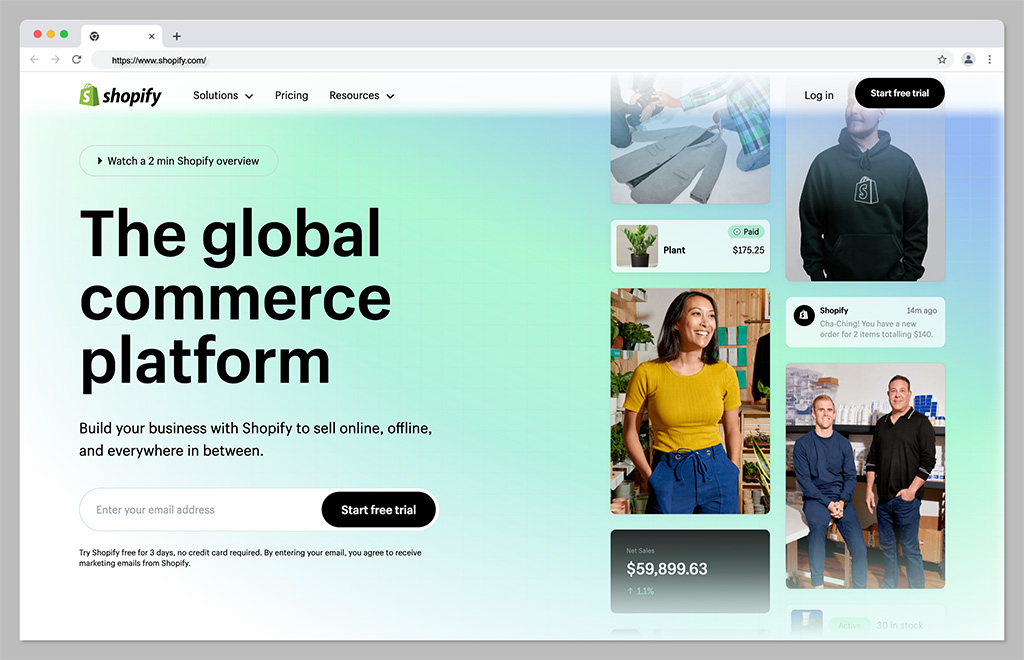
Let’s start with perhaps the biggest, most popular ecommerce platform of all for Printful sellers: Shopify. One of the world’s most popular ecommerce tools, Shopify is a software-as-a-service hosted platform, that offers everything you need to run a successful store in one place.
It comes with an intuitive interface, plenty of templates to choose from, and a comprehensive app marketplace so users can extend the functionality of their online store. Plus, it integrates directly with Printful, making it easy to automate your Print on Demand sales strategy.
With Shopify, you can sell across multiple channels at once, including marketplaces and social media platforms. Plus, there are plenty of tools for tracking orders and inventory, increasing sales with discount codes, and marketing your store through SEO, social media, and email.
Pricing
Pricing for Shopify starts with a 3-day free trial, followed by the option to sign up for 3 months for just $1 per month. After that, packages cost $39 per month for the Basic Shopify experience, or you can upgrade to Standard Shopify for $105 per month. Advanced Shopify costs $399 per month, and there are enterprise options (Shopify Plus) available with a custom cost (starting at $2000 per month).
Pros:
Huge range of themes and customizable templates
Lots of plugins, extensions, and apps in the marketplace
Integrated payment options
Included marketing and sales tools
Multi-channel and multi-location selling
Cons:
Transaction fees can eat into profits
Difficult to make some site customizations
Go to the top
2. Wix
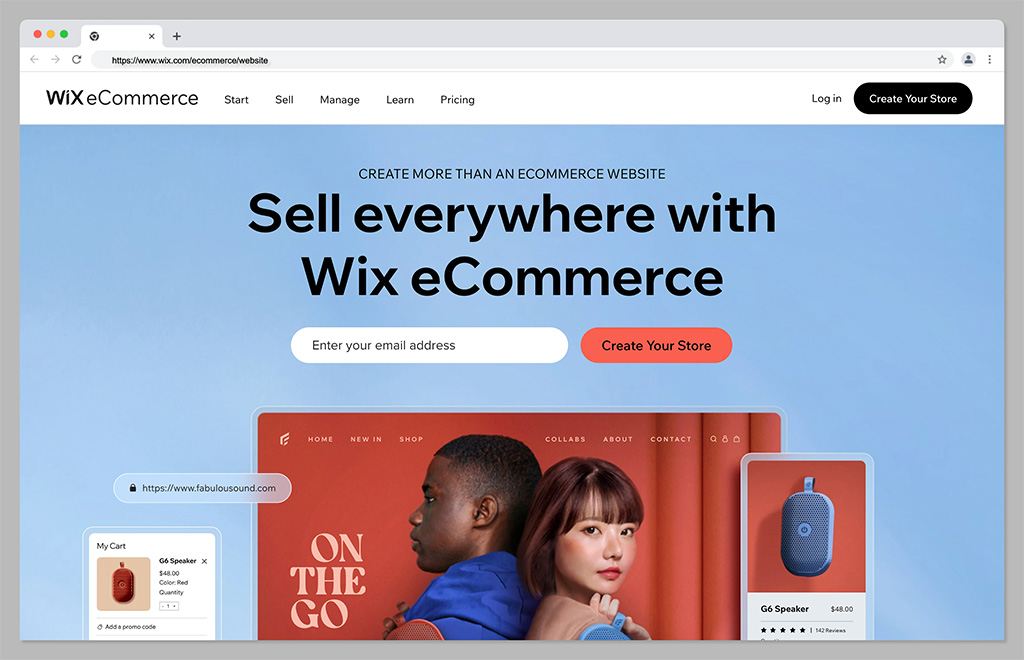
If you’re looking for a combination of exceptional ease of use and feature-rich performance, Wix could be the ideal ecommerce platform for you. Wix makes it simple to create beautiful and functional stores, either with a drag-and-drop editor, or the Wix AI design service.
There are tons of available tools to help you grow, such as Wix’s logo maker, loyalty programs, and SEO wizards. Plus, you’ll have plenty of payment solutions and a secure checkout system to help you make the most of every sale. Wix is ideal for small businesses, with it’s all-in-one functionality, and it’s easy to scale with tons of available integrations.
The platform integrates seamlessly with Printful, and has plenty of useful tools for calculating global tax and shipping, managing orders, and tracking inventory.
Pricing
Plans for Wix vary depending on whether you’re launching an ecommerce store or a standard website. If you want to make sales online, you’ll need one of the “Business” plans, starting at $38 per month if you pay monthly, or $32 per month if you pay annually. There’s also a “Business Elite” plan starting at $156 per month, and an Enterprise plan with custom pricing.
Pros:
Extremely easy to use website designer with AI tools
Lots of secure payment options to choose from
Excellent blogging, SEO, and marketing tools
Integrations with a wide range of software solutions
Extra branding tools, like a free logo maker
Cons:
Difficult to export data to another store
Some limitations on customization
Go to the top
3. Squarespace
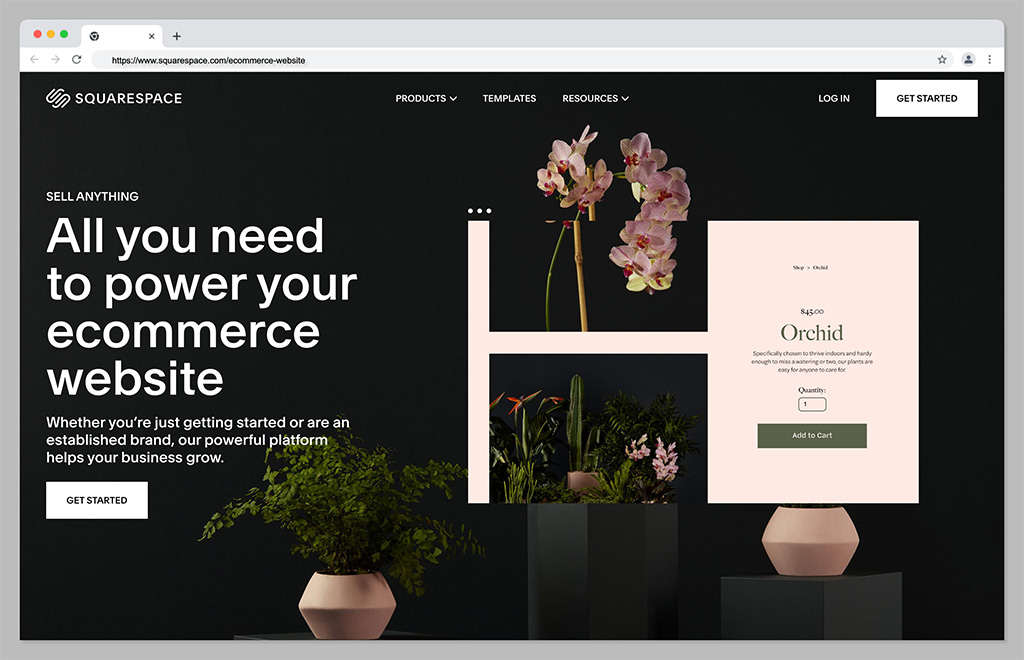
If, like many companies in the print on demand world, you’re focusing on the fashion industry, and want to stand out as a creative expert, Squarespace could be the perfect platform. Squarespace boasts some of the most attractive templates and themes in the ecommerce landscape.
The Squarespace website builder comes with a ton of advanced features, such as integrations with social media channels, booking tools, and the ability to set up subscription plans. The platform comes with fully mobile optimized designs, integrated ecommerce checkout features, and a free custom domain on some plans.
What’s more, you can access in-depth analytics for your website, to make it easier to track which of your products generate the most sales and opportunities. As you might have guessed, Squarespace also integrates directly with Printful.
Pricing
Like Wix, Squarespace pricing varies depending on whether you’re launching a website for personal reasons, or for ecommerce. Business plans start at $18 per month but come with transaction fees. To remove the transaction fees, you can upgrade to Commerce Basic for $26 per month annually, or $30 per month on a month-to-month basis.
Pros:
Beautiful and high-quality templates
Excellent integrations with social media
Free domain with annual plans
Advanced website analytics
Powerful merchandising tools
Cons:
No app marketplace
Limited payment options
Go to the top
4. Square Online
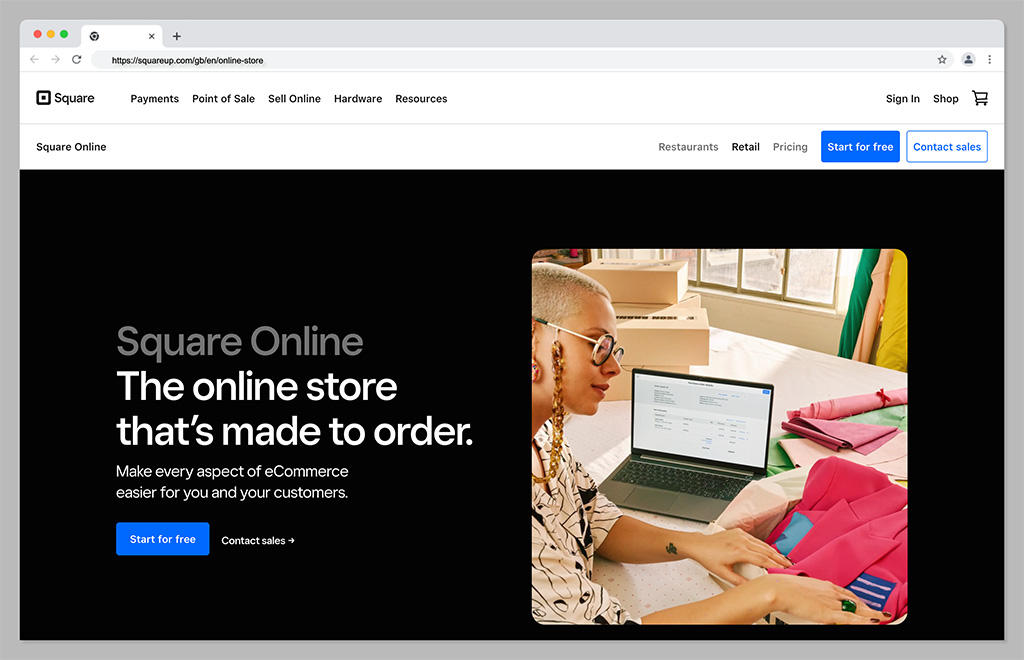
Square is best-known for it’s payment processing solutions, but it also offers a handy website building tool to smaller business owners. Square is one of the simplest tools on the market for companies in search of a low-cost way to take their business online. It’s even free to get started if you’re already using Square for payment processing.
The store builder is powered by Weebly, which makes it extremely easy to use. Plus, everything integrates seamlessly with your Square Point of Sale system (and Printful) so you can dive into omnichannel selling with minimal effort.
Square offers access to AI design tools, helpful features for showcasing your products, and a range of analytical tools. Although it doesn’t allow you to track important data like live shipping rates.
Pricing
You can start an online store with Square without paying anything at all. The only costs are transaction fees, which average out at 2.9% of your product price, plus 30 cents. There’s an option to upgrade to slightly more advanced versions of Square Online, with expanded site customization and more payment options, too, starting at around $25 per month.
Pros:
Excellent for omnichannel online and offline selling
Easy to use design tools for beginners
AI design features
Inventory management tools built-in
Analytics and reporting features
Cons:
Limited customization options
Transaction fees
Go to the top
5. Ecwid
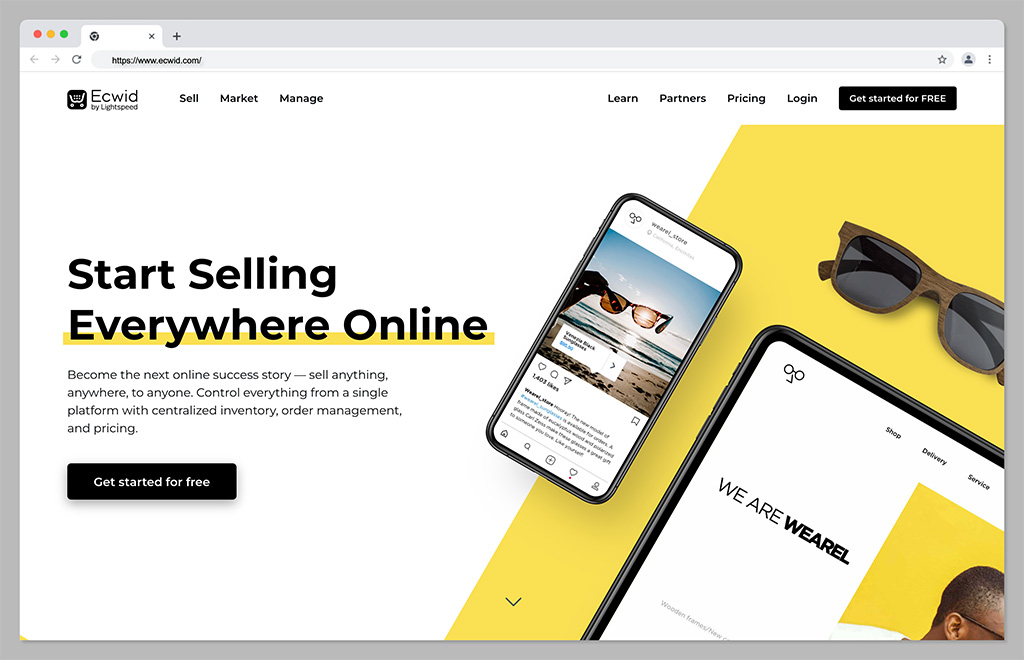
Ecwid, by Lightspeed, is a powerful tool for omnichannel selling, intended to support small and growing companies alike. With this convenient tool, you can sell across a range of social media platforms, as well as marketplaces. Plus, you can set up an account for free online and keep it for as long as you like.
The Ecwid cloud-based platform is hosted for you, which means there’s no installation required, and you can add Ecwid’s ecommerce functionality to any existing website, including Joomla, Wix, WordPress, and Drupal sites.
Plus, there are tons of helpful tool for marketing your company too, such as Google and Facebook adds, and integrations with marketing ads. You can also manage your store with a host of fantastic tools, automated tax solutions, and discount shipping options.
Pricing
There’s a free forever plan for Ecwid which is ideal for smaller companies just getting started online. Alternatively, monthly prices start at $19 per month for the basic plan, or $99 per month for everything you need to start selling online.
Pros:
Options for selling on various marketplaces and social sites
Automatic language detection for global selling
Secure payment options available
You can create a mobile app for the app store
Free plan available for beginners
Cons:
Not a standalone solution for ecommerce
Limited analytical tools
Go to the top
6. Adobe Commerce
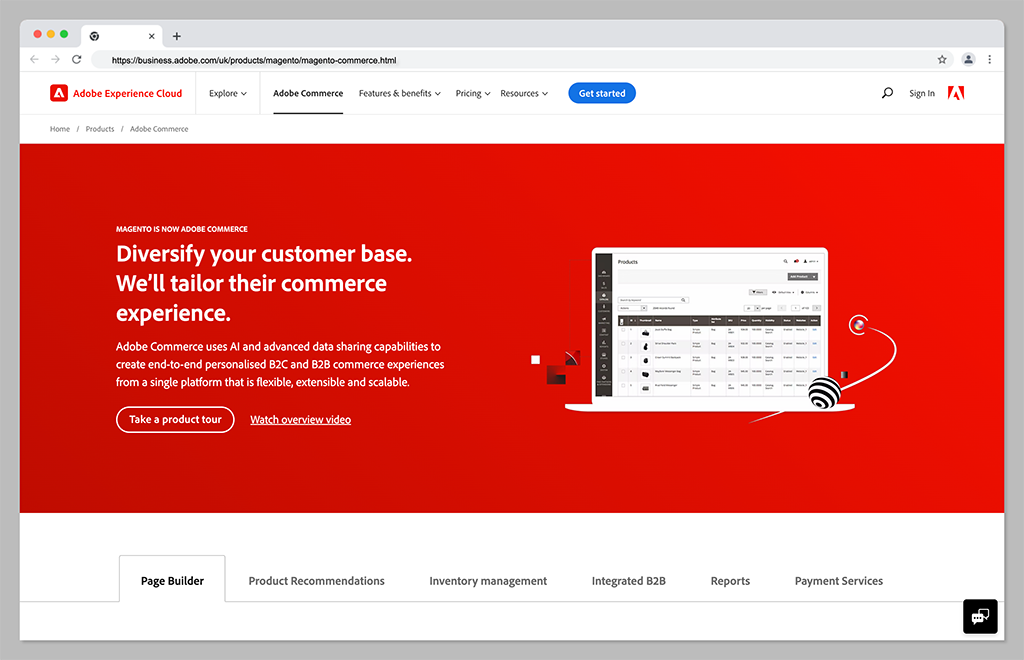
Adobe Commerce, previously known as Magento, is a comprehensive ecommerce solution, powered by the Adobe company. Supported by the Adobe Commerce platform, the solution integrates with a host of solutions in the Adobe landscape, as well as Printful, and a range of other tools.
With Adobe Commerce, companies can sell across a range of different channels. There’s even an integrated channel manager, to help you keep track of all your different platforms. Adobe Commerce also comes with access to a variety of great website building tools, and tons of customization options. You can even access headless commerce solutions as your business grows.
Although the solution is a little more complex to set up than other solutions, it does provide some more advanced features than you’ll get on other ecommerce solutions. Plus, Adobe Commerce is great for rapidly scaling brands.
Pricing
Adobe isn’t particularly forthcoming with its pricing options. You’ll need to contact the customer service team to get a quote for one of two packages. The first is Adobe Commerce Pro, an all-in-one solution for merchants of any size. The second is the “Managed Services” package, which comes with extra support from the Adobe team.
Pros:
Support for B2B and B2C multichannel selling
Excellent customization options
Wide range of fulfilment tools
Lots of payment methods
Insights and analytics
Cons:
Complex initial setup
No transparent pricing
Go to the top
7. WooCommerce
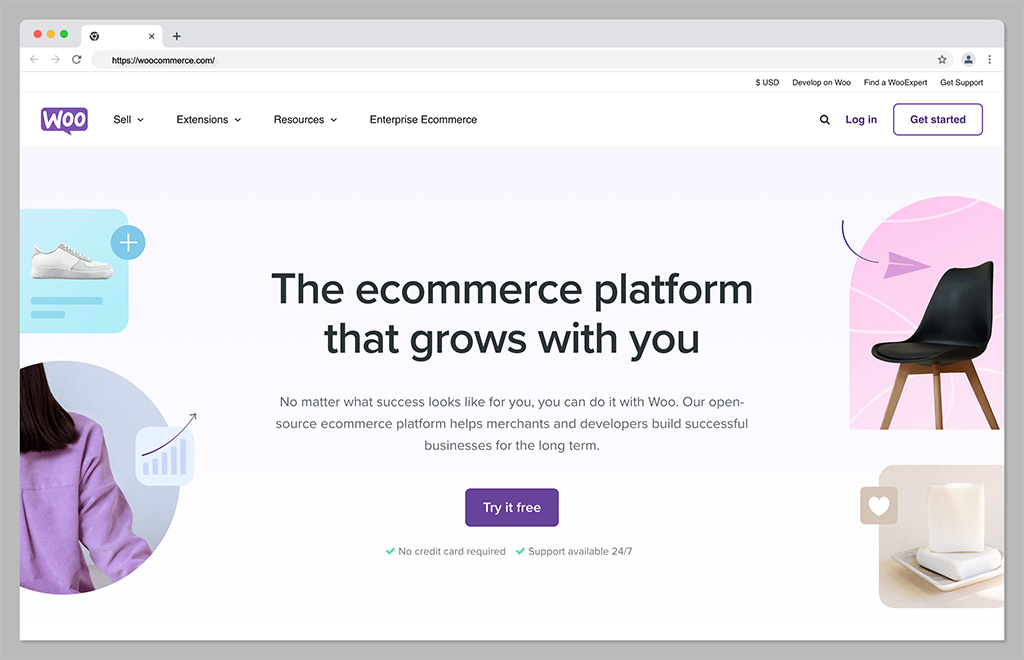
Ideal for those in search of absolute flexibility with their Printful store, WooCommerce is an ecommerce solution designed for WordPress. The solution is extremely easy to use, with a huge community of developers and experts you can reach out to for help. What’s more because its open source, it can flexibly integrate with a huge variety of tools.
WooCommerce is one of the most customizable ecommerce platforms out there, giving you complete freedom over everything from sales and inventory management to marketing. Plus, because it’s built on WordPress, you’ll have no problems with SEO and content marketing.
WooCommerce can offer live shipping insights, out of stock displays, and product personalization tools. You’ll also be able to take unlimited orders, and integrate all of your fulfillment providers into the same ecosystem.
Pricing
WooCommerce is a free, open-source solution, available to add to any WordPress store. However, because the solution is open source, you will need to pay for other features, like your domain name, website hosting, security and payment gateways.
Pros:
Exceptional customization options
Lots of built-in ecommerce and payment processing options
Affordable for beginners
No limits on how much or what you can sell
Built on top of WordPress for ease of use
Excellent for marketing and SEO
Cons:
Slight learning curve for beginners
Requires a third-party payment gateway
Go to the top
8. Big Cartel
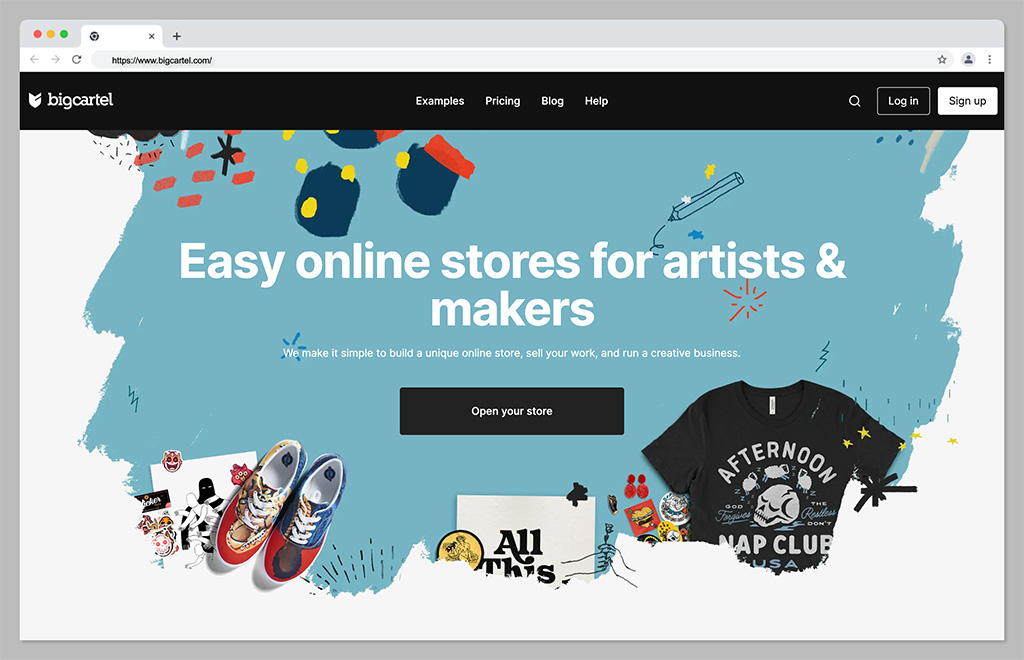
Another fantastic ecommerce platform solution that integrates directly with Printful, Big Cartel is a highly scalable tool for sellers. The platform is specifically focused on supporting independent artists and creators, with flexible templates and themes. There are theme code editing options, so you can make your own unique changes to your storefront.
Plus, Big Cartel supports both online and online selling, custom domains, real-time statistics and analytics, and inventory tracking. There’s even a sales tax autopilot solution available on some plans to help you with your financial strategies.
Though Big Cartel does require a little bit of technical knowledge, it’s an excellent choice if you want to boost the visibility of your store with some unique features. Just keep in mind there are no built-in blogging tools to help you promote your store.
Pricing
The free forever plan for Big Cartel allows users to sell up to 5 products for free with a custom domain. If you want more functionality, and the option to sell additional products, premium plans start at $9.99 per month for 50 products, or $19.99 per month for 500 products.
Pros:
Very affordable pricing
Lots of customization options and code editing
Built-in analytics and reports
Comprehensive inventory and shipment tracking
Support with sales tax calculation
Cons:
Limited payment options
Does require some coding knowledge
Go to the top
9. Amazon
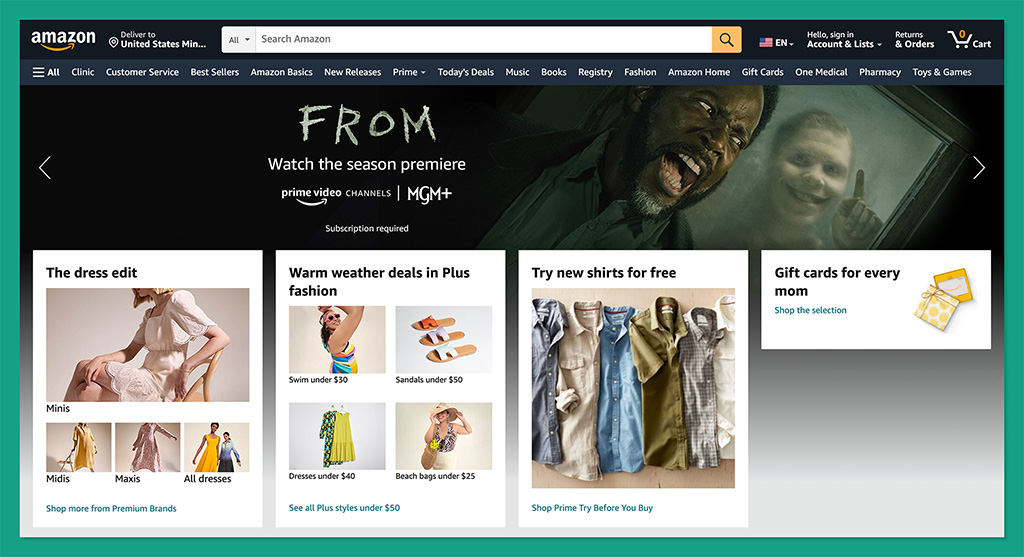
If creating and managing your own store doesn’t appeal to you, then you could always consider a different approach with your Printful integrations. Amazon is by far one of the world’s largest marketplaces, known for selling virtually every kind of product imaginable.
With more than 300 million active customers worldwide, the platform offers businesses an easy way to rapidly connect with endless buyers. What’s more, Amazon offers sellers access to a host of great benefits, from ultra-fast fulfillment to simple setup processes.
With Amazon, you can build, grow, and scale your brand effortlessly, taking advantage of world-class logistics, a fantastic customer experience team, rich data insights, and even a host of advertising and marketing solutions.
Pricing
There are some fees to pay when selling on Amazon. For most US customers, subscription prices start at around $39.99 per month, plus referral fees. There may also be additional payment processing and currency conversion fees to consider.
Pros:
Instant access to a huge audience
Worldwide logistics and fulfillment team
Excellent customer support for end-users
Built-in advertising and marketing solutions
Easy set up for beginners
Cons:
Lots of competition
Can be difficult to scale your brand
Go to the top
10. eBay
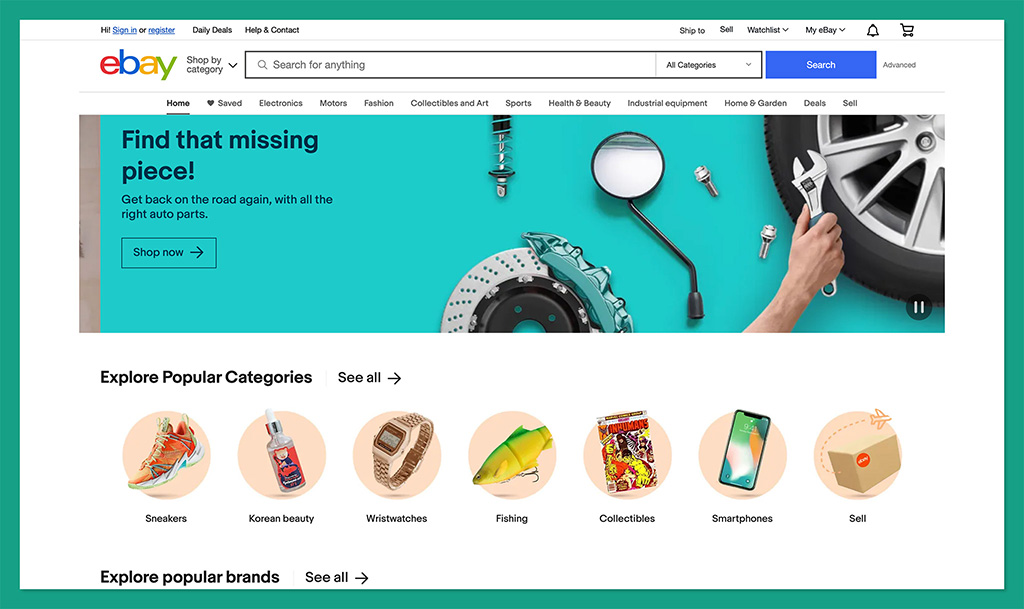
Another excellent option if you want to take the marketplace approach to selling online, eBay is a versatile platform for buyers and sellers alike. More than 109.4 million monthly visitors shop on eBay, giving you instant access to a massive potential audience.
What’s more, the platform is extremely easy to use, with simple tools for listing products, managing fulfillment, and even connecting with buyers. You can access marketing tools to boost your chances of making sales, and detailed sales information with information on daily sales trends.
Plus, advanced features provide merchants with the option to customize their selling overview, and active listing pages. You can also ship products to customers all over the world, giving yourself excellent opportunities to grow.
Pricing
It’s free to set up a seller account on eBay, but you will need to pay transaction fees, which vary depending on your location. There’s also a listing fee of $0.35 whenever you want to add a new product to your storefront.
Pros:
Extremely easy to use for beginners
Worldwide reach for a global audience
Support for marketing and promotion
Built-in analytics and reporting
Low fees for listings
Cons:
A lot of competition from other brands
Not ideal for scaling companies
Go to the top
11. Etsy
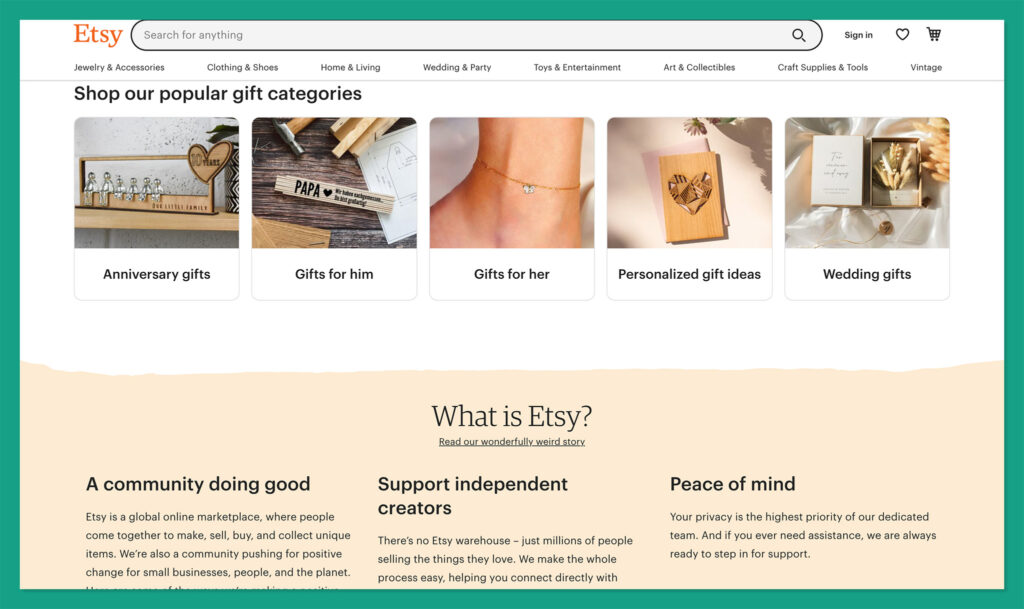
As the ultimate marketplace for creative professionals, Etsy stands out as one of the best ways to get started in the world of print on demand selling. The landscape attracts millions of potential buyers every day, so you can spend less time searching for customers, and more time designing.
Etsy comes with access to Google Analytics tools, for tracking information about your top-performing products and customers. You can track orders in your backend environment, purchase, and print postage labels directly from Etsy, and even customize your Etsy storefront.
Etsy even offers users the option to make their own custom website for branding purposes, with the “Pattern” service. This means you’re not limited to marketplace selling alone.
Pricing
Like Ebay, Etsy doesn’t charge merchants anything to get started on the platform. However, you will pay a 6.5% transaction fee on every order, and there’s a $0.20 listing fee for every product. Access to other features, like Pattern, will incur additional fees.
Pros:
Easy to use for beginners
Options to build your own store with Pattern
Convenient tools for sales and promotion
Help with fulfilment and logistics
Access to a large global audience
Cons:
High transaction fees
Significant competition
Go to the top
Choosing the Best Ecommerce Platform for Printful
Printful is one of the most versatile print on demand platforms available today, with a host of integrations available to choose from. As well as all of the options above, you’ll be able to connect your Printful platform to a variety of other vendors, from Prestashop and Weebly, to Gumroad, Shift4Shop and many others.
Plus, there’s a Printful API available for custom connections. The right solution for you will all depend on your goals, and how you want to get started in the print on demand space. The good news is that in all cases, Printful will make it easy to automate your fulfillment processes.
Go to the top
FAQ
Can I integrate Printful with my own website?
Printful integrates directly with a wide variety of ecommerce platforms and marketplaces, as well as shipment and fulfillment tools. There’s also a dedicated API available, so you can form your own connections with crucial resources too.
Can I sell directly on Printful?
Unfortunately, you can’t sell directly on Printful, as the platform doesn’t offer any online storefront or ecommerce site building services. Instead, you’ll need to use one of the platform’s integrations with other ecommerce tools or marketplaces.
Is Shopify Better than WooCommerce for Selling With Printful?
The right ecommerce integration for Printful for your business will depend on a number of factors. There’s no one-size-fits-all solution. If you want more customization and control, WooCommerce might be the ideal option. If you want a simple hosted solution, Shopify may be the better choice.
The post 11 Best Ecommerce Platforms and Integrations for Printful (2023) appeared first on Ecommerce Platforms.
Original Source: https://abduzeedo.com/ewelina-gaska-crafting-abstract-realms-through-3d-posters
Ewelina Gąska: Crafting abstract realms through her 3D Posters

AoiroStudio0824—23
In the realm of design and illustration, there are creators who possess a unique ability to transport viewers into otherworldly dimensions through their artistry. Ewelina Gąska, a talented designer and illustrator based in Poland, is one such visionary. With her exceptional skills in 3D design, she crafts abstract posters that defy conventions and invite audiences to explore mesmerizing visual landscapes.
Ewelina Gąska’s journey as a designer and illustrator began with a passion for pushing the boundaries of creativity. Armed with a deep understanding of visual aesthetics and an unquenchable curiosity, she embarked on a quest to create 3D abstract posters that would challenge perceptions and spark the imagination. Her posters are a symphony of shapes, colors, and textures that converge to form captivating visual experiences. Each composition is a testament to her mastery of 3D design techniques, where geometric forms blend seamlessly with organic elements, giving rise to dynamic and ethereal visuals that dance before the eyes.
Ewelina’s abstract posters are not mere static images; they are living, breathing entities that evoke emotions and thoughts within the viewer. The interplay of light and shadow, coupled with intricate layering, creates a sense of depth that beckons exploration. The vibrant color palettes she employs add a layer of emotion, with hues and tones communicating feelings that words often fail to capture.
Abstract Art
Ewelina Gąska is a freelance designer and illustrator based in Warszawa, Poland. You can check out more of her works via the links below:
Personal Site
Behance
Instagram
All product photos are used only for presentation for non-commercial purposes only. All rights reserved.
Original Source: https://www.creativebloq.com/news/iphone-15
2023 could be an Ultra exciting year for Apple fans.
Original Source: https://smashingmagazine.com/2023/08/interesting-ways-use-css-shadows/
The world of post-modern web design is one where the light doesn’t cast many shadows. That doesn’t mean CSS shadows are going away. On the contrary, they’ve become more adaptive. Shadows are an incredibly useful design element. We know they add depth to an otherwise two-dimensional web design, but did you know we can stack, animate, and manipulate them in ways that go beyond that?
I’ve been experimenting with shadows. In this article, I’m going to share several “tricks” I’ve discovered along the way and how they can be used to create interesting effects that have little to do with their primary role of adding depth. We’ll look at an effect that works by stacking layers of shadows that transition on hover. After that, I will show you how to make a shadow of a shadow. Lastly, we’ll play with shadows on text as an alternative to color.
Ready for some fun? Let’s start with an interesting hover effect.
The Introspective Shadow Hover Effect
Most of us are familiar with the inset keyword. It’s an optional value of the CSS box-shadow property.
When inset is specified, the shadow is cast inside the element, directed inward. It’s commonly used to make it look as if an element has been stamped into the surface of the web page. We are going to push that shadow further, both metaphorically and literally, to create an overlay hover effect for image transitions.
Just as we can control the shadow’s blur radius — how far the shadow spreads outward — we can choose to apply no blur at all to the shadow. We can combine that with the fact that inset shadows are painted over an element’s background (unlike default shadows that are cast beneath the element) to create what I call a “veil” that sits on top of an element.
Let’s start with a single div in the HTML:
<div class=”item”></div>
There’s nothing to see yet. So, let’s add some dimensions, a background color, and a border radius to make a green circle.
.item {
width: 250px;
height: 250px;
background: green;
border-radius: 50%;
}
This is nothing fancy so far. I merely want to demonstrate that we can essentially cover the green background with a red inset box-shadow:
.item {
width: 250px;
height: 250px;
background: green;
border-radius: 50%;
box-shadow: inset 250px 250px 0 red;
}
Now we have a red circle with a green background beneath it. We can remove the red inset shadow on hover to reveal the green background:
.item:hover {
box-shadow: none;
}
See the Pen Inward Shadow Pt. 1 [forked] by Preethi Sam.
Since shadows can be layered and are supported by CSS transitions, let’s incorporate that for a more fluid design. First, I’m going to update the HTML a bit by adding a span inside the .item:
<div class=”item”>
<span>The New York Times</span>
</div>
<!– more items –>
For the CSS, it’s the same idea as before. We want a circle with an inset shadow and a background:
.item {
width: 300px;
height: 300px;
background-image: url(‘nytimes.svg’);
border-radius: 50%;
box-shadow: inset -300px -300px 0 black,
}
The difference so far is that I am using a background-image instead of a background-color. They are absolutely interchangeable for the hover effect we’re working on.
Next, I’m going to do two things. First, I’m going to stack more inset shadows inside the .item. Then I’m changing the text color to white, but only for a moment so the background image shows all the way through.
.item {
width: 300px;
height: 300px;
background-image: url(‘nytimes.svg’);
border-radius: 50%;
box-shadow:
inset -300px -300px 0 black,
inset 300px -300px 0 green,
inset -300px 300px 0 blue,
inset 300px 300px 0 yellow,
0 0 20px silver; /* standard outset shadow */
color: white;
}
Even after we add those four extra shadows, we still are left with only a black circle that says “The New York Times” on it in white. The trick is to remove those shadows on hover, change the color of the text to transparent, and reveal the logo beneath our stack of inset shadows.
.item:hover {
box-shadow:
inset 0 0 0 transparent,
inset 0 0 0 transparent,
inset 0 0 0 transparent,
inset 0 0 0 transparent,
0 0 20px silver; /* retain the outset shadow */
color: transparent;
}
That works! But perhaps we should add a little transition in there to smooth it out:
.item {
width: 300px;
height: 300px;
background-image: url(‘nytimes.svg’);
border-radius: 50%;
box-shadow:
inset -300px -300px 0 black,
inset 300px -300px 0 green,
inset -300px 300px 0 blue,
inset 300px 300px 0 yellow,
0 0 20px silver; /* standard outset shadow */
color: white;
transition:
box-shadow ease-in-out .6s,
color ease-in-out .5s;
}
.item:hover {
box-shadow:
inset 0 0 0 transparent,
inset 0 0 0 transparent,
inset 0 0 0 transparent,
inset 0 0 0 transparent,
0 0 20px silver; /* keeping the outset shadow */
color: transparent;
}
The only other thing I think that’s worth calling out is that the outward shadow in the stack is not removed when the .item is hovered. I only want to remove the inset shadows.
Here’s the final result:
See the Pen Inward Shadow Pt. 2 [forked] by Preethi Sam.
I used CSS variables throughout so you can change the colors of the shadows and the size of the element.
Casting A Shadow Of A Shadow
If we learned anything from that last example, it’s that shadows are visually interesting: they can bend, fade, intersect, and transition. But what about a shadow casting another shadow? Can we create a shadow of an element’s shadow?
This is not the same as stacking layers of shadows as we did earlier. Rather, we will be making a silhouette of a shadow. And because we have a second way to add shadows to elements with the CSS drop-shadow() filter, we can do exactly that.
A drop-shadow() is a little different than a box-shadow. Where a box-shadow casts a shadow along the physical edges of the element’s bounding box, a drop-shadow() ignores the box and casts a shadow along the element’s shape.
When drop-shadow() is given to an element with a box-shadow, the shadow from the box-shadow will cast a shadow of its own. We can combine these to make interesting effects, like a Venn diagram shape.
.item {
box-shadow: 0 0 20px black ;
filter: drop-shadow(-30px 0 0 blue);
}
See the Pen Shadow of a Shadow Pt. 1 [forked] by Preethi Sam.
This simple combination of box and drop shadows can lead to interesting designs, like shadows that cast shadows. Let’s start with some HTML that includes the same .item element we used in the last section. This time, we’ll place two child elements inside it, another div and an img:
<div class=”item”>
<div class=”background”></div>
<img src=”image.jpeg” />
</div>
<!– more items –>
The .item is merely serving as a container this time. The real work happens on the .background child element. The image is purely there for decoration. We’re going to set a box-shadow on the .background element, then add a stack of three drop-shadow() layers to it:
/* third circle in the following demo */
.item > .background {
box-shadow: 0 0 40px rgb(255 0 0 / .5);
filter:
drop-shadow(-20px 0 0 rgb(255 0 0 / .5))
drop-shadow(20px 0 0 rgb(255 0 0 / .5))
drop-shadow(20px 0 0 rgb(255 0 0 / .5));
}
We can also use transitions with these effects (as in the middle circle below).
See the Pen Shadow of a Shadow Pt. 2 [forked] by Preethi Sam.
The Textual Shadow
The last effect we’re going to look at involves the CSS text-shadow property. It’s actually less of a complicated “trick” than it is a demonstration of using and showing just the shadow of a text element for color purposes.
Specifically, I’m talking about transparent text with a shadow on it:
/* second column in the below demo */
p {
color: transparent;
text-shadow: 1px 1px 0 black;
}
See the Pen Textual Shadow Pt. 2 [forked] by Preethi Sam.
Notice the emoji? Instead of the full-color deal, we normally get, this emoji is more like an icon filled with a solid color. This is one way to make a quick and dirty icon system without drawing them or working with files.
We could have also pulled this off with background-clip: text to clip around the shape of the emoji or apply a drop-shadow(). However, that affects the background, limiting where it can be used. Plus, I like the idea of using text-shadow with text elements since that’s what it’s used for, and emoji are part of the text.
You might think there’s a “gotcha” with underlines. For example, text-shadow ignores the text decoration of links.
See the Pen Text Shadow No Likey Link Underlines [forked] by Geoff Graham.
No big deal. If you need to support underlines, we can reach for the CSS text-decoration and text-underline-offset properties:
p {
color: transparent;
text-shadow: 1px 1px 0 black;
text-decoration-line: underline;
text-decoration color: black;
text-underline-offset: 3px;
}
See the Pen Shadow-Only Link With Underline [forked] by Geoff Graham.
Conclusion
That’s a look at three interesting ways to use CSS shadows as more than that thing you use to add depth. We looked at one way that uses inset shadows to hide the contents of an element’s background for a neat hover effect. Then there was the idea of combining box-shadow and drop-shadow() to cast a shadow of another shadow. We capped things off with a quick way to manipulate text and emoji with text-shadow.
I hope these experiments give you the inspiration to do some CSS shadow experiments of your own. Shadows and gradients are perhaps the two most important CSS features for “drawing” with CSS, like many of the examples you’ll see on Lynn Fisher’s A Single Div project. Shadows have incredible browser support, so the options are plentiful as far as what we can do with them.
Further Reading On SmashingMag
“Lesser-Known And Underused CSS Features In 2022,” Adrian Bece
“Fluid Sizing Instead Of Multiple Media Queries?,” Ruslan Yevych
“CSS Generators,” Iris Lješnjanin
“Creating A High-Contrast Design System With CSS Custom Properties,” Brecht De Ruyte
Original Source: https://ecommerce-platforms.com/inventory-management/shopify-inventory-management-app
Shopify recognizes the need for good inventory management. After all, any business that wants to build profits and deliver great experiences needs to keep track of its inventory. Being able to watch everything from order status to stock level across your sales channels is vital.
Shopify’s Inventory area gives you the basic functionality that you need to track and adjust inventory information. The inventory tracking system even gives you access to a full history of inventory information for up to 90 days.
However, there are limitations to what you can do with Shopify on its own. That’s where Inventory Management apps come in.
In this article:
What are the Top Shopify Inventory Management Apps?
Managing Inventory with Shopify
The Benefits of Inventory Management
What to Look For When Choosing an Inventory Management App for Shopify?
Ready to Use a Shopify Inventory Management App?
What are the Top Shopify Inventory Management Apps?
ShipBob
Katana MRP
QuickBooks Commerce
Veeq
Skubana
EasyScan
Stocky
Order Tagger
Sellbrite
Stock Sync
ShipHero
Now you know what to look for from a Shopify inventory management application, and you know why these tools are so important, we can start to examine some of the top performers.
Here are some of the highest-rated solutions for inventory tracking and order management.
1. Shipbob
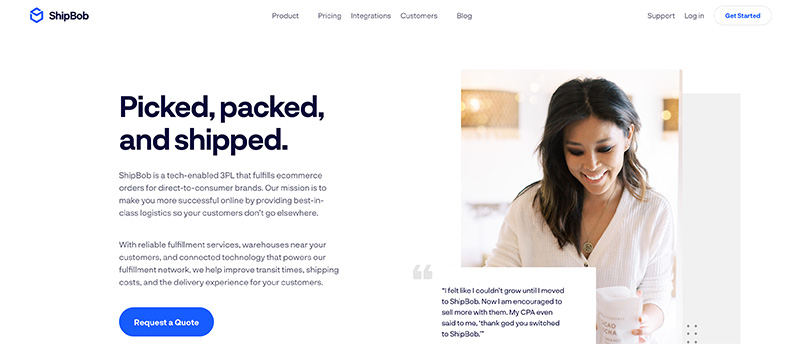
One of the most popular fulfilment brands in the world, ShipBob also offers a range of tools for inventory management in the ecommerce environment. Perfect for integrating directly with Shopify, as well as other big tools like BigCommerce and WooCommerce, ShipBob can make life much easier for retailers looking to master fulfilment.
With ShipBob, companies get access sot an all-in-one environment where they can seamlessly manage inventory control across multiple fulfilment centers and stores at the same time. There’s live inventory management, so you’re never behind on your numbers, and you can distribute inventory across multiple locations around the world, to speed up shipping.
There are inventory reorder points available, to automate re-ordering when you’re running low on crucial supplies. You can also access a range of inventory tracking tools with real-time inventory counts. All that, and all the technology is very easy to use.
Pros 👍
Great for real-time information tracking
Support for multiple location management
Distribute inventory in different spaces around the world
Speed up shipping with 2-day delivery
Excellent fulfilment and inventory management in one place
Integrates with a wide range of tools
Inventory reorder points available
Easy to use back-end environment
Cons 👎
Not the most transparent pricing
Can have a small learning curve
Pricing
ShipBob takes a slightly different approach to pricing than most of the tools from this article far. Rather than providing a range of plan options to choose from, the company asks you to contact them for a quote based on your specific needs.
On the one hand, quote-based pricing means you get a more specific package unique to your individual requirements. On the other hand, it’s difficult to know how much you can expect to pay using this strategy, which can make budgeting harder.
2. Katana MRP
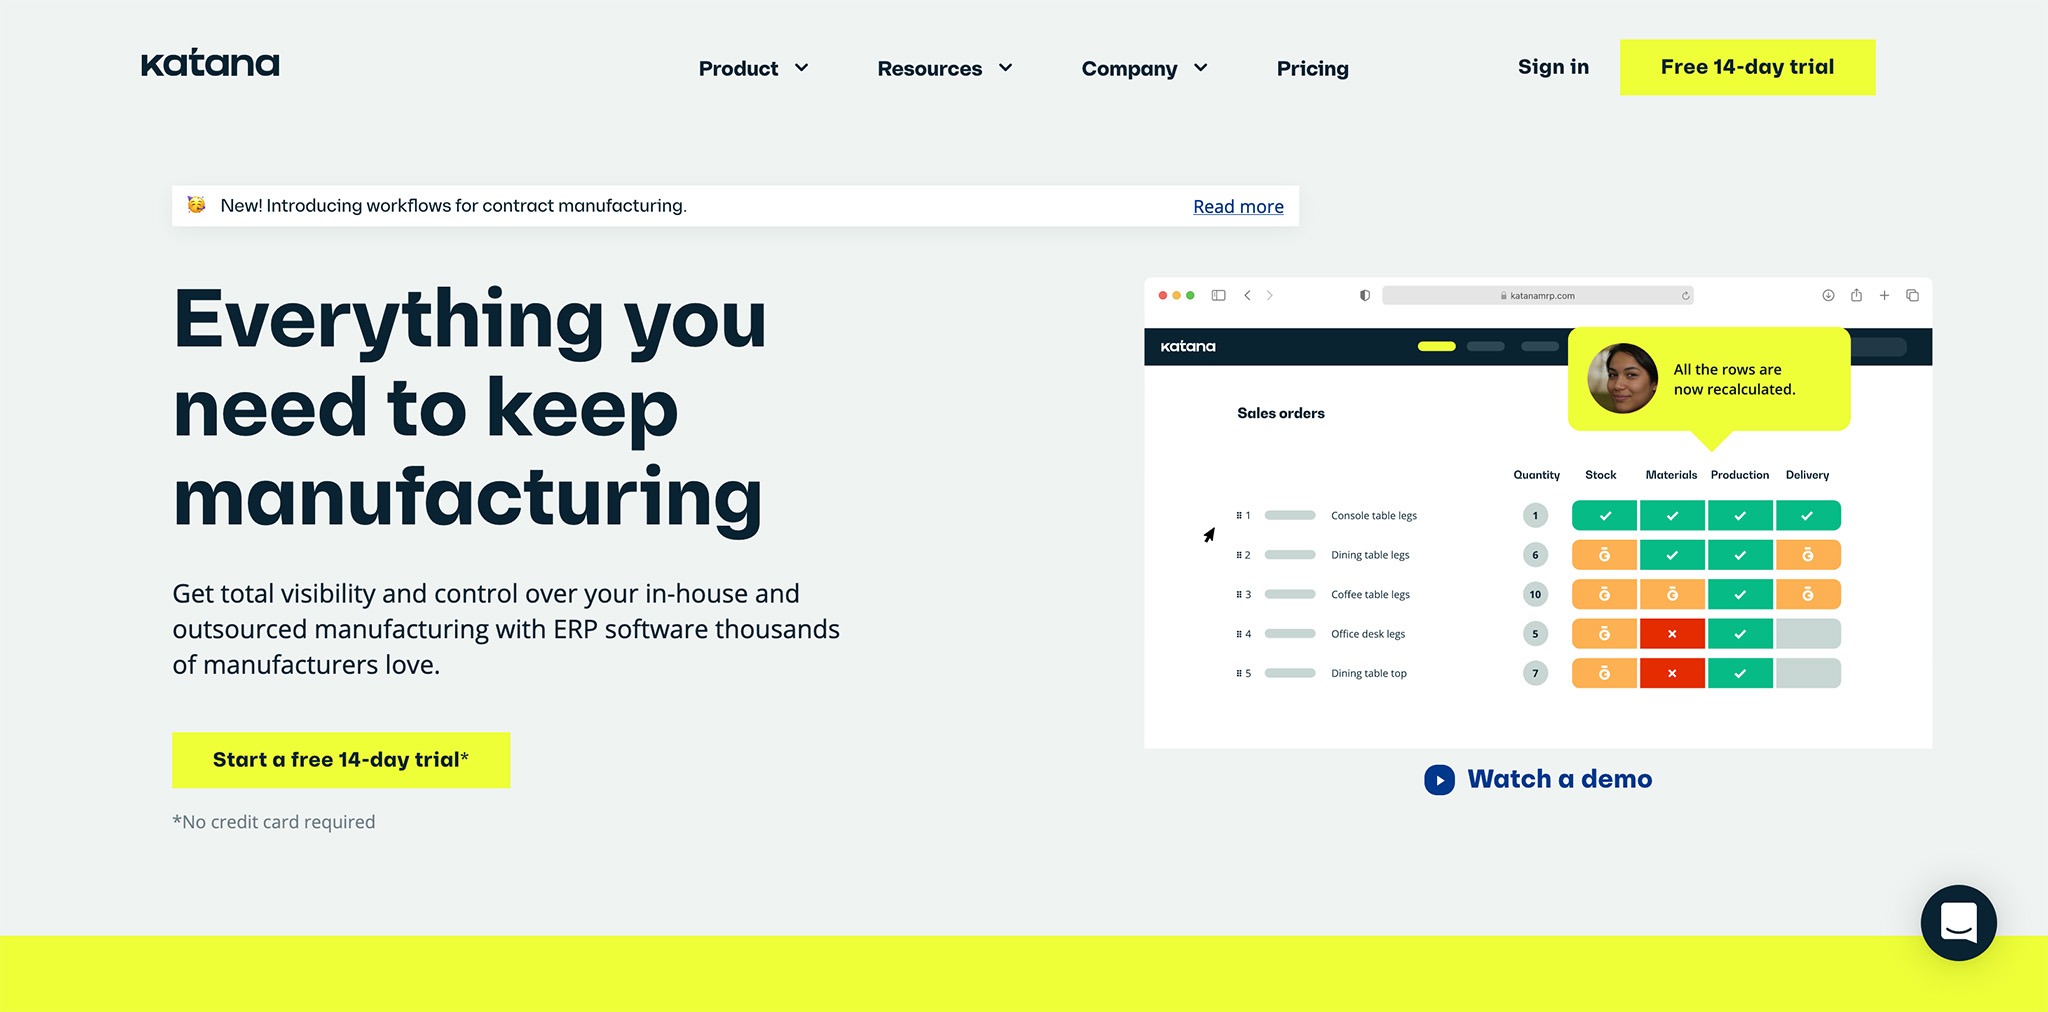
Katana MRP is easily among the best Shopify inventory management apps for today’s business leaders. The solution makes it easy to track everything from inventory to sales orders in the same place, with a comprehensive set of powerful reports.
Built for the fast-moving business, Katana ensures you can align your teams and gain comprehensive visibility into everything happening in your business. The live inventory management features enable rapid tracking of things like finished products and raw materials. You can also automate various inventory transactions and set re-ordering points to minimize stock-outs.
Katana delivers omnichannel order management, production planning, end-to-end traceability, and accurate costing features, all in an easy-to-use interface. If you have a little development knowledge, you can also build custom workflows for your team.
Pros 👍
Extensive omnichannel order management
Complete traceability for all business information
Purchase order management
Custom workflows with API
Easy set up with free trial
Comprehensive knowledgebase for guidance
Syncs easily with a range of other tools
Exceptional customer support
Cons 👎
Lots of features creates a higher learning curve
Slightly expensive for some
Pricing
There are a few packages to choose from with Katana, and you’ll spend less depending on how long you commit to the service. Annually, you can access:
Essential: $99 per month for small businesses with 1 full access user, 3 warehouses, and access to a native Shopify integration.
Pro: $299 for all the features of Essential, plus unlimited warehouses, multicurrency support, barcode scanning and custom print templates
Katana will recommend a plan based on your needs.
3. QuickBooks Commerce
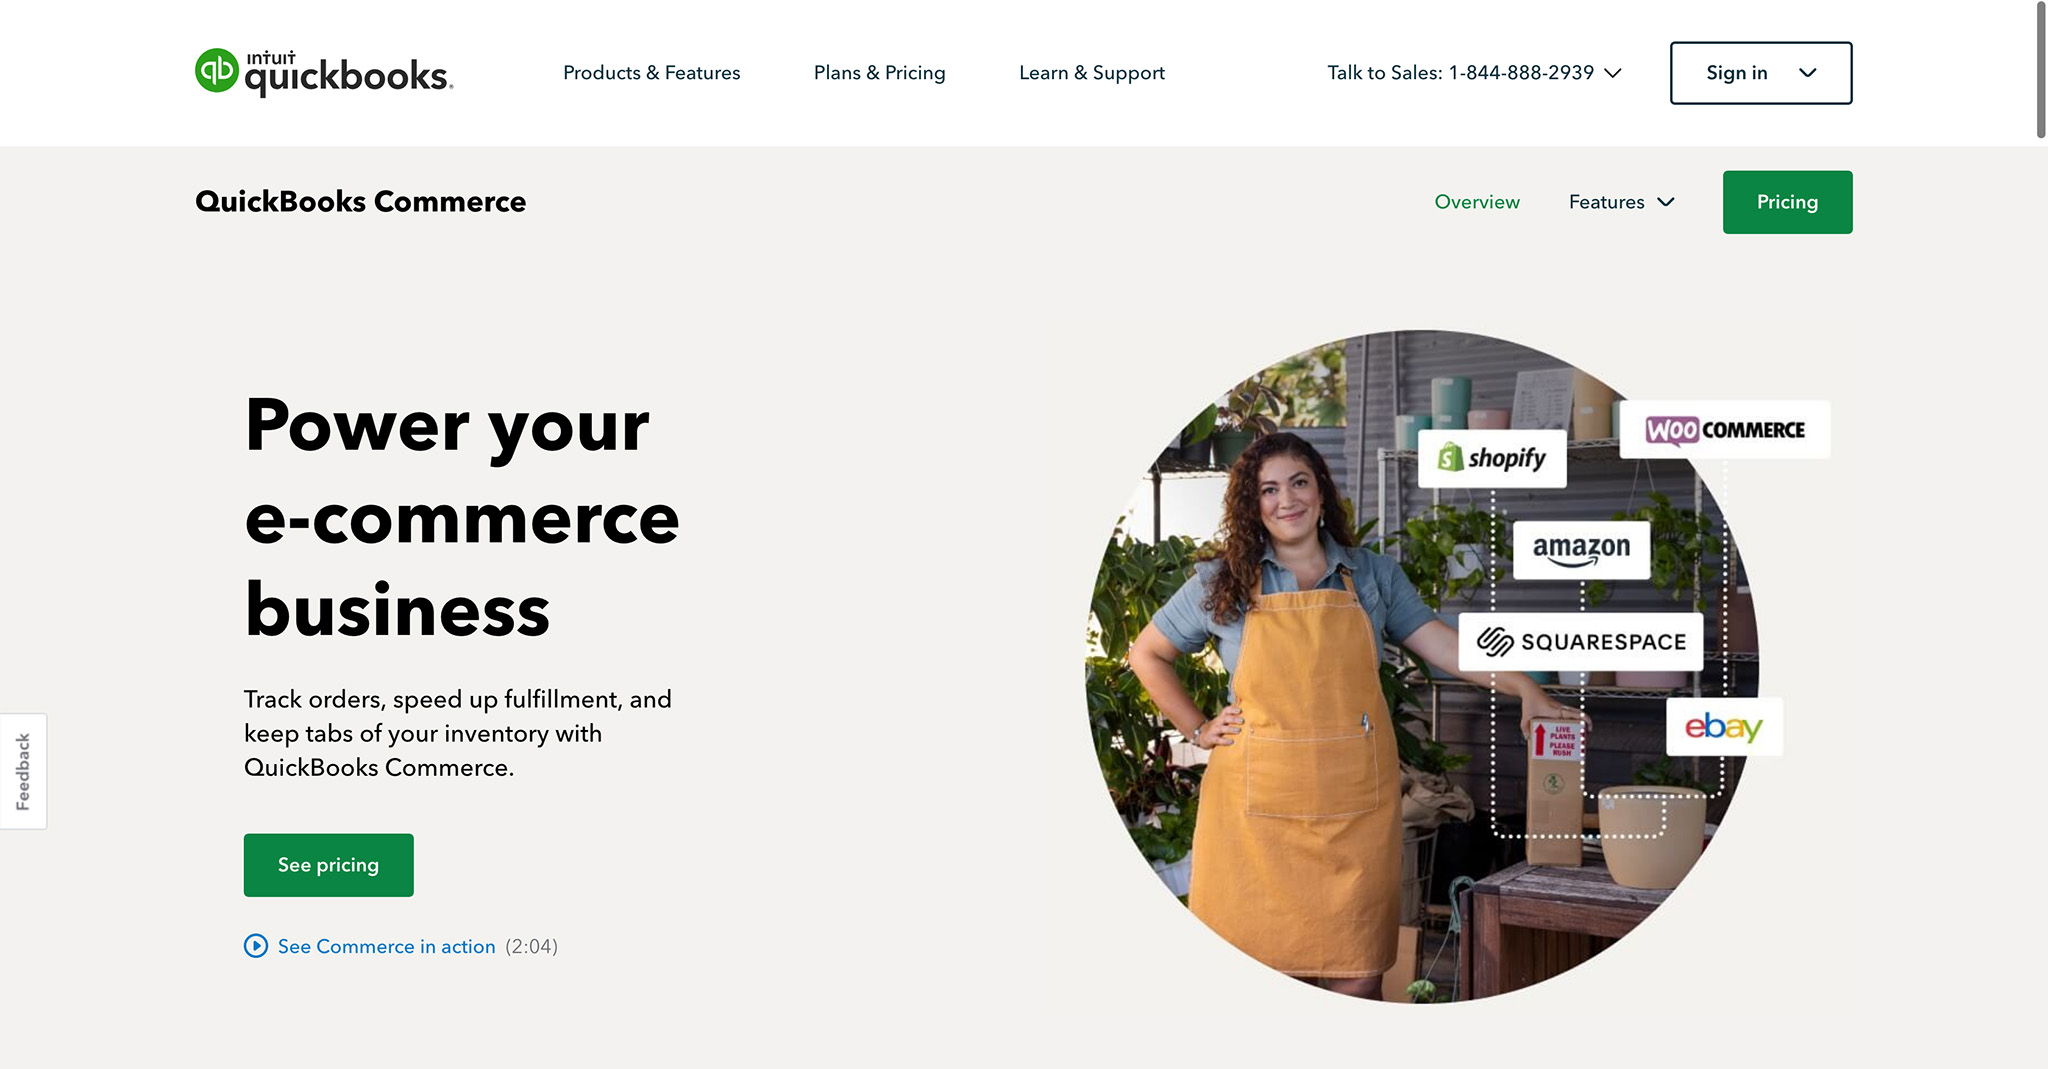
QuickBooks is a popular name in the business world thanks to it’s exceptional accounting tools. However, there’s more to QuickBooks than most people realise. The solution also has the QuickBooks Commerce app for Shopify, which you can access with a 14-day free trial.
The app is designed to help you with tracking and managing various aspects of your business, with complete order and inventory management, multi-currency tracking, reporting and analytics, and QuickBooks’ own mobile app.
You can access a range of features even on the smallest plan, and unlock valuable tools like demand forecasting, and warehouse management tools depending on your business needs. There’s even the option to track multiple ecommerce channels.
Pros 👍
Excellent demand forecasting
Great for tracking inventory and income
API access available
Multi-location support
Suitable for running various stores
Direct integration with accounting tools
Simple if you know how to use QuickBooks
Cons 👎
Not the best customer support
Some issues with the Shopify integration
Pricing
You can start your adventure with QuickBooks commerce using a 14-day free trial. After that, there are a number of options available for pricing, including:
Founder: £45 per month with multi-currency support, 10 sales orders per month, inventory and order management, and a B2B ecommerce platform integration.
Lite: £69 for all the features of Founder, plus 100 sales orders per month.
Small Business: £169 for all the features of Lite plus 1000 sales orders per month.
Business: £359 per month for all the small business features, plus 3 ecommerce channels, FBA, demand forecasting, API access, and account manager support. You’ll also get up to 2500 sales orders per month.
4. Veeq
Veeqo is an inventory and fulfilment solution designed specifically for ecommerce sellers. The flexible technology integrates with more than 21 different tools, offering built-in shipping software from DHL, DPD, Royal Mail, and more.
The inventory management tools provide real-time visibility across all of your sales channels in a single place. There’s an order management solution with digital picking, returns management, and automated order rules for every channel you sell on, plus you get shipping software already built in for importing, managing, and bulk shipping orders.
Veeqo makes it easier to automate a host of inventory management and shipping tasks. There’s also extensive reporting and analytics tools available, so you can generate information to guide you towards more sales. The multi-channel inventory management apps even mean you can keep track of your products across multiple channels at the same time, from Amazon and eBay to Shopify.
Pros 👍
Multichannel inventory management
Easy automations for completed order management
All-in-one fulfilment software
Inventory forecasting included
Powerful reporting tools for useful insights
Order tracking for customers
Warehouse management and digital picking with scanners
Comprehensive integrations with a range of tools
Shipping software included
Cons 👎
A few bugs in the software
Supplier codes can be hard to implement
Pricing
Veeqo delivers incredible inventory control and shipping solutions for a relatively predictable price. The amount you spend will depend on how many orders you process, with the opportunity to save up to 20% on everything if you pay annually. Packages for 500 orders a month start at:
Accelerator: £130 per month to unify orders and sync inventory across 10+ channels, with 20 shipping carriers and 2 users.
High Growth: £156 per month with purchasing and forecasting tools, managed user permissions for staff, and returns management.
Premium: £200 per month for everything in High Growth plus digital picking and batch picking, warehouse productivity reporting, and warehouse control
There’s also an Enterprise package starting from £1000 per month with a dedicated success manager, priority support, unlimited users, guided implementation and custom reports.
Veeqo delivers fantastic inventory control and shipping for online brands for an affordable price, at $120 per month. The service is one of the more affordable options on the market, making it a good pick for smaller businesses.
5. Skubana
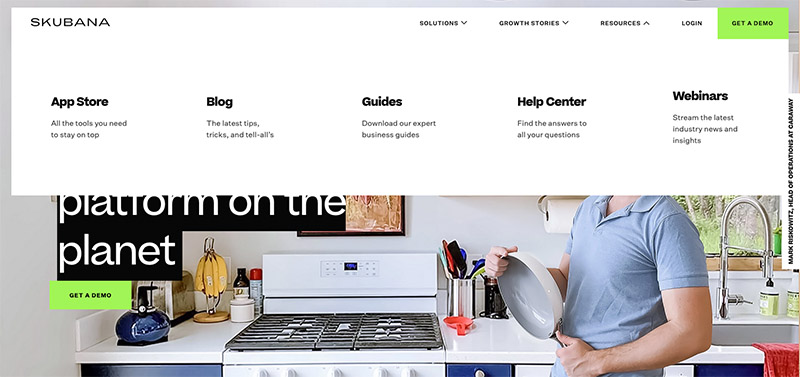
Skubana refers to itself as the operating system for Commerce, which is quite a bold claim to make. This software solution is popular for it’s sensational analytics features, and it’s ability to simplify some of the more challenging parts of inventory management.
Skubana is an inventory management solution designed by sellers, for sellers. Everything you need to track your company’s performance comes together in the same convenient platform. Form the Skubana dashboard, you can see all your most valuable stats, including incoming stock, fulfillment performance metrics, and low-stock levels.
Skubana allows users to import items from their warehouse environment with a single click, reducing the pain of inventory management. You can also cancel, track, or make orders using the in-built purchase order manual. Skubana even generates powerful reports showcasing unit margins, gross margins, and other useful details.
Pros 👍
Convenient platform designed by sellers for sellers
Incredibly intuitive for beginners
Excellent customer service and support
Great analytics features with detailed reports
All-in-one platform for managing business performance
Insights into your most popular products
Single-click warehouse importing
Cons 👎
A bit pricy compared to competing services
Lots of features mean more of a learning curve
Fewer integrations than some alternatives
Pricing
Pricing for Skubana isn’t particularly evident on the website.
You can get a free demo to put the software to the test, but after that, you need to apply for a custom quote.
The minimum fee starts at around $999 per month, which is a lot more than most small companies can afford.
6. EasyScan
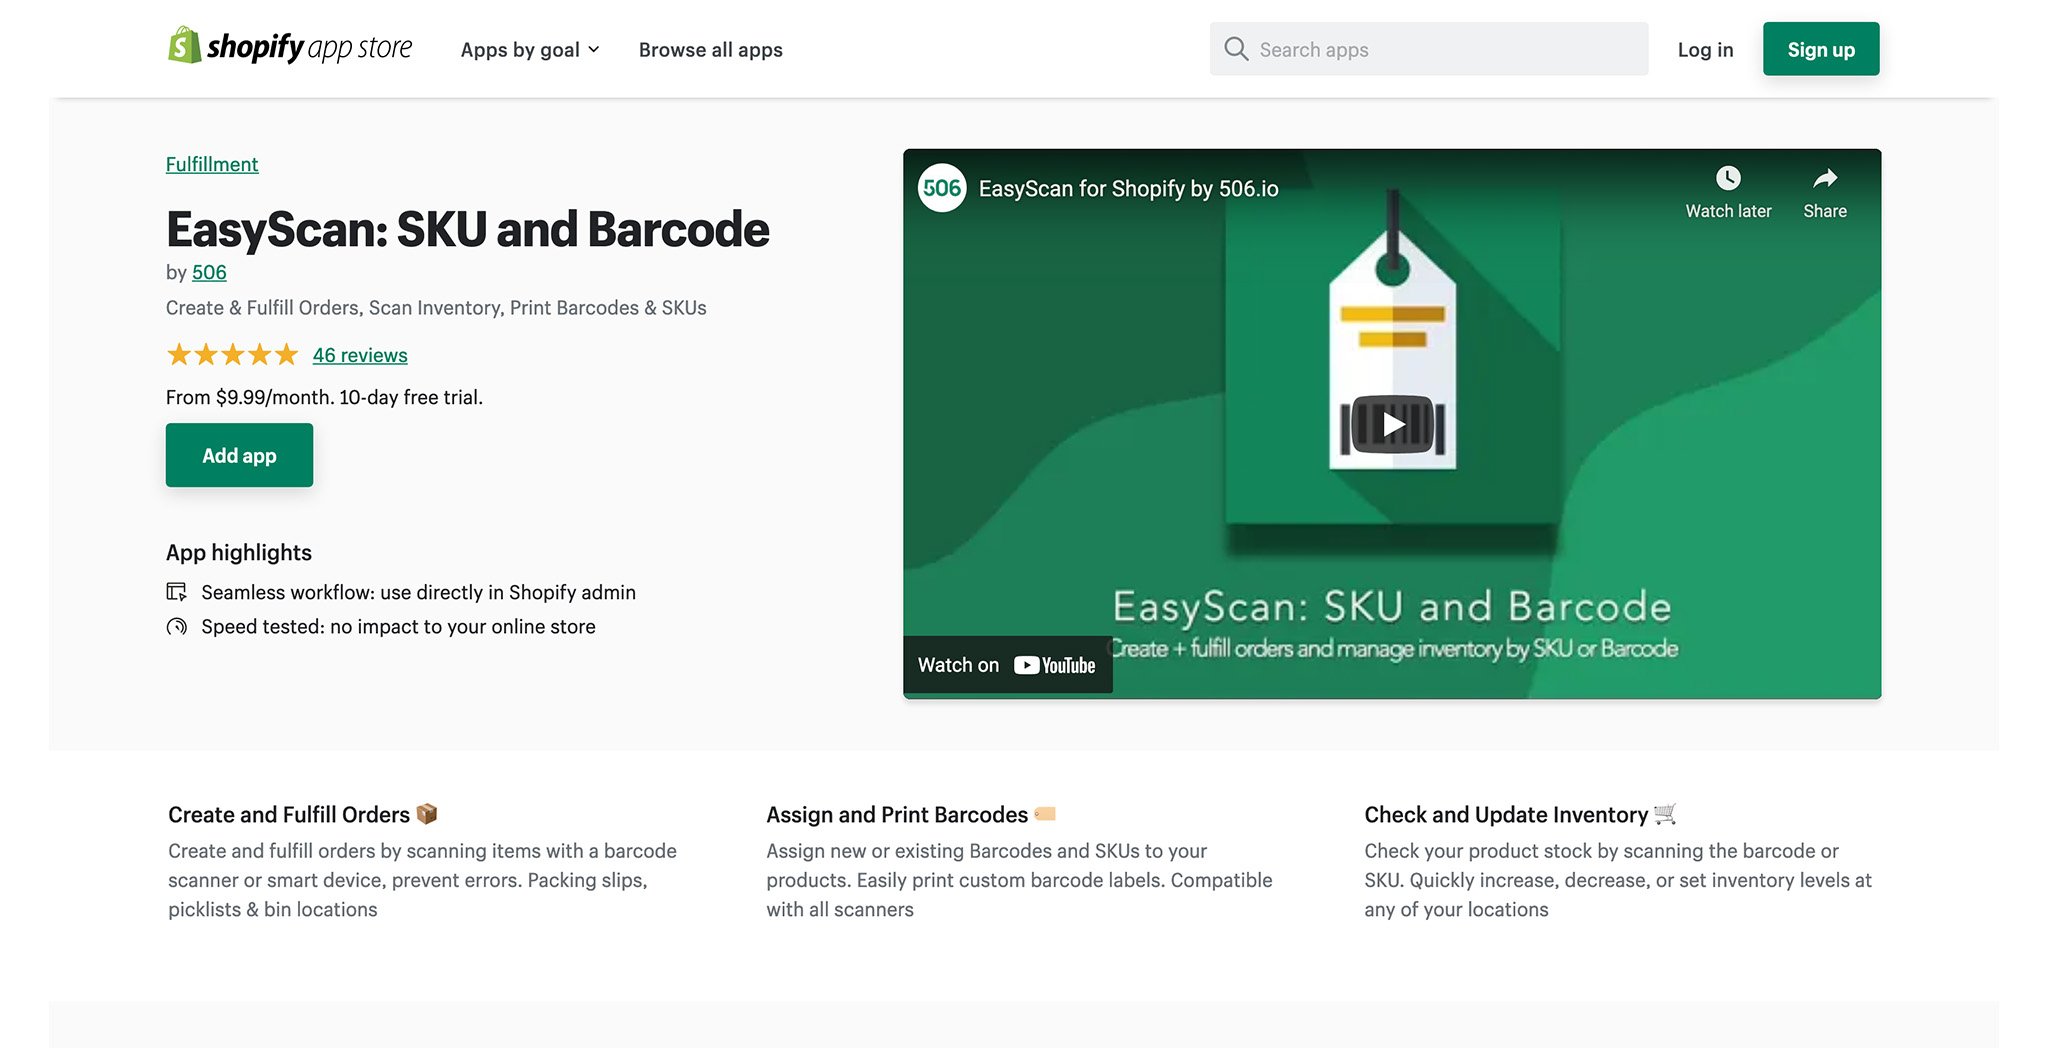
This popular Shopify app is designed to help sellers achieve faster order creation, order and stock management, and order fulfillment.
More specifically, you can use this well-reviewed app from the convenience of your Shopify admin panel:
Create orders
Reduce packing errors when fulfilling orders
Generate barcodes for your products
Perform fast inventory checks using a barcode scanner or smartphone
Update your stock at any of your locations
On top of that, the EasyScan app has been speed tested to ensure it doesn’t disrupt the load time of your online store.
You can also create packing slips, picklists, and bin locators. That’s as well as print custom barcode labels and assign new or existing barcodes and SKUs to your products. On top of that, you can increase, decrease or set inventory levels at any of your locations.
All in all, the app is ideally suited to anyone looking to streamline their warehouse operations.
Pros 👍
Shopify users give it a 5-star review.
You can custom print barcode labels.
You’ll save time on all aspects of order fulfillment.
There’s a 10-day free trial.
Three price plans scale with your business as you grow.
Cons 👎
Customer support is only available Monday to Friday, with response times as long ad 48 hours
The Basic plan only unlocks the barcode and SKU features; you have to pay more for other features
Pricing
There’s a 10-day free trial. After that, there are three price plans to choose from: Basic, Standard, and Advanced. Prices start at $9.99/month, rising to $24.99/month and $39.99/month.
The most expensive plan comes with all of the features included in the Basic and Standard plans, plus you can generate inventory history reports and access order analytics and priority online and video support.
7. Stocky
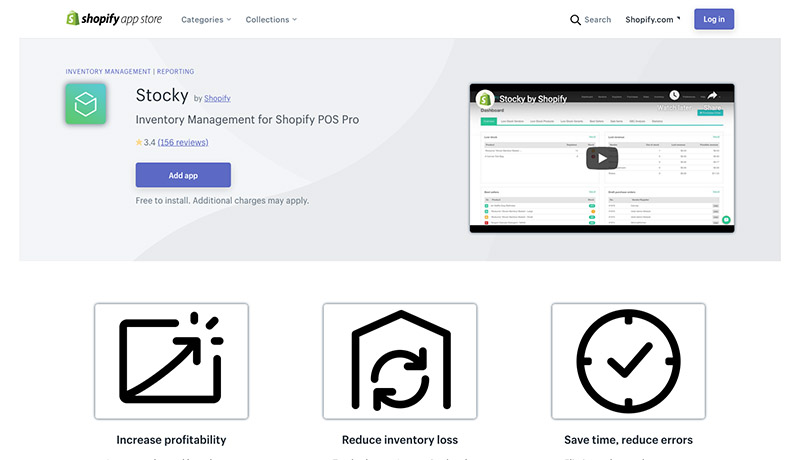
Stocky is a top-of-the-line inventory management app from Shopify’s marketplace. This solution comes with a host of fun features to discover, including demand forecasting and stock transfers. You can also set up automatic stock updates too. As an inventory management application created explicitly by Shopify for the Shopify Pro Plus experience – you know everything’s going to work well.
Stocky promises business leaders that they’ll be able to increase their profitability and reduce the risk of inventory loss with better insights into when they should be ordering new products for their customers. Stocky helps you to save time and reduce errors in your mission for business growth. You can also get forecasts based on recent performance by examining your sales metrics.
Key features of Stocky involve everything from purchase order creation to full visibility into your locations and warehouses at a distance.
Pros 👍
Easy to create orders for suppliers and vendors
Intuitive backend system that’s great for beginners
Order suggestions based on sale data
Low stock indicators and insights into high-revenue items
Demand forecasting support
Stock transfers and adjustments
Analytics and insights with in-depth reporting
Cons 👎
No extra functionality like order and shipping fulfillment
Missing some advanced forecasting tools
Pricing
Stocky is a free to use app with Shopify POS Pro.
8. Order Tagger
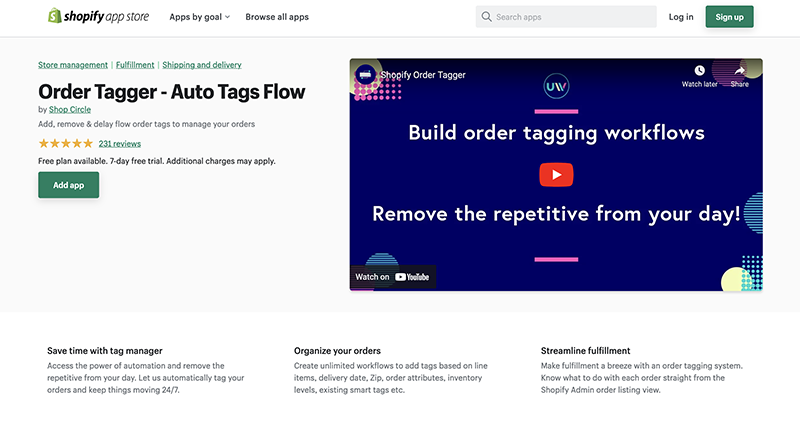
Suppose you want a solution to reduce the repetitive task of managing and fulfilling your orders. In that case, Order Tagger is a great option to consider. Order Tagger allows you to build an unlimited number of simple and/or complex workflows that analyze your orders against conditions and criteria that you’ve defined.
You can also tag orders requiring special treatment from your team, fulfillment partners, or shipping providers.
You and your team can handle all your orders straight from an orders list without going through each and every order individually.
With this app, you can automate repetitive order fulfillment processes, highlight orders, filter pre-orders, flag orders of a certain weight, and monitor order status. For instance, when an order has been made, charged, or canceled.
Additionally, you can add tags to organize your orders based on the delivery date, Zip code, inventory, and more.
Lastly, Order Tagger integrates with Shopify, Zapiet Store Pickup, and Flow Connector.
Pros 👍
Affordable pricing plans
There’s a free trial available
Reportedly good customer support
You can automate orders with simple or complex workflows
It’s suitable for beginners and tech experts alike
The “Basic” plan provides everything except Shopify Flow Connector, making it an affordable option for most merchants.
Cons 👎
Order backdating isn’t included; instead, this feature comes at an additional cost
The free plan is limited
Some users say they would like to see and use more complex tags
Pricing
Order Tagger offers a free plan that allows you to create an unlimited number of workflows. However, it limits you to only 50 orders processed per month.
They offer two reasonable paid plans- “Basic” at $15 a month and “Extra” for $40 per month.
A free 7-day trial is available for the paid plans.
9. Sellbrite
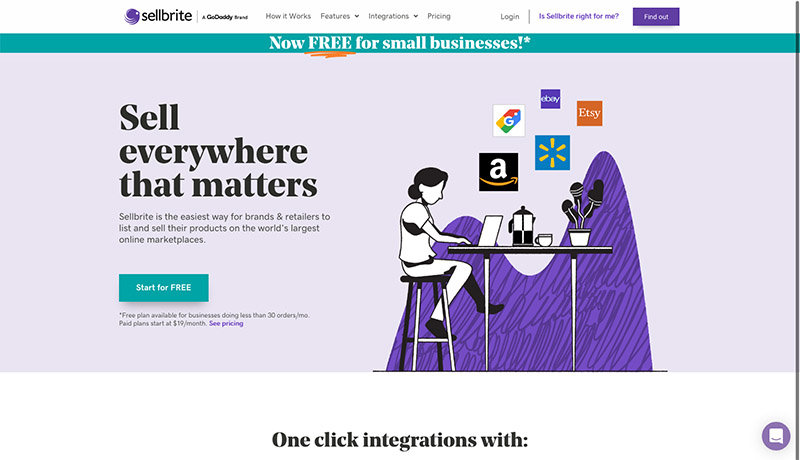
Sellbrite is a powerful online inventory management tool that you can add to your checkout on Amazon, Etsy, and eBay. Sellbrite helps people with Shopify sell their products on some of the largest marketplaces in the world.
This convenient app comes with access to various crucial features to boost the performance of ecommerce platforms. For instance, you can access multiple warehouse locations, and integrate your business with Fulfillment by Amazon. Companies using Sellbrite also get access to a centralized interface for order fulfillment, through which they can fulfill various orders.
List your new products easily, no matter where they shop with an app that gives you a complete overview of your sales. Whenever and wherever sales happen, Sellbrite adjusts and syncs inventory information automatically to avoid overselling products you don’t have access to anymore.
Pros 👍
Excellent easy-to-use platform
Great customer service and support
Works with a wide selection of marketplaces
Support for multiple warehouse locations
Fulfillment by Amazon integration
Centralized all-in-one interface
Automatic syncing for your inventory
Cons 👎
No syncing for accounting programs
Possibly not the best fit for smaller businesses
Pricing
Sellbrite’s pricing begins at $20 per month for 100 orders per month.
There’s support for $160 per month for Shopify stores that generate about 10,000 monthly orders.
10. Stock Sync
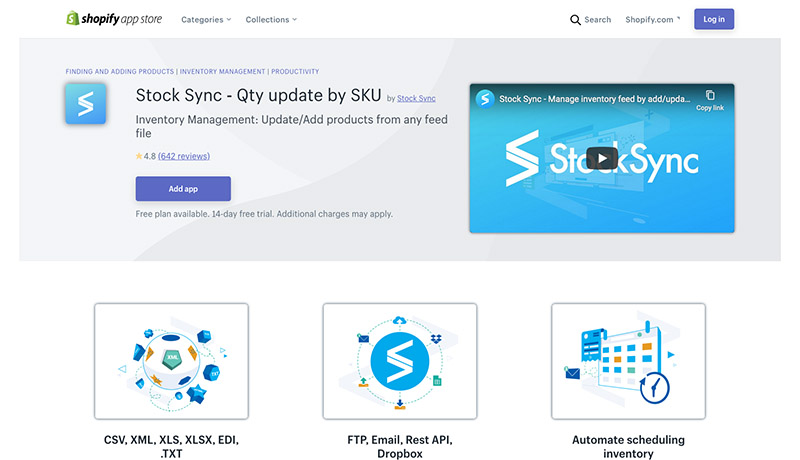
Stock Sync is one of the more popular apps for inventory management currently available from Shopify. This app has a powerful presence on Google, and hundreds of positive reviews. Thousands of Shopify users currently rely on Stock Sync as the perfect solution for automatic inventory updating. Stock Sync is great for manipulating product pricing, managing multiple suppliers and more.
If you’re looking for an advanced inventory management tool, this could be it Stock Sync helps you to update inventory data automatically using SKU information and other details. You can manipulate product pricing, export your inventory, sync details and more, The Stock Sync app also supports a host of scheduled inventory updates.
The REST API available with Stock Sync also means that you can integrate with various feed channels too.
Pros 👍
Advanced selection of inventory management features
Rest API, email, FTP, and other integrations
Automated inventory schedule
Comprehensive inventory feed management
Free access for 14 days
Excellent shipping features
Easy to change prices
Cons 👎
Quite a complicated setup process
Mapping features are tough to use
Pricing
There’s a free 14 day trial to introduce you to the software, and a free plan where you can access unlimited user trigger updates, batch inventory updates, and more.
The free plan only supports 3000 SKUs.
The Basic plan for $5 per month supports 4,000 SKUs, while the pro plan for $10 per month comes with excellent customer support.
Enterprise services start at $49 per month.
11. ShipHero

ShipHero is a sensational multi-channel inventory management app for your online store. With ShipHero, you can access a ton of brilliant features to help you avoid overselling, and boost sales opportunities. This products supports real-time inventory syncing across all of your sales channels.
When you sync inventory information, you also get access to batch order processing, purchase order information, returns management, and various forms of advanced reporting. If you want to go beyond just a direct integration with a company like USPS, ShipHero will update your sales processes in no time. You can even implement custom automated rules.
ShipHero also come with access to cycle counting, kit creation, merged order notifications or popups, and multiple warehouse inventory management solutions too. This app integrates with eBay, Amazon, and USPS. However, it is quite a bit more expensive than some of the other products on the market.
Pros 👍
Brilliant multi-warehouse inventory management
Excellent packing, picking, and shipping functions
Reduce shipping costs
Run a warehouse fearlessly
Inventory and orders tracked in real-time
Completely cloud-based solution
Kit creation and cycle counting
Integrations with USPS, eBay, and Amazon
Cons 👎
Very expensive
Complicated for beginners
Pricing
Pricing for ShipHero is pretty expensive, starting at around $1,1850 per month for smaller brands
The cost goes all the way up to $2,750 per month for enterprise companies who want access to things like batch pick and pack, multi-warehouse management, and unlimited orders.
Managing Inventory with Shopify
Inventory management is a critical part of running a successful ecommerce store. Your inventory management system does more than just provide an insight into what you’re selling. Handy software shows you trends in your buying cycles, and how often you need to restock to keep up with demand.
A convenient inventory management tool also helps with things like calculating turnover and determining how much stock you need to keep in a warehouse, or available through drop shippers at any given time. Companies with perishable products, like those in the health, beauty, and food industries, can also avoid waste and loss with inventory tracking.
Your Shopify store comes with access to a handful of inventory management features on the backend.
These include:
Inventory tracking: You can view the number of each product you have on your Inventory page. You can also use filters to sort through product information by availability, quantity, product vendor, tags, and product type.
Inventory updates: Shopify users can change the inventory count for their product variants manually on the inventory page. Just click on “Update Quantity” underneath your product to start updating the numbers.
Inventory history: If you use Shopify to track product inventory, you can view the history of any adjustments you’ve made to that product. You can only view up to 90 days of item history from your web browser or Shopify mobile app.
While these features are helpful, they may not be enough for larger companies that need to automate, manage, and keep track of complex stores. Using an inventory management app for Shopify from one of the many third-party vendors on the app store gives you access to greater functionality.
The Benefits of Inventory Management
A dedicated inventory management app from the Shopify marketplace updates what you can do on your Shopify backend. In some cases, you can get updates in real-time on your stock counts and set up notifications for whenever you need to order new stock.
Inventory management apps can also help you to keep track of purchase orders and see where certain transactions sit in your order management cue so that you can deliver items to your customers as quickly and efficiently as possible. The right app should:
Make sure you don’t run out of stock: Running out of stock means that you miss out on sales opportunities. 72% of online shoppers say they’d go to a competitor if the product they want to purchase isn’t available from the first company they visit. 67% of those customers also say that they’ll continue shopping with your competition in the future.
Reducing inventory waste: A good inventory management app also means that you don’t over-buy stock that you’re not going to use. Buying too much stock to hold in your warehouse leads to higher storage fees. It could also increase your chances of waste and loss if you’re working with perishable items.
Improve customer experience: Since Shopify apps for inventory management help you to stay one step ahead with all of your order fulfillment processes, they also lead to better customer service. You can let customers know how many products you have in stock instantly, and make sure that you’re always equipped to take their orders.
Manage cash flow: Inventory management apps can give you a more accurate view of your cash flow and assets. This makes it easier to determine how much you should budget towards buying new stock for your business. You can also make informed decisions about how to price products and how to use warehouse space. Some inventory management software even integrates with accounting tools, like those from QuickBooks.
Reduce strain on your team: Running an ecommerce store takes a lot of work. If you’re trying to manage sales and deliver amazing customer experience, you won’t always have time to keep track of every barcode and product unit too. Inventory control apps takes some of the extra work off your team’s shoulders – so they can focus on the most important tasks first.
Enables multi-channel selling: An inventory management app can even help you to keep track of sales from outside of your Shopify store. For instance, you can watch your inventory levels throughout Shopify, eBay, Amazon, Etsy, and social media selling pages at the same time. This reduces your risk of stock counting errors.
What to Look For When Choosing an Inventory Management App for Shopify?
Inventory management apps help you to track and fulfill orders as your business begins to scale more efficiently. While using Shopify’s in-built features might be a great option for beginners, the more your company grows, the more you’ll have to keep track of. If you don’t have a good inventory management system, you could end up losing money and opportunities.
The right inventory management system helps you to manage all of your sales channel with ease, and even make accurate predictions about demand and supply too. With the right inventory management system, you can accurately identify how your inventory needs fluctuate over time, and how you can prepare for seasonal changes.
When choosing your inventory management app, look for a product that can:
Streamline and automate processes: Automation is an excellent way for companies to save crucial time and money when scaling. Automated inventory updates and real-time notifications will reduce the number of repetitive tasks your team needs to worry about.
Inform and educate: You should be able to track all the orders you receive with ease, get order fulfillment information, and receive handy notifications on when you need to purchase additional stock.
Integrate with existing apps: Shopify’s vast marketplace includes a lot of different apps for multi-channel selling. If you’re already using products from the app store, make sure that your inventory management tools can work alongside them.
Include POS integrations: having a point of sale integration is crucial if you’re also selling products from an offline store or physical shop. You’ll need to automatically sync online and in-store orders and stock levels to reduce any potential errors.
Provide intelligent analytics: The best inventory management applications can offer predictions and insights to guide the decisions you make for your business. Actionable reports and analysis are a must-have for any growing company.
Ready to Use a Shopify Inventory Management App?
Having a good system for inventory management is essential for running a successful store and ecommerce business. While Shopify does have some basic inventory management tools available, the functionality doesn’t compare to what you can expect from a third-party. An inventory management system will prevent you from running out of stock, or overstocking.
Inventory management tools also avoid issues with overselling and can make it easier to handle your dropshipping business. The right tool supports a better selling experience with access to everything from custom shipping labels, to complete overviews of your sales trends and your customer expectations.
If you have an inventory management tool for Shopify, you can avoid issues with cash flow, and make your small business look as trustworthy as possible. The key to success is finding the right inventory management app. You need something that helps you to make informed decisions regarding things like inventory management and purchasing more stock.
At the same time, your inventory management app for Shopify needs to be user-friendly, capable of showing you when you should restock products in advance. Plenty of advanced tools in your inventory management tool will help you to scale your business and order fulfillment practices effectively.
Good Luck Managing your Inventory
When looking for the right app for your inventory management, you should also look into things like useful integrations with the apps you already use for things like checkout and financial management. Detailed inventory tracking and extensive reports can help with your sales forecasting. Plus, you might want a POS integration if you’re working with an offline presence as well as an online business.
We’ve covered just some of the best inventory management tools here, but don’t forget that there are plenty of other options available, and many come with their own free trial to get you started.
The post 11 Best Shopify Inventory Management Apps for 2023 appeared first on Ecommerce Platforms.
Original Source: https://tympanus.net/codrops/collective/collective-778/
Three.js 3D Bike website * WebGL Image Processing * Transhumans * Optical Toys
Original Source: https://1stwebdesigner.com/wordpress-dashboard-remove-widgets/
Your website’s command center, the WordPress dashboard, arrives with several widgets that enhance functionality. However, not all of these may be beneficial for every user. As plugins introduce more widgets over time, your dashboard may start to feel crowded and less straightforward to navigate. WordPress offers the ability to remove these unnecessary widgets, either manually or programmatically. We’ll guide you through both of these methods, aiding in decluttering your dashboard and promoting better website management.

Understanding Widgets
Widgets are elements you can include in your WordPress site’s sidebars or other widget-ready areas. WordPress includes default widgets, and plugins may introduce more. All these widgets can be managed through the Appearance » Widgets screen in your WordPress dashboard. However, an excess of unused widgets can lead to a messy widget screen. To make your dashboard more navigable, consider disabling those you don’t need. For an in-depth look at managing widgets, you can explore the WordPress official documentation.
Manual Widget Removal from WordPress Dashboard
For the quick and temporary cleanup of your dashboard, WordPress allows you to hide widgets that you don’t frequently use. Follow these steps to hide widgets:
Log into your WordPress Dashboard.
Locate the “Screen Options” button at the top right corner of the screen and click on it.
Uncheck the boxes beside the widgets you want to hide.
While this method doesn’t eliminate the widgets entirely, it does make them invisible from your view. Other users can still enable these widgets from the Screen Options panel.
Programmatic Widget Removal from WordPress Dashboard
For a more lasting cleanup, WordPress provides a way to get rid of dashboard widgets completely, preventing other users from turning them back on. This involves adding a code snippet to your theme’s functions.php file or to the site-specific plugin you’re using. Here’s the code snippet:
function clear_dashboard_widgets() {
global $wp_meta_boxes;
unset($wp_meta_boxes['dashboard']['side']['core']['dashboard_quick_press']);
unset($wp_meta_boxes['dashboard']['normal']['core']['dashboard_incoming_links']);
unset($wp_meta_boxes['dashboard']['normal']['core']['dashboard_right_now']);
unset($wp_meta_boxes['dashboard']['normal']['core']['dashboard_plugins']);
unset($wp_meta_boxes['dashboard']['normal']['core']['dashboard_recent_drafts']);
unset($wp_meta_boxes['dashboard']['normal']['core']['dashboard_recent_comments']);
unset($wp_meta_boxes['dashboard']['side']['core']['dashboard_primary']);
unset($wp_meta_boxes['dashboard']['side']['core']['dashboard_secondary']);
}
add_action('wp_dashboard_setup', 'clear_dashboard_widgets' );
}
The function above targets and removes the widgets listed. If there are certain widgets you wish to retain, simply remove the corresponding line from the code.
To customize this further, you can add the following function to the functions.php file to restrict the dashboard widget removal to only non-admin users:
if (!current_user_can('manage_options')) {
add_action('wp_dashboard_setup', 'clear_dashboard_widgets' );
}
Concluding Remarks
Having a neat and organized dashboard is a significant step towards more efficient WordPress management. Discarding unnecessary widgets tailors your dashboard to your exact needs, fostering a more effective and enjoyable user experience.
Aside from decluttering your dashboard, there are other optimization steps you can take to bolster your website’s performance and security. For instance, hiding your WordPress version can contribute to creating a more secure WordPress environment.
We hope these tweaks will help you maintain a clean and efficient dashboard, helping you focus on what truly matters: creating outstanding content.
Original Source: https://www.creativebloq.com/news/adobe-express-ai
The Canva rival keeps getting better.