Creating A Public/Private Multi-Monorepo For PHP Projects

Original Source: https://smashingmagazine.com/2021/08/public-private-multi-monorepo-php-projects/

To make the development experience faster, I moved all the PHP packages required by my projects to a monorepo. When each package is hosted on its own repo (the “multirepo” approach), it’d need be developed and tested on its own, and then published to Packagist before I could install it on other packages via Composer. With the monorepo, because all packages are hosted together, these can be developed, tested, versioned and released at the same time.

The monorepo hosting my PHP packages is public, accessible to anyone on GitHub. Git repos cannot grant different access to different assets, it’s all either public or private. As I plan to release a PRO WordPress plugin, I want its packages to be kept private, meaning they can’t be added to the public monorepo.

The solution I found is to use a “multi-monorepo” approach, comprising two monorepos: one public and one private, with the private monorepo embedding the public one as a Git submodule, allowing it to access its files. The public monorepo can be considered the “upstream”, and the private monorepo the “downstream”.

As my kept iterating on my code, the repo set-up I needed to use at each stage of my project also needed to be upgraded. Hence, I didn’t arrive at the multi-monorepo approach on day 1, but it was a process that spanned several years and took its fair amount of effort, going from a single repo, to multiple repos, to the monorepo, to finally the multi-monorepo.

In this article I will describe how I set-up my multi-monorepo using the Monorepo builder, which works for PHP projects based on Composer.

Reusing Code In The Multi-Monorepo

The public monorepo leoloso/PoP is where I keep all my PHP projects.

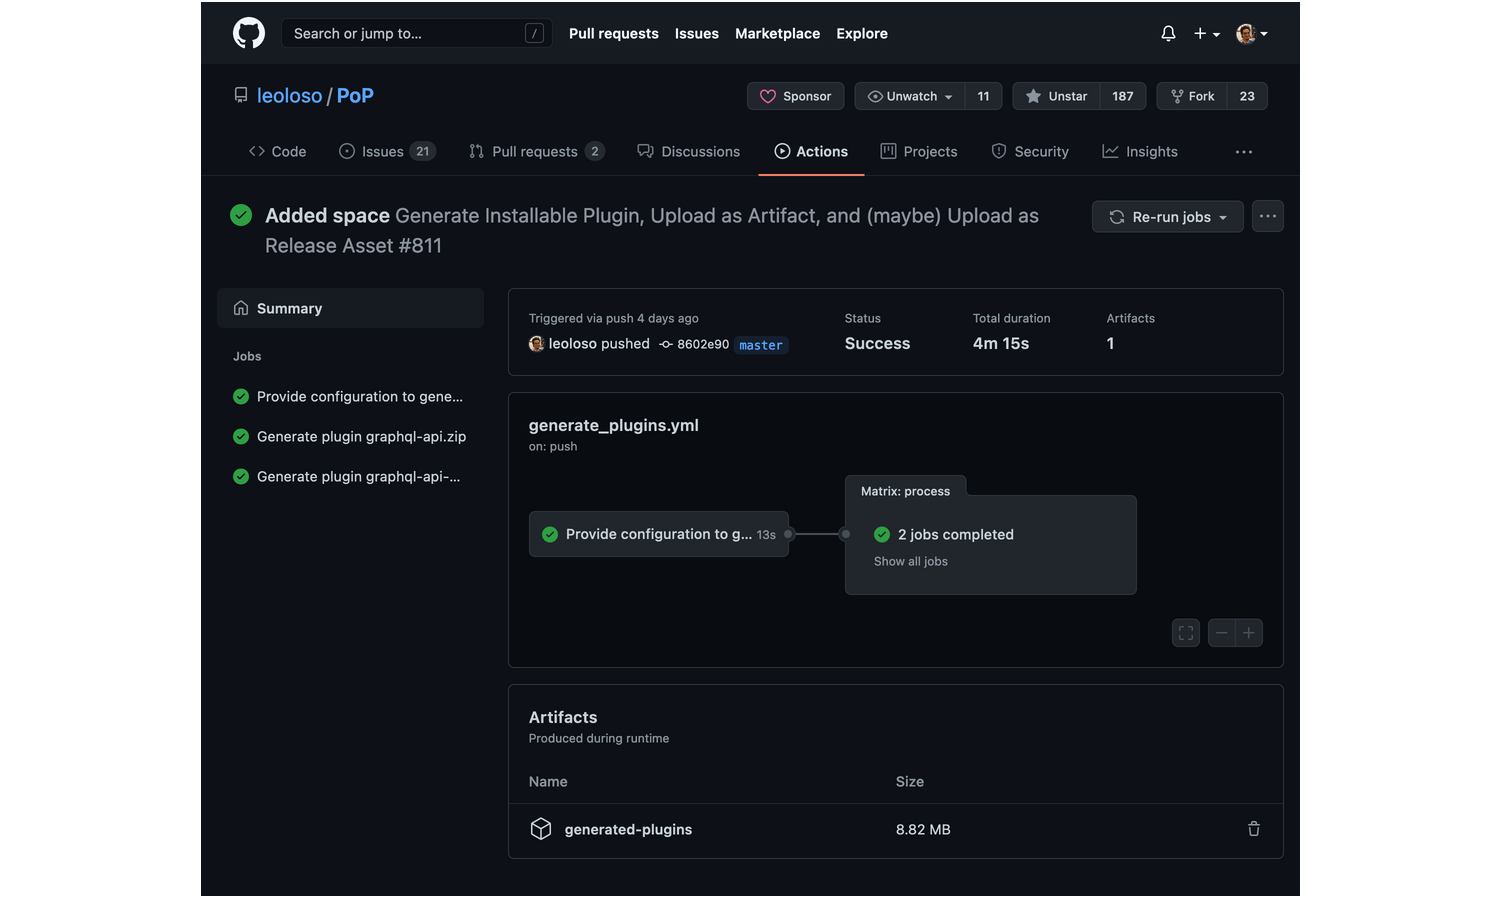
This monorepo contains workflow generate_plugins.yml, which generates multiple WordPress plugins for distribution when creating a new release on GitHub:

The workflow configuration is not hard-coded within the YAML but injected via PHP code:

– id: output_data
run: |
echo “::set-output name=plugin_config_entries::$(vendor/bin/monorepo-builder plugin-config-entries-json)”

And the configuration is provided via a custom PHP class:

class PluginDataSource
{
public function getPluginConfigEntries(): array
{
return [
// GraphQL API for WordPress
[
‘path’ => ‘layers/GraphQLAPIForWP/plugins/graphql-api-for-wp’,
‘zip_file’ => ‘graphql-api.zip’,
‘main_file’ => ‘graphql-api.php’,
‘dist_repo_organization’ => ‘GraphQLAPI’,
‘dist_repo_name’ => ‘graphql-api-for-wp-dist’,
],
// GraphQL API – Extension Demo
[
‘path’ => ‘layers/GraphQLAPIForWP/plugins/extension-demo’,
‘zip_file’ => ‘graphql-api-extension-demo.zip’,
‘main_file’ => ‘graphql-api-extension-demo.php’,
‘dist_repo_organization’ => ‘GraphQLAPI’,
‘dist_repo_name’ => ‘extension-demo-dist’,
],
];
}
}

Generating multiple WordPress plugins all together, and configuring the workflow via PHP, has reduced the amount of time needed managing the project. The workflow currently handles two plugins (the GraphQL API and its extension demo), but it could handle 200 without additional effort on my side.

It is this set-up that I want to reuse for my private monorepo leoloso/GraphQLAPI-PRO, so that the PRO plugins can also be generated without effort.

The code to reuse will comprise:

The GitHub Actions workflows to generate the WordPress plugins (including scoping, downgrading from PHP 8.0 to 7.1 and uploading to the releases page).
The custom PHP services to configure the workflows.

The private monorepo can then generate the PRO WordPress plugins, simply by triggering the workflows from the public monorepo, and overriding their configuration in PHP.

Linking Monorepos Via Git Submodules

To embed the public repo within the private one we use Git submodules:

git submodule add <public repo URL>

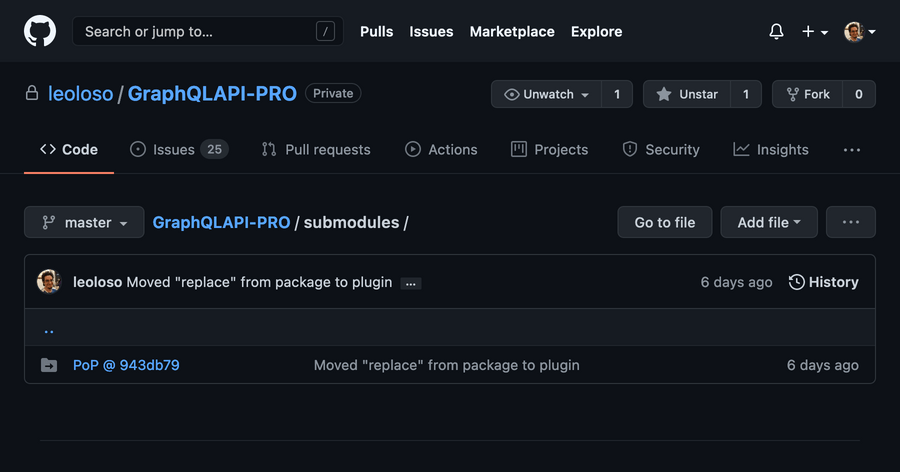
I embedded the public repo under subfolder submodules of the private monorepo, allowing me to add more upstream monorepos in the future if needed. In GitHub, the folder displays the submodule’s specific commit, and clicking on it will take me to that commit on leoloso/PoP:

Since it contains submodules, to clone the private repo we must provide the –recursive option:

git clone –recursive <private repo URL>

Reusing The GitHub Actions Workflows

GitHub Actions only loads workflows from under .github/workflows. Because the public workflows in the downstream monorepo are are under submodules/PoP/.github/workflows, these must be duplicated into the expected location.

In order to keep the upstream workflows as the single source of truth, we can limit ourselves to copying the files to downstream under .github/workflows, but never edit them there. If there is any change to be done, it must be done in the upstream monorepo, and then copied over.

As a side note, notice how this means that the multi-monorepo leaks: the upstream monorepo is not fully autonomous, and will need to be adapted to suit the downstream monorepo.

In my first iteration to copy the workflows, I created a simple Composer script:

{
“scripts”: {
“copy-workflows”: [
“php -r “copy(‘submodules/PoP/.github/workflows/generate_plugins.yml’, ‘.github/workflows/generate_plugins.yml’);””,
“php -r “copy(‘submodules/PoP/.github/workflows/split_monorepo.yaml’, ‘.github/workflows/split_monorepo.yaml’);””
]
}
}

Then, after editing the workflows in the upstream monorepo, I would copy them to downstream by executing:

composer copy-workflows

But then I realized that just copying the workflows is not enough: they must also be modified in the process. This is so because checking out the downstream monorepo requires option –recurse-submodules, as to also checkout the submodules.

In GitHub Actions, the checkout for downstream is done like this:

– uses: actions/checkout@v2
with:
submodules: recursive

So checking out the downstream repo needs input submodules: recursive, but the upstream one does not, and they both use the same source file.

The solution I found is to provide the value for input submodules via an environment variable CHECKOUT_SUBMODULES, which is by default empty for the upstream repo:

env:
CHECKOUT_SUBMODULES: “”

jobs:
provide_data:
steps:
– uses: actions/checkout@v2
with:
submodules: ${{ env.CHECKOUT_SUBMODULES }}

Then, when copying the workflows from upstream to downstream, the value of CHECKOUT_SUBMODULES is replaced with “recursive”:

env:
CHECKOUT_SUBMODULES: “recursive”

When modifying the workflow, it’s a good idea to use a regex, so that it works for different formats in the source file (such as CHECKOUT_SUBMODULES: “” or CHECKOUT_SUBMODULES:” or CHECKOUT_SUBMODULES:) as to not create bugs from this kind of assumed-to-be-harmless changes.

Then, the copy-workflows Composer script seen above is not good enough to handle this complexity.

In my next iteration, I created a PHP command CopyUpstreamMonorepoFilesCommand, to be executed via the Monorepo builder:

vendor/bin/monorepo-builder copy-upstream-monorepo-files

This command uses a custom service FileCopierSystem to copy all files from a source folder to the indicated destination, while optionally replacing their contents:

namespace PoPGraphQLAPIPROExtensionsSymplifyMonorepoBuilderSmartFile;

use NetteUtilsStrings;
use SymplifySmartFileSystemFinderSmartFinder;
use SymplifySmartFileSystemSmartFileSystem;

final class FileCopierSystem
{
public function __construct(
private SmartFileSystem $smartFileSystem,
private SmartFinder $smartFinder,
) {
}

/**
* @param array $patternReplacements a regex pattern to search, and its replacement
*/
public function copyFilesFromFolder(
string $fromFolder,
string $toFolder,
array $patternReplacements = []
): void {
$smartFileInfos = $this->smartFinder->find([$fromFolder], ‘*’);

foreach ($smartFileInfos as $smartFileInfo) {
$fromFile = $smartFileInfo->getRealPath();
$fileContent = $this->smartFileSystem->readFile($fromFile);

foreach ($patternReplacements as $pattern => $replacement) {
$fileContent = Strings::replace($fileContent, $pattern, $replacement);
}

$toFile = $toFolder . substr($fromFile, strlen($fromFolder));
$this->smartFileSystem->dumpFile($toFile, $fileContent);
}
}
}

When invoking this method to copy all workflows downstream, I also replace the value of CHECKOUT_SUBMODULES:

/**
* Copy all workflows to `.github/`, and convert:
* `CHECKOUT_SUBMODULES: “”`
* into:
* `CHECKOUT_SUBMODULES: “recursive”`
*/
$regexReplacements = [
‘#CHECKOUT_SUBMODULES:(s+”.*”)?#’ => ‘CHECKOUT_SUBMODULES: “recursive”‘,
];
(new FileCopierSystem())->copyFilesFromFolder(
‘submodules/PoP/.github/workflows’,
‘.github/workflows’,
$regexReplacements
);

Workflow generate_plugins.yml needs an additional replacement. When the WordPress plugin is generated, its code is downgraded from PHP 8.0 to 7.1 by invoking script ci/downgrade/downgrade_code.sh:

– name: Downgrade code for production (to PHP 7.1)
run: ci/downgrade/downgrade_code.sh “${{ matrix.pluginConfig.rector_downgrade_config }}” “” “${{ matrix.pluginConfig.path }}” “${{ matrix.pluginConfig.additional_rector_configs }}”

In the downstream monorepo, this file will be located under submodules/PoP/ci/downgrade/downgrade_code.sh. Then, we have the downstream workflow point to the right path with this replacement:

$regexReplacements = [
// …
‘#(ci/downgrade/downgrade_code.sh)#’ => ‘submodules/PoP/$1’,
];

Configuring Packages In Monorepo Builder

File monorepo-builder.php — placed at the root of the monorepo — holds the configuration for the Monorepo builder. In it we must indicate where the packages (and plugins, clients, or anything else) are located:

use SymfonyComponentDependencyInjectionLoaderConfiguratorContainerConfigurator;
use SymplifyMonorepoBuilderValueObjectOption;

return static function (ContainerConfigurator $containerConfigurator): void {
$parameters = $containerConfigurator->parameters();
$parameters->set(Option::PACKAGE_DIRECTORIES, [
__DIR__ . ‘/packages’,
__DIR__ . ‘/plugins’,
]);
};

The private monorepo must have access to all code: its own packages, plus those from the public monorepo. Then, it must define all packages from both monorepos in the config file. The ones from the public monorepo are located under “/submodules/PoP”:

return static function (ContainerConfigurator $containerConfigurator): void {
$parameters = $containerConfigurator->parameters();
$parameters->set(Option::PACKAGE_DIRECTORIES, [
// public code
__DIR__ . ‘/submodules/PoP/packages’,
__DIR__ . ‘/submodules/PoP/plugins’,
// private code
__DIR__ . ‘/packages’,
__DIR__ . ‘/plugins’,
__DIR__ . ‘/clients’,
]);
};

As it can be seen, the configuration for upstream and downstream are pretty much the same, with the difference that the downstream one will:

Change the path to the public packages.
Add the private packages.

Then, it makes sense to rewrite the configuration using object-oriented programming, so that we make code DRY (don’t repeat yourself) by having a PHP class in the public repo be extended in the private repo.

Recreating The Configuration Via OOP

Let’s refactor the configuration. In the public repo, file monorepo-builder.php will simply reference a new class ContainerConfigurationService where all action will happen:

use PoPPoPConfigSymplifyMonorepoBuilderConfiguratorsContainerConfigurationService;
use SymfonyComponentDependencyInjectionLoaderConfiguratorContainerConfigurator;

return static function (ContainerConfigurator $containerConfigurator): void {
$containerConfigurationService = new ContainerConfigurationService(
$containerConfigurator,
__DIR__
);
$containerConfigurationService->configureContainer();
};

The __DIR__ param points to the root of the monorepo. It will be needed to obtain the full path to the package directories.

Class ContainerConfigurationService is now in charge of producing the configuration:

namespace PoPPoPConfigSymplifyMonorepoBuilderConfigurators;

use PoPPoPConfigSymplifyMonorepoBuilderDataSourcesPackageOrganizationDataSource;
use SymfonyComponentDependencyInjectionLoaderConfiguratorContainerConfigurator;
use SymplifyMonorepoBuilderValueObjectOption;

class ContainerConfigurationService
{
public function __construct(
protected ContainerConfigurator $containerConfigurator,
protected string $rootDirectory,
) {
}

public function configureContainer(): void
{
$parameters = $this->containerConfigurator->parameters();
if ($packageOrganizationConfig = $this->getPackageOrganizationDataSource($this->rootDirectory)) {
$parameters->set(
Option::PACKAGE_DIRECTORIES,
$packageOrganizationConfig->getPackageDirectories()
);
}
}

protected function getPackageOrganizationDataSource(): ?PackageOrganizationDataSource
{
return new PackageOrganizationDataSource($this->rootDirectory);
}
}

The configuration can be split across several classes. In this case, ContainerConfigurationService retrieves the package configuration through class PackageOrganizationDataSource, which has this implementation:

namespace PoPPoPConfigSymplifyMonorepoBuilderDataSources;

class PackageOrganizationDataSource
{
public function __construct(protected string $rootDir)
{
}

public function getPackageDirectories(): array
{
return array_map(
fn (string $packagePath) => $this->rootDir . ‘/’ . $packagePath,
$this->getRelativePackagePaths()
);
}

public function getRelativePackagePaths(): array
{
return [
‘packages’,
‘plugins’,
];
}
}

Overriding The Configuration In The Downstream Monorepo

Now that the configuration in the public monorepo is setup via OOP, we can extend it to suit the needs of the private monorepo.

In order to allow the private monorepo to autoload the PHP code from the public monorepo, we must first configure the downstream composer.json to reference the source code from the upstream, which is under path submodules/PoP/src:

{
“autoload”: {
“psr-4”: {
“PoP\GraphQLAPIPRO\”: “src”,
“PoP\PoP\”: “submodules/PoP/src”
}
}
}

Below is file monorepo-builder.php for the private monorepo. Notice that the referenced class ContainerConfigurationService in the upstream repo belongs to the PoPPoP namespace, but now it switched to the PoPGraphQLAPIPRO namespace. This class must receive the additional input $upstreamRelativeRootPath (with value “submodules/PoP”) as to recreate the full path to the public packages:

use PoPGraphQLAPIPROConfigSymplifyMonorepoBuilderConfiguratorsContainerConfigurationService;
use SymfonyComponentDependencyInjectionLoaderConfiguratorContainerConfigurator;

return static function (ContainerConfigurator $containerConfigurator): void {
$containerConfigurationService = new ContainerConfigurationService(
$containerConfigurator,
__DIR__,
‘submodules/PoP’
);
$containerConfigurationService->configureContainer();
};

The downstream class ContainerConfigurationService overrides which PackageOrganizationDataSource class is used in the configuration:

namespace PoPGraphQLAPIPROConfigSymplifyMonorepoBuilderConfigurators;

use PoPPoPConfigSymplifyMonorepoBuilderConfiguratorsContainerConfigurationService as UpstreamContainerConfigurationService;
use PoPGraphQLAPIPROConfigSymplifyMonorepoBuilderDataSourcesPackageOrganizationDataSource;
use SymfonyComponentDependencyInjectionLoaderConfiguratorContainerConfigurator;

class ContainerConfigurationService extends UpstreamContainerConfigurationService
{
public function __construct(
ContainerConfigurator $containerConfigurator,
string $rootDirectory,
protected string $upstreamRelativeRootPath
) {
parent::__construct(
$containerConfigurator,
$rootDirectory
);
}

protected function getPackageOrganizationDataSource(): ?PackageOrganizationDataSource
{
return new PackageOrganizationDataSource(
$this->rootDirectory,
$this->upstreamRelativeRootPath
);
}
}

Finally, downstream class PackageOrganizationDataSource contains the full path to both public and private packages:

namespace PoPGraphQLAPIPROConfigSymplifyMonorepoBuilderDataSources;

use PoPPoPConfigSymplifyMonorepoBuilderDataSourcesPackageOrganizationDataSource as UpstreamPackageOrganizationDataSource;

class PackageOrganizationDataSource extends UpstreamPackageOrganizationDataSource
{
public function __construct(
string $rootDir,
protected string $upstreamRelativeRootPath
) {
parent::__construct($rootDir);
}

public function getRelativePackagePaths(): array
{
return array_merge(
// Public packages – Prepend them with “submodules/PoP/”
array_map(
fn ($upstreamPackagePath) => $this->upstreamRelativeRootPath . ‘/’ . $upstreamPackagePath,
parent::getRelativePackagePaths()
),
// Private packages
[
‘packages’,
‘plugins’,
‘clients’,
]
);
}
}

Injecting The Configuration From PHP Into GitHub Actions

Monorepo builder offers command packages-json, which we can use to inject the package paths into the GitHub Actions workflow:

jobs:
provide_data:
steps:
– id: output_data
name: Calculate matrix for packages
run: |
echo “::set-output name=matrix::$(vendor/bin/monorepo-builder packages-json)”

outputs:
matrix: ${{ steps.output_data.outputs.matrix }}

This command produces a stringified JSON. In the workflow it must be converted to a JSON object via fromJson:

jobs:
split_monorepo:
needs: provide_data
strategy:
matrix:
package: ${{ fromJson(needs.provide_data.outputs.matrix) }}

Unfortunately, command packages-json outputs the package names but not their paths, which works when all packages are under the same folder (such as packages/). It doesn’t work in our case, since public and private packages are located in different folders.

Fortunately, the Monorepo builder can be extended with custom PHP services. So I created a custom command package-entries-json (via class PackageEntriesJsonCommand) which does output the path to the package.

The workflow was then updated with the new command:

run: |
echo “::set-output name=matrix::$(vendor/bin/monorepo-builder package-entries-json)”

Executed on the public monorepo, it produces the following packages (among many others):

[
{
“name”: “graphql-api-for-wp”,
“path”: “layers/GraphQLAPIForWP/plugins/graphql-api-for-wp”
},
{
“name”: “extension-demo”,
“path”: “layers/GraphQLAPIForWP/plugins/extension-demo”
},
{
“name”: “access-control”,
“path”: “layers/Engine/packages/access-control”
},
{
“name”: “api”,
“path”: “layers/API/packages/api”
},
{
“name”: “api-clients”,
“path”: “layers/API/packages/api-clients”
}
]

Executed on the private monorepo, it produces the following entries (among many others):

[
{
“name”: “graphql-api-for-wp”,
“path”: “submodules/PoP/layers/GraphQLAPIForWP/plugins/graphql-api-for-wp”
},
{
“name”: “extension-demo”,
“path”: “submodules/PoP/layers/GraphQLAPIForWP/plugins/extension-demo”
},
{
“name”: “access-control”,
“path”: “submodules/PoP/layers/Engine/packages/access-control”
},
{
“name”: “api”,
“path”: “submodules/PoP/layers/API/packages/api”
},
{
“name”: “api-clients”,
“path”: “submodules/PoP/layers/API/packages/api-clients”
},
{
“name”: “graphql-api-pro”,
“path”: “layers/GraphQLAPIForWP/plugins/graphql-api-pro”
},
{
“name”: “convert-case-directives”,
“path”: “layers/Schema/packages/convert-case-directives”
},
{
“name”: “export-directive”,
“path”: “layers/GraphQLByPoP/packages/export-directive”
}
]

As it can be appreciated, it works well: the configuration for the downstream monorepo contains both public and private packages, and the paths to the public ones were prepended with “submodules/PoP”.

Skipping Public Packages In The Downstream Monorepo

So far, the downstream monorepo has included both public and private packages in its configuration. However, not every command needs to be executed on the public packages.

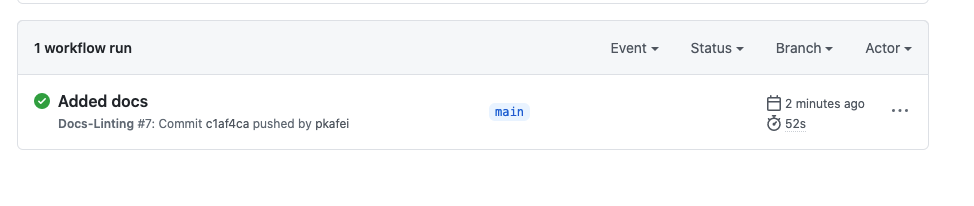
Take static analysis, for instance. The public monorepo already executes PHPStan on all public packages via workflow phpstan.yml, as shown in this run. If the downstream monorepo runs once again PHPStan on the public packages, it is a waste of computing time. Then, the phpstan.yml workflow needs to run on the private packages only.

That means that depending on the command to execute in the downstream repo, we may want to either include both public and private packages, or only private ones.

To add public packages or not on the downstream configuration, we adapt downstream class PackageOrganizationDataSource to check this condition via input $includeUpstreamPackages:

namespace PoPGraphQLAPIPROConfigSymplifyMonorepoBuilderDataSources;

use PoPPoPConfigSymplifyMonorepoBuilderDataSourcesPackageOrganizationDataSource as UpstreamPackageOrganizationDataSource;

class PackageOrganizationDataSource extends UpstreamPackageOrganizationDataSource
{
public function __construct(
string $rootDir,
protected string $upstreamRelativeRootPath,
protected bool $includeUpstreamPackages
) {
parent::__construct($rootDir);
}

public function getRelativePackagePaths(): array
{
return array_merge(
// Add the public packages?
$this->includeUpstreamPackages ?
// Public packages – Prepend them with “submodules/PoP/”
array_map(
fn ($upstreamPackagePath) => $this->upstreamRelativeRootPath . ‘/’ . $upstreamPackagePath,
parent::getRelativePackagePaths()
) : [],
// Private packages
[
‘packages’,
‘plugins’,
‘clients’,
]
);
}
}

Next, we need to provide value $includeUpstreamPackages as either true or false depending on the command to execute.

We can do this by replacing config file monorepo-builder.php with two other config files: monorepo-builder-with-upstream-packages.php (which passes $includeUpstreamPackages => true) and monorepo-builder-without-upstream-packages.php (which passes $includeUpstreamPackages => false):

// File monorepo-builder-without-upstream-packages.php
use PoPGraphQLAPIPROConfigSymplifyMonorepoBuilderConfiguratorsContainerConfigurationService;
use SymfonyComponentDependencyInjectionLoaderConfiguratorContainerConfigurator;

return static function (ContainerConfigurator $containerConfigurator): void {
$containerConfigurationService = new ContainerConfigurationService(
$containerConfigurator,
__DIR__,
‘submodules/PoP’,
false, // This is $includeUpstreamPackages
);
$containerConfigurationService->configureContainer();
};

We then update ContainerConfigurationService to receive parameter $includeUpstreamPackages and pass it along to PackageOrganizationDataSource:

namespace PoPGraphQLAPIPROConfigSymplifyMonorepoBuilderConfigurators;

use PoPPoPConfigSymplifyMonorepoBuilderConfiguratorsContainerConfigurationService as UpstreamContainerConfigurationService;
use PoPGraphQLAPIPROConfigSymplifyMonorepoBuilderDataSourcesPackageOrganizationDataSource;
use SymfonyComponentDependencyInjectionLoaderConfiguratorContainerConfigurator;

class ContainerConfigurationService extends UpstreamContainerConfigurationService
{
public function __construct(
ContainerConfigurator $containerConfigurator,
string $rootDirectory,
protected string $upstreamRelativeRootPath,
protected bool $includeUpstreamPackages,
) {
parent::__construct(
$containerConfigurator,
$rootDirectory,
);
}

protected function getPackageOrganizationDataSource(): ?PackageOrganizationDataSource
{
return new PackageOrganizationDataSource(
$this->rootDirectory,
$this->upstreamRelativeRootPath,
$this->includeUpstreamPackages,
);
}
}

Next, we should invoke the monorepo-builder with either config file, by providing the –config option:

jobs:
provide_data:
steps:
– id: output_data
name: Calculate matrix for packages
run: |
echo “::set-output name=matrix::$(vendor/bin/monorepo-builder package-entries-json –config=monorepo-builder-without-upstream-packages.php)”

However, as we saw earlier on, we want to keep the GitHub Actions workflows in the upstream monorepo as the single source of truth, and they clearly do not need these changes.

The solution I found to this issue is to provide a –config option in the upstream repo always, with each command getting its own config file, such as the validate command receiving the validate.php config file:

– name: Run validation
run: vendor/bin/monorepo-builder validate –config=config/monorepo-builder/validate.php

Now, there are no config files in the upstream monorepo, since it doesn’t need them. But it will not break, because the Monorepo builder checks if the config file exists and, if it does not, it loads the default config file instead. So we will either override the config, or nothing happens.

The downstream repo does provide the config files for each command, specifying if to add the upstream packages or not:

Btw, as a side note, this is another example of how the multi-monorepo leaks.

// File config/monorepo-builder/validate.php
return require_once __DIR__ . ‘/monorepo-builder-with-upstream-packages.php’;

Overriding The Configuration

We are almost done. By now the downstream monorepo can override the configuration from the upstream monorepo. So all that’s left to do is to provide the new configuration.

In class PluginDataSource I override the configuration of which WordPress plugins must be generated, providing the PRO ones instead:

namespace PoPGraphQLAPIPROConfigSymplifyMonorepoBuilderDataSources;

use PoPPoPConfigSymplifyMonorepoBuilderDataSourcesPluginDataSource as UpstreamPluginDataSource;

class PluginDataSource extends UpstreamPluginDataSource
{
public function getPluginConfigEntries(): array
{
return [
// GraphQL API PRO
[
‘path’ => ‘layers/GraphQLAPIForWP/plugins/graphql-api-pro’,
‘zip_file’ => ‘graphql-api-pro.zip’,
‘main_file’ => ‘graphql-api-pro.php’,
‘dist_repo_organization’ => ‘GraphQLAPI-PRO’,
‘dist_repo_name’ => ‘graphql-api-pro-dist’,
],
// GraphQL API Extensions
// Google Translate
[
‘path’ => ‘layers/GraphQLAPIForWP/plugins/google-translate’,
‘zip_file’ => ‘graphql-api-google-translate.zip’,
‘main_file’ => ‘graphql-api-google-translate.php’,
‘dist_repo_organization’ => ‘GraphQLAPI-PRO’,
‘dist_repo_name’ => ‘graphql-api-google-translate-dist’,
],
// Events Manager
[
‘path’ => ‘layers/GraphQLAPIForWP/plugins/events-manager’,
‘zip_file’ => ‘graphql-api-events-manager.zip’,
‘main_file’ => ‘graphql-api-events-manager.php’,
‘dist_repo_organization’ => ‘GraphQLAPI-PRO’,
‘dist_repo_name’ => ‘graphql-api-events-manager-dist’,
],
];
}
}

Creating a new release on GitHub will trigger the generate_plugins.yml workflow and generate the PRO plugins on my private monorepo:

Tadaaaaaaaa! ?

Conclusion

As always, there is no “best” solution, only solutions that may work better depending on the context. The multi-monorepo approach is not suitable to every kind of project or team. I believe the biggest beneficiaries are plugin creators who release public plugins to be upgraded to their PRO versions, and agencies customizing plugins for their clients.

In my case, I’m quite happy with this approach. It takes a bit of time and effort to get right, but it’s a one-off investment. Once the set-up is over, I can just focus on building my PRO plugins, and the time savings concerning project management can be huge.

Mazda trademarks a new logo (and fans spot an intriguing hidden message)

Original Source: http://feedproxy.google.com/~r/CreativeBloq/~3/gdp4T-XCJHo/mazda-wankel-logo

What do you see?

20 Best New Sites, August 2021

Original Source: https://www.webdesignerdepot.com/2021/08/20-best-new-sites-august-2021/

Often, when designing a website or branding, it is easy to get wrapped up in the details–typography, graphics, color, the grid–and lose the bigger picture. Of course, these things are vitally important, but they are building blocks that go together to form a greater whole.

A good website creates an impression; it tells a story. And all the various elements involved, from copy to hero image to type choices, combine to create that story. Telling a story can mean taking a user through a linear narrative of how a company or a product came about, using a narrative to make a point, or simply creating an environment or experience that shows the user what a brand is all about.

We have selected examples of different kinds of storytelling for this month’s collection–we’ve even included an actual story. Enjoy!

Black Dog 

Black Dog is a rather beautiful picture book project showcasing the developer’s WebGL skills.

Right to Breathe

Right to Breathe highlights the dangers of passive smoking in a way that is engaging and intriguing.

Superglow

Creative agency Superglow focuses on clients in the music industry, and their particular aesthetic is clearly demonstrated in their portfolio site.

Instabase

Instabase is an enterprise productivity platform for complex data. Not the most glamorous product to sell, but this site does a good job of engaging the user through good layout and colorful graphics.

Bake Inc.

Bake Inc.’s corporate site makes good use of diagonals to break up content and to provide a sense of energy to the flow. Plus it features some fairly mouth-watering photographs.

Julia Johnson

This portfolio site for photographer, director, and creative director Julia Johnson, is simple but with very nice details, such as the color backgrounds for image loading.

Pitchfork Music Festival

While yellow text on a multi-color background doesn’t sound like a great idea, it works on this site for Pitchfork Music Festival.

Little Yawn Collective

Some sweet illustrations and a soothing color scheme set the mood for Little Yawn Collective, which offers natural sleep solutions for children.

Pine

Production company Pine takes a bold approach, showing the work with very little text beyond contact information.

Bloomers

Bloomers describes itself as a knowledge consultancy offering branding and strategy. To illustrate its philosophy of connecting past and present, it has gone for Victoriana.

Fox Computers

With its slightly muted palette and a very businesslike feel, this site for web agency Fox Computers gives the impression of competent and safe, without being boring.

Forest Gum

Forest Gum makes natural chewing gum — from tree sap instead of plastic. There are lots of greens and bubblegum pink here and a bold, irregular display type for a modern, young feel.

Felt

Although Felt online — a collaborative mapping tool – is currently in private beta, this promotional site does a good job of creating interest while doubling as a recruitment notice/job advert.

Help Dad

Help Dad is a micro-site from Oatly, aimed at UK customers. In terms of visual design, it adheres to the same style as all of Oatly’s sites. However, what stands out here is the quality of the content, tailored for the UK market.

Epicurrence

Epicurrence, the 4-day not-conference for creatives, is back for 2021, and this time it’s at Outer Banks, NC. The site keeps the content simple and to the point, livened up by illustration.

Marram

With some great photography and a soft color palette, this site for Marram boutique hotel manages to create an impression of soft, almost golden, light and calm.

Re-Forme

Re-Forme makes recyclable and biodegradable food packaging. The site is in a style used a lot by companies whose focus is sustainability – simple illustration, strong colors, color transitions, and large type. There’s a nice little arrow detail in their logo.

Miti Navi

You could be forgiven for thinking Miti Navi has been included because we want one of their sailing boats to “test.” After seeing how they are presented here, who wouldn’t?

Under Armour

Sportswear brand Under Armour has just updated its website. Visually the difference isn’t startling, but the usability and navigation have been improved.

The Longest Road Out

The Longest Road Out site promotes a travel map and journal based on its creators’ own road trip around Britain and Ireland (plus the outlying islands). The site is charming.

Source

p img {display:inline-block; margin-right:10px;}
.alignleft {float:left;}
p.showcase {clear:both;}
body#browserfriendly p, body#podcast p, div#emailbody p{margin:0;}

The post 20 Best New Sites, August 2021 first appeared on Webdesigner Depot.

How To Automate Documentation Workflow For Developers

Original Source: https://smashingmagazine.com/2021/08/automate-documentation-workflow-for-developers/

To get the most out of this tutorial, you should be familiar with: Git, GitHub and Linux and the command line.

Why Should You Care About High-Quality Documentation?

Many teams struggle with writing documentation. When you go to check a framework, the documentation will often be out of date or unclear. This can lead to internal frustration when a team member tries to add a feature, but they don’t understand how the current feature works because of poor documentation. This can lead to unproductive hours on the job.

Poor documentation also compromises a good customer experience. According to Jeff Lawson, author of Ask Your Developer and founder of Twilio, if you are selling an API as a product, documentation is the ultimate advertisement for technical stakeholders. IBM did a study on the importance of documentation, and 90% of respondents admitted that they made their purchasing decisions based on the quality of a product’s documentation.

Writing good documentation is important for the developer and customer experiences.

If Documentation Is So Important, Then Why Do Engineering Teams Deprioritize It?

Writing documentation can break developers out of the “flow”. Documentation often lives outside of the main code base, and it is cumbersome to find and update. Putting it in an Excel spreadsheet or a proprietary CMS is not uncommon.

Automating documentation and improving documentation workflow fixes this.

Automating Documentation From a High Level

What does automating documentation mean? It means adopting common software development practices. When you automate documentation, you are:

writing your documentation in Markdown;
using a continuous integration and continuous deployment (CI/CD) pipeline to run tasks such as correcting errors and deploying updates (in this tutorial, we are going to highlight GitHub Actions);
implementing tools like Vale to enforce a style guide and to correct common grammatical mistakes.

The Style Guides

Before you use tools such as Vale and GitHub Actions to automate the style guide, let’s take a moment to define what exactly is a style guide.

You know that feeling when you are writing documentation and something seems a little off? Your explanations don’t fit the rest of the documentation, but you can’t quite describe why they’re wrong. The writing explains the concept, but it doesn’t seem to fit.

When you get this feeling, your voice and tone might be off. Refining the voice and tone is a way to make writing sound cohesive even if you are developing documentation that has been edited by the QA, engineering, and product teams. Below is an example style guide from the city bus application TAPP, taken from the book Strategic Writing for UX by Torrey Podmajersky.

TAPP is a transit application (for buses and trains). The header of the table announces TAPP’s values as a company, being efficient, trustworthy, and accessible. The left side of the table lists the different parts covered by the style guide: concepts, vocabulary, verbosity, grammar, and punctuation.

Together, these make a style guide. The header introduces the values, and the left side of the table shows the different components that you would find in any written material: vocabulary, grammar, and punctuation. The beauty of this style guide is that engineers and copywriters will clearly know what capitalization to use and which punctuation to use in order to promote Tapp’s brand identity.

Technical Writing Style Guide

Not all style guides come in tables. Microsoft has a whole website that serves as a comprehensive guide, covering everything from acronyms to bias-free communication to chatbots. Microsoft of course isn’t the only company that has a style guide. Google has one, too.

The Trouble With Style Guides

Style guides are a great starting point for companies that are serious about documentation. They solve a lot of the confusion that developers might have about how exactly to write about a major feature that they are pushing out.

The problem with style guides is that they add friction to the writing process. Many writers, including me, don’t bother to stop writing and look at the style guide every time they have a question. Sometimes, a style guide is cumbersome and too difficult to reference — for instance, the Microsoft Style Guide is over a thousand pages long!

Linters and CI/CD for Documentation

If you are a programmer, then you are probably familiar with linters. Linters are an ideal way to enforce coding standards on your team. The same is true with documentation. When you create a linter, you are setting a benchmark of quality for your documentation. In this tutorial, we are going to use the Vale linter.

Using some sort of documentation automation alongside a linter is common. When we say automation in this context, we’re referring to the continuous integration and continuous deployment (CI/CD) workflow. CI automates the building and testing of documentation. CD automates the release of code.

You can use many different types of apps to implement a CI/CD workflow. In this tutorial, we are going to use GitHub Actions to run our documentation linter. GitHub Actions run CI directly in a GitHub repository, so there is no need to use a third-party application, such as CircleCI or Travis.

Finally, GitHub Actions are event-driven, which means they are triggered when something happens, such as when someone writes a pull request or an issue. In our example, a GitHub action will occur when someone pushes changes to their main branch.

GitHub Actions

First, create a GitHub repository. Then, locally, create a folder and cd into it.

mkdir automated-docs
cd automated-docs

Once you are in the folder, initialize the directory for Git.

git init

Once you have initialized the repository, proceed to create a workflow directory to your folder.

mkdir .github/ && cd .github/ && mkdir workflows/ && cd workflows/

Workflows are where we will store all of our GitHub actions. Once you’ve created a workflows folder, make a new workflow. We are going to name this workflow vale.yml.

touch vale.yml

Vale.yml is a YAML file. In this workflow file, we will include actions and jobs.

Now, open vale.yml in your favorite text editor.

nano vale.yml

Copy and paste the following into vale.yml, and let’s go over the context and syntax.

# This is a basic workflow to help you get started with Actions

name: CI

# Controls when the workflow will run
on:
# Triggers the workflow on push or pull request events but only for the main branch
push:
branches: [ main ]
pull_request:
branches: [ main ]

# Allows you to run this workflow manually from the Actions tab
workflow_dispatch:

# A workflow run is made up of one or more jobs that can run sequentially or in parallel
jobs:
# This workflow contains a single job called “build”
build:
# The type of runner that the job will run on
runs-on: ubuntu-latest

# Steps represent a sequence of tasks that will be executed as part of the job
steps:
# Checks-out your repository under $GITHUB_WORKSPACE, so your job can access it
– uses: actions/checkout@v2

# Runs a single command using the runners shell
– name: Run a one-line script
run: echo Hello, world!

# Runs a set of commands using the runners shell
– name: Run a multi-line script
run: |
echo Add other actions to build,
echo test, and deploy your project.
env:
GITHUB_TOKEN: ${{secrets.GITHUB_TOKEN}}

name
This is the name, or what we are calling our workflow. It is a string.
on
This controls the workflow and the triggers.
jobs
This is where we set up and control our actions. We select the environment where our actions will run — it is usually a good bet to go with Ubuntu. And this is where we will add our actions.

GitHub has a guide on all of the other workflow syntax and variables, in case you’re curious.

In this section, we have:

learned what GitHub actions are,
created our first GitHub workflow,
identified the most important parts of a GitHub workflow YAML file.

Next, we are going to customize our GitHub workflow to use Vale.

Set Up Vale in GitHub Actions File

Once we’ve copied the base workflow file, it is time to customize it, so that we can start using Vale actions. The first thing to do is change the name of the YAML file to Docs-Linting.

# This is a basic workflow to help you get started with Actions.

name: Docs-Linting

Next, we want to run the Vale test once someone has pushed their changes to the main branch on GitHub. We don’t want the test to run when someone creates a pull request, so we’ll delete that part of the YAML file.

on:
# Triggers the workflow on push or pull request events but only for the main branch
push:
branches: [ main ]

The jobs section is the main part of the workflow file, and it is responsible for running the GitHub actions.

jobs:
build:
runs-on: ubuntu-latest
steps:
– name: Checkout
uses: actions/checkout@master

These actions are going to run on the latest version of Ubuntu. The Checkout action checks out the repository in order for the GitHub workflow to access it.

Now it is time to add a Vale action to our GitHub workflow.

– name: Vale
uses: errata-ai/vale-action@v1.4.2
with:
debug: true
styles: |
https://github.com/errata-ai/write-good/releases/latest/download/write-good.zip
https://github.com/errata-ai/Microsoft/releases/latest/download/Microsoft.zip

env:
GITHUB_TOKEN: ${{secrets.GITHUB_TOKEN}}

We have named our action Vale. The uses variable shows which version of Vale we’re going to implement — ideally, we should use the most recent version. In the with variable, we set debug to true.

The styles section gives us the option to add a style guide to Vale. In this example, we are going to use write-good and Microsoft’s official style guide. Keep in mind that we can use other style guides as well.

The final part of this GitHub action is env. In order to run this GitHub action, we need to include a secret token.

This is what the result should look like:

# This is a basic workflow to help you get started with Actions.

name: Docs-Linting

# Controls when the action will run.
on:
# Triggers the workflow on push or pull request events but only for the main branch
push:
branches: [ main ]

# Allows you to run this workflow manually from the Actions tab
workflow_dispatch:

jobs:
prose:
runs-on: ubuntu-latest
steps:
– name: Checkout
uses: actions/checkout@master

– name: Vale
uses: errata-ai/vale-action@v1.4.2
with:
debug: true
styles: |
https://github.com/errata-ai/write-good/releases/latest/download/write-good.zip
https://github.com/errata-ai/Microsoft/releases/latest/download/Microsoft.zip

env:
GITHUB_TOKEN: ${{secrets.GITHUB_TOKEN}}

Once you’ve finished making changes, save the file, commit to Git, and push your changes to GitHub.

git add .github/workflows/vale.yml
git commit -m “Added github repo to project”
git push -u origin main

To recap, in this section, we have:

triggered the action to occur when we push new code to the main branch;
added a Vale action, setting debug to true and identifying style guides;
added a GitHub token;
committed changes and pushed to GitHub.

In the next section, we are going to create a Vale configuration file.

Setting Up Vale Configuration File

Go to the root of your project’s directory, and then touch .vale.ini. Open .vale.ini in a text editor. Copy and paste the following into .vale.ini:

StylesPath = .github/styles
MinAlertLevel = warning

[formats]
Markdown = markdown

[*.md]
BasedOnStyles = write-good, Microsoft

StylesPath = .github/styles
The StylesPath gives the path of the Vale styles.
MinAlertLevel = warning
The minimum alert level shows the scale of severity in alerts. The options are suggestion, warning, and error.
[formats]
Markdown = markdown sets the format as Markdown.
[*.md]
The configuration BasedOnStyles = write-good, Microsoft will run write-good and the Microsoft style guide on all Markdown files ending with .md.

This set-up is the bare minimum. If you are interested in learning more about configuring Vale, head over to the documentation.

When you are finished making changes, save the file, and commit and push to GitHub.

git add .vale.ini
git commit -m “Added Vale config file”
git push -u origin main

In this part, we’ve learned the internals of a Vale configuration file. Now it’s time to create sample documentation.

Creating Documentation and Triggering the Vale GitHub Actions

Now it is time to see Vale and GitHub Actions in action! We are going to create a Markdown file and fill it with text. And we are going to get our text from DeLorean Ipsum.

Go to the root of your project, and then touch getting-started.md. Once you’ve created the getting-started file, go to DeLorean Ipsum and create some dummy text for your documentation. Then, return to your text editor and paste the text in getting-started-md.

# Getting Started Guide

I can’t play. It’s my dad. They’re late. My experiment worked. They’re all exactly twenty-five minutes slow. Marty, this may seem a little foreward, but I was wondering if you would ask me to the Enchantment Under The Sea Dance on Saturday. Well, they’re your parents, you must know them. What are their common interests, what do they like to do together?

Okay. Are you okay? Whoa, wait, Doc. What, well you mean like a date? I don’t wanna see you in here again.

No, Biff, you leave her alone. Jesus, George, it’s a wonder I was ever born. Hey, hey, keep rolling, keep rolling there. No, no, no, no, this sucker’s electrical. But I need a nuclear reaction to generate the one point twenty-one gigawatts of electricity that I need. I swiped it from the old lady’s liquor cabinet. You know Marty, you look so familiar, do I know your mother?

Save the file, commit it, and push it to GitHub.

git add getting-started.md
git commit -m “first draft”
git push -u origin main

Once you’ve pushed the changes, head over to GitHub where your repository is located. Go to the Actions tab.

You will see all of your workflows on the left side. We have only one, named Docs-Linting, the same name we put in the vale.yml file.

When we push the documentation to GitHub, we will trigger the action.

If the action has run without any problems, we will get a green checkmark.

Click on “Added docs” to get a full report.

You will see that we got 11 warnings. Let’s deal with the “weasel word” warning. Go back to the text editor, open getting-started.md, and delete the word “exactly”.

# Getting Started Guide

I can’t play. It’s my dad. They’re late. My experiment worked. They’re all twenty-five minutes slow. Marty, this may seem a little foreward, but I was wondering if you would ask me to the Enchantment Under The Sea Dance on Saturday. Well, they’re your parents, you must know them. What are their common interests, what do they like to do together?

Okay. Are you okay? Whoa, wait, Doc. What, well you mean like a date? I don’t wanna see you in here again.

No, Biff, you leave her alone. Jesus, George, it’s a wonder I was ever born. Hey, hey, keep rolling, keep rolling there. No, no, no, no, this sucker’s electrical. But I need a nuclear reaction to generate the one point twenty-one gigawatts of electricity that I need. I swiped it from the old lady’s liquor cabinet. You know Marty, you look so familiar, do I know your mother?

Save the changes, commit it to Git, and push the new version of the file to GitHub. It should trigger the GitHub action.

If we click on “Deleted the weasel word”, we will see that we have only 10 warnings now, and the “weasel word” warning is gone. Hooray!

We are finished, and we’ve covered a lot of ground. In this section, we have:

added documentation to our Vale GitHub Actions repository,
triggered the Vale GitHub action,
corrected an error produced by Vale and pushed the change back to GitHub.

Conclusion

In a world that is increasingly going remote, prioritizing good documentation and good documentation workflow is important. You first have to define what “good” is by creating a style guide. Once you’ve figured out the rules of your documentation, then it’s time to automate.

Documentation should be treated like your code base: a living body of work that is constantly being iterated and becoming a bit better than the last time you updated it.

10 Tips for Your Business’ Facebook Fan Page

Original Source: https://www.hongkiat.com/blog/facebook-business-page-tips/

Your Facebook fan page is more powerful than you think. It can help boost revenue and brand awareness which can solidify your standing in the market. If you are selling your services, digital or…

Visit hongkiat.com for full content.

Ingenius app turns the MacBook trackpad into a mini canvas

Original Source: http://feedproxy.google.com/~r/CreativeBloq/~3/iFXEFLLyDsI/draw-with-trackpad

This promises hours of fun.

Collective #675

Original Source: http://feedproxy.google.com/~r/tympanus/~3/7DmigBq5OzM/

Inspirational Website of the Week: Kookslams Hard Seltzer

A very fresh design with great summer vibes and lots of fun details. Our pick this week!

Get inspired

Editor X

This content is sponsored via Syndicate Ads
Seamless creation from concept to production with Editor X

Create dynamic and powerful web experiences with responsive CSS combined with smooth drag & drop.

Check it out

Smooth and simple page transitions with the shared element transition API

Learn how to use shared element transitions in this article by Jake Archibald.

Check it out

CSS accent-color

Learn how to bring your brand color to built-in HTML form inputs with one line of code.

Check it out

Breaking the web forward

A sobering article by Peter-Paul Koch on the current lamentable state of browsers and the web where “[c]omplex systems and arrogant priests rule”.

Read it

Practical Uses of CSS Math Functions: calc, clamp, min, max

Review the four best supported CSS math functions, and see how they can be used in both practical and unexpected ways, such as within gradients and color functions and in combination with CSS custom properties. By Stephanie Eckles.

Read it

Building a Cool Front End Thing Generator

John Polacek shows how building a tool that can generate some cool front-end magic can help you learn something new, develop your skills and maybe even get you a little notoriety.

Read it

A guide to designing accessible, WCAG-compliant focus indicators

A helpful reference aimed at both designers who want to learn about accessibility considerations for designing focus indicators, as well as developers who want to implement them. By Sara Soueidan.

Read it

Why lab and field data can be different (and what to do about it)

Learn why tools that monitor Core Web Vitals metrics may report different numbers, and how to interpret those differences. By Philip Walton.

Read it

Responsive CSS Food Truck

An amazing demo by Adam Kuhn!

Check it out

Star Rating: An SVG Solution

An exploration of how to implement a star rating with SVG that includes half a star.

Read it

GSAP + React, First Steps & Handy Techniques

Get started using GSAP in React to build fast, powerful JavaScript animations that work everywhere.

Read it

Improving responsiveness in text inputs

Nolan Lawson explains how to make slow inputs faster.

Read it

Introducing MIDIVal: the easiest way to interact with MIDI in your browser

Kacper Kula introduces MIDIVal, a platform-agnostic library for all your MIDI needs.

Read it

Akari 1A • Pure CSS • repeating-radial-gradient

Aris Acoba made this beautiful demo using some cool gradients.

Check it out

Building a switch component

A foundational overview by Adam Argyle of how to build a responsive and accessible switch component.

Read it

Sentence Forms (not Mad Libs)

Adrian Roselli dives into sentence forms, or narrative forms and writes about their challenges.

Check it out

HTML is Not a Programming Language?

Alvaro Montoro shows that the three main arguments used for claiming that HTML is not a programming language are flawed or incorrect.

Read it

CSS Pencil

Very nice CSS only work by Kass.

Check it out

MSI – The Match Maker

Supercool web game design: match with a similar player and test your skills in a series of mini games.

Check it out

CSS Drummer

An animated CSS drummer made by Deren.

Check it out

CSS Grid tooling in DevTools

Changhao Han shows how to use CSS Grid tooling in DevTools to better understand what CSS code is doing.

Read it

From Our Blog
Create an Abstract Image Slideshow with OGL, GLSL, and GSAP

Learn how to create a WebGL-powered image slideshow animated using a single value.

Read it

The post Collective #675 appeared first on Codrops.

Jamstack CMS: The Past, The Present and The Future

Original Source: https://smashingmagazine.com/2021/08/history-future-jamstack-cms/

The world’s first website was made from static HTML files created in a text editor. While it looks unassuming, it laid the foundation for the web we have today. Fast-forward 30 years, and website technology has changed significantly — we have images, stylesheets, JavaScript, streaming video, AJAX, animation, WebSockets, WebGL, rounded corners in CSS — the list goes on.

Sir Tim Berners-Lee couldn’t have possibly imagined the weird and wonderful place the world wide web would become and how deeply it would become part of our everyday lives. Yet, for all these technological developments, it’s interesting that many of us are still serving sites in the same way Tim did with the very first website — a web server serving static website files.

Throughout the web’s history, static websites have always been a popular option due to their simplicity, scalability, and security. However, unlike the early days of the web, static sites are no longer limited to developers working in a code editor. Now there’s a massive range of Jamstack CMSs available, which bring all the advantages of static sites while allowing non-technical folk to update content.

Over the years, there have been many different approaches and evolutions of static and Jamstack CMSs. In this post, we’re taking a stroll down memory lane to look at the CMSs that gave rise to the Jamstack CMSs we have today and peek beyond the horizon of what’s next.

The 90s

During the 90s, we saw two content management systems for static sites — Microsoft FrontPage in 1996 and Macromedia Dreamweaver in 1997. I vividly remember receiving a PC Magazine for my birthday with a trial of Dreamweaver. Piecing together a website using a WYSIWYG editor and seeing the code it generated was a fascinating and educational experience that sparked an initial interest in web design.

These desktop applications incremented the tooling an inch closer to the modern Jamstack content management systems of today. The idea of drag’n’dropping website components while still having control of the HTML was groundbreaking at the time.

Maintaining layouts became a particular pain point for static sites. For example, let’s say you had a website and wanted to change your navigation. You would need to make that change on every page. At this point, dynamically generated websites had already solved this problem with includes.

Dreamweaver 4 introduced editable regions, which was the first foray into separating content from the layout on a static website. Now you could manage larger sites and even hand off content editing to someone else without worrying about them breaking the rest of the site.

The bridge between local development and deployment was also a pain point Dreamweaver began to address with integrated FTP. I remember the struggle of getting my FTP configuration exactly correct in Dreamweaver for the free, advertising-ridden hosting I’d found. But, when it worked, it was magical. I had my website with funny photos and links to favorite websites live on the internet, and better yet, I could edit directly on the server.

The 00s

In the 2000s we had a showdown of two popular blog publishing platforms — MovableType in 2001 and WordPress in 2003. It was a battle of not only proprietary vs open source but also static vs dynamic. It’s safe to say WordPress, the platform now powering 40% of the internet, won that battle, but MovableType paved the way for Jamstack CMSs in the future.

MovableType was one of the first static site generators on the market, although that term wouldn’t become popular until 2008. Ben and Mena Trott created MovableType because of a “Dissatisfacion with existing blog CMSes — performance, stability.” To this day, these two points are common reasons for switching from a dynamic site to a static one.

What’s interesting is there was little mention of static sites in MoveableType’s documentation at all. Instead, they would talk about “rebuilding” the site after any changes. I imagine they wanted to avoid the limiting perception of the word ‘static.’ It’s the same problem that led the community to adopt the term ‘Jamstack.’

Before MovableType, other personal blogging platforms were available such as Geocities, Blogger & Open Diary. However, MovableType was one of the first widely available platforms you could download for free and host yourself. In addition, they introduced a hosted version of MovableType in 2003 called TypePad to compete with other popular cloud platforms.

With MovableType, you had everything you needed to manage your blog. You could create and update blog posts, all content was straight HTML — open-source WYSIWYG editors weren’t available at the time, and Markdown didn’t come about until 2004.

We can see all the bones of modern Jamstack CMSs here. MovableType really was before its time.

In 2006, Denis Defreyne tried to set up a Ruby-based blog platform and ran into performance problems — “Having a VPS with only 96 MB of RAM, any Ruby-based CMS ran extremely slowly.” One year later, Denis launches Nanoc, a static site generator that simplifies MovableType’s model. Nanoc removed the UI and is instead a program you run on the command line.

As far as I can tell, this is the first modern static site generator, although we’re still a year away from coining that term. At the time, Nanoc talked about compiling source files into HTML:

It operates on local files, and therefore does not run on the server. nanoc “compiles” the local source files into HTML by evaluating eRuby, Markdown, etc.

Nanoc had many static site generator (SSG) features we now take for granted:

Layouts
Create layout elements using Ruby’s ERB templating language.
Page Metadata
A separate YAML file for storing title and other metadata for a page. Front matter wasn’t a thing yet.
Markdown support
Write content in Markdown and transform it into HTML on build.
Templates
A feature similar to Hugo’s archetypes.
Plugins
Known as libs; extend the static site generator for your own needs.

By the end of 2008, Tom Preston-Werner announces Jekyll — a simple, blog-aware, static site generator. It took ideas from Nanoc and pushed them even further with two significant innovations:

Front matter
Instead of metadata living in a separate file, now you can have a small YAML snippet at the top of a file.
Blog aware
Create posts with Markdown files. Jekyll builds these into an array you can iterate over and paginate to create a blog.

Both Nanoc and Jekyll revolutionized the future of static site tooling in their own way. First, Nanoc introduced having a site’s configuration, layouts, and content as static files. The benefit of doing this is the entire site’s source code can live in Git. Jekyll took this a step further by providing more structure around the content. Now you could use GitHub as your CMS. Adding a new blog post is as simple as creating a new Markdown file in GitHub, writing your content, and committing.

The 10s

In 2012, Dave Cole published a post on How we build CMS free websites. The post details how Development Seed moved their websites from Drupal to Jekyll and how they use Prose.io to manage the content. Development Seed built Prose.io to make it easier for content writers to contribute to Jekyll websites.

Prose.io syncs with your GitHub repository and provides a simple GUI for everyday content tasks such as updating front matter, writing Markdown, creating posts, and uploading files. In addition, content updates save back to GitHub, creating a tight workflow between developers and content writers.

Prose turned Jekyll from a tool for developers to create blogs to a powerful content publishing platform. Moreover, it sparked a decade of companies pushing static site generator content publishing to the next level.

There are now hundreds of modern Jamstack CMSs to choose from, each with its own benefits and trade-offs. Jamstack CMSs typically take one of three approaches to manage content on a static website:

SSG/CMS package

Hailing back to MovableType, these platforms manage content and render the static site themselves. Controlling the whole stack means these CMSs can provide a tightly integrated experience. Expect live previews, straightforward setup, and strong conventions.

The downside of the SSG/CMS package is they’re bundled together. You might love the editing experience but loathe the website generation portion. It’s worth noting that you can throw away the SSG portion on some of these platforms and only use it solely as a Content API.

Examples: Statamic, Publii, WordPress (with Simply Static plugin).

Content API

These platforms provide content as a service. They offer many different field types you can use to piece together the content for your pages. On top of that, Content API platforms provide sophisticated APIs to retrieve the content.

When you run an SSG build, you download the content from the content API and interact with it like you would a data file. The nice thing about content APIs is you can reuse content across many different digital experiences. In addition to that, you can manage massive amounts of content and have deep relationships between pieces of content.

The downside is your content lives on a third party, so you’re at their mercy for any downtime, API changes, or how you interact with your content. Finally, as the editing interface is abstract from the end use-case of the content, there can be a disconnect between the fields in the Content API vs what you see rendered on a web page.

Examples: Contentful, Prismic, Strapi.

Git-Based CMS

These platforms take a similar approach to Prose.io. You connect your Git repository, they pull in your website files and create an editing interface around them. When you save changes, the files push back to your repository. The benefit of this approach is your Git repository holds your entire site and all its content.

Git based CMSs bring all the power of Git workflows to non-technical content writers. The downside is everything lives in your repository, so if you want to reuse content across multiple digital experiences, you would need to build JSON endpoints on your static site. Hosted repositories also have an upper limit of ~2GB, so you may need to use a 3rd party service for media if you have many assets.

Examples: CloudCannon (disclaimer: I’m the co-founder), Netlify CMS, Tina

Where are Jamstack CMSs today?

SSGs were originally tools for developers to build personal blogs. It was a simple approach that gave developers complete control, but you needed a basic understanding of web development to contribute to the sites. Over the past decade, the rapid evolution of Jamstack and the Jamstack CMS has helped propel Jamstack into mainstream use cases. These use cases include:

Documentation

Developers expect a lot from documentation sites, and a good experience will help win them over. Jamstack puts you on the right track to creating documentation sites developers love:

Development is rapid, and there’s more time for polish.
Markdown is an excellent format for Documentation made even easier with a good CMS.
The site will load in a snap.
The site content lives in a repository which allows the developer community to suggest improvements.

Companies including Twitch, Rackspace, and Linode are reaping the benefits of Jamstack for their documentation websites.

eCommerce

Visitors to an eCommerce site are on a path to paying money. Slow loading times or worse, downtime can make them look elsewhere. Platforms such as Snipcart, CommerceLayer, headless Shopify, and Stripe enable you to manage products in a friendly UI while taking advantage of the benefits of Jamstack:

Amazon’s famous study reported that for every 100ms in latency, they lose 1% of sales. Jamstack sites are typically among the fastest on the web.
When an eCommerce site has downtime, it can’t generate sales. There are far fewer moving parts in a Jamstack site, making them easier to keep online.
eCommerce sites are consistently iterating to improve conversion rates. Developer experience is at the heart of Jamstack, allowing developers to make and publish changes quickly.

Victoria Beckham Beauty, Teespring, and Louis Vuitton are all using Jamstack to boost their eCommerce experience.

Corporate websites

Corporate websites are the online front door to a company. Making a good impression with a fast-loading, well-constructed website can give an edge over competitors. Many of the Jamstack CMSs we’ve mentioned have the features and workflows growing enterprises require. These include translations, publishing workflows, and complex content modeling.

Netflix, Peloton, and Intercom iterate faster on their corporate websites thanks to Jamstack and Jamstack CMSs.

Large scale blogs

Static site generators often get pigeonholed as a solution for small websites. Thanks to the build speed of static site generators like Hugo and modern Jamstack CMSs designed to handle vast amounts of content, even prominent blogs like Smashing Magazine, web.dev, and JFK International Air Terminal can take advantage of a Jamstack approach.

Government

What better way to promote online transparency in government than having a website where the content lives in a public repository? There’s a complete history of all changes, and citizens can suggest improvements. You really can have a government website by the people, for the people.

digital.gov, Singapore Together, and CIO.gov all have pubic repositories on GitHub, which you can browse through every change made or suggest a content update.

Client websites

Websites for clients need to be exceptionally simple to update. Jamstack CMSs with a visual editor like Storyblok, CloudCannon and Tina make it intuitive for non-technical clients to manage content on their Jamstack website.

Wilto Makes Food, Down Thyme, The Bottle Room Bar take advantage of the same Jamstack approach that world-leading companies are.

How Does The Modern Jamstack CMS Stack Up Against Other Popular CMSs?

At a high level, there are two ways of getting a website online:

You select a template, customize it to your brand and enter your content.
You work with a designer and developer to create a bespoke website.

Of course the template approach is cheaper. For under $100, you can get a high-quality theme/template and get your website online in minutes. It’s an excellent way for an individual or small business to get a website online.

A quality bespoke website is going to start at $1k and can easily get to $100k+. A unique website with custom functionality helps you stand out against a sea of millions of websites, something many companies are willing to pay for.

Squarespace, Wix And Weebly

Website builder platforms focus on the template approach. They’re going for the mass market, and provide a way for anyone to spin up a website without a developer.

There’s no question Jamstack is a developer-focused technology. When we talk about static site generators, incremental regeneration, or instant cache invalidation, it’s enough to make the layman’s eyes glaze over. I struggle to see a future where the local flower shop needs a website and chooses a Jamstack approach without developer involvement.

Even with the most intuitive content management system for Jamstack where you can select a template, drag & drop components, and inline edit content, the benefits of Jamstack for this audience over website builders are too technical. Sure, it’ll be fast, secure, and easy to edit; however, the end-user couldn’t care less whether it’s using Jekyll, Hugo, Gatsby, or a dynamic backend.

The benefits of a fast-loading website, automated DevOps, higher uptime, and faster development cycles are much more seductive to companies building bespoke web projects. In this sense I don’t see a lot of overlap between website builders and Jamstack use cases.

WordPress

WordPress has captured both workflows. Someone completely non-technical can piece together a template with various plugins and have their website online within a day. WordPress also has rich APIs that developers use to create unique, bespoke web experiences. This broad range of use cases has helped grow WordPress to power almost 40% of the internet.

In most articles about Jamstack, you’ll find a section that throws WordPress under the bus. There’s frequently talk about how WordPress is slow, insecure, and complicated. I believe it’s a more fundamental conversation of approach. We’re often talking about static vs. dynamic and monolith vs. decoupled. WordPress is the most popular CMS, so it’s often the target.

There is no Jamstack vs. WordPress. The truth is you can enjoy the benefits of Jamstack while using WordPress as your CMS. Hosting platforms like Shifter and Strattic turn your WordPress site into a static website. You can also use a plugin to output a static site or use WordPress as a headless CMS to populate content into a static site generator.

It’s also relatively straightforward to migrate from WordPress to a Jamstack CMS. For a Git CMS you’ll want to migrate the blog posts and assets to Markdown files which live with your static site generator of choice. Fortunately, many SSGs have import tools that make this easy. For a Content API CMS, some of them have a data import tool otherwise, you can always write a script to pull data from WordPress and save it to your Content API.

Webflow

Webflow is a curious one because it allows designers to create bespoke websites without developers, but it’s too technical to be considered a website builder. It’s a robust platform that certainly overlaps with some Jamstack use cases. Ultimately it’s going to come down to control.

If your requirements fit within Webflow’s capabilities, it might be a good solution for you. While it can do a lot, it has limitations that a developer can surpass. If you need a developer, taking a Jamstack approach is one of the most efficient ways to leverage your staffing resources.

Drupal

Drupal is not just a CMS. It’s a powerful framework that can solve even the most complex use cases, gearing it more towards bespoke solutions for enterprise problems rather than much smaller informational sites.

Modern Jamstack CMSs have plenty of successful case studies of these smaller websites. For the more complex enterprise use cases, we have fewer examples. There are some limitations Jamstack needs to overcome to compete with a sizeable Drupal install:

Build time

Prebuilding a site using a static site generator takes time. For a small site, a build might take a few seconds. A site with 100k pages could take upwards of an hour to build. Waiting an hour for your site to build after each change isn’t a viable development workflow.

Static site generators have several strategies to address long build times, including build caching, incremental builds, dynamic persistent rendering, and website sharding. The choice of tooling also has a significant impact on build time. For example, using a Golang based static site generator like Hugo can rapidly build large sites, whereas using something Ruby-based like Jekyll might struggle.

We don’t have a silver bullet for build time yet, but the implementations of these strategies are improving all the time, which opens up possibilities for more extensive use cases.

Dynamic functionality

Large, complex websites typically have some form of dynamic behavior. Forms, commenting, search, and custom API endpoints are all bread-and-butter for Drupal. For many developers, it’s not obvious how to do these on a Jamstack site.

There’s a huge ecosystem of tools that support Jamstack websites for everything from commenting solutions, search, contact forms, to even eCommerce.

Perhaps you don’t want to use a third party, and you need a bespoke solution. You still have options with Jamstack:

You could build a separate API your Jamstack site interacts with for any dynamic functionality.
Netlify, Vercel, CloudFlare, and AWS all have the concept of serverless functions run at edge nodes of a CDN.

Fine-grained permissions

Drupal has a rich and extendable permission system. Large sites have large teams of content editors, which require a deep permission system.

We haven’t seen the same level of deep permission systems in a Jamstack CMS as is possible with Drupal, but it’s only a matter of time. It’s a chicken-egg situation. Without large content sites with extensive content teams, we don’t need complex permission systems. When we see more large content site adoption in Jamstack, Jamstack CMSs will introduce deep permission systems to match Drupal.

20s And Beyond

Jamstack CMSs are on an exciting trajectory. However, there’s still a long road ahead to become a mainstream way for businesses to build websites. So, what are the problems we need to solve to have a broader appeal for Jamstack?

Intuitive Content Editing

Platforms like Squarespace and Webflow are known for highly intuitive content editing experiences. What could be easier than writing content directly on your website? No guesswork or previews are necessary.

Content management for the Jamstack website has drifted towards a disconnected approach. You update content on a set of abstract field components that don’t represent how that content will look on the rendered site. The advantage of this disconnection is content reuse, but you’re sacrificing the editing experience to have this flexibility. There’s no reason we can’t have an editing experience similar to Squarespace on a Jamstack website. When we do, you’ll no longer have to make editing trade-offs to reap the benefits of Jamstack.

Less Reliance On Developers

While developers are an essential part of the Jamstack, they’re often heavily involved in the content publishing process. For Jamstack to grow, we need content tools that reduce this reliance. Editors should be able to create, manage and publish content without a developer. We’re getting close to editors becoming completely self-reliant once a site is set up, but there’s still work to do.

Better Publishing Workflows

Most CMSs have basic staging/production content workflows, which work fine for simple websites. Yet, these workflows quickly become an issue as soon as you have multiple contributors. It’s the equivalent of having a team of developers trying to work on a single branch.

Git has revolutionized how developers collaborate on content. We now have workflows where independent developers from around the world can come together and build extremely high-quality software. These workflows are game-changing, so why can’t we do the same thing for content? Jamstack sites are static. They live in a repository. With the right interface, we can bring these workflows to an entirely new audience pushing content collaboration far beyond what any CMS is capable of today.

Developers review pull requests using a code diff which indicates what code has changed. In the review process, you can have conversations about particular lines of code and iterate until it’s in a good spot to merge into the main code base. In addition to this, it’s common to run a suite of status checks as part of a pull request. Status checks are small programs to lint, run tests, or anything else you’d like to measure. Code diffs and status checks are crucial tools to review source code and ensure it’s consistent and high quality. So how do we take these ideas and bring them to content management?

We can’t put code diffs in front of content editors. The whole point of a Jamstack CMS is to abstract technical concepts. We can, however, show content diffs to indicate what content changed rather than the underlying source code. Visual diffs are another option and give you a different angle. Platforms like Percy are already doing this and give you a pixel-perfect view of what has changed between two web page versions.

As for static checking on content, we already have many tools available. There’s everything from checking for broken links, missing alt tags, SEO checks, grammar checks, and accessibility checking. We need friendly interfaces on top of these tools to help non-technical editors identify and solve issues themselves. Integrating these tools and workflows into Jamstack CMSs will change the way we manage content on the web.

The Next Frontier Of Content Management

While the bones of Jamstack CMS’s have been around since the early 90s, it’s only in the past five years we’ve seen significant funding and resources propel the approach. We’re still in the early adoption of Jamstack, but I believe we’re nearing a tipping point.

The number of large-scale deployments of Jamstack by world-leading companies is growing by the day. As the tooling and platforms improve, I can only see this trend growing. It will be hard to justify not using Jamstack for a bespoke corporate website or application in the next decade.

Where do you think Jamstack CMSs will be in 2030?

Decoroom Stylish UI/UX and Web Design

Original Source: http://feedproxy.google.com/~r/abduzeedo/~3/yjQMqb4W_00/decoroom-stylish-uiux-and-web-design

Decoroom Stylish UI/UX and Web Design
 Decoroom Stylish UI/UX and Web Design

abduzeedo08.18.21

Kirill Kim shared a quite beautiful web design and UI/UX project. There’s not much information about the project created for Decoroom, however the vignettes shared highlight the minimal look, the elegant use of photography and typography with one of my favorite typefaces, Inter.

aesthetic decor Ecommerce furniture shop site UI ux Web Websiteaesthetic decor Ecommerce furniture shop site UI ux Web Websiteaesthetic decor Ecommerce furniture shop site UI ux Web Websiteaesthetic decor Ecommerce furniture shop site UI ux Web Websiteaesthetic decor Ecommerce furniture shop site UI ux Web Websiteaesthetic decor Ecommerce furniture shop site UI ux Web Websiteaesthetic decor Ecommerce furniture shop site UI ux Web Websiteaesthetic decor Ecommerce furniture shop site UI ux Web Websiteaesthetic decor Ecommerce furniture shop site UI ux Web Websiteaesthetic decor Ecommerce furniture shop site UI ux Web Websiteaesthetic decor Ecommerce furniture shop site UI ux Web Websiteaesthetic decor Ecommerce furniture shop site UI ux Web Websiteaesthetic decor Ecommerce furniture shop site UI ux Web Websiteaesthetic decor Ecommerce furniture shop site UI ux Web Websiteaesthetic decor Ecommerce furniture shop site UI ux Web Websiteaesthetic decor Ecommerce furniture shop site UI ux Web Websiteaesthetic decor Ecommerce furniture shop site UI ux Web Websiteaesthetic decor Ecommerce furniture shop site UI ux Web Websiteaesthetic decor Ecommerce furniture shop site UI ux Web Website

For more information make sure to follow Kirill Kim on

Behance
Dribbble
Instagram