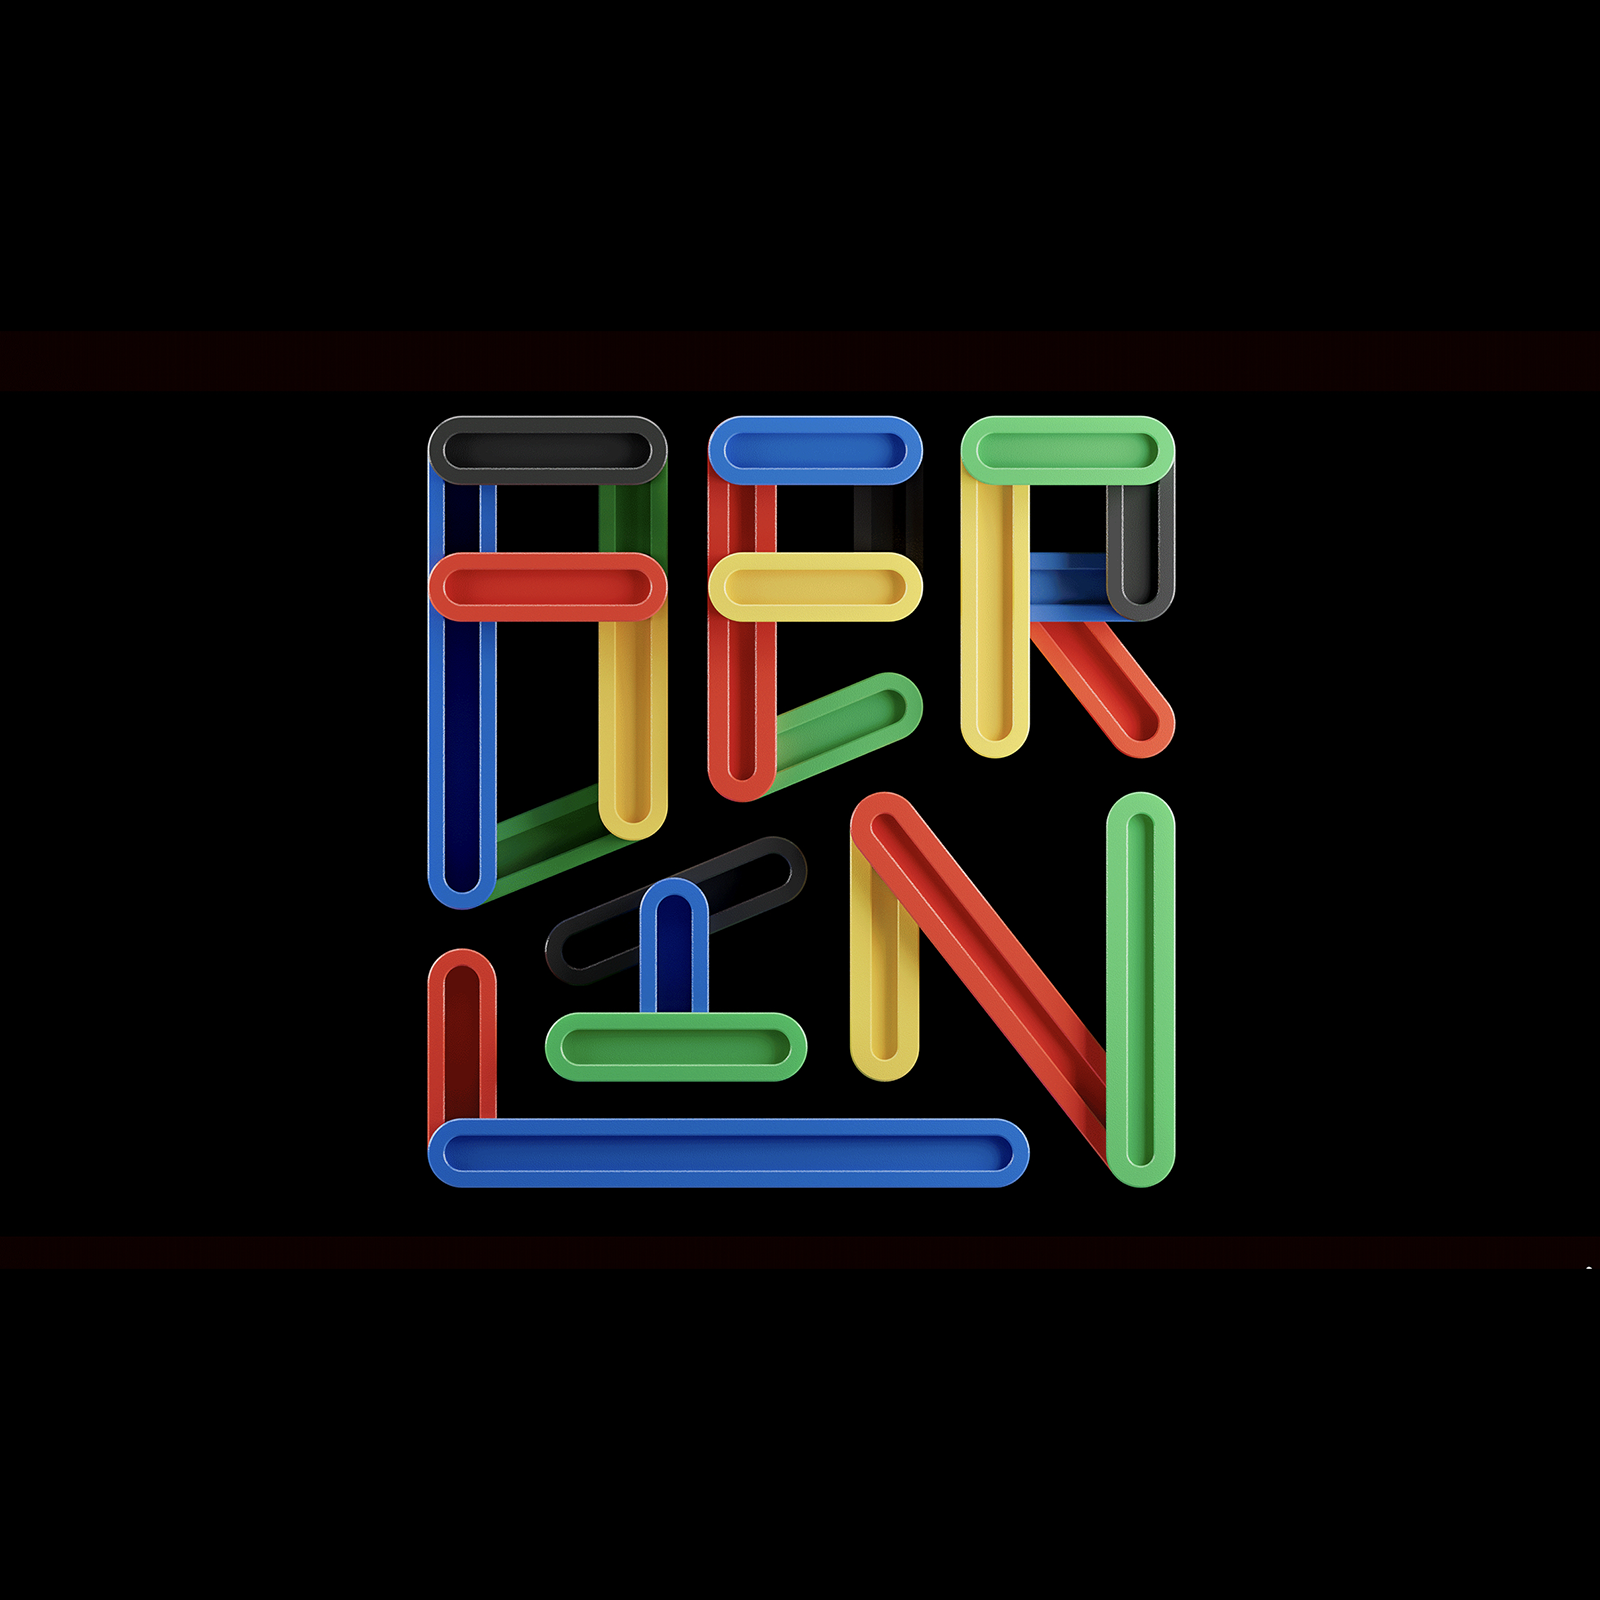
Foundation: the VFX secrets of Apple's epic sci-fi series

Original Source: http://feedproxy.google.com/~r/CreativeBloq/~3/3cvxnVejcrE/foundation

Discover how Foundation was brought to the screen with the help of stunning visual effects.

Smashing Podcast Episode 42 With Jeff Smith: What Is DevOps?

Original Source: https://smashingmagazine.com/2021/10/smashing-podcast-episode-42/

In this episode, we’re talking about DevOps. What is it, and is it a string to add to your web development bow? Drew McLellan talks to expert Jeff Smith to find out.

Show Notes

Jeff on Twitter
Jeff’s book Operations Anti-Patterns, DevOps Solutions
Attainable DevOps

Weekly Update

Bridging The Gap Between Designers And Developers written by Matthew Talebi
Useful React APIs For Building Flexible Components With TypeScript written by Gaurav Khanna
Smart CSS Solutions For Common UI Challenges written by Cosima Mielke
Tips And Tricks For Evaluating UX/UI Designers written by Nataliya Sambir
Solving CLS Issues In A Next.js-Powered E-Commerce Website written by Arijit Mondal

Transcript

Drew McLellan: He’s a DevOps practitioner that focuses on attainable levels of DevOps implementations, regardless of where you are in your journey. He’s director of production operations at digital advertising platform Centro, as well as being a public speaker, sharing his DevOps knowledge with audiences all around the globe. He’s the author of the book, Operations Anti-Patterns, DevOps Solutions for Manning Publishing, which shows how to implement DevOps techniques in the kind of imperfect environments most developers work in. So we know he’s an expert in DevOps, but did you know George Clooney regards him as the best paper airplane maker of a generation? My Smashing friends, please welcome Jeff Smith. Hi Jeff. How are you?

Jeff Smith: I’m smashing, Drew, how you doing?

Drew: I’m good. Thank you. That’s good to hear. So I wanted to talk to you today about the subject of DevOps, which is one of your main key area. Many of our listeners will be involved in web and app development, but maybe only have a loose familiarity with what happens on the operations side of things. I know those of us who might work in larger companies will have whole teams of colleagues who are doing ops. We’re just thankful that whatever it is they do, they’re doing it well. But we hear DevOps mentioned more and more, and it feels like one of those things that as developers, we should really understand. So Jeff, what is DevOps?

Jeff: So if you ask 20 people what DevOps is, you might get 20 different answers. So I will give you my take on it, all right, and know that if you’re at a conference and you mention this, you could get into a fist fight with someone. But for me, DevOps is really about that relationship between, and we focus on dev and ops, but really that inter team relationship and how we go about structuring our work and more importantly, structuring our goals and incentives to make sure that they’re aligned so that we are working towards a common goal. And a lot of the core ideas and concepts from DevOps come from the old world where dev and ops were always adversarial, where there was this constant conflict. And when you think about it, it’s because of the way those two teams are incentivized. One team is incentivized to push changes. Another team is incentivized to keep stability, which means fewer changes.

Jeff: When you do that, you create this inherent conflict and everything spills out from there. So DevOps is really about aligning those teams and goals so that we are working towards a common strategy, but then also adopting practices from both sides, so that dev understands more about ops and ops understands more about dev, as a way to gain and share empathy with each other so that we understand the perspective of where the other person is coming from.

Jeff: But then also to enhance our work. Because again, if I understand your perspective and take that into account in my work, it’s going to be a lot more beneficial for each of us. And there’s a lot that ops can learn from developers in terms of automation and how we go about approaching things so that they’re easily reproducible. So it’s this blending and skills. And what you’re seeing now is that this applies to different group combinations, so you’re hearing things like DevSecOps, DevSecFinOps, DevSecFinHROps. It’s just going to keep growing and growing and growing. So it’s really a lesson that we can stamp out across the organization.

Drew: So it’s taking some of the concepts that we understand as developers and spreading our ideas further into the organization, and at the same time learning what we can from the operations to try and move everyone forward.

Jeff: Absolutely, yes. And another aspect of ops, and you had mentioned it a little bit in the intro, is we think it’s just for these larger organizations with dedicated ops teams and things like that, but one thing to think about is ops is happening in your organization, regardless of the size. It’s just a matter of it’s you doing it, or if there’s a separate team doing it, but somehow you’re deploying code. Somehow you’ve got a server out there running somewhere. So ops exist somewhere in your organization, regardless of the size. The question is, who is doing it? And if it’s a single person or a single group then DevOps might even be even more particularly salient for you, as you need to understand the types of things that ops does.

Drew: As professional developers, how important do you think it is for us to have a good grasp of what DevOps is and what it means to implement?

Jeff: I think it’s super important, especially at this phase of the DevOps journey. And the reason I think it’s important is that one, I think we’re always more efficient, again, when we understand what our counterparts are doing. But the other thing is to be able to take operational concerns into account during your design development and implementation of any technology. So one thing that I’ve learned in my career is that even though I thought developers were masters of the universe and understood everything that had to do with computers, turns out that’s not actually the case. Turns out there’s a lot of things that they outsource to ops in terms of understanding, and sometimes that results in particular design choices or implementation choices that may not be optimal for a production deployment.

Jeff: They might be fine in development and testing and things like that, but once you get to production, it’s a little bit of a different ballgame. So not to say that they need to own that entire set of expertise, but they at least need to know enough to know what they don’t know. So they know when to engage ops early, because that’s a common pattern that we see is development makes a choice. I won’t even say make a choice because they’re not even cognizant that it’s a choice, but there’s something that happens that leads to a suboptimal decision for ops and development was completely unaware. So just having a bit more knowledge about ops, even if it’s just enough to say, maybe we should bring ops in on this to get their perspective before we go moving forward. That could save a lot of time and energy and stability, obviously, as it relates to whatever products you’re releasing.

Drew: I see so many parallels with the way that you’re talking about the relationship between dev and ops as we have between design and dev, where you’ve got designers working on maybe how an interface works and looks and having a good understanding of how that’s actually going to be built in the development role, and bringing developers in to consult can really improve the overall solution just by having that clear communication and an understanding of what each other does. Seems like it’s that same principle played out with DevOps, which is really, really good to hear.

Drew: When I think of the things I hear about DevOps, I hear terms like Kubernetes, Docker, Jenkins, CircleCI. I’ve been hearing about Kubernetes for years. I still don’t have any idea what it is, but from what you’re saying, it seems that DevOps isn’t just about … We’re not just talking about tools here, are we? But more about processes and ways of communicating on workflows, is that right?

Jeff: Absolutely. So my mantra for the last 20 years has always been people process tools. You get people to buy into the vision. From there, you define whatever your process is going to look like to achieve that vision. And then you bring on tools that are going to model whatever your process is. So I always put tools at the tail end of the DevOps conversation, mainly because if you don’t have that buy-in, then it doesn’t matter. I could come up with the greatest continuous deployment pipeline ever, but if people aren’t bought into the idea of shipping every change straight to production, it doesn’t matter, right? What good is the tool? So those tools are definitely part of the conversation, only because they’re a standardized way to meet some common goals that we’ve defined.

Jeff: But you’ve got to make sure that those goals that are being defined make sense for your organization. Maybe continuous deployment doesn’t make sense for you. Maybe you don’t want to ship every single change the minute it comes out. And there are plenty of companies and organizations and reasons why you wouldn’t want to do that. So maybe something like a continuous deployment pipeline doesn’t make sense for you. So while the tools are important, it’s more important to focus on what it is that’s going to deliver value for your organization, and then model and implement the tools that are necessary to achieve that.

Jeff: But don’t go online and find out what everyone’s doing and be like, oh, well, if we’re going to do DevOps, we got to switch to Docker and Kubernetes because that’s the tool chain. No, that’s not it. You may not need those things. Not everyone is Google. Not everyone is Netflix. Stop reading posts from Netflix and Google. Please just stop reading them. Because it gets people all excited and they’re like, well this is what we got to do. And it’s like, well, they’re solving very different problems than the problems that you have.

Drew: So if say I’m starting a new project, maybe I’m a startup business, creating software as a service product. I’ve got three developers, I’ve got an empty Git repo and I’ve got dreams of IPOs. To be all in on a DevOps approach to building this product, what are the names of the building blocks that I should have in place in terms of people and processes and where do I start?

Jeff: So in your specific example, the first place I would start with is punting on most of it as much as possible and using something like Heroku or something to that effect. Because you get so excited about all this AWS stuff, Docker stuff, and in reality, it’s so hard just to build a successful product. The idea that you are focusing on the DevOps portion of it is like, well I would say outsource as much of that stuff as possible until it actually becomes a pain point. But if you’re at that point where you’re saying okay, we’re ready to take this stuff in house and we’re ready to take it to the next level. I would say the first place to start is, where are your pain points? what are the things that are causing you problems?

Jeff: So for some people it’s as simple as automated testing. The idea that hey, we need to run tests every time someone makes a commit, because sometimes we’re shipping stuff that’s getting caught by unit tests that we’ve already written. So then maybe you start with continuous integration. Maybe your deployments are taking hours to complete and they’re very manual, then that’s where you focus and you say like, okay, what automation do we need to be able to make this a one button click affair? But I hate to prescribe a general, this is where you start, just because your particular situation and your particular pain points are going to be different. And the thing is, if it’s a pain point, it should be shouting at you. It should be absolutely shouting at you.

Jeff: It should be one of those things where someone says, oh, what sucks in your organization? And it should be like, oh, I know exactly what that is. So when you approach it from that perspective, I think the next steps become pretty apparent to you in terms of what in the DevOps toolbox you need to unpack and start working with. And then it becomes these minimal incremental changes that just keep coming and you notice that as you get new capabilities, your appetite for substandard stuff becomes very small. So you go from like, oh yeah, deploys take three hours and that’s okay. You put some effort into it and next thing you know, in three weeks, you’re like, man, I cannot believe the deployment is still taking 30 minutes. How do we get this down from 30 minutes? Your appetite becomes insatiable for improvement. So things just sort of spill out from there.

Drew: I’ve been reading your recent book and that highlights what you call the four pillars of DevOps. And none of them is tools, as mentioned, but there are these four main areas of focus, if you like, for DevOps. I noticed that the first one of those is culture, I was quite surprised by that, firstly, because I was expecting you to be talking about tools more and we now understand why, but when it comes to culture, it just seems like a strange thing to have at the beginning. There’s a foundation for a technical approach. How does the culture affect how successful DevOps implementation can be within an organization?

Drew: … how successful DevOps implementation can be within an organization.

Jeff: Culture is really the bedrock of everything when you think about it. And it’s important because culture, and we get into this a little bit deeper in the book, but culture really sets the stage for norms within the organization. Right. You’ve probably been at a company where, if you submitted a PR with no automated testing, that’s not a big thing. People accept it and move on.

Jeff: But then there’s other orgs where that is a cardinal sin. Right. Where if you’ve done that, it’s like, “Whoa, are you insane? What are you doing? There’s no test cases here.” Right. That’s culture though. That is culture that is enforcing that norm to say like, “This is just not what we do.”

Jeff: Anyone can write a document that says we will have automated test cases, but the culture of the organization is what enforces that mechanism amongst the people. That’s just one small example of why culture is so important. If you have an organization where the culture is a culture of fear, a culture of retribution. It’s like if you make a mistake, right, that is sacrilege. Right. That is tantamount to treason. Right.

Jeff: You create behaviors in that organization that are adverse to anything that could be risky or potentially fail. And that ends up leaving a lot of opportunity on the table. Whereas if you create a culture that embraces learning from failure, embraces this idea of psychological safety, where people can experiment. And if they’re wrong, they can figure out how to fail safely and try again. You get a culture of experimentation. You get an organization where people are open to new ideas.

Jeff: I think we’ve all been at those companies where it’s like, “Well, this is just the way it’s done. And no one changes that.” Right. You don’t want that because the world is constantly changing. That’s why we put culture front and center, because a lot of the behaviors within an organization exist because of the culture that exists.

Jeff: And the thing is, cultural actors can be for good or ill. Right. What’s ironic, and we talk about this in the book too, is it doesn’t take as many people as you think to change the organizational culture. Right. Because most people, there’s detractors, and then there’s supporters, and then there’s fence sitters when it comes to any sort of change. And most people are fence sitters. Right. It only takes a handful of supporters to really tip the scales. But in the same sense, it really only takes a handful of detractors to tip the scales either.

Jeff: It’s like, it doesn’t take much to change the culture for the better. And if you put that energy into it, even without being a senior leader, you can really influence the culture of your team, which then ends up influencing the culture of your department, which then ends up influencing the culture of the organization.

Jeff: You can make these cultural changes as an individual contributor, just by espousing these ideas and these behaviors loudly and saying, “These are the benefits that we’re getting out of this.” That’s why I think culture has to be front and fore because you got to get everyone bought into this idea and they have to understand that, as an organization, it’s going to be worthwhile and support it.

Drew: Yeah. It’s got to be a way of life, I guess.

Jeff: Exactly.

Drew: Yeah. I’m really interested in the area of automation because through my career, I’ve never seen some automation that’s been put in place that hasn’t been of benefit. Right. I mean, apart from the odd thing maybe where something’s automated and it goes wrong. Generally, when you take the time to sit down and automate something you’ve been doing manually, it always saves you time and it saves you headspace, and it’s just a weight off your shoulders.

Drew: In taking a DevOps approach, what sort of things would you look to automate within your workflows? And what gains would you expect to see from that over completing things manually?

Jeff: When it comes to automation, to your point, very seldom is there a time where automation hasn’t made life better. Right. The rub that people encounter is finding the time to build that automation. Right. And usually, at my current job, for us it’s actually the point of the request. Right. Because at some point you have to say, “I’m going to stop doing this manually and I’m going to automate it.”

Jeff: And it may have to be the time you get a request where you say, “You know what? This is going to take two weeks. I know we normally turn it around in a couple of hours, but it’s going to take two weeks because this is the request that gets automated.” In terms of identifying what you automate. At Central, I use the process where basically, I would sample all of the different types of requests that came in over a four week period, let’s say. And I would categorize them as planned work, unplanned work, value add work, toil work. Toil being work that’s not really useful, but for some reason, my organization has to do it.

Jeff: And then identifying those things that are like, “Okay, what is the low hanging fruit that we can just get rid of if we were to automate this? What can we do to just simplify this?” And some of the criteria was the risk of the process. Right. Automated database failovers are a little scary because you don’t do them that often. And infrastructure changes. Right. We say, “How often are we doing this thing?” If we’re doing it once a year, it may not be worth automating because there’s very little value in it. But if it’s one of those things that we’re getting two, three times a month, okay, let’s take a look at that. All right.

Jeff: Now, what are the things that we can do to speed this up? And the thing is, when we talk about automation, we instantly jumped to, “I’m going to click a button and this thing’s just going to be magically done.” Right. But there are so many different steps that you can do in automation if you feel queasy. Right. For example, let’s say you’ve got 10 steps with 10 different CLI commands that you would normally run. Your first step of automation could be as simple as, run that command, or at least show that command. Right. Say, “Hey, this is what I’m going to execute. Do you think it’s okay?” “Yes.” “Okay. This is the result I got. Is it okay for me to proceed?” “Yes.” “Okay. This is the result I got.” Right.

Jeff: That way you’ve still got a bit of control. You feel comfortable. And then after 20 executions, you realize you’re just hitting, yes, yes, yes, yes, yes, yes. You say, “All right. Let’s chain all these things together and just make it all one.” It’s not like you’ve got to jump into the deep end of, click it and forget it right off the rip. You can step into this until you feel comfortable.

Jeff: Those are the types of things that we did as part of our automation effort was simply, how do we speed up the turnaround time of this and reduce the level of effort on our part? It may not be 100% day one, but the goal is always to get to 100%. We’ll start with small chunks that we’ll automate parts of it that we feel comfortable with. Yes. We feel super confident that this is going to work. This part we’re a little dicey on, so maybe we’ll just get some human verification before we proceed.

Jeff: The other thing that we looked at in terms of we talk about automation, but is what value are we adding to a particular process? And this is particularly salient for ops. Because a lot of times ops serves as the middleman for a process. Then their involvement is nothing more than some access thing. Right. It’s like, well, ops has to do it because ops is the only person that has access.

Jeff: Well, it’s like, well, how do we outsource that access so that people can do it? Because the reality is, it’s not that we’re worried about developers having production access. Right. We’re worried about developers having unfettered production access. And that’s really a safety thing. Right. It’s like if my toolbox has only sharp knives, I’m going to be very careful about who I give that out to. But if I can mix up the toolbox with a spoon and a hammer so that people can choose the right tool for the job, then it’s a lot easier to loan that out.

Jeff: For example, we had a process where people needed to run ad hoc Ruby scripts in production, for whatever reason. Right. Need to clean up data, need to correct some bad record, whatever. And that would always come through my team. And it’s like, well, we’re not adding any value to this because I can’t approve this ticket. Right. I have no idea. You wrote the software, so what good is it me sitting over your shoulder and going, “Well, I think that’s safe”? Right. I didn’t add any value to typing it in because I’m just typing exactly what you told me to type. Right.

Jeff: And worst case, and at the end of it, I’m really just a roadblock for you because you’re submitting a ticket, then you’re waiting for me to get back from lunch. I’m back from lunch, but I’ve got these other things to work on. We said, “How do we automate this so that we can put this in the hands of developers while at the same time addressing any of these audit concerns that we might have?”

Jeff: We put it in a JIRA workflow, where we had a bot that would automate executing commands that were specified in the JIRA ticket. And then we could specify in the JIRA ticket that it required approval from one of several senior engineers. Right.

Jeff: It makes more sense that an engineer is approving another engineer’s work because they have the context. Right. They don’t have to sit around waiting for ops. The audit piece is answered because we’ve got a clear workflow that’s been defined in JIRA that is being documented as someone approves, as someone requested. And we have automation that is pulling that command and executing that command verbatim in the terminal. Right.

Jeff: You don’t have to worry about me mistyping it. You don’t have to worry about me grabbing the wrong ticket. That increased the turnaround time for those tickets, something like tenfold. Right. Developers are unblocked. My team’s not tied up doing this. And all it really took was a week or two week investment to actually develop the automation and the permissioning necessary to get them access for it.

Jeff: Now we’re completely removed from that. And development is actually able to outsource some of that functionality to lower parts of the organization. They’ve pushed it to customer care. It’s like now when customer care knows that this record needs to be updated for whatever, they don’t need development. They can submit their standard script that we’ve approved for this functionality. And they can run it through the exact same workflow that development does. It’s really a boon all around.

Jeff: And then it allows us to push work lower and lower throughout the organization. Because as we do that, the work becomes cheaper and cheaper because I could have a fancy, expensive developer running this. Right. Or I can have a customer care person who’s working directly with the customer, run it themselves while they’re on the phone with a customer correcting an issue.

Jeff: Automation I think, is key to any organization. And the final point I’ll say on that is, it also allows you to export expertise. Right. Now, I may be the only person that knows how to do this if I needed to do a bunch of commands on the command line. But if I put this in automation, I can give that to anyone. And people know what the end result is, but they don’t need to know all the intermediate steps. I have increased my value tenfold by pushing it out to the organization and taking my expertise and codifying it into something that’s exportable.

Drew: You talked about automating tasks that are occurring frequently. Is there an argument for also automating tasks that happen so infrequently that it takes a developer quite a long time to get back up to speed with how it should work? Because everybody’s forgotten. It’s been so long. It’s been a year, maybe nobody has done it before. Is there an argument for automating those sorts of things too?

Jeff: That’s a tough balancing act. Right. And I always say take it by a case by case basis. And the reason I say that is, one of the mantras in DevOps is if something painful, do it more often. Right. Because the more often you do it, the more muscle memory it becomes and you get to work out and iron out those kinks.

Jeff: The issue that we see with automating very infrequent tasks is that the landscape of the environment tends to change in between executions of that automation. Right. What ends up happening is your code makes particular assumptions about the environment and those assumptions are no longer valid. So the automation ends up breaking anyways.

Drew: And then you’ve got two problems.

Jeff: Right. Right. Exactly. Exactly. And you’re like, “Did I type it wrong? Or is this? No, this thing is actually broke.” So-

Jeff: Typing wrong or is this no, this thing is actually broke. So when it comes to automating infrequent tasks, we really take it by a case by case basis to understand, well, what’s the risk if this doesn’t work, right. If we get it wrong, are we in a bad state or is it just that we haven’t finished this task? So if you can make sure that this would fail gracefully and not have a negative impact, then it’s worth giving a shot in automating it. Because at the very least, then you have a framework of understanding of what should be going on because at the very least, someone’s going to be able to read the code and understand, all right, this is what we were doing. And I don’t understand why this doesn’t work anymore, but I have a clear understanding of what was supposed to happen at least based at design time when this was written.

Jeff: But if you’re ever in a situation where failure could lead to data changes or anything like that, I usually err on the side of caution and keep it manual only because if I have an automation script, if I find some confluence document that’s three years old that says run this script, I tend to have a hundred percent confidence in that script and I execute it. Right. Whereas if it’s a series of manual steps that was documented four years ago, I’m going to be like, I need to do some verification here. Right? Let me step through this a little bit and talk to a few people. And sometimes when we design processes, it’s worthwhile to force that thought process, right? And you have to think about the human component and how they’re going to behave. And sometimes it’s worth making the process a little more cumbersome to force people to think should I be doing this now?

Drew: Are there other ways of identifying what should be automated through sort of monitoring your systems and measuring things? I mean, I think about DevOps and I think about dashboards as one of the things, nice graphs. And I’m sure there’s a lot more to those dashboards than just looking pretty, but it’s always nice to have pretty looking dashboards. Are there ways of measuring what a system’s up to, to help you to make those sorts of decisions?

Jeff: Absolutely. And that sort of segues into the metrics portion of cams, right, is what are the things that we are tracking in our systems to know that they are operating efficiently? And one of the common sort of pitfalls of metrics is we look for errors instead of verifying success. And those are two very different practices, right? So something could flow through the system and not necessarily error out, but not necessarily go through the entire process the way it should. So if we drop a message on a message queue, there should be a corresponding metric that says, “And this message was retrieved and processed,” right? If not, right, you’re going to quickly have an imbalance and the system doesn’t work the way it should. I think we can use metrics as a way to also understand different things that should be automated as we get into those bad states.

Jeff: Right? Because a lot of times it’s a very simple step that needs to be taken to clean things up, right? For people that have been ops for a while, right, the disc space alert, everyone knows about that. Oh, we’re filled up with disc. Oh, we forgot it’s month end and billing ran and billing always fills up the logs. And then VAR log is consuming all the disc space, so we need to run a log rotate. Right? You could get woken up at three in the morning for that, if that’s sort of your preference. But if we sort of know that that’s the behavior, our metrics should be able to give us a clue to that. And we can simply automate the log rotate command, right? Oh, we’ve reached this threshold, execute the log rotate command. Let’s see if the alert clears. If it does, continue on with life. If it doesn’t, then maybe we wake someone up, right.

Jeff: You’re seeing this a lot more with infrastructure automation as well, right, where it’s like, “Hey, are our requests per second are reaching our theoretical maximum. Maybe we need to scale the cluster. Maybe we need to add three or four nodes to the load balancer pool.” And we can do that without necessarily requiring someone to intervene. We can just look at those metrics and take that action and then contract that infrastructure once it goes below a particular threshold, but you got to have those metrics and you got to have those hooks into your monitoring environment to be able to do that. And that’s where the entire metrics portion of the conversation comes in.

Jeff: Plus it’s also good to be able to share that information with other people because once you have data, you can start talking about things in a shared reality, right, because busy is a generic term, but 5,200 requests per second is something much more concrete that we can all reason about. And I think so often when we’re having conversations about capacity or anything, we use these hand-wavy terms, when instead we could be looking at a dashboard and giving very specific values and making sure that everyone has access to those dashboards, that they’re not hidden behind some ops wall that only we have access to for some unknown reason.

Drew: So while sort of monitoring and using metrics as a decision-making tool for the businesses is one aspect of it, it sounds like the primary aspect is having the system monitor itself, perhaps, and to respond maybe with some of these automations as the system as a whole gives itself feedback on onto what’s happening.

Jeff: Absolutely. Feedback loops are a key part of any real system design, right, and understanding the state of the system at any one time. So while it’s easy in the world where everything is working fine, the minute something goes bad, those sorts of dashboards and metrics are invaluable to have, and you’ll quickly be able to identify things that you have not instrumented appropriately. Right. So one of the things that we always talk about in incident management is what questions did you have for the system that couldn’t be answered, right. So what is it, or you’re like, “Oh man, if we only knew how many queries per second were going on right now.” Right.

Jeff: Well, okay. How do we get that for next time? How do we make sure that that’s radiated somewhere? And a lot of times it’s hard when you’re thinking green field to sit down and think of all the data that you might want at any one time. But when you have an incident, it becomes readily apparent what data you wish you had. So it’s important to sort of leverage those incidents and failures and get a better understanding of information that’s missing so that you can improve your incident management process and your metrics and dashboarding.

Drew: One of the problems we sometimes face in development is that teammate members, individual team members hold a lot of knowledge about how a system works and if they leave the company or if they’re out sick or on vacation, that knowledge isn’t accessible to the rest of the team. It seems like the sort of DevOps approach to things is good at capturing a lot of that operational knowledge and building it into systems. So that sort of scenario where an individual has got all the information in their head that doesn’t happen so much. Is that a fair assessment?

Jeff: It is. I think we’ve probably, I think as an industry we might have overstated its efficacy. And the only reason I say that is when our systems are getting so complicated, right? Gone are the days where someone has the entire system in their head and can understand it from beginning to end. Typically, there’s two insidious parts of it. One, people typically focus on one specific area and someone doesn’t have the whole picture, but what’s even more insidious is that we think we understand how the system works. Right. And it’s not until an incident happens that the mental model that we have of the system and the reality of the system come into conflict. And we realize that there’s a divergence, right? So I think it’s important that we continuously share knowledge in whatever form is efficient for folks, whether it be lunch and learns, documentation, I don’t know, presentations, anything like that to sort of share and radiate that knowledge.

Jeff: But we also have to prepare and we have to prepare and define a reality where people may not completely understand how the system works. Right. And the reason I think it’s important that we acknowledge that is because you can make a lot of bad decisions thinking you know how the system behaves and being 100% wrong. Right. So having the wherewithal to understand, okay, we think this is how the system works. We should take an extra second to verify that somehow. Right. I think that’s super important in these complicated environments in these sprawling complex microservice environments. Whereas it can be very, it’s easy to be cavalier if you think, oh yeah, this is definitely how it works. And I’m going to go ahead and shut the service down because everything’s going to be fine. And then everything topples over. So just even being aware of the idea that, you know what, we may not know a hundred percent how this thing works.

Jeff: So let’s take that into account with every decision that we make. I think that’s key. And I think it’s important for management to understand the reality of that as well because for management, it’s easy for us to sit down and say, “Why didn’t we know exactly how this thing was going to fail?” And it’s like, because it’s complicated, right, because there’s 500 touch points, right, where these things are interacting. And if you change one of them, it changes the entire communication pattern. So it’s hard and it’s not getting any easier because we’re getting excited about things like microservices. We’re getting excited about things like Kubernetes. We’re giving people more autonomy and these are just creating more and more complicated interfaces into these systems that we’re managing. And it’s becoming harder and harder for anyone to truly understand them in their entirety.

Drew: We’ve talked a lot about a professional context, big organizations and small organizations too. But I know many of us work on smaller side projects or maybe we volunteer on projects and maybe you’re helping out someone in the community or a church or those sorts of things. Can a DevOps approach benefit those smaller projects or is it just really best left to big organizations to implement?

Jeff: I think DevOps can absolutely benefit those smaller projects. And specifically, because I think sort of some of the benefits that we’ve talked about get amplified in those smaller projects. Right? So exporting of expertise with automation is a big one, right? If I am… Take your church example, I think is a great one, right? If I can build a bunch of automated tests suites to verify that a change to some HTML doesn’t break the entire website, right, I can export that expertise so that I can give it to a content creator who has no technical knowledge whatsoever. Right. They’re a theologian or whatever, and they just want to update a new Bible verse or something, right. But I can export that expertise so that they know that I know when I make this content change, I’m supposed to run this build button.

Jeff: And if it’s green, then I’m okay. And if it’s red, then I know I screwed something up. Right. So you could be doing any manner of testing in there that is extremely complicated. Right. It might even be something as simple as like, hey, there’s a new version of this plugin. And when you deploy, it’s going to break this thing. Right. So it has nothing to do with the content, but it’s at least a red mark for this content creator to say “Oh, something bad happened. I shouldn’t continue. Right. Let me get Drew on the phone and see what’s going on.” Right. And Drew can say, “Oh right. This plugin is upgraded, but it’s not compatible with our current version of WordPress or whatever.” Right. So that’s the sort of value that we can add with some of these DevOps practices, even in a small context, I would say specifically around automation and specifically around some of the cultural aspects too.

Jeff: Right? So I’ve been impressed with the number of organizations that are not technical that are using get to make changes to everything. Right. And they don’t really know what they’re doing. They just know, well, this is what we do. This is the culture. And I add this really detailed commit message here. And then I push it. They are no better than us developers. They know three get commands, but it’s the ones they use over and over and over again. But it’s been embedded culturally and that’s how things are done. So everyone sort of rallies around that and the people that are technical can take that pattern.

Jeff: … around that and the people that are technical can take that pattern and leverage it into more beneficial things that might even be behind the scenes that they don’t necessarily see. So I think there’s some value, definitely. It’s a matter of how deep you want to go, even with the operations piece, right? Like being able to recreate a WordPress environment locally very easily, with something like Docker. They may not understand the technology or anything, but if they run Docker Compose Up or whatever, and suddenly they’re working on their local environment, that’s hugely beneficial for them and they don’t really need to understand all the stuff behind it. In that case, it’s worthwhile, because again, you’re exporting that expertise.

Drew: We mentioned right at the beginning, sort of putting off as much sort of DevOps as possible. You mentioned using tools like Heroku. And I guess that sort of approach would really apply here on getting started with, with a small project. What sort things can platforms like Heroku offer? I mean, obviously, I know you’re not a Heroku expert or representative or anything, but those sorts of platforms, what sort of tools are they offering that would help in this context?

Jeff: So for one, they’re basically taking that operational context for you and they’re really boiling it down into a handful of knobs and levers, right? So I think what it offers is one, it offers a very clear set of what we call the yellow brick road path, where it’s like, “If you go this route, all of this stuff is going to be handled for you and it’s going to make your life easier. If you want to go another route, you can, but then you got to solve for all this stuff yourself.” So following the yellow brick road route helps because one, they’re probably identifying a bunch of things that you hadn’t even thought of. So if you’re using their database container or technology, guess what? You’re going to get a bunch of their metrics for free. You’re going to get a lot of their alerting for free. You didn’t do anything. You didn’t think anything. It’s just when you need it, it’s there. And it’s like, “Oh wow, that’s super are helpful.”

Jeff: Two, when it comes to performance sizing and flexibility, this becomes very easy to sort of manage because the goal is, you’re a startup that’s going to become wildly successful. You’re going to have hockey stick growth. And the last thing you necessarily really want to be doing is figuring out how to optimize your code for performance, while at the same time delivering new features. So maybe you spend your way out of it. You say, “Well, we’re going to go up to the next tier. I could optimize my query code, but it’s much more efficient for me to be spending time building this next feature that’s going to bring in this new batch of users, so let’s just go up to the next tier,” and you click button and you move on.

Jeff: So being able to sort of spend your way out of certain problems, I think it’s hugely beneficial because tech debt gets a bad rap, but tech debt is no different than any debt. It’s the trade off of acquiring something now and dealing with the pain later. And that’s a strategic decision that you have to make in every organization. So unchecked tech debt is bad, right? But tech debt generally, I think, is a business choice and Heroku and platforms like that enable you to make that choice when it comes to infrastructure and performance.

Drew: You’ve written a book, Operations, Anti-Patterns, DevOps Solutions, for Manning. I can tell it’s packed with years of hard-earned experience. The knowledge sort of just leaps out from the page. And I can tell it’s been a real labor of love. It’s packed full of information. Who’s your sort of intended audience for that book? Is it mostly those who are already working in DevOps, or is it got a broader-

Jeff: It’s got a broader… So one of the motivations for the book was that there were plenty of books for people that we’re already doing DevOps. You know what I mean? So we were kind of talking to ourselves and high-fiving each other, like, “Yeah, we’re so advanced. Awesome.” But what I really wanted to write the book for were people that were sort of stuck in these organizations. I don’t want to use the term stuck. That’s unfair, but are in these organizations that maybe aren’t adopting DevOps practices or aren’t at the forefront of technology, or aren’t necessarily cavalier about blowing up the way they do work today, and changing things.

Jeff: I wanted to write it to them, mainly individual contributors and middle managers to say like, “You don’t need to be a CTO to be able to make these sorts of incremental changes, and you don’t have to have this whole sale revolution to be able to gain some of the benefits of DevOps.” So it was really sort of a love letter to them to say like, “Hey, you can do this in pieces. You can do this yourself. And there’s all of these things that you may not think are related to DevOps because you’re thinking of it as tools and Kubernetes.” Not every organization… If you were for this New York State, like the state government, you’re not going to just come in and implement Kubernetes overnight. Right? But you can implement how teams talk to each other, how they work together, how we understand each other’s problems, and how we can address those problems through automation. Those are things that are within your sphere of influence that can improve your day to day life.

Jeff: So it was really a letter to those folks, but I think there’s enough data in there and enough information for people that are in a DevOps organization to sort of glean from and say like, “Hey, this is still useful for us.” And a lot of people, I think identify quickly by reading the book, that they’re not in a DevOps organization, they just have out a job title change. And that happens quite a bit. So they say like, “Hey, we’re DevOps engineers now, but we’re not doing these sorts of practices that are talked about in this book and how do we get there?”

Drew: So it sounds like your book is one of them, but are there other resources that people looking to get started with DevOps could turn to? Are there good places to learn this stuff?

Jeff: Yeah. I think DevOps For Dummies by Emily Freeman is a great place to start. It really does a great job of sorting of laying out some of the core concepts and ideas, and what it is we’re striving for. So that would be a good place to start, just to sort of get a lay of the land. I think the Phoenix Project is obviously another great source by Gene Kim. And that is great, that sort of sets the stage for the types of issues that not being in a DevOps environment can create. And it does a great job of sort of highlighting these patterns and personalities that occur that we see in all types of organizations over and over again. I think it does a great job of sort of highlighting those. And if you read that book, I think you’re going to end up screaming at the pages saying, “Yes, yes. This. This.” So, that’s another great place.

Jeff: And then from there, diving into any of the DevOps handbook. I’m going to kick myself for saying this, but the Google SRE Handbook was another great place to look. Understand that you’re not Google, so don’t feel like you’ve got to implement everything, but I think a lot of their ideas and strategies are sound for any organization, and are great places where you can sort of take things and say like, “Okay, we’re, we’re going to make our operations environment a little more efficient.” And that’s, I think going to be particularly salient for developers that are playing an ops role, because it does focus on a lot of the sort of programmatic approach to solving some of these problems.

Drew: So, I’ve been learning all about DevOps. What have you been learning about lately, Jeff?

Jeff: Kubernetes, man. Yeah. Kubernetes has been a real sort of source of reading and knowledge for us. So we’re trying to implement that at Centro currently, as a means to sort of further empower developers. We want to take things a step further from where we’re at. We’ve got a lot of automation in place, but right now, when it comes to onboarding a new service, my team is still fairly heavily involved with that, depending on the nature of the service. And we don’t want to be in that line of work. We want developers to be able to take an idea from concept to code to deployment, and do that where the operational expertise is codified within the system. So, as you move through the system, the system is guiding you. So we think Kubernetes is a tool that will help us do that.

Jeff: It’s just incredibly complicated. And it’s a big piece to sort of bite off. So figuring out what do deployments look like? How do we leverage these operators inside Kubernetes? What does CICD look like in this new world? So there’s been a lot of reading, but in this field, you’re constantly learning, right? It doesn’t matter how long you’ve been in it, how long you’ve been doing it, you’re an idiot in some aspect of this field somewhere. So, it’s just something you kind of adapt to

Drew: Well, hats off as I say, even after all these years, although I sort of understand where it sits in the stack, I still really don’t have a clue what Kubernetes is doing.

Jeff: I feel similar sometimes. It feels like it’s doing a little bit of everything, right? It is the DNS of the 21st century.

Drew: If you, the listener, would like to hear more from Jeff, you can find him on Twitter, where he’s at dark and nerdy, and find his book and links to past presentations and blog posts at his site, attainabledevops.com. Thanks for joining us today, Jeff. Did you have any parting words?

Jeff: Just keep learning, just get out there, keep learning and talk to your fellow peers. Talk, talk, talk. The more you can talk to the people that you work with, the better understanding, the better empathy you’ll generate for them, and if there’s someone in particular in the organization you hate, make sure you talk to them first.

How to Control Windows Only With Keyboard

Original Source: https://www.hongkiat.com/blog/controlling-windows-with-shortcuts/

No need to worry if you have lost access to your PC mouse, you can still control your PC just with the keyboard. Your PC keyboard offers all the keys and shortcuts to perform almost all of the…

Visit hongkiat.com for full content.

The 20 best business card designs

Original Source: http://feedproxy.google.com/~r/CreativeBloq/~3/8h0FQAOCAe4/business-card-designs-5132829

Get creative with business card design to stand out from the crowd.

18 Creative Custom Cursors

Original Source: http://feedproxy.google.com/~r/1stwebdesigner/~3/H7NlEJUyiho/

A cursor/pointer is a position indicator that helps the user enter text, numbers, or symbols. The default cursor is a symbol that is easily recognized by tons of people around the world. Without the cursor, user integration would not be as easy as it is now. Cursors have saved many people the trouble of memorizing keyboard shortcuts required to navigate a page.

Creative custom cursors are basically unique customized pointers. Throughout the years, the cursor has been modified to assume different shapes and characters. These customized pointers can boost a site’s interaction and traffic. Many websites have adopted custom cursors because they help them stand out and attract more customers.

Your Designer Toolbox
Unlimited Downloads: 500,000+ Web Templates, Icon Sets, Themes & Design Assets


DOWNLOAD NOW


Benefits of Creative Custom Cursors

Though they’re not going to make a massive difference in how your website is received by visitors, custom cursors can make an impact, including:

Help maintain the theme of the website.
Can attract more customers.
Build website aesthetics.
Are easy to make.

How to Choose a Custom Cursor

Here are some factors to consider when looking for a custom cursor for your next website project.

Suitability

Getting a custom cursor that suits your website can offer great user interaction. If your site targets young users, having a quirky cursor can enhance engagement with your website. Whereas if your target market is older, having a custom cursor might not get you the same results.

Formal websites should use default cursors and stay away from custom ones. This helps to maintain the site’s formal tone.

Functionality

Some custom cursors don’t work well with older browsers. If a user opens a website using an old browser that doesn’t support custom cursors, the pointer will assume its default design.

This means features that work with the custom cursor will not be as effective when using the default cursor, which in turn affects user experience. This is something to heavily consider.

Speed

Your site’s loading speed is an important factor if you want to rank well on Google and attract more visitors. Minor site upgrades such as a custom cursor will not typically affect your site’s speed.

18 Examples of Creative Custom Cursors

And now, the part you’ve been waiting for: on to the list of creative and eye-catching custom cursors worthy of your consideration.

1. Custom Cursor by Simon Busborg

See the Pen
custom cursor by Simon Busborg (@simonbusborg)
on CodePen.light

2. Custom Cursor Navigation Effect by Mark Mead

See the Pen
Custom Cursor Navigation Effect by Mark Mead (@markmead)
on CodePen.light

3. Custom Cursor Inverting Color by Uwe Chardon

See the Pen
custom cursor inverting color by Uwe Chardon (@uchardon)
on CodePen.light

4. Custom Cursor by Ivan Di Stasio

See the Pen
Custom cursor by Ivan Di Stasio (@IvanDiStasio)
on CodePen.light

5. Custom Cursor With Mixed-Blend-Mode by Victor Hripko

See the Pen
Custom cursor with mix-blend-mode by Victor Hripko (@victorhripko)
on CodePen.light

6. Custom Cursor Effect by Ivan Grozdic

See the Pen
Custom Cursor Effect by Ivan Grozdic (@ig_design)
on CodePen.light

7. Custom Cursor by Tim Jackleus

See the Pen
Custom cursor by Tim Jackleus (@timjackleus)
on CodePen.light

8. Custom Cursor With CSS Variables by Tobias Reich

See the Pen
Custom cursor with CSS variables by Tobias Reich (@electerious)
on CodePen.light

9. Circle Cursors by Chris Heuberger

See the Pen
Circle Cursors by Chris Heuberger (@ChrisBup)
on CodePen.light

10. Magnetic Hover Interaction by Sikriti Dakua

See the Pen
Magnetic Hover Interaction by Sikriti Dakua (@dev_loop)
on CodePen.light

11. Interactive Custom Cursor by hb nguyen

See the Pen
Interactive Custom Cursor by hb nguyen (@hbthen3rd)
on CodePen.light

12. Custom Cursor With GSAP TweenMax and CSS by Karlo Videk

See the Pen
Custom cursor with GSAP TweenMax and CSS by Karlo Videk (@karlovidek)
on CodePen.light

13. Custom Cursor- Circle Follows The Mouse Pointer by Cojea Gabriel

See the Pen
Custom Cursor – Circle Follows The Mouse Pointer by Cojea Gabriel (@gabrielcojea)
on CodePen.light

14. Creating Custom Cursors by designcourse

See the Pen
Creating Custom Cursors by designcourse (@designcourse)
on CodePen.light

15. Circle Cursor With Blend Mode by Clement Girault

See the Pen
Circle cursor with blend mode by Clement Girault (@clementGir)
on CodePen.light

16. Custom Dot Cursor by Kyle Brumm

See the Pen
Custom Dot Cursor by Kyle Brumm (@kjbrum)
on CodePen.light

17. Custom Cursor Using Data-Uri by Sten Hougaard

See the Pen
Custom cursors using data-uri by Sten Hougaard (@netsi1964)
on CodePen.light

18. Mutant Cursor by Rafael Gonzalez

See the Pen
Mutant Cursor by Rafael González (@rgg)
on CodePen.light

Conclusion

A unique custom cursor is a great way to make sure that users don’t — if you’ll pardon the pun — lose the point. Websites that use creative custom cursors that fit their aesthetic or theme create a more branded look and that is synonymous with increased traffic.

If you’re looking for the best custom cursor for your website, we hope this article will help to that end. Good luck to you!


countrylayer – The Must-Have API for Any Website

Original Source: http://feedproxy.google.com/~r/1stwebdesigner/~3/PSlPUZl9wug/

If you have ever worked on a project that deals with geographic information of any type – which, let’s face it, most websites and applications do these days – then you have likely had to come up with a solution for providing or accessing information about one if not more countries. Whether it’s population, location, currencies, languages, or any other information about a country you need, it can be challenging to find a way to dynamically bring those details into your project.

There are tools available to help you solve this problem, but all too often there are obstacles such as programming language, ease of use, complexity of integration, pricing, and other hurdles that you may encounter.

Until now.

countrylayer is a JSON API that is compatible with all programming languages, provides extensive and accurate data from almost 200 different countries, is simple and easy to integrate, and is affordable to use – starting at free!

In this article, we’re taking a look at what countrylayer has to offer and how you can start using it in your projects.

What Is countrylayer?

countrylayer is a service brought to you by apilayer that provides common information about countries via a REST API. With this API, users will be able to get detailed information about countries in the world. Because they can filter by name of a country, language, code, currency, the capital city, calling code, region, or regional bloc.

Using your project’s API key, you can access country data that is returned in a standard JSON format, which can then be easily parsed in any programming language.

Here is an example of an API response. Check out all of the information it provides:

[
{
"name": "Germany",
"topLevelDomain": [
".de"
],
"alpha2Code": "DE",
"alpha3Code": "DEU",
"callingCodes": [
"49"
],
"capital": "Berlin",
"altSpellings": [
"DE",
"Federal Republic of Germany",
"Bundesrepublik Deutschland"
],
"region": "Europe",
"subregion": "Western Europe",
"population": 81770900,
"latlng": [
51,
9
],
"demonym": "German",
"area": 357114,
"gini": 28.3,
"timezones": [
"UTC+01:00"
],
"borders": [
"AUT",
"BEL",
"CZE",
"DNK",
"FRA",
"LUX",
"NLD",
"POL",
"CHE"
],
"nativeName": "Deutschland",
"numericCode": "276",
"currencies": [
{
"code": "EUR",
"name": "Euro",
"symbol": "€"
}
],
"languages": [
{
"iso639_1": "de",
"iso639_2": "deu",
"name": "German",
"nativeName": "Deutsch"
}
],
"translations": {
"br": "Alemanha",
"de": "Deutschland",
"es": "Alemania",
"fa": "آلمان",
"fr": "Allemagne",
"hr": "Njemačka",
"it": "Germania",
"ja": "ドイツ",
"nl": "Duitsland",
"pt": "Alemanha"
},
"flag": "https://restcountries.eu/data/deu.svg",
"regionalBlocs": [
{
"acronym": "EU",
"name": "European Union"
}
],
"cioc": "GER"
},
{…}
]

Available API Endpoints

The countrylayer API comes with a number of endpoints, each providing different functionality. You can customize the request output data to get only the fields you need. This causes the request to execute faster, and reduces the response size.

Endpoint for all countries

GET https://api.countrylayer.com/v2/all
? access_key = API_KEY

Endpoint for country search by name

GET https://api.countrylayer.com/v2/name/{name}
? access_key = API_KEY & FullText=

Endpoint for country search by capital

GET https://api.countrylayer.com/v2/capital/{capital}
? access_key = API_KEY

Endpoint for country search by language

GET https://api.countrylayer.com/v2/language/{language}
? access_key = API_KEY

Endpoint for country search by currency

GET https://api.countrylayer.com/v2/currency/{currency}
? access_key = API_KEY

Endpoint for country search by region

GET https://api.countrylayer.com/v2/region/{region}
? access_key = API_KEY

Endpoint for country search by region block

GET https://api.countrylayer.com/v2/regionalbloc/{regionalbloc}
? access_key = API_KEY

Endpoint for country search by calling code

GET https://api.countrylayer.com/v2/callingcode/{callingcode}
? access_key = API_KEY

Endpoint for country search by alpha code

GET https://api.countrylayer.com/v2/alpha/{code}
? access_key = API_KEY

As you can see, these endpoints can be very useful for you to be able to access and utilize the country information needed for your project in a variety of manners, and helps to streamline and speed up your requests for the fastest execution possible.

You can learn more about how to integrate the countrylayer API into your projects by reading their extensive (yet surprisingly succinct and simple) documentation.

How Much Does Using The countrylayer API Cost?

You can get started for free with 100 searches per month and a rate limit of 1 per second. From there, pricing goes up from $9.99 per month for up to 5,000 searches, all the way to $149.99 per month for 250,000 searches. Enterprise pricing is also available on request. It’s important to note that SSL encryption is only available with paid subscription plans.

How Will You Use The countrylayer API In Your Projects?

As you can see, countrylayer is a relatively simple yet robust solution that can be used in a multitude of ways in your current and future projects. It is easy to integrate, provides accurate and extensive data, and is very affordable. We encourage you to give it a try – especially since you can get started for free! When you do, be sure to let us know what you think by reaching out on any of our social channels.


UEFA reveal vibrant new logo for 2024 Euros, and it comes with an easter egg

Original Source: http://feedproxy.google.com/~r/CreativeBloq/~3/WwXtzJFEwMo/euro-2024-logo

Will it be coming home?

60 High Quality Free Photoshop Patterns and Textures

Original Source: http://feedproxy.google.com/~r/Designrfix/~3/x3ykN6lFQ04/free-photoshop-patterns

Welcome to day 6 of freebie week on Designrfix. Today we have assembled a stunning collection of high quality free Photoshop patterns and textures. So if you are in search of some really cool patterns and textures for your latest project, this post is not to be missed. Feel free to download and use them…

The post 60 High Quality Free Photoshop Patterns and Textures appeared first on .

Building A Static-First MadLib Generator With Portable Text And Netlify On-Demand Builder Functions

Original Source: https://smashingmagazine.com/2021/10/static-first-madlib-generator-portable-text-netlify-builder-functions/

Creating an interactive experience with fiction can be a chore with traditional content management tools. Writing the prose, creating the forms, combining them in the frontend — these are often the domain of three different people.

Let’s make it the domain of just one content creator in which the user will fill out a form before reading the story — creating odd and often funny stories. This type of experience was popularized as “Madlibs.”

Generate your own madlibs in the demo;
Look through the final code on Github;
Get a fully-built version set up in your accounts.

How The Generator Will Work

An editor can create a series of madlibs that an end-user can fill out and save a copy with their unique answers. The editor will be working with the Sanity Studio inside a rich-text field that we’ll craft to provide additional information for our front-end to build out forms.

For the editor, it will feel like writing standard paragraph content. They’ll be able to write like they’re used to writing. They can then create specific blocks inside their content that will specify a part of speech and display text.

The front-end of the application can then use that data to both display the text and build a form. We’ll use 11ty to create the frontend with some small templates. The form that is built will display to the user before they see the text. They’ll know what type of speech and general context for the phrases and words they can enter.

After the form is submitted, they’ll be given their fully formed story (with hopefully hilarious results). This creation will only be set within their browser. If they wish to share it, they can then click the “Save” button. This will submit the entire text to a serverless function in Netlify to save it to the Sanity data store. Once that has been created, a link will appear for the user to view the permanent version of their madlib and share it with friends.

Since 11ty is a static site generator, we can’t count on a site rebuild to generate each user’s saved Madlib on the fly. We can use 11ty’s new Serverless mode to build them on request using Netlify’s On-Demand Builders to cache each Madlib.

The Tools
Sanity.io

Sanity.io is a unified content platform that believes that content is data and data can be used as content. Sanity pairs a real-time data store with three open-source tools: a powerful query language (GROQ), a CMS (Sanity Studio), and a rich-text data specification (Portable Text).

Portable Text

Portable Text is an open-source specification designed to treat rich text as data. We’ll be using Portable Text for the rich text that our editors will enter into a Sanity Studio. Data will decorate the rich text in a way that we can create a form on the fly based on the content.

11ty And 11ty Serverless

11ty is a static site generator built in Node. It allows developers to ingest data from multiple sources, write templates in multiple templating engines, and output simple, clean HTML.

In the upcoming 1.0 release, 11ty is introducing the concept of 11ty Serverless. This update allows sites to use the same templates and data to render pages via a serverless function or on-demand builder. 11ty Serverless begins to blur the line between “static site generator” and server-rendered page.

Netlify On-Demand Builders

Netlify has had serverless functions as part of its platform for years. For example, an “On-Demand Builder” is a serverless function dedicated to serving a cached file. Each builder works similarly to a standard serverless function on the first call. Netlify then caches that page on its edge CDN for each additional call.

Building The Editing Interface And Datastore

Before we can dive into serverless functions and the frontend, it would be helpful to have our data set up and ready to query.

To do this, we’ll set up a new project and install Sanity’s Studio (an open-source content platform for managing data in your Sanity Content Lake).

To create a new project, we can use Sanity’s CLI tools.

First, we need to create a new project directory to house both the front-end and the studio. I’ve called mine madlibs.

From inside this directory in the command line, run the following commands:

npm i -g @sanity/cli
sanity init

The sanity init command will run you through a series of questions. Name your project madlibs, create a new dataset called production, set the “output path” to studio, and for “project template,” select “Clean project with no predefined schemas.”

The CLI creates a new Sanity project and installs all the needed dependencies for a new studio. Inside the newly created studio directory, we have everything we need to make our editing experience.

Before we create the first interface, run sanity start in the studio directory to run the studio.

Creating The madlib Schema

A set of schema defines the studio’s editing interface. To create a new interface, we’ll create a new schema in the schema folder.

// madlibs/studio/schemas/madlib.js

export default {
// Name in the data
name: ‘madlib’,
// Title visible to editors
title: ‘Madlib Template’,
// Type of schema (at this stage either document or object)
type: ‘document’,
// An array of fields
fields: [
{
name: ‘title’,
title: ‘Title’,
type: ‘string’
},
{
title: ‘Slug’,
name: ‘slug’,
type: ‘slug’,
options: {
source: ‘title’,
maxLength: 200, // // will be ignored if slugify is set
}
},
]
}

The schema file is a JavaScript file that exports an object. This object defines the data’s name, title, type, and any fields the document will have.

In this case, we’ll start with a title string and a slug that can be generated from the title field. Once the file and initial code are created, we need to add this schema to our schema.js file.

// /madlibs/studio/schema/schema.js

// First, we must import the schema creator
import createSchema from ‘part:@sanity/base/schema-creator’

// Then import schema types from any plugins that might expose them
import schemaTypes from ‘all:part:@sanity/base/schema-type’

// Imports our new schema
import madlib from ‘./madlib’

// Then we give our schema to the builder and provide the result to Sanity
export default createSchema({
// We name our schema
name: ‘default’,
// Then proceed to concatenate our document type
// to the ones provided by any plugins that are installed
types: schemaTypes.concat([
// document
// adds the schema to the list the studio will display
madlib,
])
})

Next, we need to create a rich text editor for our madlib authors to write the templates. Sanity has a built-in way of handling rich text that can convert to the flexible Portable Text data structure.

To create the editor, we use an array field that contains a special schema type: block.

The block type will return all the default options for rich text. We can also extend this type to create specialty blocks for our editors.

export default {
// Name in the data
name: ‘madlib’,
// Title visible to editors
title: ‘Madlib Template’,
// Type of schema (at this stage either document or object)
type: ‘document’,
// An array of fields
fields: [
{
name: ‘title’,
title: ‘Title’,
type: ‘string’
},
{
title: ‘Slug’,
name: ‘slug’,
type: ‘slug’,
options: {
source: ‘title’,
maxLength: 200, // // will be ignored if slugify is set
}
},
{
title: ‘Madlib Text’,
name: ‘text’,
type: ‘array’,
of: [
{
type: ‘block’,
name: ‘block’,
of: [
// A new type of field that we’ll create next
{ type: ‘madlibField’ }
]
},
]
},
]
}

This code will set up the Portable Text editor. It builds various types of “blocks.” Blocks roughly equate to top-level data in the JSON data that Portable Text will return. By default, standard blocks take the shape of things like paragraphs, headers, lists, etc.

Custom blocks can be created for things like images, videos, and other data. For our madlib fields, we want to make “inline” blocks — blocks that flow within one of these larger blocks. To do that, the block type can accept its own of array. These fields can be any type, but we’ll make a custom type and add it to our schema in our case.

Creating A Custom Schema Type For The Madlib Field

To create a new custom type, we need to create a new file and import the schema into schema.js as we did for a new document type.

Instead of creating a schema with a type of document, we need to create one of type: object.

This custom type needs to have two fields: the display text and the grammar type. By structuring the data this way, we open up future possibilities for inspecting our content.

Alongside the data fields for this type, we can also specify a custom preview to show more than one field displayed in the rich text. To make this work, we define a React component that will accept the data from the fields and display the text the way we want it.

// /madlibs/studio/schemas/object/madLibField.js
import React from ‘react’

// A React Component that takes hte value of data
// and returns a simple preview of the data that can be used
// in the rich text editor
function madlibPreview({ value }) {
const { text, grammar } = value

return (

{text} ({grammar})

);
}

export default {
title: ‘Madlib Field Details’,
name: ‘madlibField’,
type: ‘object’,
fields: [
{
name: ‘displayText’,
title: ‘Display Text’,
type: ‘string’
},
{
name: ‘grammar’,
title: ‘Grammar Type’,
type: ‘string’
}
],
// Defines a preview for the data in the Rich Text editor
preview: {
select: {
// Selects data to pass to our component
text: ‘displayText’,
grammar: ‘grammar’
},

// Tells the field which preview to use
component: madlibPreview,
},
}

Once that’s created, we can add it to our schemas array and use it as a type in our Portable Text blocks.

// /madlibs/studio/schemas/schema.js
// First, we must import the schema creator
import createSchema from ‘part:@sanity/base/schema-creator’

// Then import schema types from any plugins that might expose them
import schemaTypes from ‘all:part:@sanity/base/schema-type’

import madlib from ‘./madlib’
// Import the new object
import madlibField from ‘./objects/madlibField’

// Then we give our schema to the builder and provide the result to Sanity
export default createSchema({
// We name our schema
name: ‘default’,
// Then proceed to concatenate our document type
// to the ones provided by any plugins that are installed
types: schemaTypes.concat([
// documents
madlib,
//objects
madlibField
])
})

Creating The Schema For User-generated Madlibs

Since the user-generated madlibs will be submitted from our frontend, we don’t technically need a schema for them. However, if we create a schema, we get an easy way to see all the entries (and delete them if necessary).

We want the structure for these documents to be the same as our madlib templates. The main differences in this schema from our madlib schema are the name, title, and, optionally, making the fields read-only.

// /madlibs/studio/schema/userLib.js
export default {
name: ‘userLib’,
title: ‘User Generated Madlibs’,
type: ‘document’,
fields: [
{
name: ‘title’,
title: ‘Title’,
type: ‘string’,
readOnly: true
},
{
title: ‘Slug’,
name: ‘slug’,
type: ‘slug’,
readOnly: true,
options: {
source: ‘title’,
maxLength: 200, // // will be ignored if slugify is set
},
},
{
title: ‘Madlib Text’,
name: ‘text’,
type: ‘array’,
readOnly: true,
of: [
{
type: ‘block’,
name: ‘block’,
of: [
{ type: ‘madlibField’ }
]
},
]
},
]
}

With that, we can add it to our schema.js file, and our admin is complete. Before we move on, be sure to add at least one madlib template. I found the first paragraph of Moby Dick worked surprisingly well for some humorous results.

Building The Frontend With 11ty

To create the frontend, we’ll use 11ty. 11ty is a static site generator written in and extended by Node. It does the job of creating HTML from multiple sources of data well, and with some new features, we can extend that to server-rendered pages and build-rendered pages.

Setting Up 11ty

First, we’ll need to get things set up.

Inside the main madlibs directory, let’s create a new site directory. This directory will house our 11ty site.

Open a new terminal and change the directory into the site directory. From there, we need to install a few dependencies.

// Create a new package.json
npm init -y
// Install 11ty and Sanity utilities
npm install @11ty/eleventy@beta @sanity/block-content-to-html @sanity/client

Once these have been installed, we’ll add a couple of scripts to our package.json

// /madlibs/site/package.json

“scripts”: {
“start”: “eleventy –serve”,
“build”: “eleventy”
},

Now that we have a build and start script, let’s add a base template for our pages to use and an index page.

By default, 11ty will look in an _includes directory for our templates, so create that directory and add a base.njk file to it.

<!DOCTYPE html>
<html lang=”en”>

<head>
<meta charset=”UTF-8″>
<meta name=”viewport” content=”width=device-width, initial-scale=1.0″>
<title>Madlibs</title>
{# Basic reset #}
<link rel=”stylesheet” href=”https://unpkg.com/some-nice-basic-css/global.css” />

</head>

<body>
<nav class=”container navigation”>
<a class=”logo” href=”/”>Madlibs</a>
</nav>

<div class=”stack container bordered”>
{# Inserts content from a page file and renders it as html #}
{{ content | safe }}
</div>

{% block scripts %}
{# Block to insert scripts from child templates #}
{% endblock %}
</body>

</html>

Once we have a template, we can create a page. First, in the root of the site directory, add an index.html file. Next, we’ll use frontmatter to add a little data — a title and the layout file to use.


title: Madlibs
layout: ‘base.njk’

<p>Some madlibs to take your mind off things. They’re stored in <a href=”https://sanity.io”>Sanity.io</a>, built with <a href=”https://11ty.dev”>11ty</a>, and do interesting things with Netlify serverless functions.</p>

Now you can start 11ty by running npm start in the site directory.

Creating Pages From Sanity Data Using 11ty Pagination

Now, we want to create pages dynamically from data from Sanity. To do this, we’ll create a JavaScript Data file and a Pagination template.

Before we dive into those files, we need to create a couple of utilities for working with the Sanity data.

Inside the site directory, let’s create a utils directory.

The first utility we need is an initialized Sanity JS client. First, create a file named sanityClient.js in the new utils directory.

// /madlibs/site/utils/sanityClient.js’
const sanityClient = require(‘@sanity/client’)
module.exports = sanityClient({
// The project ID
projectId: ‘<YOUR-ID>’,
// The dataset we created
dataset: ‘production’,
// The API version we want to use
// Best practice is to set this to today’s date
apiVersion: ‘2021-06-07’,
// Use the CDN instead of fetching directly from the data store
useCdn: true
})

Since our rich text is stored as Portable Text JSON, we need a way to convert the data to HTML. We’ll create a utility to do this for us. First, create a file named portableTextUtils.js in the utils directory.

For Sanity and 11ty sites, we typically will want to convert the JSON to either Markdown or HTML. For this site, we’ll use HTML to have granular control over the output.

Earlier, we installed @sanity/block-content-to-html, which will help us serialize the data to HTML. The package will work on all basic types of Portable Text blocks and styles. However, we have a custom block type that needs a custom serializer.

// Initializes the package
const toHtml = require(‘@sanity/block-content-to-html’)
const h = toHtml.h;

const serializers = {
types: {
madlibField: ({ node }) => {
// Takes each node of type madlibField
// and returns an HTML span with an id, class, and text
return h(‘span’, node.displayText, { id: node._key, className: ’empty’ })
}
}
}

const prepText = (data) => {
// Takes the data from a specific Sanity document
// and creates a new htmlText property to contain the HTML
// This lets us keep the Portable Text data intact and still display HTML
return {
…data,
htmlText: toHtml({
blocks: data.text, // Portable Text data
serializers: serializers // The serializer to use
})
}
}

// We only need to export prepText for our functions
module.exports = { prepText }

The serializers object in this code has a types object. In this object, we create a specialized serializer for any type. The key in the object should match the type given in our data. In our case, this is madlibField. Each type will have a function that returns an element written using hyperscript functions.

In this case, we create a span with children of the displayText from the current data. Later we’ll need unique IDs based on the data’s _key, and we’ll need a class to style these. We provide those in an object as the third argument for the h() function. We’ll use this same serializer setup for both our madlib templates and the user-generated madlibs.

Now that we have our utilities, it’s time to create a JavaScript data file. First, create a _data in the site directory. In this file, we can add global data to our 11ty site. Next, create a madlibs.js file. This file is where our JavaScript will run to pull each madlib template. The data will be available to any of our templates and pages under the madlibs key.

// Get our utilities
const client = require(‘../utils/sanityClient’)
const {prepText} = require(‘../utils/portableTextUtils’)
// The GROQ query used to find specific documents and
// shape the output
const query = *[_type == “madlib”]{
title,
“slug”: slug.current,
text,
_id,
“formFields”: text[]{
children[_type == “madlibField”]{
displayText,
grammar,
_key
}
}.children[]
}

module.exports = async function() {
// Fetch data based on the query
const madlibs = await client.fetch(query);

// Prepare the Portable Text data
const preppedMadlib = madlibs.map(prepText)
// Return the full array
return preppedMadlib
}

To fetch the data, we need to get the utilities we just created. The Sanity client has a fetch() method to pass a GROQ query. We’ll map over the array of documents the query returns to prepare their Portable Text and then return that to 11ty’s data cascade.

The GROQ query in this code example is doing most of the work for us. We start by requesting all documents with a _type of madlib from our Sanity content lake. Then we specify which data we want to return. The data starts simply: we need the title, slug, rich text, and id from the document, but we also want to reformat the data into a set of form fields, as well.

To do that, we create a new property on the data being returned: formFields. This looks at the text data (a Portable Text array) and loops over it with the [] operator. We can then build a new project on this data like we’re doing with the entire document with the {} operator.

Each text object has a children array. We can loop through that, and if the item matches the filter inside the [], we can run another projection on that. In this case, we’re filtering all children that have a _type == “madlibField”. In other words, any inline block that has an item with the type we created. We need the displayText, grammar, and _key for each of these. This will return an array of text objects with the children matching our filter. We need to flatten this to be an array of children. To do this, we can add the .children[] after the projects. This will return a flat array with just the children elements we need.

This gives us all the documents in an array with just the data we need (including newly reformatted items).

To use them in our 11ty build, we need a template that will use Pagination.

In the root of the site, create a madlib.njk file. This file will generate each madlib page from the data.


layout: ‘base.njk’
pagination:
data: madlibs
alias: madlib
size: 1
permalink: “madlibs/{{ madlib.slug | slug }}/index.html”

In the front matter of this file, we specify some data 11ty can use to generate our pages:

layout
The template to use to render the page.
pagination
An object with pagination information.
pagination.data
The data key for pagination to read.
pagination.alias
A key to use in this file for ease.
pagination.size
The number of madlibs per page (in this case, 1 per page to create individual pages).
permalink
The URLs at which each of these should live (can be partially generated from data).

With that data in place, we can specify how to display each piece of data for an item in the array.


layout: ‘base.njk’
pagination:
data: madlibs
alias: madlib
size: 1
permalink: “madlibs/{{ madlib.slug | slug }}/index.html”

<h2>{{ madlib.title }}</h2>
<p><em>Instructions:</em> Fill out this form, submit it and get your story. It will hopfully make little-to-no sense. Afterward, you can save the madlib and send it to your friends.</p>
<div class=”madlibtext”>
<a href=”#” class=”saver”>Save it</a>
{{ madlib.htmlText | safe }}
</div>
<h2>Form</h2>
<form class=”madlibForm stack”>
{% for input in madlib.formFields %}
<label>
{{ input.displayText }} ({{ input.grammar }})
<input type=”text” class=”libInput” name={{input._key}}>
</label>
{% endfor %}
<button>Done</button>
</form>

We can properly format the title and HTML text. We can then use the formFields array to create a form that users can enter their unique answers.

There’s some additional markup for use in our JavaScript — a form button and a link to save the finalized madlib. The link and madlib text will be hidden (no peeking for our users!).

For every madlib template, you created in your studio, 11ty will build a unique page. The final URLs should look like this

http://localhost:8080/madlibs/the-slug-in-the-studio/

Making The Madlibs Interactive

With our madlibs generated, we need to make them interactive. We’ll sprinkle a little JavaScript and CSS to make them interactive. Before we can use CSS and JS, we need to tell 11ty to copy the static files to our built site.

Copying Static Assets To The Final Build

In the root of the site directory, create the following files and directories:

assets/css/style.css — for any additional styling,
assets/js/madlib.js — for the interactions,
.eleventy.js — the 11ty configuration file.

When these files are created, we need to tell 11ty to copy the assets to the final build. Those instructions live in the .eleventy.js configuration file.

module.exports = function(eleventyConfig) {
eleventyConfig.addPassthroughCopy(“assets/”);
}

This instructs 11ty to copy the entire assets directory to the final build.

The only necessary CSS to make the site work is a snippet to hide and show the madlib text. However, if you want the whole look and feel, you can find all the styles in this file.

.madlibtext {
display: none
}
.madlibtext.show {
display: block;
}

Filling In The Madlib With User Input And JavaScript

Any frontend framework will work with 11ty if you set up a build process. For this example, we’ll use plain JavaScript to keep things simple. The first task is to take the user data in the form and populate the generic madlib template that 11ty generated from our Sanity data.

// Attach the form handler
const form = document.querySelector(‘.madlibForm’)
form.addEventListener(‘submit’, completeLib);

function showText() {
// Find the madlib text in the document
const textDiv = document.querySelector(‘.madlibtext’)
// Toggle the class “show” to be present
textDiv.classList.toggle(‘show’)
}

// A function that takes the submit event
// From the event, it will get the contents of the inputs
// and write them to page and show the full text
function completeLib(event) {
// Don’t submit the form
event.preventDefault();
const { target } = event // The target is the form element

// Get all inputs from the form in array format
const inputs = Array.from(target.elements)

inputs.forEach(input => {
// The button is an input and we don’t want that in the final data
if (input.type != ‘text’) return
// Find a span by the input’s name
// These will both be the _key value
const replacedContent = document.getElementById(input.name)
// Replace the content of the span with the input’s value
replacedContent.innerHTML = input.value
})
// Show the completed madlib
showText();
}

This functionality comes in three parts: attaching an event listener, taking the form input, inserting it into the HTML, and then showing the text.

When the form is submitted, the code creates an array from the form’s inputs. Next, it finds elements on the page with ids that match the input’s name — both created from the _key values of each block. It then replaces the content of that element with the value from the data.

Once that’s done, we toggle the full madlib text to show on the page.

We need to add this script to the page. To do this, we create a new template for the madlibs to use. In the _includes directory, create a file named lib.njk. This template will extend the base template we created and insert the script at the bottom of the page’s body.

{% extends ‘base.njk’ %}

{% block scripts %}
<script>
var pt = {{ madlib.text | dump | safe }}
var data = {
libId: {{ madlib._id }},
libTitle: {{ madlib.title }}
}
</script>
<script src=”/assets/js/madlib.js”></script>
{% endblock %}

Then, our madlib.njk pagination template needs to use this new template for its layout.


layout: ‘lib.njk’
pagination:
data: madlibs
alias: madlib
size: 1
permalink: “madlibs/{{ madlib.slug | slug }}/index.html”

// page content

We now have a functioning madlib generator. To make this more robust, let’s allow users to save and share their completed madlibs.

Saving A User Madlib To Sanity With A Netlify Function

Now that we have a madlib displayed to the user, we need to create the link for saving send the information to Sanity.

To do that, we’ll add some more functionality to our front-end JavaScript. But, first, we need to add some more data pulled from Sanity into our JavaScript, so we’ll add a couple of new variables in the scripts block on the lib.njk template.

{% extends ‘base.njk’ %}

{% block scripts %}
<script>
// Portable Text data
var pt = {{ madlib.text | dump | safe }}
var data = {
libId: {{ madlib._id }},
libTitle: {{ madlib.title }}
}
</script>
<script src=”/assets/js/madlib.js”></script>
{% endblock %}

We can write a script to send it and the user-generated answers to a serverless function to send to Sanity with that additional data.

// /madlibs/site/assets/js/madlib.js

// … completeLib()

async function saveLib(event) {
event.preventDefault();

// Return an Map of ids and content to turn into an object
const blocks = Array.from(document.querySelectorAll(‘.empty’)).map(item => {
return [item.id, { content: item.outerText }]
})
// Creates Object ready for storage from blocks map
const userContentBlocks = Object.fromEntries(blocks);

// Formats the data for posting
const finalData = {
userContentBlocks,
pt, // From nunjucks on page
…data // From nunjucks on page
}

// Runs the post data function for createLib
postData(‘/.netlify/functions/createLib’, finalData)
.then(data => {
// When post is successful
// Create a div for the final link
const landingZone = document.createElement(‘div’)
// Give the link a class
landingZone.className = “libUrl”
// Add the div after the saving link
saver.after(landingZone)
// Add the new link inside the landing zone
landingZone.innerHTML = <a href=”/userlibs/${data._id}/” class=”savedUrl”>Your url is /userlibs/${data._id}/</a>

}).catch(error => {
// When errors happen, do something with them
console.log(error)
});
}

async function postData(url = ”, data = {}) {
// A wrapper function for standard JS fetch
const response = await fetch(url, {
method: ‘POST’,
mode: ‘cors’,
cache: ‘no-cache’,
credentials: ‘same-origin’,
headers: {
‘Content-Type’: ‘application/json’
},
body: JSON.stringify(data)
});
return response.json(); // parses JSON response into native JavaScript objects
}

We add a new event listener to the “Save” link in our HTML.

The saveLib function will take the data from the page and the user-generated data and combine them in an object to be handled by a new serverless function. The serverless function needs to take that data and create a new Sanity document. When creating the function, we want it to return the _id for the new document. We use that to create a unique link that we add to the page. This link will be where the newly generated page will be.

Setting Up Netlify Dev

To use Netlify Functions, we’ll need to get our project set up on Netlify. We want Netlify to build and serve from the site directory. To give Netlify this information, we need to create a netlify.toml file at the root of the entire project.

[build]
command = “npm run build” # Command to run
functions = “functions” # Directory we store the functions
publish = “_site” # Folder to publish (11ty automatically makes the _site folder
base = “site” # Folder that is the root of the build

To develop these locally, it’s helpful to install Netlify’s CLI globally.

npm install -g netlify-cli

Once that’s installed, you can run netlify dev in your project. This will take the place of running your start NPM script.

The CLI will run you through connecting your repository to Netlify. Once it’s done, we’re ready to develop our first function.

Creating A Function To Save Madlibs To Sanity

Since our TOML file sets the functions directory to functions, we need to create the directory. Inside the directory, make a createLib.js file. This will be the serverless function for creating a madlib in the Sanity data store.

The standard Sanity client we’ve been using is read-only. To give it write permissions, we need to reconfigure it to use an API read+write token. To generate a token, log into the project dashboard and go to the project settings for your madlibs project. In the settings, find the Tokens area and generate a new token with “Editor” permissions. When the token is generated, save the string to Netlify’s environment variables dashboard with the name SANITY_TOKEN. Netlify Dev will automatically pull these environment variables into the project while running.

To reconfigure the client, we’ll require the file from our utilities, and then run the .config() method. This will let us set any configuration value for this specific use. We’ll set the token to the new environment variable and set useCdn to false.

// Sanity JS Client
// The build client is read-only
// To use to write, we need to add an API token with proper permissions
const client = require(‘../utils/sanityClient’)
client.config({
token: process.env.SANITY_TOKEN,
useCdn: false
})

The basic structure for a Netlify function is to export a handler function that is passed an event and returns an object with a status code and string body.

// Grabs local env variables from .env file
// Not necessary if using Netlify Dev CLI
require(‘dotenv’).config()

// Sanity JS Client
// The build client is read-only
// To use to write, we need to add an API token with proper permissions
const client = require(‘../utils/sanityClient’)
client.config({
token: process.env.SANITY_TOKEN,
useCdn: false
})

// Small ID creation package
const { nanoid } = require(‘nanoid’)

exports.handler = async (event) => {
// Get data off the event body
const {
pt,
userContentBlocks,
id,
libTitle
} = JSON.parse(event.body)

// Create new Portable Text JSON
// from the old PT and the user submissions
const newBlocks = findAndReplace(pt, userContentBlocks)

// Create new Sanity document object
// The doc’s _id and slug are based on a unique ID from nanoid
const docId = nanoid()
const doc = {
_type: “userLib”,
_id: docId,
slug: { current: docId },
madlib: id,
title: ${libTitle} creation,
text: newBlocks,
}

// Submit the new document object to Sanity
// Return the response back to the browser
return client.create(doc).then((res) => {
// Log the success into our function log
console.log(Userlib was created, document ID is ${res._id})
// return with a 200 status and a stringified JSON object we get from the Sanity API
return { statusCode: 200, body: JSON.stringify(doc) };
}).catch(err => {
// If there’s an error, log it
// and return a 500 error and a JSON string of the error
console.log(err)
return {
statusCode: 500, body: JSON.stringify(err)
}
})
}

// Function for modifying the Portable Text JSON
// pt is the original portable Text
// mods is an object of modifications to make
function findAndReplace(pt, mods) {
// For each block object, check to see if a mod is needed and return an object
const newPT = pt.map((block) => ({
…block, // Insert all current data
children: block.children.map(span => {
// For every item in children, see if there’s a modification on the mods object
// If there is, set modContent to the new content, if not, set it to the original text
const modContent = mods[span._key] ? mods[span._key].content : span.text
// Return an object with all the original data, and a new property
// displayText for use in the frontends
return {
…span,
displayText: modContent
}
})
}))
// Return the new Portable Text JSON
return newPT
}

The body is the data we just submitted. For ease, we’ll destructure the data off the event.body object. Then, we need to compare the original Portable Text and the user content we submitted and create the new Portable Text JSON that we can submit to Sanity.

To do that, we run a find and replace function. This function maps over the original Portable Text and for every child in the blocks, replace its content with the corresponding data from the modfications object. If there isn’t a modification, it will store the original text.

With modified Portable Text in hand, we can create a new object to store as a document in the Sanity content lake. Each document needs a unique identifier (which we can use the nanoid NPM package to create. We’ll also let this newly created ID be the slug for consistency.

The rest of the data is mapped to the proper key in our userLib schema we created in the studio and submitted with the authenticated client’s .create() method. When success or failure returns from Sanity, we pass that along to the frontend for handling.

Now, we have data being saved to our Sanity project. Go ahead and fill out a madlib and submit. You can view the creation in the studio. Those links that we’re generating don’t work yet, though. This is where 11ty Serverless comes in.

Setting Up 11ty Serverless

You may have noticed when we installed 11ty that we used a specific version. This is the beta of the upcoming 1.0 release. 11ty Serverless is one of the big new features in that release.

Installing The Serverless Plugin

11ty Serverless is an included plugin that can be initialized to create all the boilerplate for running 11ty in a serverless function. To get up and running, we need to add the plugin to our .eleventy.js configuration file.

const { EleventyServerlessBundlerPlugin } = require(“@11ty/eleventy”);

module.exports = function (eleventyConfig) {
eleventyConfig.addPassthroughCopy(“assets/”);

eleventyConfig.addPlugin(EleventyServerlessBundlerPlugin, {
name: “userlibs”, // the name to use for the functions
functionsDir: “./functions/”, // The functions directory
copy: [“utils/”], // Any files that need to be copied to make our scripts work
excludeDependencies: [“./_data/madlibs.js”] // Exclude any files you don’t want to run
});
};

After creating this file, restart 11ty by rerunning netlify dev. On the next run, 11ty will create a new directory in our functions directory named userlibs (matching the name in the serverless configuration) to house everything it needs to have to run in a serverless function. The index.js file in this directory is created if it doesn’t exist, but any changes you make will persist.

We need to make one small change to the end of this file. By default, 11ty Serverless will initialize using standard serverless functions. This will run the function on every load of the route. That’s an expensive load for content that can’t be changed after it’s been generated. Instead, we can change it to use Netlify’s On-Demand Builders. This will build the page on the first request and cache the result for any later requests. This cache will persist until the next build of the site.

To update the function, open the index.js file and change the ending of the file.

// Comment this line out
exports.handler = handler

// Uncomment these lines
const { builder } = require(“@netlify/functions”);
exports.handler = builder(handler);

Since this file is using Netlify’s functions package, we also need to install that package.

npm install @netlify/functions

Creating A Data File For User-generated Madlibs

Now that we have an On-Demand Builder, we need to pull the data for user-generated madlibs. We can create a new JavaScript data file in the _data file named userlibs.js. Like our madlibs data file, the file name will be the key to get this data in our templates.

// /madlibs/site/_data/userlibs.js

const client = require(‘../utils/sanityClient’)
const {prepText} = require(‘../utils/portableTextUtils’)

const query = *[_type == “userLib”]{
title,
“slug”: slug.current,
text,
_id
}

module.exports = async function() {
const madlibs = await client.fetch(query);
// Protect against no madlibs returning
if (madlibs.length == 0) return {“404”: {}}

// Run through our portable text serializer
const preppedMadlib = madlibs.map(prepText)

// Convert the array of documents into an object
// Each item in the Object will have a key of the item slug
// 11ty’s Pagination will create pages for each one
const mapLibs = preppedMadlib.map(item => ([item.slug, item]))
const objLibs = Object.fromEntries(mapLibs)
return objLibs
}

This data file is similar to what we wrote earlier, but instead of returning the array, we need to return an object. The object’s keys are what the serverless bundle will use to pull the correct madlib on request. In our case, we’ll make the item’s slug the key since the serverless route will be looking for a slug.

Creating A Pagination Template That Uses Serverless Routes

Now that the plugin is ready, we can create a new pagination template to use the generated function.

In the root of our site, add a userlibs.njk template. This template will be like the madlibs.njk template, but it will use different data without any interactivity.


layout: ‘base.njk’
pagination:
data: userLibs
alias: userlib
size: 1
serverless: eleventy.serverless.path.slug

permalink:
userlibs: “/userlibs/:slug/”

<h2>{{ userlib.title }}</h2>
<div>
{{ userlib.htmlText | safe }}
</div>

In this template, we use base.njk to avoid including the JavaScript. We specify the new userlibs data for pagination.

To pull the correct data, we need to specify what the lookup key will be. On the pagination object, we do this with the serverless property. When using serverless routes, we get access to a new object: eleventy.serverless. On this object, there’s a path object that contains information on what URL the user requested. In this case, we’ll have a slug property on that object. That needs to correspond to a key on our pagination data.

To get the slug on our path, we need to add it to the permalink object. 11ty Serverless allows for more than one route for a template. The route’s key needs to match the name provided in the .eleventy.js configuration. In this case, it should be userlibs. We specify the static /userlibs/ start to the path and then add a dynamic element: :slug/. This slug will be what gets passed to eleventy.serverless.path.slug.

Now, the link that we created earlier by submitting a madlib to Sanity will work.

Next Steps

Now we have a madlib generator that saves to a data store. We build only the necessary pages to allow a user to create a new madlib. When they create one, we make those pages on-demand with 11ty and Netlify Functions. From here, we can extend this further.

Statically build the user-generated content as well as render them on request.
Create a counter for the total number of madlibs saved by each madlib template.
Create a list of words users use by parts of speech.

When you can statically build AND dynamically render, what sorts of applications does this open up?