Entries by admin

Collective #353

Original Source: http://feedproxy.google.com/~r/tympanus/~3/qXHdr8WWclw/

C353_WOTW

Inspirational Website of the Week: Badass

An actually fun to scroll site with an interesting skew effect. Our pick this week.

Get inspired

C353_northwestern

This content is sponsored via Syndicate Ads
Earn your MS in Information Design and Strategy

Learn to master the space where data meets story in Northwestern’s online master’s in Information Design and Strategy.

Find out more

C353_Draggable

draggable

A lightweight and responsive drag and drop library by Shopify. Great interactive presentation, too.

Check it out

C353_FF

Start Your Engines – Firefox Quantum Lands in Beta, Developer Edition

Great news from Firefox: double acceleration with the Quantum engine is now available in the developer edition.

Read it

C353_GridGotachs

CSS Grid Gotchas And Stumbling Blocks

An article by Rachel Andrew where she answers a number of common questions regarding CSS Grid.

Check it out

C353_EssImageOpt

Essential Image Optimization

Addy Osmani’s eBook on automating image compression.

Read it

C353_ExpoAr

Introducing Expo AR: Three.js on ARKit

Nikhilesh Sigatapu shows how you can use the new Expo Augmented Reality API for iOS to create AR scenes using only JavaScript.

Read it

C353_ARTut

WebVR is for everyone – This is how to design and develop an experience.

Get started with WebVR using Google Blocks in this tutorial by Natalia Wojtkowska.

Read it

C353_DesignCasestudies

How They Design

Handpicked casestudies delivered biweekly to your inbox. Curated by Dawid Woźniak.

Check it out

C353_WInner

Js13kGames Winners

Find out who the winners of this year’s Js13kGames JavaScript coding competition are.

Check it out

C353_UX

Growing a UX tool

Julius Huijnk builds and shares small prototypes and writes about them. This is part three of his series.

Read it

C353_Fuzzy

Fuzzy Plus

Great demo of a hair like structure by DPDK.

Check it out

C353_GuidetoTypo

A Five Minutes Guide to Better Typography

A great visual guide for understanding what makes good typography. By Pierrick Calvez.

Read it

C353_Sort

What I Talk About When I Talk About Sorting: Untangling Array#sort

Claudia Hernández explains how JavaScript’s Array#sort works under the hood.

Check it out

C353_VRTutAFrame

Creating Your First WebVR App using React and A-Frame

Prayash Thapa’s tutorial on creating a WebVR application using A-Frame and React.

Check it out

C353_Jam

Jam Icons

A set of 422 versatile icons in SVG and as web font.

Get it

C353_FutureHTML

I’ve seen the future, it’s full of HTML

Some suggestions by Mikeal Rogers to distribute re-usable framework independent components with just npm.

Read it

C353_ExJS

The rise and fall of Ext JS

Jay Garcia walks you through the history of Ext JS and expresses his observations and personal thoughts along the way.

Read it

C353_billion

Serving One Billion JavaScript Library Downloads

Learn how the team at Algolia managed to deliver over a billion JavaScript libraries.

Read it

C353_Viro

Viro AR

Leveraging React Native and a proprietary rendering engine, Viro is a cross platform alternative to Apple’s SceneKit for AR/VR development.

Check it out

C353_Cryptocurrency

Blockchain curated

Blockchain Curated is a project by Zach Segal that collects the best blockchain-related content.

Check it out

C353_Clockify

Clockify

Free time tracking for agencies and freelancers.

Check it out

C353_ElectrodeNative

Electrode Native: The Platform For Integrating React Native Into Your Apps

Alex Grigoryan introduces Electrode Native, a streamlined mobile app development platform based on React Native.

Check it out

Collective #353 was written by Pedro Botelho and published on Codrops.

Essential Trends of Web Design 2K17

Original Source: http://feedproxy.google.com/~r/Designrfix/~3/V3281iZ5lYg/essential-trends-web-design-2k17

  We all are attracted to beautiful website designs and anything less; we discard them for not appealing. So as a designer you must stick to the rules that make a site worth visiting, at all times. The simpler the design, the better as it prevents clutter, offers seamless navigation and gives a sleek overall […]

The post Essential Trends of Web Design 2K17 appeared first on designrfix.com.

Pay What You Want for the White Hack Hacker 2017 Bundle

Original Source: http://feedproxy.google.com/~r/Designrfix/~3/4deOuee8AyA/pay-white-hack-hacker-2017-bundle

The news is often full of stories about hackers stealing data from the government and large corporations. Because of this, it’s easy to see why people tend to associate the word hacker with thieves and cybercriminals. But the truth is that, not all hackers are evil. Despite the overused negative connotation that hackers use their […]

The post Pay What You Want for the White Hack Hacker 2017 Bundle appeared first on designrfix.com.

Abstract 3D Creations by Patrick Foley

Original Source: http://feedproxy.google.com/~r/abduzeedo/~3/61l_Wnhqbn8/abstract-3d-creations-patrick-foley

Abstract 3D Creations by Patrick Foley

Abstract 3D Creations by Patrick Foley

PauloGabriel
Sep 28, 2017

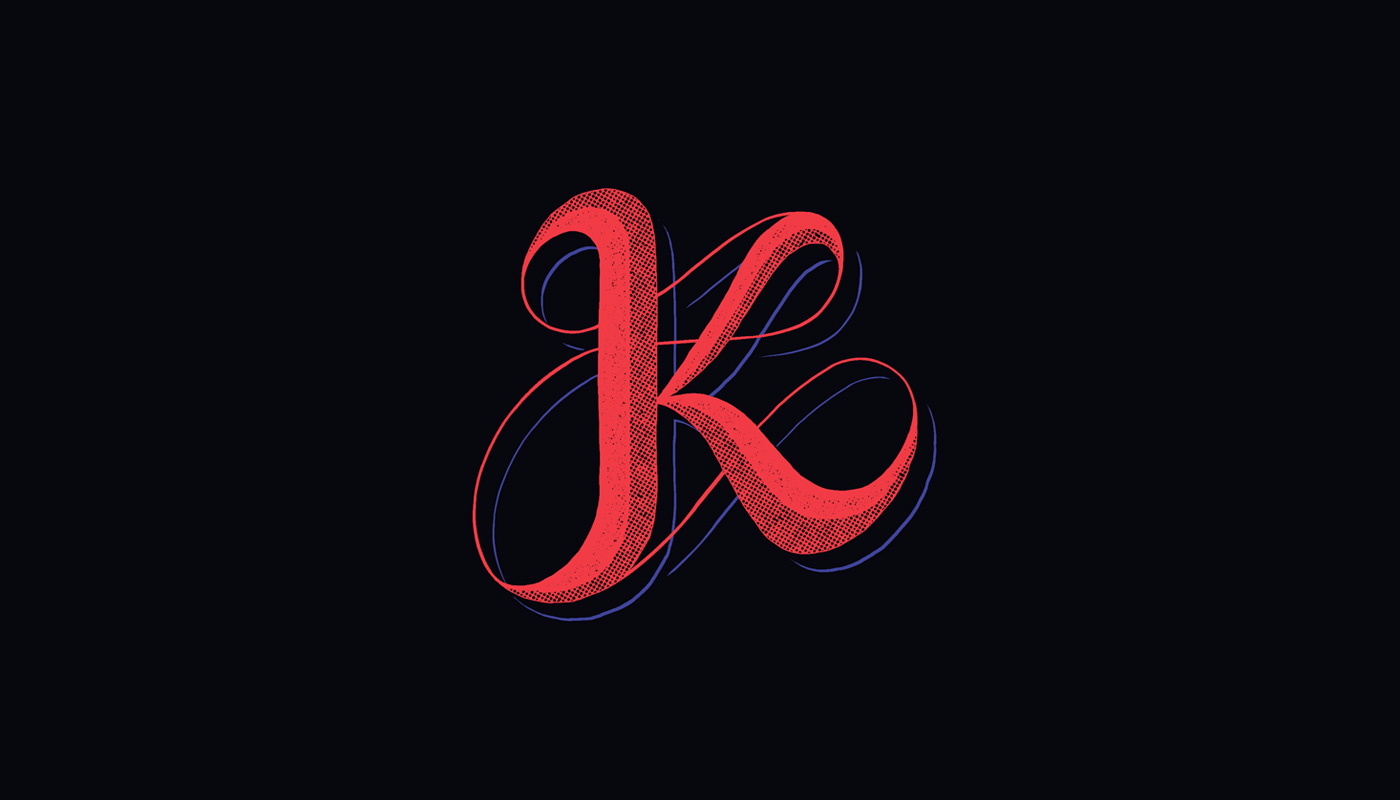
Nothing like a fresh 3D set to start the day. It’s awesome that artists get to come up with so many cool creations, like these by Patrick Foley. These are some very cool abstract scenes, in which materials, textures and lighting are the main characters.

As usual, these are only a handful of his works. For more of it, please visit his Instagram account! I hope you enjoy these as much as we did. Cheers! 😉

Uma publicação compartilhada por Patrick Foley (@patrick_4d) em Set 25, 2017 às 9:41 PDT
Uma publicação compartilhada por Patrick Foley (@patrick_4d) em Set 22, 2017 às 8:48 PDT

Uma publicação compartilhada por Patrick Foley (@patrick_4d) em Set 16, 2017 às 3:05 PDT

Uma publicação compartilhada por Patrick Foley (@patrick_4d) em Ago 27, 2017 às 3:17 PDT

Uma publicação compartilhada por Patrick Foley (@patrick_4d) em Ago 15, 2017 às 9:18 PDT

Uma publicação compartilhada por Patrick Foley (@patrick_4d) em Ago 11, 2017 às 12:33 PDT

Uma publicação compartilhada por Patrick Foley (@patrick_4d) em Ago 10, 2017 às 12:48 PDT

Uma publicação compartilhada por Patrick Foley (@patrick_4d) em Jul 18, 2017 às 7:58 PDT

computer graphics
3d
abstract


Not Taking Negative Feedback from a Client Too Personally

Original Source: http://feedproxy.google.com/~r/1stwebdesigner/~3/zrvTD3sVED8/

There’s something deeply personal about being creative. It feels like you’re putting a piece of yourself in whatever you create. For many designers, it’s really a labor of love.

The anticipation of sharing a shiny new design with a client is exciting. After all, if you’re passionate about the work you’ve done for them, they should feel the same way about what they see.

Unfortunately, things don’t always turn out that way. Clients may not see things quite the same way as you do. Sometimes their feedback can be constructive; sometimes it can even be a bit harsh. Either way, seeing something you poured your heart and soul into creating being picked apart can really sting.

Receiving negative feedback, unpleasant as it is, is something every designer faces. Let’s take a look at some ways that we can better deal with it.

It’s Not Personal

Receiving criticism can be very difficult – especially for inexperienced designers. When someone casually says that they don’t like something you’ve done, it can make you feel like a failure. You’ve put in untold hours of work and here is this person who, in your mind, may not even be qualified to critique design just tearing apart your ideas.

This is something we will all experience. In my own career, I can recall instances where I felt as if I were the poorest excuse for a web designer in the world. You start to think that others have zero confidence in your abilities to get the job done. You start to question whether they’re right.

Don’t fall for it. Sometimes our minds tend to project more meaning into situations than is really there. In the overwhelming majority of cases, it’s the design being criticized – not you personally. In fact, the person you’re dealing with may think highly of you and is in no way looking to hurt your feelings. They’re just being honest with their opinions – whether you agree with them or not.

As you deal with this sort of thing more often, it becomes easier to compartmentalize design critique into its own little space. Having to make changes may frustrate you, but it shouldn’t make you feel as though you’ve failed.

Remember, even the best athletes don’t win every single time. They make adjustments to their game and come back stronger. It’s much the same in design.

It’s Not Your Baby

It’s natural to take ownership of something you have created – even if you’ve created it for someone else’s use. And so we take it to heart when someone isn’t as thrilled with a design as we are. In a way, this is a good trait to have because it shows how much you care.

On the other hand, the work you’re doing for someone else ultimately belongs to them. So while you may be disappointed if a certain part of a design doesn’t meet with their approval – it’s their right to do so.

Sometimes a client may even have a suggestion or demand that you think will fully ruin the whole concept. Personally, this is always a tough one to swallow. But there are a few different ways you can deal with it.

First, state your case. Kindly and calmly explain your reasons for making specific design choices. You were hired because of your expertise and have every right to express your professional opinion. It may just be enough to get the client to see things your way, or compromise on a happy medium.

If that doesn’t work, the second tact is to simply do what the client has asked to the very best of your abilities. This isn’t as easy as it sounds. When you’re certain that a change will have a negative impact on a design, it may be difficult to gather up enough enthusiasm to go through with it.

That’s when you need to remember that you’re working for your client – not the other way around. Put forth your best effort and sincerely try to make it work. Showing that you’re willing to try conveys a maturity and professionalism that will be very much appreciated.

It’s Part of the Job

If you hire someone to remodel your kitchen, you’ll want to express your opinions about how it’s going to look. There may even be some things you want to change during the process. Feedback is a natural side effect of work. And that’s really how we should treat it.

Once you learn to accept criticism as part of the design process, you’ll be so much better at dealing with it. Seeing what different people do and don’t like can be a valuable resource in future projects. You’ll become a better listener and more focused on the client’s point of view. Put it all together and that can make you an even better designer.

The next time you receive negative feedback, think of it not as an insult but as an opportunity for growth.


What's Worth Preserving? Chicago Design Museum's Heartfelt Book Project

Original Source: http://feedproxy.google.com/~r/abduzeedo/~3/iUJ66OTohdU/whats-worth-preserving-chicago-design-museums-heartfelt-book-project

What’s Worth Preserving? Chicago Design Museum’s Heartfelt Book Project

What's Worth Preserving? Chicago Design Museum's Heartfelt Book Project

ibby
Sep 28, 2017

We love Kickstarter almost as much as our morning Cup of Jo so upon discovering this heartwarming project by Chicago Design Museum’s Founder and Executive Director Tanner Woodford we just had to share with our readers in hopes we could help bring it to life. My personal affection for handwritten notes and helping save this lost art is also a motivating factor for supporting this special cause. Over the past year, Tanner  has sent hundreds of letters to a variety of people across all walks of life. In it, he kindly asks the recipient to answer a broad question that traces back to the medium on which it was sent.

“What’s worth preserving?”


Responses poured in. Each was more interesting and profound than the previous, expressing its author’s heartfelt, authentic and captivating thoughts through their handwriting. While the individual letters are fascinating, the sum of the portfolio is greater than its parts.

In an era of constant distractions, the process of writing a letter by hand serves as a reminder to breathe, and to be in the moment. Writing an answer to a thoughtful question promotes reflection. 

The book of 50 letters is the first edition. It’s published by ChiDM, created by its executive director Tanner Woodford, edited by Christopher Jobson of Colossal, with a project video by Bowie. Thank you to Kickstarter for helping projects like this exist and please click on this link to help bring to life! 

An early draft of the book.

People who have answered “What’s worth preserving?” in their handwriting so far.

The first response came from Dave Eggers of McSweeney’s and 826 Valencia, who suggested “it’s worth preserving the knowledge that good design comes from good designers (not robots)” on a custom, hand-drawn letterhead.

Dave Eggers is the Founder of McSweeney’s and 826 Valencia.

Elissa Tenny is President of the School of the Art Institute of Chicago.

Bestselling author Seth Godin sent a giant novelty post-it note with a short list on it that included both “lemons” and “giving a damn/making a ruckus.”

Seth Godin is the author of 18 bestsellers.

Proceeds from sales of this book support ChiDM, a 501c3 non-profit organization that strengthens design culture and builds community. For ChiDM, the book is a critical step in a broader effort to promote cultural discourse, preserving ideas alongside those that have them. 

Proceeds support ChiDM. Photo: Geoff Adler, Peyote.

Returned mail


Tanner Woodford
kickstarter
What’s Worth Preserving?


An Overview Of The Most Common UX Design Deliverables

Original Source: https://www.smashingmagazine.com/2017/09/comprehensive-overview-ux-design-deliverables/


What do UX designers do on a daily basis? A lot of things! UX professionals need to communicate design ideas and research findings to a range of audiences. They use deliverables (tangible records of work that has occurred) for that purpose.

A Comprehensive Overview Of UX Design Deliverables

I’ve created a list that contains the most common deliverables produced by UX designers as they craft great experiences for users. For better readability, I’ve combined the deliverables according to UX activities.

The post An Overview Of The Most Common UX Design Deliverables appeared first on Smashing Magazine.

How to Create an Agile UX Workflow

Original Source: http://feedproxy.google.com/~r/1stwebdesigner/~3/fxdMT-OJddo/

Agile used in sports means athletic, energetic, and limber. It is applied to gymnasts and Olympic athletes at the top of their game. It can be used to describe mental processes that are fast, flexible, and acute.

In the world of user experience design, agile refers to a number of processes that start with minimal overhead and combines teams of collaborators to complete a fluid sequence of tasks. The agile approach values interactions and individuals, customer collaboration, and a quick response to change.

Scrum Methodology

An agile workflow based on the Scrum model started out in software design. It starts with a team planning meeting in which all members break down processes and decide how many each member can commit to. They create a list of tasks that can be completed in a specified length of time, usually between two weeks and a month.

The scrum team codes and tests features for functionality during the first agile sprint, a brief time frame for intense work. They attend brief, daily scrum meetings facilitated by the ScrumMaster, who is like a coach. Team members share progress and brainstorm solutions to problems. Daily meetings keep the team synchronized throughout the sprint.

Image via prosoftnearshore.com.

At the end of the sprint, they review what they’ve created with stakeholders, receive feedback, and plan the next sprint. Feedback suggests revisions or changes that drive the next phase of development.

An agile workflow helps teams complete projects quickly, so industries like law and marketing have adopted similar methodologies. A UX workflow diagrams the steps from research and gathering user data, through usability testing just ahead of development.

Currently an estimated 69 percent of UX practitioners use an Agile UX workflow. Google’s methodology allows professionals to move from designing to testing in as little as a week, but each organization can modify stages to fit the best time frame for their project.

Transitioning to Agile UX Workflows

Teamwork speeds the process. Designers, developers, and managers create cross-functional teams so everyone is working on different aspects of the same problem concurrently. As a group and as individuals, each segment focuses on user activities, needs, and interactions, and studies every aspect through that lens.

The process is seen as a series of stages or increments. At each stage, development can loop back to correct problems or misconceptions, or move forward to the next stage.

Chunk UX Design for Agile Planning

When teams move quickly to see a project from start to finish in a very brief period, it’s tempting to shift focus from meeting the user’s needs to completing the task. A finished product is worthless if doesn’t accomplish the goals for which it was designed.

Chunk design work into smaller tasks so you can continually refocus on user research. First, define your intent, then plan UX activities that will support that intent. Break activities into smaller tasks, then use agile software or sticky notes to create user stories.

Decide in what order requirements should be accomplished and who will be responsible for each. Every decision must be directly related to a user story.

Sprint Like Google

Strong design processes follow a systematic plan, but there’s always room for iteration. If an idea doesn’t go as expected, take a step back to re-iterate before moving forward. Google’s Design Sprint involves five phases, but designers are free to loop at any point.

Let’s look at the steps, each of which is designed to take one day. Organizations that don’t follow Google’s timeline can still use the same sequence to make their UX workflow agile.

Image via zapier.net

Unpack the Project. Google’s Design Sprint starts with a team meeting that includes all relevant individuals from throughout the organization. Designers, sales staff, customer service representatives, marketers, and senior management should all provide input from the beginning.

Because so many people and levels of responsibility are involved, it’s helpful to invite a facilitator to keep discussions on track. Here are some things to cover as you unpack:

Present an outline for how a solution will benefit your company.
Provide reviews of what competitors are currently offering.
Demonstrate both the problem and any partial solutions that already exist.
Furnish user personas and analytical data
Summarize the proposed solution.
Deliver business metrics that support success.

If you aren’t using Google’s process, an agile workflow still starts by setting a vision. Designers provide the team with a starting vision, whether through customer journey mapping or sketches of page-flow.

Sketch Solutions. Everyone who was involved in the unpacking meeting separates to create a pencil and paper sketch of possible solutions. If the problem is complex, participants can break it into pieces and indicate the order in which they should be addressed. Start with a simple framework. Details will be developed as you iterate over time.

Make Decisions. List important factors like your budget, technology constraints, and user input, and then review possible solutions to narrow them down to a limited number. Create storyboards for the top solutions. Use a design wall to display solutions. Reevaluate whether each solution is focused on the user.

Create Prototypes. Groups each take one of the top solutions and get to work. Google suggests building prototypes quickly using Keynote templates or any other tool that allows models to be developed in a day. Develop a testing process for use the next day or the next stage. Invite and incorporate stakeholder contributions at every step.

Test designs. Invite users to interact with your prototype. As they do, record feedback and note what didn’t go as planned. User experience drives the next iteration. UX designers can note friction points and lags in user experience from either back-end performance issues or design flaws.

In the beginning, organizations may need longer than intended to complete some phases. Just like athletes improve with practice, design teams will develop faster sprints with repeated practice.

Whether you model your Agile UX workflow on Google’s model or develop a different pace for your organization, time management is part of what makes the agile process so productive.

Time Tracking and Time Boxing

Just like a runner has a rough estimate of how long it will take them to complete a distance, and uses regular checkpoints to monitor progress, Agile sets estimates and tracks progress through time.

Estimates help teams project how long it will take to deliver a product. At first, it can be difficult to calculate how long a sprint will take, but with practice, the work will develop a predictable rhythm. Track how long it takes to complete individual tasks during a sprint, then combine them to begin developing an average sprint time.

Time boxing involves setting a limited amount of time during which an activity must be completed. Time box UX research, and review meetings and sprints, to maximize efficiency. This forces each team member to immediately reject ideas that won’t work and focus on the ones that show the most promise.

Teamwork Drives Workflow

Just like the design process has many distinct parts that flow together, each team member has a role within the iterative cycle. Designers instinctively picture pages as a whole and set about addressing design tasks as necessary to create the whole, but that means working independently.

Instead, write tasks as individual user stories and involve the team in creating content toward individual goals. Allow the whole to evolve through input from the team.

Designers have the most input during backlog, analysis, development, and testing. When the developer is working through details, that’s a good time to collaborate. Project management tools like Basecamp< and design platforms like UXPin and Invision App can aid communication between web designers and developers.

The iterative design cycle involves designing for individual stories. Each organization goes through a unique process when transitioning to an Agile UX workflow. Be willing to compromise and adjust until your team and your product come together into something even greater than you first envisioned.


Getting Started With Free Vector App Gravit

Original Source: https://www.webdesignerdepot.com/2017/09/getting-started-with-free-vector-app-gravit/

Free stuff! Get your free stuff here! Well, it’s a free vector editor, anyway. We like those, right? To be more specific, I am talking about Gravit. Like I said, it’s free, it always will be, and it has a little something for most people. Plus, it has a version for just about every desktop OS (including Linux and Chrome OS. It has a browser version. Android and iPad versions are coming. It even has a simpler version for total beginners called Klex, which is a bit like Canva.

We’ve mentioned it a couple of times here on WDD, but we’ve never examined it in any sort of depth. Well version 3.2 has just been released, so it’s time to remedy that. Here it is, our introduction to Gravit Designer:

Standard features

It’s a vector editor. It’s got your pen and pencil line-drawing tools. It has shapes, symbols, and boolean operations. You can make multi-page documents. Export your images to all of the standard formats, such as PDF, SVG, JPEG, PNG, etc. Oh, and you can export to Sketch.

Now, most decent vector editors support CMYK, but Gravit lays claim to:

The first engine that fully supports CMYK rendering in the browser…

So yeah, you can do print work in the browser, if you want to.

Standout features

It’s free. Have I mentioned that, yet?

Free cloud storage: the cloud storage is accessible from both the web and desktop versions of the app, so it’s perfect for constantly-mobile designers. The only real downsides are that there currently doesn’t seem to be a way to share documents on your corner of the cloud with others. Oh, and every system is vulnerable, so if you’re making classified vector drawings, maybe just leave them on your hard drive.

Effects: Basically layer styles and basic filters, but for individual objects, and groups of objects. You can’t apply effects to entire layers, so they’re used purely for organization and easier object manipulation.

Presentations: You can take any multi-page document, and play it as a presentation. Just design your pages and go.

Libraries: You can’t make your own libraries of shapes, yet, but it comes with some built in to make things easier on beginners. There are icons, emojis, some clip art

Anchors: Anchors are a simple way of creating responsive graphics. I wouldn’t try designing a whole responsive site layout with them, but if you have to make graphics for, say, a variety of social media channels, Gravit will work quite nicely. This is actually the intended use case.

Interface

Well it wouldn’t be a proper introduction unless we gave you a head start with the interface. Gravit’s UI is not overly complicated, but time is money. Oh, and note that you can change your theme in the settings menu. I’m actually partial to the “light” theme.

On first running the app, you’ll be presented with a screen that’s supposed to get you started fast. It should be noted that there are a number of graphical templates for various uses, including website graphics, social media posts, presentations, posters, and more.

Standard tools are all located in the top toolbar. This is where you’ll switch between select tools, drawing tools, shape tools, object arrangement functions, and more. It’s the obvious stuff. It feels a bit empty for now, when the window is full screen at 1080p, but you can do a lot with the tools provided. The left sidebar is where you can manage your pages and layers, access the libraries and some handy tutorials on the app’s basic functions.

The sidebar on the right is contextual. Depending on what tool and/or object you select, everything changes. This is where you’ll adjust settings, input precise pixel measurements for objects, and all that sort of thing.

The contextual sidebar is also where you’re going to find all of the available object effects. You’ll only see options like Blur, Color Adjust, Drop Shadow, and Inner Shadow to start with. But don’t stop there; click that “More” option. There are quite a few complex and artistic filters and effects to be found.

You’ll also find the Anchor options here. As previously mentioned, these options can be used to “anchor” any object relevant to its position on the page, or in relation to a parent object.

Using the cloud functionality is simple enough. You can save files to the cloud, open them from the cloud, and organize them with folders. It’s fairly bare-bones for now, but it works. For a single user, it works perfectly well enough.

Conclusion

This app can absolutely do some awesome things in the hands of a professional; but illustrators will most likely want to stick with whatever paid app they’re using. It can do a lot, but it can’t do everything Illustrator can to make your workflow easier, for example.

On the other hand, Gravit is a great option for beginners, and web designers with limited vector graphics needs. Just need to whip up a quick banner? This app has you covered with templates to get you started, and enough complex functionality to let designers flex their creative muscles. On top of that, it’s great for anyone who does a lot of design work on the go.

1,300+ Premium Logo Templates: Vintage, Modern & More – only $14!

Source

p img {display:inline-block; margin-right:10px;}
.alignleft {float:left;}
p.showcase {clear:both;}
body#browserfriendly p, body#podcast p, div#emailbody p{margin:0;}

React Router v4: The Complete Guide

Original Source: https://www.sitepoint.com/react-router-v4-complete-guide/

React Router is the de facto standard routing library for React. When you need to navigate through a React application with multiple views, you’ll need a router to manage the URLs. React Router takes care of that, keeping your application UI and the URL in sync.

This tutorial introduces you to React Router v4 and a whole lot of things you can do with it.

Introduction

React is a popular library for creating single-page applications (SPAs) that are rendered on the client side. An SPA might have multiple views (aka pages), and unlike the conventional multi-page apps, navigating through these views shouldn’t result in the entire page being reloaded. Instead, we want the views to be rendered inline within the current page. The end user, who’s accustomed to multi-page apps, expects the following features to be present in an SPA:

Each view in an application should have a URL that uniquely specifies that view. This is so that the user can bookmark the URL for reference at a later time — e.g. www.example.com/products.
The browser’s back and forward button should work as expected.
The dynamically generated nested views should preferably have a URL of their own too — e.g. example.com/products/shoes/101, where 101 is the product id.

Routing is the process of keeping the browser URL in sync with what’s being rendered on the page. React Router lets you handle routing declaratively. The declarative routing approach allows you to control the data flow in your application, by saying “the route should look like this”:

<Route path=”/about” component={About}/>

You can place your <Route> component anywhere that you want your route to be rendered. Since <Route>, <Link> and all the other React Router API that we’ll be dealing with are just components, you can easily get used to routing in React.

A note before getting started. There’s a common misconception that React Router is an official routing solution developed by Facebook. In reality, it’s a third-party library that’s widely popular for its design and simplicity. If your requirements are limited to routers for navigation, you could implement a custom router from scratch without much hassle. However, understanding how the basics of React Router will give you better insights into how a router should work.

Overview

React Router Logo This tutorial is divided into different sections. First, we’ll be setting up React and React Router using npm. Then we’ll jump right into React Router basics. You’ll find different code demonstrations of React Router in action. The examples covered in this tutorial include:

basic navigational routing
nested routing
nested routing with path parameters
protected routing

All the concepts connected with building these routes will be discussed along the way. The entire code for the project is available on this GitHub repo. Once you’re inside a particular demo directory, run npm install to install the dependencies. To serve the application on a development server, run npm start and head over to http://localhost:3000/ to see the demo in action.

Let’s get started!

Setting up React Router

I assume you already have a development environment up and running. If not, head over to “Getting Started with React and JSX”. Alternatively, you can use Create React App to generate the files required for creating a basic React project. This is the default directory structure generated by Create React App:

react-routing-demo-v4
├── .gitignore
├── package.json
├── public
│ ├── favicon.ico
│ ├── index.html
│ └── manifest.json
├── README.md
├── src
│ ├── App.css
│ ├── App.js
│ ├── App.test.js
│ ├── index.css
│ ├── index.js
│ ├── logo.svg
│ └── registerServiceWorker.js
└── yarn.lock

The React Router library comprises three packages: react-router, react-router-dom, and react-router-native. react-router is the core package for the router, whereas the other two are environment specific. You should use react-router-dom if you’re building a website, and react-router-native if you’re on a mobile app development environment using React Native.

Use npm to install react-router-dom:

npm install –save react-router-dom

React Router Basics

Here’s an example of how our routes will look:

<Router>
<Route exact path=”/” component={Home}/>
<Route path=”/category” component={Category}/>
<Route path=”/login” component={Login}/>
<Route path=”/products” component={Products}/>
</Router>

Router

You need a router component and several route components to set up a basic route as exemplified above. Since we’re building a browser-based application, we can use two types of routers from the React Router API:

<BrowserRouter>
<HashRouter>

The primary difference between them is evident in the URLs that they create:

// <BrowserRouter>
http://example.com/about

// <HashRouter>
http://example.com/#/about

The <BrowserRouter> is more popular amongst the two because it uses the HTML5 History API to keep track of your router history. The <HashRouter>, on the other hand, uses the hash portion of the URL (window.location.hash) to remember things. If you intend to support legacy browsers, you should stick with <HashRouter>.

Wrap the <BrowserRouter> component around the App component.

index.js
/* Import statements */
import React from ‘react’;
import ReactDOM from ‘react-dom’;

/* App is the entry point to the React code.*/
import App from ‘./App’;

/* import BrowserRouter from ‘react-router-dom’ */
import { BrowserRouter } from ‘react-router-dom’;

ReactDOM.render(
<BrowserRouter>
<App />
</BrowserRouter>
, document.getElementById(‘root’));

Note: A router component can only have a single child element. The child element can be an HTML element — such as div — or a react component.

For the React Router to work, you need to import the relevant API from the react-router-dom library. Here I’ve imported the BrowserRouter into index.js. I’ve also imported the App component from App.js. App.js, as you might have guessed, is the entry point to React components.

The above code creates an instance of history for our entire App component. Let me formally introduce you to history.

history

history is a JavaScript library that lets you easily manage session history anywhere JavaScript runs. history provides a minimal API that lets you manage the history stack, navigate, confirm navigation, and persist state between sessions. — React Training docs

Each router component creates a history object that keeps track of the current location (history.location) and also the previous locations in a stack. When the current location changes, the view is re-rendered and you get a sense of navigation. How does the current location change? The history object has methods such as history.push() and history.replace() to take care of that. history.push() is invoked when you click on a <Link> component, and history.replace() is called when you use <Redirect>. Other methods — such as history.goBack() and history.goForward() — are used to navigate through the history stack by going back or forward a page.

Moving on, we have Links and Routes.

Links and Routes

The <Route> component is the most important component in React router. It renders some UI if the current location matches the route’s path. Ideally, a <Route> component should have a prop named path, and if the pathname is matched with the current location, it gets rendered.

The <Link> component, on the other hand, is used to navigate between pages. It’s comparable to the HTML anchor element. However, using anchor links would result in a browser refresh, which we don’t want. So instead, we can use <Link> to navigate to a particular URL and have the view re-rendered without a browser refresh.

We’ve covered everything you need to know to create a basic router. Let’s build one.

Demo 1: Basic Routing
src/App.js
/* Import statements */
import React, { Component } from ‘react’;
import { Link, Route, Switch } from ‘react-router-dom’;

/* Home component */
const Home = () => (
<div>
<h2>Home</h2>
</div>
)

/* Category component */
const Category = () => (
<div>
<h2>Category</h2>
</div>
)

/* Products component */
const Products = () => (
<div>
<h2>Products</h2>
</div>
)

/* App component */
class App extends React.Component {
render() {
return (
<div>
<nav className=”navbar navbar-light”>
<ul className=”nav navbar-nav”>

/* Link components are used for linking to other views */
<li><Link to=”/”>Homes</Link></li>
<li><Link to=”/category”>Category</Link></li>
<li><Link to=”/products”>Products</Link></li>

</ul>
</nav>

/* Route components are rendered if the path prop matches the current URL */
<Route path=”/” component={Home}/>
<Route path=”/category” component={Category}/>
<Route path=”/products” component={Products}/>

</div>
)
}
}

We’ve declared the components for Home, Category and Products inside App.js. Although this is okay for now, when the component starts to grow bigger, it’s better to have a separate file for each component. As a rule of thumb, I usually create a new file for a component if it occupies more than 10 lines of code. Starting from the second demo, I’ll be creating a separate file for components that have grown too big to fit inside the App.js file.

Inside the App component, we’ve written the logic for routing. The <Route>’s path is matched with the current location and a component gets rendered. The component that should be rendered is passed in as a second prop.

Here / matches both / and /category. Therefore, both the routes are matched and rendered. How do we avoid that? You should pass the exact= {true} props to the router with path=’/’:

<Route exact={true} path=”/” component={Home}/>

If you want a route to be rendered only if the paths are exactly the same, you should use the exact props.

Nested Routing

To create nested routes, we need to have a better understanding of how <Route> works. Let’s do that.

<Route> has three props that you can you use to define what gets rendered:

component. We’ve already seen this in action. When the URL is matched, the router creates a React element from the given component using React.createElement.
render. This is handy for inline rendering. The render prop expects a function that returns an element when the location matches the route’s path.
children. The children prop is similar to render in that it expects a function that returns a React element. However, children gets rendered regardless of whether the path is matched with the location or not.

Path and match

The path is used to identify the portion of the URL that the router should match. It uses the Path-to-RegExp library to turn a path string into a regular expression. It will then be matched against the current location.

If the router’s path and the location are successfully matched, an object is created and we call it the match object. The match object carries more information about the URL and the path. This information is accessible through its properties, listed below:

match.url. A string that returns the matched portion of the URL. This is particularly useful for building nested <Link>s
match.path. A string that returns the route’s path string — that is, <Route path=””>. We’ll be using this to build nested <Route>s.
match.isExact. A boolean that returns true if the match was exact (without any trailing characters).
match.params. An object containing key/value pairs from the URL parsed by the Path-to-RegExp package.

Now that we know all about <Route>s, let’s build a router with nested routes.

Switch Component

Before we head for the demo code, I want to introduce you to the <Switch> component. When multiple <Route>s are used together, all the routes that match are rendered inclusively. Consider this code from demo 1. I’ve added a new route to demonstrate why <Switch> is useful.

<Route exact path=”/” component={Home}/>
<Route path=”/products” component={Products}/>
<Route path=”/category” component={Category}/>
<Route path=”/:id” render = {()=> (<p> I want this text to show up for all routes other than ‘/’, ‘/products’ and ‘/category’ </p>)}/>

If the URL is /products, all the routes that match the location /products are rendered. So, the <Route> with path :id gets rendered along with the Products component. This is by design. However, if this is not the behavior you’re expecting, you should add the <Switch> component to your routes. With <Switch>, only the first child <Route> that matches the location gets rendered.

Continue reading %React Router v4: The Complete Guide%