A guide to Google's Cloud Vision
Original Source: http://feedproxy.google.com/~r/CreativeBloq/~3/WPVZ2bcZxK0/a-guide-to-googles-cloud-vision
Machine learning. Deep learning. Natural language processing. Computer vision. Automation. Voice recognition. You've probably heard all these and many other terms recently, all under the umbrella of artificial intelligence. In fact, the field is growing so rapidly, it's becoming increasingly difficult to nail down a definitive definition. AI is becoming part of nearly every aspect of our lives, from ecommerce websites and search engines to unlocking your phone.
Your websites and apps can leverage APIs to tap directly into the power of AI. Without having to 'train' AI agents, you can take advantage of massive quantities of data already analysed. Google, Amazon, IBM and many others have created endpoints for developers to hook into and start using AI right away.
On the front end, you can connect voice commands, chatbot interfaces or reactive WebGL creative elements. On the back end, databases use intelligent algorithms to maximise speed and analysis. APIs can provide a layer of abstraction from a wide range of AI functions, from predictions to collective training.
A guide to Google's web tools

There’s a flash sale now on on generate New York tickets! Don’t miss out, click the image to book your place
What is computer vision?
Computer vision is the study and creation of artificial systems that extract information from images. It can also encompass the mechanical system of vision itself. In terms of recognition, it is the process of analysing and determining the content of an image or series of images (including video). This could include medical scans, photos, 360-degree video and virtually any kind of imagery you can imagine.
AI-powered computer vision can:
Identify, label and categorise contentDetect faces and emotionsRecognise headwear such as glasses and hatsIdentify landmarks, buildings and structuresAssess pixel-level information such as colour data, quality and resolutionRecognise popular logosIdentify and read textIdentify potentially inappropriate images
Computer vision with Google's Cloud Vision API
There are lots of choices for Vision APIs but we'll be using Google's Cloud Vision API. Google hosts many AI APIs, including natural language processing, voice recognition, deep learning and vision.
The Cloud Vision API enables your sites and apps to understand what is in an image. It will classify the content into categories, labelling everything it sees. It also provides a confidence score, so you know how likely it is that what it believes is in an image actually appears there. You could use this to interact intelligently regarding camera input in AR or video apps. You could create tools to assist those who are visually impaired. You could create assistants to help identify buildings or landmarks for tourists. The possibilities are endless.
01. Set up a Cloud project
If you've used Google's APIs before, some of these first steps will be familiar. As with other Google services, you'll need to set up a cloud project. Go to the Google Cloud Platform console and create a new project or select an existing one. Like most of Google's services, the Cloud Vision API is free to use until you start making lots of API requests. You may need to enter billing info when you activate the API but this is not charged at a low volume of requests and you can remove the services after you're done testing.
02. Enable the Cloud Vision API
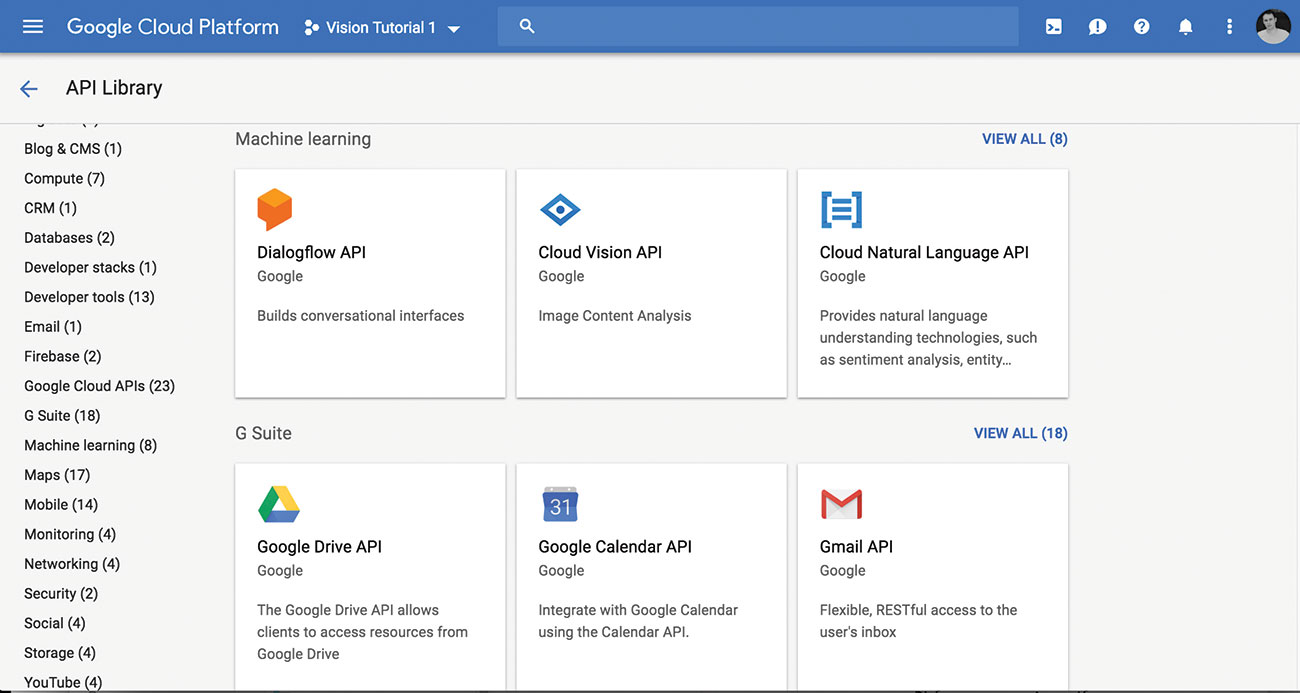
Browse the API library and then enable the Cloud Vision API
Browse the API library and select the Cloud Vision API for your project.
Once enabled you should see a little green check and the message 'API Enabled' beside it.
03. Create a service account
Next you'll need to set up a service account. Think of the API as a web service you're creating. Since we are going to set up usage like a typical service, this is the best practice. It also works best with authentication flow.
04. Download private key
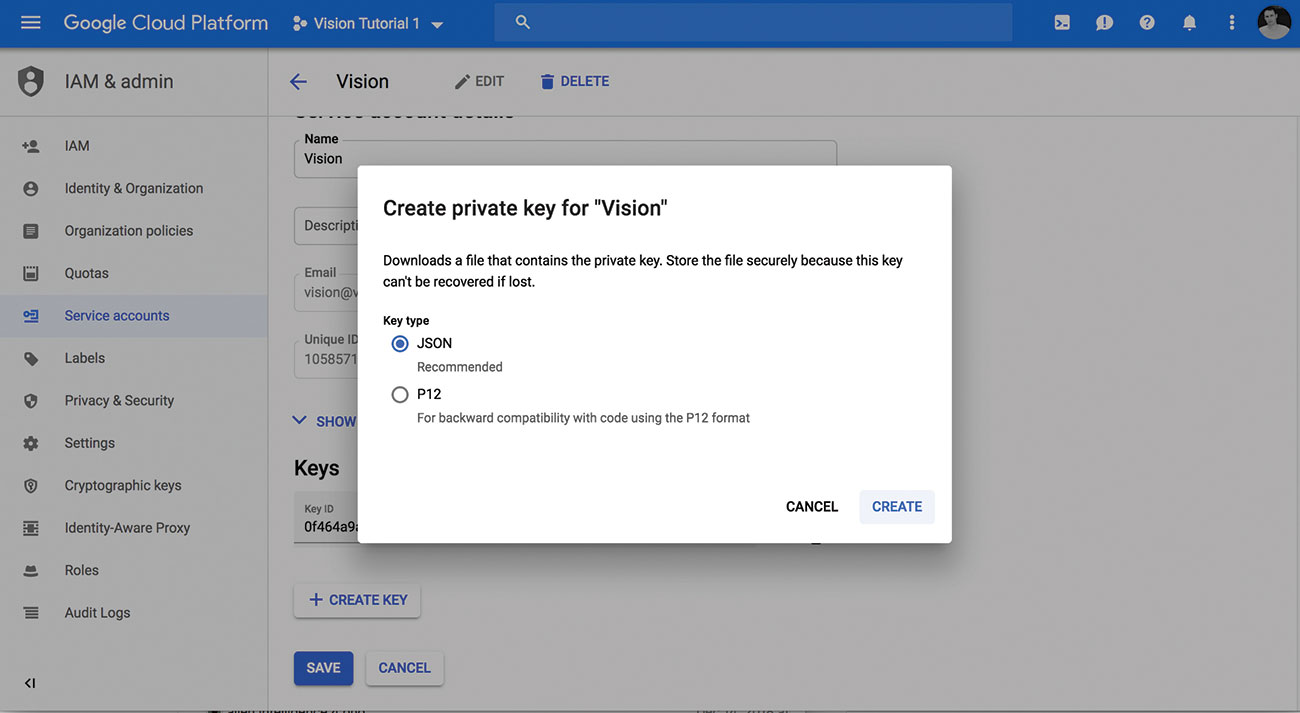
Get your private key for the service account
Once you have a project with the API enabled and a service account, you can download your private key as a JSON file. Take note of the location of the file, so you can use it in the next steps.
If you have any problems with the first few steps there is a quick start guide that helps and ends with the download of the JSON key.
05. Set environment variable
You need to set the GOOGLE_APPLICATION_CREDENTIALS environmental variable, so it can be accessed by our API calls. This points to the JSON file you just downloaded and saves you having to type the path every time. Open a new terminal window and use the export command like so:
Replace the [username] with your username. Be sure the path to the place you stored the private key file is correct. Replace the [file name] with your private key file and use the path to your file.
On Windows, you can do the same thing via the command line, like this:
Note: If you close your terminal or console window, you may need to run that again to set the variable again. We'll add this into our PHP code shortly as well, so you don't have to worry about it again.
06. Make a call to the API
Now you're ready to dig into the Cloud Vision API. You'll use curl to do quick tests of the API. You can also use this method from your code as well.
The curl requests can be made in most languages, whether that's PHP, Python or Node. This way you can make the calls direct in command line or assign the result to a variable in the language of your choice. FInd some quick tips on using curl here.
Create a simple JSON file to hold the details of the request. Call it google_vision.json. Store it local to where you want to run the terminal commands from.
In the above code, you've indicated an image to analyse, as well as specific API features to use, including face detection and landmark detection. SAFE_SEARCH_DETECTION is great for knowing if the image is safe and in what category it belongs to, such as adult content or violent. IMAGE_PROPERTIES tells you about colours and pixel-level details.
To execute the curl command, in your terminal or command line interface, enter the following.
By using the > results syntax, you'll have the results stored in a new file called results for you. You indicated the URL to the API ("https://vision.googleapis.com/v1/images:annotate") and included your JSON data to POST to it.
You may get prompted the first time you use this to activate the API or allow access. Answer yes or Y to that prompt and it should return the JSON.
If you open the results file, you'll get JSON data results from the Vision API request. Here's a snippet:
You see some very useful results right away. Under the labelAnnotations node, you can see a 98 per cent match that the image contains a "dog" and a 95 per cent match that it contains a "golden retriever"! The AI already identified the content of the image and other detail, including a "snout" and the fact it is likely a "sporting dog".
This required no training on your part because of the already-trained Google Vision AI system. Scanning through the results, you'll see everything from recommended crop regions – for auto-cropping images to subjects – to incredible detail of what is in the images, including colours and content. Try it out with other images to see how powerful the API is.
You can continue using this method to test out the calls we'll use. You can also set up a local SDK in a language you prefer and integrate it into your app.
07. Install client library
Next you will make a simple web-based app to show how to integrate the API into your projects.
There are a number of SDKs available in a variety of languages to make integration easy. You'll use the PHP SDK for this next section. If you wish to tweak the code that follows into a different language, there is a great resource of SDKs here.
Start by making sure you have a project folder set up on your local or remote server. If you don't have it already, get Composer and install it to your project folder. Optionally, you may have Composer already installed globally and that is fine too.
Run the following Composer command to install the vendor files for the Cloud Vision SDK.
Composer makes a vendor folder in your project folder and installs all the dependencies for you. If you get stuck setting this up and want to use PHP, you can check out this installing Composer resource.
08. Create a new file
Create a new PHP file in your project folder. Set it up however you like but include a simple HTML form to upload images for quick testing. Here's an example PHP file with the form included:
The code includes a basic HTML file with a form and a placeholder for PHP code. The code starts checking for the existence of the image, submitted from the form. If it's not submitted yet, it does nothing.
09. Store the image
If you'd prefer to point to images online or on your system, skip this step. If you'd like to process images you select, add this code to save the image selected.
10. Add environment variable
You need to set the GOOGLE_APPLICATION_CREDENTIALS variable for it to authenticate. In PHP we use the putenv command to set an environment variable. Add this code next in your PHP code:
Replace the path and file name to your JSON private key file.
11. Include the library
Add the library and initialise the LanguageClient class in your code. Add this code next:
Start by requiring the vendor autoload. This is similar in Python or Node when you require your dependencies. Import the ImageAnnotatorClient next, to make use of the class. Define your projectId. If you aren't sure what this is, look it up in your Google Cloud Project console. Finally, create a new ImageAnnotatorClient object using your projectId and assign it to the $imageAnnotator variable.
12. Analyse image content
Start submitting the image to the API for analysis. You'll display the result as JSON to the screen for now but in practice you could assess the results and use them any way you wish.
Add the following to submit the image to the API.
This submits the content from the submitted form to the imageAnnotator endpoint and stores the result in the $response variable. It specifies the labelDetection feature. You can also use faceDetection, logoDetection, textDetection and many other functions. For a full list, check here.
Next, iterate over the list of labels. This is just an example to show how to use it: you could process it and react to the results however you need.
13. Detect faces
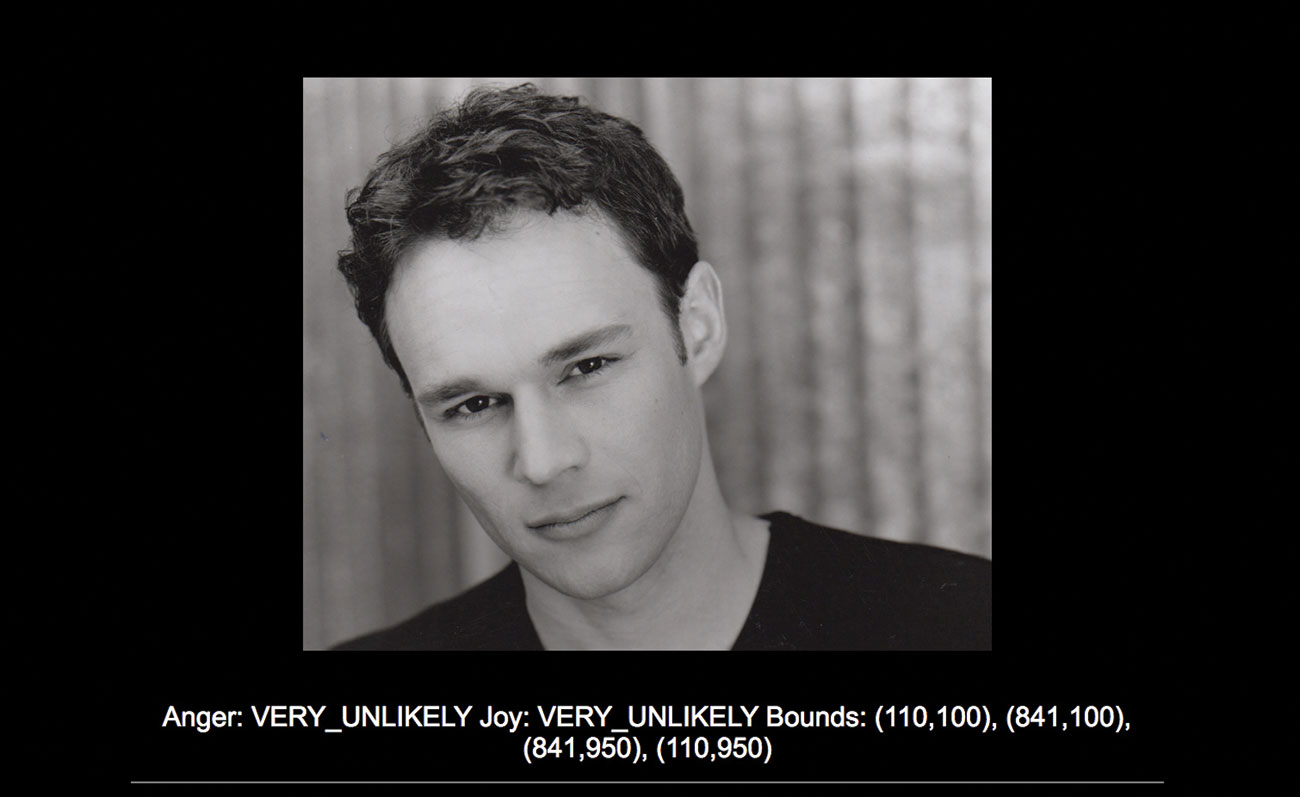
Using the faceDetection function of the Vision API, you can find the emotions and bounding boxes of faces in the image
Another quick example of how powerful the API is lies in the faceDetection function. This will return emotion data as well as location information of where in the image the faces are. Try out this code to see how it works.
You start out by using the faceDetection function of the Annotator and pass in the image like the previous example. Then you get the faceAnnotiatons. You use an array of response weights in more common language, so you can see the likelihood of certain emotions. Following this, you iterate the response like before. You check for two of several possible emotions, anger and joy, returning the results of those. This will also give you the corners of the bounding boxes that define each face found.
This article was originally published in issue 316 of net, the world's best-selling magazine for web designers and developers. Buy issue 316 here or subscribe here.
Related articles:
Amazing AI tool reconstructs photos like magic17 top tools in Google AnalyticsThe best code editors


Leave a Reply
Want to join the discussion?Feel free to contribute!