How to Animate Gradient Text Using CSS

Original Source: https://1stwebdesigner.com/how-to-animate-gradient-text-using-css/

Web design takes a captivating turn when CSS comes into play. It enables a world of transformations, such as taking static text elements and infusing them with life. Our focus today is one such engaging transformation – animate gradient text using CSS.

So, let’s demonstrate how a seemingly complex effect can be achieved with a few lines of code.

UNLIMITED DOWNLOADS: 400,000+ Fonts & Design Assets
Starting at only $16.50 per month!

DOWNLOAD NOW

Setting Up the Text in the HTML

We begin by defining our text element in HTML, which in this case is a simple heading:

<h1 class="animated-gradient">1stWebDesigner</h1>

Here, we create an <h1> element with a class called “animated-gradient”. This class becomes our anchor for creating the gradient animation in CSS.

Unfolding the Gradient Animation

The core part lies within our CSS. Let’s define the gradient and set it in motion with the following code:

/* Google Fonts for Open Sans */
@import url('https://fonts.googleapis.com/css2?family=Open+Sans:wght@700&amp;display=swap');

/* Define animation */
@keyframes gradient-shift {
0% {background-position: 0%}
100% {background-position: 100%}
}

/* Styling our animated gradient text */
.animated-gradient {
font-family: 'Open Sans', sans-serif;
font-size: 2em;
background: linear-gradient(270deg, #ff4b59, #ff9057, #ffc764, #50e3c2, #4a90e2, #b8e986, #ff4b59);
background-size: 200%;
-webkit-background-clip: text;
-webkit-text-fill-color: transparent;
animation: gradient-shift 3s ease-in-out infinite;
}

Our CSS setup does the following:

@import url: This directive fetches the Open Sans font from Google Fonts, noted for its modern and clean aesthetics.
@keyframes: Here, we define an animation named gradient-shift. This animation creates the illusion of motion in the gradient by shifting the background’s position from 0% to 100%.
font-family and font-size: These properties set our text’s font to Open Sans and its size to 2em.
background: This property generates a linear gradient using a striking array of colors. The gradient direction is set to 270 degrees, providing a left-to-right color flow.
background-size: This property, set to 200%, enlarges the background, contributing to the illusion of movement.
-webkit-background-clip and -webkit-text-fill-color: These properties render the text transparent, allowing the animated gradient to shine through.
animation: Lastly, we deploy our gradient-shift animation. It uses an ease-in-out timing function for smooth transitions and loops indefinitely, creating an ever-changing cascade of colors.

The Result

And there we have it! Check out the vibrant, animated gradient text:

See the Pen
Animated Gradient Text by 1stWebDesigner (@firstwebdesigner)
on CodePen.0

Final Thoughts

The process of creating the animated gradient text effect is surprisingly straightforward, but the creative opportunities it unveils are far-reaching. With this foundational knowledge, you can experiment with different color schemes and gradient directions, apply the animation to various elements like buttons or headers, and even incorporate subtle animated accents into your design.

Remember, the real beauty of CSS is in its flexibility and power – it provides a vast canvas for creativity. You could also explore further with CSS keyframes to manipulate other properties and add more dynamic animations to your design. Feel free to dive deeper into the world of CSS animations with our guide on CSS keyframes.

GoDaddy POS Review: A Complete Guide to GoDaddy POS

Original Source: https://ecommerce-platforms.com/articles/godaddy-pos-review

In this GoDaddy POS review, we’re taking a behind-the-scenes look at the compelling point of sale solution offered by one of the world’s best-known technology vendors.

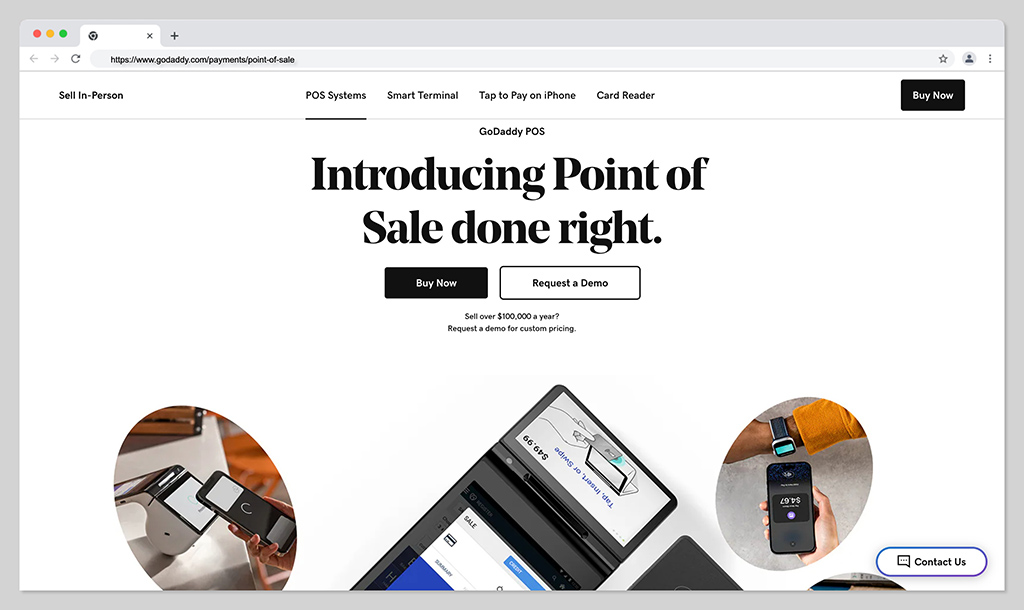
GoDaddy POS is the all-in-one payment processing and management solution, that allows retailers to accept payments from customers anywhere, with ease.

Quick verdict:

If you’re looking for a simple way to take your business to the next level, GoDaddy POS could be an excellent choice. Straightforward and versatile, this convenient solution appeals to both small and growing companies alike.

You even have plenty of freedom when it comes to choosing the hardware you want to use to accept and process payments.

Rating

Godaddy POS

Godaddy POS logo

Features
8/10

Ease of Use
6/10

Pricing
8/10

Hardware
8/10

In this article:

Quick verdict:

What is GoDaddy POS?

GoDaddy POS Pros and Cons

GoDaddy POS: Setup and Functionality

GoDaddy POS: Ease of Use

GoDaddy POS Payment Processing & Analytics

The GoDaddy POS Hardware

GoDaddy POS Pricing and Fees

GoDaddy Customer Service and Integrations

GoDaddy POS Review: The Verdict


Toggle

Go to the top

Let’s take a closer look at what GoDaddy POS can do.

What is GoDaddy POS?

While you might be most familiar with GoDaddy as a web hosting and domain name provider, the company has expanded significantly in recent years.

Today, GoDaddy doesn’t just host websites, it also offers tools for building your online presence, implementing SSL security, and managing email accounts. You can even access specialist web design services and online store solutions.

godaddy pos review - homepage

The GoDaddy POS (Point of Sale) solutions allow large and small business owners alike to unlock new sales opportunities in the worlds of physical sales and ecommerce.

Aligned with “GoDaddy Payments”, the payment processing solution from the vendor, the POS system can integrate with your ecommerce store or website builder, as well as offline hardware and technology.

Business owners can choose from a range of two dedicated devices to help with taking payments from debit cards and credit cards in-person. Plus, with the GoDaddy mobile app and dashboard, you can seamlessly track and manage sales from multiple environments with one easy-to-use dashboard.

The POS aligns with GoDaddy’s other ecommerce tools, although it doesn’t integrate directly with third-party payment processors.

The system does support multiple payment methods, though, including Google Pay, Apple Pay, and mobile wallets.

Go to the top

GoDaddy POS Pros and Cons

Like virtually any POS solution on the market today, GoDaddy has both pros and cons to consider. While it’s an excellent tool for processing card payments, it does have some limitations compared to other, more advanced toolkits.

Pros 👍
Cons 👎

Pros 👍

Instant connectivity to GoDaddy’s other tools
Multichannel ecommerce and offline selling
Competitive transaction fees with GoDaddy Payments
Easy-to-use mobile app for instant transactions
Two different hardware options to choose from
Integrations with ecommerce tools and accounting apps
Security built-in for transactions
Simple and straightforward backend

Cons 👎

No advanced features for customer or employee management
Limited insights into customer profiles
No support for third-party payment processors
No monthly pricing options on plans
Prices can increase when you renew your subscription

Go to the top

GoDaddy POS: Setup and Functionality

GoDaddy POS is excellent for small business owners and beginners in the retail world, as it takes very little effort to implement.

There’s even a “Quick Start Guide” you can use to walk through all of the various steps you need to take. The company can also offer access to human guides if you do encounter any problems with your initial configuration.

Depending on your business structure, you can use GoDaddy POS as a software solution, and take payments directly from your iOS or Android smartphone via the GoDaddy Mobile app. This means there are no extra costs to consider. The app comes with access to all of the features of GoDaddy payments, including access to invoicing tools and payment tracking.

Alternatively, you can integrate the intuitive software with two dedicated hardware options from GoDaddy (which we’ll cover in a moment).

Ultimately, the GoDaddy POS service works best when it’s integrated with the online store and website building tools already available from the hosting provider.

You can use GoDaddy to set up a free mobile-friendly website with built-in security features, appointment booking and marketing. Plus, you can upgrade your site for a fee with a custom domain name, 100s of customizable templates to choose from, and multi-channel selling options.

GoDaddy supports sales across channels like:

Facebook

Ebay

Google

Instagram

Etsy

Amazon

It also provides business owners with a comprehensive back-end environment, primming with tools for things like inventory management, and social media marketing.

Go to the top

GoDaddy POS: Ease of Use

Most of the solutions provided by GoDaddy for today’s business owners are renowned for their simplicity. Whether you’re using the GoDaddy e-commerce platform, website building tools, or virtual terminal, you can expect a relatively straightforward experience.

The domain registrar provides a central, unified dashboard within it’s POS technology. This helps retailers unify the orders received on their GoDaddy website, with in-person payments and offline transactions. Plus, there are even handy analytics and reporting functions, to track customer purchases and buying habits.

When you use GoDaddy POS and the ecommerce platform in unison, you’ll also have access to various options for serving customers. For instance, you can allow customers to buy items online and pick them up in store, or place orders for delivery in-person.

The cloud-based solution is straightforward setup and use, and comes with built-in storage, to ensure you can keep track of all the right data. Plus, business leaders have complete freedom to choose how they want to accept payments. You can use the GoDaddy Smart Terminal to accept payments, or just access your payment gateway through the mobile app.

An added bonus for GoDaddy is the ability to integrate the hardware and software you buy with other third-party platforms. You can connect your tools to hardware accessories, like cash drawers, or receipt printers. Plus, you can link the POS software to accounting tools like QuickBooks.

Go to the top

GoDaddy POS Payment Processing & Analytics

A big factor in choosing the right POS system for any store is payment processing functionality. Business owners appreciate GoDaddy POS for its straightforward transaction solutions.

The GoDaddy Payments service supports both online and in-person sales, with competitive pricing on transaction fees. Costs start at only 2.3% for in-person transactions, and 2.3% plus 30 cents for online transactions. The only downside is there’s no option to integrate with other payment processors.

This means if you’re using Stripe, Square, or PayPal to handle payments, you might encounter a problem. On the plus side, with GoDaddy Payments, you can get payouts sent to your bank account within as little as 24 hours. Plus, every transaction is PCI secure.

Aside from ensuring you can accept and manage payments effectively; it also helps to have access to insights that can assist in boosting your revenue and profits. Fortunately, GoDaddy does offer some handy solutions here. There are reporting and analytics tools built into the POS software for tracking both in-person and online sales from a central dashboard.

Business owners can view transactions and returns over time, track revenue growth, and even download and customize POS reports. There are even tools to help you monitor buying habits among consumer segments, so you can personalize your sales and marketing strategies.

Go to the top

The GoDaddy POS Hardware

As mentioned, you don’t necessarily need any hardware to handle online payments and in-person transactions with GoDaddy.

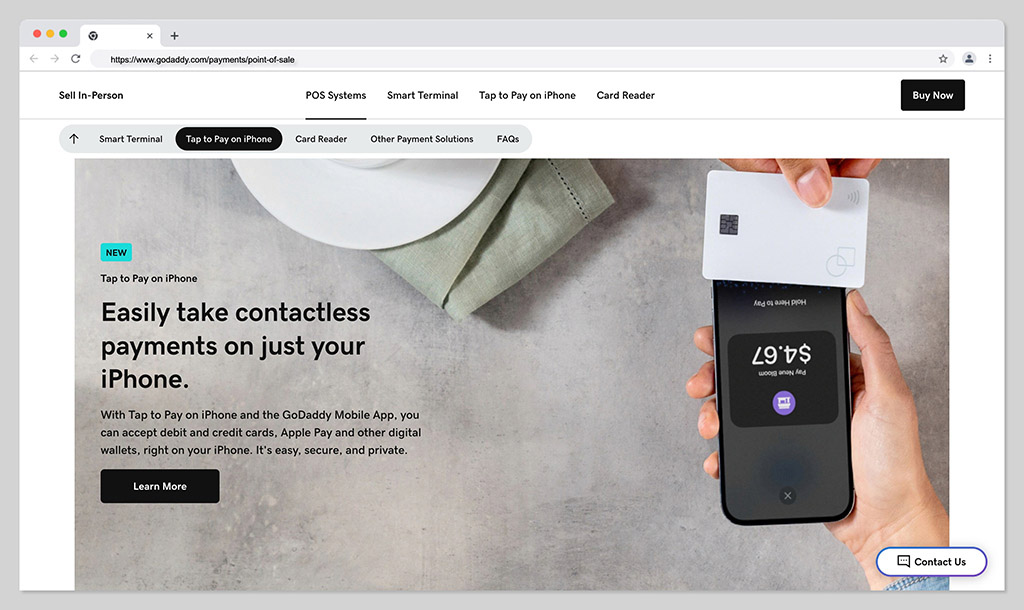
The mobile app for the GoDaddy POS system ensures you can turn any iPhone or Android device into a functional payment terminal.

godaddy tap to pay on iphone - godady pos review

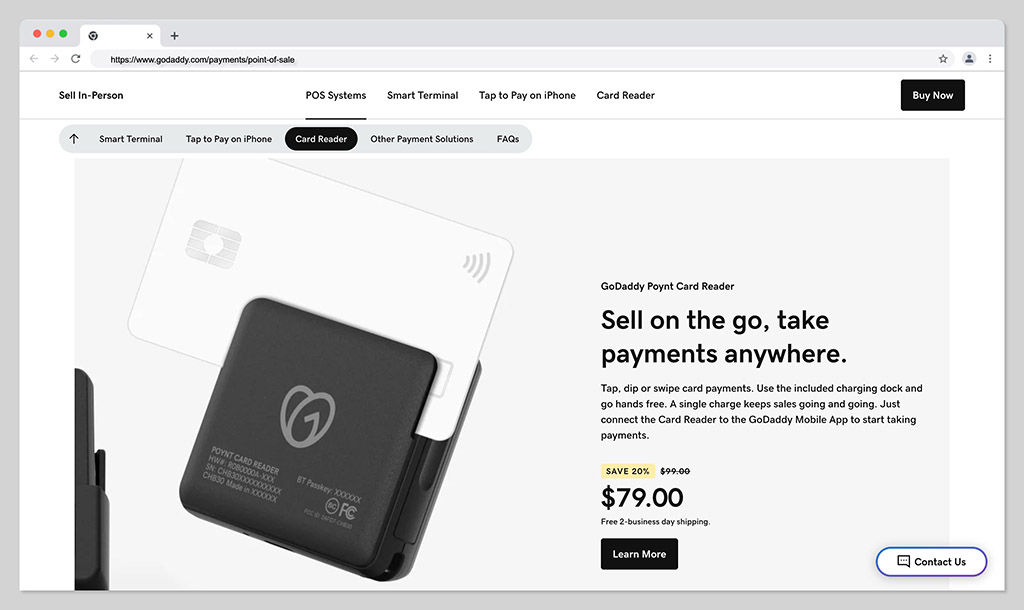
However, if you do want to invest in intuitive hardware, GoDaddy introduced two distinct solutions for business owners in 2021. The first option is the GoDaddy Poynt Smart Terminal, and the second is the simple GoDaddy Poynt Card Reader.

godaddy smart reader - godady pos review

With a suggested retail price of around $99, the card reader is an excellent option for smaller businesses and pop-up shops. It supports tap, dip, and swipe payments, and comes with an included charging dock, so you can even use the system wirelessly.

What’s more, the card reader can seamlessly connect to the GoDaddy Mobile app, so you can painlessly take payments and track transactions without a separate screen.

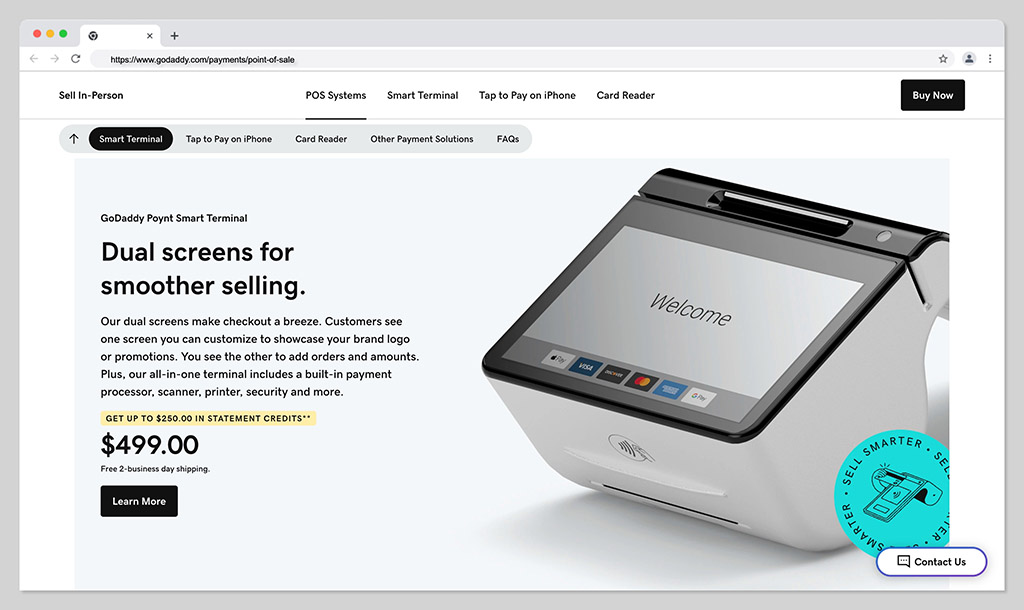
Intended for slightly larger businesses, the Smart Terminal is a little more comprehensive. This modern and sleek payment terminal comes with two screens, one for you, and one for your customer. You can even customize the screen your customer sees, to show your brand logo, promotions, and more. On your side, you’ll be able to see orders and amounts in a clean format.

godaddy smart terminal - godady pos review

The all-in-one terminal comes with payment processing tools, a scanner, and a printer, so you don’t need to invest in any other accessories to run your store. With a retail price of around $499, this is a relatively cost-effective solution for growing companies.

Every device also comes with a 1-year limited warranty and a 30-day money back guarantee if you decide you want to return your system.

Go to the top

GoDaddy POS Pricing and Fees

As mentioned above, the exact price you’ll pay for your GoDaddy POS service will depend on the functionality and hardware you need. The smart reader costs around $99, while the full terminal will set you back approximately $499.

On top of that, you’ll have the GoDaddy payment processing fees to consider, which start at 2.3% for in-person transactions. There’s another 30 cents added to every transaction fee if you’re processing payments with the same solution online.

To access the full integration options between GoDaddy Payments, your ecommerce website, and your offline store, you’ll need a subscription plan too.

GoDaddy currently doesn’t offer any monthly payment options, instead requiring customers to pay outright for a full year.

Plans include:

Basic: $9.99 per month (annually): Access to GoDaddy’s website builder, marketing tools, and payment processing options.

Premium: $14.99 per month (annually): All the features of the Basic plan, plus online appointment options and enhanced marketing features.

Commerce: $16.99 per month (annually): The features of the Premium plan, plus access to tools for building your own online store, and connecting the POS system.

Commerce Plus: $29.99 per month (annually): All the features included in the Commerce package, with advanced automation features.

Go to the top

GoDaddy Customer Service and Integrations

One good thing about GoDaddy’s retail solutions is that they can integrate with a wide variety of tools, including:

WordPress

WooCommerce

Squarespace

LiveAgent

You can also use some GoDaddy solutions (like domain names) on virtually any site, including Shopify sites.

When it comes to customer service, GoDaddy has had some negative reviews in the past. However, the company has committed to making its services a lot more reliable in recent years.

GoDaddy offers similar customer support to most competitors, with 24/7 guidance available over the phone.

You can also request support from GoDaddy Guides through email, text message, or chat. Most responses are delivered within the same business day. GoDaddy even received an A+ rating from the Better Business Bureau, which not every competing brand has achieved.

Go to the top

GoDaddy POS Review: The Verdict

GoDaddy POS is relatively affordable, and you don’t necessarily need to purchase hardware straight away, so you can always test out the service before making your decision.

Of course, there are plenty of rival services still worth considering.

Business owners in search of more advanced features and scalability may want to consider an alternative solution like:

Square POS

Shopify POS

Clover POS

Further reading 📚

Shopify POS Review (2023): Is it the Best Point of Sale System & Retail POS?

Shopify POS Go Review – Everything You Need to Know

Square POS Reviews: Everything You Need to Know (2023)

Clover POS System Review: Transactions Made Easy (2023)


The post GoDaddy POS Review: A Complete Guide to GoDaddy POS appeared first on Ecommerce Platforms.

The Best Fulfillment Companies in Europe

Original Source: https://ecommerce-platforms.com/articles/the-best-fulfillment-companies-in-europe

best fulfillment centers europe

Does your eCommerce business operate in Europe? Suppose it does, and you’re considering outsourcing order fulfillment, product storage, and shipping. In that case, finding a reputable and reliable order fulfillment company is imperative. 

So, I’m shining a light on a few such companies to help you kickstart your search for the best fulfillment companies in Europe.

We’ll give you the lowdown on what they offer, their features, pros and cons, pricing, and who the service is best for.

That’s a lot to cover, so let’s explore some of the best options available.

In this article:

Best Fulfillment Companies in Europe for 2023

The Best Fulfillment Companies in Europe: My Final Thoughts

Toggle

Best Fulfillment Companies in Europe for 2023

ShipBob

ShipMonk

Huboo

Amazon FBA

Byrd

1. ShipBob
best fulfillment companies europe

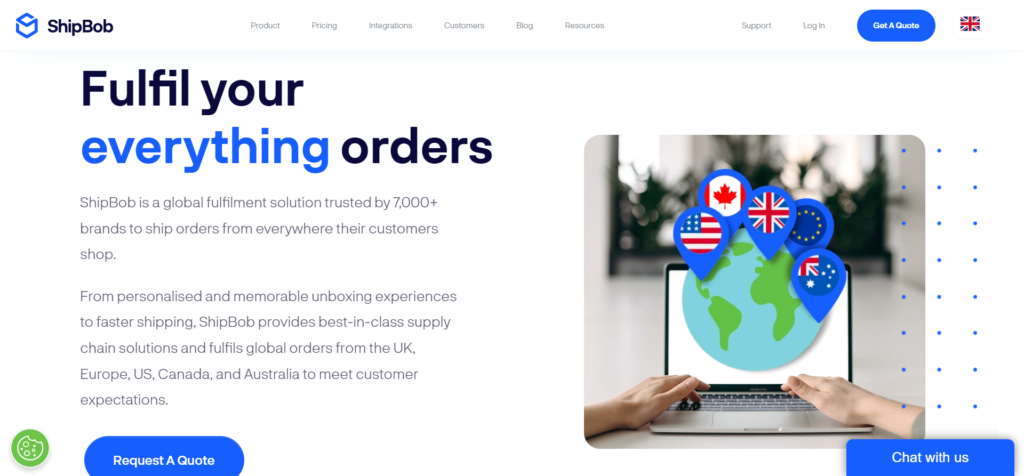
Having been around since 2014, ShipBob’s an old hand at order fulfillment. 

ShipBob operates across 220+ countries and boasts 110+ integrations, including a choice of popular eCommerce platforms and online marketplaces like Shopify, Amazon, BigCommerce, eBay, Squarespace, and Wix. 

It has 30+ fulfillment centers across Europe, the UK, the US, Canada, and Australia. The European centers are located in Poland and the Netherlands, with a further three in the UK. 

To get started:

Integrate your store with ShipBob.

Send ShipBob your products across your chosen fulfillment centers.

Then, when a customer places an order on your store, it’s automatically sent to ShipBob, who picks, packs, and ships to the customer. 

ShipBob Features

ShipBob partners with reputable carriers like Spring Global, GLS, Royal Mail, Evri, Deutsche Post, DPD, and UPS. 

From ShipBob’s dashboard, you can view order updates, inventory status, storage and shipping costs, and more. 

A trackable returns management service is available.

Custom-branded or plain packaging is free to use.

Real-time order management tools (oversee orders from start to finish and automatically push tracking details to customers).

Inventory management tools (easily view inventory status and quantity across fulfillment locations, identify slow-moving stock with high storage costs, get insights into product performance over time by channel, and more).

Reporting and analytics tools

Pricing

The pricing tab on ShipBob’s website takes us to two pricing pages:

Warehouse management service

Outsourced fulfillment

In both cases, you have to contact ShipBob’s sales team for costs. But, the ShipBob resource center states that pick fees start at $0.20 per pick. 

Pros

ShipBob offers a good selection of integrations across various categories, including eCommerce and marketplaces, inventory management, return management, freight and shipping, and more. 

ShipBob offers 2-3 day shipping to 90% of the EU and UK and 2-day express shipping to 100% of the US.

ShipBob has 40+ fulfillment centers, including two in Europe and three in the UK.

Cons

Pricing information is sparse. 

Some users complain about inventory mix-ups at ShipBob warehouses.

Some users aren’t satisfied with ShipBob’s customer support. 

Who is it Best For? 

As ShipBob offers 2-3 day shipping to most of Europe and the UK, ShipBob is best for companies looking to provide these kinds of shipping times. ShipBob also integrates with many eCommerce platforms and marketplaces, making it a viable option for most online sellers. 

Further Reading

ShipBob Review (2023) – The Ultimate Order Fulfillment Solution?

ShipBob vs Deliverr (2023): Choosing the Best Ecommerce Shipping Option

ShipBob vs ShipMonk (2023): A Complete Comparison

ShipBob vs. Shopify Fulfillment Network: Which is Better? (2023)

ShipBob vs Red Stag Fulfillment: A Comparison of Top 3rd-party Logistics (3PL) Providers

5 Best ShipBob Competitors and Alternatives for 2023

ShipBob vs. Shipstation: Which Is The Best Ecommerce Order Fulfillment Solution?

ShipBob vs. Amazon FBA: Which is Best for Fulfilment?

Go to the top

3. ShipMonk
best fulfillment companies europe

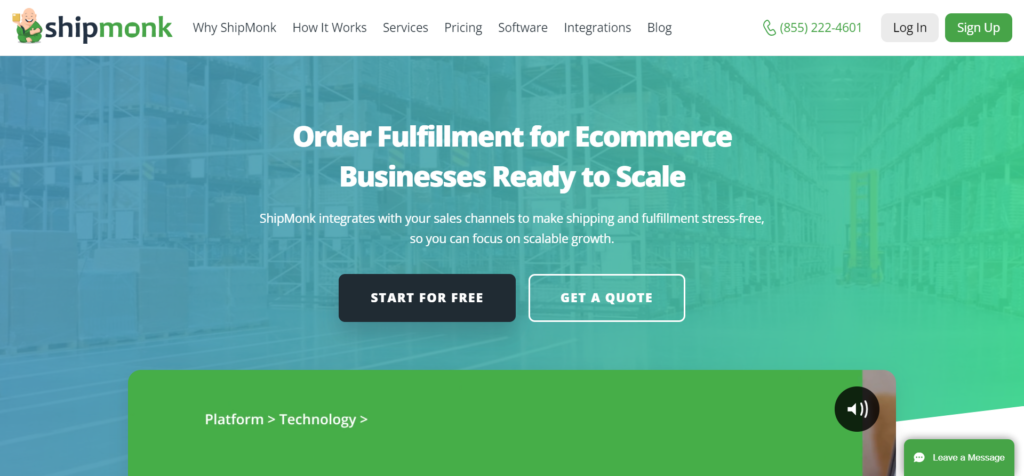
ShipMonk is a third-party logistics platform for DTC eCommerce brands of varying sizes. You’ll get access to advanced order, inventory, shipping, and warehouse management software and benefit from a worldwide network of fulfillment centers. Eight are located in the US, then there’s one piece in Canada, Mexico, the UK, and the Czech Republic, enabling ShipMonk to ship to 180+ countries. 

Where European merchants are concerned, using ShipMonk’s warehouse in the Czech Republic enables you to achieve an average delivery time of two to five days. 

ShipMonk also boasts 75+ plug-and-play integrations, including popular eCommerce shopping carts, online marketplaces, and inventory and warehouse management solutions. Notable names include Shopify, WooCommerce, Squarespace, Wix, and Bigcommerce – to name a few!

It’s also worth noting that ShipMonk advertises a 99.9% picking accuracy, which is pretty impressive!

Here’s how ShipMonk works:

You or your supplier ship products to one (or more) of ShipMonk’s fulfillment centers. If you split your inventory, ShipMonk automatically selects the warehouse that provides the quickest delivery time at the best price for your customer. 

Integrate your sales channels with ShipMonk to sync orders, inventory, returns, and more automatically.

Upon receiving your wares, ShipMonk logs your inventory onto its system. This involves taking photos and measuring SKUs to ensure quality control and optimized shipping.

When a customer orders, ShipMonk picks, packs, and ships the items directly to them. ShipMonk sends automated shipping confirmation emails with tracking details to your customers. Plus, you can even brand your tracking pages.

Should a failed delivery occur (or something else goes wrong), you and your customers can utilize MonkProtect, an automated claims portal for filing, tracking, and resolving issues directly with ShipMonk. 

Features

Access to reputable carriers and discounted shipping rates from providers like USPS, FedEx, DHL, UPS, and more. 

Access to a ‘Happiness Engineer’ who can help coordinate and manage your freight (should this be a service you require). Your ‘Happiness Engineer’ can also help with any other questions. 

Returns management – You can easily create return shipping labels and receive alerts when returns arrive at ShipMonk’s warehouses.

From your dashboard, you can view a breakdown of costs, orders, inventory unit numbers, and where you’re shipping most frequently.

You can add new users to your ShipMonk account for free and edit user permissions.

You can use custom packaging – I.e., promotional inserts, branded stickers, custom boxes, dunnage, etc.

…and more.

Pricing

ShipMonk’s pricing varies depending on which ShipMonk service you want (for the purposes of this review, we’re quoting ShipMonk’s eCommerce Fulfillment service).

To get a quote, you need to use ShipMonk’s pricing calculator to calculate pick fees for the monthly orders you wish to process (the more orders you process, the lower the costs). 

For example, for 0-500 monthly orders, expect to pay:

A $3.00 first-item pick fee (per order) and $0.75 for additional items 

$0.20 for promotional Inserts

$2.00 + .50/additional item for returns processing

Next, you need to factor in your storage requirements. Each product SKU needs storage. Storage fees are as follows:

A small bin: $1 a month

A medium bin: $2 a month

A large bin: $3 a month

An X-large bin: $4 a month

A Pallet $25 a month

There are also one-off costs to consider; however, I won’t list them all due to space restrictions. You can find more pricing info on ShipMonk’s pricing page, from which you can also contact ShipMonk directly to receive a custom quote.  

Pros

Users praise ShipMonk’s helpful customer support agents and efficient onboarding process. 

ShipMonk is more transparent about its pricing than the majority of its competitors. 

Several Trustpilot users speak to ShipMonk’s reliability

Some users mention that they’ve managed to make savings after using ShipMonk

Cons

A few users have complained about miscounted and lost inventory

Other users have grumbled about delayed shipments

Who is it Best For?

ShipMonk is a suitable 3PL for European eCommerce businesses of all sizes. It’s certainly worth a second glance if branding is your priority. Not least because you can use branded packaging and customize your tracking pages.

Further Reading

ShipMonk Review (2023): An Order Fulfillment platform

ShipBob vs ShipMonk (2023): A Complete Comparison

Go to the top

3. Huboo

best fulfillment companies europe

Huboo focuses on providing order fulfillment for the European and UK eCommerce markets. It has five order fulfillment centers in the UK and one a piece in Germany, the Netherlands, and Spain. 

Huboo has fulfilled 15,000,000+ products for 1,200+ clients in the last month and promises a 99.9% picking accuracy rate. It also integrates with 26 eCommerce platforms and marketplaces, including Shopify, WooCommerce, and eBay, and a further 18 tools covering CRM and marketing, tax, finance, inventory, order, and channel management. 

When you sign up:

Link your store to Huboo.

Upload your products to the Huboo portal.

You or your manufacturer send Huboo your products (you can send stock to multiple warehouses).

When a customer places an order, Huboo picks, packs, and ships it via one of its many shipping partners, including DPD, DHL, Hermes, and domestic postal carriers. 

Shipping times depend on the country you’re shipping to and from and the carrier you use. For example, in Germany and Spain, shipping tends to be between one to three days, whereas in the UK, it’s between one to two days. However, times aren’t shown for the Netherlands.

Features

Huboo provides fulfillment solutions for those sending between one and 5,000+ packages a month

Access to a network of European and UK fulfillment centers

Free storage for two months

44 integrations are available, including popular eCommerce platforms

You can track the daily costs of inbound goods and monitor stock levels and sales in real-time via Huboo’s dashboard

A complete order fulfillment service, including pick, pack, and ship

Pricing

Hubbo stands out because its website actually lists its prices- mostly in one place! Costs depend on which region you’re in, and in each instance, you’ll see a cost breakdown comprising of:

Fulfillment and shipping per item

Additional charges for added items

Return handling costs

Storage costs per item 

EU and UK customers can sign up for one of four subscription plans in EUR or GBP. Plans include:

Free storage for two months

Product picking and sending when orders come in

Access to Huboo’s dashboard

The plans are based on the number of monthly orders dispatched:

Silver: limit of 300

Gold: limit of 1,500 

Enterprise: limit of 5,000

Corporate: 5,000+ 

There’s also a minimum monthly invoice value of €375 or £375.

Pros

Pricing is available and includes free storage for two months

Huboo marketplace integrations, such as Wish, Etsy, and Wayfair.

It has a high review rating of 4.7 out of five on Trustpilot

It partners with several reputable domestic and international carriers

Several users praise Huboo’s customer support and onboarding process

Cons

The minimum invoice fee might not be affordable for really small businesses.

If you’re looking for worldwide fulfillment center access, you’ll have to look elsewhere.

Some users complain that it takes a while to process new stock. 

Who is it Best For? 

Huboo is best for online marketplace sellers and eCommerce store owners in the UK; here, shipping takes one to two days. It’s similarly viable for Germa and/or Spanish businesses; here, shipping tends to be between one to three days. It’s also worth noting that this solution suits companies of all sizes, including tiny operations selling between one and 100 units a month.  

Go to the top

4. Amazon FBA
best fulfillment companies europe

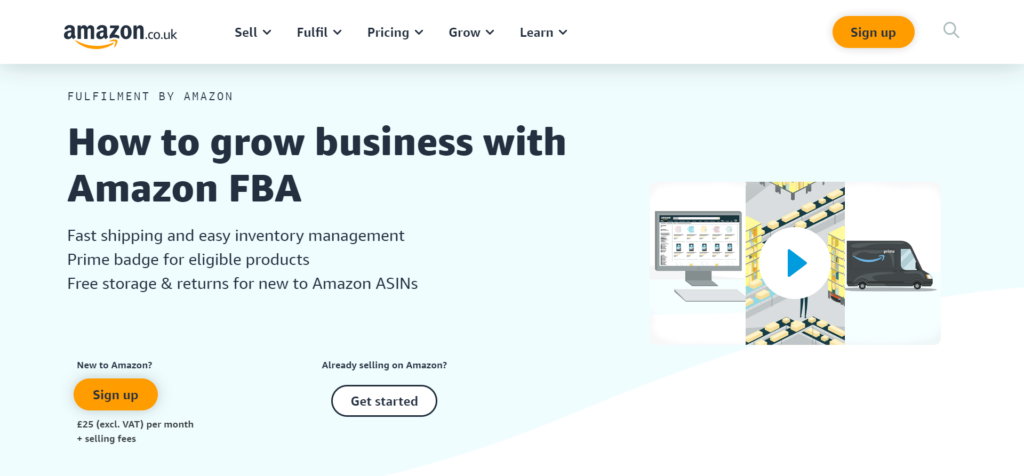
Amazon FBA (fulfilled by Amazon) allows businesses to list their products on Amazon (and elsewhere) and store them in its fulfillment centers. Then, when an order comes through, Amazon picks, packs, and ships it. It also provides customer support and returns management for those products. 

Recent statistics show there are 76 fulfillment centers in Europe, mainly in Germany and the UK, and The Amazon FBA site specifically refers to storing products in Germany, France, Italy, Poland, and Spain. 

Eligible orders carry the Prime badge, guaranteeing free two-day shipping for Amazon Prime customers.

Here’s how it works:

When you sign up, you decide which products you wish to sell on Amazon using FBA.

Amazon helps with this via its FBA opportunities tool within the Amazon Seller Central portal. This analyzes your catalog and suggests products to sell via Amazon FBA.

Once ready, send your products to Amazon’s fulfillment centers- you can enable product storage in at least two of the countries mentioned above. 

Once received, your products are available for customers to buy on Amazon. 

When a customer buys one of your FBA products, Amazon picks, packs, and ships it. 

Features

Fast two-day shipping is available for eligible orders.

Amazon FBA can facilitate worldwide deliveries and includes an extensive fulfillment network in Europe.

Returns and customer service are handled for you.

Amazon FBA offers a one-stop storage, pick, pack, and shipping service.

Auto tracking of inventory 

Access to an ‘Inventory Performance Dashboard’ – Here, you can access your Inventory Performance Index (IPI) score, monitor storage fees, benefit from personalized restock recommendations, track your inventory and supplier orders to meet product demand, and more. 

Pricing

You can access all fees via the Amazon FBA website, including selling plans, fulfillment fees, and a pricing overview. However, in a nutshell, there are two core Amazon FBA fees:

Fulfillment: These are per-unit fees for picking, packing, and shipping to customers and vary depending on the product’s size, weight, and category.

Monthly inventory storage: This fee varies depending on the average volume of space your inventory occupies, product size, and the time of year

Amazon FBA has an FBA Revenue Calculator you can use to work out your anticipated costs. 

Pros

You can display the Prime badge on qualifying goods you sell on Amazon, which is great for building credibility and boosting your ranking. 

Access to the world’s largest fulfillment network

Fast delivery

Fast pick and pack service

Worldwide shipping is available.

Cons

Amazon FBA costs can mount up. 

Some users report a surge of returns after using Amazon FBA – partly because of Amazon’s open return policy.

Your external packaging is covered in Amazon’s branding, making it harder to establish your own brand identity.

Who is it Best For?

Amazon FBA is best for any Amazon seller wanting to outsource order fulfillment and quickly ship to customers in multiple locations. 

Further Reading

What is Amazon FBA? What does Amazon FBA mean?

ShipBob vs. Amazon FBA: Which is Best for Fulfilment?

Go to the top

5. Byrd
best fulfillment companies europe

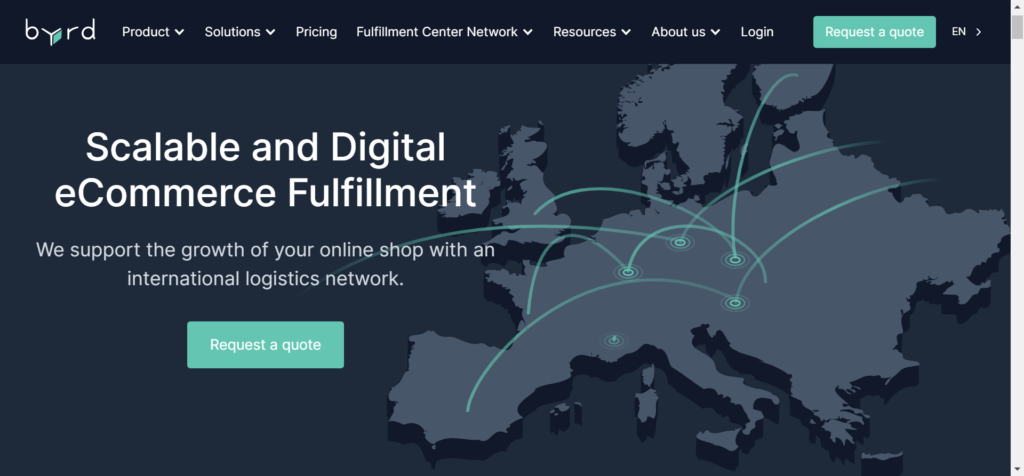
Byrd describes itself as a cloud-based, ‘tech-driven third-party logistics and fulfillment company.’ I.e., It offers an order fulfillment service that includes warehousing, pick and pack, shipping, and returns. 

Byrd’s website tells us that 99.42% of shipments are sent on time, and it has a fulfillment center network spanning 25+ locations across Europe and the UK.

More specifically, its centers are in:

Austria

France

Germany

Spain

Netherlands

Italy

The UK

Byrd integrates with ten eCommerce and marketplace platforms, including Amazon FBM, WooCommerce, Shopify, and Prestashop. 

Here’s how it works:

Integrate your sales channel with Byrd

Send your products to Byrd’s warehouses- you can split your inventory across as many warehouses as you need. 

When your stock arrives, Byrd books it in. 

Then, when your customer orders come in, Byrd’s order fulfillment process (including shipping) starts the same day.

Byrd partners with 20 reputable carriers, including DPD, FedEx, UPS, and DHL. 

Byrd Features

Automated inventory updates

Automatic shipment tracking is available.

Byrd can fulfill orders to 120+ countries.

You can offer customers a self-service returns portal for more efficient returns management.

Seller Fulfilled Prime (SFP) – If you’re an Amazon seller, you can get Byrd to deliver your products with the “Prime badge” directly to your Amazon Prime customers from a Byrd warehouse. 

Same-day shipping on a national level

Real-time inventory management from your Byrd dashboard

Organic certification is possible thanks to best-before date and LOT tracking, as well as first-in, first-out product picking to help you move old stock.

Byrd offers tailor-made packaging solutions, including tissue paper, ribbons, and marketing inserts.

Pricing

Although no prices are shown on Byrd’s website, I managed to find a few details about what its prices include:

Acceptance of goods

Storage

Commissioning

Packaging

Dispatch

The following aspects of order fulfillment are also included free of charge:

Access to a warehouse network of 25+ fulfillment centers throughout Europe

Access to flexible shipping options (you’re not tied to a specific shipping service, allowing you to benefit from the cheapest and quickest shipping options)

You can integrate Byrd with your online store with just a few clicks.

Access to Byrd’s app

Detailed shipment reports, including a breakdown of costs

Access to real-time inventory levels

Customer support

Pros

Access to 25+ fulfillment centers located throughout Europe and the UK

Byrds offers an end-to-end order fulfillment and returns service

Its website goes into lots of detail about each stage of the fulfillment process

The self-service returns portal makes it easy for customers to kickstart the returns process. 

Cons

No pricing is visible on its website

Some users grumble about the quality of the packaging used.

Some users complain about poor customer service and delays in order dispatches. 

Who is it Best For?

Byrd is a good choice for businesses looking for same-day fulfillment with a company with sustainability in mind. 

Further Reading

Byrd Review: Who Are They?

Go to the top

The Best Fulfillment Companies in Europe: My Final Thoughts

So, there you have it – we’ve reached the end of my best fulfillment companies in Europe round-up. As you can see, there are plenty to choose from, each offering something slightly different. So, hopefully, this review helps you narrow down your options. 

One final word of advice before we part- be sure to take advantage of any free demos and fulfillment software trials. It’s also wise to drop their customer service team a message to clarify order processing and shipping times and total costs before making any final decisions.  

That’s all from me – let us know which (if any) of these best fulfillment companies in Europe you opt for in the comments below!

The post The Best Fulfillment Companies in Europe appeared first on Ecommerce Platforms.

100+ Useful Notion Keyboard Shortcuts and Commands

Original Source: https://www.hongkiat.com/blog/keyboard-shortcuts-notion/

Notion is an all-in-one workspace and notes-taking app that combines the best of task management, wikis, and databases. Enhanced with AI-powered features, it’s a great tool ideal for individuals, freelancers, and teams looking to streamline their workflow and organize their ideas. Whether you’re a student managing assignments, a project manager overseeing tasks, or a writer crafting your next piece, Notion offers a customizable platform to meet your diverse needs.

Alternative apps similar to Notion: includes: Evernote, OneNote, Apple Notes, and Google Keep. See all.

Notion interfaceNotion interface

This post is designed to provide you with a comprehensive list of Notion keyboard shortcuts, helping you maximize the utility of this powerfu tool.

Jump to: Notion’s Common Shortcuts, Content Markdown, Content Styling, Blocks, and other shortcuts (I.e, shortcuts for @, [[, + and /.)

Common Shortcuts

Action
Windows
Mac

Create new page (desktop)
Control + N
Command + N

Open new window (desktop)
Control + Shift + N
Command + Shift + N

Open page as new window (desktop)
Alt + Shift + Click
Option + Shift + Click

Open link as new tab (desktop)
Control + Click
Command + Click

Create new tab (desktop)
Control + T
Command + T

Open search/recent page
Control + P
Command + P

Copy page URL
Control + L
Command + L

Go back a page
Control + [
Command + [

Go forward a page
Control + ]
Command + ]

Previous database page (peek)
Control + K
Control + Shift + K

Next database page (peek)
Control + J
Control + Shift + J

Toggle dark/light mode
Control + Shift + L
Command + Shift + L

Content Markdown

Action
Windows and Mac

Bold text 1
**

Italicize text 1
*

Create inline code 1
“`

Strikethrough text 1
~

Create bulleted list 2
*, -, or + followed by Space

Create to-do checkbox 2
[] followed by Space

Create numbered list 2
1., a., or i. followed by Space

Create H1 heading 2
# followed by Space

Create H2 sub-heading 2
## followed by Space

Create H3 sub-heading 2
### followed by Space

Create toggle list 2
> followed by Space

Create quote block 2
” followed by Space

Note:

1 Command can be used while typing.
2 Command can be used at the beginning of a new line.

Content Styling

Action
Windows
Mac

Insert Text
Enter

Line Break
Shift + Enter

Create Comment
Control + Shift + M
Command + Shift + M

Insert Divider

Bold Text
Control + B
Command + B

Italicize Text
Control + I
Command + I

Underline Text
Control + U
Command + U

Strikethrough Text
Control + Shift + S
Command + Shift + S

Add Link
Control + K
Command + K

Inline Code
Control + E
Command + E

Indent Content
Tab

Un-nest Content
Shift + Tab

Change Block Type
/turn

Change Text Color
/color

Create Text
Control + Shift + 0
Command + Option + 0

Create H1 Heading
Control + Shift + 1
Command + Option + 1

Create H2 Heading
Control + Shift + 2
Command + Option + 2

Create H3 Heading
Control + Shift + 3
Command + Option + 3

Create To-Do Checkbox
Control + Shift + 4
Command + Option + 4

Create Bulleted List
Control + Shift + 5
Command + Option + 5

Create Numbered List
Control + Shift + 6
Command + Option + 6

Create Toggle List
Control + Shift + 7
Command + Option + 7

Create Code Block
Control + Shift + 8
Command + Option + 8

Create New Page
Control + Shift + 9
Command + Option + 9

Zoom In
Control + +
Command + +

Zoom Out
Control + –
Command + –

Go Up One Level
Control + Shift + U
Command + Shift + U

Duplicate Content
Alt + Drag and Drop
Option + Drag and Drop

Blocks

Action
Windows
Mac

Select Current Block
Escape

Select Block with Cursor
Control + A
Command + A

Toggle Full-Screen Image
Space

Select Different Block
Arrow Keys

Expand Selection
Shift + ↑ / ↓

Select/De-select Entire Block
Alt + Shift + Click
Command + Shift + Click

Select Blocks in Between
Shift + Click

Delete Selected Blocks
Delete

Duplicate Selected Blocks
Control + D
Command + D

Edit Text in Selected Block
Enter

Edit Selected Blocks
Control + /
Command + /

Edit Multiple Rows in Database
Control + /
Command + /

Move Selected Block
Control + Shift + Arrow Keys
Command + Shift + Arrow Keys

Toggle All Lists
Control + Alt + T
Command + Option + T

Apply Last Text/Highlight Color
Control + Shift + H
Command + Shift + H

Modify Current Block
Control + Enter
Command + Enter

Other Commands

Here are the shortcuts for using @, [[, + and /.

The @ Commands

Action
Windows and Mac

Mention a Person
Type @ plus a member’s name for mentions.

Mention a Page
Type @ plus a page name to link it.

Mention a Date
Type @ plus a date for due dates.

Add a Reminder
Type @remind plus a date to set a reminder.

Dismiss @ Command Menu
Press Esc to dismiss.

The [[ Commands

Action
Windows and Mac

Link a Page
Type [[ plus a page name to link it.

Create a Sub-Page
Type [[ plus sub-page name and select “+ Add new sub-page.”

Create a New Page Elsewhere
Type [[ plus page name, select “↗ Add new page in…” and choose location.

The + Commands

Action
Windows and Mac

Create a Sub-Page
Type + plus sub-page name and select “+ Add new sub-page.”

Create a New Page Elsewhere
Type + plus page name, select “↗ Add new page in…” and choose location.

Link a Page
Type + plus a page name to link it.

The / Commands

Action
Windows and Mac

Create Text Block
/text or /plain

Create New Page
/page

Create Bulleted List
/bullet

Create Numbered List
/num

Create To-Do List
/todo

Create Toggle List
/toggle

Create Divider
/div

Create Quote Block
/quote

Create Large Heading
/h1 or /#

Create Medium Heading
/h2 or /##

Create Small Heading
/h3 or /###

Create Link
/link

Mention Page or Person
/mention

Add Timestamp or Reminder
/date or /reminder

Add TeX Formula
/equation

Access Emoji Picker
/emoji

Add / Upload Image
/image

Add PDF from URL
/pdf

Create Web Bookmark
/book

Add / Upload Video
/video

Add / Upload Audio
/audio

Create Code Block
/code

Add / Upload File
/file

Add Other Files
/embed

Create Comment
/comment

Duplicate Block
/duplicate

Move / Relocate Block
/moveto

Delete Block
/delete

Create Table of Contents
/toc

Add / Duplicate Template and Button
/button or /template

Insert Breadcrumb Menu
/bread

Write Mathematical TeX Equations
/math or /latex

The post 100+ Useful Notion Keyboard Shortcuts and Commands appeared first on Hongkiat.

How to Make Your Gmail Account Safer (2023)

Original Source: https://www.hongkiat.com/blog/gmail-security-tips/

Email is a key part of our online identity. It can give access to many of our other online accounts. So, it’s very important to protect our email from bad people.

Gmail has strong safety features, but many of us don’t know about them all. In this article, I’ll share a list of easy steps to help protect your account from unwanted access and harmful actions.

First, we will deal with strengthening the security of the Google account, and then we will dive into adding extra security measures to the Gmail account.

Make Your Google Account Stronger

Let’s start by strengthening your Google account. Every Gmail account is also a Google account. I’ll guide you through the important settings to make sure your account is safe from usual security issues. Plus, I’ll teach you how to adjust some things to enhance its safety.

1. Activate 2-Step Verification

2-Step Verification is an extra safety step that better guards your account. It requires you to provide a second security answer (not just your password). So, it’s always a good idea to turn on and use two-step verification.

Passkey is another effective method to protect your Google account. Learn how to set up Google Passkey for your account.

Here’s how you can set it up:

Open Sign-in & security in your browser and select “2-Step Verification“.
Activating 2-Step VerificationActivating 2-Step Verification
Next, click “GET STARTED“. Google will suggest using your phone for the second sign-in step, called Google Prompt. If you want to try this, click “TRY IT NOW“. If your phone isn’t listed, select “Don’t see your device?” to add it. But if you prefer using your phone number, click “DON’T USE PROMPT”.
Using Google Prompt for VerificationUsing Google Prompt for Verification
If you chose “DON’T USE PROMPT” and want to use your phone number for verification, enter your number and hit SEND. Google will send a code to your phone. Input that code when asked, and you’re all set.

Using Phone Number for VerificationUsing Phone Number for Verification
2. Add Backup Contact Details

It’s smart to have backup contact details in case you can’t access some of your info. Here’s how you can add them:

Open Sign-in & security in your browser and sign in if needed.
Select “Signing in to Google” on the left side, then find the “Account recovery options” section.

Setting Backup Contact DetailsSetting Backup Contact Details

Add or Update Backup Email

Click “Recovery email”. Choose “ADD RECOVERY EMAIL” and enter the email address you want as a backup. Click DONE. To change it, click the pencil symbol and update the email.

Adding or Updating Backup EmailAdding or Updating Backup Email

Add or Update Backup Phone Number

Click “Recovery phone”. Choose “ADD RECOVERY PHONE” and enter the phone number you want as a backup. Click NEXT. Google will ask you to confirm, so do that. To change it, click the pencil symbol and update the phone number.

Adding or Updating Backup PhoneAdding or Updating Backup Phone
3. Remove Unapproved Apps

When you use your Google account to sign in to an app or website, you give it permission to access your account. This allows it to access your account whenever it wants, but only the information or services you’ve approved.

But you wouldn’t give a stranger the key to your home, right? Similarly, it’s a good idea to check your account often for apps you didn’t approve or no longer use and remove them. Here’s how:

Open Sign-in & security in your browser and sign in if prompted.
Select “Apps with account access” on the left and then click “MANAGE APPS“.

Viewing Apps with Account AccessViewing Apps with Account Access

You’ll see a list of apps connected to your account. These are apps that can access your account based on their permissions. To see an app’s details, including what it can access and when you approved it, click on the app. To remove it, click “REMOVE ACCESS“. I suggest removing any apps you don’t recognize, didn’t approve, or no longer use.

Removing Unapproved AppsRemoving Unapproved Apps
4. Turn Off Low-Security Apps

“Allow less secure apps” lets apps with weaker security access your account. It’s best to keep this off, even if you turned it on for a specific reason, like using Microsoft Outlook to check your emails.

It’s safer to turn this setting off and find a different way to do what you need. For example, you can use the new Gmail and its offline feature to check and manage your emails without an internet connection.

Go to Sign-in & security in your browser.
Select “Apps with account access” on the left. Then turn off the setting that says “Allow less secure apps”.

Turning Off Low-Security AppsTurning Off Low-Security Apps
5. Review Important Account Activities

Keeping an eye on activity logs is a good way to spot possible unauthorized access or hacking attempts. Google keeps a log of all your account activities. It’s wise to check this regularly and mark any activity that looks odd, like changes you didn’t make. Here’s how to view this log:

Go to Sign-in & security in your browser.
Select “Device activity & security events” on the left side.
You’ll find two sections: “Recent security events” and “Recently used devices“. Look through these for any unusual activity, like a login from a place you’ve never been. You can also click “REVIEW EVENTS” and “REVIEW DEVICES” to see more details.

Strengthen Your Gmail Account

After securing your Google account and setting up basic protections, it’s time to focus on your Gmail account. Since this post is about keeping your emails safe, it’s very important to know and use the safety features of Gmail.

1. Review Gmail Settings

First, let’s examine the Gmail settings to ensure everything is as it should be. Gmail may not have a ton of options, but the ones it has are vital for email safety. To start, click the gear icon in Gmail to open settings. Here’s what to look for:

Accessing Gmail SettingsAccessing Gmail Settings

1. General Tab

In this section, review the following:

Signature: Ensure your signature hasn’t been altered and doesn’t have any unfamiliar links.

Reviewing Gmail SignatureReviewing Gmail Signature

Vacation Responder: Make sure it’s on or off based on your preference and the message is correct.

Checking Vacation ResponderChecking Vacation Responder

2. Accounts and Import Tab

Here, ensure the following:

Send Mail As: All email addresses in this section should be yours.
Check Mail from Other Accounts: Every email address here should belong to you. Otherwise, you could unintentionally access someone else’s email.
Grant Access to Your Account: This section shouldn’t have any unfamiliar addresses. If there’s an address you don’t recognize, someone might have access to your account, and you should remove them right away. To do this, click Delete next to their address.

Reviewing Accounts and Import SettingsReviewing Accounts and Import Settings

3. Filters and Blocked Addresses Tab

Within this section, you should review:

Filtered Emails: Ensure there aren’t any unexpected filters. If there’s a filter that looks suspicious, remove it right away.
Blocked Emails: This section lists all the email addresses you’ve blocked. You won’t get emails from these addresses, so ensure none of them are important or familiar to you. If you find an address you shouldn’t have blocked, unblock it.

Reviewing Filters and Blocked Addresses in GmailReviewing Filters and Blocked Addresses in Gmail

4. Forwarding and POP/IMAP Tab

Under this section, ensure the following:

Forwarding: Your emails shouldn’t be sent to someone else without you knowing. If there’s an unfamiliar address here, remove it to prevent unwanted access to your emails.
POP Download: Make sure POP isn’t turned on if you didn’t enable it.
IMAP Access: Ensure IMAP is off if you’re not using it.

Reviewing Forwarding and POP/IMAP Settings in GmailReviewing Forwarding and POP/IMAP Settings in Gmail
2. Remove Suspicious Emails

Block Unwanted Senders

If you get an email that seems strange or you don’t trust, and you don’t want emails from that sender anymore, you can block them. Gmail will then move their future emails to Spam.

To block an email sender, follow these steps:

Open the email from the sender you want to block.
Click the options icon at the top-right of the email, then pick the “Block” option.

Blocking Unwanted Senders in GmailBlocking Unwanted Senders in Gmail

Report Junk or Harmful Emails

It’s not unusual to get junk or harmful emails, especially on work addresses shared with others. Nobody wants to read these unwanted emails. If you get one, you can report it. If Gmail agrees it’s junk or harmful, it’ll mark similar emails as spam in the future.

To report these emails, follow these steps:

Open the junk or harmful email in Gmail.
Click the options icon in the top-right corner, then pick either “Report phishing” or “Report spam” depending on what kind of email it is.

Reporting Junk or Harmful Emails in GmailReporting Junk or Harmful Emails in Gmail

I hope this post helps you keep your Gmail account safe. Remember to be careful and follow safety guidelines when you’re online. If someone hacks into your computer or online session, they might get into your emails too.

The post How to Make Your Gmail Account Safer (2023) appeared first on Hongkiat.

Pazzesca: A branding story through pizza!

Original Source: https://abduzeedo.com/pazzesca-branding-story-through-pizza

Pazzesca: A branding story through pizza!

AoiroStudio1010—23

In the bustling streets of Mexico, where culture and culinary artistry collide, FAENA Studio, a design powerhouse, has woven its magic yet again. Their recent endeavor, the visual identity for Pazzesca, a local Italian pizzeria, is a testament to their knack for infusing design with culture and flavor. The challenge was clear: How do you transport someone from the streets of Mexico to the cobblestone alleys of Italy with a single glance? FAENA Studio’s solution was nothing short of brilliant. They infused the visual identity with the warmth of rustic Italian charm. Earthy tones, reminiscent of Italian countryside landscapes, adorned the branding, creating an inviting and cozy ambiance. Typography plays a pivotal role in any branding, and for Pazzesca, FAENA Studio carefully selected fonts that spoke the language of authenticity. The handwritten script used in the logo and menus brings a personal touch, as if each pizza is handcrafted with love and care.


The visual identity tells a story. It’s not just about the final product but the journey—the kneading of the dough, the selection of the freshest ingredients, and the wood-fired oven that imparts that unmistakable smoky flavor. FAENA Studio used these elements as inspiration for the design, creating visuals that tantalize the senses and convey the craftsmanship behind each dish. The collaboration between FAENA Studio and Pazzesca is a testament to the power of design to elevate dining experiences. It showcases how a well-crafted visual identity can become an integral part of a brand’s story, enriching not just the dining experience but the entire brand essence.


The logotype is based on the typography of the character script, which has an evocative angular shape and a sense of frenzy and adventure that comes with experiments that can be tested in one of the platillos.


Visual Identity

brand identity branding  Logo Design Logotype visual identity Brand Design logo design Graphic Designer Pizza

brand identity branding  Logo Design Logotype visual identity Brand Design logo design Graphic Designer Pizza

brand identity branding  Logo Design Logotype visual identity Brand Design logo design Graphic Designer Pizza

brand identity branding  Logo Design Logotype visual identity Brand Design logo design Graphic Designer Pizza

brand identity branding  Logo Design Logotype visual identity Brand Design logo design Graphic Designer Pizza

brand identity branding  Logo Design Logotype visual identity Brand Design logo design Graphic Designer Pizza

brand identity branding  Logo Design Logotype visual identity Brand Design logo design Graphic Designer Pizza

brand identity branding  Logo Design Logotype visual identity Brand Design logo design Graphic Designer Pizza

brand identity branding  Logo Design Logotype visual identity Brand Design logo design Graphic Designer Pizza

brand identity branding  Logo Design Logotype visual identity Brand Design logo design Graphic Designer Pizza

brand identity branding  Logo Design Logotype visual identity Brand Design logo design Graphic Designer Pizza

brand identity branding  Logo Design Logotype visual identity Brand Design logo design Graphic Designer Pizza

brand identity branding  Logo Design Logotype visual identity Brand Design logo design Graphic Designer Pizza

brand identity branding  Logo Design Logotype visual identity Brand Design logo design Graphic Designer Pizza

brand identity branding  Logo Design Logotype visual identity Brand Design logo design Graphic Designer Pizza

brand identity branding  Logo Design Logotype visual identity Brand Design logo design Graphic Designer Pizza


FAENA is a graphic & art direction studio based in Mexico City, Mexico. You can check out more of their works via the links below:

Behance
Instagram
Studio site

All product photos are used only for presentation for non-commercial purposes only. All rights reserved.

The 10 Most Successful Rebrands of All Time – Ranked

Original Source: https://www.webdesignerdepot.com/successful-rebrands-ranked/

We’re all familiar with rebrands going wrong, but what happens when they go right? From McDonald’s health kick to Burberry’s iconic turnaround, hold on to your hats as we explore the ten most successful rebrands of all time.

Exciting New Tools for Designers, October 2023

Original Source: https://www.webdesignerdepot.com/tools-for-designers-2023/

Welcome to our all treats-no tricks, October tools collection.

100 macOS Sonoma Keyboard Shortcuts

Original Source: https://www.hongkiat.com/blog/mac-keyboard-shortcuts/

macOS is a robust operating system used worldwide. However, many Mac enthusiasts might not be aware of the numerous keyboard shortcuts that enhance its usability.

Detailed Mac Keyboard ShortcutsDetailed Mac Keyboard Shortcuts

Interested in harnessing more from your Mac? Here’s an extensive list of Mac keyboard shortcuts. Whether it’s accessibility functions, desktop configurations, or in-system searches, these shortcuts will enable you to perform tasks efficiently, bypassing the need for a mouse.

macOS Keyboard Shortcuts for:

Starting up Mac
Shutting down Mac
Accessibility
Finder
Desktop
Screen Capture
Spotlight

Starting Up Your Mac

Booting your Mac usually involves pressing the power button and waiting for the iconic Apple logo (and chime) before the operating system loads. However, there are multiple modes in which you can start your Mac, each offering different features and functionalities.

For example, you can boot your Mac in Safe Mode to troubleshoot issues, or use the Target Disk Mode to operate your system using an external medium.

To access these modes, you’ll need to press and hold a specific combination of keys right after hitting the power button. For instance, to enter Safe Mode, power up your Mac and immediately press and hold the Shift key.

There are various other modes to explore, enhancing your Mac startup experience.

↑ Back to Main Menu

Startup from built-in macOS Recovery system.
Command + R (hold).

Startup from macOS Recovery system over Internet.
Command + Option + R (hold).

Startup to Startup Manager.
Option (hold).

Reset NVRAM / PRAM.
Command + Option + P+ R (hold).

Startup in Safe Mode.
Shift (hold).

Startup from Apple Diagnostic utility.
D (hold).

Startup from a NetBoot server.
N (hold).

Startup in single-user mode.
Command + S (hold).

Startup in target-disk mode.
T (hold).

Startup in verbose mode.
Command + V (hold).

Shutting Down Your Mac

When wrapping up on a MacBook, many users simply close the lid, letting it enter sleep mode. On an iMac, some might wait for the Energy Save mode to activate.

Yet, there are efficient keyboard shortcuts to shut down your Mac. Explore these shortcuts below to enhance your user experience.

↑ Back to Main Menu

Turn on Mac / Wake it up from sleep.
Power button (press once).

Force Mac to turn off.
Power button (press hold 5 seconds).

Put Mac to sleep.
Command + Option + Power button.

Put display to sleep.
Control + Shift + Power button.

Select between restart, sleep or shutdown.
Control + Power button.

Force Mac to restart.
Command + Control + Power button.

Quit all apps, then shut down Mac.
Command + Control + Option + Power button.

Log out Mac user account, asking for confirmation.
Command + Shift + Q

Log out Mac user account, without asking for confirmation.
Command + Shift + Option + Q

Shortcuts for Accessibility

Mac offers dedicated “Accessibility Options” tailored for individuals with special needs or disabilities. This includes features like screen zoom, voiceover, inverted display colors, and more. Users can effortlessly manage, activate, or deactivate these features through keyboard shortcuts or assistive devices.

↑ Back to Main Menu

Show Accessiblity Options.
Command + Options + F5

Toggle VoiceOver on/off.
Command + F5

Open VoiceOver Utility.
Control + Option + F8

Turn Zoom on/off.
Command + Option + 8

Zoom In.
Command + Option + +

Zoom Out.
Command + Option + –

Invert Colors settings on/off.
Command + Control + Option + 8

Increase Contrast.
Command + Control + Option + ,

Reduce Contrast.
Command + Control + Option + .

Shortcuts for Finder

The Finder on a Mac serves as your central dashboard, granting you access to all your documents, apps, and services. Given its versatility, using keyboard shortcuts becomes crucial to execute specific actions, organize files and folders, and swiftly access content.

↑ Back to Main Menu

Use Quick Look to preview selected item.
Space bar

Move items to Bin.
Command + Delete

View items in Finder windows as icons.
Command + 1

View items in Finder windows as list.
Command + 2

View items in Finder windows in columns.
Command + 3

View items in Finder windows with Cover Flow.
Command + 4

Duplicate selected files.
Command + D

Eject disk or volume.
Command + E

Search in Finders’s window.
Command + F

Show Get Info window for selected file.
Command + I

Open the Computer window.
Shift + Command + C

Open the desktop folder.
Shift + Command + D

Open Go to Folder window.
Shift + Command + G

Open Home folder of current macOS user.
Shift + Command + H

Open iCloud Drive.
Shift + Command + I

Open the Network window.
Shift + Command + K

Open the Downloads folder.
Shift + Command + L

Create a new folder.
Shift + Command + N

Create a new Smart Folder.
Option + Command + N

Open the Documents folder.
Shift + Command + O

Show/hide Preview pane in Finder windows.
Shift + Command + P

Open AirDrop window.
Shift + Command + R

Show/hide tab bar in Finder windows.
Shift + Command + T

Open the Utilities folder.
Shift + Command + U

Show/hide path bar in Finder windows.
Option + Command + P

Show/hide sidebar in Findow windows.
Option + Command + S

Show View Options.
Command + J

Open Connect to Server window.
Command + K

Make an alias of selected item.
Command + L

Open a new Finder window.
Command + N

Create new tab in current Finder windows.
Command + T

Use Quick Look to preview selected file.
Command + Y

Use Quick Look in slideshow mode of selected files.
Option + Command + Y

Go to previous folder.
Command + [

Go to next folder.
Command + ]

Close the selected folder. (When in List view).

Open the selected folder. (When in List view).

Go to folder that contains the current folder.
Command + ↑

Go into folder of current selected folder.
Command + ↓

Open item in a separate window and close current window.
Option + Double-clicking item.

Open folder in a separate tab.
Command + Double-clicking item.

Move the dragged item instead of copying it.
Command + dragging item to another destination.

Copy the dragged item.
Option + dragging item to another destination.

See folders that contain current folder.
Command + click window title.

Shortcuts for Desktop

Mac provides an array of keyboard shortcuts designed to amplify your desktop experience. They’re particularly beneficial for users managing multiple desktops or those frequently tweaking appearance settings.

↑ Back to Main Menu

Decrease brightness.
F1

Increase brightness.
F2

Empty Bin.
Command + Shift + Delete

Empty Bin without confirmation dialog.
Option + Command + Shift + Delete

Show all windows of active app.
Control + ↓

Show/hide the Dock.
Option + Command + D

Launch/quit Mission Control.
Control + ↑

Launch/quit Mission Control.
F3

Open Appearance Preferences.
Option + F3

Show desktop.
Control + F3

Move to space on left.
Control + ←

Move to space on right.
Control + →

Switch to a specific (#n) desktop. Example: To switch to desktop 3, use Control + 3.
Control + #.

View installed apps.
F4

Shortcuts for Capturing Screens on macOS

With the rise of virtual work and learning environments, the need for screenshots and screen recordings has grown immensely. Thankfully, macOS comes equipped with integrated screenshot and screen-recording features.

Below is a list of keyboard shortcuts to leverage the diverse functionalities of the Mac screen capture tool.

↑ Back to Main Menu

Screen capture entire screen, save as picture.
Command + Shift + 3

Screen capture custom area, copies to clipboard.
Command + Shift + Control + 3

Screen capture custom area, save as picture.
Command + Shift + 4

Screen capture custom area, copies to clipboard.
Command + Shift + Control + 4

Screen capture an open window or app.
Command + Shift + 4, press Space bar

Launch and customize screen capture options.
Command + Shift + 5

Shortcut for Spotlight

Spotlight serves as an efficient tool on your Mac, helping you locate items such as apps, documents, music, and even emails. Explore the list of keyboard shortcuts below to enhance your productivity with Spotlight.

↑ Back to Main Menu

Launch/close Spotlight.
Command + Space bar

Move to next result.

Move to previous result.

Move to first result in next category.
Command + ↓

Move to first result in previous category.
Command + ↑

Open selected result.
Enter

See selected file in an app.
Command + R

Open a Finder window with selected result.
Option + Command + Space bar

More Mac-related Shortcuts:

Keyboard Shortcuts for Messages (iMessage)
Compressing Files & Folders Using Keyboard Shortcuts
Ultimate Screen Capture Keyboard Shortcuts

The post 100 macOS Sonoma Keyboard Shortcuts appeared first on Hongkiat.