The Best Printing Services For Your Freelance Business and Clients

Original Source: http://feedproxy.google.com/~r/1stwebdesigner/~3/spEVhpIQlBA/

Whether you are a freelance web designer, developer or any other type of business, you will need printing services to promote, publicize, and communicate your brand. Business cards, stationery, stickers, brochures, and flyers are just some of the items businesses need printed, and when you’re looking for printing services it can be difficult to find a place that provides creative and unique solutions. Until now. In this post we’ll look at a printing company that will help your business of any size stand out from the rest.

Print Peppermint is a diverse team of creative professionals that provide refreshingly creative print services and more, including logo design, business card design, T-shirt design, and many more graphic design services in-house. They can design what you need printed for you, or you can use one of their several online tools to do it yourself. Pricing is affordable and both their products and customer service receives outstanding reviews.

What Makes Print Peppermint’s Printing Services Stand Out?

For starters, they are a business run by creative professionals (like you). They understand what creatives need and want to help them represent and promote their business in a way that is unique. They hand-proof every single order, no matter how large or small. And they support their products with a 100% money-back quality guarantee.

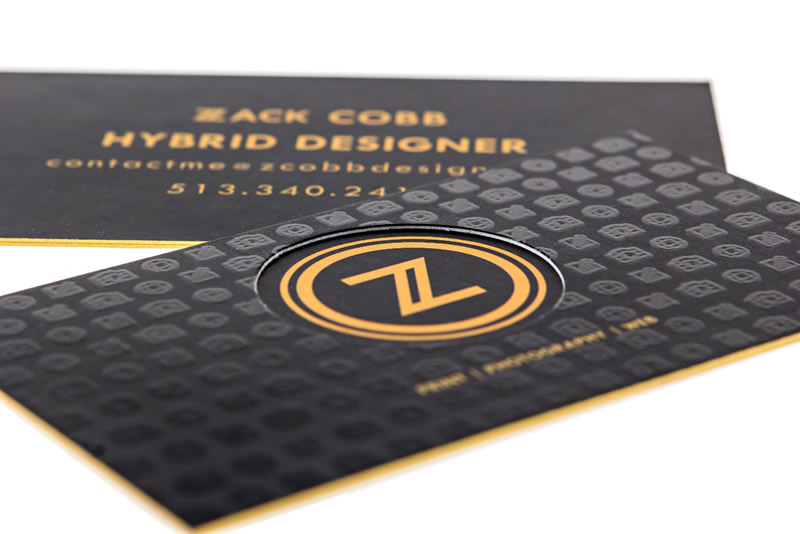
Want to kick your business cards up a notch? How about die cut, spot UV, square, plastic, foil, embossed, or letterpress business cards? Print Peppermint printing services include all of these options and more. Check out some examples below.

Business Cards - Printing Services by Print Peppermint

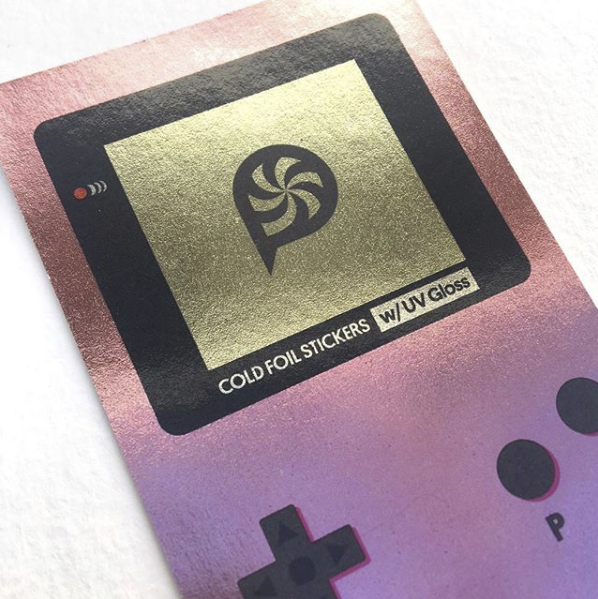
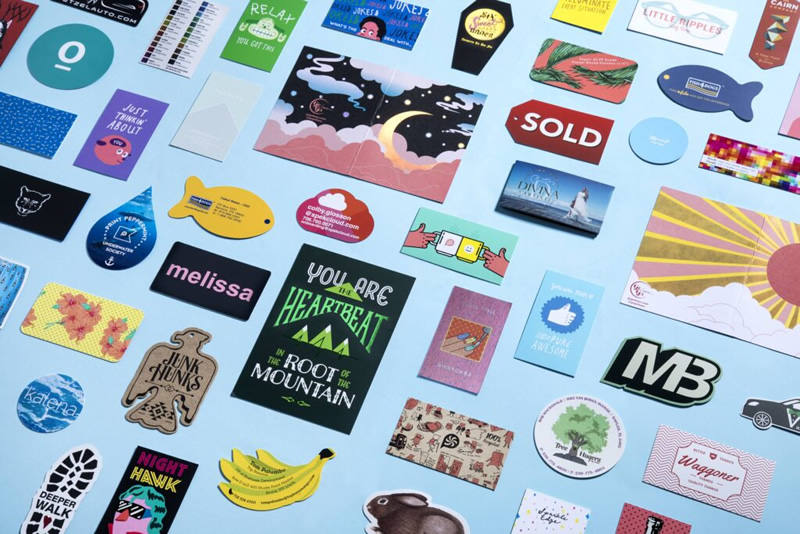
How about sending your clients stickers of your logo in a thank you card so they can help build your brand awareness by letting it be seen on their laptop, bike, phone, or car bumper? Print Peppermint can print the stickers and custom greeting cards to help you accomplish this, with stickers in many shapes and sizes printed on durable weather-resistant vinyl.

Stickers - Printing Services by Print Peppermint

Eco-Friendly Printing Services

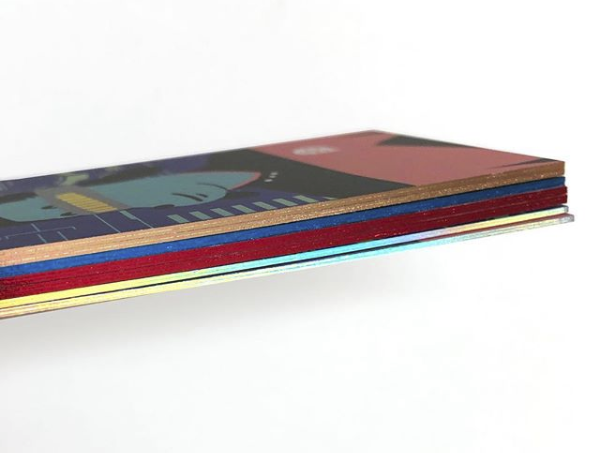
Unlike most print companies, Print Peppermint prides themselves on choosing green alternatives. They use environmentally responsible papers, inks, and coatings, and recycle waste materials. Utilizing soy-ink, which also allows for brighter, more vibrant colors than petroleum-based ink, they endeavor to make their process as efficient as possible.

Edge foiling - Printing Services by Print Peppermint

Exceptionally High Quality Paper and Materials

Print Peppermint only uses premium, high-quality paper that is durable, writable and scratch resistant, and everything is offset printed at an incredible 500 lines per inch screen depth. This means your printing services needs will be the absolute best you can find anywhere. You can choose from 100% Cotton, Soft-Touch, Triplex Layered, Clear-Frosted Plastic, Onyx Black Suede, Recycled Kraft and many more standard offerings, or they can custom order any other kind of stock you may desire.

High End Business Cards - Printing Services by Print Peppermint

Great Printing Services, Great Design Services, Great Company!

So when you are looking to get printing done for your business, or if your clients ask for recommendations of where they can fulfill their printing needs, we at 1stWebDesigner.com strongly encourage you to give Print Peppermint a try. We know you won’t be disappointed, and more importantly, your brand will stand out in the crowd.

Want to learn more about Print Peppermint? Be sure to check out their website, read their blog, and learn what they have to say about graphic design and photography.


Crafting a Cutout Collage Layout with CSS Grid and Clip-path

Original Source: http://feedproxy.google.com/~r/tympanus/~3/oFk0vTMSyRI/

Disclaimer: This event is fake, it’s made up. I got the name from a generator, I recommend not going. But if you do, don’t you dare @ me! ?

In this article, I’ll show you how to create an accessible and responsive layout using semantic HTML and modern CSS. As a bonus, we’ll add some spice with a little bit of JavaScript to make the design feel more alive. We’ll be covering the following:

Accessible and semantic HTML Responsive design Flexbox CSS Grid Clip-path

As a bonus, we’ll look at how to bring the layout to live by adding a subtle parallax scroll effect.

The inspiration for the design comes from this poster and the cubist-style portraits by Brno Del Zou.

You can skip to the sections that most interest you, or follow along on our journey of building the entire layout. This article is for developers of all experience levels. So, if I’m covering something you already know, you can simply skip ahead, no hard feelings.

Getting Started

For following along visually, have a look at the Figma file here, that lays out the desktop, tablet, and mobile designs.

Note that I’ll be using rems for units instead of pixels. In case a user zooms in, it’ll keep the design and fonts scalable. Our root pixel size is 16px, so the formula for wanting to know how many rems a pixel value would be is to divide the pixel size by 16. So, if we wanted to convert 20px into rems, we’d calculate 20 / 16 = 1.25rem. 

First, let’s build out the basic layout that involves a <header> that contains a <nav> element and adjacent to the header, we have a <main> element which houses the heading and main component (the magazine cutout). 

Here’s the HTML structure:

<body class=”site”>
<header class=”site__header”>
<p>When: <span class=”block”>May 10-12</span></p>
<p>Where: <span class=”block”>UCL London</span></p>
<nav class=”site__nav”>
<ul class=”site__nav-list”>
<li><a class=”site__nav-link” href=”/”>Tickets</a></li>
<li><a class=”site__nav-link” href=”/”>About</a></li>
<li><a class=”site__nav-link” href=”/”>Contact</a></li>
</ul>
</nav>
</header>

<main class=”main”>
<div class=”container”>
<h1 class=”heading”>
heading here
</h1>

<div>Main Component here</div>
</div>
</main>
</body>

Body

Let’s cover the body element’s styles which have a background radial gradient:

.site {
background: radial-gradient(50% 50% at 50% 50%, rgba(123, 131, 126, 0.9) 0%, rgba(54, 75, 73, 0.9) 100%), #364b49;
color: #FFF;
height: 100%;
min-height: 120vh; // we’re adding an extra 20vh here for scrolling purposes we’ll use later
}

This line is the gradient: background: radial-gradient(50% 50% at 50% 50%, rgba(123, 131, 126, 0.9) 0%, rgba(54, 75, 73, 0.9) 100%), #898989;. If you’re unfamiliar with background gradients, the first argument 50% 50% indicates the width and height of the inner shape and at 50% 50% refers to the x and y position of the container. Next, the rgba value is the color with a .1 value of transparency and the color starts from the middle of the circle (0%). The next rgba value indicates the last color which starts at the very end (100%). Finally, the last value of #364b49is the background color that shows beneath the gradient since we’re using a little bit of the transparency in the alpha channel for the two gradient values. And just like that, we have an ambient radial-gradient! Neat!

Next, we place a min-height on the body to span at least 120% of the viewport. This allows the gradient to cover the entire screen, but don’t stare too closely at it… it can read your thoughts.

Navigation

Next, let’s cover the <nav> and its styles:

<header class=”site__header”>
<p>When: <span class=”block”>May 10-12</span></p>
<p>Where: <span class=”block”>UCL London</span></p>
<nav class=”site__nav”>
<ul class=”site__nav-list”>
<li><a class=”site__nav-link” href=”/tickets”>Tickets</a></li>
<li><a class=”site__nav-link” href=”/about”>About</a></li>
<li><a class=”site__nav-link” href=”/contact”>Contact</a</li>
</ul>
</nav>
</header>

We’re using the <header> element here since it contains a group of information about the site which makes up important conference details and the navigation to all of the links. In the case that a screen reader is reading it, it’s concise and accessible to the user. 

Ok, let’s talk about the styles now. What’s required of this component is the following:

Spread elements across the height of the viewport
Align items at their top
Fix it to the window
Display the text on its side

CSS that requires equal spacing and can align at the top or center is a perfect use case for Flexbox. We don’t have to do too much in order to get that. 

For the parent element .site__header and the .site__nav-list, we’ll add this flex style:

.site__header,
.site__nav-list {
display: flex;
}

What this does is lay out the direct children of the elements to situate beside each other and align at the top of the elements.

For the direct children of .site__header, we want them to grow to fill the available space by adding the following:

.site__header > * {
flex: 1 1 auto;
}

The flex property is a shorthand property for flex children. The three values stand for flex-grow, flex-shrink, and flex-basis. These values indicate to grow to the available space and be able to shrink/get smaller if need be, and auto is the default value which tells the browser to look at the element’s width or height property rather than specifying a particular width value like a percentage. 

Finally for the .site__nav-list, we’ll add justify-content: space-between so the elements spread out equally among the available space.

.site__nav-list {
justify-content: space-between;
}

Alright, now let’s finish the header by turning it on its side and fixing it to the window!

.site__header {
height: 100%;
padding: 1.25rem 0;
position: fixed;
right: 1.25rem;
top: 0;
writing-mode: vertical-rl;
}

In order for the text to turn 90 degrees, we give the writing-mode property the value of vertical-rl. The writing-mode property determines if lines of text are horizontal, vertical, and what direction the blocks should be laid out.

Next, we fix the position of the header which means the element stays at a specific point relative to the window as one scrolls, so the user always sees it and never scrolls away from it. It’s best practice to put at least one Y or X value for fixed and absolute positioned elements. We have our Y value of top: 0, and the X value of right: 1.25rem to move it to the top and right of the window. Then we want to have some padding on both ends so the text doesn’t hit the sides of the window by adding `1.25rem` which is equal to 20px.

Note: since we’re dealing with a different writing mode, we have a padding-top and bottom instead of padding-left/right as the element now behaves as a vertical element. And to get the header to span the entire height of the body, we add 100% to the height property.

See the Pen Magazine Cutout Basic Layout – 1 by Bri Camp Gomez (@brianacamp) on CodePen.light

Main Component

What we have so far is a responsive foundation of a fixed navigation and background. Great job for making it all this way, dear reader. Now let’s cover the <h1> and the grid cutout section.

Our HTML looks as follows:

<main class=”main”>
<div class=”container”>
<h1 class=”heading”>
<mark>2020</mark>
<br />
<mark>Golden Makers</mark>
<br />
<mark>Awards &amp; Ceremony</mark>
</h1>
<div>Magazine cutout</div>
</div>
</main>

For the <main> element we have the following styles:

.main {
padding: 5rem 0;
display: flex;
justify-content: center; // centers content horizontally
align-items: center; // centers content vertically
min-height: 100vh; // make content at least as tall as the viewport
width: 100%;
}

.container {
position: relative;
}

Heading

If we look at the desktop, tablet, and mobile designs we notice that the heading is on top of the cutout component for desktop and tablet indicating it’s out of the document flow, and on mobile, it’s back in the normal document flow. We’ll implement this via the position property and a media query. Since we’re going to absolutely position the heading, we need to add position: relative to its parent element so the heading position value is relative to the .container vs the window. 

To implement this layout we’ll leave it a static positioned element (which means it’s in the normal document flow), and then absolutely position it on screens larger than 40rem (640px) and above. We position it 6rem (92px) from the top of the <main> element and to be exactly on the left edge as we’ll need that for tablet and mobile screens.

.heading {
font-size: 1.5rem;
text-transform: uppercase;
margin-bottom: 2rem;

@media screen and (min-width: 40rem) {
font-size: 2rem;
left: 0;
position: absolute;
top: 6rem;
z-index: 10; // to be on top of grid
}
}

We also slightly change font sizes to be 1.5rem on mobile and 2rem on larger screens:

For the heading, we’re using the <mark> HTML element for the highlight styles instead of a <span> since it’s a little more semantic. It’s how we get the background color to show beneath the text.

mark {
color: #FFF;
background-color: #000;
line-height: 1.35;
padding: .375rem;
}

See the Pen Magazine Cutout Basic Layout – 2 by Bri Camp Gomez (@brianacamp) on CodePen.light

Magazine Cutout

Now it’s time for the magazine cutout. Since there’s a lot of images overlapping each other, we’re going to use CSS Grid. Wahoo, let’s get started!

Alright, let’s take a look at how we can best implement this via a grid. 

This image shows us the grid and clip-path outlines of the images so we can easily see what’s happening here with the different layers. The design allows us to divide the grid into 12 equal columns. Perfect! This image will be our rough guide for where to put each item in the grid. 

Let’s set up the starting HTML structure:

<div class=”grid-container” aria-hidden=”true”>
<div class=”grid” aria-hidden=”true”>
<div class=”grid__item”>
<img src=”” alt=””>
</div>
</div>
</div>

We have a parent div that’ll contain the grid and its styles with an aria-hidden=“true” attribute which tells screenreaders to not add this element and its children to the Accessibility Tree or in other words, skip over this element because it’s purely for decoration. If you’d like to learn more about when to use aria-hidden=“true” or role=“presentation”, I encourage reading this wonderful article explaining the differences and when to use what. 

For the grid styles we’ll add:

.grid-container {
margin: 0 auto; // centers itself horizontally
padding: 0 10%;
max-width: 65rem; // restricts the grid from getting too big
}

.grid {
display: grid;
grid-template-columns: repeat(12, 1fr);
grid-template-rows: repeat(12, 1fr);
position: relative;
}

In order for the grid to act like a grid, we define the display property as, well, grid. Next, we want to be explicit about how many columns and rows we want for this grid since we’ll be laying out the images at a particular column and row value.

This line: grid-template-columns: repeat(12, 1fr) means to make 12 equal columns with the available space of 1fr. fr is a flexible unit that indicates the fraction of the available space in the grid. To learn more, I’d recommend reading this article and this article to see different fr unit use cases.

The same goes for grid-template-rows; we’ll want 12 equally spaced rows. This allows the images to scale beautifully and keep their positions in the grid once the browser is resized. Lastly, we add position: relative for the ability to overlap images which we’ll be covering soon.

Let’s look at the assets needed for this: 

Since we’re dealing with images, we’ll want them to act as a block-level element and take up the entire space of the container. So we’ll add this to all of our images:

img {
display: block;
width: 100%;
}

Next, we add the .grid__item children elements with their specific classes and placements.  I will write about a couple of them so you can see the thinking behind them.

<div class=”grid__item grid__item–bg”>
<img src=”https://s3-us-west-2.amazonaws.com/s.cdpn.io/110238/codrops-portrait.jpg”>
</div>

.grid__item–bg {
grid-column: 2 / span 9;
z-index: 0;
grid-row: 1 / -1;
}

For each .grid__item element, we have 3 very important properties that we’ll use to place the element where we want in the grid and where in the z-stack we want it to reside.

The grid-column property is a shorthand that takes the grid-column-start and grid-column-end property values separated by a “/“.  Let’s take grid-column: 2 / span 9. This rule says to start at the second grid-line and span 9 columns. I recommend using Firefox’s dev tools when you’re working with grid so you can easily see the grid lines. The grid-row property acts very similarly to grid-column; it’s a shorthand property that combines grid-row-start and grid-row-end. This line grid-row: 1 / -1 says start at grid-row 1, and stretch all the way to the end which is -1. It’s the same as saying grid-row: 1 / span 12. Last we have the z-index property to be at the very bottom or background of the grid which is what we get with the value of  0.

Another grid__item is a half portrait:

<div class=”grid__item grid__item–portrait-half”>
<img src=”https://s3-us-west-2.amazonaws.com/s.cdpn.io/110238/codrops-portrait-half.jpg” alt=””>
</div>

We do very close to what we did with the background but shift it to the right of the grid:

.grid__item–portrait-half {
grid-column: 6 / span 6;
z-index: 1;
grid-row: 1 / -1;
}

We start at grid-line 6 and span 6 columns, make it stretch the entire height of the grid with the grid-row property, and with a higher z-index than the background, so it sits right on top of the background. 

Since there are a total of 10 grid elements I won’t list them all out here but here’s a demo so you can see what I did for each and every one of them:

See the Pen Magazine Cutout – Sans Clip Path – 3 by Bri Camp Gomez (@brianacamp) on CodePen.light

Clip-path

Now we want to add the clip-paths to make the cutout shapes appear on the images. Cool cool, but what’s a clip-path?

I’m glad you asked! A clip-path is a clipping area that determines what part of an element can be seen. What’s inside of the area is shown, while what’s outside of the area is hidden. Clip-paths can take several values, but we’re going to use the polygon shape for the most part.  

The anatomy of a clip-path property value is this:

clip-path: polygon(x1 y1, x2 y2, x3 y3);

You can add more than 3 x/y values, which we’ll be doing for our images. Since it can be complicated to write out clip-path values by hand, I find it necessary to use clip-path tools that make clip-path shapes. I like to use Clippy and Firefox’s dev tools to create the clip-paths because they both make it incredibly easy to get the exact shapes you want and give you the values for it. So nice!

In order to make this shape:

It consists of these values: the first point value (the white dots in the above photo) indicates 5% from the left and 10% from the top, then the second point is 27% from the left and 3% from the top, and so on and so forth for all of the points.

.grid__item–portrait-half {
clip-path: polygon(5% 10%, 27% 3%, 94% 25%, 84% 98%, 39% 98%, 11% 98%, 4% 66%, 4% 34%);
}

I apply different clip-paths to each element to make each image look cutout and unique. I highly recommend experimenting with the different points, it’s loads of fun!

See the Pen Magazine Cutout – With Clip Path – 4 by Bri Camp Gomez (@brianacamp) on CodePen.light

And there you have it, a responsive, accessible layout that employs modern CSS and semantic HTML.  You’re probably thinking, cool, but how can we spice this up a bit? In the next section, we’ll make the image’s layers come alive!  

Bonus: Interactivity and Animation

To get this spice party started there are a two things we could do:

1. Add some fun little parallax

2. Animate the clip-path on hover with the transition property

I recommend doing one instead of both. As much as I love animation, there’s a fine line between a little spice and completely over the top psychopathic. 

We’re going to cover the first option, a little bit of parallax, since the overlapping images call for it, in my opinion! If you wanted to see an example of an animated clip-path, check out the demo in the reference section at the bottom of this article.

Adding animation comes with great responsibility. We need to be mindful of users that have vestibular disorders who might get dizzy when seeing parallax. After we implement the parallax we’ll cover how to remove it if the user has their “Prefers Reduced Motion” Preference turned on via their operating system.

This section will cover a basic implementation of the very small parallax library called rellax.js. We only need one line of JavaScript to make it happen, which is great!

Depending on your project, you can import the library via npm/yarn or add the minified file itself in your project. We’re going to go with the latter by way of their CDN. So, before the end of the closing body tag we’ll add:

<script src=”https://cdnjs.cloudflare.com/ajax/libs/rellax/1.10.0/rellax.min.js”></script>

In our JavaScript file, all we need to do to instantiate the Rellax object in the following line:

const rellax = new Rellax(‘.js-rellax’);

There are many options you can also pass in via JavaScript but for our purposes, we only need this line. We’ll handle the different scrolling speeds in the HTML.

In order for Rellax to know what elements should be used for parallax we need to add the class js-rellax to them. I like to prepend js to classes that are only used in JavaScript so it’s easy to tell if it’s tied to JavaScript, i.e. if you remove that class from the HTML, something will likely break!

We’ll add the class to the all of the elements in the .grid so it’s easy to control what we want. Next, Rellax has a handy data attribute called data-rellax-speed which handles the scrolling speed of the element. If you don’t specify the speed, it’ll fall back to its default speed of -2. It’s recommended to use the values of -10 through 10. -10 is the slowest while 10 is the fastest. In order to add a speed, we add this line to each element with a different value, for example: data-rellax-speed=”3″. I encourage you to play around with different speeds, I find it a ton of fun!

Here’s the final output:

See the Pen Magazine Cutout – With Animation – 5 by Bri Camp Gomez (@brianacamp) on CodePen.light

Animations and Accessibility

For users who have vestibular (or inner ear) disorders, where they can get dizzy by seeing animations they can tell their operating systems to reduce motion in their system preferences. Wonderfully, there’s a media query that captures that information and is called prefers-reduced-motion and takes the values of no-preference and reduce. Read more about where the browsers look for various operating systems here: prefers-reduced-motion on MDN

Since we’re not animating anything via CSS and only JS, we’ll detect the media query via JavaScript and kill the parallax animations if the media query is set to reduce.

To turn off the animations for users who prefer reduced motion we’ll add these two lines of code:

// grabs the media query
const motionMediaQuery = window.matchMedia(‘(prefers-reduced-motion: reduce)’);

// if there is a prefers-reduced-motion media query set to reduce, destroy animations
if (motionMediaQuery.matches) rellax.destroy();

Read more about the topic here: Move Ya! Or maybe, don’t, if the user prefers-reduced-motion!

See the Pen Final Magazine Cutout – With Accessible Animation – 6 by Bri Camp Gomez (@brianacamp) on CodePen.light

If you made it this far, you get 5 gold stars! This was a full tutorial that builds from a Figma file, is responsive, uses modern CSS, semantic HTML, and accessible animations. I hope you enjoyed it!

Resources & Credits

Image from UnsplashRellax Clippy – CSS clip-path makerMove Ya! Or maybe, don’t, if the user prefers-reduced-motion!prefers-reduced-motion on MDN

Crafting a Cutout Collage Layout with CSS Grid and Clip-path was written by Briana Camp and published on Codrops.

Apple has plans for a foldable iPhone that might actually work

Original Source: http://feedproxy.google.com/~r/CreativeBloq/~3/5CJiXPiKAgo/apple-foldable-iphone

It seems that for every smartphone manufacturer, the dream is to produce a foldable phone, and a new patent application from Apple has revealed that it's on the case, and also looking to address the problems inherent in foldable tech.

These problems immediately became evident when Samsung rushed out its Galaxy Fold in April last year. The $1,980 device looked good on paper and had the potential to become one of the best smartphones, but it quickly became apparent that its display couldn't cope with the physical stress of repeatedly being opened and closed. Bulges appeared along the hinge and in many cases the Galaxy Fold broke completely.

iPhone 11 Pro review

Samsung Galaxy Fold

The Galaxy Fold wasn’t particularly well executed

Folding displays are a huge challenge for the tech industry, and a look through Apple's new patent application, discovered by AppleInsider, shows that while it's developing a folding iPhone, it's also trying to do it in a way that won't result in broken phones and angry customers. 

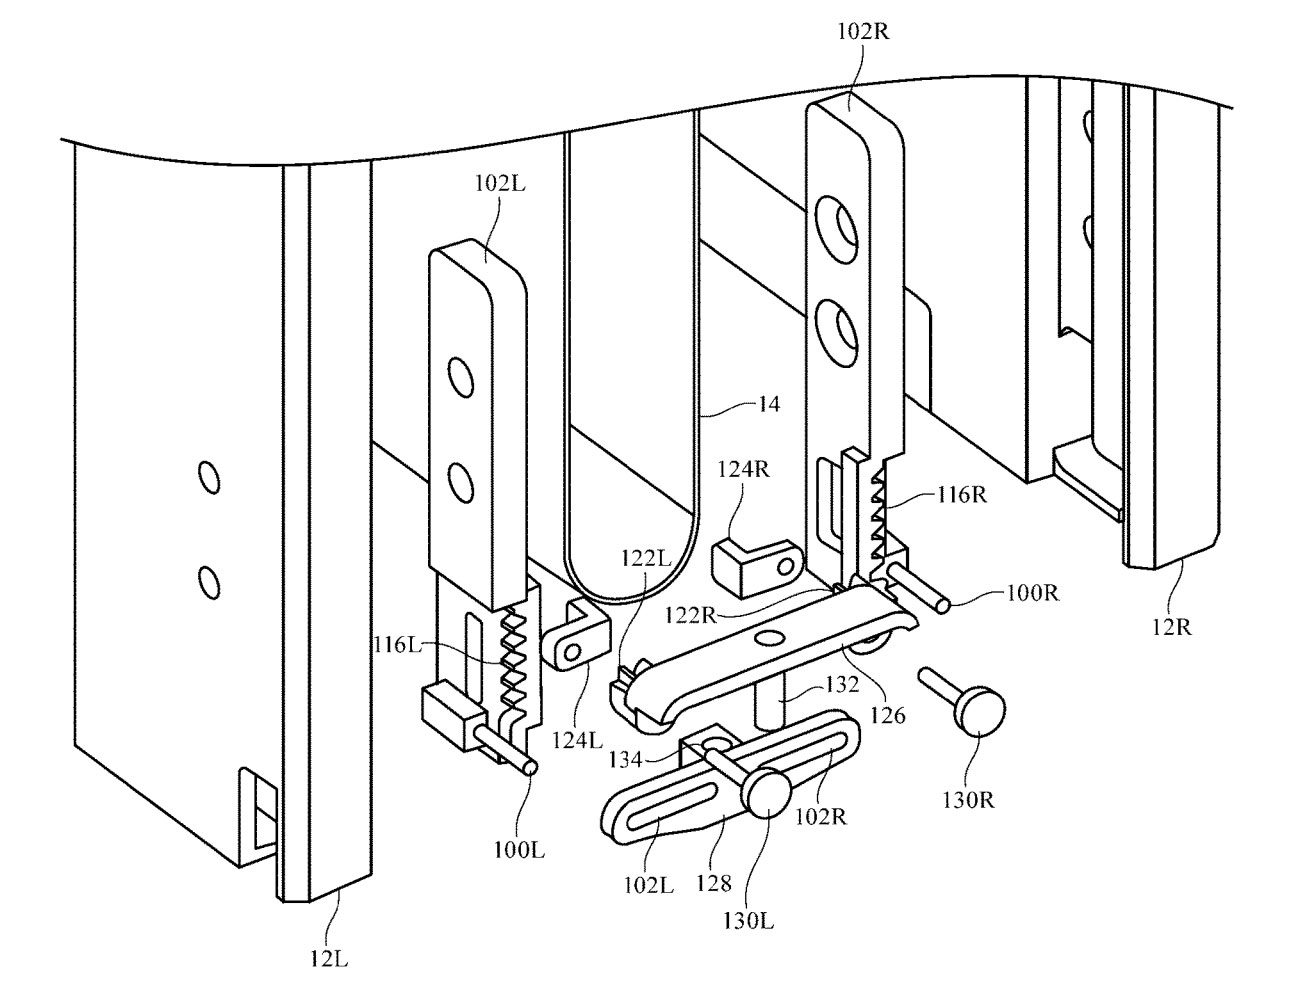
So rather than have the screen simply fold along a central hinge – which creates stress and ultimately results in a dead display – it's pursuing a carefully engineered solution where the central folding section bends in a much more gentle arc, and in which the many delicate components are supported by an arrangement of extending flaps, stiffening plates and tiny little gear and rack structures.

There's something quite wonderfully old-school about Apple's approach. We're all used to phones having no moving parts whatsoever, but what Apple's proposing in this patent filing is quite the opposite. Whatever device comes out the other end of this process is going to be packed with moving parts, all dedicated to ensuring that the folding screen works perfectly without breaking after a couple of days, and frankly we love it.

Foldable iPhone patent

Apple’s taking a mechanical approach to a folding display

Don't go getting too excited just yet, though. As we all know, Apple files a lot of patent applications, and not all of the technology described in them sees the light of day. We can confidently predict that it's not going to launch an iPhone 12 with a folding screen this year.

In fact, given the intricate mechanical direction Apple's outlining here, it's possible it may never launch at all. While it all looks amazing in theory, when it comes to the practicalities of actually assembling and mass-producing a foldable iPhone along these lines, it could all prove to be prohibitively expensive. We're excited to see where this all goes, but don't hold your breath; take a look through Apple's patent application and judge for yourself whether it's actually doable.

In the meantime, you can also check out the best flip phones available right now.

Related articles:

An iPhone with no ports. What's that about?iPhone 12: Surprising design decision revealedFleshy iPhone skin is the stuff of nightmares

Fresh Resources for Web Designers and Developers (February 2020)

Original Source: https://www.hongkiat.com/blog/fresh-resources-for-web-designers-and-developers-february-2020/

It’s the time again for us to share resources with our fellow web developers. In this round of the series, we’ve put together a handful of interesting desktop applications such as one to…

Visit hongkiat.com for full content.

3 Essential Design Trends, February 2020

Original Source: https://www.webdesignerdepot.com/2020/02/3-essential-design-trends-february-2020/

Designers are embracing big, bold concepts with oversized elements, bright color, and even a little rule-breaking. (The best part? Most of these trends seem to overlap somewhat.) Here’s what’s trending in design this month.

Homepage Headline Heroes

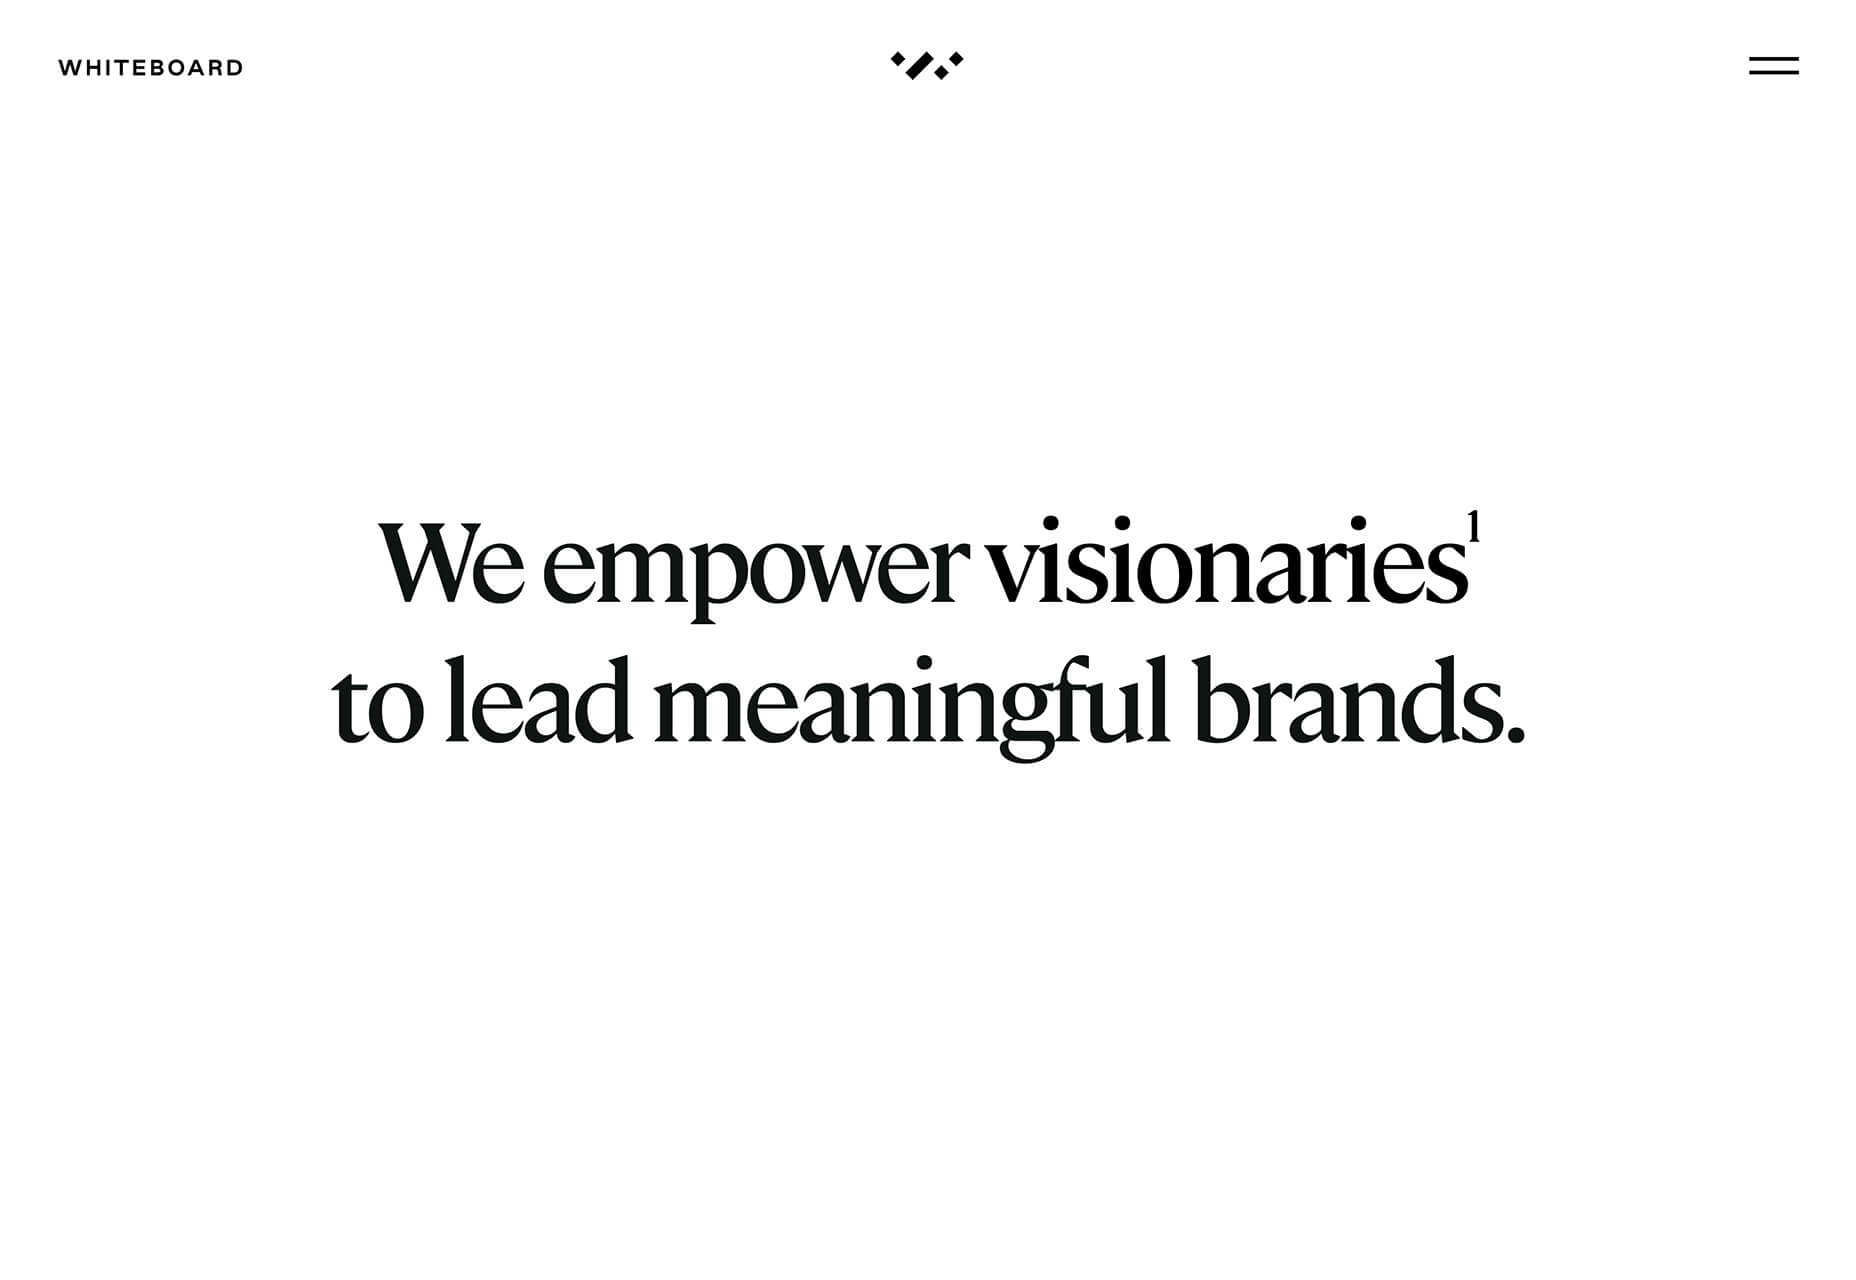
Homepage hero areas are shifting again from website entryways with plenty of text, CTAs, and options for users, to simple displays with big headlines (and maybe not much else).

Use of oversized headlines and text elements make it clear from the start what a website or design is about, but doesn’t provide a lot of opportunity for users to explore without scrolling. And that might be okay. Thanks to mobile dominance, users have become accustomed to the scroll. It may even be shifting to the preferred method of digesting content. (Even more than clicks or taps.)

Scroll is fast and allows users to glance at content and information with little delay or interaction.

Each of the website examples below are designed for just that:

Whiteboard opens with a large headline that encompasses their vision statement and nothing else. On scroll you get access to projects and a deeper dive into information about the brand.

Self-Evident Poems doesn’t actually scroll but moves into prompts for usability. It’s rooted in the same homepage headline hero area that’s designed to draw you into the content.

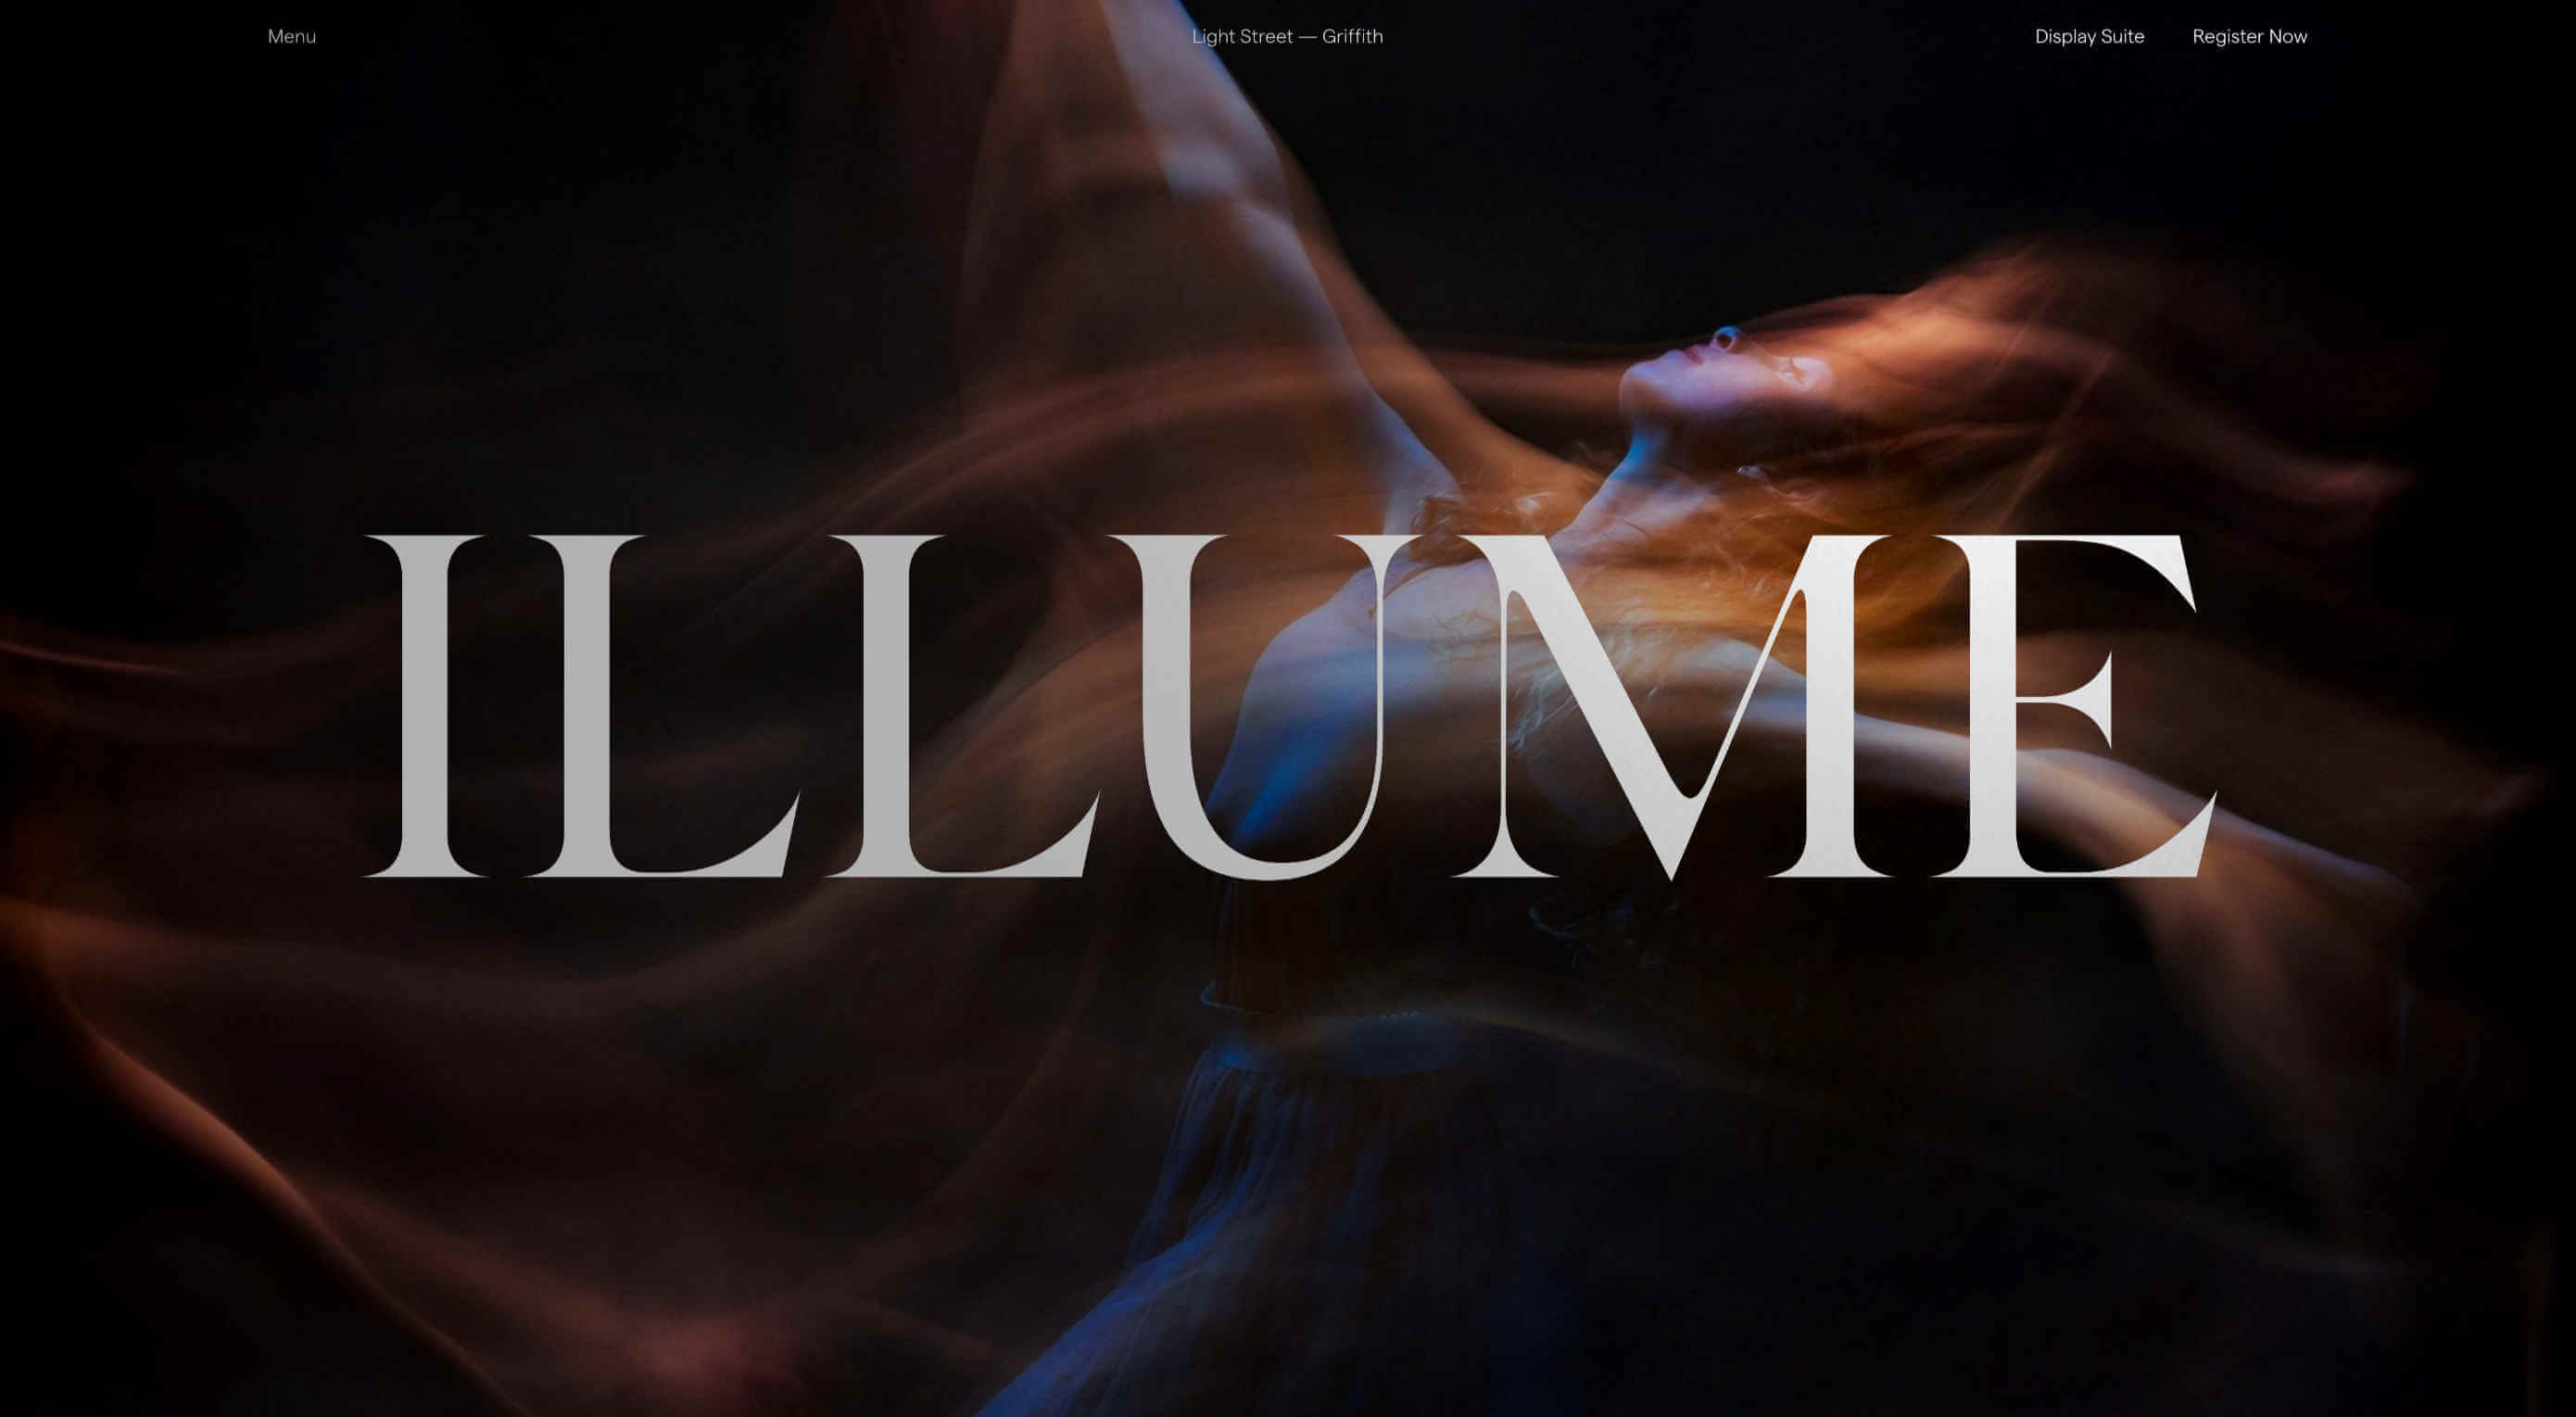
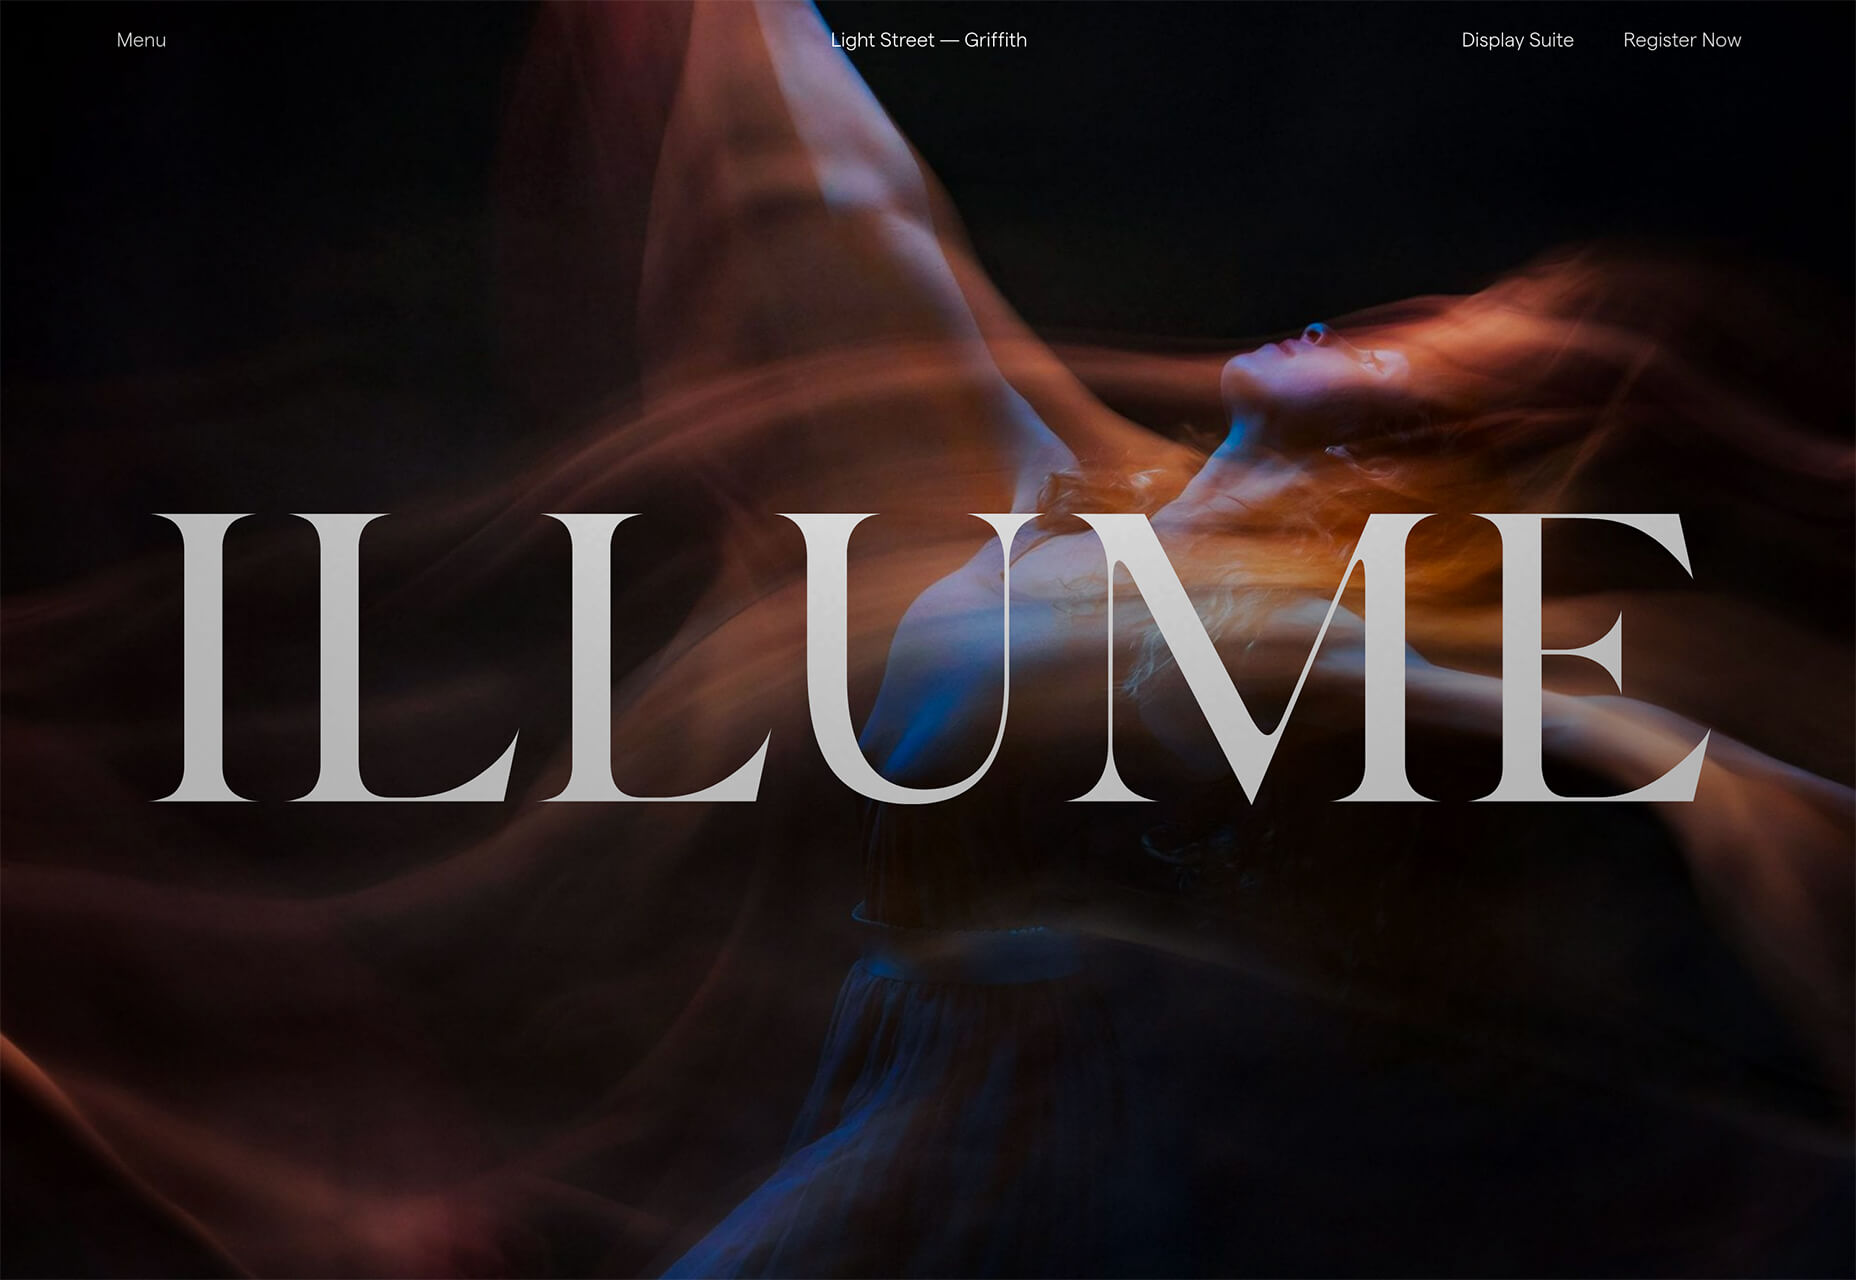
Illume has additional content below the scroll beneath a giant headline in the hero area. What this design does differently is that it does include some imagery, although it is still secondary to the text because of typography size.

Peachy Tones

Beat the Winter blues with a dose of Spring color! Peachy tones seem to be everywhere.

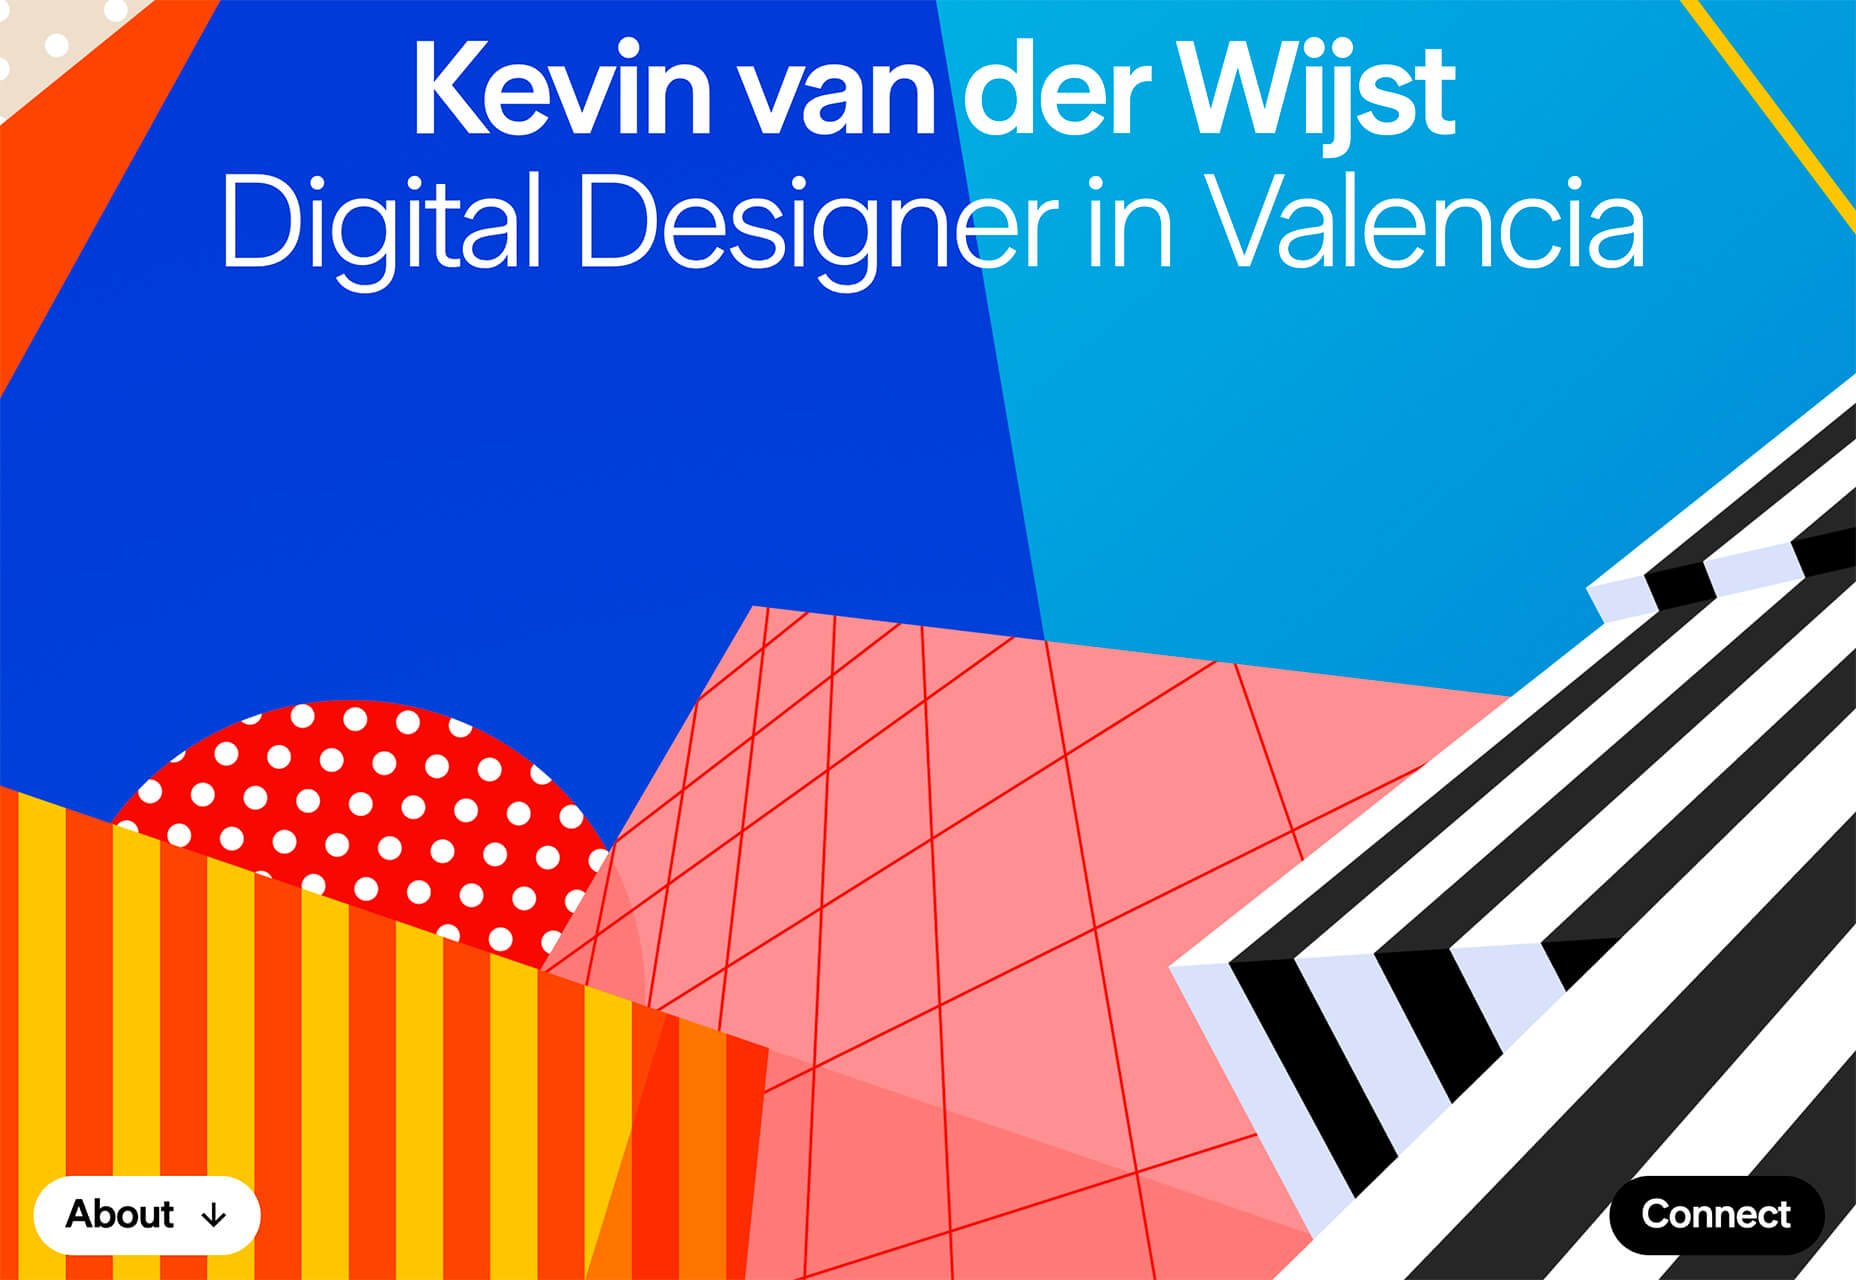
While this trend might be an evolution from other bright colors such as pinks and oranges that have been popular, it has a lot of practical application. Use it as a dominant color such as Grain & Mortar, and Monokai, or to create an accent like Kevin van der Wijst’s portfolio.

Peachy tones provide plenty of options and can be more pinkish or push toward orange. The color can be highly saturated or fairly pale. The nice thing about peachy tones is that they aren’t that overpowering, and work equally well as background or foreground color. Peach can get a little tricky when used for typographic elements, depending on the font style and contrasting elements.

Larger swaths of peach tend to stand up against other elements better than tiny ones. Note that even as an accent in the featured portfolio below, peach tones encompass a significant portion of the canvas. (You might also want to click through and play with that design, which also includes cool liquid animation. You can even make the peach area take up most of the screen.)

Outline Fonts

This trend is exploding in use from small projects to big brands. Outline fonts are a big deal. It’s one of those trends that you would shake your head at and say “no way” if you didn’t see it in action … and used so well.

Outline fonts can be a challenge. They create an effect that’s almost the opposite of the oversized typography in another trend mentioned here. But they do create an eye-catching effect that draws you into the words on screen.

Outline fonts are almost always paired with the same font filled. It creates and yin and yang effect that can help keep users reading longer and engaging with content. The contrast between and outline and filled font also put specific emphasis on the bolder element in the lettering pair.

The trick to making it work is not to get too crazy with the design and design outline fonts so that there’s plenty of contrast for the letters to remain readable.

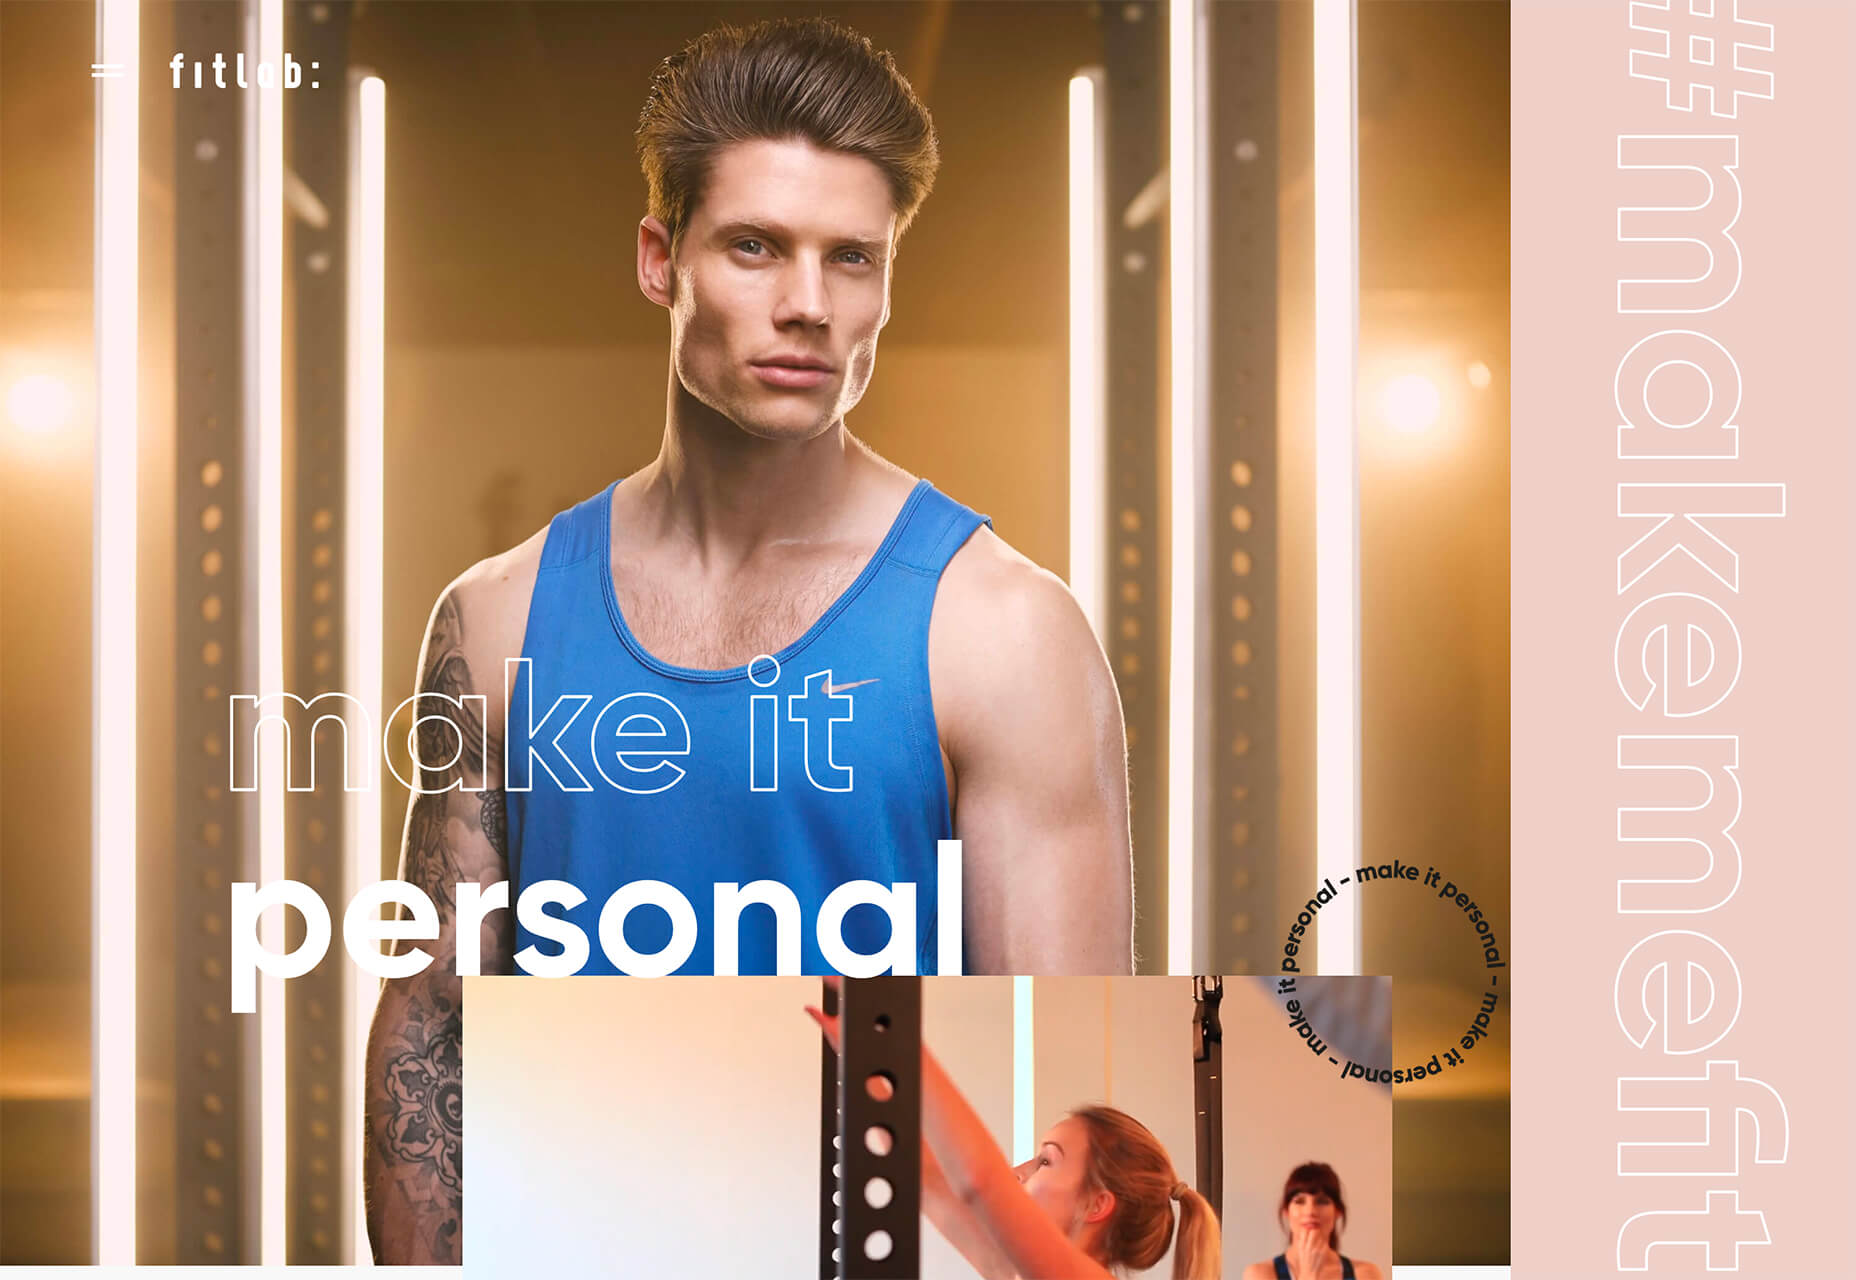
Fitlab is the busiest of the examples of this trend with multiple use of outline fonts and even a quick-moving video roll. Put it all together and the emphasis is on “personal” training. It works.

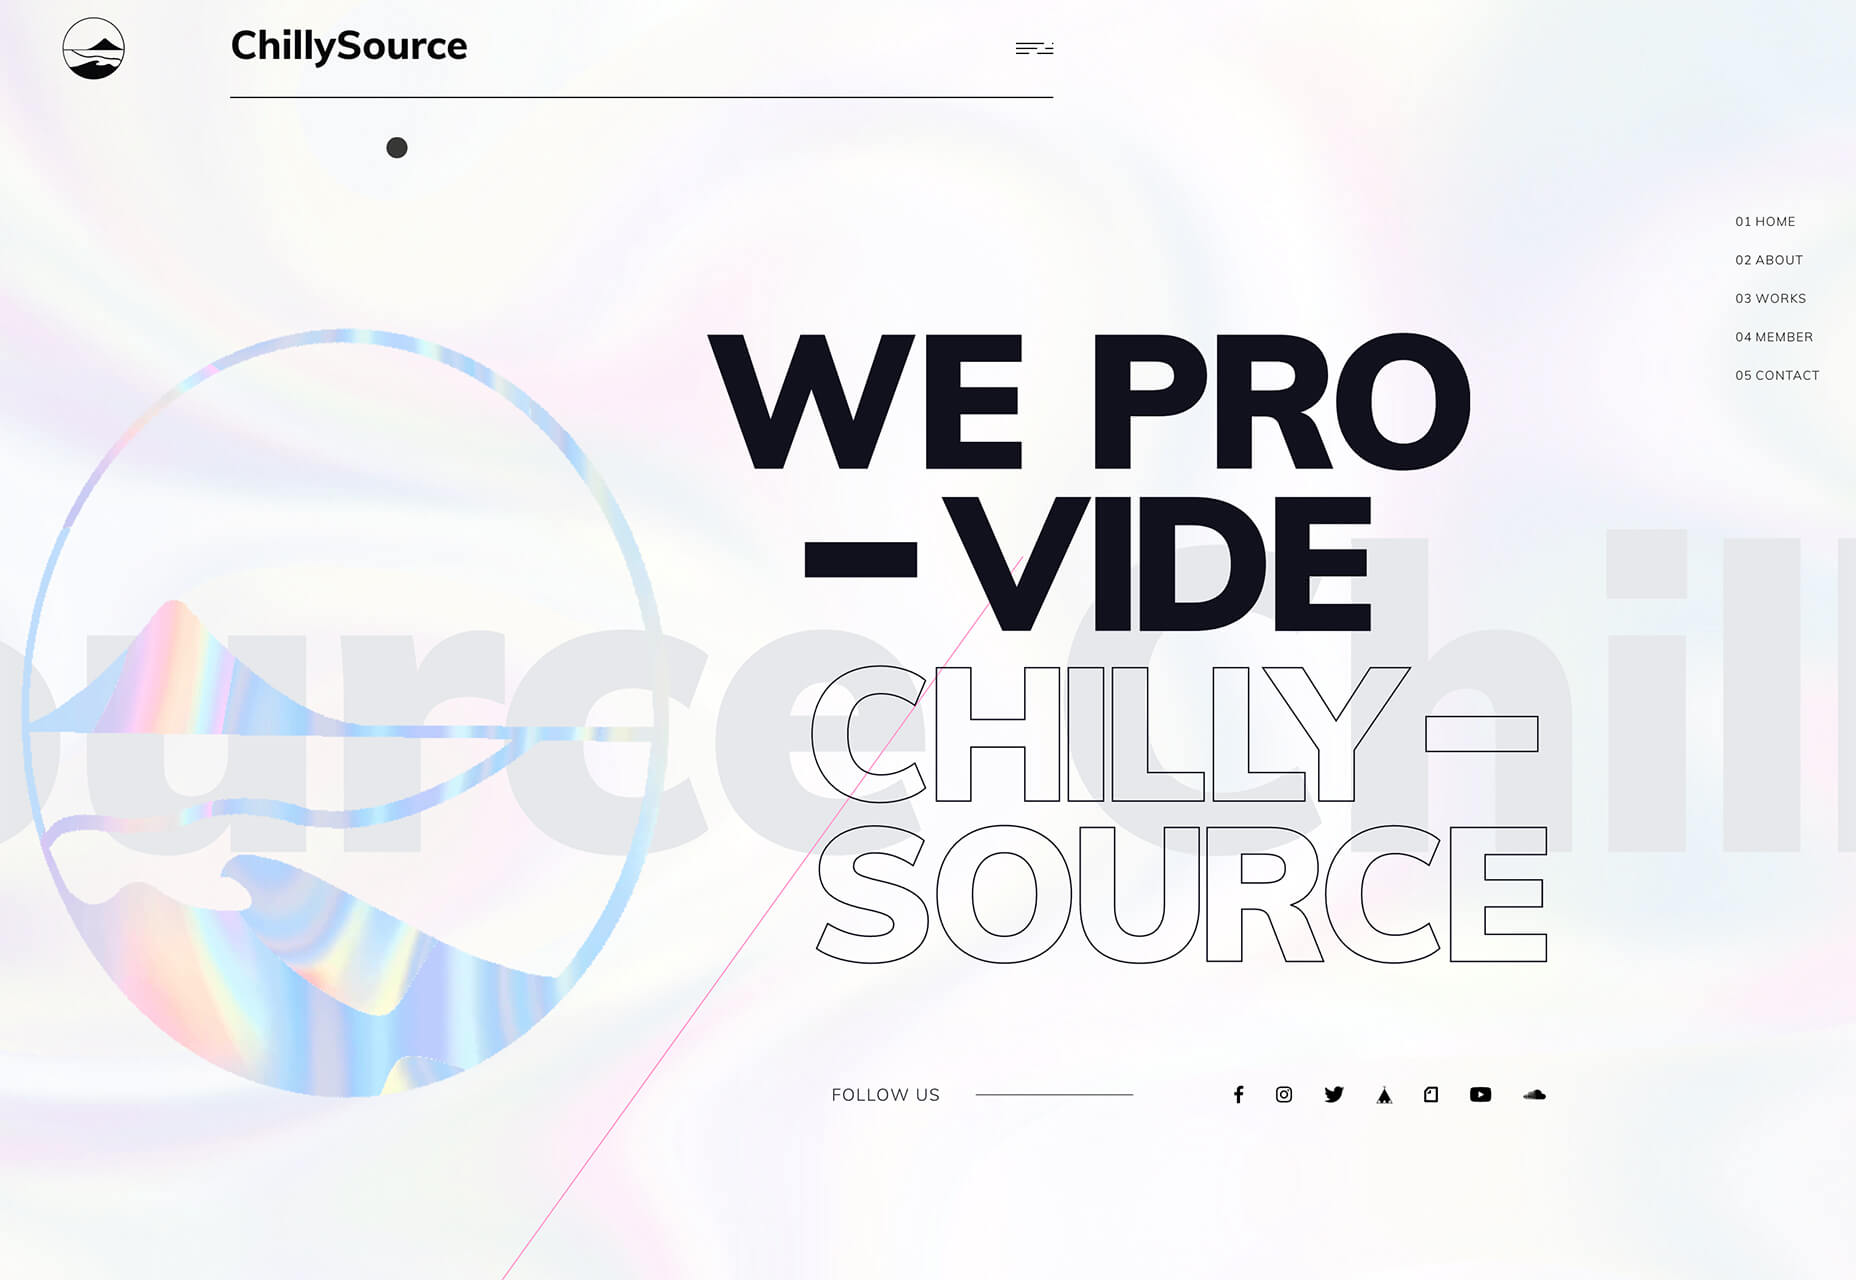
Chilly Source uses an outline font for its brand name so that you get another intro to it without too much brand in your face. (The name is mentioned three time on the homepage.)

Vitesse Trucking uses outline text to tell you what they do throughout the design. Text is information but also serves as an art element with movement in the parallax-style scrolling design. Outline type elements mirror smaller filled words and even include some layering and overlays to keep the eyes moving. It’s an interesting use of this trend in an industry where you might not expect it.

Conclusion

I’ll be the first to admit, you probably won’t find me designing with a lot of peachy coloring. While it works for these projects, it’s not a favorite of mine.

On the flip side, I adore all the outline font options. It’s funky and provides depth to text elements that we haven’t seen a lot of. How about you? What design trends can you see yourself using in the coming months?

Source

p img {display:inline-block; margin-right:10px;}
.alignleft {float:left;}
p.showcase {clear:both;}
body#browserfriendly p, body#podcast p, div#emailbody p{margin:0;}

Building a Headless WordPress Website with GatsbyJS

Original Source: http://feedproxy.google.com/~r/1stwebdesigner/~3/YUX_9KCa43I/

Recently, we took a look at the rising trend of “headless” WordPress configurations. The term describes the process of creating content within WordPress, then pushing it out for use in another application. In essence, this works to separate (or decouple) the front and back ends.

One of the more exciting features of this setup is the ability to create content within the familiar confines of a CMS and use it to feed just about anything you want. Among the most common destinations for this content would be mobile apps, progressive web applications and static websites.

Today, the focus will be on the latter. We’ll take you through the process of using a headless WordPress installation to create a static website. For this, we’ll utilize GatsbyJS, a React-based framework that can work in tandem with WordPress.

The result will be a basic static website that will run incredibly fast, while allowing us to keep the content management abilities of WordPress. Let’s get started!

UNLIMITED DOWNLOADS: 500,000+ WordPress & Design Assets

DOWNLOAD NOW

A Quick Look at GatsbyJS

GatsbyJS has become a popular tool for generating static websites. It offers a lot of flexibility, as well as a number of plugins and starters to help get your project going rather quickly. This goes well beyond WordPress, with the ability to work with a number of different CMS and other data sources.

But for our purposes, WordPress compatibility is exactly what we’re looking for. And while there are some WordPress-specific starters available, we’re taking a very barebones approach. The starters are outstanding, but do have some dependencies which could trip up beginners.

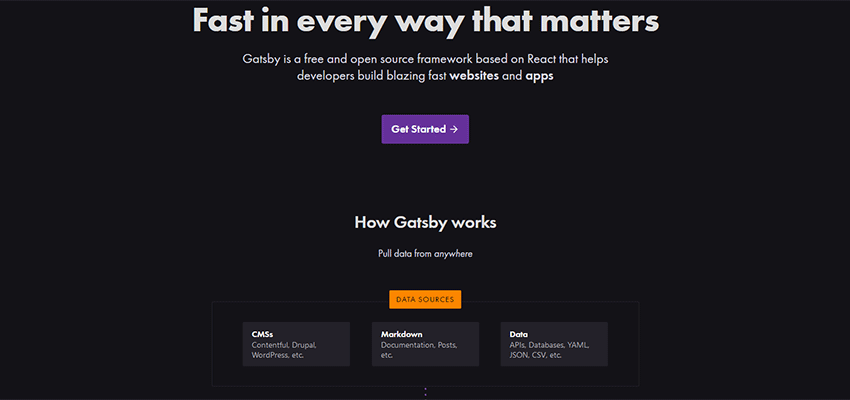
The GatsbyJS home page.

Requirements

In order to use GatsbyJS, you’ll need to familiarize yourself with the command line. And you’ll need, among other things, to have Node.js, Git and the Gatsby CLI tool installed on your web server or local machine (that’s where we’re building our demo).

You may be wondering: How is a local machine set up? While we won’t go into too much detail here, there are a number of ways to go about it. For example, XAMMP (which we’re using) is a great option and will work on Mac OS, Windows and Linux. In essence, it’s a matter of downloading the server you want, installing it and then hitting the command line.

There’s a tutorial available that will walk you through the various software packages you need for your particular environment.

The other big requirement is, of course, an installation of WordPress. To push data from WordPress to your GatsbyJS static website, you can use the default REST API that comes built into the CMS.

Inside WordPress

Inside our WordPress site, we created a handful of test pages, along with a test blog post. You don’t need to do anything more than this when first experimenting.

In addition, we put our pages in a menu called “Main Menu”.

By default, WordPress menus aren’t available in the REST-API. Installing the WP REST API Menus plugin will do the trick. We’ll be using this as well to help auto-create menus on our static site.

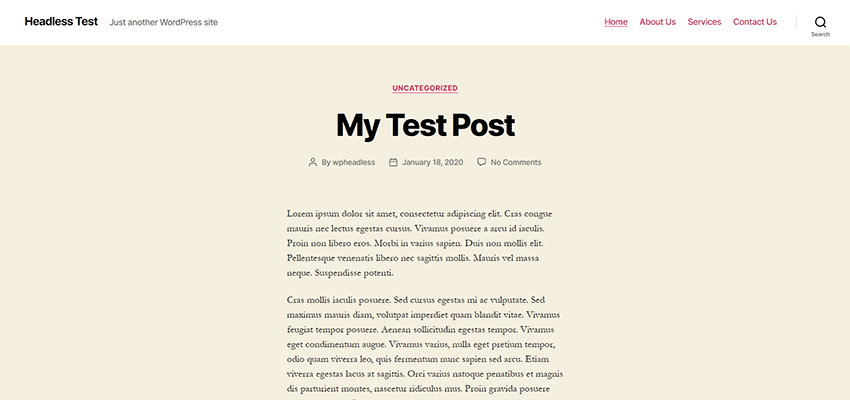
Our headless WordPress website.

Creating a New GatsbyJS Website

So, we’ve installed the necessary command line software on our local machine and created a fresh install of WordPress (with the WP REST API Menus plugin installed and activated) on a remote web host.

According to the GatsbyJS documentation, we need to run a command in order to create a new website. First, navigate to a directory where you’d like to build (we’re using C:gatsby on a Windows 10 machine). We’ll deviate a little from their notes, as we’ll be using a custom site title “1wd-static” (which will create a folder with the same name).

Here’s the command for building this new website:

gatsby new 1wd-static

The command takes a little time to run, as it installs the package. When the process finishes up, we can navigate to that new site via the command line. In our case, it’s:

cd 1wd-static

Okay. We’re in the directory where our static website has been created.

Next, we’ll install the gatsby-source-wordpress plugin. This allows us to fetch data from WordPress:

npm install gatsby-source-wordpress

In addition, gatsby-plugin-sitemap and gatsby-plugin-sass will be installed, as they are dependencies for the demo code we’ll use later on:

npm install gatsby-plugin-sitemap gatsby-plugin-sass

Now, it’s time to put GatsbyJS into development mode:

gatsby develop

If everything went smoothly, you should now be able to view the site in your web browser by visiting http://localhost:8000

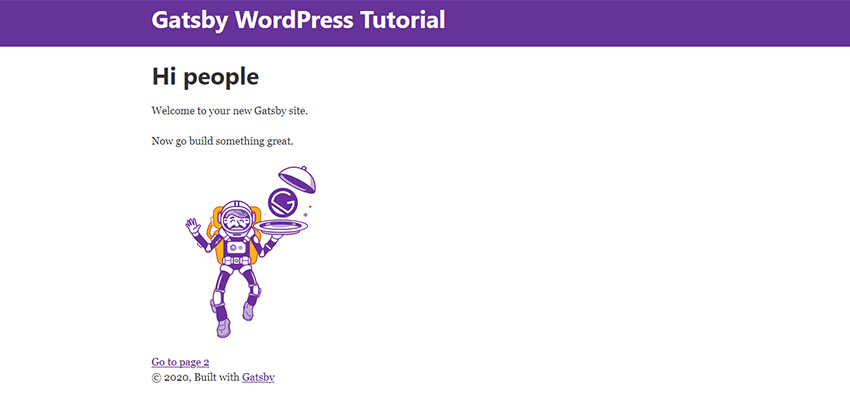
The site is nothing fancy so far, just a basic page with default content. We still have to configure some files to get GatsbyJS talking to our WordPress site.

The GatsbyJS starter home page.

Tip: If you need clarification on the process, check out this helpful tutorial on the official GatsbyJS blog.

Pushing Site Content from WordPress to GatsbyJS

The next step on our journey involves grabbing the content from our WordPress install and feeding it into our new GatsbyJS static website.

The first part of the process is in customizing some GatsbyJS files.

Download and Replace the Files

Before we move along, you’ll want to download a copy of the example GatsbyJS site and replace the existing files. Several of the files have been changed from the default in order to grab pages and posts from a WordPress install. There is also a GitHub repository of the files if you’d like to take a look around.

The original code is courtesy of Tim Smith, who wrote the GatsbyJS blog tutorial we referenced above.

Options to change:

Assuming you have downloaded the necessary files above, there is only one place you’ll need to make changes. Open up gatsby-config.js, located in the root folder of the static website.

Head to the section that reads: resolve: “gatsby-source-wordpress” and take a look at the following:

baseUrl: “gatsbypress.iamtimsmith.com”, // Change to your WordPress URL, without the ‘http://’.
protocol: “https”, // Use https if you have SSL installed on your WordPress website. Otherwise, use http.
hostingWPCOM: false, // Keep as ‘false’ UNLESS you are hosting with WordPress.com.

A little farther down, look for:

searchAndReplaceContentUrls: {
sourceUrl: “http://gatsbypress.iamtimsmith.com”, // Replace with the full URL of your WordPress website.
replacementUrl: “https://localhost:8000”, // The local URL of your GatsbyJS website – this should be fine as-is.
},

Testing

Now that we’ve customized gatsby-config.js, it’s time to test! In order for GatsbyJS to recognize the updated files we’ve installed, we’ll need to:

Restart the local server;
In the command line, navigate over to the folder where our static website exists, /1wd-static/

Then, enter the following command:

gatsby develop

Once GatsbyJS starts up, the test site will be available once again at: http://localhost:8000

The Results

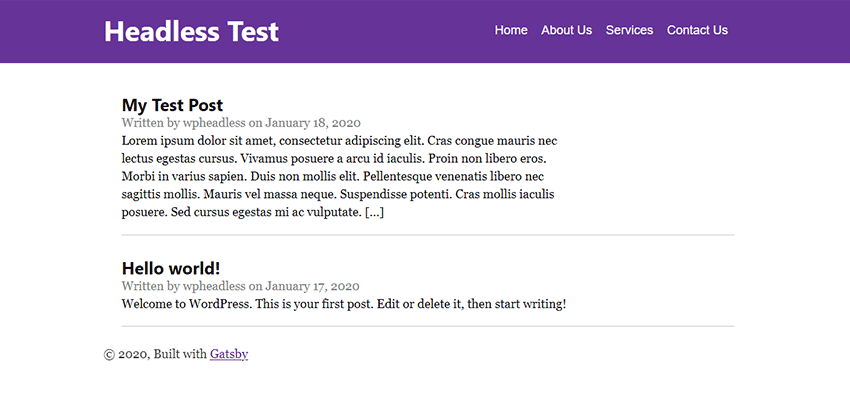
It works! The static website now displays our blog posts on the front page, while a top navigation menu will direct visitors to our secondary pages. Notice the site’s title also reflects what we set in WordPress.

The site is not ready for public consumption just yet, but we’ve got a great foundation to build on.

The GatsbyJS website, using content from WordPress.

Moving Forward

Now that we have the basics of a headless configuration, there are plenty of goodies to add. The most obvious of them is the design. Check out the documentation to see how to style a GatsbyJS website and use a theme.

Another thing missing from our demo are images, which is covered in Adding Images to a WordPress Site.

Finally, if you’re looking for a complete and thorough guide to the site building process, check out this step-by-step tutorial. It will take you through site set up, development and launch.

Final Thoughts

The experience of building a headless WordPress configuration was full of ups and downs – sometimes even a bit discouraging. That’s to be expected, as there is just about always a learning curve when experimenting with new tools. However, once you get the process down and gain a better understanding of what GatsbyJS is doing, things improve.

That being said, it’s worth taking the time to read the documentation. Setting up GatsbyJS is much more intricate than WordPress alone. It seemed like one false move led to lots of error messages. Each time, some research was required to sort things out.

Once you get it running, though, you can see why developers are adopting this approach. We’re just in the beginning stages, but the future looks awfully bright.


How to Tackle a Python Interview

Original Source: https://www.sitepoint.com/tackle-python-interview/?utm_source=rss

How to Tackle a Python Interview

Have you cleared the first round of calls with the HR? Are you going for a Python interview in person? If you’re wondering what Python-related questions may be asked, this guide should be of help.

In the first section, we’ll discuss a few questions about Python’s philosophy — those that help you make decisions about the architecture of a project. In the next section, we cover questions related to the Pythonic way of programming — which may manifest in the form of review or finding the output of a code snippet.

A word of caution before we start. This guide talks primarily about Python’s built-in capabilities. The aim of this guide is to help you get up to speed with the inherent Python functionalities that enable quick development. So we won’t be able to cover every question you may face from the various types of companies out there.

Development in Python: Project Architecture
What is Python? Why should you use Python?

If you’re interviewing for a Python role, you should have a clear idea of what Python is and how it’s different from other programming languages. Here are a few key points regarding Python that you should be aware of.

First, you should not be wrong about the etymology. A large section of Python programmers wrongly think that Guido van Rossum named it after the snake! On the contrary, Python is named after British sketch comedy Monty Python’s Flying Circus. The next time you see a Python book with a snake on the cover, you may perhaps wish to stay away from it.

Next, Python is a high level, object-oriented, interpreted programming language. This means that Python code is executed line by line. Python is also dynamically typed, as it doesn’t require you to specify the type of variables when declaring them.

Given Python’s ease of use, it has found uses for common automation tasks. Python is often the go-to scripting choice for programmers who know multiple languages. With the increasing popularity of Python-based web frameworks like Django and Flask, Python’s share of the pie has increased significantly in recent years.

Limitations of Python

While it’s good to know about the capabilities of a programming language, it’s also good to be aware of its limitations to truly comprehend the situations you need to be wary of.

The first limitation of Python is execution speed. Though development in Python is quick, executing a similar block of Python code is often slower compared to compiled languages such as C++. For this reason, hackathons often give Python programs some extra time for execution. There are ways to circumvent this issue, though. For instance, you can integrate Python with a compiled language like C to perform the core processing through the other language.

In a world which is going mobile first, Python is not native to mobile development. You will rarely find mobile applications developed in Python. The two major mobile operating systems, Android and iOS, don’t support Python as an official programming language.

Package Determination: Django vs Flask

In addition to Python’s capabilities and limitations, a category of questions that are popular in interviews focuses around choosing between packages based on your requirements. Let’s look at one approach that you may take when tackling such questions.

Let’s say you’re given a choice between Django and Flask to start a web application. The answer to this question should lie within an amalgamation of the requirements of the project and the culture of the organization.

At the outset, you should know that with the use of plugins, there’s no right answer here: you can create the similar applications using either framework. However, there’s a stark difference between the design philosophies of each framework. Flask provides you the bare minimum features for you to create a web application like URL routing, templating, unit testing and a development server, thereby giving you a lot of freedom to design your application. On the other hand, Django provides you a large array of built in features from the beginning — database support, extensive admin functionality, and security features.

If you’re building an application that will use relational databases, with a lot of dynamic content, you should probably choose Django. However, if you’re looking for a lot of freedom in your project, you should opt for Flask.

The post How to Tackle a Python Interview appeared first on SitePoint.

This Week In Web Design – January 31, 2020

Original Source: http://feedproxy.google.com/~r/1stwebdesigner/~3/GvPGsvKRImU/

We’re ending the month of January by kicking off a new weekly roundup series, “This Week In Web Design”, in which we will bring you a curated list of web design related articles published in the past week. Every Friday we will provide a list of links to helpful tips, tutorials, and learning opportunities to help you continue to grow your web design knowledge and skills. Of course, we have a wealth of information here at 1stWebDesigner to aid in that endeavor, but we hope these lists will help you to expand your resources beyond our own site.

So, here’s what we’ve found this week. Enjoy!

Your Web Designer Toolbox
Unlimited Downloads: 500,000+ Web Templates, Icon Sets, Themes & Design Assets


DOWNLOAD NOW


UI Interactions & Animations Roundup #2

Some selected shots of great UI interactions and animations for your inspiration.

How To Keep Designing When Tragedy Strikes

You’re going to face these things sooner or later, here’s how you too, can overcome your personal disasters.

How Web Designers Can Maximize On-SERP SEO and Traffic with Structured Data

Get your SEO hat on. How web designers can use structured data markup to qualify for key SERP features.

How To Design Powerful Narratives On Mobile

Want to build a website or PWA that attracts a large audience and then converts as much of that audience into paying customers as possible? If that’s the case, what you need to do is use storytelling in your web design.

How to Install MySQL

This article discusses various options for using MySQL on your local system during development.

How to Add a WordPress Author Box to Your Blog Posts

Using a theme, plugin, or coding yourself.

How to design a portfolio that will land you clients

Your portfolio website is the place to show off your best work and establish your brand. It needs to be easy to get to, pleasing to the eye and professional looking. It is a combination of business card, elevator pitch and samples of your work.

Going Beyond Sales: 7 Types of Website Conversions to Optimize for on Your Website

What a conversion goal is, seven types of website conversions, and four steps for setting up your conversion rate goals.

Use and Reuse Everything in SVG… Even Animations!

Learn how to build and optimize your code with <use> element, CSS Variables and CSS animations.

A Rational Approach to Updating Your WordPress Install

Take a look at some techniques to mitigate risk and give you some peace of mind.

What Is Modern Web Design in 2020? 20 Stunning Examples

You know an outdated design when you see it for sure. Here’s a collection of 20 examples of modern web designs to help shape a better idea of what it looks like.

How to Be a Sustainable Web Designer

Talking about the practicalities of going green and asking whether it is possible to be a sustainable web designer.

How to Improve Security on WordPress Websites for Optimal Performance

A discussion of some rather small but significant tips that can be used to achieve improved security on your WordPress website and as a result improve performance.

WordPress 5.4 Will Add Lazy-Loading to All Images

WordPress announced that WordPress 5.4 may feature image lazy-loading by default.

Sticky Table of Contents with Scrolling Active States

A fairly common pattern for documentation.

How to Automatically Update Your JavaScript Dependencies

One frustrating aspect of the modern JavaScript ecosystem is keeping all your dependencies up to date. Thankfully, there are automated tools that can handle this thankless task for you.

That’s A Wrap!

We hope you have found this list helpful in your continuing growth as a web designer. If you are a publisher, blogger, or own a website that is publishing articles about or related to web design and you would like to make sure you get included in our lists, please contact us here.

Cover photo courtesy of ShotStash