Performance Auditing: A Firefox Developer Tools Deep Dive

Original Source: https://www.sitepoint.com/performance-auditing-a-firefox-developer-tools-deep-dive/

In this article, we’ll cover Firefox Web Developer Tools (“DevTools”) — a set of tools designed to help developers inspect, debug, profile and optimize the performance of websites and web applications. We’ll particularly look at the tools related to performance, but we’ll also see how to get started using DevTools in general, and learn about some useful settings.

You can access DevTools in different ways:

click on the hamburger menu at the right of the navigation toolbar, click on Web Developer, then choose the sub-tool you want to use
use keyboard combinations, such as Shift+F5 (Windows and macOS) for the Performance tool and Ctrl+Shift+E (Windows) or Cmd+Option+E (macOS) for the Network tool
right-click anywhere in the page a choose Inspect Element.

DevTools Settings

The Firefox DevTools have many options that help developers customize their experience, such as the option to Enable time-stamps in the Web Console, or to Disable HTTP Cache, which is used to simulate first-load performance in all pages that have DevTools open.

You can access the DevTools Settings panel in different ways:

Start by opening DevTools, next:

either click the Settings button in the toolbar
press F1 to show the Settings panel on top of any current tool
press Ctrl+Shift+O (Windows and Linux), Cmd+Shift+O (macOS) to show the Settings panel.

The Firefox DevTools settings

Here you can choose your default tools, the buttons you want to show in the toolbox, themes (dark-light-Firebug) and other advanced settings.

Performance-focused Tools

When analyzing the performance of a web application, you need to differentiate between load-time performance and run-time performance.

Load-time performance answers questions like “what resources are taking too much time to load?” When dealing with run-time performance, we need to focus on JavaScript and CSS (CSS animations in particular) so we’re able to see where the code spends most of its time and what’s causing bottlenecks.

Let’s look at the Network Monitor and the Performance Tool.

The Network Monitor

The Network Monitor

The Network Monitor shows you a tabular view of all network requests that Firefox made (for example, when it’s loading a page, or sending XMLHttpRequests, Fetch API requests etc.).

It can also display request-related HTTP headers, HTTP responses and cookies, and let you search through them. You can also use it to perform, display and save a performance analysis of the current page load.

In a nutshell, this tool can be used to determine how long the browser takes to download different assets of a web page.

You can also use this tool to monitor and single out requests that are slowing or blocking the web page’s fast loading. The Network panel shows you when principal events are fired (DOMContentLoaded and load).

Request Timeline

Each request in the network list has a timeline column which displays timing information related to the request, such as the total time taken to load the resource.

DevTools marks major life-cycle events in the report, like DOMContentLoaded, and page load. The blue refers to the time when the event DOMContentLoaded is fired; the purple line refers to the time when the page’s load event is fired.

Major life-cycle events

DOMContentLoaded vs Load Events

The DOMContentLoaded event fires right when the HTML document is completely loaded and parsed, not including CSS style sheets, images, and frames.

The event load fires when the HTML document and all associated style sheets, images and frames are completely loaded.

Request Details Panel

Once you click on a request in the requests list, you can a see right-docked details pane which has many different tabs such as headers, params, response, timings and security.

For performance, we’ll particularly look at the timing information.

Network Timings

In this pane, there are many timing metrics related to each request:

Network Timings

Blocked is the time spent in a queue waiting for a network connection.

Sending is the time taken for sending the request to the server.

Receiving is the time taken to receive the response from the server or (if it’s cached) to read it from the cache.

Waiting is the total time waited by the client before the first byte has been received. In other performance analysis tools like WebPageTest.org or Chrome’s DevTools, this is called TTFB or Time to First Byte.

There’s also DNS resolution, which is the time taken to resolve the host name of the server, and Connecting, which is the time taken to open a TCP connection.

How to analyze the load time performance

The Network Monitor integrates a performance analysis tool that can be used to analyze the load-time performance of your web page.

To start analyzing the load-time performance, you can:

click the Analyze icon in the bottom status bar
reload your page or make a network request while your Network monitor is open (actually this is going only to show tabular information about requests not do a load-time performance analysis).

Analyzing the load-time performance

The final report shows a pie chart and a corresponding table for the received resources by types: JavaScript, CSS, images and fonts etc. and a summary with the following details:

number of cached responses
total requests
size
transferred size
loading time

Final report

The web page is tested with an empty cache, and with a primed cache.

First load performance

Firefox’s DevTools allow you to analyze the performance of your web application in two different situations:

Without caching, which emulates the first-time visit when assets are still not cached.
With caching, which emulates the second-time visits. The browser has already cached the app’s assets, eliminating many round-trips to the server.

You can also use the Disable Cache setting to emulate the first-time load of a web page when the DevTools are open on any tab.

The post Performance Auditing: A Firefox Developer Tools Deep Dive appeared first on SitePoint.

The Best Image Compression Tools for the Web

Original Source: https://www.webdesignerdepot.com/2018/07/the-best-image-compression-tools-for-the-web/

It’s no real secret that the size of web pages is increasing. We’re adding more and more assets, slowing down sites, and ruining user experience.

But even though we’ve identified the problem, we still won’t take responsibility. Instead, we lean on coders to streamline their output—we ask then to drop useful libraries like jQuery, just because it saves us 80kb. Meanwhile, we’re designing layouts with 1mb images.

If we’re serious about making our sites fast (and we should be), if we’re serious about improving UX (and we should be), if we’re serious about boosting SEO (and we should be), then we need to do something about the real culprit: images.

Images are by far the biggest bloat on sites. And due to the type of images they suit, JPGs are the biggest bloat on the web.

Today we’re going to introduce 14 of the best JPG compression tools, and publish the results of our tests to find the best.

If you just want to know which of these services performs best, scroll to the bottom.

14 Top JPG Compression Tools

We’re comparing these tools for their ability to compress JPGs, because JPGs feature the most complex data, and so are most likely to contribute to site bloat. Some of these tools will also compress other file formats, like PNG.

1. Compress JPEG

Limitation: Maximum 20 files at a time
Cost: Free

Compress Jpeg is a pretty standard service that’s making its money out of advertising. There’s very little feedback as you compress images, it gives you a percentage, and when complete tells you how much it saved as a percentage, but progress isn’t obvious which can be difficult if you’re compressing a lot of images.

2. Compress Photos

Limitation: Maximum 50Mb per image
Cost: Free

Compress.photos is another free site that supports itself with advertising. You have to be careful not to get hijacked by a dark-pattern advert. Click “Add Files” then “Start Upload”. A good range of progress bars gives you the original size of the image you’re compressing and the change in filesize.

Compressor

Limitation: Maximum 10mb per image
Cost: Free

Compressor offers more options—it can handle JPG, PNG, GIF, and SVG, and features lossless or lossy compression. Compressor has a 10mb max file size limit, so it failed to compress two of our test files. The UI is nice to use, but it’s one file at a time, which makes it very slow to use for batches of files. Looking very closely at one of our files there’s a small amount of noise generated that isn’t evident in images optimized by the other tools.

GiftOfSpeed

Limitation: One file at a time
Cost: Free

GiftOfSpeed offers numerous tools for compressing your website, but for comparison purposes we’re only interested in the JPG compression tool. Again, this is a manual tool, meaning you’ve got to manually compress each individual image one at a time. It offers a nice option of changing the level of compression, but unless you’re experienced it’s a case of trial and error to find the best setting.

iLoveImg

Limitation: None
Cost: Free

iLoveIMG is another free tool that’s offering more options than just image compression. You can resize, crop, or rotate images. You can also turn different formats into JPG, or convert JPGs into PNGs or GIFs. iLoveImg feels like a tool for amateurs that want to make changes to snaps from their phone.

ImageRecycle

Limitation: None
Cost: From $10 per 10,000 images

ImageRecycle is a paid tool, so we expected it to be better than the free options. (We tested using the free trial.) It was a little buggy when we tried the multiple file upload—it may be better to upload one file at a time—but you can download them together as a batch. ImageRecycle wouldn’t allow us to compress the final file as the tests exceeded their trial quota, considering how many of these tools are free, that’s unfortunate.

ImageResize.org

Limitation: Up to 20 images
Cost: Free

ImageResize.org is a free tool that’s ideal for people who want to edit images but don’t have an app like Photoshop. You can drag and drop images onto ImageResize.org’s UI, or supply an online URL for the image you want to compress.

ImageSmaller

Limitation: Max 50mb per image, one at a time
Cost: Free

ImageSmaller is a simple script that allows you to compress JPG or PNG images. There is a maximum file upload of 50mb, and you can only upload one image at a time. ImageSmaller also supports itself with advertising, and you have to be careful not to click on a dark pattern advert when using the UI.

JPEGMini

Limitation: Maximum 128mb per image
Cost: Free (with premium options)

JPEGMini is geared towards an Adobe Lightroom/Photoshop plugin. There’s a free online version that enables whole album uploads, which is what we tested. You have to wait for a while, and there’s no visual feedback on progress, and we found the UI confusing. One surprisingly useful feature is that JPEGMini emails you when your files are ready, so you can go do something else while it works.

Kraken

Limitation: None
Cost: from $9

Kraken is one of the most professional feeling tools in this list. The free version has plenty of options, and the pro version of Kraken has even more. Every pro version of Kraken comes with 100mb of trial data, (which is what we used to test). The UI was easy to use, and well designed. It feels like a premium service.

Optimizilla

Limitation: 20 images at a time
Cost: Free

Optimizilla is a really simple site. Just drag your photos onto the drop area, and then watch them upload. Click the download all button at the end to download a zip. Of the free options on this list, Optimizilla feels like the best user experience.

Shortpixel

Limitation: Maximum 50 images at a time
Cost: From free

Shortpixel is geared towards its WordPress plugin that automatically compresses any images that you upload to your media library. There is a 10mb image restriction unless you create an account, once you do the restriction is lifted. The free account has a 100 image quota, and premium options are available. Unexpectedly, in our test, the image with the smallest image dimensions resulted in a larger file size than the next size up!

TinyJPG

Limitation: Maximum 5mb per image, maximum 20 images at a time
Cost: Free

Who doesn’t love a Panda? TinyJPG has a companion TinyPNG site, which is nice to know. There is also the Go Pro option, for just $25 per year, that will upgrade you to a 25mb limit, plus you’ll get hugs from George the Panda.

toolur

Limitation: Maximum 25 images, maximum 30mb per file
Cost: Free

Toolbar is an interesting tool, because despite being free, it has a lot of options. You can specify 7 different compression methods, alter image quality, change the compression type, or resize the images. When testing, we left everything at the default but it’s good to know that you have some flexibility. Unfortunately they decided to include some weak blackhat SEO on their page.

The Results

To test out these services we used three free stock images that you can download here, here, and here. At 100% scale the images are all 2480px by 1860px.

We exported them as JPGs from Adobe Photoshop and used the export feature to create five different versions of each image: 33% scale, 50% scale, 100% scale, 200% scale, and 300% scale. This simulates saving different file sizes for responsive web designs.

When exported straight out of Photoshop, the size of the images are:

Valley – 33% (317kb), 50% (718kb), 100% (2.5mb), 200% (6.2mb), 300% (10.8mb)
Bike – 33% (412kb), 50% (905kb), 100% (2.9mb), 200% (6.9mb), 300% (12.1mb)
Beach – 33% (257kb), 50% (538kb), 100% (1.6mb), 200% (4.1mb), 300% (7.3mb)

Size Tests

The first test is how small the outputted files are. It’s important to remember that large images have lots of room for compression, but small images have less. So we’ve compared the images as percentages.

It’s also important to know that some tools allow you to be more or less aggressive with your compression. For these tests we used the default settings.

Click on the image to see the results in full.

Speed Tests

The second test is how long it takes the various services to compress the whole set of 15 images. This probably doesn’t matter if you’re squashing down one image, but it matters a lot if you’re compressing dozens, or even a whole website’s worth.

When we ran the tests, they were run consecutively, and nothing other than background processes were running at the same time. (The conditions for each test were as identical as possible, but there may have been some minor network variations.)

Click on the image to see the results in full.

Conclusions

The first thing that leaps out at us, is that the JPG compression in Photoshop is terrible. Every single one of the services we tested improved what Photoshop spat out. So if there’s one thing we can learn from this testing, it’s to always compress your images.

Some of the tests were failed (marked in red in the results). With one exception (when the trial account ran out of capacity) this was because some images don’t support very large files. So if you’re compressing small images only, you might find those services useful. Having said that, the results weren’t affected because none of the services that failed were category leaders in any case.

There was no real difference between paid services and free tools. Many of the free options out-performed the paid options.

Compress JPG and Optimizilla produced near-identical files, at identical sizes, and completed the task within fours seconds of each other. So these two different services appear to be the same service skinned with different frontends.

Best General Compression

The very best compression came from Shortpixel, which was consistently the best service in our tests for everything except our smallest images. Strangely, the size of the 33% image was actually larger than the 50% image—so strange that we tested this several times to be sure. Shortpixel struggles when it comes to smaller images, but where Shortpixel really struggles is speed, it took 2 minutes 35 seconds to complete the task, and only looks acceptable on the graph because Compress Photos performed so slowly and distorted the results.

Best Small File Compression

The best small JPG compression came from ImageResize, which produced the smallest 33% file for each of the images. What’s more, ImageResize was close behind ShortPixel for the other image sizes. ImageResize ran through the files in 30 seconds, just 9 seconds slower than the fastest.

Fastest Compression

The speed test is a tie between Kraken, and TinyJPG. Both services ran through all of the files in just 21 seconds. However, TinyJPG failed to compress six of our largest files. So the award for the fastest service goes to Kraken.

Recommendations

If you’re looking for the most aggressive compression, Shortpixel is our recommendation. If you need to compress smaller images then switch to ImageResize. And if you’re compressing lots of images, you value a premium experience, and you’re prepared to pay for the privilege, then use Kraken.

It helps to have access to a variety of services, because they all excel in one way or another. And it’s always worth running your own tests.

Add Realistic Chalk and Sketch Lettering Effects with Sketch’it – only $5!

Source

p img {display:inline-block; margin-right:10px;}
.alignleft {float:left;}
p.showcase {clear:both;}
body#browserfriendly p, body#podcast p, div#emailbody p{margin:0;}

Should Freelancers Join a Professional Network?

Original Source: https://www.webdesignerdepot.com/2018/07/should-freelancers-join-a-professional-network/

One of the biggest concerns that freelancers have is that they can be isolated from others in similar fields. So can a professional network offer the additional resources you need to succeed?

The answer is yes if you find the right group. Here are reasons why you should join a professional network and how to find one that’s right for you.

You’ll Build Relationships

The No. 1 reason to join a professional organization is to develop personal and business relationships. This can be vitally important to freelance web designers and developers because you most often work in isolation.

A professional group can help you stay fresh in the design community as well as work with people who have different skills and strengths. You might find someone that you can refer work to when you are busy or a person that will serve as a mentor to you. Professional groups often include members from all different career levels and that have varying experience. There’s a lot to learn from each other.

Professional groups of a more general nature—not field specific—can also come with benefits. These groups are also good for cultivating relationships, but rather than staying on top of design trends and changes, you might actually develop new clients with these connections.

Get Access to Development and Training

Affiliation with a professional group often comes with perks such as free or discounted training opportunities. From live training sessions and speakers to webinars and online training, this is often a major benefit of a professional group.

Professional organizations at a local level are often part of a larger, national organization, which provides many of these opportunities to members. Many groups also include large national directories and access to discounts – from health insurance to web hosting – for members, depending on the organization. These opportunities can often make training and tools that might seem expensive more accessible and affordable (even free in some instances).

Development and training can also extend to national events. Most bigger organizations have local, regional and national gatherings. These conferences are a breeding ground for training and large-scale networking. Often the most active members of an organization at the local level have easy access to these events (and the parent organization often will help foot the bill for participants).

“Free” Promotion for Your Brand

Think of professional networking as “free” promotion for your brand or freelance design or web development business. The more people you meet and talk with about work, the more opportunities you have to generate new business.

Whenever meeting with members of a professional organization, you should always be networking. Engaging in projects with the group will also show others how well you collaborate and what you are good at. (This can result in more freelance work and referrals from group members.)

Make sure to take advantage of opportunities to show off as well. Most professional organizations have some type of honors or awards each year. Make sure to enter your work. Whether you win or not, it puts your name and projects in front of your full organization and a panel of judges. (There’s no better opportunity to show the work you do to a wide – and industry connected – audience.)

Get Involved in the Community Locally and Nationally

A linkage to a professional organization is an easy way to get involved in the design community locally and nationally. You’ve got an immediate network and connection to an established group with events, public service projects and common goals. While not all groups are part of larger organizations, many are. Look for local or affiliated chapters of organizations such as these:

AIGA, the professional organization for design
Freelancers Union
International Web Association
International Council of Design
Graphic Artists Guild
Association of Registered Graphic Designers
The HTML Writers Guild
Interaction Design Association

How to Find a Professional Group That Fits You

Finding the right professional group can take a little time.

Start by looking for organizations that are rooted in things you believe in. What is the mission of the organization? What do they support or promote and is that in line with your goals?
Then look at the meeting and event schedule. Does it work with your calendar? There’s no point in joining an organization if you know you’ll never make any of the meetings.
Attend with a friend. Do you know someone already involved with a specific group? Most organizations allow potential members to visit an event or meeting without a financial commitment; ask a friend if you can tag along.
Think about the budget. Can you afford dues or costs associated with the organization? Costs to join professional networks range from free to hundreds of dollars annually.
Look at the big picture. Does the group have ties to a bigger national organization? It’s almost like interviewing for a job; do you see the potential for personal/professional growth?

When Not to Join a Professional Group

Professional networking groups are not one size fits all. Don’t feel like you have to be a member of a group just because it relates to your field. Professional networking groups and associations only help your resume if you are active and involved. Don’t join a group if:

You don’t connect with current members. Just like workplaces, professional groups have a culture of their own. Find people who feel like part of your tribe.
You don’t believe in the mission or projects the group takes on.
The organization has a bad reputation in your community.
You don’t plan on actually participating.
You don’t get value from membership. (This can happen with the best professional groups over time and sometimes you need to “phase out” of a current role and move on to something else.)

Conclusion

When making a choice to join a professional networking group, look for an organization with ties or a chapter where you live. You’ll almost always get more out of an organization where you get actual face time with other members than an organization that’s all online.

While there are benefits to both kinds of groups, make sure to pick a group that you actually benefit from personally or professionally and that you want to be a part of. You should want to go to meetings and events and spend time working with other members. That’s the true test as to whether a professional networking group is right for you.

Add Realistic Chalk and Sketch Lettering Effects with Sketch’it – only $5!

Source

p img {display:inline-block; margin-right:10px;}
.alignleft {float:left;}
p.showcase {clear:both;}
body#browserfriendly p, body#podcast p, div#emailbody p{margin:0;}

20 Best New Portfolios, July 2018

Original Source: https://www.webdesignerdepot.com/2018/07/20-best-new-portfolios-july-2018/

Hello again, Readers. It’s time to stop playing those games you got on the Steam Summer Sale for a minute, ‘cause it’s July now—I know, it caught me off guard, too.

This month, I say “minimalist” at least as much as I did last month, because the trend of near-monochromatic, dead-simple, kind of post-modern sites shows no signs of slowing. I’m okay with this, but if you’re going to be redesigning your portfolio this month, maybe throw a bit more color at it. Please? For me?

Enjoy.

Note: I’m judging these sites by how good they look to me. If they’re creative and original, or classic but really well-done, it’s all good to me. Sometimes, UX and accessibility suffer. For example, many of these sites depend on JavaScript to display their content at all; this is a Bad Idea™, kids. If you find an idea you like and want to adapt to your own site, remember to implement it responsibly.
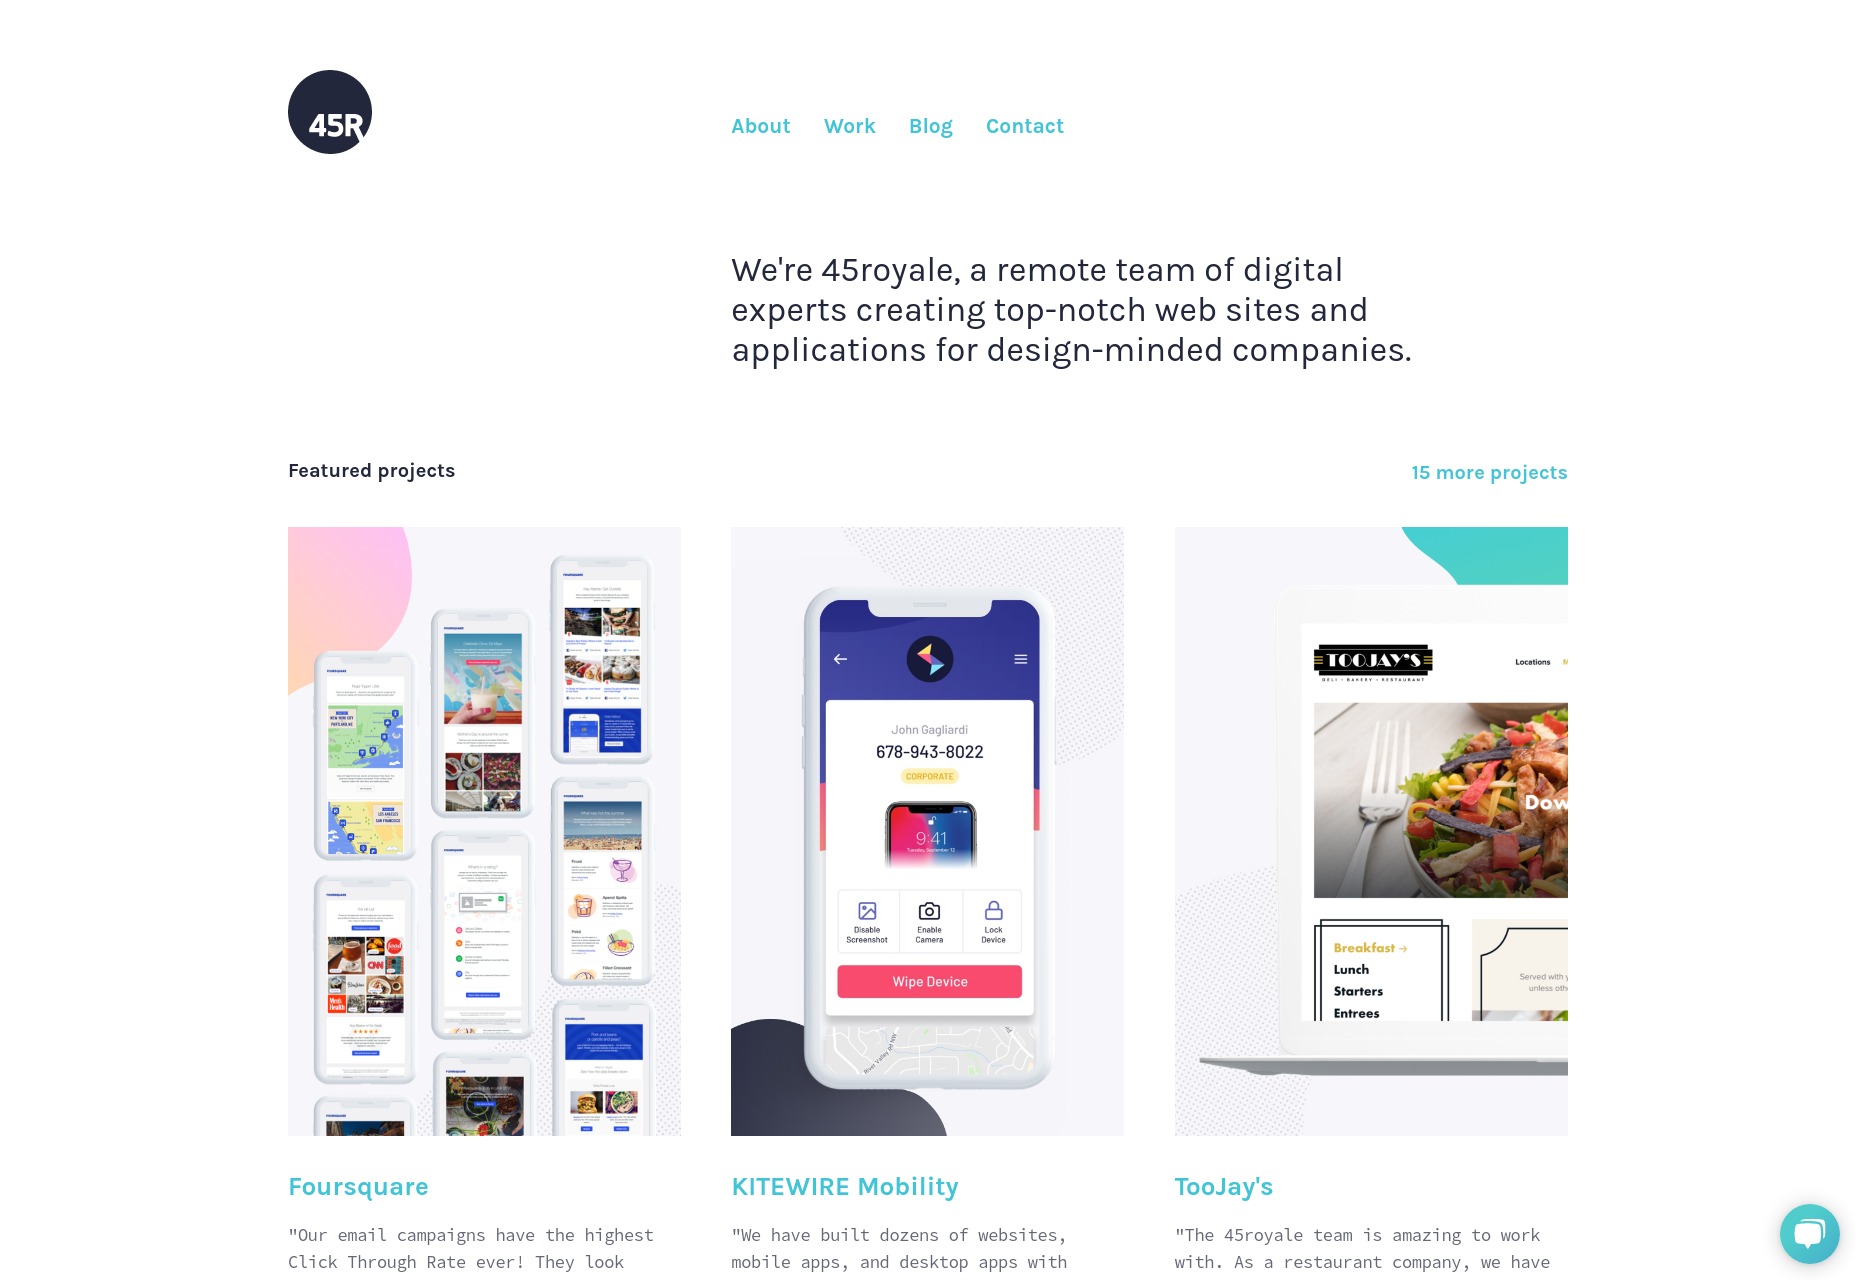
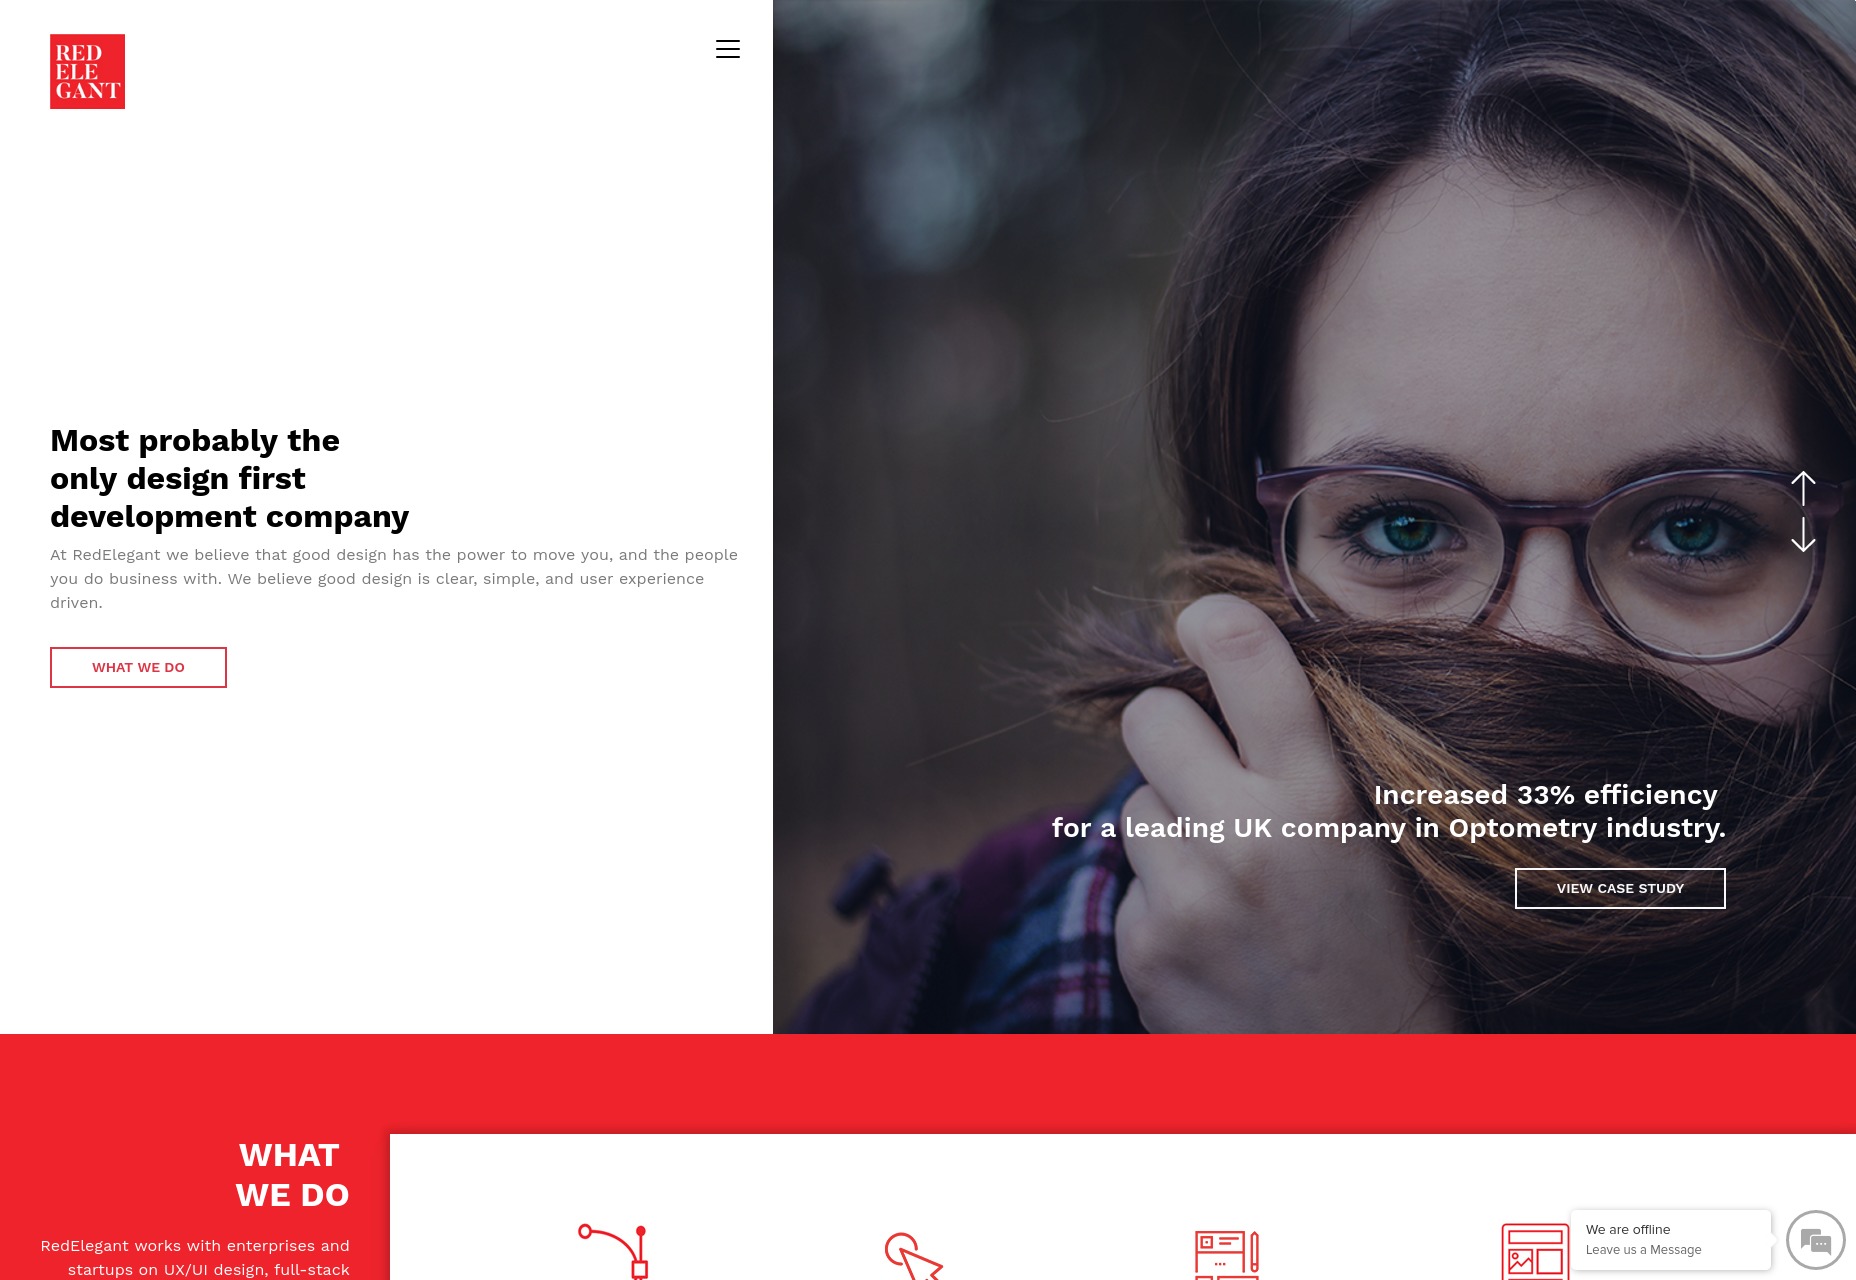
Zsolt Kaszanyicki

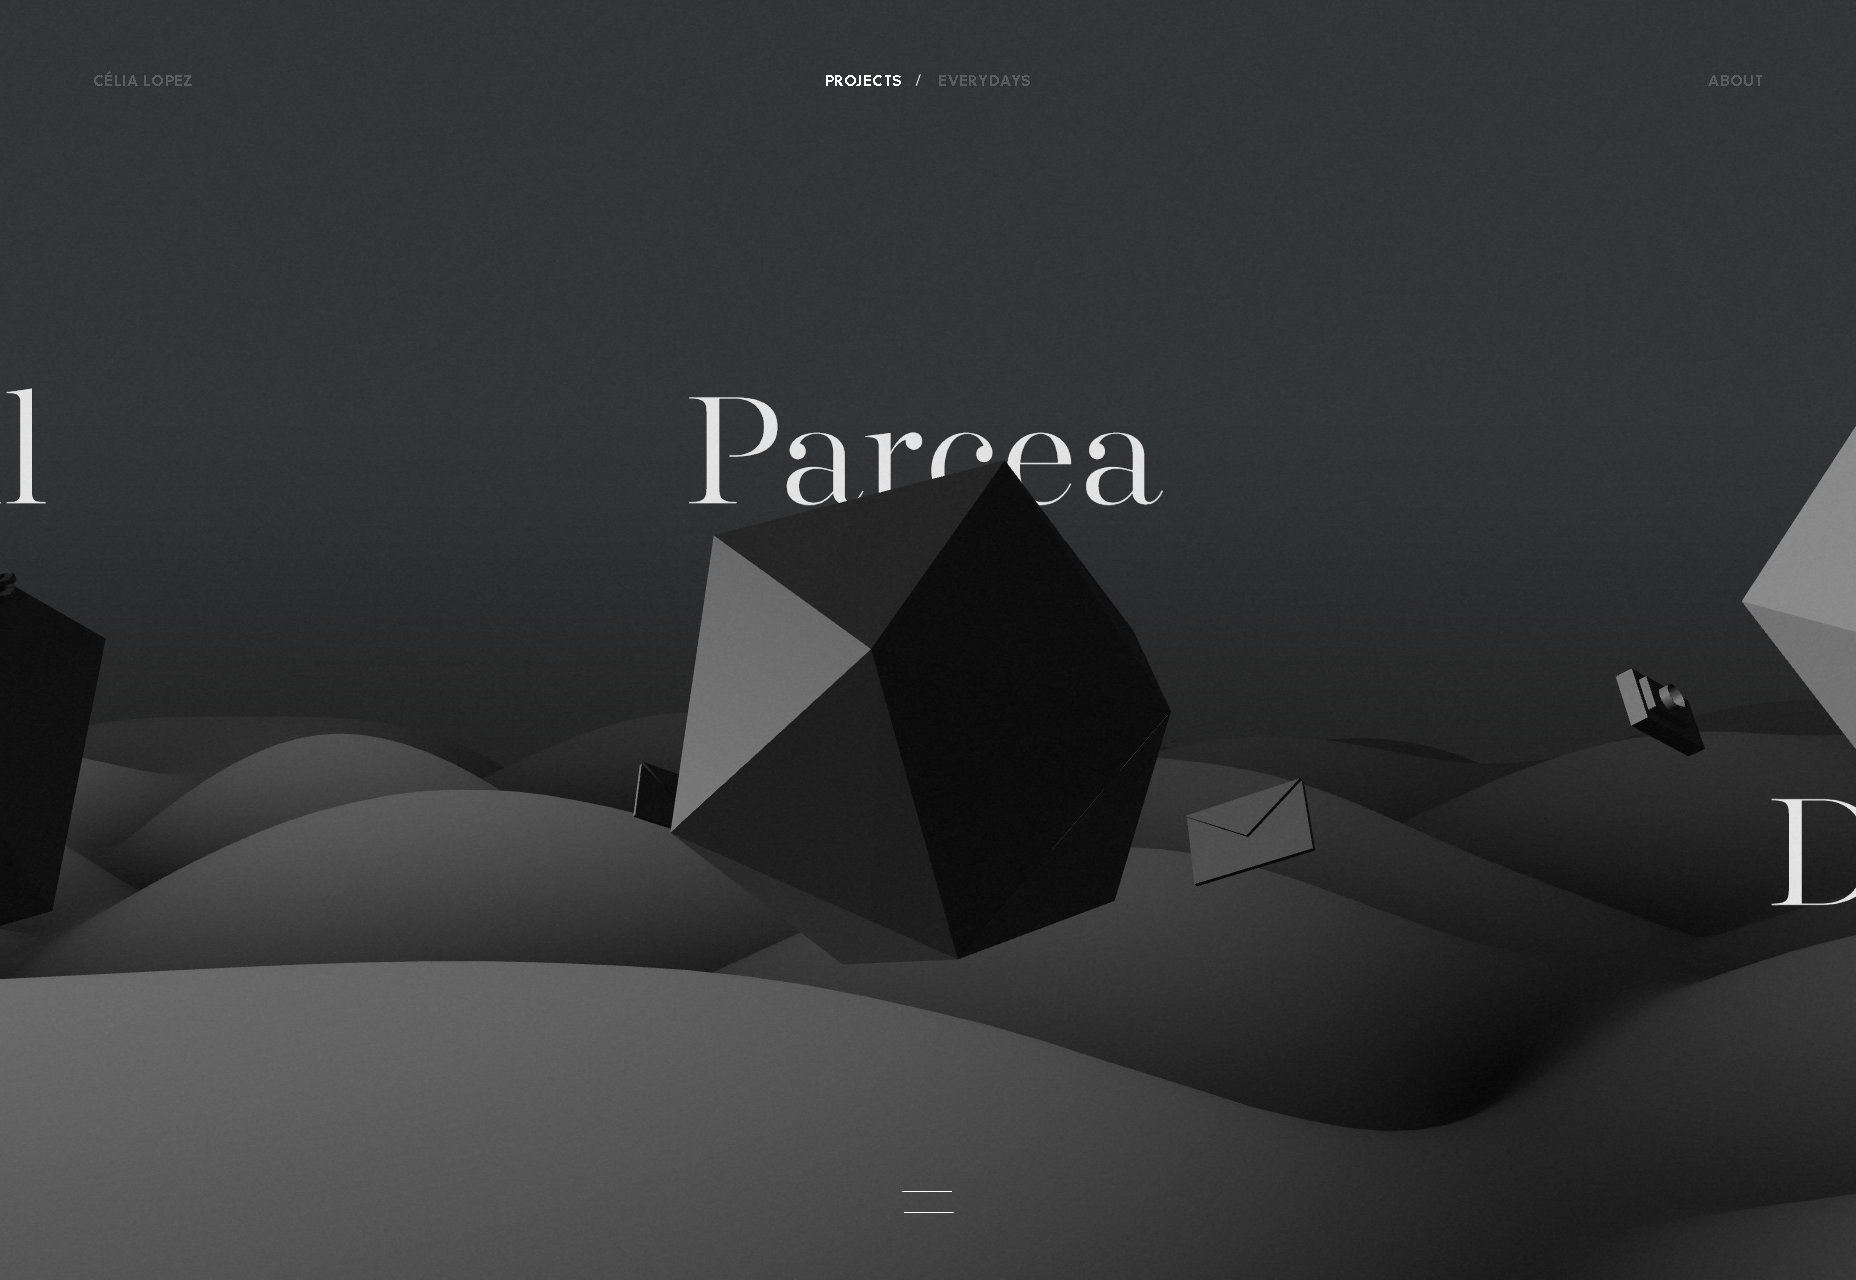
This particular portfolio reminds me of old “futuristic graphics” in the best possible way. You’ve got the old thick sci-fi type combined with a ‘90s-era flicker effect on a dark color scheme. Combine that with the more subtle animated touches, and you have a fantastic presentation-style site.

Platform: Static Site

Paula Sansano

Paula Sansano’s portfolio is visually minimalist, and very pastel. I also actually quite like the way JavaScript is used to transition from one page layout to another smoothly and nearly seamlessly. What I like even more is that this does not tie the site’s basic functionality to JS. The site works just fine without it.

See? This is how it’s done.

Platform: WordPress

Firma

Firma’s agency site is another one bringing us back to that retro-futuristic aesthetic. This time, it’s accomplished through animated clipart. I’m not even kidding. Don’t you remember when those basic 3D geometric shapes were the height of clipart fashion?

And throughout the rest of the site, little touches of clipart-style illustration abound. It’s an aesthetic approach that maybe shouldn’t work, but it does.

Platform: WordPress

Loworks

Well, they say the Japanese are efficient. If Loworks is anything to go by, they‘re not wrong. You seem this site actually pulls double duty by being two sites in one (sort of): a portfolio, and a store/gallery. The home page is actually kind of two home pages that share the screen.

The consistent aesthetics keep things manageable, though. And browsing into one “side” of the site or another will show you separate navigation, so it’s not all that confusing. It’s an interesting approach.

Platform: Static Site

Template Studio

Template Studio is perhaps an odd name for an agency that does some pretty original work, but that’s irony for you. The site has a some pretty decent typography combined with a simple layout, and some fantastically executed diagonal lines. Sorry, I’m a sucker for those.

Platform: Vue.js

Tom Parkes

Tom Parke’s portfolio goes for some of that full mid-‘00s minimalism, and it looks fantastic. It’s just got that good old clean feeling we all used to try and steal from Apple, but with a penchant for text that makes you crane your neck to read it.

Platform: Static Site

Naho Kubota

Naho Kubota’s portfolio is that kind of artsy minimalism that got real popular recently. It is also basically a kind of vertical slideshow, but not in the way we’ve come to expect, what with all of the full-screen content sections we’ve become so familiar with. It’s somehow even more minimalist than that, but it also somehow has more text-based information than you’d expect. It’s a fusion of ideas, and it works.

Platform: Static Site (probably)

Saul Studio

Saul Studio’s site is simple, clean, and professional. It’s not going to win awards for mind-blowing visuals or originality, but as always, I like to celebrate the sites that are just plain good. In many situations, reliable design beats innovative design, and it’s good to remember that.

Platform: WordPress

Jean Böhm

Jean Böhm’s portfolio is almost aesthetically brutalist, and focused on functionality. It’s all about focusing your attention directly on the work, to the point that you can collapse the sidebar navigation to see the images in as much detail as possible. This is function (almost) over form at its finest.

Platform: Static Site

Emil Johannes Boye

Emil Johannes Boye is an excellent example of the way that typography can make that little extra difference between a good-looking design and a great-looking design. And this one looks great. Also, this is why good font rendering is so important.

Platform: WordPress

Cine365films

Cine365films is another one of those sites where the grid isn’t just a layout tool, it’s a defining part of the aesthetic. I happen to like that approach, but Cine365films has also added in some interesting bits, like their animated gradients.

Another thing to note is the implementation of their video players. Instead of giving them a full screen or a modal window, off the bat, they’re very specifically confined to the grid. Even going full screen, the grid and some of the text are still visible, which while odd, is clearly a choice they made to keep certain bits of information front and center.

Platform: WordPress

Jerome Harris

Jerome Harris is a teaching fellow in an art college, so his portfolio is particularly artsy, as you might expect. For all of that, it looks great, and I’m partial to the scrolling portfolio on the right. It’s just enough to give you a taste, while the links on the bottom left can give you more detail.

Platform: Static Site

Simon Goetz

Simon Goetz has even more minimalism for us, and this time, it’s that super slick, kinda corporate simplicity that I like almost despite myself. Plus, I can never be mad at a designer who makes a horizontal layout work as well as Simon does.

Platform: Static Site

Omse

Omse is by far one of the most colorful sites on this month’s list, and it shows that the almost post-modernish style people seem to really like now need not be monochromatic. With a healthy dose of animation, the presentation-style site is fused with more staid design elements to create something that feels fresh.

Platform: WordPress

Tom Bird

Tom Bird’s photography portfolio is… well it’s a little predictable. The “post-modern photography collage” is strong with this one, and it’s a style that’s become increasingly popular with photography sites.

For all of that, it’s a good-looking site that showcases its work effectively. As I’ve said before, that alone is worth a look.

Platform: Static Site

Stephen Wells

When you‘re looking at portraits, it’s all about the details, so it’s a darned good thing that Stephen Wells’ portfolio is designed with that in mind. Where many portfolios will show you a lot of smaller photos to save bandwidth, and give you an idea of a photographers overall style at a glance, this one shows off big ol’ photos so you can see those details in all of their pixelly glory. It’s a simple approach, but it’s perfectly suited to the work being shown.

Platform: Static Site

Beaubourg

Beaubourg is a dead-simple site with magazine-pretty type. The layout is also heavily magazine-inspired, making use of vertical space within elements differently than you might expect from a regular site. It’s touches like that which keep me excited to see the possibilities of Flexbox and CSS Grid.

Platform: Static Site (Probably)

Jonny Belton

Jonny Belton’s portfolio is more of that Apple-inspired minimalism,complete with thin sans-serif type, and slight contrast issues. Well he works for Invision, so that’s about right, isn’t it? Well, contrast issues aside, the site is pretty.

Platform: Webflow

Tiago Carneiro

Tiago Carneiro’s portfolio has that touch of almost post-modern minimalism combined with an honest-to-god fade-into the background white gradient. Just look at the home page and scroll down to see what I mean. Man, I haven’t seen one of those in ages. Why did we ever stop doing those?

Platform: WordPress

Hoad & More

Hoad & More is a lighting installation company that specializes in installing light, well… artistically. As such, their website focuses largely on showcasing photos of their work simply, and with as few words as possible. They’re lighting installations, you don’t want words.

I do like the half-and-half layout they use for the photos on the desktop version of the site. It allows you to look at one (vertical) photo at a time easily, without too much scrolling, and without shrinking the photos so much that you miss all of the detail.

Platform: WordPress

Add Realistic Chalk and Sketch Lettering Effects with Sketch’it – only $5!

Source

p img {display:inline-block; margin-right:10px;}
.alignleft {float:left;}
p.showcase {clear:both;}
body#browserfriendly p, body#podcast p, div#emailbody p{margin:0;}

Top 10 iPad Stands for 2018

Original Source: https://www.hongkiat.com/blog/top-ipad-stands/

A list of 2018’s top 10 iPad stands that you can buy along with their different unique features.

The post Top 10 iPad Stands for 2018 appeared first on Hongkiat.

Visit hongkiat.com for full content.

How to draw a big cat with pastels

Original Source: http://feedproxy.google.com/~r/CreativeBloq/~3/6EAg0WMujUg/draw-a-big-cat-with-pastels

The softness and luminosity of pastel sticks make them the ideal choice for backgrounds in my pastel drawings; whereas pastel pencils (when sharpened to a fine point) have two types of lead for precision: hard and soft. However, I personally find these attributes are not as important as colour range. 

How to draw a landscape with pastels

I work mainly from photographs. This allows me to make any changes to the drawn composition should I wish to do so. In choosing this particular shot, I was able to capture a sense of the tiger's presence, which I try to convey with all my work. Not only did it present great tonal values, but also areas of really dark contrast against the lighter shades. The combination of these aspects always makes for a great painting.

As I select my colours ready for my painting, I use spare pieces of Pastelmat as testers to find the correct shades I wish to use. Once I've started, I never use a colour I have not already selected, as a small amount of a new shade would stand out in the painting. I always use Pastelmat for my pastel work – the combination of this surface with pastel pencils is ideal for showing off the effectiveness of the medium. 

For this piece, I use the following materials:

Anthracite Pastelmat 360 gsmWinsor & Newton Artists' Soft Pastels (for the background)Hard Conté sticks (for the underpainting)Pastel pencils including Derwent, Faber-Castell and Caran D'acheConté 630 White for the whiskersA HB Pencil for sketching
01. The original drawing 

Don’t put too much detail into your initial sketch

I use a general HB pencil to sketch the scene. I avoid a great deal of detail as I tend to remove the lines, using an eraser after transferring it to the Pastelmat. The lines show through the pastel using tracedown paper. 

02. Start from a focal point

sketch of tiger with eyes filled in

Grab the viewer’s attention by starting with the eyes

I always start with the eye area as this is the focal point to any animal portrait painting. I begin with the white highlights first, and then add the palest colours proceeded by the darker shades in and around the pupil. Following the pupil, I leave gaps in the blackness of the eyelid for the white fur to drop down. 

I always find it's best to establish some of the tiger's black stripes in advance, as the white fur sits over the top of its edges. Next, I apply the green and ochre hues over the white in light fine strokes, finally continuing with the orange across the nose area. This area is then worked from dark to light – all using pastel pencils.

03. Establish head shape

tiger's head in sketch

Work in a background edge first to show up the fine hairs

Having established a starting point, I continue above the eye area. I apply a background edge using a soft pastel in black, to account for all the fine hairs that run off the tiger's contour – especially around the ears. After edging the ear from orange, ochre then to cream, the centre is a layer of black, ochre and green all smudged together. I then draw in lots of fine white curly lines, topped with a layer of green and cream. The lines are random, but run in the direction of the tiger's form and shape.

04. Colour the cheek

tiger painting half done

Build up the side of the head, working in the direction of the fur

Continuing with the side of the head, I use oranges, ochres, and creams once again, noting that the layers of fur are running downwards. I work on the section directly underneath the eye using greens and greys first. I then use white to cover the coloured layers using wavy lines, exposing the original underpainting. I add green to the whiter area, then lastly, I add a layer of orange – ready for the nose. 

05. Get the nose right

tiger painting with nose

Take time to ensure that you capture the nose’s structure properly

The nose area is the most challenging as its structure spreads out into various directions. The line work runs above the eye, across at the bridge of the nose and curves in a downward stroke half way across the width of the nose, leaving a small triangular patch sitting centrally, just underneath the bridge. I follow this to the tip of the nose, using small light strokes of ochre and cream, continuing with darker shades in a circular motion to the side for depth. 

As I reach the fleshy part of the nose, I use grey before edging off in white, then I'm ready to apply the palest of pinks for the nose. Before applying the highlight of white, I add a dash of crimson and ochre, finishing off with black for the nostril. 

06. Work on muzzle and mouth

tiger painting with muzzle and mouth

Don’t forget the whiskers!

I now begin working around the cat's muzzle, putting in all the black areas first, sweeping in with the white at a diagonal angle. However, I make sure to leave space for the whiskers, which I drew in with Conté 630 White. I then work on the shadow areas using grey and green in the lower corner of the bottom lip over the black. 

I now need to create a 2D effect on the teeth, so I paint a mixture of ochre and yellow on the backs of the teeth. Moving towards the middle, I paint in a yellow towards the front, then a cream on the bottom half, with a white at the tip of the teeth. Once I'm happy with the result, I blend a small amount of pink into the black behind the teeth. I then proceed to the chin, which is all fine strokes of white, plus yellow, green and grey for the shadow areas.

07. Focus on underpainting

Tiger portrait with hard pastel sticks

Use hard pastel sticks for your underpainting

Having completed the main facial features, I now move onto the underpainting. This is not only a great way to define colour values and contrast, but also adds depth and body. Without it, the image would appear flat and lifeless. With the use of hard pastel sticks, I establish where the lights and darks are in my painting. This prepares the base ready for the details, which are drawn over the top in pastel pencil. 

08. Add layers

long fur close up of tiger painting

Give your picture depth by adding in layers of longer fur

In this step, I paint the longer fur between the face and neck. Starting with the black stripe first, I quickly move onto the white layers, rubbing them lightly into the Pastelmat's base, as I add a layer of yellow and ochre part way through. Shamrock and grey in the shadow areas keep the luminosity in the pastel layers fresh and transparent. Finally, I add fine, light spontaneous strokes, some more heavy than others.

09. Emphasise contrast

tiger painting with contrast added

Bring in further depth by emphasising the tiger’s natural contrasts

I start with the darkest area, the middle section, so that I can build my colours from dark to light bearing in mind where the contrast is. I lay down black first – for the stripes as well as the shadow area. I then work towards the top with a barely visible, very dark orange. I use a golden yellow to highlight the edges of the fur and a lemon with an upward stroke as the fur reaches the top of the tiger. The highlight is cream, with several white strokes done with an edging of tiny orange pencil marks. 

The bottom pattern is a bit tricky: I use orange into cream at a diagonal angle, flicking the pencil out at the bottom edges and blending for a natural look. I add black and grey between each shape, running into white near the bottom.

10. Create the background

tiger painting with black background

Add a black background then soften it with orange, green and cream

For the background, I cover the Pastelmat in a soft black pastel, which I rub in using an artist's sponge. I then work in a mixture of orange, green and cream directly to the side of the cat to add a warmth in the shadows – still using soft pastels with a circular motion.

This article was originally published in Paint & Draw.

Related articles:

How to add drama to your pastel artworksCarbOthello Pastel Pencil Set (24) reviewHow to fix your finished pastel artwork

How To Create A Flat Vector Illustration In Affinity Designer

Original Source: https://www.smashingmagazine.com/2018/07/flat-vector-illustration-affinity-designer/

How To Create A Flat Vector Illustration In Affinity Designer

How To Create A Flat Vector Illustration In Affinity Designer

Isabel Aracama

2018-07-11T20:00:02+02:00
2018-07-12T11:08:58+00:00

(This is a sponsored post.) If you are in the design world, chances are that you’ve already heard about Affinity Designer, a vector graphics editor for Apple’s macOS and Microsoft Windows.

It was July 2015 when Serif Europe launched the amazing software that many designers and illustrators like me are using now as their main tool for professional work. Unlike some other packages, its price is really affordable, there’s no subscription model and, as mentioned already, it’s available for both Macs and PCs.

In this article, I would like to walk you through just some of its very user-friendly main tools and features as an introduction to the software and to show you how we can create a nice flat vector illustration of a Volkswagen Beetle. The illustration will scale up to whatever resolution and size needed because no bitmaps will be used.

Note: As of today, July 11, Affinity Designer is also available for the iPad. Although the iPad app’s features and functionality almost completely match the desktop version of Affinity Designer, it relies much more on using the touch screen (and the Apple Pencil) and because of that, you may expect to find some differences in the workflows.

Final image that we’ll be creating in this tutorial.

Final image that we’ll be creating in this tutorial. (View large version)

I will also explain some of the decisions I take and methods I follow as I work. You know the old saying, “All roads lead to Rome”? In this case, many roads will take us where we’d like to get to, but some are better than others.

We will see how to work with the Pen tool to trace the main car outline, how to break curves and segments, how to convert objects into curves, and how to use the wonderful Corner tool. We will also, among other things, learn how to use the Gradient tool, what is a “Smart copy”, how to import a color palette from an image that we can use as a reference for our artwork, how to use masks, and how to create a halftone pattern. Of course, along the way, you will also learn some helpful keyboard shortcuts and commands.

Note: Affinity Designer has three work environments, referred to as “personas”. By default, Affinity Designer is set to the draw persona. To switch from the draw persona to the pixel persona or to the export persona, you have to click on one of the three icons located in the top-left corner of the main window. You can start working in the draw persona and switch to the pixel persona at any time, when you need to combine vectors and bitmaps.

The three work environments: draw persona (leftmost icon), bitmap persona (middle icon) and export persona (rightmost icon).The three work environments: draw persona (leftmost icon), bitmap persona (middle icon) and export persona (rightmost icon). (View large version)

Introduction: The Flat Design Era

In recent years, we’ve seen the rise of “flat design”, in contrast to what is known as skeuomorphic representation in design.

To put it simply, flat design gets rid of the metaphors that skeuomorphic design uses to communicate with users, and we’ve seen these metaphors in design, especially in user interface design, for years. Apple had some of the best examples of skeuomorphism in its early iOS and app designs, and today it is widely used in many industries, such as music software and video games. With Microsoft’s (with Metro) and later Google’s material design and Apple’s iOS 7, mobile apps, user interfaces and most systems and OS’ have moved away from skeuomorphism, using it or elements of it as mere enhancements to a new design language (including gradients and shadows). As you can imagine, illustrations on these systems were also affected by the new design currents, and illustrators and designers started creating artwork that would be consistent with the new times and needs. A whole new world of flat icons, flat infographics and flat illustrations opened in front of our eyes.

iPhone’s home screen (iOS 6 versus iOS 7).

iPhone’s home screen (iOS 6 versus iOS 7). (View large version)

(Image source) (View large version)

(Image source) (View large version)

(Image source) (View large version)

(Image source) (View large version)

Let’s Draw A Flat Illustration!

I am providing here the source file for this work, so you can use it to explore it and to better follow along as we design it. If you do not yet have a copy of Affinity Designer, you can download a trial.

1. Canvas Settings

Open Affinity Designer, and create a new document by clicking Cmd + N (Mac) or Ctrl + N (Windows). Alternatively, you can go to “Menu” → “File” → “New”. Be sure not to check the “Create Artboard” box.

Set the type to “Web”, which will automatically set the field DPI to 72. It should be understood now as PPI, but we won’t dive into the details here. If you want to learn more on the topic, check the following two resources:


It’s PPI not DPI,” Forums, Affinity

“PPI vs. DPI: What’s the Difference?,” Alex Bigman, 99designs

Also, remember that you can change this setting at any time. The vectors’ quality won’t be affected by scaling them.

Set the size to 2000 × 1300 pixels, and click “OK”.

Our white canvas is now set, but before we start, I’d suggest you first save this file and give it a name. So, go to “File” → “Save”, and name it “Beetle”.

2. Importing A Color Palette From An Image

One of the things I use a lot in Affinity Designer is its ability to import the colors contained in an image and creating a palette from them.

Let’s see how this is done.

For the illustration I want to draw, I thought of warm colors, like in a sunset, so I searched Google with this query: “warm colors yellows oranges reds palette”. From all the images it found, I chose one that I liked and copied it into Affinity Designer in my recently created canvas. (You can copy and paste the image to the canvas directly from the browser.)

If the Swatches panel isn’t open yet, use menu “View” → “Studio” → “Swatches”. Click the menu in the top-right corner of the panel, and select the option “Create Palette From Document”, and then click on “As Document Palette”. Click “OK” and you’ll see the colors contained in the image form a new palette in the Swatches panel. The default name for it will be “Palette” if you still haven’t saved your file with a name. In case you have, the name of this palette will be the same as your document, but if you want to rename it, simply go to the menu on the right in the Swatches panel again and select the option “Rename Palette”.

I will call it “Beetle Palette”.

Creating a palette from an image.

Creating a palette from an image. (View large version)

We can now get rid of that reference image, or simply hide it in the Layers panel. We will be using this palette as a guide to create our artwork with harmonious colors.

Interface: Before we continue, I will present a quick overview of the main sections of the user interface in Affinity Designer, and the names of some of the most used tools.

Main areas of the UI in Affinity Designer when using the draw persona.

Main areas of the UI in Affinity Designer when using the draw persona. (View large version)

Tools for the (default) draw persona in Affinity Designer.

Tools for the (default) draw persona in Affinity Designer. (View large version)

3. Creating The Background With The Gradient Tool

The next thing is to create a background. For this, go to the tools displayed on the left side, and select the Rectangle tool. Drag it along the canvas, making sure to give it an initial random fill color so that you can see it. The fill color chip is located in the top toolbar.

Click the Rectangle tool and drag it along the canvas. Fill it with a random color.

Click the Rectangle tool and drag it along the canvas. Fill it with a random color. (View large version)

Next, select the Fill tool (the color wheel icon, or press G on the keyboard), and in the top Context toolbar, select the type: “Linear”.

Select “Linear” from the Fill tool’s contextual menu.

Select “Linear” from the Fill tool’s contextual menu. (View large version)

We have several options here: “None” removes the fill color, “Solid” applies one solid color, and all of the rest are different types of gradients.

To straighten the gradient and make it vertical, place your cursor over one of the ends and pull. When you are near the vertical line, press Shift: This will make it perfectly vertical and perpendicular to the base of the canvas.

To straighten a linear gradient, pull from one end, and then press the Shift key to make it perfectly vertical.To straighten a linear gradient, pull from one end, and then press the Shift key to make it perfectly vertical. (View large version)

Next, in the Context toolbar, click on the color chip, and you’ll see a dialog that corresponds exactly with the gradient we just applied. Click now on the color chip, and an additional dialog will open.

In the combo, click on the “Color” tab, and then select “RGB Hex Sliders”; in the field marked with a #, input the value: FE8876. Press “OK”. You’ll see now how the gradient has been updated to the new color. Repeat this action with the other color stop in the gradient dialog, and input this value: E1C372.

You should now have something like this:

Setting gradient colors.

Setting gradient colors (View large version)

Let’s go to the Layers panel and rename the layer to “Background”. Double-click on it to rename it, and then lock it (by clicking on the little lock icon in the top-right corner).

4. Drawing The Car Outline With The Pen Tool

The next thing we need to do is look for an image that will serve as our reference to draw the outline of the car. I searched Google for “Volkswagen Beetle side view”. From the images I found, I selected one of a green Beetle and copied and pasted it into my document. (Remember to lock the layer with the reference image, so that it doesn’t move accidentally.)

Next, in the side toolbar, select the Pen tool (or press P), zoom in a bit so that you can work more comfortably, and start tracing a segment, following the outline of the car in the picture. Give the stroke an 8-pixel width in the Stroke panel.

Note: You won’t need to create a layer, because the segments you trace will be automatically placed on top of the image.

The Pen tool is one of the most daunting tools for beginners, and it is obviously one of the most important tools to learn in vector graphics. While practice is needed to reach perfection, it is also a matter of understanding some simple actions that will help you use the tool better. Let’s dive into the details!

As you trace with the Pen tool in Affinity Designer, you will see two types of nodes: squared nodes appear first, and as you pull the handles, they will turn into rounded nodes.

Sharp, smooth nodes and handles on a path segment

Sharp, smooth nodes and handles on a path segment (View large version)

Affinity Designer comes with several pen modes, but we will only be using the default one, called “Pen Mode”, and as we trace the car, we will get rid of one of the handles by clicking Alt in such a way that the next section of the segment to be traced will be independent of the previous one, even if connected to it.

Here’s how to proceed. Select the Pen tool, click once, move some distance away, click a second time (a straight line will be created between nodes 1 and 2), drag the second node (this will create a curve), Alt-click the node to remove the second control handle, then proceed with node 3, and so on.

An alternative way would be to select the Pen tool, click once, move some distance away, click a second time (a straight line will be created between nodes 1 and 2), drag the second node (this will create a curve), then, without moving the mouse, Alt-click the second handle’s point to remove this handle, then proceed with node 3, and so on.

Trace the outline of the car and get rid of the handles we don’t need by Alt-clicking.Trace the outline of the car and get rid of the handles we don’t need by Alt-clicking. (View large version)

Note: Don’ be afraid to trace segments that are not perfect. With time, you’ll get a better grip of the Pen tool. For now, it’s not very important that each node and line looks as we want it to look in the end. In fact, Affinity Designer makes it really easy to amend segments and nodes, so tracing a rough line to start is just fine. For more insight on how to easily use the Pen tool (for beginners), check out Isabel Aracama’s video tutorial.

5. Resculpting Segments And Using The Corner Tool

What we need now is to make all of those rough lines look smooth and curvy. First, we will pull the straight segments to smoothen them, and then we will improve them using the Corner tool.

Click the Node tool in the side toolbar, or select it by pressing A on your keyboard. Now, start pulling segments to follow the lines of your reference picture. You can also use the handles to help make the line take the shape you need by moving and pulling them accordingly. Just do it in such a way that it all fits the reference image, but don’t bother much if it’s not yet perfect. With the Node tool (A), you can both select and move nodes, but you can also click and drag the curves themselves to change them.

Resculpt and correct segments with the Node tool A.Resculpt and correct segments with the Node tool (A). (View large version)

Once all of the segments are where we need them, we are going to smoothen their corners using the Corner tool (shortcut: C). This is one of my favorite tools in Affinity Designer. The live Corner tool allows you to adjust your nodes and segments to perfection. Select it by pressing C, or select it from the Tools sidebar. The method is pretty simple: Pass the corner tool over the sharp nodes (squared nodes) that you want to smoothen. If you need to, switch back to the Node tool (A) to adjust a section of a segment by pulling it or its handles. (Smooth nodes (rounded nodes) don’t allow for more softening, and they will display a smaller circle the moment you select the Corner tool.)

View large version

View large version

Use the Corner tool on sharp nodes to smoothen the lines.Use the Corner tool on sharp nodes to smoothen the lines. (View large version)

Once our corners and segments look good, we’ll want to fill the shape and change the color of the stroke. Select the closed curve line that we just created for the car, click on the fill color chip, and in the HEX color field input FFCF23. Click on the stroke color chip beside it and input 131000.

This is what you should have after applying the fill color and stroke color.

This is what you should have after applying the fill color and stroke color. (View large version)

Create now a shape with the Pen tool, and fill it with black (000000). Place it behind the car’s bodywork (the yellow shape). The exact shape of the new object that you will create does not really matter, except that its bottom side needs to be straight, as in the image below. Place it behind the main bodywork (the yellow shape) via either the Layers panel or through the menu “Arrange” → “Back One”.

Black shape behind the car bodywork.

Black shape behind the car bodywork (View large version)

6. Creating The Wheels Using Smart Copy

We need to put the wheels in place next. In the Tools, pick the Ellipse tool, and drag over the canvas, creating a circle the same size as the wheel in the reference picture. Click Shift as you drag to make the circle proportionate. Additionally, holding Ctrl (Windows) or Cmd (Mac), you can create a perfect circle from the center out.

Note: If you need to, hide the layers created thus far to see better, or simply reduce their opacity temporarily. You can change the opacity by selecting any shape and pressing a number on the keyboard, from 1 to 9, where 1 will apply a 10% opacity and 9 a 90% opacity value. To reset the opacity to 100%, press 0 (zero).

Choose a random color that contrasts with the rest. I like to do so initially just so that I can see the shapes well contrasted and differentiated. When I am happy with them, I apply the final color. Set the opacity to 50% (click 5 on the keyboard) to be able to see through as you draw it.

Zoom into your wheel shape. Press Z to select the Zoom tool, and drag over the shape while holding Alt key, or double-click on the thumbnail corresponding to it in the Layers panel. (It doesn’t need to be previously selected, although this will help you to visually locate it in the Layers panel.)

We will now learn how to use Smart copy, and we will paste some concentric circles.

Select the circle and press Cmd + J (Mac) or Ctrl + J (Windows). A new circle will be placed on top of the original one. Select it. This command is found under “Edit” → “Duplicate”, and it’s also known as Smart copy or Smart duplicate.

Click Shift + Cmd (Mac) or Shift + Ctrl (Windows), and drag in to transform it into a smaller concentrical circle. Repeat three times, reducing a bit more in size each time, to fit your reference. Smart duplicating a shape by pressing Shift + Cmd (Mac) or Shift + Ctrl (Windows) will make the shape transform in a relative way. This will happen from your third smart-duplicated shape onwards.

smart copy via keyboard shortcutsSmart copy via Cmd + J or Ctrl + J. (View large version)

So, we have our concentric circles for the wheel, and now we have to change the colors. Go to the Swatches panel, and in the previously created palette, choose colors that work well with the yellow that we have applied to the car’s bodywork. You can select a color and modify it slightly to adapt to what you think works best. We need to apply fill and stroke colors. Remember to give the stroke the same width as the rest of the car (8 pixels) except for the innermost circle, where we will apply a stroke of 11.5 pixels. Also, remember to put back to 100% the opacity of each concentric circle.

I chose these colors, from the outer to inner circles: 5D5100, 918A00, CFA204, E5DEAB.

Now we want to select and group all of them together. Select them all and press Cmd + G (Mac) or Ctrl + G (Windows). Name the new group “Front Wheel” in the Layers panel. Duplicate this group and, while pressing Shift, select it and drag along the canvas until it overlaps with the back wheel. Name the layer accordingly.

The car should look similar to this now.

The car should look similar to this now. (View large version)

7. Breaking Curves And Clipping Masks To Draw The Inner Lines Of The Car’s Bodywork

To keep working, either hide all layers or bring down the opacity so that they don’t get in your way. We need to trace the front and back fenders. We have to do the same as what we did for the main bodywork. Pick the Pen tool and trace an outline over it.

Once it is traced, modify it by using the handles, nodes and Corner tool. I also modified the black shape behind the car a bit, so that it shows a bit more in the lower part of the body work.

Fenders added to the car.

Fenders added to the car. (View large version)

Now we want to trace some of the inner lines that define the car. For this, we will duplicate the main yellow shape, remove its fill color and place it onto our illustration in the canvas.

Press A on the keyboard, and click on any of the bottom nodes of the segment. In the top Context toolbar, click on “Action” → “Break Curve”. You will see now that the selected node has turned into a red-outlined squared node. Click on it and pull anywhere. As you can see, the segment is now open. Click the Delete or Backspace key (Windows) or the Delete key (Mac), and do the same with all of the bottom nodes, leaving just the leftmost and rightmost ones, and also being very careful that what is left of the top section of the segment is not deformed at all.

(View large version)

I use this method for one main reason: Duplicating an existing line allows for a more consistent look and for more harmonious lines.

Select now the newly opened curve, and make it smaller in such a way that it fits into the main yellow shape when you place them on top of one another. In the Layers panel, drag this curve into the yellow shape layer to create a clipping mask. The reason for creating a clipping mask is simple: We want an object inside another object so that they do not overlap (i.e. both objects are visible), but one nested inside the other. Not doing so would result in some bits of the nested object being visible, which is not what we want; we need perfect, clean-cut lines.

Note: Clipping masks are not to be mistaken for masks. You will know you’re clipping and not masking because of the thumbnail (masks show a crop-like icon when applied) and because when you are about to clip, a blue stripe is displayed horizontally, a bit more than halfway across the layer. Masks, on the other hand, display a small vertical blue stripe beside the thumbnail.

Clipping versus masking in Affinity Designer

Clipping versus masking in Affinity Designer (View large version)

Clipping mask once it is appliedClipping mask once it is applied (View large version)

Now that we have applied our clipping mask to insert the newly created segment inside the main shape of the car, I’ve broken some nodes and moved some others around a bit in order to place them exactly how I want. I’ve stretched the width a bit, and separated the front from the rest of the segment using exactly the same methods we’ve already seen. Then, I applied a bit more Corner tool to soften whatever I felt needed to be softened. Finally, with the Pen tool, I added some extra nodes and segments to create the rest of the inner lines that define the car.

Note: In order to select an object in a mask, a clipping mask or a group when not selecting the object directly in the Layers panel, you have to double-click until you select the object, or hold Ctrl (Windows) or Cmd (Mac) and click.

Adding extra lines to a segment.Adding extra lines to a segment (View large version)

After some amendments and tweaking using the mentioned methods, our car looks like this:

How the car looks after a little tweaking of the segments and nodes

How the car looks after a little tweaking of the segments and nodes (View large version)

8. Drawing The Windows Using Some Primitive Shapes

In the side Toolbar, select the Rounded Rectangle tool. Drag on the canvas to create a shape. The size of the shape should fit in the car’s bodywork and look proportionate. No matter how you create it, you will be able to resize it later, so don’t worry much.

Note: When you create a shape with strokes and resize it, be sure to check “Scale with object” in the Stroke panel if you want the stroke to scale in proportion with the object. I recommend that you visually compare the difference between having this option checked and unchecked when you need to resize an object with a stroke.

Make sure this is checked if you plan to resize your artwork, so that it scales the strokes accordingly.

Make sure this is checked if you plan to resize your artwork, so that it scales the strokes accordingly. (View large version)

Once you have placed your rounded rectangle on the canvas, fill it with a blue-ish colour. I’ve used #93BBC1. Next, select it with the Node tool (press A). You will now see a little orange circle in the top-left corner. If you pull outwards or inwards, you’ll see how the angle in that corner changes. In the top Context toolbar, you can uncheck “Single radius”, and apply the angle you want to each corner of the rectangle individually. Uncheck it, and pull inwards on the tiny orange circle in the top-left corner. If you pull, you will be able to round it to a certain percentage, but you can also input the desired value in the input field for it, or even use the slider it comes with (it will show whether you’ve clicked on the little chevron). Let’s apply a value of 100%.

View large version

How the rounded rectangle primitive shape looks in default mode and how it changes when we uncheck the single radius box. Now we can manipulate the corners individually.

How the rounded rectangle primitive shape looks in default mode and how it changes when we uncheck the single radius box. Now we can manipulate the corners individually. (View large version)

Primitive shapes are not so flexible in terms of vector manipulation (compared to curves and lines), so, in order to apply further changes to such a shape (beyond fill, stroke, corners, width and height), we will need to convert it to curves.

Note: Once you convert a primitive shape into curves, there is no way to go back, and there will be no option to manipulate the shape through the little orange stops. If you need further tweaking, you will need to do it with the Corner tool.

Select the rectangle with the Node tool (A), and in the top Context toolbar, click the button “Convert to Curves”. The bounding box will disappear, and all of the nodes forming the shape will be shown. Also, note how in the Layers panel, the name of the object changes from “Rounded Rectangle” to “Curve”.

Now you need to manipulate the shape in order to create an object that looks like a car window. Look at the reference picture to get a better idea of how it should look. Also, tweak the rest of the drawn lines in the car, so that it all fits together nicely. Don’t worry if the shapes don’t look perfect (yet). Getting them right is a matter of practice! Using the Pen tool, help yourself with the Alt and Shift keys and observe how differently the segment nodes behave. After you have created the front window, go ahead and create the back one, following the same method.

We also need to create the reflections of the window, which we’ll do by drawing three rectangles, filling them with white color, overlapping them with a bit of offset from one another, and setting the opacity to 50%.

Place the cursor over the top bounding-box white circle, and when it turns into a curved arrow with two ends, move it to give the rectangles an angle. Create a clipping mask, dragging it over the window shape in the Layers panel as we saw before. You can also do this by following the following alternative methods:

Under the menu “Layer” → “Insertion” → “Insert Inside” the selected window object.

With the keyboard shortcut Ctrl + X (Windows) and Cmd + X (Mac), select your window object → “Edit” → “Paste Inside” (Ctrl/Cmd + Alt + V).

Repeat this for the back window. To add visual interest, you can duplicate the reflections and slightly change the rectangles’ opacities and widths.

Create the reflections on the windows, and clip them inside.Create the reflections on the windows, and clip them inside. (View large version)

9. Adding Visual Interest: Halftone Pattern, Shadows And Reflections

Before we start with the shadows and reflections, we need to add an extra piece onto the car so that all of the elements look well integrated. Let’s create the piece that sits below the doors. It is a simple rectangle. Place it on the corresponding layer order, so that it looks like the picture below, and keep inserting all of the pieces together so that it looks compact. I will also move a bit the front fender to make the front shorter.

The car, once the final bodywork pieces have been placed and tweaks made. We’re getting there!

The car, once the final bodywork pieces have been placed and tweaks made. We’re getting there! (View large version)

Now let’s create the halftone pattern.

Grab the Pen tool (P) and trace a line on your canvas. In the Stroke panel (you can also do this in the Pen tool’s Context toolbar section for the stroke, at the top), set the size to something like 7 pixels. We can easily change this value later if needed. Select the “Dash” line style, and the rest of the dialog settings should be as follows:

Settings for the first part of creating the halftone pattern.

Settings for the first part of creating the halftone pattern. (View large version)

Now, duplicate this line, and place the new one below with a bit of an offset to the left.

View large version

Group both lines, duplicate this group with a Smart copy, and create something like this:

Smart copy the first two lines, and create the whole pattern.

Smart copy the first two lines, and create the whole pattern. (View large version)

When you drag a selection in Affinity Designer, only objects that are completely within the selection area will be selected. If you want to select all objects without having to drag over all of them completely, you have the following options:

Mac: Holding the ⌃ (Ctrl) key will allow you to select all objects touching the selection marquee as you draw it.

Windows: Click and hold the left mouse button, start dragging a selection, and then click and hold the right mouse button as well. As you are holding both buttons, all objects touching the selection marquee will be selected.

Alternatively, you can make this behavior a global preference. On Mac, go to “Affinity Designer” → “Preferences” → “Tools”, and check “Select object when intersects with selection marquee”. On Windows, go to “Edit” → “Preferences” → “Tools”, and check “Select object when intersects with selection marquee”.

To make the illustration more interesting, we are going to vary the beginning and end of some of the lines a bit. To do this, we select the Node tool (A), and move the nodes a bit inwards.

It should now look like this:

View large version

To apply the pattern to our design, make sure everything is grouped, copy and paste it into our car artwork, reduce its opacity to 30%, and also reduce the size (making sure “Scale with object” is checked in the Stroke panel). We will then create a clipping mask. It is important to keep consistency in the angle, color and size of this pattern throughout the illustration.

Applying the halftone mask.Applying the halftone mask (View large version)

Now, apply the halftone pattern to the back fender and to the car’s side; make sure to create a placeholder for it first, be it the fender itself or a new shape. Make some tweaks if you need to adapt the pattern to your drawing in a harmonious way. You can change the overall size, the dots’ size, the transparency, the angle and so on, but try to be consistent when applying these changes to the pattern bits.

For the shadow below the windows, I drew a curve to be the placeholder, and applied the color #CFA204 so that it looks darker.

10. Creating The Remaining Elements Of The Car

Now, it’s all about creating the rest of the elements that make up the car: the bumpers, the back wheel and the surf board, plus the design stickers.

The front and back lights
For the front light, switch to the Segment tool and draw the shape. Then we need to rotate it a bit and place it somewhere below the car’s main bodywork. The same can be done for the back light but using the Rectangle tool. The colors are #FFDA9D for the front light and #FF0031 for the back light.

Creating the front lightCreating the front light (View large version)

Surfboard
To create the surfboard, we will use the Ellipse tool and draw a long ellipse. Convert it to curves and pull up the lower segment, adjusting a bit the handles to give it the ideal shape.

Creating the surf boardCreating the surf board (View large version)

Now, just create two small rounded rectangles, with a little extra line on top for the board’s rack. Place them in a layer behind the car’s main body shape.

Board rack pieces

Board rack pieces (View large version)

With the Pen tool, add the rudder. Its color is #B2E3EF. And for the stroke, use a 6-pixel width and set the color to #131000.

Spare wheel
Now let’s create the the spare wheel! Switch to the Rounded Rectangle tool. Drag over the canvas to draw a shape. Color it #34646C, and make the stroke #131000 and 8 pixels in size. The size of the spare wheel should fit the proportions of your car and should have the same diameter as the other wheels, or perhaps just a bit smaller. Pull the orange dots totally inwards, and give it a 45-degree angle. For the rack that holds the wheel, create a small piece with the Rectangle tool, and give it the same 45-degree angle, color it #4A8F99, and make the stroke #131000 and 4.5 pixels in size. Create the last piece that rests over the car in the same way, with a color of #34646C, and a stroke that is #131000 and 4.5 pixels in size.

Lastly, let’s create a shadow inside the wheel to add some more interest. For this, we’ll create a clipping mask and insert an ellipse shape with a color of #194147, without a stroke.

Note: We may want to create the same shadow effect for the car wheels. Use the Rectangle tool and a color of #312A00, create a clipping mask, and insert it in the wheel shape, placing it halfway.

Three simple shapes to draw the spare wheel and its rack

Three simple shapes to draw the spare wheel and its rack (View large version)

Bumpers
For the bumpers, we will apply the boolean operation “add” to two basic shapes and then clip-mask a shadow, just as we did for the wheels.

Boolean operations are displayed in the section of icons labeled “Geometry” (Mac) and “Operations” (Windows). (Yes, the label names are inconsistent, but the Affinity team will likely update them in the near future, and one of the labels will become the default for both operating systems.) If you don’t see them in the upper toolbar, go to “View” → “Customize Toolbar”, and drag and drop them into the toolbar.

Important: If you want the operation to be non-destructive, hold the Alt key while clicking on the “Add” icon (to combine the two basic shapes).

Boolean operations: Add, Subtract, Intersect, Divide, Combine.

Boolean operations: Add, Subtract, Intersect, Divide, Combine. (View large version)

Applying the (destructive) Add operation to create a single shape from two shapes.

Applying the (destructive) Add operation to create a single shape from two shapes. (View large version)

Note: If you try to paste the “shadow” object inside the bumper, it will only work if the bumper is one whole object (a destructive operation). So, if you used Alt + “Add”, this will not work now. However, you can still work around this by converting the Compound shape (the result of a non-destructive operation that is a group of two objects) to one Curve (one whole vector object). You just need to click on the Compound shape, then in the menu go to “Layer” → “Convert to Curves” (or use the key combination Ctrl + Enter).

Back window
We are still missing the back window, which we will create with the Pen tool, and the decoration for the car. For the two colored stripes, we need the Square tool and then clip-mask these two rectangles into the main bodywork. The size is 30 × 380 pixels, and the colors are #0AC8CE and #FF6500. Clip them by making sure you’ve put them on the right layer, so that the dark lines we drew before are above them.

Number 56
For the number “56” decoration, use the Artistic Text tool (“T”), and type in “56”. Choose a nice font that matches the style of the illustration, or try the one I’ve used.

The color for the text object is #FFF3AD.

(I added an extra squared shape behind the back fender, which will look like the end of the exhaust pipe. The color is #000000.)

Color strips
Now that we’ve done this, check the color stripes and the window they overlap with. As you can see (and because we put some transparency in the window glass), the orange stripe is visible through it. Let’s use some Boolean power again to fix this.

Bumpers and exhauster added. Check out the overlapped window and the orange stripe!

Bumpers and exhauster added. Check out the overlapped window and the orange stripe! (View large version)

Duplicate the window object. Select both the window object (the one you just duplicated) and the orange stripe in the Layers panel. Apply a “subtract” operation.

Stage 1, before the subtract operation.

Stage 1, before the subtract operation. (View large version)

tage 2, once the subtract operation is applied.

Stage 2, once the subtract operation is applied. (View large version)

Now, the orange stripe has the perfect shape, fitting the window in such a way that they don’t overlap.

Stripe and window with subtraction operation applied.

Stripe and window with subtraction operation applied. (View large version)

Smoke
To create the smoke from the exhaust, draw a circle with a white stroke, 5.5 pixels in size and no fill. Transform it to curves and break one of its points. From the bottom node, trace a straight line with the Pen tool.

Duplicate this “broken” circle, and resize to smaller circles, and flip and place them so that they look like this:

Creating the exhaust smoke

Creating the exhaust smoke (View large version)

Note: Now that the car is finished, group all of its layers together. It will be much easier to keep working if you do so!

11. Creating The Ground And The Background Elements.

Ground
Let’s trace a simple line for the ground, and add two bits breaking it in order to create visual interest and suggest a bit of movement. We also want to add an extra piece to create the ground. For this, we will use the Rectangle tool and draw a rectangle with a gradient color of #008799 for the left stop and #81BEC7 for the right stop. Give it 30% opacity.

Gradient for the ground piece and the grouped car layers for a clean view in the Layers panel.

Gradient for the ground piece and the grouped car layers for a clean view in the Layers panel. (View large version)

Clouds
For the clouds, select the Cloud tool from the list of (primitive) vector shapes. Draw a cloud by holding Shift to keep the proportions. Make it white. Transform it into curves, and with the Node tool (A) select the bottom nodes and delete them. Sub-select the bottom-left and bottom-right nodes (after deleting all of the others), and then in the Context toolbar, select “Convert to Sharp” in the Convert section. This will make your bottom segment straight. Apply some transparency with the Transparency tool (Y), and duplicate this cloud. Place the clouds in your drawing, spread apart as you wish and in different sizes.

My clouds have 12 bubbles and an inner radius of 82%. You can do the same or change these values to your liking.

Creating the clouds with the Cloud tool and the Transparency toolCreating the clouds with the Cloud tool and the Transparency tool (View large version)

Palm trees
To create the palm trees, use the Crescent tool from the list of primitive shapes on the left. Give it a gradient color, with a left stop of #F05942 and a right stop of #D15846.

Drag to draw the crescent shape. Move its center of rotation to the bottom of the bounding box, and give it a -60-degree angle.

The center of rotation can be made visible in the Contextual toolbar section for the Move (and Node) tool. It looks like a little crosshair icon. When you click on it, the crosshair for moving the rotation center of an object will show. Duplicate it, either via Cmd + C and Cmd + V (Mac) or Ctrl + C and Ctrl + V (Windows), or by clicking and then Alt + dragging on the object, and move the angle of the new crescent to -96 degrees. Make it a bit smaller. Copy the two shapes and flip them horizontally.

I also created and extra crescent.

Creating the palm leavesCreate the palm leaves (View large version)

To create the indentations on the leaves, transform the object to curves, add a node with the Node tool, and pull inwards. To make the vortex sharp, use “Convert” → “Sharp”.

Creating the leaves’ indentationsCreating the leaves’ indentations (View large version)

Create the trunk of the palm tree with the Pen tool, group all of the shapes together, and apply an “add” boolean. This way, all of the shapes will transform into just one. Apply a 60% opacity to it.

The palm tree once the Add boolean operation has been applied.

The palm tree once the Add boolean operation has been applied (View large version)

Duplicate the tree shape several times, changing the sizes and tweaking to make the trees slightly different from one another. (Making them exactly the same would result in a less interesting image.)

The last thing we need to make is the sun.

The sun
For this, simply draw an ellipse and apply a color of #FFFFBA to it. Apply a transparency with the Transparency tool (Y), where the bottom is transparent and gets opaque at the top.

Transparency applied to the sun shape

Transparency applied to the sun shape (View large version)

Now we will add some detail by overlapping several rounded rectangles over the sun circle and subtracting them (click Alt for a non-destructive action, if you prefer).

Applying a subtract operationApplying a subtract operation (View large version)

Place your sun in the scene, and we are done!

12. A Note On The Stacking Order (And Naming Of Layers)

While you work, and as the number of objects (layers) grows, which will also make your illustration more and more complex, keep in mind the stacking order of your layers. The sooner you start naming the layers and placing them in the right order, the better. Also, lock those layers that you’re done with (especially for things such as the background), so that they don’t get in the way as you work.

In this illustration, the order of elements from bottom to top is:

background,
ground,
sun,
clouds,
palm trees,
car.

Conclusion

I hope you could follow all of the steps with no major problems and now better understand some of Affinity Designer’s main tools and actions. (Of course, if you have some questions or need help, leave a comment below!)

These tools will allow you to create not only flat illustrations, but many other kinds of artwork as well. The tools, actions and procedures we’ve used here are some of the most useful and common that designers and illustrators use daily (including me), be it for simple illustration projects or much more complex ones.

However, even my most complex illustrations usually need the same tools that we’ve seen in action in this tutorial! It’s mainly a matter of understanding how much you can get out of each tool.

Remember the few important tips, such as locking the layers that could get in your way (or using half-transparency), stacking the layers in the right order, and naming them, so that even the most complex of illustrations are easy to organize and work with. Practice often, and try to organize things so that your workflow improves — this will lead to better artwork and better time management as well.

Also, to learn more about how to create this type of illustration, check out the video tutorial that I posted on my YouTube channel.

The completed Volkswagen Beetle illustration.

The completed Volkswagen Beetle illustration. (View large version)

Smashing Editorial
(mb, ms, ra, yk, al, il)

Collective #431

Original Source: http://feedproxy.google.com/~r/tympanus/~3/xBg3j0XlsEQ/

C430_optin

Our Sponsor
Bloom: eMail Opt-In And Lead Generation Plugin For WordPress

Bloom gives you the power to display opt-in forms using integrations of the most popular email marketing systems available.

Check it out

C431_paintapi

The CSS Paint API

Learn all about the new and exciting CSS Paint API in this article by Ruth John.

Read it

C431_redux

What Is Redux: A Designer’s Guide

In this article, Linton Ye writes about Redux and how it relates to design.

Read it

C431_roadmap

React Developer Roadmap

A complete roadmap to becoming a React developer in 2018.

Check it out

C431_unused

UnusedCSS

A tool that helps you find unused CSS on a webpage.

Check it out

C431_browser

Browsh

Browsh is a bandwidth-saving text-based browser that can render anything that a modern browser can. It can be used from a terminal or from within a normal browser.

Check it out

C431_nesting

CSS Nesting Request

Read this interesting discussion around the proposed CSS Nesting module that could be a game changer in how we write CSS.

Check it out

C431_podcasts

Podmap

Podmap is an open-source app that maps the world’s podcasts and helps you discover podcasts near you.

Check it out

C431_sitelink

Itty.bitty

Itty.bitty is a tool to create links that contain entire small sites.

Check it out

C431_div

The div that look different in every browser

Martijn Cuppens shared this fantastic demo that shows a div that renders differently in every major browser. Check out the tweet replies for more examples.

Check it out

C431_designteam

Design Systems at GitHub

Diana Mounter shares a brief history of how the design team at GitHub grew, what they’ve been working on, and what’s next.

Read it

C431_cssinjs

CSS-in-JS: FTW || WTF?

In this CSS Day 2018 talk Bruce Lawson dives into the CSS-in-JS topic.

Watch it

C431_modals

The current state of modal dialog accessibility

Scott O’Hara explores how modal dialogs are doing when it comes to accessibility.

Read it

C431_speedup

How I scaled a website to 10 million users

Ex-Google Tech Lead Patrick Shyu talks about scalability, and how he grew a website to handle 10 million monthly users.

Watch it

C431_font2

Free Font: Mathison

A great looking font designed by Gabriela Bindis.

Get it

C431_viewsource

Different views on view-source

Some interesting notes on the current debate around the controversial tweet by Tom Dale about “view-source”. By Christian Heilmann.

Read it

C431_fractal

Pattern Library First: An Approach For Managing CSS

Rachel Andrew shows how to use Fractal to manage CSS Grid components.

Read it

C431_font1

Free Font: Manrope Font

Manrope font is an open-source modern grotesque font family designed by Michael Sharanda.

Get it

C431_vue

Vue.js: the good, the meh, and the ugly

In case you missed it: Pier Bover explains what he likes and doesn’t like about Vue.

Read it

C431_voxel

Cryptovoxels

A virtual world on the Ethereum blockchain where you can build, develop and sell property.

Check it out

C431_voronoi

Sketch of Voronoi

A demo of amazing Voronoi structures by Gerard Ferrandez.

Check it out

Collective #431 was written by Pedro Botelho and published on Codrops.

Collective #433

Original Source: http://feedproxy.google.com/~r/tympanus/~3/e1VmhUIvmjw/

C433_AffinityDesignerIpad

Our Sponsor
Affinity Designer for iPad

Take the full power of professional vector graphic design wherever you go. Available now at an introductory price $13.99/£13.99/14,99€.

Tell me more

C433_TermSheets

Term Sheets

With Term Sheets you can create animated terminal presentations and export them as SVG, animated GIF, or HTML with CSS.

Check it out

C433_malicous

Anatomy of a malicious script: how a website can take over your browser

In this interesting article, Paolo Mioni shows how to find and take apart a malicious script.

Read it

C433_v8n

V8N

A reusable JavaScript validation library with a simple API.

Check it out

C433_stiches

Stitches

A template generator with functional CSS by Amie Chen. Check out the GitHub repo here.

Check it out

C433_Guppy

Guppy

Guppy is an application manager and task runner for React.js.

Check it out

C433_lint

Postmortem for Malicious Packages Published on July 12th, 2018

Read about the incident with ESLint, where an attacker compromised the npm account of a maintainer and published malicious versions of two packages. Read the GitHub issue discussion here.

Read it

C433_CSS

CSS: A New Kind Of JavaScript

Heydon Pickering’s hilarious introduction to a new tool that will make styling so much easier!

Read it

C433_fontplayground

Font Playground

Wenting Zhang’s project will let you play with variable fonts.

Check it out

C433_track

Track

A musical WebVR experience built with WebGL, Houdini, and Three.js.

Check it out

C433_cubeform

3D Cube Form

A great rotating 3D cube form made by Clément Roche.

Check it out

C433_delay

First Input Delay

Learn how you can use First Input Delay (FID) in the Chrome UX Report to measures the time that it takes for a web page to respond to the first user interaction with the page.

Watch it

C433_didfile

did.txt file

Patrick Tran shows how to create an insanely simple “did” file accessible by terminal.

Read it

C433_Nucleardissent

Nuclear Dissent

A great documentary and web experience about the tragic fate of the victims of France’s terrible nuclear tests in French Polynesia.

Watch it

C433_font1

Free Font: Facón

A very dynamic looking font designed by Alejo Bergmann.

Get it

C433_webassembly

WebAssembly is more than the web

Steve Klabnik writes about the marvels of WebAssembly as a versatile embeddable language.

Read it

C433_cssgrid3d

Isometric eCommerce CSSGrid

Andy Barefoot’s experimental eCommerce grid layout made with CSS Grid.

Check it out

C433_ramd

ramd.js

A minimal JavaScript library for building TODO like web applications.

Check it out

C433_cssgridcomplex

How to build complicated grids using CSS grid

In case you missed it: Dan Webb shows how to pull off a real world grid layout.

Read it

C433_alaskafont

Free Font: Alaska

A great looking display typeface made by the team of Unblast.

Get it

C433_seedbank

Seedbank

Seedbank is a registry and search engine for Colab(oratory) notebooks for and around machine learning for rapid exploration and learning.

Check it out

C433_cool

coolHue

Great for your next design project: some new gradient hues and swatches were added to coolHue.

Check it out

Collective #433 was written by Pedro Botelho and published on Codrops.

So You Want to Persuade Users? Make Things Simple!

Original Source: https://www.smashingmagazine.com/2018/07/persuasion-user-experience-design/

So You Want to Persuade Users? Make Things Simple!

So You Want to Persuade Users? Make Things Simple!

Lyndon Cerejo

2018-07-17T16:15:38+02:00
2018-07-17T15:48:55+00:00

(This article is kindly sponsored by Adobe.) The persuasive design toolbox is filled with powerful tools based on psychology. These tools range from Cialdini’s set of six principles of persuasion to ten times that number of Persuasive Patterns. Presented with all these methods, it can be tempting to use all of them to cover all possible bases, using a shotgun approach, hoping that one will resonate with your target users.

However, applying persuasion principles and patterns in a haphazard manner just ends up being persuasive design clutter. Like user experience design, designing for everyone is designing for no one. Randomly thrown together persuasive techniques will also make users feel manipulated, not in control, making them abandon the site or experience. The key to persuading your users is to keep it simple: using focused persuasive techniques and tactics that will work for your users.

Persuasion Funnel

AIDA is an acronym used in marketing and advertising to describe the stages that a customer goes through in the purchase process. The stages of Attention, Interest, Desire and Action, generically follow a series of cognitive (thinking) and affective (feeling) stages culminating in a behavioral (doing e.g. purchase or trial) stage. This should sound familiar since this is what we do through design, especially persuasive design.

When it comes to persuasive design, users go through a few stages between Awareness and Action, and the design should guide them from one stage to the next. I don’t have a clever acronym for it (yet), but the stages the design has to take the users through are:

Awareness
Relevant
Credible
Usable
Desirable
Persuasive
Action

(Large preview)

When users are contemplating an action (like booking a hotel room), they have to be aware of your site, app, or experience. Once they begin their journey on your site, they quickly evaluate the experience and either proceed to the next step or leave and go elsewhere. With fewer users continuing to subsequent stages, the number of users at each stage begins to resemble the shape of a funnel as shown above.

Let’s peek inside what could be going on in hypothetical users’ minds as they go through the experience of booking a hotel room for New Year’s Eve in Times Square, and some of the reasons they may drop off in each stage.

Awareness

“Hmmm… Where do I start? Hotel chains promise the lowest rate if we book directly with them, but I won’t be able to see other hotel options around Times Square. Hotel… Maybe I should try an online travel agency like Trivago (looks like the Trivago guy / Trivago girl advertising works!) to find a wider range of hotels. I’m going to also quickly Google it to see if there are other options.”

Users have to be aware of your site, app or experience to use it — Duh!

Relevant

“I found HotelTonight on Google. It looks like a great way to get rooms last minute, but not this far in advance — it’s not relevant to me.”

If your experience is not relevant to the task they are trying to accomplish, users will leave and try elsewhere. If your products or services are relevant, but not findable by the user, work on your navigation, search, and content layout to ensure your products and services are visible. Everything does not have to be one click away, but if the user gets the scent of information, or cues that make them think they are on the right path, they will follow the trail to that information.

Credible

“This design looks like it hasn’t been updated since the [GeoCities era](http://www.arngren.net/).

— Warning bells go off in head —

I’m out of here.”

Users are aware of many of the risks available online and look for trust indicators including a known brand and domain, secure site, professional design, real-world contact information and third-party certificates or badges. Incorporate these elements to create a comfort level for the user.

Usable

“I can’t figure out where things are in the navigation, and the search results had hundreds of unhelpful results. The homepage has nice big images, but that meant I had to scroll before I could see any real content.”

Usability is surprisingly still an issue with many sites. Follow User Experience best practices during design, and test with users to validate that the design is usable.

Desirable

“This reminds me of Craigslist — it is usable, but the design does not make me want to stay and use it. I’ll try that other hotel website that provides an immersive, interactive experience as I search for hotels.”

As much as we like to believe it, users’ decisions are not always rational, and very often driven by emotion, and we can address that through design. Usability is about making it work well; this is about making it beautiful as well.

In his book Emotional Design, Don Norman explains: “Attractive things do work better — their attractiveness produces positive emotions, causing mental processes to be more creative, more tolerant of minor difficulties.” Don talks about the three different aspects of design: visceral, behavioral, and reflective. Visceral design is about appearance, behavioral about the pleasure and effectiveness of use, and reflective design involves the rationalization and intellectualization of a product.

Persuasive

“Oh, Wow! That’s a long list of hotels, with plenty of availability for New Year’s Eve. There’s no real reason to book now. I’ll just come back to book after Thanksgiving…”

The user was interested, able, and willing, but the design did not motivate him to take intended action. Use relevant persuasion techniques that apply to your user to move them toward the desired action.

Examples of persuasive methods while shopping on Travelocity for a hotel room for New Year’s Eve.

Examples of persuasive methods while shopping on Travelocity for a hotel room for New Year’s Eve. (Large preview)

Action

“Oh, Wow! 65% of hotels are already booked in this area for New Year’s Eve. I better make a reservation now. . This looks like a nice hotel, and it also offers free cancellation – I’m reserving it now!”

The user who made it to this stage was interested, able, and willing, and the design nudged him to take intended action of making a reservation before leaving the site.

Persuasion is not about applying all available principles and patterns to your designs, but systematically identifying how you can address users’ barriers and motivators during each step of the journey, and guiding your users through the funnel to take the desired action.

The KISS Approach

Most of us are familiar with the acronym KISS: “Keep It Simple, Stupid,” a principle advocating simplicity as a key goal in design by avoiding unnecessary complexity. Let’s borrow that acronym for a 4-step approach to persuasive design.

Know The Right Behavior To Target

The first step is knowing the behavior you would like to target, and identifying the simplest action that can lead to that behavior change. Take the example of term life insurance companies who, to put it very bluntly, stand to benefit if their policyholders are healthy and don’t die while the policy is active. While those companies have a long-term ambitious goal of helping their policyholders lead healthy lives (mutually beneficial), that could be broken down into a simpler target behavior of walking 10,000 steps daily. This behavior is simple to understand, achieve, measure, and contributes to the long-term goal of healthier policyholders.

One such insurance company is offering new policyholders the latest Apple Watch for a low initial down payment ($25). The ongoing monthly payments can be waived each month that the policyholder leads an active lifestyle and exercises regularly (e.g. walks about 10,000 steps a day). About half the people who participated have achieved monthly goals, despite potential privacy implications.

John Hancock Term Life Insurance Apple Watch offer targets walking about 10,000 steps a day.

John Hancock Term Life Insurance Apple Watch offer targets walking about 10,000 steps a day. (Large preview)

Identify Barriers And Motivators

User research for persuasive design digs below the surface thinking level to the feeling level, and moves beyond the rational to the emotional level, as shown below. Getting to know your users at a deeper level will help you use psychology to focus your design to get users to engage in the target behavior identified above. User interviews that focus on users’ feelings and emotions are used to uncover barriers and motivators they consciously or subconsciously face while trying to achieve the target behavior. This helps us identify which blocks we need to weaken, and which motivators we should strengthen, through persuasive design techniques and tactics.

Tip of the iceberg user research diagram

(Large preview)

Simplify The Experience

Simplify the design experience of the first stages of the funnel, as users go through the mental verifications of relevancy, credibility, and usability of the experience. This includes making it easy for the user to find what they are looking for, credibility indicators like professional design, contact information, and third-party certificates or badges, as well as addressing usability issues. As Steve Krug put it very succinctly: “Don’t Make Me Think”.

Select Appropriate Triggers

Users who have made it this far in the process are interested in something you have to offer. As a designer, you have to nudge them to take the desired action. A good starting point is Robert Cialdini’s, six key principles of persuasion:

Reciprocity
People are obliged to give something back in exchange for receiving something.
Scarcity
People want more of those things they can have less of.
Authority
People follow the lead of credible, knowledgeable experts.
Consistency
People like to be consistent with the things they have previously said or done.
Liking
People prefer to say yes to those that they like.
Consensus (Social Proof)
Especially when they are uncertain, people will look to the actions and behaviors of others to determine their own.

These principles can be applied through dozens of different persuasive design patterns and methods, some of which have been previously published on Smashing Magazine (patterns, triggers), or in the books listed in the resources at the end. As you may notice, many persuasive patterns are related to UI patterns, because part of persuasion is reducing friction and simplifying what the user needs to do at any given point in time. For example, the persuasive pattern of Limited Choice can be realized through UI Pattern of Progressive Disclosure.

Given that there are dozens of patterns and methods (depending on where you look), it is important to selectively use methods that will resonate with your users. Applying all design patterns in the hope of some working will result in persuasion clutter and overwhelm the user, possibly driving them away from your site.

Examining Persuasion

Let’s take a closer look at the earlier example of the term life insurance through the eyes of someone who is motivated (shopping for life insurance) and has the ability (to pay monthly life insurance cost). Like me, let’s assume that this user was made aware of this through a sponsored post on Facebook. During the stages of awareness and relevance, there are a few persuasive triggers as shown below that make the user click “Learn More”.

facebook

(Large preview)

Clicking the “Learn More” button takes the user to a landing page that we will examine in sections for a persuasive flow:

(Large preview)

The user’s primary motivation in shopping for term life insurance is: “Protect Family,” and a big barrier is “High Cost.”

Reputable Name (Credibility)
Even if you’ve not heard of this company, John Hancock is a famous person and the term used as a synonym in the United States for one’s signature. The company reinforces it’s longevity later on the page.
Toll-free Number (Credibility)
Established and legitimate organization.
Message Framing
Live healthy, is also reinforced by the image of a family enjoying outdoors.
“This life insurance product will help me live longer, lead a happy life like them, and protect my family in case something happens, and won’t cost much.”
People Like Me & Association
This family looks like mine (or the family next door) — I can see myself in this wide-open field (visceral and reflective triggers).
Extrinsic Reward
An Apple watch for $25 — that’s a bonus here!
Visual Cueing
The person in focus (stereotypical breadwinner) has his gaze directly focused at the form below, leading the user to the next step.
Foot In The Door
This quote won’t cost anything — zip, nada.
Computer As A Social Actor
The information takes a conversational tone and format, not the usual form in rows and columns. The information seems reasonable to generate a quote.
Commitment & Consistency
By filling this quick, easy, and free form, chances are that the user will act consistently and proceed when it comes to the next step (application), unless there’s another barrier (price, benefits, etc.)

(Large preview)

Control
The user has a choice of devices.
Extrinsic Rewards
More rewards to be earned.
Control
The user controls how much they pay (the more active, the less you’ll pay). Also, in case the user does is not active, the cost is framed as just $13 (for a month).
Credibility
The company reinforces longevity and protector of America.
Authority
Licensed Coverage Coach (not just a sales agent).
Flow
One way to keep users in the flow and not get distracted is by disabling the social media links (which could raise the question: why display them?).

That took longer to dissect and read than it does in real life, where most of this is processed consciously and subconsciously in a few seconds, often with a glance or two.

Apart from the methods establishing credibility, the persuasive methods are used to strengthen the primary motivator of “Protect Family” (get insurance, extrinsic reward will help me live longer for my family), and weaken the barrier of “High Cost” (low monthly cost, additional savings, no ongoing watch payments). Note how they work together and don’t conflict or clutter the experience.

Conclusion

Persuasion is all around us, in our everyday lives. As designers, we can use ethical persuasive design methods to get users to take some action. With plenty of persuasive methods available, we have to be selective about what we use. We can use the KISS approach to keep it simple:

Know the right behavior to target
Identify barriers and motivators
Simplify the experience
Select appropriate triggers

KISS also reminds us to Keep It Simple & Straightforward, by selecting a simple target behavior, simplifying the experience for the user, and by applying persuasive techniques that will lead to the target behavior without overwhelming the user.

Further Reading

“Neuro Web Design: What Makes Them Click?,” Susan Weinschenk
“Design for the Mind: Seven Psychological Principles of Persuasive Design,” Victor S. Yocco
“Influence: The Psychology of Persuasion, by Robert B. Cialdini
“Persuasive Technology: Using Computers to Change What We Think and Do,” B.J. Fogg
“Persuasive Design Patterns (scroll down the page),” UI-Patterns
“Persuasive Patterns Card Deck,” UI-Patterns

This article is part of the UX design series sponsored by Adobe. Adobe XD tool is made for a fast and fluid UX design process, as it lets you go from idea to prototype faster. Design, prototype, and share — all in one app. You can check out more inspiring projects created with Adobe XD on Behance, and also sign up for the Adobe experience design newsletter to stay updated and informed on the latest trends and insights for UX/UI design.

Smashing Editorial
(yk, il)