Apple's AirPods Pro 2 could look (and sound) incredible
Original Source: https://www.creativebloq.com/news/airpods-pro-2
Game-changing new features just emerged.
Original Source: https://www.creativebloq.com/news/airpods-pro-2
Game-changing new features just emerged.
Original Source: https://designrfix.com/reviews/best-graphics-card-for-photo-editing
If you are a professional photo editor, you need the best graphics card for photo editing. You’ll need to work with different programs like Photoshop, Paint Shop, photo director, and many more. However, if you want to know the best model to use on your PC, we have highlighted 10 graphics cards for photo editing…
The post Best Graphics Card for Photo Editing Reviews appeared first on DesignrFix.
Original Source: https://www.creativebloq.com/news/card-deck-design-secret
Did you spot it?
Original Source: https://www.webdesignerdepot.com/2022/01/popular-design-news-of-the-week-december-27-2021-january-2-2022/
 Every day design fans submit incredible industry stories to our sister-site, Webdesigner News. Our colleagues sift through it, selecting the very best stories from the design, UX, tech, and development worlds and posting them live on the site.
The best way to keep up with the most important stories for web professionals is to subscribe to Webdesigner News or check out the site regularly. However, in case you missed a day this week, here’s a handy compilation of the top curated stories from the last seven days. Enjoy!
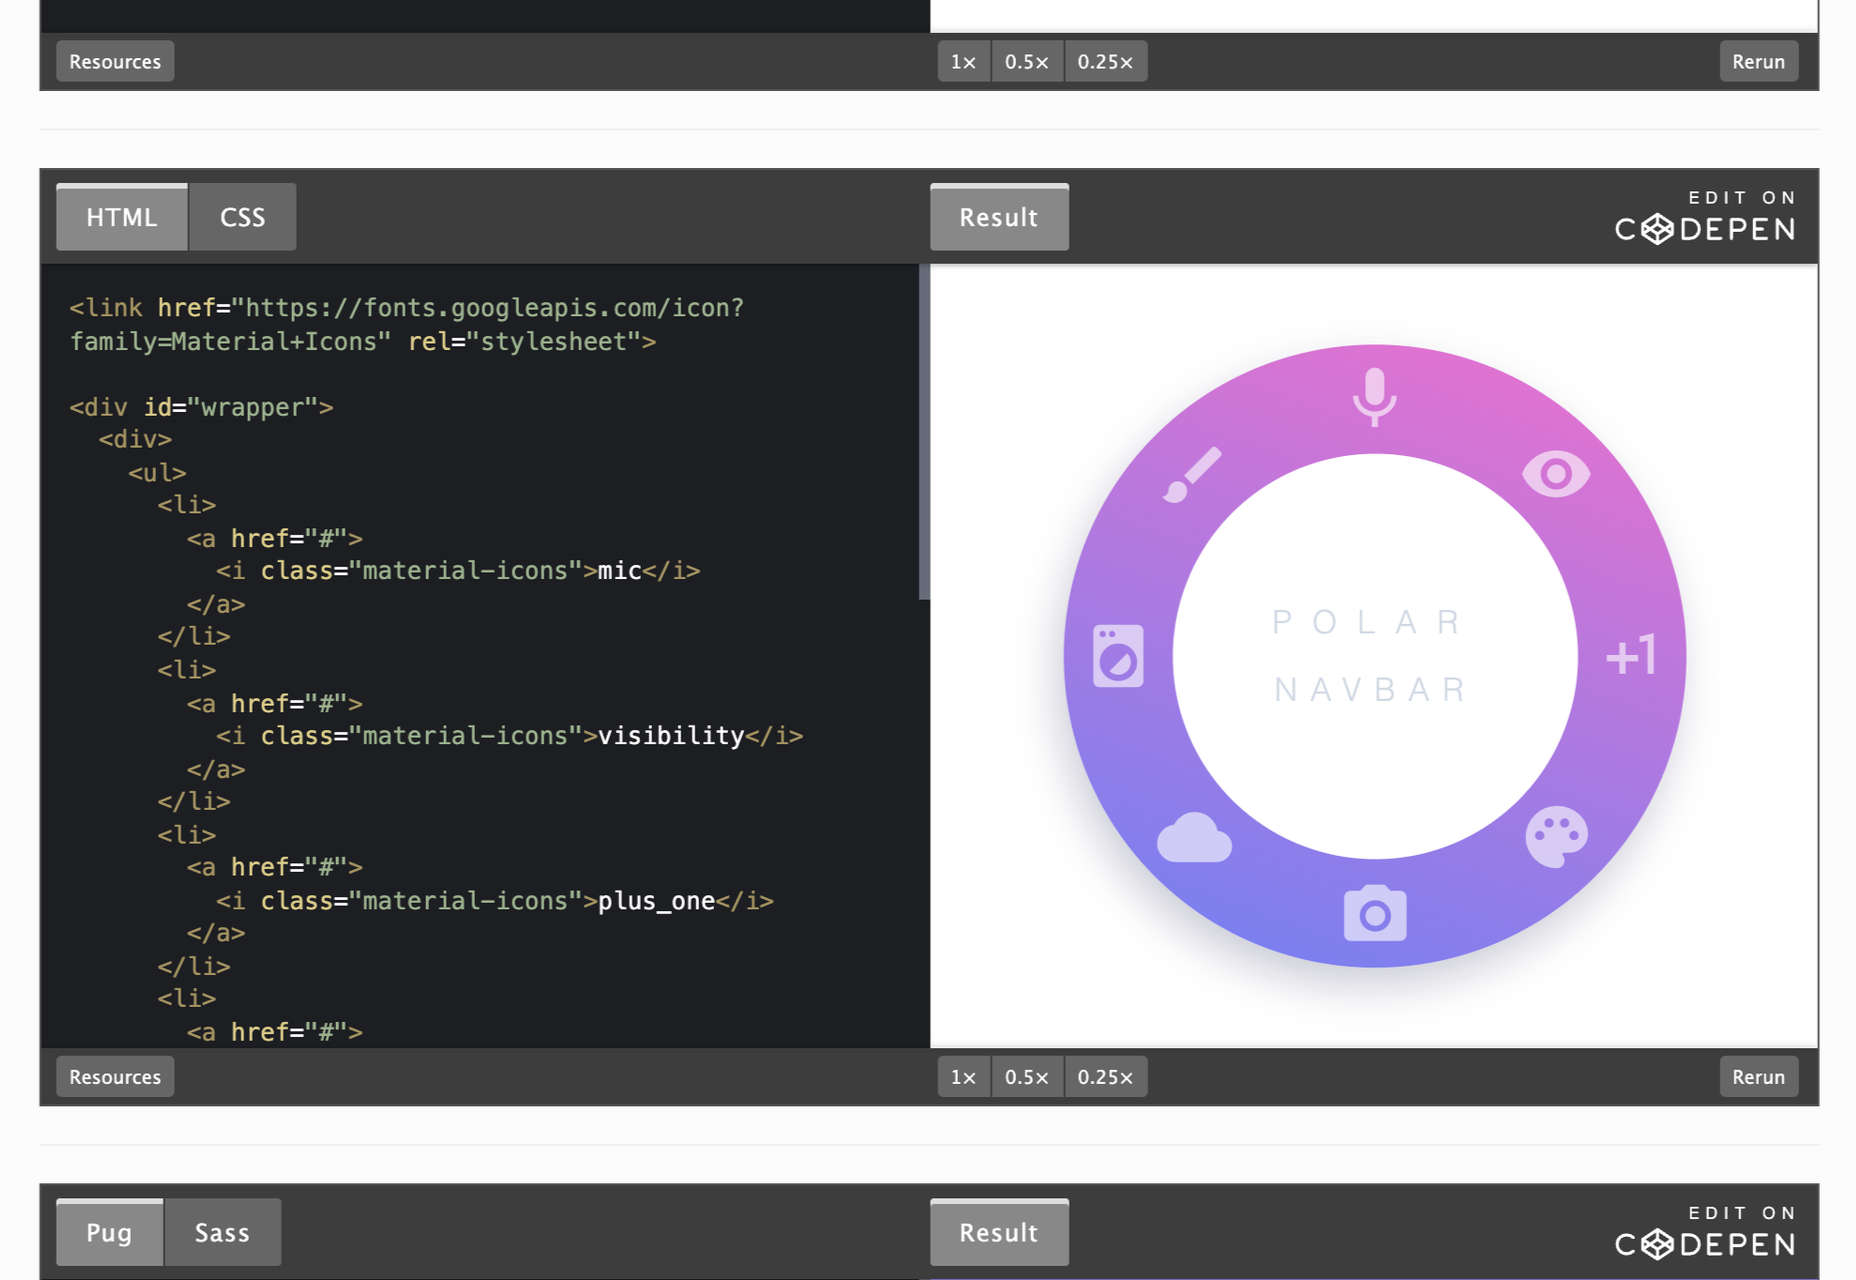
Pure CSS NavBar Responsive Examples
A List of Games for Bored (and Curious) Designers

Free Black and White Images

5 Exciting Web Design Trends for 2022
22 Inspiring Web Design Trends for 2022

How to Find Business Ideas
What’s the Right Font Size in Web Design?
Unbelievable 100-year-old Font Can Be Read Both Backwards and Forwards

Top Web Design and UI Trends for 2022

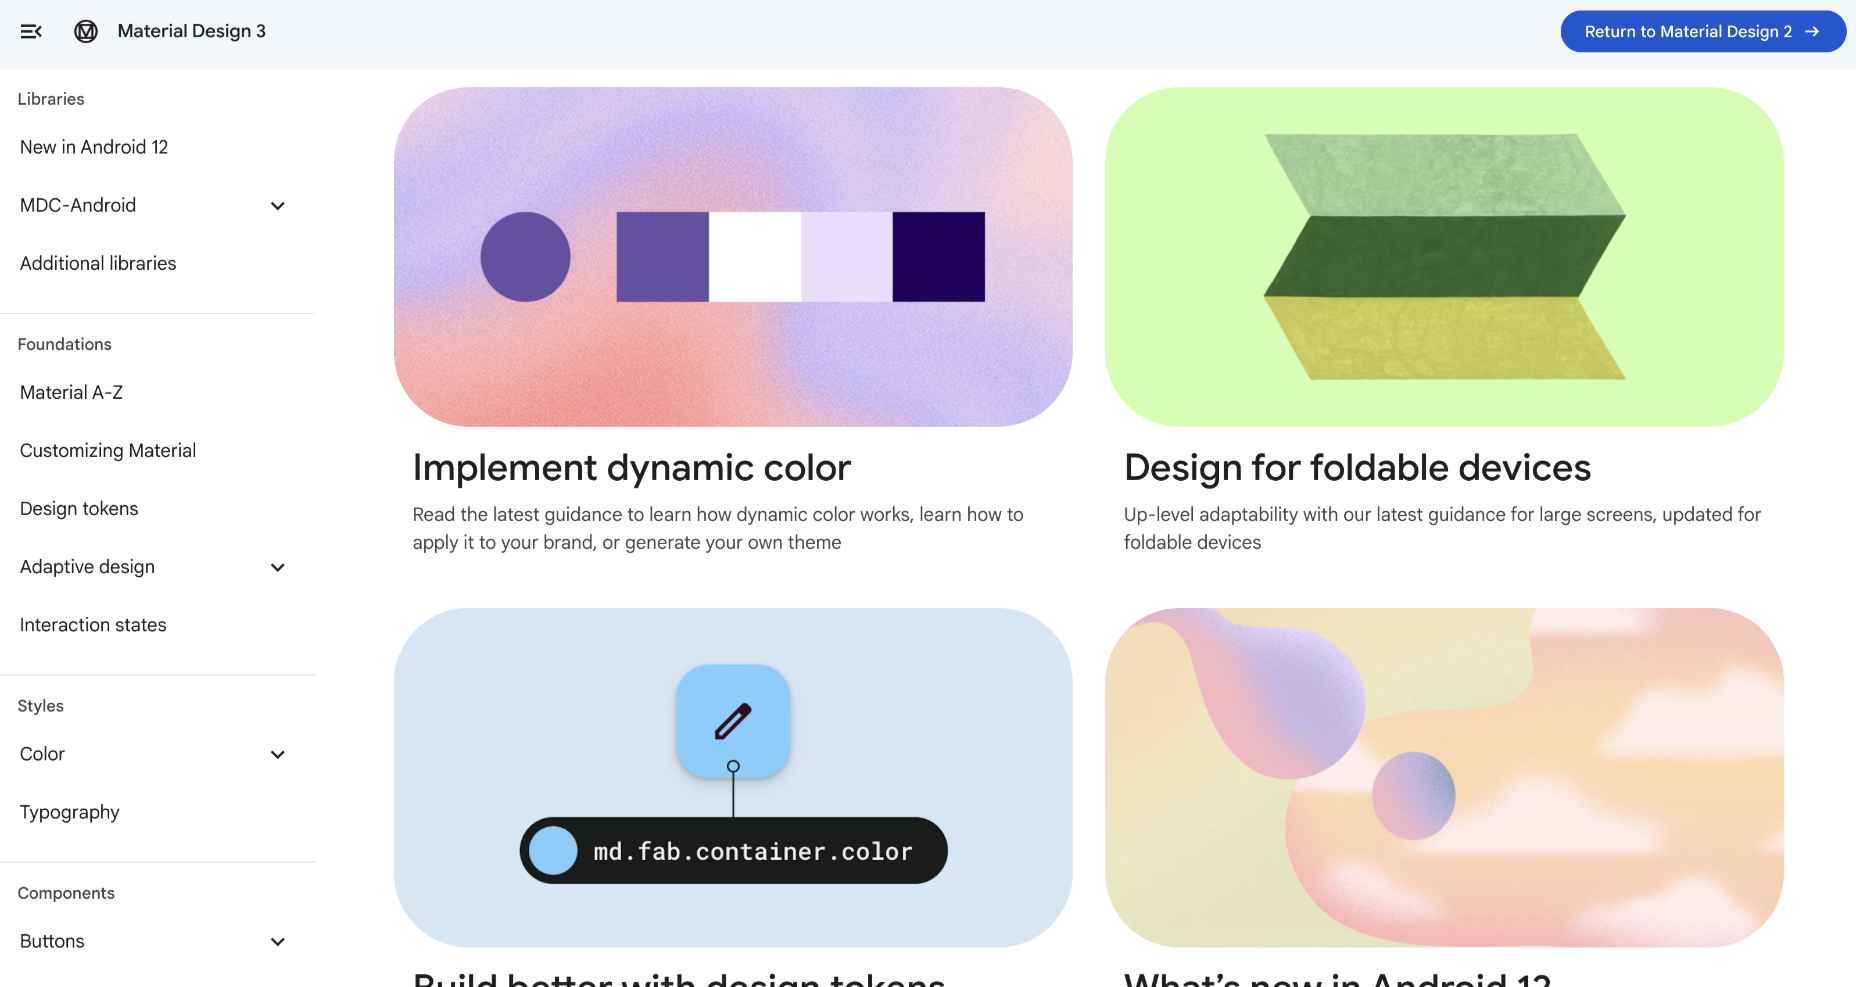
Material Design 3
Source
p img {display:inline-block; margin-right:10px;}
.alignleft {float:left;}
p.showcase {clear:both;}
body#browserfriendly p, body#podcast p, div#emailbody p{margin:0;}
The post Popular Design News of the Week: December 27, 2021 – January 2, 2022 first appeared on Webdesigner Depot.
Original Source: https://designrfix.com/reviews/best-13×19-printer
The hearsays have it that large format printers are pretty expensive. You are not a chump, but it is folly and cowardly to believe such falsehoods when google can prove. If your business needs the best 13×19 Printer to print drafts, accurate color prints, detailed picture memories, brochures, and posters, you are on the right…
The post Top 10 Best 13×19 Printer Reviews appeared first on DesignrFix.
Original Source: https://www.creativebloq.com/news/live/apple-january-sales
Get 2022 off to a great start with an unbeatable Apple deal.
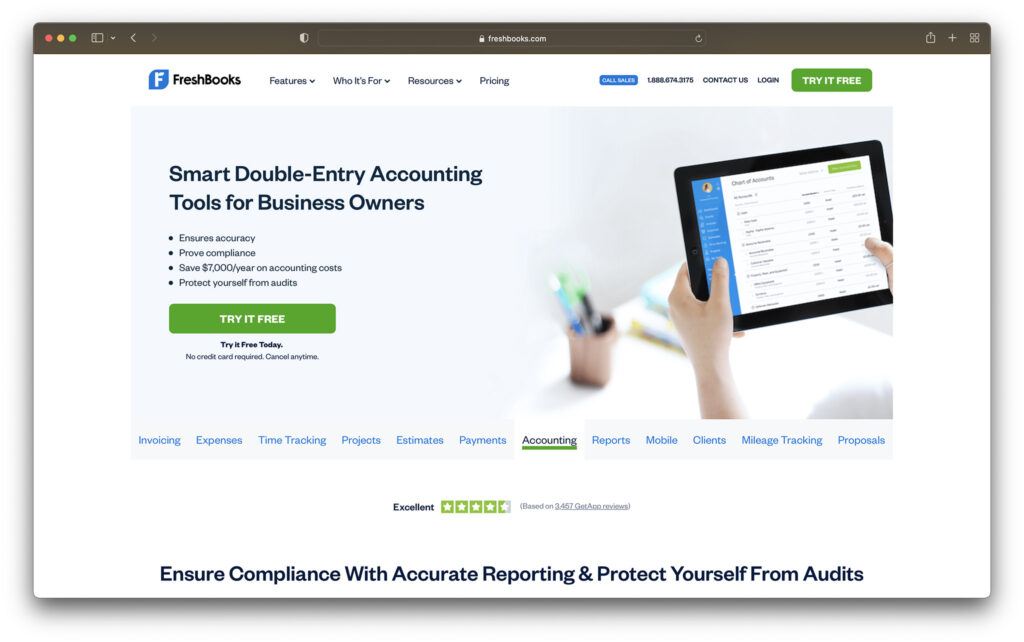
Original Source: https://ecommerce-platforms.com/accounting-software/freshbooks-review
In this FreshBooks review, we’ll be looking at one of the most popular tools for small business accounting on the market and exploring whether it’s as valuable as it seems. When it first started, FreshBooks was a simple but effective invoicing solution. Over the years, the solution expanded, offering new features for business money management.
Today, FreshBooks helps business owners and freelancers from all walks of life to handle their ingoing and outgoing cash more effectively.
FreshBooks has evolved significantly recently and now adheres to double-entry accounting rules. While you can still do the same things as you could before, like creating invoices and tracking work time, you’ll have a more reliable framework for your record keeping.
How Does FreshBooks Work?
FreshBooks offers a 30-day free trial option for users, so you can jump in and get a sense of the services you’re going to get as quickly as possible. After your free trial, you’ll be able to choose one of the premium plans for your long-term setup.
FreshBooks upgraded its onboarding process quickly and has begun to ask more questions about each user’s business, contact information, and whether they want to invite team members to the service. Once you’re done entering details, FreshBooks will drop you into the intuitive user interface.
To begin, FreshBooks walks you through everything you need to get started, including customizing your invoices with logos. On the main dashboard, you’ll be able to see the basic details of your company’s financial health spreads across five charts. The charts cover things like outstanding revenue (who owes you money), Total profit for insights into your profit and loss, and more.
Links on the top right corner of the page will take you to a page where you can invite team members to join you or connect with an accountant. You’ll also have a comprehensive navigation menu for getting to various parts of the tool, like the client list, dashboard, expenses, estimates and time tracking tools.
You’ll also be able to link your financial accounts to your FreshBooks environment, so you can track incoming and outgoing expenses automatically. You’ll even be able to use tools like Stripe and FreshBooks payments to accept money within your app.
Though there are products with more advanced UIs out there, FreshBooks offers quite a convenient and straightforward solution for modern business owners. If you’ve ever used the old FreshBooks, you’re likely to feel a little confused about how much it’s changed.
Go to top
FreshBooks Review: Pricing
Let’s start our review by considering how much FreshBooks will cost your business. The first point to remember when choosing your pricing package is you can get a lot of accounting tools in one with FreshBooks, so make sure you consider the value in each package before making a choice.
Like many SaaS solutions for accounting, website building, email marketing, and more, FreshBooks also comes with discount options if you’re willing to pay for an entire year of your subscription up front. The available pricing options include:
Lite: $15 per month: Support for up to 5 billable clients, unlimited expense tracking, unlimited estimates, credit and debit card payment processing, reports and sales tax, mobile apps, and VAT return filing.
Plus: $25 per month: All the features of Lite, but you can send invoices up to 50 clients. You’ll also be able to invite your accountant to help with your double-entry accounting reports. There’s an ios and Android app, mobile mileage tracking and more.
Premium: $50 per month: Everything you get from Plus, but with unlimited invoices, bill tracking, accounts payable, profitability reports, custom email templates and signatures. Checkout links. Direct debit and recurring billing settings.
Select: Custom pricing: All the features of the Premium invoicing software, plus 2 member accounts, premium customer support, bank account connections, dedicated account manager and custom migration. Mobile app access, no branding on client emails, automate expense tracking and late payment reminders, plus access to business health reports.
If you need the most advanced service FreshBooks can offer, you’ll have to contact the team about the “Select” plan.
This package offers all the features of Premium, as well as a range of extras such as multiple member accounts, dedicated account managers, migration assistance if you’re already using another software and custom onboarding. You can also remove the branding on your FreshBooks emails.
If you’re not sure which features are going to be most important to you, FreshBooks offers a 30-day free trial, where you can access all the features, and see how everything works. Though not as inexpensive as some of the other alternatives on the market, FreshBooks is still a popular pick offering a decent level of value.
Go to top
FreshBooks Review: Invoicing
As mentioned above, FreshBooks started life as an invoicing brand, so it makes sense this should also be somewhere the company can perform well. If you head to the “Invoices” tab in your toolbar, you’ll get all the information you need to know about your accounts receivable. There’s also the option to dive into who owes what amount.
FreshBooks’ invoicing page provides plenty of details about historical and resent transactions. There are also a few additional transactions to track here: proposals and estimates. Both of these documents can be converted to invoices. With a proposal, you basically provide an in-depth estimate to your client explaining what you’re going to offer, and the client signs it to approve the transaction.
When you click on the button to create a new invoice, you’ll travel to the building page, where your billing data and invoice number will already be filled in. You can then work on the rest by selecting services and entering quantities for what you’re selling.
Crucially, FreshBooks allows companies to customize their invoices, which is a nice extra touch. You can create templates for your brand which are available to re-use as often as you like.
Go to top
FreshBooks Review: Accounting
The accounting tools provided with FreshBooks help to ensure accuracy in your records, maintain compliance, and give you a better understanding of your financial situation. You can connect with your accountant within FreshBooks, to get their help when it comes to calculating profits and losses, or submitting information for a tax return.
The extensive accounting environment comes with a host of helpful features intended to ensure business leaders can make decisions based on valuable information they have about their company. For instance, you can track how much money you’re setting aside for tax time, and how much you owe for other things, like VAT.
The accounting section of FreshBooks includes:
Journal entries
Chart of accounts
Accounts payable
Accountant access
Trial balance
VAT Return report
General ledger
Balance sheet
The best thing about the accounting features of FreshBooks for most companies will be the ability to invite your accountant to come and access crucial financial data. But you’ll also be able to unlock a range of other beneficial tools too, like categorized transactions, automated matching suggestions, and summary reports you can export to Excel.
There’s an “Accounts Payable” feature too, which means you can set up automated management of repeat purchases in your FreshBooks account, making it easier to track everything you owe over time. We’re also fans of the “credits” feature, which allows you to track prepayments, overpayments, and even credits you’d like to use to reward customers in future.
Go to top
FreshBooks Review: Projects and Time Tracking
Although FreshBooks is a solution for accounting first and foremost, it’s also a tool for keeping your business running as smoothly as possible. You can use FreshBooks to track the progress of projects within your workplace, and keep teams on the right page, enabling collaboration and growth.
FreshBooks’ solution is specially built for small business owners and teams, to help increase productivity levels. You can invite all your contracts, employees, business partners, and other professionals into the same project management environment, and decide which files they’re going to have access to as you go. With knowledge management no need for digging through email chains trying to find a single attachment. You can easily find everything located in one space.
FreshBooks’ project management solution also enables faster collaboration with clients – which is great if you need feedback for your strategy every step of the way. You’ll have access to a range of easy tracking tools to help you understand your business better, such as:
Project profitability: Detailed reports of each project’s performance
Profitability summaries: overviews of profitability across projects and clients
Profitability widget: Comprehensive insights into incomes, costs, and unbilled hours
The comprehensive project management section is packed full of features, so you can chat and collaborate on work, assign tasks to teams, and share files or images in the same place. You can even assign costs and billable hourly rates to specific projects, and control what your team has access to with in-depth permissions. Plus, there’s a simple duplication feature too, if you need to track a number of similar projects.
The project management functionality with FreshBooks is particularly valuable when paired with the company’s time-tracking software. You can start tracking time with a click and create easy-to-read reports with billable hours for your clients.
You don’t need to download anything if you don’t want to, either. Time tracking is available as a mobile app, but you can also use it as a Chrome plugin too. Or you can integrate your time tracker into the apps you use already, like Trello, Teamwork, and Asana. Easily keep your team on track with the same time tracking technology and view how well they’re using their time with reports.
Go to top
FreshBooks Review: Other Features
FreshBooks is pretty feature rich these days.
Outside of the features we’ve already covered, the solution includes a payment system which allows your customers to pay you using the FreshBooks payment processor. This costs around 2.9% plus 30 cents per transaction – which is about the same as most tools.
You can set up sales tax within your invoice to reduce the amount of time you spend figuring out the full cost a customer has to pay. There are also context-sensitive settings to consider, which is a unique feature just for FreshBooks. As you work on invoices, the software basically detects what kind of tools you’re going to need and makes sure you can access them.
Other features to be aware of include:
Client records: FreshBooks allows you to collect information about your customers over time. When you first add a client record to the system, you’ll basically only have contact information. However, client records gradually become more immersive over time. You can attach receipts and individual expenses to a client or use the relationship tab to see transaction histories.
Expenses: As part of your overall FreshBooks accounting experience, you’ll get a tab for tracking expenses. The software automatically categorizes these expenses with choices like meals, entertainment, and personal. At first you need to train the expenses system to recognize your payments, but over time it does become more accurate. You can attach files, drag and drop receipt images, and mark the expense as billable. There’s even the option to designate an expense as cost of goods sold (COGS).
Mobile apps: FreshBooks offers a set of mobile apps for Android and iOS. The two apps are easy enough to use, but they are somewhat limited compared to the full user experience you’ll get on the primary site. The FreshBooks app offers access to a dashboard with charts for outstanding revenue, total spending, total profit, and icons which take you to specific areas within the tool. There’s also automatic mileage tracking if you run the app with location services on, which can be very convenient.
Reporting: The ready-made financial reports from FreshBooks are extremely useful for learning more about your business. There are MTD ready reports, color-coded expenses breakdowns, VAT return reports, profit and loss reports, accounts aging reports, Recent activity reports, sales tax reports and more. You can even track expenses, payments collected, and invoices in the same place.
Estimates: Similar to other accounting software like Quickbooks, Freshbooks can also help with figuring out how much you need to charge a customer. The bookkeeping solution has estimates which you can automatically change into invoices when the time comes to get a credit card payment from a customer.
Payments: Crucially, business leaders can also get payment for one-off and recurring invoices through FreshBooks payments. The solution provides excellent ease of use for small businesses, so you can set up online payments in no time. The system also offers excellent security, and integration with the rest of your accounting solution.
Go to top
Who is FreshBooks For?
There are plenty of accounting software options out there where you can track time on projects, send invoices, and manage the growth of your business, from Xero to QuickBooks online. There are tools available for all kinds of business owners. In fact, FreshBooks recommends tools for advanced payments depending on the kind of business you want to run.
Self-employed freelancers can access bank reconciliation and set recurring invoices with different payment options without having to purchase a separate add-on. There are even tools for establishing late fees when customers don’t deliver cash on time.
Businesses with employees or contractors also have a range of tools available to them, ideal for improving cash flow, keeping track of due dates for projects, and accepting credit card payments. The FreshBooks help desk and FAQs will show you how to use various features, from late payment reminders to new FreshBooks tools as they arrive.
Go to top
FreshBooks Review: Customer Support
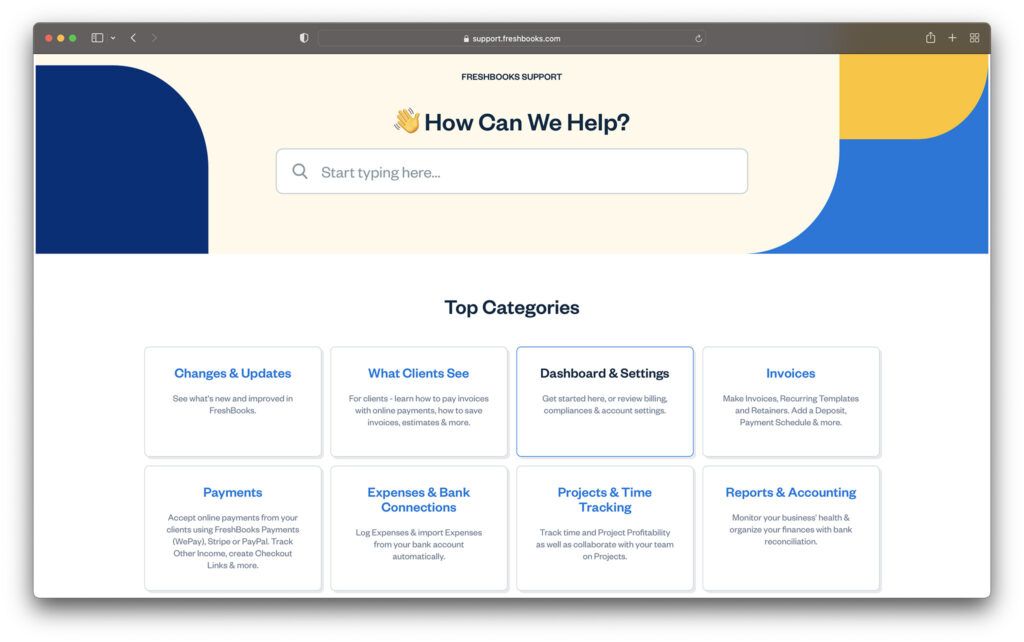
The best support for FreshBooks comes with access to the later, more expensive plans. However, you can still reach out for guidance for things like using invoice templates, PayPal payments, and tips on how to use the FreshBooks mobile app with the contact page.
FreshBooks has award-winning customer service, with both a phone number you can contact and an email address for help requests. There’s also plenty of guidance and tips available on the FAQ page and blog pages if you need extra DIY help with things like integrating Zoho or making the most of your accounting reports.
Go to top
FreshBooks Review: Verdict
FreshBooks is one of the most popular reporting, bookkeeping, and accounting tools on the market today. Offering exceptional customer support, advanced features, and genuine ease of use, it’s a great pick for a range of customers.
Although you might be a little restricted by the Lite plan, companies willing to pay a little more for accounting tools will generally do well with FreshBooks. Remember to examine your business needs carefully before you pick a plan, and make sure you’re getting the right level of technology. You can always reach out to the team if you’re not sure.
The post FreshBooks Review (Dec 2021): Easy Business Accounting? appeared first on Ecommerce Platforms.
Original Source: https://designrfix.com/reviews/best-brother-all-in-one-printer
Are you looking for the best brother all in one printer? Right. An all-in-one printer should be multifunctional with print, scan, copy, and fax. However, we know the task of getting the most ideal is time taking and not very easy. So, we have compiled the top 10 brother printers selected on reliability and efficiency….
The post Best Brother All in One Printer Reviews appeared first on DesignrFix.
Original Source: https://www.webdesignerdepot.com/2021/12/the-ux-of-maps-in-web-design/
 Maps are a fascinating method for delivering content. At their best, they can create an intuitive way of presenting information and interacting with it. This is the advantage that digital maps, through mobile apps and websites, have over print maps and images where no interactivity is possible.
But it’s important to understand that more data ≠ better experiences. We all now have so much data available to us through multiple services that, arguably, the greatest challenge isn’t sourcing information but filtering it out. We can only handle so much information input before we become overloaded. This issue risks being omnipresent with maps. There are so many potential points of interest on a map that it’s essential to be clear about what needs to be exposed to users.
Also, UX design, map design, and user interface are all critical. While maps can be a powerful way of drawing people in, if end-users feel that you didn’t even consider the visual design, they’ll ‘bounce off’ your site or app in moments.
Common Use Cases
When are maps useful, and what problems do they solve? Let’s dive right into the most common use cases for maps used in web design.
Navigation and Direction
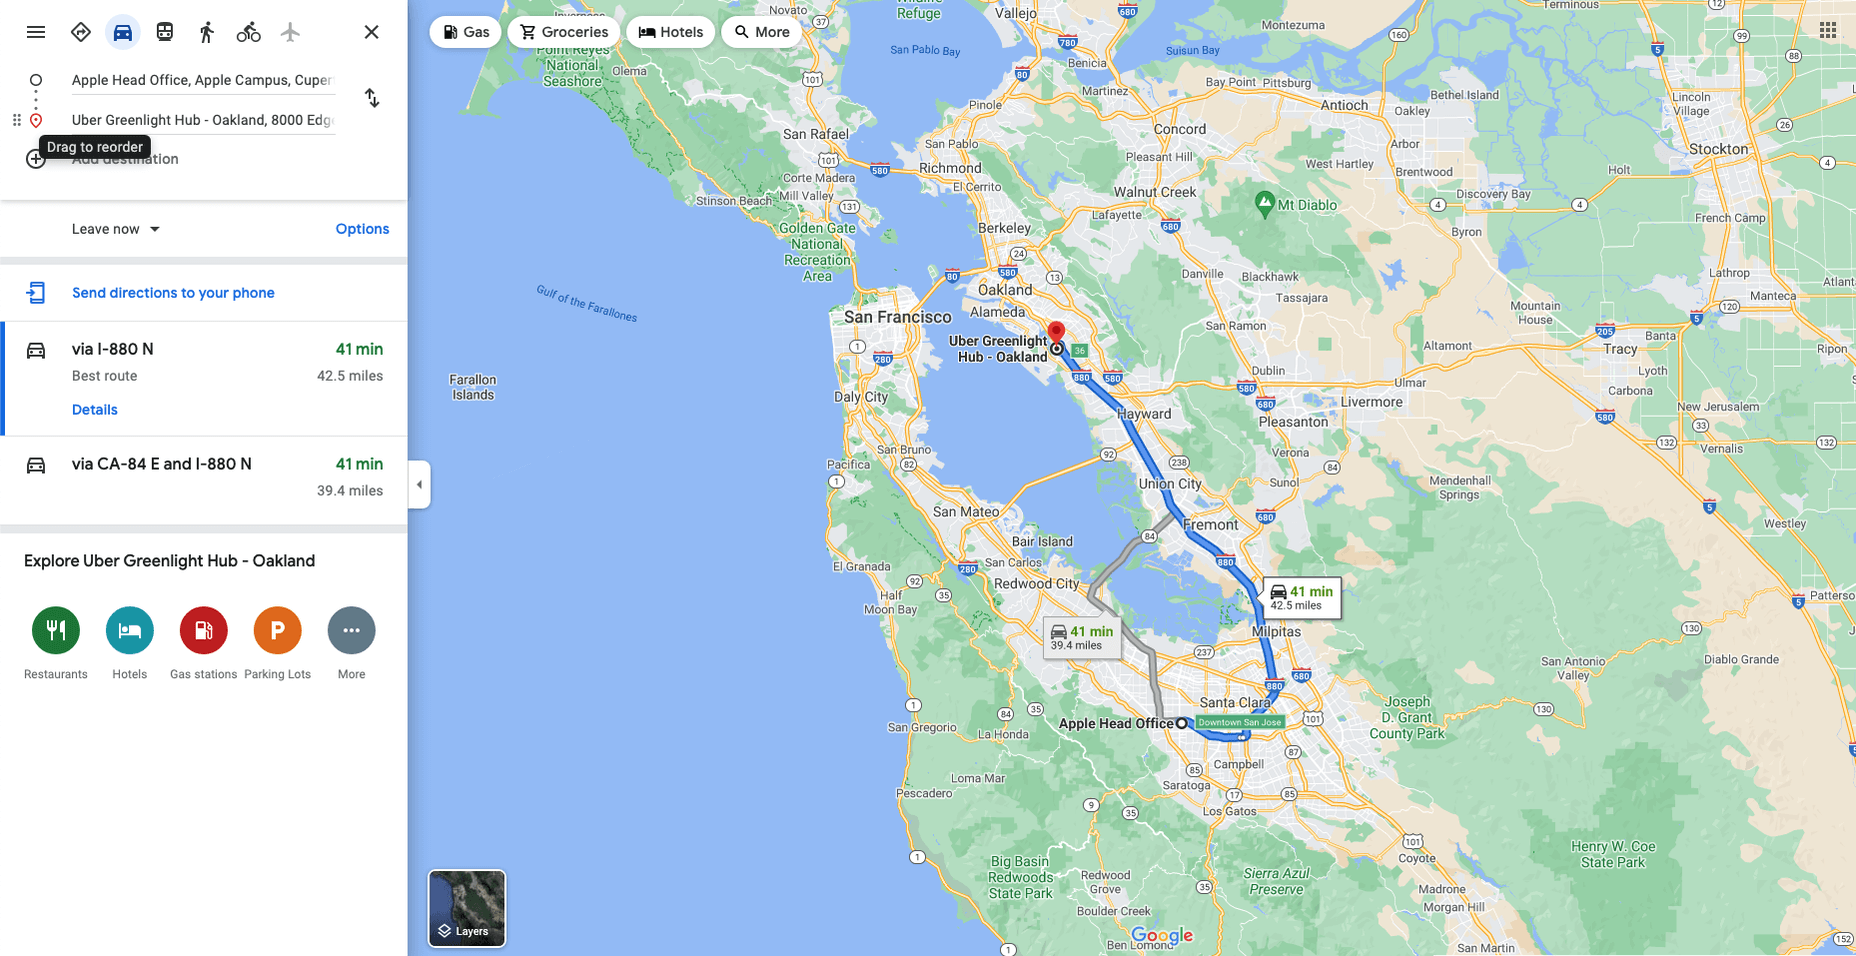
Like Google Maps shows, navigation and direction are arguably the classic case study for interactive maps. You are in one place and need to get to another. You can enter your destination, your current location, and the map will present suggestions for getting there. You can select the method of travel and adjust desired departure or arrival times. But you need to understand first what functionality your users need. How these options are exposed to users is a critical piece of UX design.
Also, if users are searching for options such as somewhere to eat, it’s not so straightforward. Then, how your map handles panning in real-time as users swipe around a city is going to be a big issue.
Showing Relationships and Trends Geographically
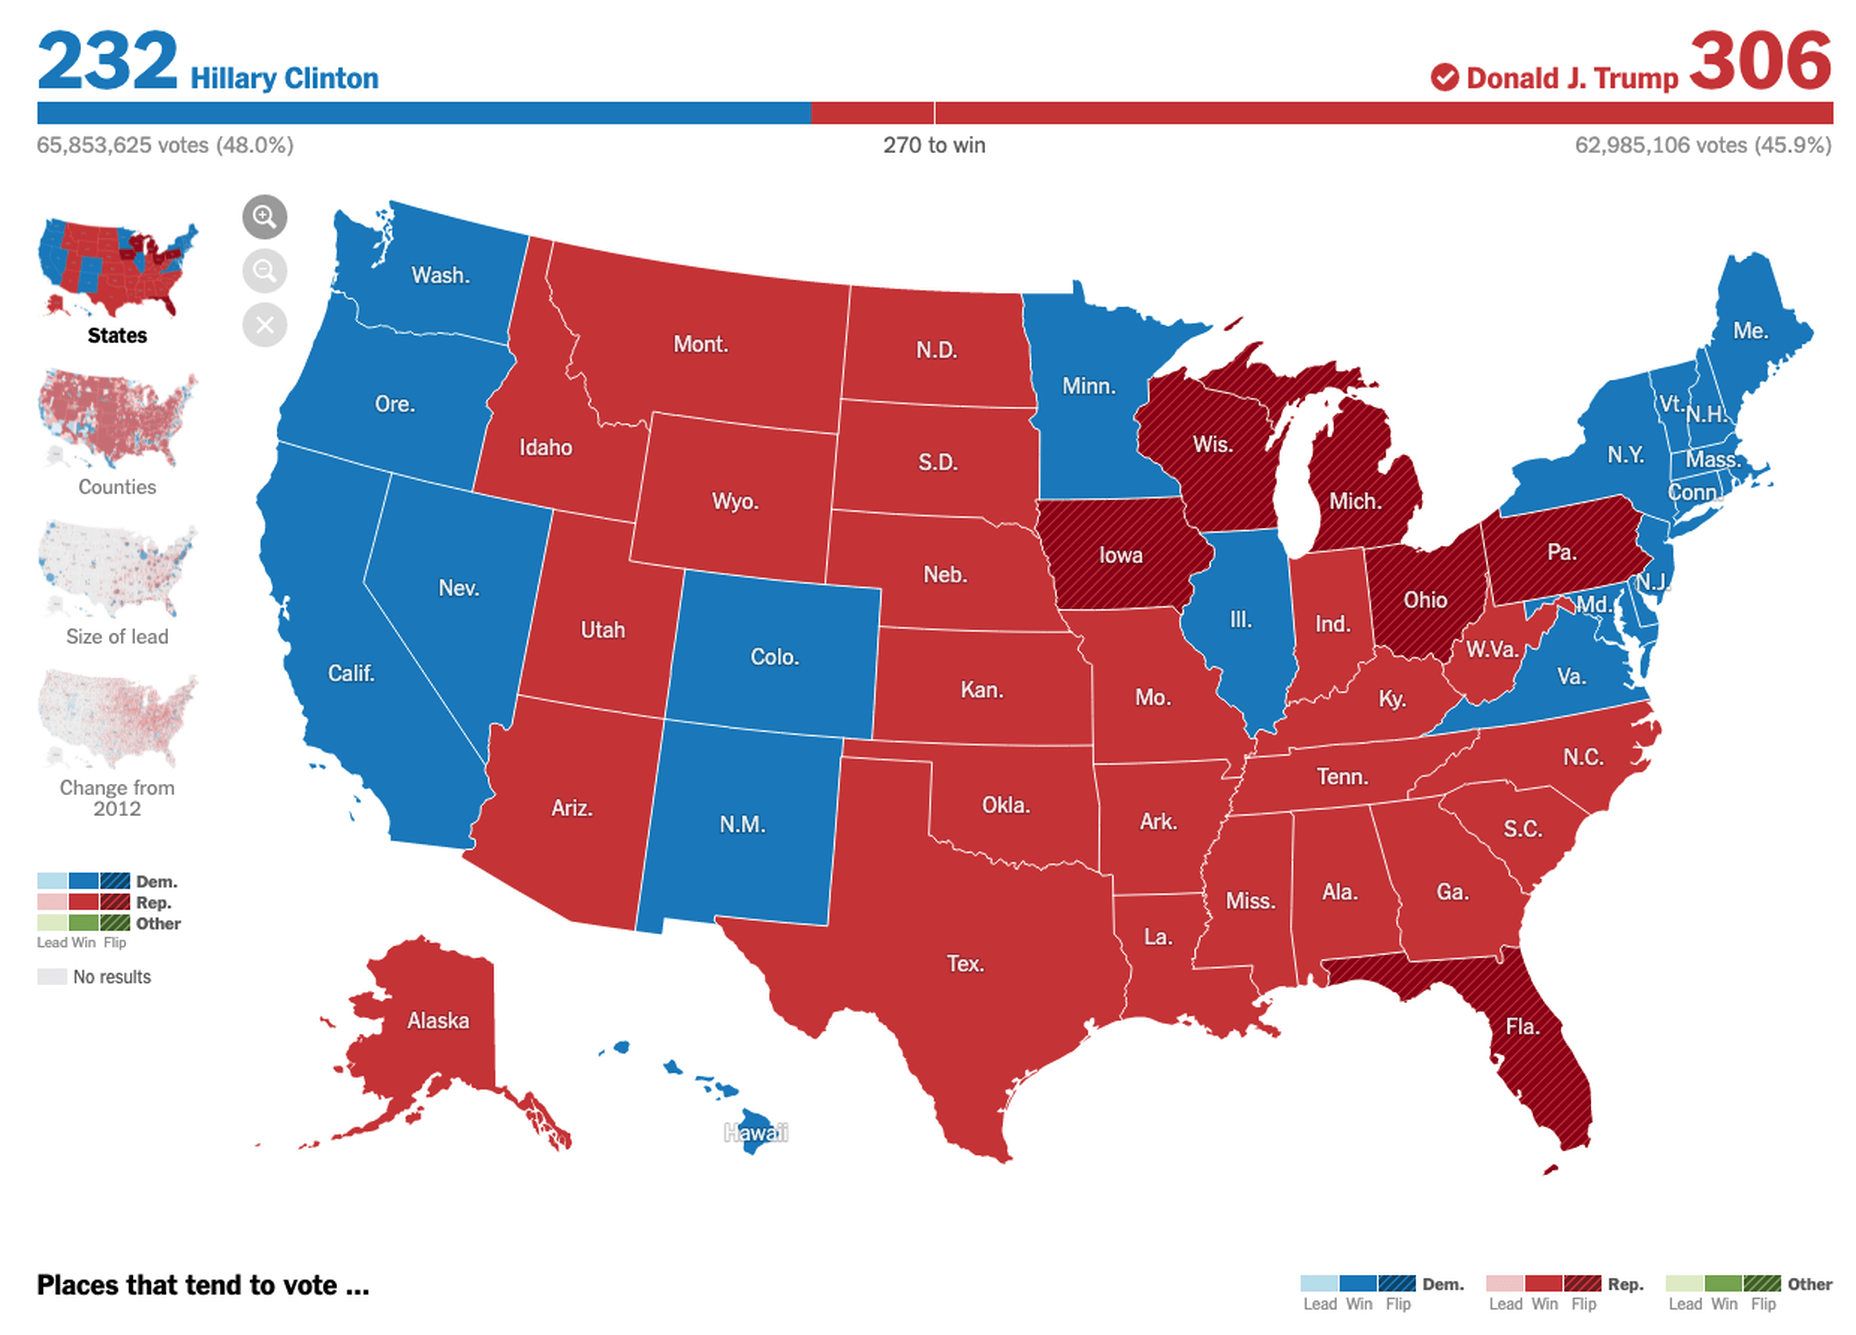
This is something that you’ll see in every election in any western country. We’re all used to seeing maps that give us a state-of-play for which state or seat is held by which party. Then, we might see projections based on voter intentions and projected voting swings deriving from that. Then, exit poll data can be projected with the map updated on an ongoing basis until the final result is confirmed.
The capability to do this is essential because if a static map were used, it’d be out of date any time a new poll was released. Also, voting intentions can change over a campaign, so such maps need to be dynamic. Of course, such maps are only as accurate as the available data, as the US 2016 election map showed.
Show Points of Interest
As mentioned previously, there’s a lot of data that can be exposed to map users. However, that doesn’t automatically mean that it should be. Usability is key. For example, when you look at a map, you’ll typically first see key points of interest. Which points of interest are going to be presented to you can vary.
One variant is zoom level. If your map is currently showing an entire city, the level of detail the map presents is deliberately limited. You’ll see districts, large roads, or geographic features such as rivers. If more detailed information were presented, users on mobile devices, in particular, would be overwhelmed. Even at this level, you’ll notice typography differences. These can include the city name being in bold or the names of different areas in capital letters. So the level of detail is coupled with the scale of the map. Zooming in a few notches will expose significant points of interest, such as museums. Zooming in to specific districts will reveal restaurants, coffee shops, and universities. This visual hierarchy is a critical way of managing the exposed level of information.
But information is still being abstracted away. It’s not until you tap on the museum that you’ll see information on opening hours and busy times. This is also typically presented with user photos and reviews. Context is also taken into account, so you’ll start to see local hotels and restaurants. So it’s not just individual points of interest that are important, but the connections between them.

6 Tips For Improving Interactive Maps
What are the challenges of creating effective maps, and how do people address the data overload problem? We’ll answer this question and go over the must-know aspects of map creation.
1. Ensure Security and Brand Trust
GDPR or General Data Protection Regulation. This is a critically important European law that extends a wide range of legal protection to European citizens regarding personal data. It’s not possible here to cover the full extent of the law, but here are some quick key points:
Consent is required for the processing of personal data; it cannot be assumed
You need to have a retention policy for information that’s capable of identifying people
Be aware that the latter doesn’t just cover commercial purposes. Research students have to submit GDPR forms that address what kind of data they’re sourcing and how they’ll be retaining it.
But the most crucial context is commercial. If a business suffers a data breach, it can be fined up to 20 million euros or 4% of annual worldwide turnover in the preceding financial year, whichever is greater. Therefore, any business storing data that could identify their customers will need to assess risk and compliance. Remember: it’s 4% of worldwide turnover, not EU turnover.
Also, anything of your business that you expose to your customers or users is an extension of your brand. Therefore, you need to assess your maps for brand compliance too. If you have primary brand colors and your map doesn’t abide by them, that’s a very poor look. Source the color hex codes directly from your brand team and involve them in design.
2. Use the Appropriate Type of Map
It’s also important to consider what type of map is most appropriate for your use case. Think carefully about what your users need, what you’re trying to communicate, what information you need to present, and how best to present it.
For example, points of interest style maps in a tourist app will be way more helpful than heat maps: people want to know where something is, key data like opening hours, and how to get there. A heat map showing the number of visitors to each attraction or area of a city is unlikely to be useful to tourists. However, it could be useful to the attractions themselves to map their visitors by heat map over time. This could help larger museums chart which exhibits are most popular.
Transport for London is charting passenger movement on the London Underground by detecting when a device with Wi-Fi comes into range and then passes out of range. They’re using this to understand overall user journeys and movements within individual stations to better manage disruptions.
3. Avoid Pop-Ups
It should go without saying by now that auto pop-ups are despised. It doesn’t matter what they’re doing or what they’re offering; an unwanted pop-up can only get in the way. The level of impact is even greater on a phone where pop-ups take up even more screen space.
Given this, many users close them without even reading them. So if you’re using pop-ups, don’t kid yourself. You’re likely just irritating users and increasing the likelihood that they’ll ‘bounce off’ or uninstall.
4. Avoid Auto-Geolocation
Auto-geolocation sounds incredibly convenient but can result in some real problems. For example, if there are any bugs with auto-geolocation, you could get false results. If someone connects through public building Wi-Fi, you could get false results. If they’re connecting through a VPN then, unless you get the user’s IP address and check if it’s the exit portal of a VPN, you could get false results.
The problem is most significant with mobile maps. If a map user is looking at a points of interest map, they likely have a specific and immediate use. This means it’s in their best to get the most accurate results possible. So why not just ask them?
Precision and Accuracy
These terms have specific meanings in geolocation. ‘Precision’ is the exactness of the data. ‘Accuracy’ is how closely the information on a map matches the real world. So you want precision and accuracy to be spot on, or data risks losing value. This applies not just to the gathering of data but to the representation of it. For example, if you have street-level data but your maps don’t present individual streets, then any representation of data on that map is likely to have poor accuracy. That map might succeed in abstracting irrelevant information but presenting an imprecise and inaccurate view.
5. Avoid Map Legends as Much as Possible
In many cases, primarily points-of-interest maps, they’re just not needed anymore. An essential part of user experience design isn’t just visual hierarchy but information hierarchy. You can mouse over on a desktop or laptop to get the essentials of a location, e.g., the museum’s name and its opening hours. On a mobile device, you can tap on that location to get the essentials, and you can tap on another location to move on; you don’t even have to press back. Given that, a legend would get in the way. So this simple piece of information design solves information overload issues.
As with all rules, there are exceptions. A good one is a heat map where a density of what’s being measured needs to be communicated. It doesn’t matter what the data is; it just needs to be something where mapping provides greater insight, especially if it informs decision-making. Sales is an excellent example for a national or multinational company. Of course, weather forecasting can make use of literal heat maps.
6. Accessibility Compliance
Not everyone has perfect eyesight. Even if someone has excellent vision, they could still be colorblind (8% of men and 0.5% of women are). Given that, take the W3C’s accessibility standards into account and treat them as a baseline or minimum barrier to entry for compliance. You shouldn’t feel good about the possibility of excluding 8% of your potential audience or customers. Ensure you keep your UX designers involved and don’t shy away from creating senior-friendly web designs.
Put simply: imagine if you could appeal to a new demographic that’s not catered to. If your competitors ignore them, you could give them a real reason to choose you instead by taking some straightforward steps. If your competitors are catering to them, you also need to. If you don’t, you’re just giving potential customers a big reason to ignore you.
Conclusions
The key takeaway is that there’s far more to creating good maps than just good cartography. That can be critical, too, though this may vary depending on the use case.
This will be a team effort because your map will involve data sets, design decisions, and, yes, cartography. You’re going to need to involve brand and IT too. So think about design principles and development methodologies.
First and foremost, what are your users’ needs? If you haven’t done any user research or taken the time to understand the customer journey, are you adding anything or getting in the way? It’s easy to see the department that requested the map as stakeholders, but you should probably view your users as stakeholders too.
This sounds complex, but as you hopefully now appreciate, a map is probably more complicated than you thought.
Featured image via Pexels.
Source
p img {display:inline-block; margin-right:10px;}
.alignleft {float:left;}
p.showcase {clear:both;}
body#browserfriendly p, body#podcast p, div#emailbody p{margin:0;}
The post The UX of Maps in Web Design first appeared on Webdesigner Depot.
Original Source: https://designrfix.com/reviews/best-flatbed-printer
Investing in a piece of equipment that will sort all your printing needs at a go requires much attention. When you plan to purchase the best flatbed printer, it’s important to note that though the cost of most printers can be un-nerving, the investment is sky-high. So as long as you manage to make a…
The post Best Flatbed Printer Reviews appeared first on DesignrFix.

