Design SVG graphics in your browser
Original Source: http://feedproxy.google.com/~r/CreativeBloq/~3/gZM9AZ8zogs/design-svg-graphics-in-your-browser
The Vecteezy Editor is a free vector editing suite that runs right in your browser. This tutorial covers the basic shape tools and editing tools you can use to edit any vectors on the site. This way you can build badges, buttons, logos, or anything else with relative ease.
The GUI for this editor feels similar to Adobe software, so if you already use Photoshop or Illustrator, you'll have an easier time learning the ropes. But even complete beginners can dive into this and pick up the basics from scratch.
Get Adobe Creative Cloud
We're going to use these shopping icons from Vecteezy.
Just visit the icons page and click the 'Edit & Download' button. This opens the editor right in your browser so you can customise and build upon these graphics. For this tutorial, we'll show you how to nab some of these icons and convert them into a larger progress bar graphic – the perfect choice for any eCommerce homepage.
So with those shopping icons open in the Vecteezy Editor, we can get started!
01. Pick the icons
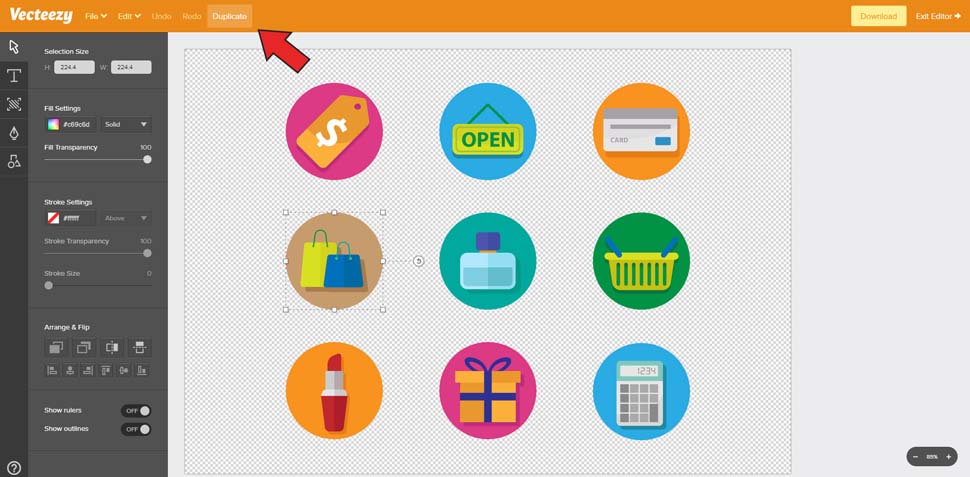
Click into the icon group and select one icon, then click Duplicate at the top
Double-click on the icon group to select all the icons (you might need to double-click twice). I'll use three specific icons for this tutorial: the shopping bags, the credit card and the gift box.
Select the shopping bag and click Duplicate at the very top of the page. This should give you a duplicate of the whole icon. Move this up towards the top and duplicate the other two.
Note: the gift box isn't fully grouped, so when you click to duplicate you'll only select a piece of the icon. To fix this, just drag a selection box over the entire gift icon, then at the top click Edit->Group. Now, you can duplicate the whole present icon with one click.
Once you have duplicates of all three icons, double-click anywhere on the empty canvas. This brings you outside the group of icons so you can select other objects on the page. If you click any of the older icons, you'll select the whole group. This is perfect, because you'll want to drag them down off the canvas so they're out of sight.
02. Clear the rubbish

Change the background opacity if you want it to be white instead of transparent
Double-click on each duplicated icon to access the individual shapes inside. We only need the main icon, so you should select and delete the colourful circle backgrounds and drop shadows.
To do this, simply zoom in very close and select the background circle. Then press Delete, and it should disappear.
If the entire icon disappears – don't panic. Just click Undo near the top or press Ctrl/Cmd+Z and try again. You may need to double-click to get inside the icon group.
By the end, you should have three clean icons ready to use. If you don't like the transparent background you can always access the Background panel in the left-hand menu (third button down) and increase the opacity to 100 per cent for a pure white background.
03. Adding text
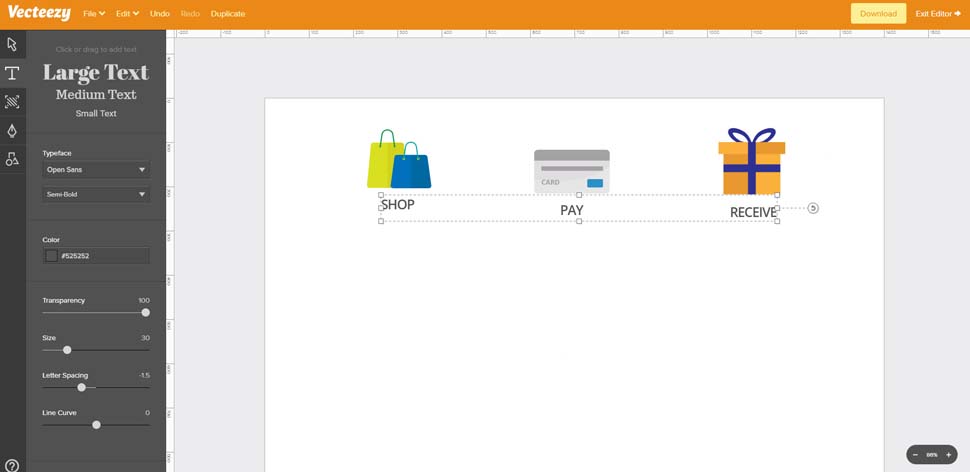
Add text labels under each icon with the same font settings
This progress bar will be incredibly simple; just advertising three stages of an eCommerce shop.
To emphasise this process, let's add labels underneath each icon. In the left-hand toolbar, find the Text tool (second button) then click underneath the bag icon to add a text block. Add the text 'SHOP' and hit Enter on your keyboard.
This auto-selects the text so you can move it around and find a good position. But if you select the Text tool again, you can change the font family, colour, size, letter spacing and other features.
I'm using Open Sans Semi-Bold size 30 with a -1.50 letter spacing. Text colour is #525252.
Duplicate this text twice and place the duplicates under the other icons. Use the text 'PAY' under the credit card icon and 'RECEIVE' under the gift box.
You should use the Select tool for repositioning the icons above the text. Also, space each icon close to equidistant apart if possible.
04. Adjusting graphics
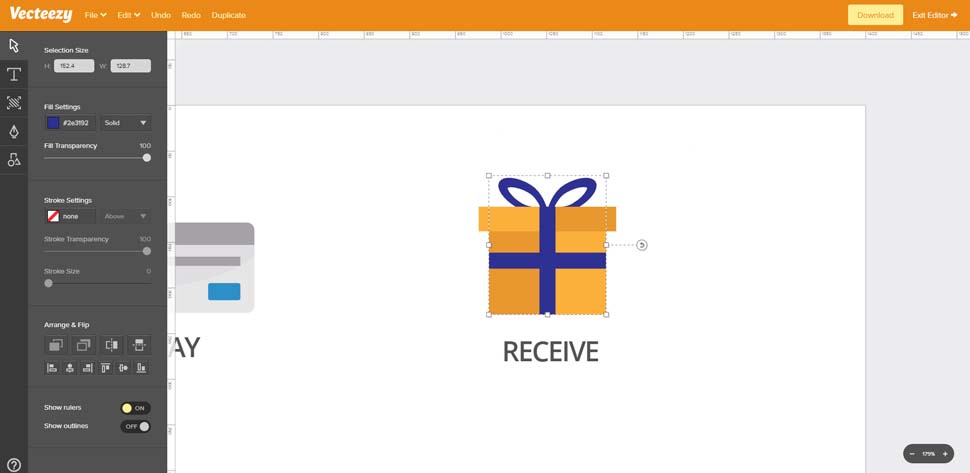
Shift+click to select the ribbon shapes and change the background colour
Before creating the progress bar, you can alter any colours you like in the icons.
To do this, double-click to enter any icon group, then select whatever shape you want to change. In this case, I'll edit the gift box ribbon to change the colour from blue to green.
Once you're inside the icon group, hold Shift while clicking to select more than one item at a time. I'll select the horizontal and vertical rectangles, plus the bow shape at the top.
In the Select panel (first icon in the left-hand menu) find the Fill settings. You'll see the default colour is #2e3192. Click that Fill menu to access a drop-down colour wheel. Here, you can either drag around to find the colour you want, or enter a hex code directly.
Enter #518531 and hit Enter. This should save the result and update all three shapes at once. Feel free to play around with any other colour settings you'd like to change!
05. Starting the progress bar
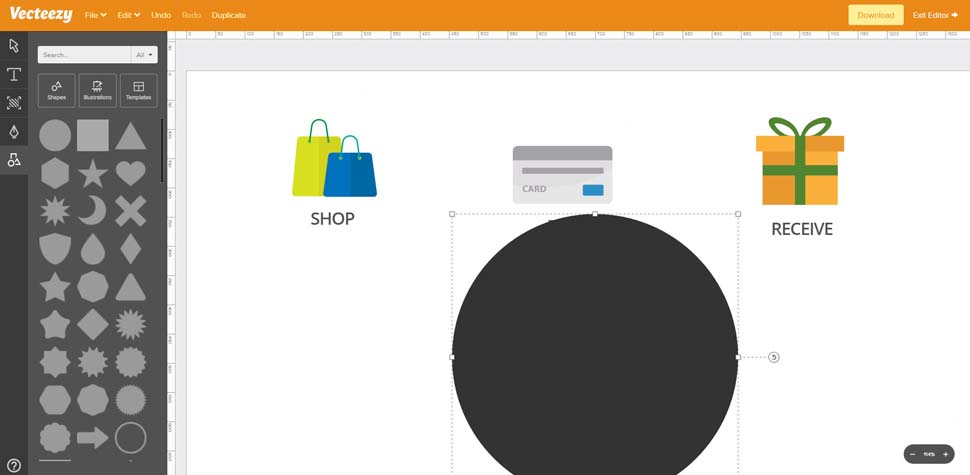
Click the top-left circle in the Elements panel to add a new circle to the canvas
To create a progress bar, you only need two shapes: circles and rectangles. Thankfully, both of these are available in the Elements panel located at the very bottom of the Tools menu.
Click to Elements panel and select the circle shape, which is the very first item in the list. It'll automatically place a dark grey circle in the centre of your workspace.
You can resize the circle by dragging the little white square boxes in the corner or the select boundary. This works well, but it's not as precise as the direct resizing feature.
So instead go back to the Select tool and make sure your new circle is selected. At the very top of the Select tool panel, you should see a selection size with a height and width value.
Enter 100 in both fields and drag your first circle under the first icon.
06. Duplicating circles
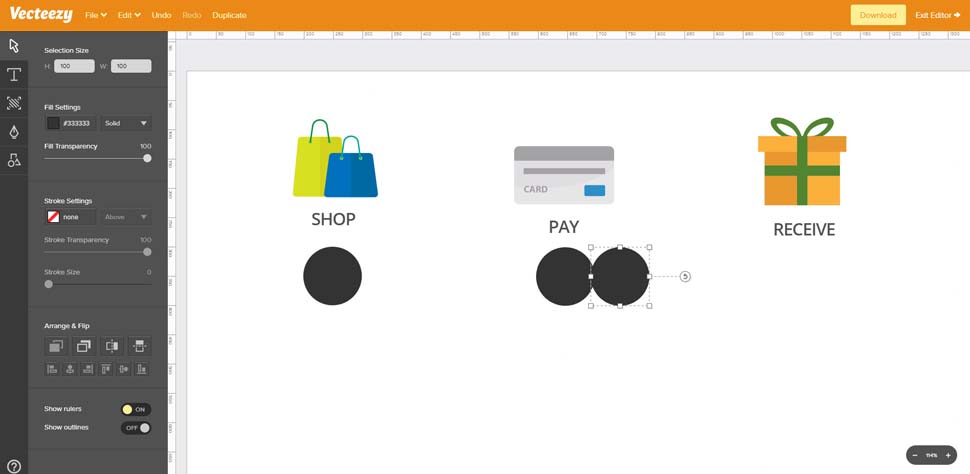
Resize the circle and duplicate twice, then move them under each shopping icon
With your circle shape selected, click Duplicate in the top menu. Now, reposition this duplicate so it aligns closely with your original circle. Try to get it right on top of the first circle so they look like one shape.
Now, if you hold Shift and click, you can drag this duplicate circle in a straight line horizontally. This lets you perfectly align all your circles together in a straight line (or close enough to one).
Do this until you have three different circle shapes at 100 x 100, each placed underneath the three icons.
07. Add some connecting lines
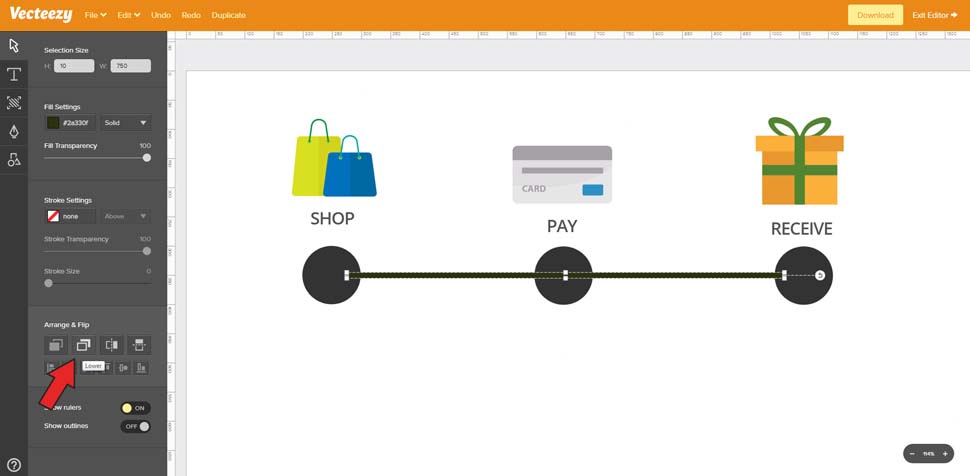
Select the rectangle shape and arrange it behind the three circles
Move back to the Elements panel and find the square shape. Click to add one square onto the canvas.
With this shape selected move back to the Select tool and find the width/height size panel. Since this rectangle should span the entire width of the progress bar, we just need one really long shape. So change the height to 10 and the width to whatever number you need to connect all your circles together. Mine is 750 wide.
Now, with this rectangle in position, look towards the bottom of the Select panel where it says Arrange & Flip. Click the second icon in the top row, which lets you move any selected shape behind the other shapes.
Note: you may have to click the Lower button a few times to get the rectangle behind all three circles. But now the connecting rectangle is only visible between the circle shapes, so we can add text into the circles later.
08. Recolouring
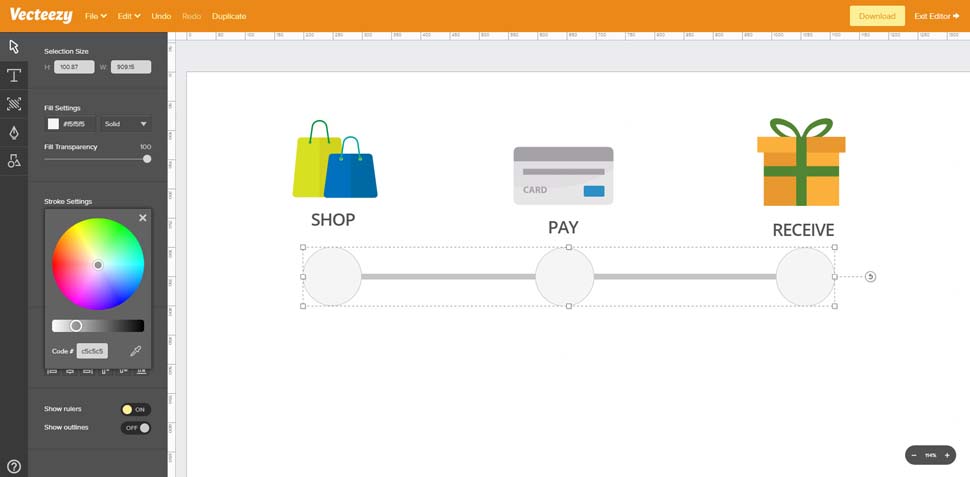
Recolour all the shapes and include a small stroke on the three circles
The current progress bar looks a little dark, so let's alter the colour a bit.
Click to select the long rectangle and find the Fill Settings in the Tools panel. Change the colour to #c5c5c5 and hit Enter.
Now, click anywhere off-canvas to deselect the rectangle. We also want to change the circle colours, and they should be lighter, using the darker grey as a border colour.
Hold Shift, and click each of the three circles. Adjust the fill colour to #f5f5f5, hit Enter and then click the X icon to close the fill colour select panel. Below, you'll find stroke settings. Change the stroke fill to #c5c5c5 and hit Enter.
Click the X icon to close this colour selection panel, then change the stroke size to 6. At this stage I also recommend grouping all the circles and the rectangle together by dragging a selection box and going to Edit>Group. Now, you can adjust the position of all shapes at once with ease.
09. Adding progress steps
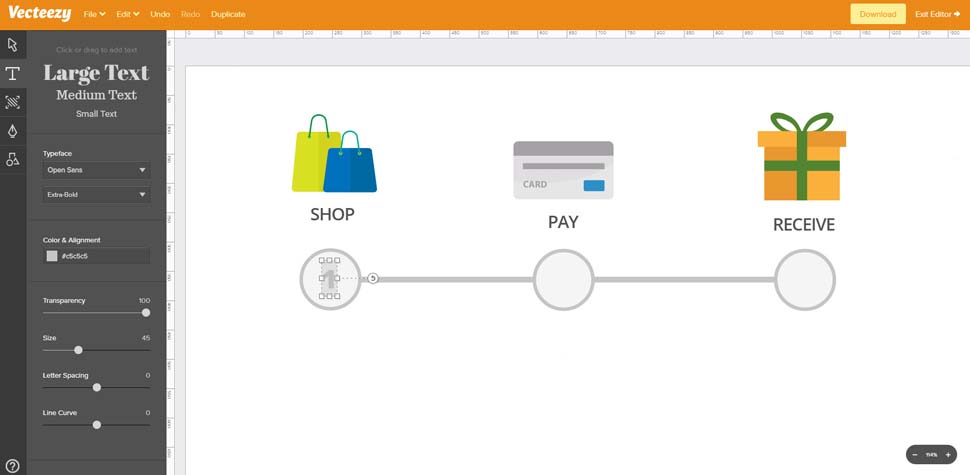
Add a text label into the first circle and duplicate the text for all three shapes
Let's add some numbers into each circle to finalise the progress bar design.
Click the Text tool and enter the number 1 into the first circle. I'm using Open Sans Extra-Bold, size 45 with the colour #c5c5c5 to match the borders. Drag this text so it's positioned in the centre of the circle.
Duplicate the text element and move it into the second circle with the text '2'. Do the same for the third circle with text '3'.
10. Highlight the first step
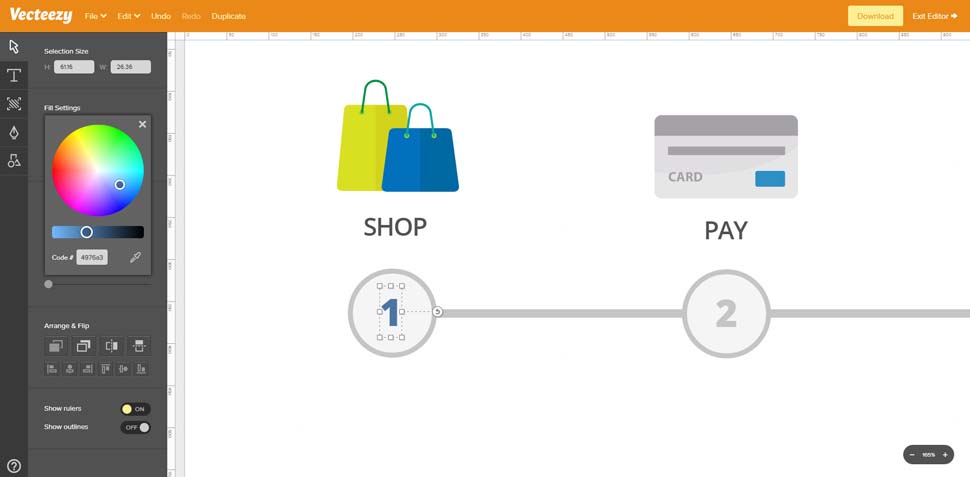
Recolour the first circle blue so it appears like the active progress step
As a finishing touch, let's highlight the very first step using a lighter blue outline. First select the number '1' you just created, and change the fill to #4976a3. Then click to select the circle behind the text. Find the Stroke Settings and change the stroke colour to #4976a3. This should add a dark blue border around the circle. With the circle still selected, click the Fill Settings and change the colour to #e2ebfa.
And that's it! Now you can export this as a PNG/JPG using the Download feature in the top-right corner. You can also hide the white background to export this as a transparent PNG and change the overall document size using the Background panel (third button in the left-side menu).
Or if you'd like to save this for future changes, just go to File>Save For Later. You'll have to create a free Vecteezy account but it's a great way to keep your hard work saved for future reference.
This article originally appeared in net magazine issue 295. Buy it here.
Read more:
10 golden rules for responsive SVGsExplore the exciting new features in SVG 2Supercharge SVG animations with GSAP

Leave a Reply
Want to join the discussion?Feel free to contribute!