Getting Started with Gemini CLI

Original Source: https://www.hongkiat.com/blog/getting-started-with-gemini-cli-guide/

Gemini CLI is a free, open-source tool that brings Googles Gemini AI right into your Terminal.

If you’re a developer, it can help you work faster as it allows you to talk to your system and code in plain English. Aside of dealing with code, you can use it for, writing, research, and more. It’s lightweight, supports long prompts, works with tools like VS Code, and is easy to customize.

But, before you can start using its powerful features, you’ll need to install it on your machine. Let’s see how to install it and how to get everything set up.

Installation

First, install Node.js version 18 or higher on your machine. You can download it from the official Node.js website: Node.js Downloads.

You will also need a personal Google Account or a Gemini API key, which you can get from Google AI Studio, to authenticate your access to Gemini AI.

Once you get either of those, you can either run Gemini CLI instantly using npx:

npx https://github.com/google-gemini/gemini-cli

Or, I would recommend to install it globally with npm, so you can use it from anywhere in your terminal. To do this, run the following command:

npm install -g @google/gemini-cli

After the installation is complete, you can verify whether Gemini CLI is installed correctly by running:

gemini –version

Authentication

When you run Gemini for the first time…

gemini

…you will be asked to select the color theme that it will use to render the codes generated. You can select any of the available themes that suit your preference.

Gemini CLI initial setup showing theme selection interface

Then, you will also need to authenticate your access to Gemini AI by providing your Google Account. Or, If you need higher quotas, beyond the free tier, I’d suggest to provide a Gemini API key from Google AI Studio.

Gemini CLI authentication screen showing Google Account and API key options

Examples and Use Cases

The Gemini CLI can be used for various tasks including for coding assistant, file management, content generation, research, task automation, and even system troubleshooting. Let’s see some of these examples:

Coding Assitant

Gemini CLI can help you write code, debug, and even explain code snippets. For example, you can ask it to write a function in Node.js that calculates the factorial of a number. To do this, you can simply run gemini. This will bring the interactive mode, as we can see below:

By default, it will be using the gemini-2.5-pro. But, if you do not need all the power of the gemini-2.5-pro model, you can switch it to other Gemini models, such as gemini-2.0-flash-lite, which is a lightweight model that is faster and cheaper to use.

gemini –m gemini-2.0-flash-lite

Now, we can ask it to write our function. In this case, I will prompt it to: Generate a function in Node.js that calculates the factorial of a number.

Gemini CLI generating Node.js factorial function code example

It generated the code for us. But we can also ask it even further to save it in a file, such as factorial.js. To do this, we can simply prompt it to: Save this code in a file named factorial.js.

You will be asked permission to save the file, and you can either allow it once or always. If you choose to allow it always, it will save the file without asking you again in the future.

Gemini CLI saving generated code to factorial.js with permission prompt

Now, we should find the file in the current working directory.

Terminal showing ls command output with newly created factorial.js file

File and Project

As mentioned earlier, Gemini CLI can also help you with file management. For example, you can ask it to create a new directory for your project, and then create a new file inside that directory.

In this example, I’d like to ask Gemini to scaffold a new Go project for me. To do this I will ask it a bit more detail about what needs to be created inside the initial project, for example:

I want to scaffold a new Go project with the following details:

* Module name: github.com/tfirdaus/go-project
* Language: Go
* Purpose: A simple CLI application
* Go version: 1.20+
* Dependency management: Go modules

Please generate:

1. A standard directory structure
2. Initial go.mod file
3. A minimal main.go file (if applicable)
4. Sample README.md
5. Optional: .gitignore for Go projects
6. Test file example

Use idiomatic Go practices and organize the code to be easy to extend later.

After sending this prompt, Gemini will ask you some permissions to make some changes on the file system such as for changing directory, creating directory, creating and writing files.

Gemini CLI requesting permissions for scaffolding a new Go project

After you allow it, it will start creating the project structure for you, and you can check the result by running ls command:

Terminal showing the generated Go project structure with ls command

Wrapping up

Gemini CLI is a powerful and flexible tool that can help you with all kinds of tasks, from coding and managing files to generating content and answering questions. It’s easy to install, simple to set up, and works right from your terminal using plain language commands.

In this article, we walked through how to install Gemini CLI, setting it up, and explored a few practical examples, like using it to help with code and generate an initial project structure.

But there’s much more to explore. In upcoming articles, we’ll dive deeper into Gemini CLI’s advanced features, like integrating with Model Context Protocol (MCP), customizing context and behavior, and using some of its built-in tools.

Stay tuned for more tips to help you get the most out of Gemini CLI!

The post Getting Started with Gemini CLI appeared first on Hongkiat.

Stories Of August (2025 Wallpapers Edition)

Original Source: https://smashingmagazine.com/2025/07/desktop-wallpaper-calendars-august-2025/

Everybody loves a beautiful wallpaper to freshen up their desktops and home screens, right? To cater for new and unique designs on a regular basis, we started our monthly wallpapers series more than 14 years ago, and from the very beginning to today, artists and designers from across the globe have accepted the challenge and submitted their artworks. This month is no exception, of course.

In this post, you’ll find desktop wallpapers for August 2025, along with a selection of timeless designs from our archives that are bound to make your August extra colorful. A big thank you to everyone who tickled their creativity and shared their wallpapers with us this month — this post wouldn’t exist without your kind support!

Now, if you’re feeling inspired after browsing this collection, why not submit a wallpaper to get featured in one of our upcoming posts? Fire up your favorite design tool, grab your camera or pen and paper, and tell the story you want to tell. We can’t wait to see what you’ll come up with! Happy August!

You can click on every image to see a larger preview.
We respect and carefully consider the ideas and motivation behind each and every artist’s work. This is why we give all artists the full freedom to explore their creativity and express emotions and experience through their works. This is also why the themes of the wallpapers weren’t anyhow influenced by us but rather designed from scratch by the artists themselves.

August Afloat

“Set sail into a serene summer moment with this bright and breezy wallpaper. A wooden boat drifts gently across wavy blue waters dotted with lily pads, capturing the stillness and simplicity of late August days.” — Designed by Libra Fire from Serbia.

preview
with calendar: 320×480, 640×480, 800×480, 800×600, 1024×768, 1024×1024, 1152×864, 1280×720, 1280×800, 1280×960, 1280×1024, 1400×1050, 1440×900, 1600×1200, 1680×1050, 1680×1200, 1920×1080, 1920×1200, 1920×1440, 2560×1440
without calendar: 320×480, 640×480, 800×480, 800×600, 1024×768, 1024×1024, 1152×864, 1280×720, 1280×800, 1280×960, 1280×1024, 1400×1050, 1440×900, 1600×1200, 1680×1050, 1680×1200, 1920×1080, 1920×1200, 1920×1440, 2560×1440

Dive Into Summer Mode

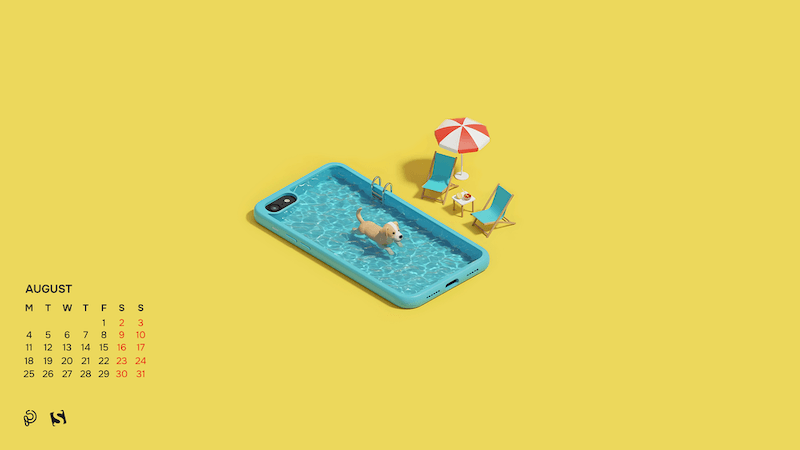
“When your phone becomes a pool and your pup’s living the dream — it’s a playful reminder that sometimes the best escapes are simple: unplug, slow down, soak in the sunshine, and let your imagination do the swimming.” — Designed by PopArt Studio from Serbia.
preview
with calendar: 320×480, 640×480, 800×480, 800×600, 1024×768, 1024×1024, 1152×864, 1280×720, 1280×800, 1280×960, 1280×1024, 1400×1050, 1440×900, 1600×1200, 1680×1050, 1680×1200, 1920×1080, 1920×1200, 1920×1440, 2560×1440
without calendar: 320×480, 640×480, 800×480, 800×600, 1024×768, 1024×1024, 1152×864, 1280×720, 1280×800, 1280×960, 1280×1024, 1400×1050, 1440×900, 1600×1200, 1680×1050, 1680×1200, 1920×1080, 1920×1200, 1920×1440, 2560×1440

Sea Shanties And Ears In The Wind

“August is like a boat cruise swaying with the rhythm of sea shanties. Our mascot really likes to have its muzzle caressed by the salty sea wind and getting its ears warmed by the summer sun.” — Designed by Caroline Boire from France.

preview
with calendar: 320×480, 640×480, 800×480, 800×600, 1024×768, 1024×1024, 1152×864, 1280×720, 1280×800, 1280×960, 1280×1024, 1400×1050, 1440×900, 1600×1200, 1680×1050, 1680×1200, 1920×1080, 1920×1200, 1920×1440, 2560×1440
without calendar: 320×480, 640×480, 800×480, 800×600, 1024×768, 1024×1024, 1152×864, 1280×720, 1280×800, 1280×960, 1280×1024, 1400×1050, 1440×900, 1600×1200, 1680×1050, 1680×1200, 1920×1080, 1920×1200, 1920×1440, 2560×1440

Queen Of August

“August 8 is International Cat Day, so of course the month belongs to her majesty. Confident, calm, and totally in charge. Just like every cat ever.” — Designed by Ginger IT Solutions from Serbia.

preview
with calendar: 320×480, 640×480, 800×480, 800×600, 1024×768, 1024×1024, 1152×864, 1280×720, 1280×800, 1280×960, 1280×1024, 1400×1050, 1440×900, 1600×1200, 1680×1050, 1680×1200, 1920×1080, 1920×1200, 1920×1440, 2560×1440
without calendar: 320×480, 640×480, 800×480, 800×600, 1024×768, 1024×1024, 1152×864, 1280×720, 1280×800, 1280×960, 1280×1024, 1400×1050, 1440×900, 1600×1200, 1680×1050, 1680×1200, 1920×1080, 1920×1200, 1920×1440, 2560×1440

Happiness Happens In August

“Many people find August one of the happiest months of the year because of holidays. You can spend days sunbathing, swimming, birdwatching, listening to their joyful chirping, and indulging in sheer summer bliss. August 8th is also known as the Happiness Happens Day, so make it worthwhile.” — Designed by PopArt Studio from Serbia.

preview
without calendar: 320×480, 640×480, 800×480, 800×600, 1024×768, 1024×1024, 1152×864, 1280×720, 1280×800, 1280×960, 1280×1024, 1366×768, 1400×1050, 1440×900, 1600×1200, 1680×1050, 1680×1200, 1920×1080, 1920×1200, 1920×1440, 2560×1440

Nostalgia

“August, the final breath of summer, brings with it a wistful nostalgia for a season not yet past.” — Designed by Ami Totorean from Romania.

preview
without calendar: 1440×900, 1600×1200, 1680×1050, 1680×1200, 1920×1080, 1920×1200, 1920×1440, 2560×1440

Relax In Bora Bora

“As we have taken a liking to diving through the coral reefs, we’ll also spend August diving and took the leap to Bora Bora. There we enjoy the sea and nature and above all, we rest to gain strength for the new course that is to come.” — Designed by Veronica Valenzuela from Spain.

preview
without calendar: 640×480, 800×480, 1024×768, 1280×720, 1280×800, 1440×900, 1600×1200, 1920×1080, 1920×1440, 2560×1440

Banana!

Designed by Ricardo Gimenes from Spain.

preview
without calendar: 640×480, 800×480, 800×600, 1024×768, 1024×1024, 1152×864, 1280×720, 1280×800, 1280×960, 1280×1024, 1366×768, 1400×1050, 1440×900, 1600×1200, 1680×1050, 1680×1200, 1920×1080, 1920×1200, 1920×1440, 2560×1440, 3840×2160

Summer Day

Designed by Kasturi Palmal from India.

preview
without calendar: 800×600, 1280×1024, 1600×1200, 1680×1200, 1920×1080, 1920×1200, 1920×1440, 2560×1440

Retro Road Trip

“As the sun dips below the horizon, casting a warm glow upon the open road, the retro van finds a resting place for the night. A campsite bathed in moonlight or a cozy motel straight from a postcard become havens where weary travelers can rest, rejuvenate, and prepare for the adventures that await with the dawn of a new day.” — Designed by PopArt Studio from Serbia.

preview
without calendar: 320×480, 640×480, 800×480, 800×600, 1024×768, 1024×1024, 1152×864, 1280×720, 1280×800, 1280×960, 1280×1024, 1400×1050, 1440×900, 1600×1200, 1680×1050, 1680×1200, 1920×1080, 1920×1200, 1920×1440, 2560×1440

Spooky Campfire Stories

Designed by Ricardo Gimenes from Spain.

preview
without calendar: 640×480, 800×480, 800×600, 1024×768, 1024×1024, 1152×864, 1280×720, 1280×800, 1280×960, 1280×1024, 1366×768, 1400×1050, 1440×900, 1600×1200, 1680×1050, 1680×1200, 1920×1080, 1920×1200, 1920×1440, 2560×1440, 3840×2160

Bee Happy!

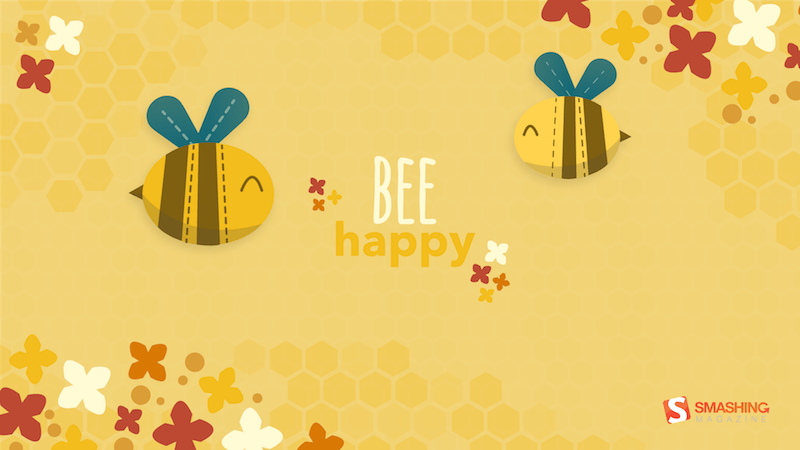
“August means that fall is just around the corner, so I designed this wallpaper to remind everyone to ‘bee happy’ even though summer is almost over. Sweeter things are ahead!” — Designed by Emily Haines from the United States.
preview
without calendar: 640×480, 800×600, 1280×720, 1280×800, 1280×960, 1366×768, 1400×1050, 1440×900, 1600×1200, 1680×1050, 1680×1200, 1920×1080, 1920×1200, 1920×1440, 2560×1440

Oh La La… Paris’ Night

“I like the Paris night! All is very bright!” — Designed by Verónica Valenzuela from Spain.

preview
without calendar: 800×480, 1024×768, 1152×864, 1280×800, 1280×960, 1440×900, 1680×1200, 1920×1080, 2560×1440

Cowabunga

Designed by Ricardo Gimenes from Spain.
preview
without calendar: 640×480, 800×480, 800×600, 1024×768, 1024×1024, 1152×864, 1280×720, 1280×800, 1280×960, 1280×1024, 1366×768, 1400×1050, 1440×900, 1600×1200, 1680×1050, 1680×1200, 1920×1080, 1920×1200, 1920×1440, 2560×1440, 3840×2160

Childhood Memories

Designed by Francesco Paratici from Australia.

preview
without calendar: 320×480, 1024×768, 1024×1024, 1280×800, 1280×1024, 1366×768, 1440×900, 1680×1050, 1920×1080, 1920×1200, 2560×1440

Summer Nap

Designed by Dorvan Davoudi from Canada.

preview
without calendar: 800×480, 800×600, 1152×864, 1280×720, 1280×800, 1280×960, 1280×1024, 1366×768, 1400×1050, 1440×900, 1600×1200, 1680×1050, 1680×1200, 1920×1080, 1920×1200, 1920×1440, 2560×1440

Live In The Moment

“My dog Sami inspired me for this one. He lives in the moment and enjoys every second with a big smile on his face. I wish we could learn to enjoy life like he does! Happy August everyone!” — Designed by Westie Vibes from Portugal.

preview
without calendar: 320×480, 1024×1024, 1080×1920, 1680×1200, 1920×1080, 2560×1440

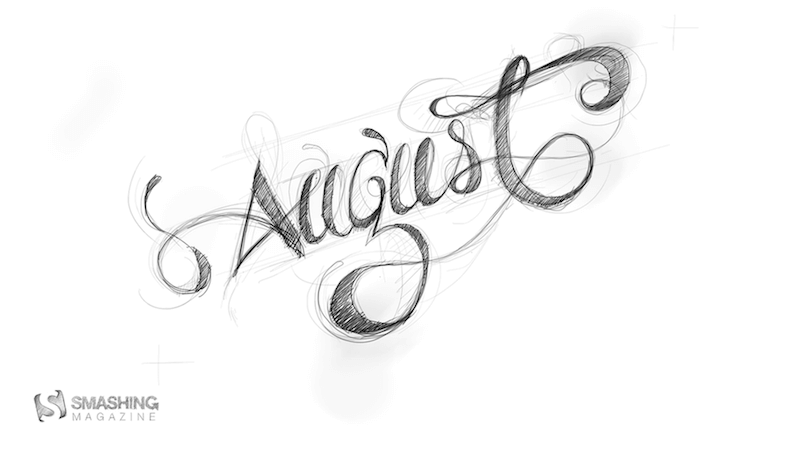
Handwritten August

“I love typography handwritten style.” — Designed by Chalermkiat Oncharoen from Thailand.
preview
without calendar: 320×480, 640×480, 800×480, 800×600, 1024×768, 1024×1024, 1152×864, 1280×720, 1280×800, 1280×960, 1280×1024, 1400×1050, 1440×900, 1600×1200, 1680×1050, 1680×1200, 1920×1080, 1920×1200, 1920×1440, 2560×1440

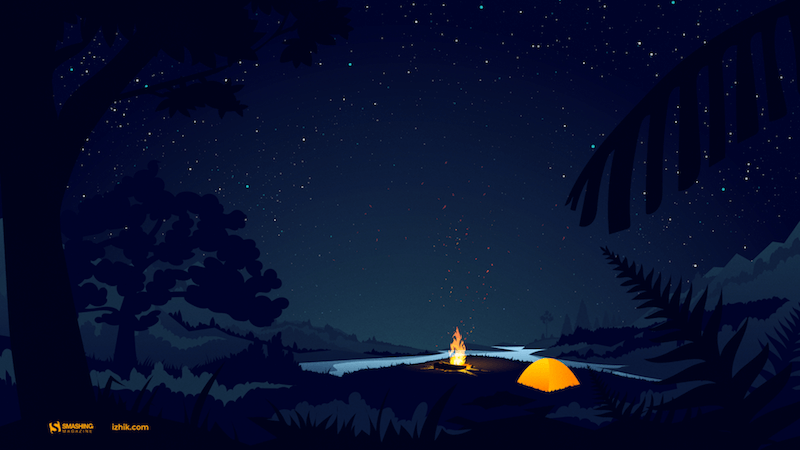
Psst, It’s Camping Time…

“August is one of my favorite months, when the nights are long and deep and crackling fire makes you think of many things at once and nothing at all at the same time. It’s about heat and cold which allow you to touch the eternity for a few moments.” — Designed by Igor Izhik from Canada.
preview
without calendar: 1024×768, 1024×1024, 1280×720, 1280×800, 1280×960, 1280×1024, 1400×1050, 1440×900, 1600×1200, 1680×1050, 1680×1200, 1920×1080, 1920×1200, 1920×1440, 2560×1440

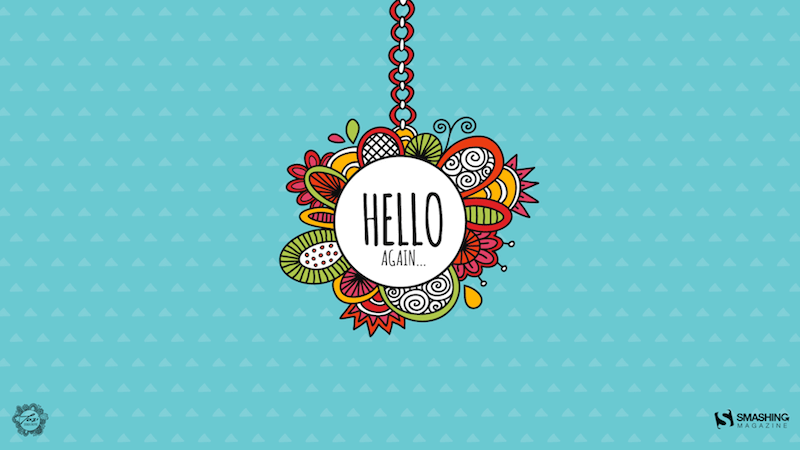
Hello Again

“In Melbourne it is the last month of quite a cool winter so we are looking forward to some warmer days to come.” — Designed by Tazi from Australia.
preview
without calendar: 320×480, 640×480, 800×600, 1024×768, 1152×864, 1280×720, 1280×960, 1600×1200, 1920×1080, 1920×1440, 2560×1440

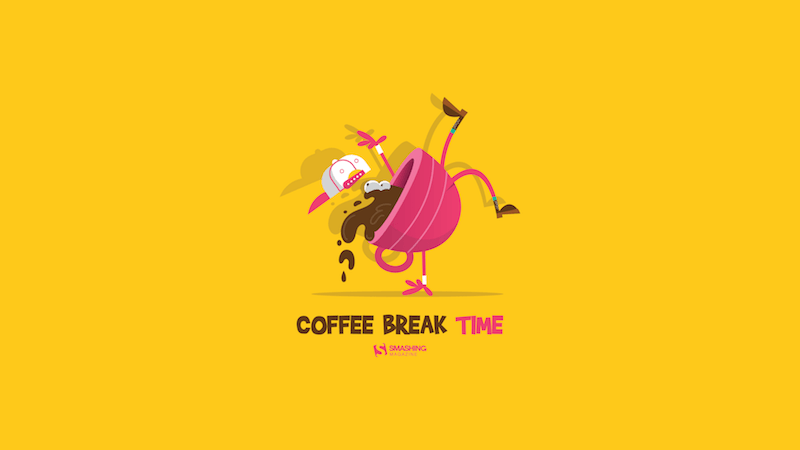
Coffee Break Time

Designed by Ricardo Gimenes from Spain.
preview
without calendar: 320×480, 640×480, 800×480, 800×600, 1024×768, 1024×1024, 1152×864, 1280×720, 1280×800, 1280×960, 1280×1024, 1366×768, 1400×1050, 1440×900, 1600×1200, 1680×1050, 1680×1200, 1920×1080, 1920×1200, 1920×1440, 2560×1440

Subtle August Chamomiles

“Our designers wanted to create something summery, but not very colorful, something more subtle. The first thing that came to mind was chamomile because there are a lot of them in Ukraine and their smell is associated with a summer field.” — Designed by MasterBundles from Ukraine.

preview
without calendar: 320×480, 640×480, 800×480, 800×600, 1024×768, 1024×1024, 1152×864, 1280×720, 1280×800, 1280×960, 1280×1024, 1366×768, 1400×1050, 1440×900, 1600×1200, 1680×1050, 1680×1200, 1920×1080, 1920×1200, 1920×1440, 2560×1440

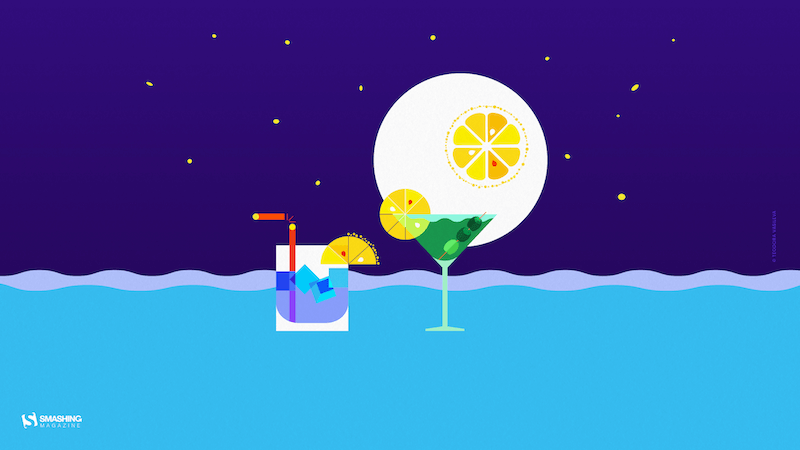
Party Night Under The Stars

“August… it’s time for a party and summer vacation — sea, moon, stars, music… and magical vibrant colors.” — Designed by Teodora Vasileva from Bulgaria.
preview
without calendar: 640×480, 800×480, 800×600, 1024×768, 1280×720, 1280×960, 1280×1024, 1400×1050, 1680×1050, 1680×1200, 1920×1080, 1920×1200, 1920×1440, 2560×1440

A Bloom Of Jellyfish

“I love going to aquariums – the colors, patterns, and array of blue hues attract the nature lover in me while still appeasing my design eye. One of the highlights is always the jellyfish tanks. They usually have some kind of light show in them, which makes the jellyfish fade from an intense magenta to a deep purple — and it literally tickles me pink. We discovered that the collective noun for jellyfish is a bloom and, well, it was love-at-first-collective-noun all over again. I’ve used some intense colors to warm up your desktop and hopefully transport you into the depths of your own aquarium.” — Designed by Wonderland Collective from South Africa.

preview
without calendar: 320×480, 800×600, 1024×768, 1280×960, 1680×1050, 1920×1200, 2560×1440

Colorful Summer

“‘Always keep mint on your windowsill in August, to ensure that the buzzing flies will stay outside where they belong. Don’t think summer is over, even when roses droop and turn brown and the stars shift position in the sky. Never presume August is a safe or reliable time of the year.’ (Alice Hoffman)” — Designed by Lívi from Hungary.

preview
without calendar: 800×480, 1024×768, 1280×720, 1280×1024, 1400×1050, 1680×1050, 1680×1200, 1920×1200, 2560×1440, 3475×4633

Searching For Higgs Boson

Designed by Vlad Gerasimov from Georgia.

preview
without calendar: 800×600, 960×600, 1024×768, 1152×864, 1229×768, 1280×800, 1280×960, 1280×1024, 1400×1050, 1440×900, 1440×900, 1440×960, 1600×1200, 1600×1200, 1680×1050, 1728×1080, 1920×1200, 1920×1440, 2304×1440, 2560×1600

Freak Show Vol. 1

Designed by Ricardo Gimenes from Spain.

preview
without calendar: 640×480, 800×480, 800×600, 1024×768, 1024×1024, 1152×864, 1280×720, 1280×800, 1280×960, 1280×1024, 1366×768, 1400×1050, 1440×900, 1600×1200, 1680×1050, 1680×1200, 1920×1080, 1920×1200, 1920×1440, 2560×1440, 3840×2160

Grow Where You Are Planted

“Every experience is a building block on your own life journey, so try to make the most of where you are in life and get the most out of each day.” — Designed by Tazi Design from Australia.

preview
without calendar: 320×480, 640×480, 800×600, 1024×768, 1152×864, 1280×720, 1280×960, 1600×1200, 1920×1080, 1920×1440, 2560×1440

Chill Out

“Summer is in full swing and Chicago is feeling the heat! Take some time to chill out!” — Designed by Denise Johnson from Chicago.

preview
without calendar: 1024×768, 1280×800, 1280×1024, 1440×900, 1600×1200, 1920×1200

Estonian Summer Sun

“This is a moment from Southern Estonia that shows amazing summer nights.” Designed by Erkki Pung from Estonia.

preview
without calendar: 320×480, 1024×1024, 1280×800, 1440×900, 1920×1200

Adobe Firefly Hands the Director’s Chair to You—Remix The Unfinished Film

Original Source: https://abduzeedo.com/adobe-firefly-hands-directors-chair-you-remix-unfinished-film

Adobe Firefly Hands the Director’s Chair to You—Remix The Unfinished Film

The Unfinished Film: Adobe Firefly Hands the Director’s Chair

ibby
07/31 — 2025

Remix an unfinished film with Adobe Firefly. Use AI tools to direct, design, and share your own cinematic vision. The story starts with you.

What if a story didn’t start with a script or storyboard—but with a spark? That’s the idea behind The Unfinished Film, a new collaborative project from Adobe Firefly and director Sam Finn. At its core, it’s a creative invitation: download an unfinished film sequence, open up Firefly, and let your imagination take the lead. No rules, no roadmap just pure, generative experimentation.

Create Your Own Story with Adobe Firefly AI

Sam Finn’s original cut is the catalyst, but the film isn’t the point. The process is. Built on Adobe Firefly’s growing suite of generative tools—including video, audio, and visual effects—this project gives creators the power to remix, reframe, and reimagine with cinematic control. Whether you’re a motion designer, creative coder, or indie filmmaker, Firefly helps you move from concept to screen without friction.

And this isn’t automation. It’s amplification. The app includes tools like Firefly Boards for collaborative ideation, seamless integration with third-party models like Veo3 and Runway Gen-4, and support for moodboarding, style transfer, and more. Each output includes Content Credentials, so your vision stays yours.

From Claymation to Cinematics

To show what’s possible, four creators took Sam’s sequence and turned it into something completely their own. Their reimagined films—and behind-the-scenes looks—are live now at @adobefirefly.

Noémie Pino blended claymation and generative effects to create a dreamy, handcrafted narrative that’s tactile and deeply personal.
Phil Cohen fused fashion, visual effects, and futuristic transitions to push cinematic AI storytelling.
Jad Kassis used Firefly across image, video, and ideation tools to spotlight emotional storytelling with fast, fluid workflows.
Keenan Lam brought an educator’s lens—demonstrating how AI can expand creative control rather than compromise it.

It used to take years of learning—and a lot of money—to make a film. Now anyone with a vision can start. I’m excited to see what creators from non-traditional backgrounds will make when those barriers fall away. That’s what The Unfinished Film is about: opening the door for new voices and unexpected perspectives.

-Sam Finn (@samfinn.studio), director of The Unfinished Film project
The Scene Is Set. The Rest Is Yours.

Want to finish The Unfinished Film? Start now — because your best ideas are just getting started. Download Firefly in the iOS App Store and Google Play Store. And share your take using #AdobeFirefly.

Film Artifacts

The Unfinished Film: Adobe Firefly Hands the Director’s Chair

The Unfinished Film: Adobe Firefly Hands the Director’s Chair

The Unfinished Film: Adobe Firefly Hands the Director’s Chair

The Unfinished Film: Adobe Firefly Hands the Director’s Chair

The Unfinished Film: Adobe Firefly Hands the Director’s Chair

The Unfinished Film: Adobe Firefly Hands the Director’s Chair

The Unfinished Film: Adobe Firefly Hands the Director’s Chair

The Unfinished Film: Adobe Firefly Hands the Director’s Chair

Google Graveyard Revisited: Shutdowns Since 2015

Original Source: https://www.hongkiat.com/blog/google-graveyard-2015/

We know them for Search, Gmail, Android… the giants. But Google’s also famous for something else: trying out tons of ideas. Seriously, hundreds of them! This ‘throw it at the wall and see what sticks’ approach means innovation, but it also means… well, a lot doesn’t stick.

Over the years, Google has become notorious for shutting down services, sometimes leaving us users scrambling for alternatives, other times making us go, ‘Wait, that was a thing?’. This post is a trip down memory lane, revisiting the Google ‘graveyard’ starting from 2015.

100+ Must-Know Google Services and Tools to Boost Your Productivity

.no-js #ref-block-post-25395 .ref-block__thumbnail { background-image: url(“https://assets.hongkiat.com/uploads/thumbs/250×160/google-services-tools.jpg”); }

100+ Must-Know Google Services and Tools to Boost Your Productivity

Mention Google products and you’d probably think of Google Search, Gmail, Chrome, YouTube or Android but there are… Read more

Google TV

(Discontinued on: Jan 6, 2015)

Announced in May of 2010, Google Video seemed like a smart idea for giving viewers an enhanced TV experience with an interactive overlay over online video sites.

The problem, despite various Android updates, was that it was more about computerizing your television than offering an awesome viewing experience.

With the launch of Android Lollipop and Android TV, the company planned to phase Google TV out and switch to Android TV.

“By extending Android to the TV form factor, living room developers get the benefits, features and the same APIs available for Android phone and tablet development,” said the Google and Android TV teams in a shared Google+ post.

Nonetheless, only some Google TV devices will be updated to Android TV since certain devices can’t work with the new system.

Google Code

(Discontinued on: Jan 25, 2015)

Google Code project hosting platform

Announced in March 2005, Google Code is a service (which started a year after, in 2006) to host scalable, open source projects reliably.

Google Code went read-only in August 2015, and will shut down on January 25 2016 for version control clients. Public project data will get archived and be accessible via Google Code Archive for years to come.

“…we’ve seen a wide variety of better project hosting services such as GitHub and Bitbucket bloom. Many projects moved away from Google Code to those. … After profiling non-abusive activity on Google Code, it has become clear to us that the service simply isn’t needed anymore“, stated Chris DiBona (Director of Open Source) on Google’s Open Source Blog on March 12, 2015.

Google Talk

(Discontinued on: Feb 23, 2015)

Google Talk chat interface

Google Talk app for Windows was officially launched on August 24, 2005 – “a small program that lets you call and IM other Google Talk friends over the Internet for free.“

It was based on the XMPP protocol, and so various XMPP clients such as GAIM, Trillian, etc. were supported.

Mayur Kamat, Product Manager at Google Voice and Hangouts, posted on February 14, 2015 that “… Google Talk app for Windows will be deprecated on February 23, 2015. This will allow us to focus on bringing you the most robust and expressive communications experience with Google Hangouts.“

ClientLogin protocol

(Discontinued on: Apr 20, 2015)

A password-only authentication protocol, ClientLogin, offered API for third-party applications to access one’s Google account data through validation of the account’s username and password.

It was widely used by various apps and websites for getting authorized, but this API was less secure then OAuth 2.0.

Officially deprecated since April 20, 2012, Google finally shut ClientLogin API down 3 years later on April 20, 2015.

“Password-only authentication has several well known shortcomings and we are actively working to move away from it,” wrote Ryan Troll (Technical Lead, Identity and Authentication) on the Google Developers blog as a reason for its shutdown.

Google Helpouts

(Discontinued on: Apr 20, 2015)

Google Helpouts video tutorial platform

The online collaboration and tutorial service, Google Helpouts, was launched in November 2013.

A kind of freelance market, its main objective was to help people find real-time assistance through live, streaming videos with the aim of bringing together solution experts and learners or help seekers.

It lets users talk face-to-face online and avail expert collaboration to sort out problems.

Although considered helpful for masses, yet Google shut Helpouts down on April 20, 2015.

Slow growth was given as the reason behind its termination: “… unfortunately, it hasn’t grown at the pace we had expected. Sadly, we’ve made the tough decision to shut down the product.“

Google+ Photos

(Discontinued on: Aug 1, 2015)

A photo hosting and management solution integrated in Google+, Google+ Photos lets you create, edit, and manage your own private albums online.

It also had cool features like Stories, which would automatically repackage your pictures into a fun timeline or scrapbook.

Google+ announced to start shutting Google+ Photos down beginning August 1, 2015, beginning with the Android version of the app, and then the Web and iOS versions.

To clarify few doubts, Google+ still supports photo and video sharing.

As for why they folded on it, Anil Sabarwal (Lead Product Manager at Google Photos) said, “… it is confusing to users why we have two offerings that virtually do the same thing, and it means our team needs to divide its focus rather than working on building a single, great user experience.“

PageSpeed Service

(Discontinued on: Aug 3, 2015)

Google PageSpeed performance dashboard

Launched on July 28, 2011, Page Speed was an online service, which automatically sped up web page loading and gave 25% to 60% speed improvements on several websites.

It was a free CDN service that fetches content from the site’s servers, applies web performance best practices to the pages, and serves them to the users from Google’s worldwide servers.

Google announced that the PageSpeed service will cease on August 3, 2015.

Google Catalogs

(Discontinued on: Aug 4, 2015)

Launched on August 16, 2011, Google Catalogs app, originally available on Android tablets, offered people the chance to discover trending products from digital catalogs.

Catalogs lets you access and share information about products and their availability and create collages using the favorite catalogs.

Having alerted registered Catalogs users through an email, Google announced that it was going to break off support and services for Catalogs, and the company would trash the Catalogs app on August 4, 2015.

The Google Catalogs team didn’t provide any reason for its shutdown with the alert.

Autocomplete API

(Discontinued on: Aug 10, 2015)

The popular Autocomplete API was a text prediction service that used integrated resources to predict a query before a user finished typing search keywords.

Before the unauthorized access to non-published API was shut down on August 10, 2015, this was a widely available unofficial, non-published tool, which could be incorporated into applications without any restrictions, working independently of Google Search.

Google blocked unauthorized access and various online tools (for example, keyword tools) using this service need to re-invent themselves.

Peter Chiu (on behalf of Autocomplete team) wrote on Google’s Webmaster Central blog, “… uses for an autocomplete data … outside of the context of a web search don’t provide a meaningful user benefit. We want to ensure that users experience autocomplete as it was designed to be used – as a service closely tied to Search.“

Google Moderator

(Discontinued on: Aug 15, 2015)

On September 24, 2008, Google Moderator was released for public use by its developer Taliver Heath, a Platform Engineer at Google.

The Moderator tool allowed crowd-sourcing questions within limited time using Google’s groups by using consensus to elevate questions that were pertinent or useful.

Before making it freely available, it was used inside Google at tech talks to vote if a question should be asked.

Google announced that August 15, 2015 is Moderator’s last day, after which the site will be taken down.

Its data was made available via Takeout so that people can download their Moderator’s data starting from 30th March 2015.

To explain why the decision was made to close down the project, it was posted, “… has not had the usage we had hoped, so we’ve made the difficult decision to close down the product.“

Google Flu Trends

(Discontinued on: Aug 20, 2015)

Announced in November 2008, Flu Trends was a service by Google.org as a way to track Influenza outbreaks by sourcing and analyzing search trends.

It was a search prediction model used for “nowcasting” estimates of Flu and Dengue fevers based on search trends.

Google stopped posting public data about these estimates on its website (starting from August 2015), and has decided to provide signal data to its partner health organizations.

“Instead of maintaining our own website going forward, we’re now going to empower institutions who specialize in infectious disease research to use the data to build their own models,” says The Flu Trends Team on Google Research blog.

Google Hotel Finder

(Discontinued on: Sep 22, 2015)

Google Hotel Finder search interface

Launched on July 28, 2011 as an experimental hotel search and inventory tool, Hotel Finder lets travellers find hotel information and book accommodations.

Its features include tourist spotlights for any neighborhood, and short-list results to keep track of them.

At the end of September 2015, Hotel Finder got replaced by Hotel Ads, an advertising service that allows direct bookings from Google Search results.

According to the official announcement on Google’s Inside Adwords blog, Google retired the dedicated Hotel Finder website because “… users are now able to access the hotel information they need right from Google search.“

ADT for Eclipse

(Discontinued on: Dec 31, 2015)

ADT, Android Developer Tools, a plugin for Eclipse provided an Android application development environment for Eclipse users.

Its 0.9.4 version released in October 2009, ADT was a part of Android’s SDK and helped people develop Android applications easily.

After releasing Android Studio as the official IDE for Android app development, Google announced in June 2015 that support for ADT plugin for Eclipse would end by December 2015.

“To that end and to focus all of our efforts on making Android Studio better and faster, we are ending development and official support for the Android Developer Tools (ADT) in Eclipse,” said Jama Eason, Product Manager at Android.

Google Allo

(Discontinued on: Mar 12, 2019)

Google Allo messaging app

Launched in September 2016, Google Allo was a smart messaging app that integrated Google Assistant directly into conversations. It offered features like smart replies, stickers, and the ability to whisper or shout messages by adjusting text size.

Despite its innovative features, Google announced in December 2018 that Allo would be discontinued in March 2019. The company encouraged users to switch to Messages for SMS and Duo for video calls.

“We’ve learned a lot from Allo, particularly what’s possible when you incorporate machine learning features, like the Google Assistant, into messaging. We’re bringing the best of Allo into Messages, including Smart Reply, GIFs and desktop support,” said Google in their announcement.

Google+

(Discontinued on: Apr 2, 2019)

Google+ social network

Launched in June 2011 as Google’s answer to Facebook, Google+ was the company’s fourth attempt at creating a social network. It introduced innovative features like Circles for organizing contacts and Hangouts for video chat.

After a data breach affecting 52.5 million users was discovered in December 2018, Google announced it would shut down Google+ for consumers in April 2019. The enterprise version, Google+ for G Suite, continued until April 2020.

“While our engineering teams have put a lot of effort and dedication into building Google+ over the years, it has not achieved broad consumer or developer adoption, and has seen limited user interaction with apps,” stated Google in their blog post.

Google Inbox

(Discontinued on: Apr 2, 2019)

Google Inbox email client

Introduced in October 2014, Google Inbox was an experimental email client that aimed to revolutionize email management. It featured smart grouping of emails, reminders, and a clean, modern interface.

Google announced in September 2018 that Inbox would be discontinued in March 2019 (later extended to April 2019). Many of its features were integrated into the main Gmail app.

“We’ve taken popular Inbox features and added them into Gmail to help more people benefit from them,” said Google in their announcement.

Google Daydream

(Discontinued on: Oct 15, 2019)

Google Daydream VR platform

Announced in May 2016, Google Daydream was Google’s mobile virtual reality platform. It included a VR headset and controller, along with a platform for VR apps and games.

Google announced in October 2019 that it would discontinue Daydream, citing limited adoption and the challenges of mobile VR. The Daydream View headset was discontinued, and the Daydream app was removed from the Google Play Store.

“We saw that the smartphone-based VR experience wasn’t as compelling as we had hoped, and that there were limitations to the technology that made it difficult to develop high-quality VR experiences,” explained Google in their statement.

Google Play Music

(Discontinued on: Dec 2020)

Google Play Music streaming service

Launched in November 2011, Google Play Music was Google’s music streaming service that allowed users to upload and stream their music library, as well as access a catalog of songs through a subscription service.

Google announced in August 2020 that it would shut down Google Play Music by December 2020, transitioning users to YouTube Music. The company provided tools to transfer playlists, uploads, and preferences to the new service.

“We’re committed to making this transition as easy as possible, and we’re working to bring over your music library, personalized recommendations, and playlists,” said Google in their announcement.

Google Cloud Print

(Discontinued on: Dec 31, 2020)

Google Cloud Print service

Introduced in April 2010, Google Cloud Print allowed users to print from any device to any printer connected to the service. It was particularly useful for printing from mobile devices and Chromebooks.

Google announced in November 2019 that Cloud Print would be discontinued by the end of 2020, citing the availability of native printing solutions in modern operating systems.

“With the evolution of printing technology and the growing number of ways to print from mobile devices, we’ve seen a steady decline in the usage of Google Cloud Print,” explained Google in their support page.

Google Hangouts

(Discontinued on: Nov 1, 2022)

Google Hangouts messaging platform

Launched in May 2013, Google Hangouts was a unified messaging platform that combined features from Google Talk, Google+ Messenger, and Google+ Hangouts. It offered text, voice, and video chat capabilities.

Google announced in October 2020 that Hangouts would be discontinued in favor of Google Chat and Google Meet. The transition was completed in November 2022.

“We’re committed to making this transition as smooth as possible, and we’ll help guide you through the process of moving your conversations from Hangouts to Chat,” said Google in their announcement.

Google Stadia

(Discontinued on: Jan 18, 2023)

Google Stadia gaming platform

Launched in November 2019, Google Stadia was a cloud gaming service that allowed users to play high-quality games on various devices without needing a console or powerful PC.

Google announced in September 2022 that Stadia would be shut down in January 2023, citing low adoption rates and the challenges of building a successful gaming platform.

“While Stadia’s approach to streaming games for consumers was built on a strong technology foundation, it hasn’t gained the traction with users that we expected,” explained Google in their blog post.

Google Domains

(Discontinued on: Sep 7, 2023)

Google Domains service

Launched in January 2015, Google Domains was a domain registration service that offered a simple interface, transparent pricing, and integration with other Google services.

Google announced in June 2023 that it would sell Google Domains to Squarespace, with the transition completed by September 2023. Existing customers were migrated to Squarespace’s platform.

“We’re committed to making this transition as smooth as possible for our customers, and we’ll work closely with Squarespace to ensure a seamless transfer of domains,” said Google in their announcement.

Google Podcasts

(Discontinued on: 2024)

Google Podcasts app

Launched in June 2018, Google Podcasts was a dedicated podcast app that offered personalized recommendations, automatic downloads, and cross-device syncing.

Google announced in September 2023 that it would discontinue Google Podcasts in 2024, encouraging users to migrate to YouTube Music for their podcast listening needs.

“We’re committed to making this transition as smooth as possible, and we’ll help guide you through the process of moving your podcast subscriptions and listening history to YouTube Music,” said Google in their announcement.

100+ Must-Know Google Services and Tools to Boost Your Productivity

.no-js #ref-block-post-25395 .ref-block__thumbnail { background-image: url(“https://assets.hongkiat.com/uploads/thumbs/250×160/google-services-tools.jpg”); }

100+ Must-Know Google Services and Tools to Boost Your Productivity

Mention Google products and you’d probably think of Google Search, Gmail, Chrome, YouTube or Android but there are… Read more

The post Google Graveyard Revisited: Shutdowns Since 2015 appeared first on Hongkiat.

RE:CHEMISTRY Flip-Tastic Brand Refresh by NOT Wieden+Kennedy

Original Source: https://abduzeedo.com/rechemistry-flip-tastic-brand-refresh-not-wiedenkennedy

RE:CHEMISTRY Flip-Tastic Brand Refresh by NOT Wieden+Kennedy

RE:CHEMISTRY Gets a Flip-Tastic Brand Refresh by NOT Wieden+Kennedy

ibby
07/29 — 2025

RE:CHEMISTRY gets a bold new brand design and visua identity by NOT Wieden+Kennedy—featuring flipped visuals, vibrant pink, and creative design

What do you get when a former Premier League footballer teams up with a creative agency that dares to call itself “NOT” Wieden+Kennedy? You get RE:CHEMISTRY—a science-backed, planet-loving branding and brand identity that’s as bold as it is brilliant.

The Basics

RE:CHEMISTRY is the flagship innovation from GFBiochemicals, a company co-founded by ex-Arsenal player Mathieu Flamini (yes, really). Their mission? To replace fossil-based chemicals in everyday products—think detergents, paint, shampoo—with safe, sustainable, natural alternatives.

Enter the Flip

To communicate just how game-changing RE:CHEMISTRY really is, NOT Wieden+Kennedy (based in London and clearly having fun with naming conventions) introduced “the flip” as the center of the visual identity. Why? Because this technology quite literally flips the script on the chemicals we use every day.

The brand is full of delightful design twists:

A logo that’s upside down (yes, on purpose)
Typography and language that play with opposites
Flipped images of nature and products that challenge the norm
A loud-and-proud vibrant pink palette that breaks from the predictable blues and greens of “clean” branding

Why It Works

We’ve always believed chemistry can change our lives for the better. This new identity reflects that radical optimism. 

The identity doesn’t just look good—it feels like change. It’s rebellious, smart, and unexpected. It reminds us that innovation doesn’t need to whisper—it can shout in hot pink and inverted logos. Mathieu Flamini puts it best: 

Brand Design Takeaway

When your mission is to reinvent the chemical makeup of everyday life, you need a brand system that’s just as transformative. This one flips expectations—literally. Check out the full look at re-chemistry.com and learn more about the minds behind the magic at notwk.london.

RE:CHEMISTRY Gets a Flip-Tastic Brand Refresh by NOT Wieden+Kennedy

RE:CHEMISTRY Gets a Flip-Tastic Brand Refresh by NOT Wieden+Kennedy

RE:CHEMISTRY Gets a Flip-Tastic Brand Refresh by NOT Wieden+Kennedy

RE:CHEMISTRY Gets a Flip-Tastic Brand Refresh by NOT Wieden+Kennedy

RE:CHEMISTRY Gets a Flip-Tastic Brand Refresh by NOT Wieden+Kennedy

RE:CHEMISTRY Gets a Flip-Tastic Brand Refresh by NOT Wieden+Kennedy

The Death of the Click: How Scrolling Took Over the Web

Original Source: https://webdesignerdepot.com/the-death-of-the-click-how-scrolling-took-over-the-web/

Clicks are dead. Scrolling took over. What used to be a choice—navigation—is now a passive feed disguised as design. From infinite scroll to TikTokified portfolios, the web is turning into one big dopamine loop. Designers need to take back control before every site becomes just another endless scroll-fest.

Aloha POS Review 2025: A Legacy System Built for Restaurants – But Is It Right for You?

Original Source: https://ecommerce-platforms.com/articles/aloha-pos-review

Aloha POS, built by NCR, has long been a go-to point-of-sale system for restaurants.

With its deep roots in hospitality and a client list that includes brands like Outback Steakhouse and Red Robin, Aloha is clearly trusted by big players.

But how does it hold up in 2025, especially if you’re looking to combine online ordering with in-store operations?

I spent time researching how Aloha works, who it’s best for, and what you’ll actually get for your money.

If you’re managing a restaurant and considering Aloha for your business — or want to know how it integrates with ecommerce — I’ll cover everything you need to know here.

Why You Can Trust This Review

We’ve reviewed dozens of POS systems and ecommerce platforms, comparing pricing, features, integrations, and real-world usability.

All insights here are based on hands-on testing, customer feedback, and up-to-date data. We’ve also researched Aloha’s latest updates, including its newer cloud-based offering.

Aloha POS: Quick Overview

Aloha POSBest for restaurant chains and franchisesRating3.8 out of 5Price Range$175–$300+/month or $2,000+ setup (on-premise)StrengthsOffline capabilities, loyalty tools, multi-location supportDrawbacksNot ecommerce-native, expensive setup, dated UXFree TrialNo standard free trial; must go through a reseller

Go to the top

My Experience With Aloha POS

Getting started with Aloha isn’t as straightforward as with cloud-native tools like Square or Shopify POS.

There’s no direct signup or demo environment online. You’ll need to contact a certified NCR reseller, get a custom quote, and schedule installation or onboarding.

This process can take a few weeks, especially if you’re setting up a complex, multi-terminal system.

Once installed, the interface feels more functional than sleek. Aloha’s on-premise system can feel a little outdated, but its cloud-based version — Aloha Cloud — offers a more modern dashboard and remote access capabilities.

Still, you won’t get a DIY setup or drag-and-drop simplicity. It’s a serious POS system for serious businesses.

Go to the top

Aloha POS Pricing: What You’ll Pay

Aloha’s pricing depends on whether you go with on-premise software or the newer cloud-based version.

There’s no fixed public pricing for the legacy on-prem solution — costs vary by reseller, hardware needs, and number of locations. But here’s what you can expect:

On-Premise Pricing

ItemEstimated PriceSoftware License$1,200–$2,500 per terminal (one-time)Hardware Package$1,500–$3,000Setup & Installation$500–$2,000Support Contract$50–$150/monthEcommerce Integration (via Olo, Chowly, etc.)$50–$200/month

Aloha Cloud Pricing

PlanMonthly CostAloha Cloud POS (Basic)Starting at $175/monthAdd-ons & IntegrationsVaries by app

Key Takeaways

Expensive upfront costs for on-prem setups

Monthly SaaS pricing for Aloha Cloud is more predictable

Third-party integrations for online ordering add to monthly cost

For small restaurants or startups, Aloha’s price tag can be a tough pill to swallow. But if you’re running a high-volume kitchen or managing multiple sites, it could be worth it.

Go to the top

Aloha POS Features: What Do You Get?

Aloha POS delivers a deep feature set tailored for hospitality businesses. Its strength is in running on-site operations efficiently, with all the tools you need to manage staff, tables, orders, inventory, and guests.

Core Features

Order Management

Split checks, modify orders, table tracking, and quick reorders

Multiple revenue centers for takeout, dine-in, or curbside

Offline order mode for uninterrupted service

Custom workflows for high-volume or quick-service models, giving restaurants more control over prep times and kitchen ticket pacing

Inventory and Menu Management

Real-time inventory tracking

Ingredient-level reporting (for food cost analysis)

Menu versioning and multi-location menu updates

Smart forecasting tools in the cloud version help restaurants minimize food waste by tracking usage trends over time

Staff Management

Time tracking with PIN or biometric login

Shift scheduling tools

Labor cost forecasting

Manager overrides and audit logs help prevent time theft and improve accountability in larger teams

CRM & Loyalty

Guest profiles and purchase history

Custom loyalty programs

Email marketing integrations available via third-party apps

Built-in features support upsell prompts and personalized offers, which can improve average ticket size over time

Reporting & Analytics

Sales performance dashboards

Enterprise-level reporting for franchises

Integration with BI tools via API

Drill-down filters let owners and managers analyze performance by server, location, daypart, or menu item for better operational decisions

While Aloha POS may not offer the flashiest interface or cutting-edge design, its real value lies in depth over flash.

The platform provides robust, restaurant-specific tools that cover nearly every aspect of daily operations — from staffing and inventory to sales tracking and guest engagement.

For operators who prioritize performance, consistency, and operational control over aesthetics or out-of-the-box ecommerce, Aloha delivers a system that can handle the pressure of high-volume service without missing a beat.

Go to the top

Ecommerce with Aloha POS: Is It Possible?

Aloha POS is not an ecommerce platform, but that doesn’t mean you can’t take online orders. You’ll need to use third-party tools to bridge the gap between your POS and your online storefront.

Integration Options

ToolUse CaseOloSyncs your menu and orders from your restaurant’s website or app to AlohaChowlyConnects DoorDash, Grubhub, Uber Eats directly to your POSDeliverectCentralizes online orders across platforms

Pros

Works well for restaurants offering online ordering or delivery

Helps keep menu items synced between POS and online

Preserves data across both channels

Allows centralized control over menus and pricing across in-store and online, improving consistency for customers

Cons

No built-in ecommerce storefront

Can require custom development

Adds monthly cost

Integration complexity increases with the number of ordering platforms, which can lead to order throttling or sync delays during peak periods

If you’re running a pure ecommerce store (selling products, not food) — skip Aloha. It’s not built for that. But if you’re managing a restaurant with delivery or pickup, Aloha can work with some backend support.

Go to the top

Who Should Use Aloha POS?

Aloha POS is ideal for restaurants that need stability, especially ones that can’t afford any downtime or need detailed reporting across locations.

Best for:

Full-service restaurants

Large chains and franchises

Businesses needing offline order support

Multi-location operations

Hospitality teams with high employee turnover who benefit from Aloha’s structured, role-based interface and training options

Not suited for:

Ecommerce-first businesses

Retail shops

Small restaurants with tight budgets

DIY entrepreneurs looking for plug-and-play setups

Any business needing advanced ecommerce features, such as digital product delivery or subscription models

While it isn’t the most flexible POS on the market, it provides high operational resilience and structure — something most emerging platforms struggle with at scale.

It’s also a familiar interface in the restaurant industry, which can help reduce training time for new staff members.

Go to the top

Real User Feedback

Capterra: 3.8/5

“Great for reliability, but the interface is clunky and support is inconsistent.”

Software Advice: 4.0/5

“We use Aloha across our 12 locations and it works well — just takes some time to get used to.”

G2: 3.5/5

“The reporting is great, but the setup process was more painful than it should be.”

Most Common Praise

Solid offline functionality

Handles high-volume business with ease

Integrates well with kitchen display systems and back-office tools

Many users say once it’s set up correctly, it requires little ongoing maintenance — making it dependable for busy environments

Most Common Complaints

Outdated interface (on-prem version)

Not beginner-friendly

Third-party integration needed for online ordering

Some reviewers mention that resolving support issues often depends on the responsiveness of local resellers, which varies regionally

A lot of customer sentiment reflects a love/hate relationship with Aloha — it performs when needed but doesn’t offer the modern UX or instant access that many newer systems provide.

Still, for long-term operators who prioritise function over form, it remains a solid bet.

Go to the top

Alternatives to Aloha POS

Looking for other options? Here’s how Aloha compares to other POS systems for restaurants and ecommerce hybrids:

POS SystemBest ForStarting PriceEcommerce IntegrationToast POSRestaurantsFree – $165/monthNative online ordering toolsSquare for RestaurantsSMBsFree – $60/monthBuilt-in ecommerce and deliveryLightspeedRestaurants & Retail$69/monthGood ecommerce supportShopify POSRetail & hybrid businesses$89+/monthSeamless Shopify ecommerce

Most of these alternatives offer a smoother ecommerce experience, but Aloha outshines them in specific areas like offline order handling, table management, and enterprise scalability.

It’s also a better match for teams that need strict operational control.

That said, if your business is just starting out or leans heavily on ecommerce, platforms like Square or Shopify POS may be more cost-effective and easier to set up.

These systems offer intuitive design, faster onboarding, and native online selling tools that don’t require third-party connectors — making them strong choices for smaller teams or digital-first operations.

Go to the top

Final Verdict: Is Aloha POS Worth It?

Aloha POS is a powerful system for established restaurants, especially those running multi-location operations or needing robust reporting. It’s battle-tested, reliable, and offers excellent features for managing in-person service.

But it’s not perfect:

It’s not cloud-native by default (unless you get Aloha Cloud)

There’s no native ecommerce storefront

You’ll need to budget for integrations and hardware setup

Ongoing updates and support depend heavily on your reseller, so you’ll want to choose that partner carefully

If you’re a growing restaurant with complex needs, Aloha is a solid investment.

But if you’re looking for a flexible, modern POS with ecommerce tools out of the box — tools like Square, Toast, or Shopify POS might be a better fit.

The post Aloha POS Review 2025: A Legacy System Built for Restaurants – But Is It Right for You? appeared first on Ecommerce-Platforms.com.

Houdini shares free workflows for game assets from Project Elderwood demo

Original Source: https://www.creativebloq.com/3d/houdini-shares-free-workflows-for-game-assets-from-project-elderwood-demo

Check out the new cliff-generation pipeline and a tool for creating ruins.

Design Meets Nature: U.S. National Parks Open Their Gates for Free on August 4

Original Source: https://abduzeedo.com/design-meets-nature-us-national-parks-open-their-gates-free-august-4

Design Meets Nature: U.S. National Parks Open Their Gates for Free on August 4

Design Meets Nature: U.S. National Parks Open Their Gates for Free on August 4

ibby
07/28 — 2025

If you’re in the United States, mark your calendar for August 4th—one of several days in 2025 when the National Parks waive entrance fees across all U.S. national parks to celebrate the passage of the Great American Outdoors Act. 

To celebrate, we’re sharing photo highlights from a few recent family road trips through four visually iconic parks—each one a crash course in composition, color, and natural design: Lassen Volcanic National Park, CA: bubbling hydrothermal pools and lava rock trails; Yosemite National Park, CA: granite cliffs, towering pines, and epic golden light; Grand Canyon National Park, AZ: ancient rock layers and panoramic drama; Zion National Park, UT: red rock cathedrals and bold desert textures

A Brief History Lesson (and a Few Numbers)

The U.S. National Park Service was founded in 1916, but Yellowstone—America’s first national park—was established even earlier, in 1872. Today, the NPS manages over 400 sites, including 63 designated national parks. Collectively, they span more than 84 million acres and welcome 300+ million visitors annually.

And get this—Hudson Canyon, featured in our last post, is deeper than parts of the Grand Canyon. Nature’s still got surprises.

Bonus: Got a 4th Grader?

If you’re a parent or guardian of a 4th grade student in the U.S., you’re eligible for free park access all year long through the Every Kid Outdoors program. It’s a great way to turn field trips into real adventures.

Where We Stayed (and Recommend):

Lassen Volcanic National Park, CA – Mill Creek Resort for rustic cabins close to the park.
Yosemite, CA – AutoCamp Yosemite for sleek Airstream stays or Evergreen Lodge for a timeless forest retreat near Hetch Hetchy—a lesser-known corner of the park that’s home to a dramatic glacial valley and the Hetch Hetchy Reservoir, an early 20th-century engineering marvel that still supplies water to San Francisco today. For designers and engineers, it’s a fascinating intersection of natural beauty and human ingenuity.
Grand Canyon, AZ – El Tovar Hotel or Bright Angel Lodge right on the Southern rim.
Zion, UT – Under Canvas Zion for upscale tents or any boutique stay in nearby Springdale.

For our global readers: While the fee-free days apply to U.S. parks, the value of time outdoors is universal. Whether you’re exploring a national landmark or a neighborhood trail, nature offers a kind of clarity and perspective that fuels creativity in any corner of the world.

Nature’s Moodboard

Lassen Volcanic's Bumpass Hell by Fabio Sasso

Volcanic National Park by Fabio Sasso

Half Dome in December by Fabio Sasso

Yosemite Falls in December by Fabio Sasso

Outside Zion National Park, Utah by Fabio Sasso

Grand Canyon from Mather Point at Dusk by Fabio Sasso

Grand Canyon from Mather Point at Dusk by Fabio Sasso


Web Components: Working With Shadow DOM

Original Source: https://smashingmagazine.com/2025/07/web-components-working-with-shadow-dom/

It’s common to see Web Components directly compared to framework components. But most examples are actually specific to Custom Elements, which is one piece of the Web Components picture. It’s easy to forget Web Components are actually a set of individual Web Platform APIs that can be used on their own:

Custom Elements
HTML Templates
Shadow DOM

In other words, it’s possible to create a Custom Element without using Shadow DOM or HTML Templates, but combining these features opens up enhanced stability, reusability, maintainability, and security. They’re all parts of the same feature set that can be used separately or together.

With that being said, I want to pay particular attention to Shadow DOM and where it fits into this picture. Working with Shadow DOM allows us to define clear boundaries between the various parts of our web applications — encapsulating related HTML and CSS inside a DocumentFragment to isolate components, prevent conflicts, and maintain clean separation of concerns.

How you take advantage of that encapsulation involves trade-offs and a variety of approaches. In this article, we’ll explore those nuances in depth, and in a follow-up piece, we’ll dive into how to work effectively with encapsulated styles.

Why Shadow DOM Exists

Most modern web applications are built from an assortment of libraries and components from a variety of providers. With the traditional (or “light”) DOM, it’s easy for styles and scripts to leak into or collide with each other. If you are using a framework, you might be able to trust that everything has been written to work seamlessly together, but effort must still be made to ensure that all elements have a unique ID and that CSS rules are scoped as specifically as possible. This can lead to overly verbose code that both increases app load time and reduces maintainability.

<!– div soup –>
<div id=”my-custom-app-framework-landingpage-header” class=”my-custom-app-framework-foo”>
<div><div><div><div><div><div>etc…</div></div></div></div></div></div>
</div>

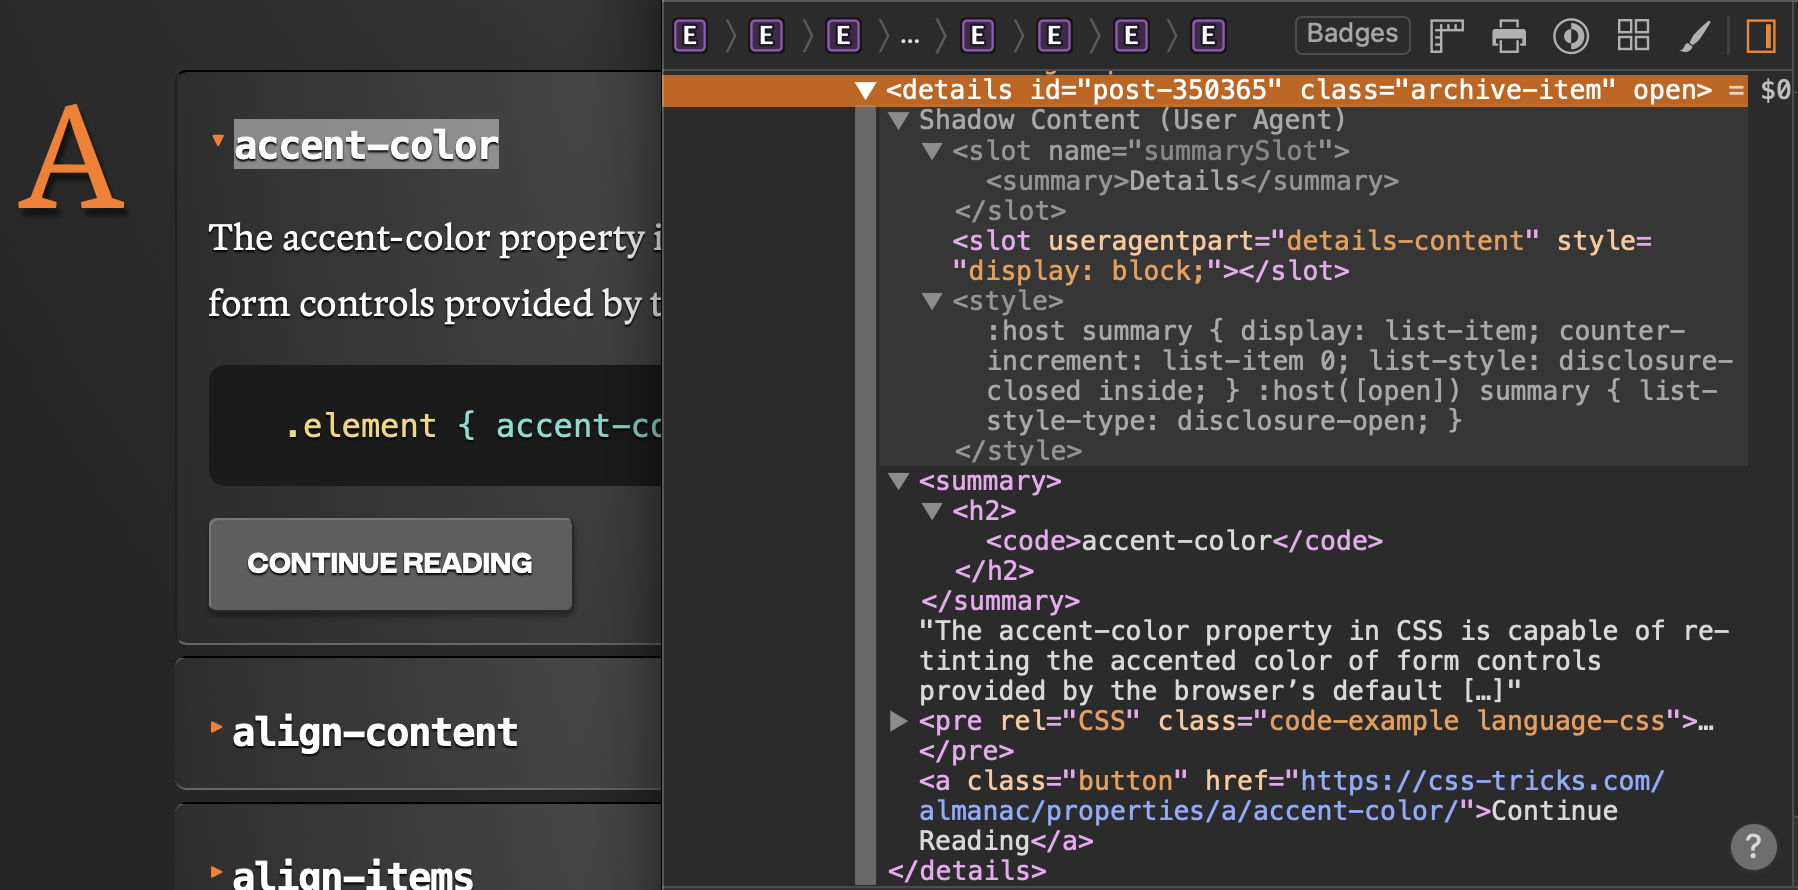
Shadow DOM was introduced to solve these problems by providing a way to isolate each component. The <video> and <details> elements are good examples of native HTML elements that use Shadow DOM internally by default to prevent interference from global styles or scripts. Harnessing this hidden power that drives native browser components is what really sets Web Components apart from their framework counterparts.

Elements That Can Host A Shadow Root

Most often, you will see shadow roots associated with Custom Elements. However, they can also be used with any HTMLUnknownElement, and many standard elements support them as well, including:

<aside>
<blockquote>
<body>
<div><footer>
<h1> to <h6>
<header>
<main>
<nav>
<p>
<section>
<span>

Each element can only have one shadow root. Some elements, including <input> and <select>, already have a built-in shadow root that is not accessible through scripting. You can inspect them with your Developer Tools by enabling the Show User Agent Shadow DOM setting, which is “off” by default.

Creating A Shadow Root

Before leveraging the benefits of Shadow DOM, you first need to establish a shadow root on an element. This can be instantiated imperatively or declaratively.

Imperative Instantiation

To create a shadow root using JavaScript, use attachShadow({ mode }) on an element. The mode can be open (allowing access via element.shadowRoot) or closed (hiding the shadow root from outside scripts).

const host = document.createElement(‘div’);
const shadow = host.attachShadow({ mode: ‘open’ });
shadow.innerHTML = ‘<p>Hello from the Shadow DOM!</p>’;
document.body.appendChild(host);

In this example, we’ve established an open shadow root. This means that the element’s content is accessible from the outside, and we can query it like any other DOM node:

host.shadowRoot.querySelector(‘p’); // selects the paragraph element

If we want to prevent external scripts from accessing our internal structure entirely, we can set the mode to closed instead. This causes the element’s shadowRoot property to return null. We can still access it from our shadow reference in the scope where we created it.

shadow.querySelector(‘p’);

This is a crucial security feature. With a closed shadow root, we can be confident that malicious actors cannot extract private user data from our components. For example, consider a widget that shows banking information. Perhaps it contains the user’s account number. With an open shadow root, any script on the page can drill into our component and parse its contents. In closed mode, only the user can perform this kind of action with manual copy-pasting or by inspecting the element.

I suggest a closed-first approach when working with Shadow DOM. Make a habit of using closed mode unless you are debugging, or only when absolutely necessary to get around a real-world limitation that cannot be avoided. If you follow this approach, you will find that the instances where open mode is actually required are few and far between.

Declarative Instantiation

We don’t have to use JavaScript to take advantage of Shadow DOM. Registering a shadow root can be done declaratively. Nesting a <template> with a shadowrootmode attribute inside any supported element will cause the browser to automatically upgrade that element with a shadow root. Attaching a shadow root in this manner can even be done with JavaScript disabled.

<my-widget>
<template shadowrootmode=”closed”>
<p> Declarative Shadow DOM content </p>
</template>
</my-widget>

Again, this can be either open or closed. Consider the security implications before using open mode, but note that you cannot access the closed mode content through any scripts unless this method is used with a registered Custom Element, in which case, you can use ElementInternals to access the automatically attached shadow root:

class MyWidget extends HTMLElement {
#internals;
#shadowRoot;
constructor() {
super();
this.#internals = this.attachInternals();
this.#shadowRoot = this.#internals.shadowRoot;
}
connectedCallback() {
const p = this.#shadowRoot.querySelector(‘p’)
console.log(p.textContent); // this works
}
};
customElements.define(‘my-widget’, MyWidget);
export { MyWidget };

Shadow DOM Configuration

There are three other options besides mode that we can pass to Element.attachShadow().

Option 1: clonable:true

Until recently, if a standard element had a shadow root attached and you tried to clone it using Node.cloneNode(true) or document.importNode(node,true), you would only get a shallow copy of the host element without the shadow root content. The examples we just looked at would actually return an empty <div>. This was never an issue with Custom Elements that built their own shadow root internally.

But for a declarative Shadow DOM, this means that each element needs its own template, and they cannot be reused. With this newly-added feature, we can selectively clone components when it’s desirable:

<div id=”original”>
<template shadowrootmode=”closed” shadowrootclonable>
<p> This is a test </p>
</template>
</div>

<script>
const original = document.getElementById(‘original’);
const copy = original.cloneNode(true); copy.id = ‘copy’;
document.body.append(copy); // includes the shadow root content
</script>

Option 2: serializable:true

Enabling this option allows you to save a string representation of the content inside an element’s shadow root. Calling Element.getHTML() on a host element will return a template copy of the Shadow DOM’s current state, including all nested instances of shadowrootserializable. This can be used to inject a copy of your shadow root into another host, or cache it for later use.

In Chrome, this actually works through a closed shadow root, so be careful of accidentally leaking user data with this feature. A safer alternative would be to use a closed wrapper to shield the inner contents from external influences while still keeping things open internally:

<wrapper-element></wrapper-element>

<script>
class WrapperElement extends HTMLElement {
#shadow;
constructor() {
super();
this.#shadow = this.attachShadow({ mode:’closed’ });
this.#shadow.setHTMLUnsafe(&lt;nested-element&gt;
&lt;template shadowrootmode=”open” shadowrootserializable&gt;
&lt;div id=”test”&gt;
&lt;template shadowrootmode=”open” shadowrootserializable&gt;
&lt;p&gt; Deep Shadow DOM Content &lt;/p&gt;
&lt;/template&gt;
&lt;/div&gt;
&lt;/template&gt;
&lt;/nested-element&gt;);
this.cloneContent();
}
cloneContent() {
const nested = this.#shadow.querySelector(‘nested-element’);
const snapshot = nested.getHTML({ serializableShadowRoots: true });
const temp = document.createElement(‘div’);
temp.setHTMLUnsafe(&lt;another-element&gt;${snapshot}&lt;/another-element&gt;);
const copy = temp.querySelector(‘another-element’);
copy.shadowRoot.querySelector(‘#test’).shadowRoot.querySelector(‘p’).textContent = ‘Changed Content!’;
this.#shadow.append(copy);
}
}
customElements.define(‘wrapper-element’, WrapperElement);
const wrapper = document.querySelector(‘wrapper-element’);
const test = wrapper.getHTML({ serializableShadowRoots: true });
console.log(test); // empty string due to closed shadow root
</script>

Notice setHTMLUnsafe(). That’s there because the content contains <template> elements. This method must be called when injecting trusted content of this nature. Inserting the template using innerHTML would not trigger the automatic initialization into a shadow root.

Option 3: delegatesFocus:true

This option essentially makes our host element act as a <label> for its internal content. When enabled, clicking anywhere on the host or calling .focus() on it will move the cursor to the first focusable element in the shadow root. This will also apply the :focus pseudo-class to the host, which is especially useful when creating components that are intended to participate in forms.

<custom-input>
<template shadowrootmode=”closed” shadowrootdelegatesfocus>
<fieldset>
<legend> Custom Input </legend>
<p> Click anywhere on this element to focus the input </p>
<input type=”text” placeholder=”Enter some text…”>
</fieldset>
</template>
</custom-input>

This example only demonstrates focus delegation. One of the oddities of encapsulation is that form submissions are not automatically connected. That means an input’s value will not be in the form submission by default. Form validation and states are also not communicated out of the Shadow DOM. There are similar connectivity issues with accessibility, where the shadow root boundary can interfere with ARIA. These are all considerations specific to forms that we can address with ElementInternals, which is a topic for another article, and is cause to question whether you can rely on a light DOM form instead.

Slotted Content

So far, we have only looked at fully encapsulated components. A key Shadow DOM feature is using slots to selectively inject content into the component’s internal structure. Each shadow root can have one default (unnamed) <slot>; all others must be named. Naming a slot allows us to provide content to fill specific parts of our component as well as fallback content to fill any slots that are omitted by the user:

<my-widget>
<template shadowrootmode=”closed”>
<h2><slot name=”title”><span>Fallback Title</span></slot></h2>
<slot name=”description”><p>A placeholder description.</p></slot>
<ol><slot></slot></ol>
</template>
<span slot=”title”> A Slotted Title</span>
<p slot=”description”>An example of using slots to fill parts of a component.</p>
<li>Foo</li>
<li>Bar</li>
<li>Baz</li>
</my-widget>

Default slots also support fallback content, but any stray text nodes will fill them. As a result, this only works if you collapse all whitespace in the host element’s markup:

<my-widget><template shadowrootmode=”closed”>
<slot><span>Fallback Content</span></slot>
</template></my-widget>

Slot elements emit slotchange events when their assignedNodes() are added or removed. These events do not contain a reference to the slot or the nodes, so you will need to pass those into your event handler:

class SlottedWidget extends HTMLElement {
#internals;
#shadow;
constructor() {
super();
this.#internals = this.attachInternals();
this.#shadow = this.#internals.shadowRoot;
this.configureSlots();
}
configureSlots() {
const slots = this.#shadow.querySelectorAll(‘slot’);
console.log({ slots });
slots.forEach(slot => {
slot.addEventListener(‘slotchange’, () => {
console.log({
changedSlot: slot.name || ‘default’,
assignedNodes: slot.assignedNodes()
});
});
});
}
}
customElements.define(‘slotted-widget’, SlottedWidget);

Multiple elements can be assigned to a single slot, either declaratively with the slot attribute or through scripting:

const widget = document.querySelector(‘slotted-widget’);
const added = document.createElement(‘p’);
added.textContent = ‘A secondary paragraph added using a named slot.’;
added.slot = ‘description’;
widget.append(added);

Notice that the paragraph in this example is appended to the host element. Slotted content actually belongs to the “light” DOM, not the Shadow DOM. Unlike the examples we’ve covered so far, these elements can be queried directly from the document object:

const widgetTitle = document.querySelector(‘my-widget [slot=title]’);
widgetTitle.textContent = ‘A Different Title’;

If you want to access these elements internally from your class definition, use this.children or this.querySelector. Only the <slot> elements themselves can be queried through the Shadow DOM, not their content.

From Mystery To Mastery

Now you know why you would want to use Shadow DOM, when you should incorporate it into your work, and how you can use it right now.

But your Web Components journey can’t end here. We’ve only covered markup and scripting in this article. We have not even touched on another major aspect of Web Components: Style encapsulation. That will be our topic in another article.