An Interview with One of the Best Selling WordPress Theme Authors

Original Source: http://feedproxy.google.com/~r/1stwebdesigner/~3/I1PiNN2kvDo/

We recently had the opportunity to interview Qode, author of one of the best selling WordPress themes. Their humble beginnings and rapid success are inspiring to anyone interested in selling digital products.

Can you tell us a bit about how Qode started and the team behind it?

Qode started out as two people with a shared goal – to create quality digital products, but with a focus on beauty and aesthetics. In our early stages, we provided custom web development services. But we soon noticed the rising popularity of WordPress themes and saw an opportunity there, even though the marketplace was already fairly saturated.

Our team was still small, but we were all oriented toward UX and aesthetics. That was our main advantage. We made a decision back then that has become the cornerstone of our company: never to compromise our creative vision, even if it meant reaching fewer people. Instead of going down the commercial path and making the types of themes everyone was churning out, we primarily focused on great design. And I think that’s what distinguishes us from the rest of the market.

Qode Interactive home page

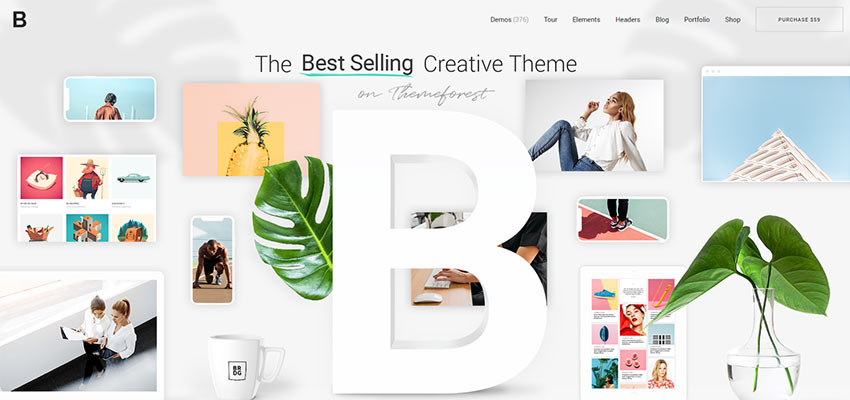
Your Bridge theme is one of the most popular WordPress themes on ThemeForest with over 100,000 sales — an incredible achievement. What do you believe sets Bridge apart from other WordPress themes?

When it came out, Bridge was just another theme by Qode. The thing is, we approach each new theme as a success, even in the earliest stages of design. I think that’s evident in all our themes, from the very beginning.

With Bridge, it turned out people were drawn to its clean and simple style, which was popular at the time. It got that initial boost straight out of the gate and gained enough visibility on the market. So, we adapted and started developing it in that direction. We wanted to offer Bridge to as many people as we could, while still sticking to our principles and making as few compromises as possible.

That’s how the Bridge demos came to be. Bridge currently has nearly 380 distinct demos, and we’re always adding more. It was the first bestseller on the market with so many and might have even set the standard in terms of the number and the quality of demos a WordPress theme can have.

Bridge WordPress Theme

With the huge success of Bridge and your other WordPress products, what are some challenges you’ve faced with that type of growth?

Bridge served as proof that we were doing something right and it motivated us to keep moving in that direction. So when we decided to create new brands and expand our catalog of themes, we knew we would need a lot more manpower. Our first goal was hiring the best people in the business.

We now have over 100 employees, and more than 25 professional designers and artists working on our themes. With so many people cooperating on multiple projects, we had to implement a set of procedures to make sure things run smoothly at all times.

We also quickly outgrew the downtown apartment we started from and had to move to a larger office. This alone brought its own set of challenges: planning the space, remodeling, obtaining all the necessary equipment, etc. A larger company requires a completely different approach than a startup. But with great success comes great responsibility, I guess.

Qode Interactive theme catalog

What has your experience been like developing for Gutenberg and are you excited for the direction WordPress is taking?

We’re currently working on a new theme framework that’s ultimately going to let users switch between page builders. Developing for Gutenberg has been a significant part of that project.

We definitely see Gutenberg as a step in the right direction. The components and modules are well executed, but the editor in its current form isn’t as user-friendly as we’d like it to be. We think there’s still work to be done in terms of the UX.

Of course, we understand this is just the first phase of what could be an entirely new approach to website building in WordPress and we’re excited to see where it goes. But one of the goals with our new framework is to give users a choice in terms of the editor they’d like to use.

If you could give any advice to a new designer or developer trying to sell digital goods, what would it be?

Everyone that came before you already has a massive head start. So, when thinking about the audience for your product, don’t take the expected route. Don’t try to satisfy everyone at all times. That’s a surefire recipe for failure.

Find a small but reliable audience and do everything you can to speak directly to their needs. Tailor all aspects of your business – from your actual product and its functionalities to your design, branding, and messaging – to that select group of people and you’ll have a way better chance at success.

Do you have any tips on promoting your work to build an audience?

The best form of promotion is the quality of your product. And satisfied customers are always the best advocates. I think ThemeForest does a good job of promoting great themes, but these days, with so many authors and themes out there, you can’t rely only on that. You need to use all available techniques to get your themes in front of your target audience. Once you accomplish that, the design and quality will often be the deciding factors.

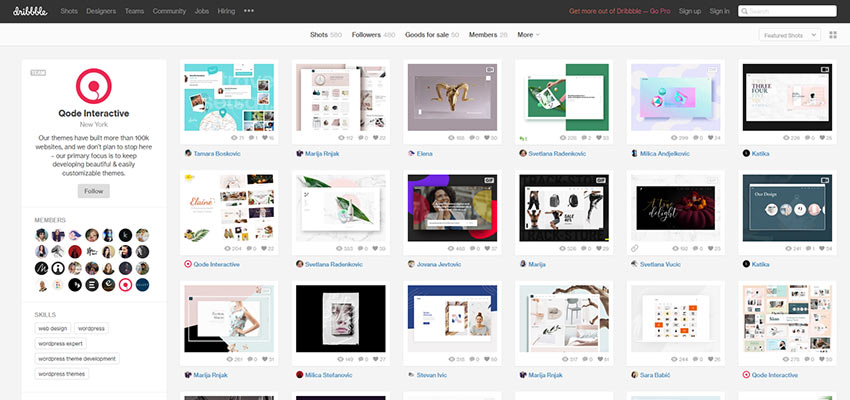
When it comes to places for promoting our work, we take a special interest in visually-oriented social networks. Particularly ones like Dribbble and Pinterest, where we can connect with fellow designers and other users who recognize the importance of a visual experience.

Qode Interactive Dribble profile

Before we wrap up this interview, are there any upcoming products or other announcements you’d like to share?

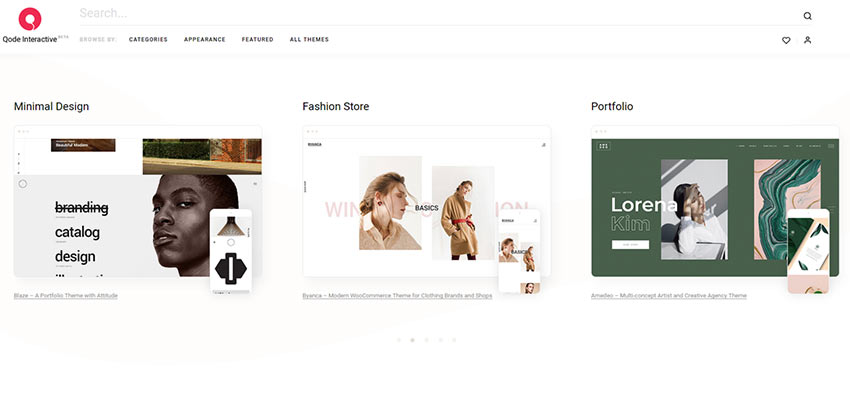
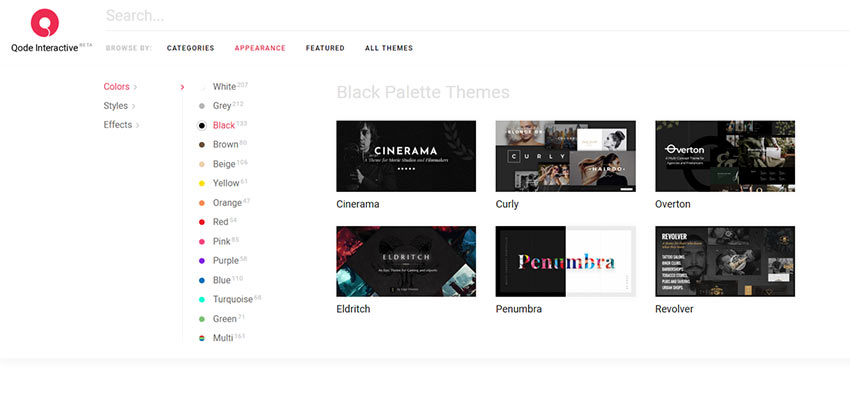
We recently launched the new Qode Interactive website. It’s now the home of all 330+ themes from our five brands. If you look at the current state of the market, you’ll see that the best quality often gets buried in the avalanche of themes coming out every day. Our new site provides a collection of themes that make no compromise when it comes to quality.

And finding the right one is now quicker and easier than ever, thanks to our powerful filtering system. We made sure people can search themes based on all imaginable parameters, from colors, styles, and effects all the way down to the shortcodes and plugins each theme comes with. So, if you’re looking for a new way to find beautiful WordPress themes, you might want to check it out.

Qode Interactive theme search and filtering


SitePoint Premium New Releases: Webpack, TensorFlow, Swift & Parcel

Original Source: https://www.sitepoint.com/sitepoint-premium-new-releases-webpack-tensorflow-swift-parcel/?utm_source=rss

We’re working hard to keep you on the cutting edge of your field with SitePoint Premium. We’ve got plenty of new books to check out in the library — let us introduce you to them. A Beginner’s Guide to Webpack When using JavaScript module bundler webpack for the first time, it can be difficult to […]

The post SitePoint Premium New Releases: Webpack, TensorFlow, Swift & Parcel appeared first on SitePoint.

The Art Movements That Inspired Modern Web Design

Original Source: http://feedproxy.google.com/~r/Designrfix/~3/BINpKdu0ZJg/art-movements-inspired-modern-web-design

Modern web design has its roots in some of the most influential art moments in the history of the world. The elements that we identify as being pleasing to the eye are echoes and homages to the great art of the past. That’s not to say modern web design isn’t a new and important form […]

The post The Art Movements That Inspired Modern Web Design appeared first on designrfix.com.

The Best 26 Web Resources In 2018

Original Source: http://feedproxy.google.com/~r/Designrfix/~3/EWferGZgTYY/best-26-web-resources-2018

We continue the series of showcases in which we review the best 25 web resources. This is the first showcase in 2018, and it’s coming with new entries and changes to the well-reputed web tools and services. The showcase starts with Tailor Brands, logo design and brand solution that is being used by most of […]

The post The Best 26 Web Resources In 2018 appeared first on designrfix.com.

Collective #518

Original Source: http://feedproxy.google.com/~r/tympanus/~3/pcwxtsmNUbw/

C518_WOTW

Inspirational Website of the Week: Nike Circular Design Guide

A razor-sharp grid-based design with lots of personality. Our pick this week.

Get inspired

C518_ucraftwhitelabel

This content is sponsored via Syndicate Ads
Website Builder Software With Your Branding

This B2B platform fits designers, freelancers, agencies and anyone who wants to make beautiful websites for their clients or let them do it on their own.

Find out more

C518_TakeBackWeb

Take Back Your Web

“Own your domain. Own your content. Own your social connections. Own your reading experience.” —Tantek Çelik talks about how we can use IndieWeb services, tools, and standards to take back our web.

Watch it

C518_accbutton

Accessible Icon Buttons

An overview of how an icon button can be implemented accessibly. By Sara Soueidan.

Read it

Screen-Shot-2019-05-23-at-19.26.07

SCAR

SCAR is a deployment stack that make it easy for you to deploy a static website with a custom domain, SSL, and a CDN

Check it out

C518_plotter

Twisted Polygons

A Vue.js project for generating SVGs of polygons for plotting. By Maks Surguy.

Check it out

C518_animation

Animation Handbook

A free ebook that will teach you how to use animation to demonstrate abstract concepts, make products feel more life-like, and instill more emotion into digital experiences. By Ryan McLeod.

Get it

C518_tesla

Tesla’s Touchscreen UI: A Case Study of Car-Dashboard User Interface

Some valuable information on what’s important when designing for car-dashboard user interfaces.

Read it

C518_typography

The State of Fluid Web Typography

A very insightful article by Matej Latin on the current state of fluid typography and its issues.

Read it

Screen-Shot-2019-05-23-at-19.47.52

The “Inside” Problem

Chris Coyier explains the “inside” layout problem and shows how to tackle it.

Read it

Screen-Shot-2019-05-23-at-19.36.23

Few-Shot Adversarial Learning of Realistic Neural Talking Head Models

Some amazing work from the Samsung AI lab with the potential to animate heads using only few or even one shot of a target person.

Watch it

Screen-Shot-2019-05-23-at-19.45.58

Vue.js And SEO: How To Optimize Reactive Websites For Search Engines And Bots

Paolo Mioni writes about how reactive JavaScript frameworks like Vue and React perform in terms of SEO.

Read it

C518_smile

Face Button

Katherine Kato created this fun button that you can startle by hovering or tapping on.

Check it out

C518_lines

THREE – Optimized Line Mess!

A demo by Colin van Eenige where “lines are created, stored and animated”.

Check it out

Screen-Shot-2019-05-23-at-19.46.04

Colour Diver

A wonderful animation made by Chris Gannon.

Check it out

C518_svgacc

Contextually Marking up accessible images and SVGs

Scott O’Hara explains the various methods for providing accessible names for images or SVGs and points out related quirks in browser.

Read it

C518_iconfonts

Font-display is incompatible with icon fonts

Zach Leatherman writes how the font-display descriptor has no valid value that is compatible with icon fonts.

Read it

C518_burberry

Burberry: The Monogram Universe

A very cool WebGL powered interactive explorer for showcasing a new collection.

Check it out

C518_cloud

A Cloud

A beautiful volume ray marching demo of a cloud.

Check it out

C518_wolfram

Launching Today: Free Wolfram Engine for Developers

Read about the release of the free Wolfram Engine for developers and learn what you can do with it.

Read it

C518_datatables

Flexible data tables with CSS Grid

Adam Lynch shows how to use CSS Grid for making versatile, responsive tables.

Read it

Screen-Shot-2019-05-23-at-19.49.16

Font Kiko

Font Kiko is a pack of more than 700 Open Source icons suitable for many types of projects.

Get it

Screen-Shot-2019-05-23-at-19.24.45

Color Designer

A tool to help you with building a color palette and generate tints and shades based on it.

Check it out

C518_quiz

On How I Approach Teaching CSS, CodePen Quizzes and Playing Cards

PeHaa Hetman shares a series of three quizzes around the CSS selectors and explains her process of teaching web development.

Read it

C518_undesign

Undesign

A collection of free design tools and resources for makers, developers and designers.

Check it out

Collective #518 was written by Pedro Botelho and published on Codrops.

6 Popular Page Builders for WordPress in 2019

Original Source: http://feedproxy.google.com/~r/1stwebdesigner/~3/XngK5tTxuT8/

WordPress is without a doubt one of the easiest and yet most customizable site-building platforms available. It brings the difficulty of creating a website down for beginners, while also not chaining down expert designers and developers.

But what if you want to customize your website with your own special touch? Making a theme isn’t exactly easy. Thanks to WordPress page builders, anyone can easily customize their website with tons of design options and functionality.

Both individuals creating a personal site and new designers breaking into WordPress site building should try out these six great page builders.

Semplice

Semplice

Built by designers for designers, Semplice is a feature-rich portfolio page builder optimized for the needs of professional artists. Everyone from agencies down to individual designers can use this platform; the Single, Studio, and Business plans are priced just right. And you only need to pay once!

Semplace uses a dynamic layout builder rather than sticking you with repetitive templates. Drag and drop to create your responsive website, use the blocks feature on Studio+ plans, and create stunning full screen designs for your work.

If you need a designer-focused tool, Semplice is the way to go.

Elementor

Elementor

With two million users, Elementor is one of the most popular page builders, and you can see why. Built just for professionals, Elementor offers a simple yet powerful page builder that integrates seamlessly with almost any theme.

With 80+ design elements from simple image widgets to buttons and forms, everything you need is there. You can also use it for free! But pay a per-year fee for the advanced plans, and you’ll get more widgets, WooCommerce integration, and a theme builder just for designers.

Divi Builder

Divi Builder

Do you feel overwhelmed with most page builders? Divi is made for simplicity. It’s super easy to learn its drag-and-drop system. But as you grow, you’ll find that this builder is more powerful than it seems.

46 content modules let you easily insert sliders, menus, forms, portfolios, and other helpful widgets. Pay per-year or a one-time fee; no crucial features locked behind pricey paywalls. And designers can use Elegant Themes and Divi to build client websites!

Beaver Builder

Beaver Builder

Beaver Builder was made for both users and professionals, with some special features for WordPress designers. The front-end editor is easy to use and allows you to build column-based pages or position elements with precision.

Editor Mode allows designers to give their clients the freedom of editing their site, while removing features that might allow them to break it. Beaver Builder is simple enough for clients to learn, too!

The builder uses three plans on per-year pricing, but later plans only unlocks features useful for companies like white labeling, multisite, and a framework theme.

Visual Composer

Visual Composer

Fast, easy to learn, and straightforward to use, Visual Composer offers a page builder that absolutely anyone can try. Templates, blocks, and elements are essential to its design. Start with a template, insert smaller template blocks, and use elements to enhance your design. Premium users can download more!

And developers will love Visual Composer. Extend it with the API, or create your own custom templates and elements!

SiteOrigin Page Builder

SiteOrigin Page Builder

If you need a free page builder without any features behind a paywall, SiteOrigin is the way to go. The builder is simple, but it has everything you need. Fast and efficient code means no drain on your website speed, and the live editor is very easy to use, even for beginners.

The extra widgets mean you can still spice things up with elements like calendars, buttons, comments, sliders, and more to your website. SiteOrigin may not come with all the fancy bells and whistles that a $200 page builder would, but it gets the job done and it does it well.

Create Beautiful WordPress Sites

With WordPress such a popular platform, there are always new competitors arising for plugins, themes – and page builders. These are some of the most popular ones so far in 2019, and that popularity clearly exists for a reason. Try one of these builders and you won’t be disappointed.


How many of these 15 web design tools & resources have you tried?

Original Source: https://www.hongkiat.com/blog/how-many-of-these-design-tools-youve-tried/

As a web designer or design agency, you’ve learned to keep a close watch on design trends. They come and go as well as changes in digital design technology and how they affect your profession….

Visit hongkiat.com for full content.

It’s Time to Talk About Testimonials

Original Source: https://www.webdesignerdepot.com/2019/05/its-time-to-talk-about-testimonials/

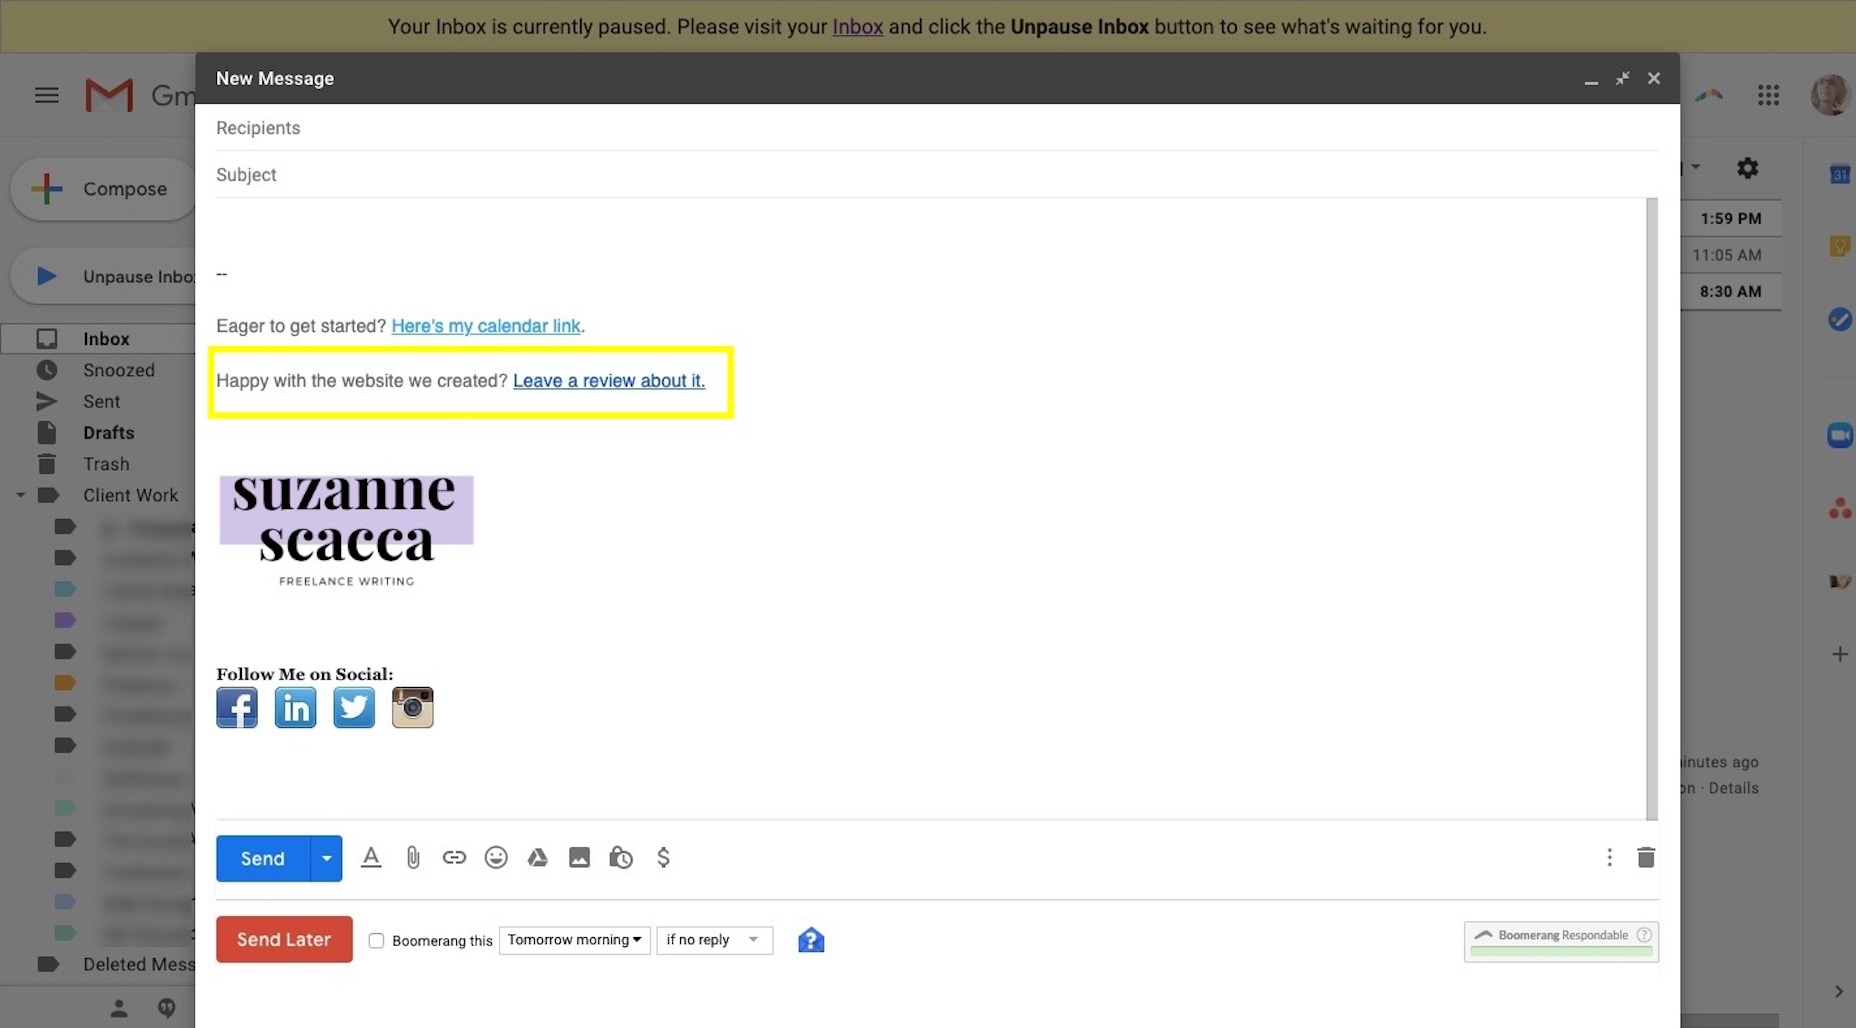
Word-of-mouth marketing is one of the best ways to get new business — and high-quality business at that. But unless you’re focused on a very small space where everyone knows each other, it can be hard to get your clients to refer you to others on their own.

That’s why you need to be willing to ask clients for testimonials and online reviews.

Look, consumers are smart. They know that anyone can build a website for their business and claim that they’re the best in their space. “We build websites that get you results” isn’t going to mean anything to prospective clients unless you have proof of those results.

That’s where client testimonials and reviews come into play. You’re going to let the words of former clients and proof of their satisfaction and results speak on your behalf.

How to Ask Clients for Testimonials and Reviews

As a web designer, it would greatly benefit you to collect as many client testimonials as you can for your website. And, beyond that, to start encouraging clients to leave positive reviews for you on Google.

Think about it like this:

consumers need to read about 10 online reviews before they can trust a business

Prospective clients are taking a big risk when they hire a designer to build their website. If they don’t know you, have never heard of your business, and don’t know anyone who’s used your services, how can they trust that you’ll design a great website for them?

Bright Local conducted a Local Consumer Review Survey a couple years back and found that consumers need to read about 10 online reviews before they can trust a business.

That’s because client reviews and testimonials are valuable. They give prospective clients a sense for what it’s like to work with you and what they can realistically expect to get out of the relationship.

For example, you can see here the level of detail included in this testimonial for BA Creative:

Then, you have to think about what happens when reviews come into a channel like Google and are assigned a star rating. That could be really great for standing out in search results amongst the competition. For instance, here is a search I did for “web designer London”:

Above the organic search results is this map snippet that highlights the most popular and well-reviewed results that match the search. Imagine what that would do for your business’s visibility.

That said, you can’t just expect former clients to start shouting to anyone who will listen: “This designer was amazing to work with and, thanks to the website he/she built for me, I now make 25% more in sales every month!”

It’s just not going to happen that way. You’re going to have to ask them for testimonials and reviews.

Here’s what you can do:

1. Create a Google My Business Page

According to the Bright Local survey, 86% of consumers are actively looking for and reading reviews for local businesses. So, if you have a physical address or P.O. box you’re comfortable associating with your business, you should create a Google My Business page. It’s completely free and takes no more than a few minutes to set up your business profile.

This is the only way your business listing will show up in Google search results, like this one for Ted Angel Design:

It’s also how you get your listing to show up in Maps results:

If you don’t have an address you can work with, Google won’t be an option. However, you can set yourself up with a Facebook page as Ted Angel has (Yelp will only work with an address, too):

Google loves to see positive customer reviews on platforms like these, so anything you can do to collect those reviews and get good star ratings will help you in search results.

Just make sure to monitor the reviews and respond to them, too. 89% of consumers surveyed by Bright Local said that they not only read reviews, but they look at the businesses’ responses to them, too.

2. Send an Offboarding Survey

In your client offboarding process, you should have a step where you follow up 30 to 60 days after the project ends. Why not put a link to a questionnaire in that email, asking them for feedback on the experience?

By putting it out there like that, you’re not pressuring them to say something good about you on the spot. Instead, you’re giving them a valid reason to share their positive sentiments. And, if they don’t, consider this a great opportunity to collect criticisms and improve your business.

Now, if you’re not comfortable combing through their response and asking if you can use their statement as a testimonial, that’s okay. Instead, make the last slide of the questionnaire say something like:

“It was an absolute pleasure working with you and I’m glad I had a hand in helping you create the perfect website for your business. If you were happy with the experience, I’d greatly appreciate it if you’d leave a review on my Google page so other business owners like yourself can find my services when they need them!”

Stay positive, don’t sound desperate, and leave it up to them to take action.

3. Add a Link in Your Email Signature

Chances are good that the bulk of your communication with clients is through email. So, why not put something in your email signature about leaving a review?

Your email signature is always a good place to leave small notes, reminding prospects and clients of things they should check out or next steps they should take. An invitation to leave a review would fit right in.

4. Write a Testimonial for Them

In the past, I would ask clients at the end of a job if they’d be comfortable writing a testimonial that I could share with prospective clients. However, I found that most of them were reluctant to do so — not because they secretly hated my work, but because they were too busy to do so. What was nice, though, was that many of those clients asked me to just write it for them. That’s when I decided to change my approach.

These days, when I conduct offboarding calls and final training with clients, I listen closely to what they say. If they are really happy with the experience and what they got in the end, they’re bound to say something about it to me. Or they’ll email me later on, with their thanks and kind words.

If they do, I jot it down on a notepad. Then, I turn the quote into a testimonial and email it to them later in the day:

“I’m so happy to hear how well the project worked out for you. I was wondering if you’d let me publish a testimonial from you with a link back to your website? It would really help me get more clients like yourself!

I know you’re busy, so I took the time to write this up from our call/email earlier:

[Include testimonial here.]

If you’re happy with it, please let me know. Feel free to tweak it if you have something else to say!”

If you know that they were happy with the website you built and you’ve taken the time to summarize their thoughts into a concise testimonial so they don’t have to, why wouldn’t they say “yes”? Plus, they’ll get a free backlink to their new website, which is a fantastic bonus.

Wrap-Up

Don’t forget to make sure that the rest of your website is prepared to sell on your behalf. By publishing an impressive portfolio and sharing other trust marks from your clientele (past and present), you can more easily and quickly convince prospects to work with you over the competition.


Featured image via Unsplash.

Add Realistic Chalk and Sketch Lettering Effects with Sketch’it – only $5!

Source

p img {display:inline-block; margin-right:10px;}
.alignleft {float:left;}
p.showcase {clear:both;}
body#browserfriendly p, body#podcast p, div#emailbody p{margin:0;}

A Beginner’s Guide to Webpack

Original Source: https://www.sitepoint.com/webpack-beginner-guide/?utm_source=rss

A Beginner’s Guide to Webpack

Nowadays, we’re forced to use many accessory tools to facilitate, speed up and optimize our web development workflow. Often though, such tools add an extra layer of complexity into the stack. As a result, we need to utilize additional time and effort to learn, understand and use these tools correctly. The same is true for webpack.

When using webpack for the first time, it can be difficult to understand how it works and how it should be used. Although it has good documentation, it can be daunting for novices, and it has a steep learning curve. However, webpack is worth learning and can save considerable time and effort in the long run. In this tutorial, I’ll introduce all the core concepts to help you get started.

Note: in this tutorial I’ve used webpack 4.30.

What Is Webpack?

As its core, webpack is a static module bundler. In a particular project, webpack treats all files and assets as modules. Under the hood, it relies on a dependency graph. A dependency graph describes how modules relate to each other using the references (require and import statements) between files. In this way, webpack statically traverses all modules to build the graph, and uses it to generate a single bundle (or several bundles) — a JavaScript file containing the code from all modules combined in the correct order. “Statically” means that, when webpack builds its dependency graph, it doesn’t execute the source code but stitches modules and their dependencies together into a bundle. This can then be included in your HTML files.

Now, to expand the above cursory overview, let’s explore the main concepts webpack uses.

Webpack Main Concepts

Webpack has some main concepts which we need to understand clearly before digging in its practical implementation. Let’s examine them one by one:

Entry. The entry point is the module, which webpack uses to start building its internal dependency graph. From there, it determines which other modules and libraries that entry point depends on (directly and indirectly) and includes them in the graph until no dependency is left. By default, the entry property is set to ./src/index.js, but we can specify a different module (or even multiple modules) in the webpack configuration file.

Output. The output property instructs webpack where to emit the bundle(s) and what name to use for that file(s). The default value for this property is ./dist/main.js for the main bundle and ./dist for other generated files — such as images, for example. Of course, we can specify different values in the configuration depending on our needs.

Loaders. By default, webpack only understands JavaScript and JSON files. To process other types of files and convert them into valid modules, webpack uses loaders. Loaders transform the source code of non-JavaScript modules, allowing us to preprocess those files before they’re added to the dependency graph. For example, a loader can transform files from a CoffeeScript language to JavaScript or inline images to data URLs. With loaders we can even import CSS files directly from our JavaScript modules.

Plugins. Plugins are used for any other task that loaders can’t do. They provide us with a wide range of solutions about asset management, bundle minimization and optimization, and so on.

Mode. Typically, when we develop our application we work with two types of source code — one for the development build and one for the production build. Webpack allows us to set which one we want to be produced by changing the mode parameter to development, production or none. This allows webpack to use built-in optimizations corresponding to each environment. The default value is production. The none mode means that there won’t be used any default optimization options. To learn more about the options webpack uses in development and production mode, visit the mode configuration page.

How Webpack Works

In this section we’ll examine how webpack works. Even a simple project contains HTML, CSS and JavaScript files. Also, it can contains assets such as fonts, images, and so on. So, a typical webpack workflow would include setting up an index.html file with the appropriate CSS and JS links, and the necessary assets. Also, if you have many CSS and JS modules which depend on each other, they need to be optimized and properly combined in one unit ready for production.

To do all this, webpack relies on configuration. Although webpack 4 comes with reasonable defaults, for any non-trivial project you’ll need to provide a special configuration file webpack.config.js, which describes how the files and assets should be transformed and what kind of output should be generated. This file can quickly become quite monolithic, which makes it hard to understand how webpack does its job unless you know the main concepts behind its working.

Based on the provided configuration, webpack starts from the entry points and resolves each module it encounters while constructing the dependency graph. If a module contains dependencies, the process is performed recursively against each dependency until the traversal has completed. Then webpack bundles all project’s modules into a small number of bundles — usually, just one — to be loaded by the browser.

Getting Started

Note: you can find the files for our project in the GitHub repo.

Now that we have solid theoretical foundation, let’s implement it in practice.

To start, we’ll create a new directory and switch to it. Then we’ll initialize a new project:

mkdir learn-webpack
cd learn-webpack
npm init -y

Next, we need to install webpack and webpack CLI locally:

npm install webpack webpack-cli –save-dev

Now, the content of the generated package.json should be similar to the following:

{
“name”: “learn_webpack”,
“version”: “1.0.0”,
“description”: “”,
“main”: “index.js”,
“scripts”: {
“test”: “echo “Error: no test specified” && exit 1″
},
“keywords”: [],
“author”: “”,
“license”: “ISC”,
“devDependencies”: {
“webpack”: “^4.30.0”,
“webpack-cli”: “^3.3.0”
}
}

Besides bundling modules, webpack can be used as a simple task runner. We can create webpack tasks by including the name of our task followed by its instructions in the scripts section of the package,json file. Let’s try this now. Open package.json and change the scripts object to the following:

“scripts”: {
“test”: “echo “Error: no test specified” && exit 1″,
“dev”: “webpack –mode development”,
“build”: “webpack –mode production”
},

Within the scripts property, webpack allows us to reference locally installed npm packages by their names. We use that and the –mode flag to define dev and build tasks, which will run webpack in development (npm run dev) and production (npm run build) mode respectively.

Before we test the tasks we’ve just created, let’s create a src directory and put an index.js file in it so that it contains console.log(“Hello webpack”);. Now we can already to run the dev task to start webpack in development mode:

$ npm run dev

> learn_webpack@1.0.0 dev C:UsersUserWebpacklearn_webpack
> webpack –mode development

Hash: 5bb3bdc1efd7b7f4b627
Version: webpack 4.30.0
Time: 226ms
Built at: 2019-04-16 17:48:32
Asset Size Chunks Chunk Names
main.js 3.8 KiB main [emitted] main
Entrypoint main = main.js
[./src/index.js] 27 bytes {main} [built]

Great! It works as expected. But to verify that we get the correct output, we need to display the result in the browser. To do that, let’s create an index.html file in the dist directory:

<!doctype html>
<html>
<head>
<title>Getting Started</title>
</head>
<body>
<script src=”main.js”></script>
</body>
</html>

Now, if we open the file in the browser, we should see the Hello webpack message in the console.

So far, so good. But writing our index.html file manually can be problematic in some cases. For example, if we change the name of our entry point, the generated bundle will be renamed, but our index.html file will still reference the old name. So, we’ll need to update our HTML file manually every time we rename an entry point or add new one. Fortunately, we can easily fix that with the html-webpack-plugin. Let’s install it now:

npm install html-webpack-plugin –save-dev

At this point, to activate the plugin, we need to create a webpack.config.js file in the root directory with the following content:

const HtmlWebpackPlugin = require(“html-webpack-plugin”);

module.exports = {
plugins: [
new HtmlWebpackPlugin({
title: “Webpack Output”,
}),
],
};

As you can see, to activate a webpack plugin, we need to include it and then add it to the plugins array. If needed, we also pass options to the plugin.

Let’s run our build now to see what will happen:

$ npm run build

> learn_webpack@1.0.0 build C:UsersUserWebpacklearn_webpack
> webpack –mode production

Hash: e56a796f5ccfebcc8270
Version: webpack 4.30.0
Time: 1088ms
Built at: 2019-04-16 20:44:47
Asset Size Chunks Chunk Names
index.html 183 bytes [emitted]
main.js 956 bytes 0 [emitted] main
Entrypoint main = main.js
[0] ./src/index.js 27 bytes {0} [built]
Child html-webpack-plugin for “index.html”:
1 asset
Entrypoint undefined = index.html
[2] (webpack)/buildin/global.js 472 bytes {0} [built]
[3] (webpack)/buildin/module.js 497 bytes {0} [built]
+ 2 hidden modules

Let’s open the index.html. As we can see, the plugin automatically creates an updated index.html file for us which uses the title option from the configuration:

<!DOCTYPE html>
<html>
<head>
<meta charset=”UTF-8″>
<title>Webpack Output</title>
</head>
<body>
<script type=”text/javascript” src=”main.js”></script></body>
</html>

Let’s now expand our project and specify custom names for the entry and output properties. In webpack.config.js we add the following before the plugins property:

entry: ‘./src/app.js’,
output: {
filename: ‘[name].bundle.js’,
path: path.resolve(__dirname, ‘dist’)
},

Now, we’ll create an src/component.js file:

export default (text = “Hello webpack”) => {
const element = document.createElement(“p”);

element.innerHTML = text;

return element;
};

Next, we rename index.js to app.js to reflect our changes, and swap its content with the following:

import component from “./component”;

document.body.appendChild(component());

Now, let’s run webpack in production mode:

$ npm run build

> learn_webpack@1.0.0 build C:UsersUserWebpacklearn_webpack
> webpack –mode production

Hash: 9f78936f8a2a21061f0b
Version: webpack 4.30.0
Time: 1689ms
Built at: 2019-04-17 23:43:40
Asset Size Chunks Chunk Names
index.html 190 bytes [emitted]
main.bundle.js 1.04 KiB 0 [emitted] main
Entrypoint main = main.bundle.js
[0] ./src/app.js + 1 modules 227 bytes {0} [built]
| ./src/app.js 79 bytes [built]
| ./src/component.js 148 bytes [built]
Child html-webpack-plugin for “index.html”:
1 asset
Entrypoint undefined = index.html
[2] (webpack)/buildin/global.js 472 bytes {0} [built]
[3] (webpack)/buildin/module.js 497 bytes {0} [built]
+ 2 hidden modules

Let’s examine and clarify the information from the webpack output. Beginning from the top, we see the hash of the build, webpack version, and the time it took to execute the build. Next, we see the files generated in the dist directory (index.html and main.bundle.js). Below them, we see the entry module (app.js) and its dependency (component.js). The output after Child html-webpack-plugin for “index.html”: is related to the internal work of the html-webpack-plugin and we can safely ignore it.

So now, in the dist folder, we have the newly generated bundle file main.bundle.js. If we open index.html in the browser, we should see Hello webpack displayed on the page. Also, if we check the source of index.html, we’ll see that the value of the src property in the script tag is updated to main.bundle.js.

The post A Beginner’s Guide to Webpack appeared first on SitePoint.

Why the Highest Paid Developers “Fight” Their Coworkers

Original Source: https://www.sitepoint.com/why-the-highest-paid-developers-fight-their-coworkers/?utm_source=rss

You’re going to be asked to do it.

At some point, if it hasn’t happened already, your coworkers or your boss will ask you to do something foolish. Something you know will make things worse for you, your coworkers, maybe even the business itself.

If you’re like most developers, you do it anyway.

That’s what most will do, right? It’s better to keep your head down, avoid making waves and simply do what you’re told. Job security isn’t a thing anymore, but that’s one of the best things you can do to keep your job, for a while at least.

This Common Mistake Creates a Career Handicap

This is the problem.

Most employees want to keep their jobs and their clients. They don’t have the leverage or control they want over their own careers. They need their job. In fact, most people are terrified of losing their jobs.

This has a cascading effect.

Research shows the fear of losing your job creates job dissatisfaction and a lack of commitment at work. This, in turn, affects job performance, negatively increasing the likelihood that you will lose your job. It’s a vicious cycle that seems to repeat itself over and over.

But there’s something worse than the fear of a job loss.

It’s the misplaced confidence or expectation of job security, the kind of confidence that crushes you when you’re actually let go. Both of these issues are a problem, and both of these issues are continually ignored.

Why is it a problem?

Because 78 percent of employees live paycheque-to-paycheque. This includes workers making $100,000+ per year. This is the real reason why most employees have no leverage, no ability to say no. This is the reason most developers won’t fight with their coworkers.

Why Developers Need to Fight Their Coworkers

What do I mean by “fight?”

The post Why the Highest Paid Developers “Fight” Their Coworkers appeared first on SitePoint.