11 Inspirational Designer Portfolios For 2019

Original Source: http://feedproxy.google.com/~r/1stwebdesigner/~3/CwkL30labtI/

For web and graphic designers, it’s important to nail that portfolio, instantly convincing anyone who visits that you’re the one for the job. With the new year rolling around, it might just be time for a fresh redesign.

There are so many amazing portfolios out there to draw inspiration from. If you’d like to explore and learn from the work of your fellow designers, you’re going to love this list. These are the portfolios that get it right!

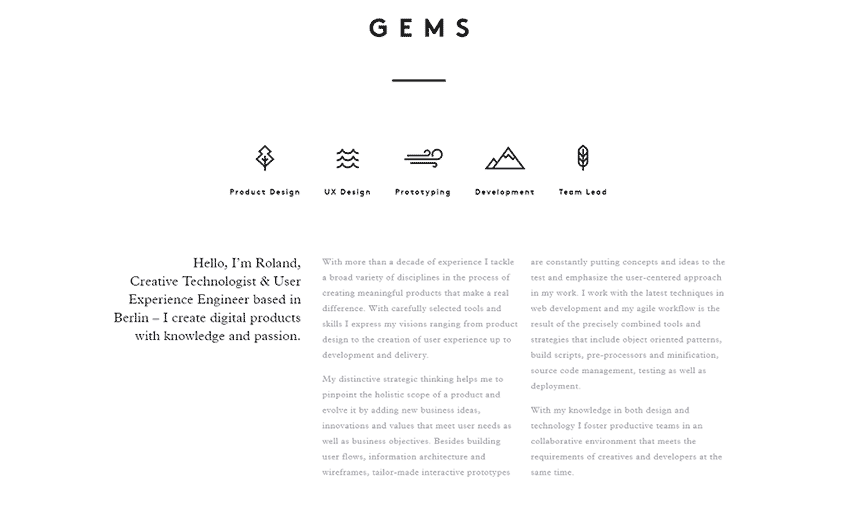
We Ain’t Plastic

We Ain't Plastic

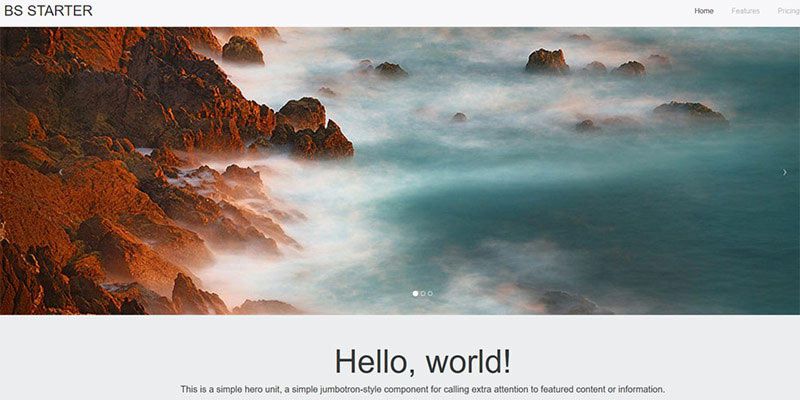
We Ain’t Plastic definitely leaves its mark. Its subtle effects, animations and images all come together to create a website that was obviously crafted with love. It also gets right to the point, careful not to overload you with too much information.

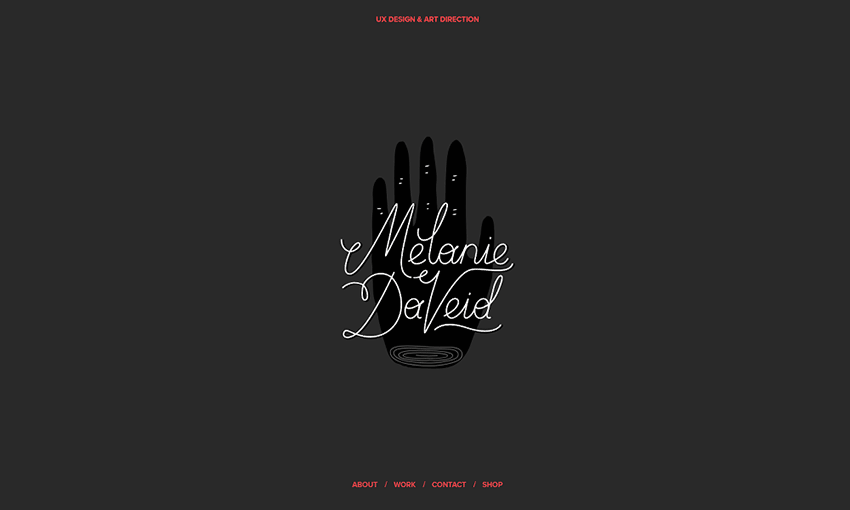
Melanie Daveid

Melanie Daveid

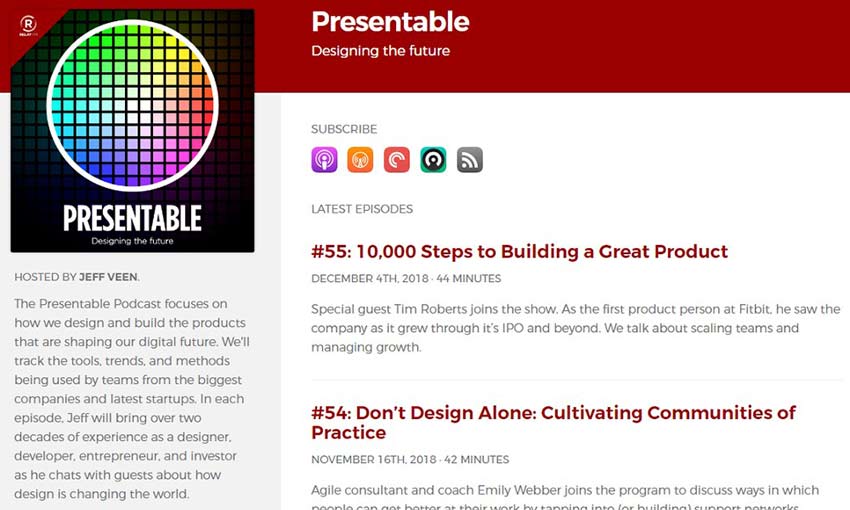
This beautiful one-page portfolio proves that simple-but-strong design is often the best way to go. The perfectly elegant animations are the most memorable part of this website, alongside the dynamic layout.

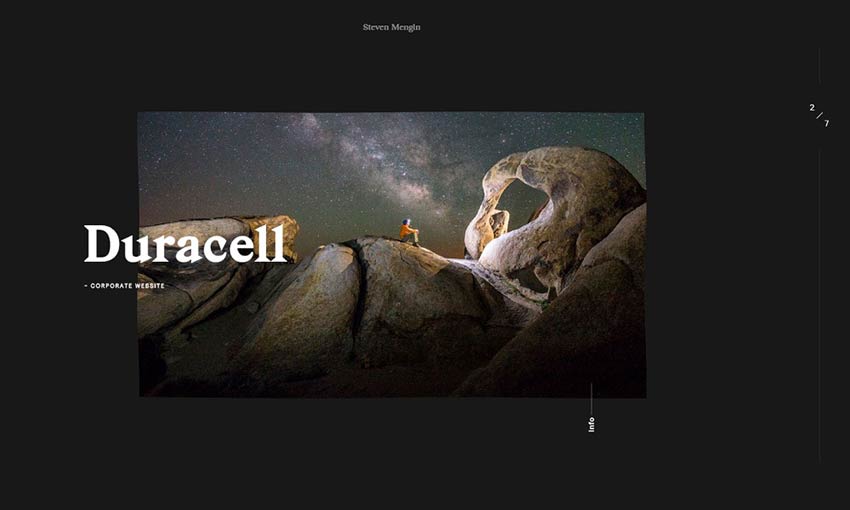
Steve Mengin

Steve Mengin

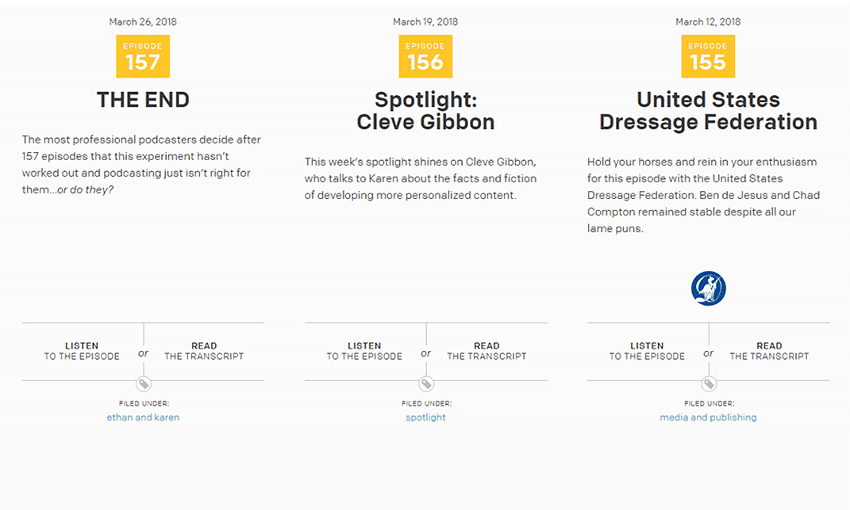
Stylish and well put together, navigating this portfolio is no less than delightful. Every animation looks great, and though many navigation elements are fairly unique, getting around is very intuitive thanks to fantastic UI design.

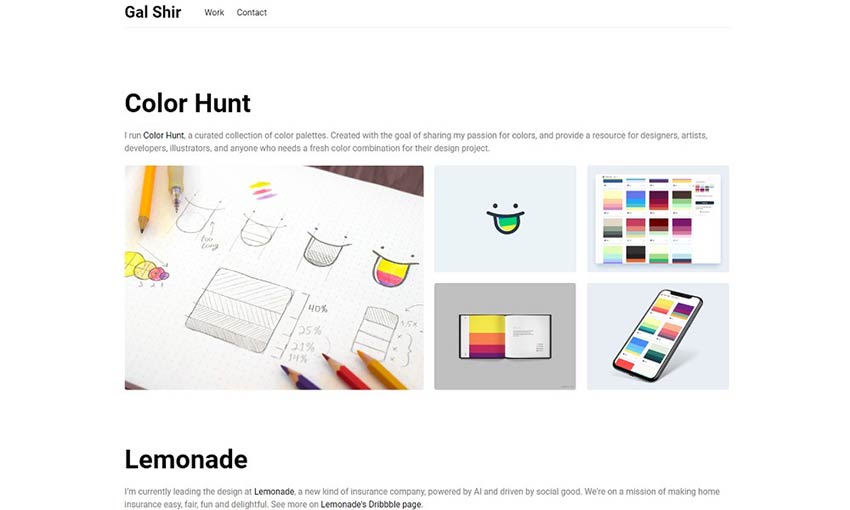
Gal Shir

Gal Shir

Fun animations and colorful images quickly bring this site to life. You won’t be able to stop scrolling, stopping to see each animated image. And a pretty parallax effect brings the site to a satisfying end.

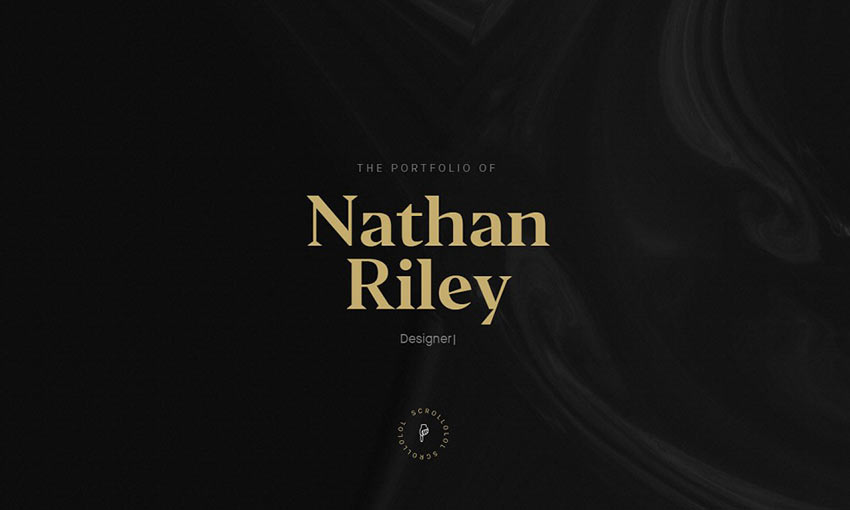
Portfolio of Nathan Riley

Portfolio of Nathan Riley

This dark, modern website is filled with all sorts of fun little details, animations and browser interactions. Discovering them all is a joy. You know this is a designer who loves his job. Click to see the projects and you’ll get some interesting behind-the-scenes info on design choices, too!

Jack Jeznach

Jack Jeznach

Everything about this website indicates excellency at both style and skill. There’s so much attention to detail that it’s astounding. As you navigate the well laid-out portfolio you’ll be constantly driven to keep exploring and learning more about the developer.

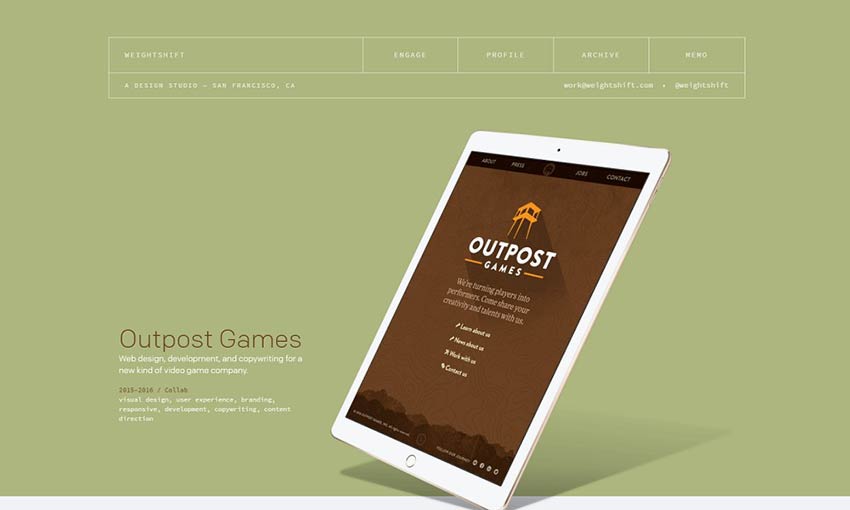
Weightshift

Weightshift

What’s better than a collection of case studies so nicely presented? Scroll through the clean, brightly colored website and check out the examples to see a short demonstration of the company’s past work!

Timothy Achumba

Timothy Achumba

This portfolio uses a pleasant block-based layout that’s easy to navigate on any device. Images are the focal point, taking up a majority of the screen. What text there is tells you exactly what you need to know.

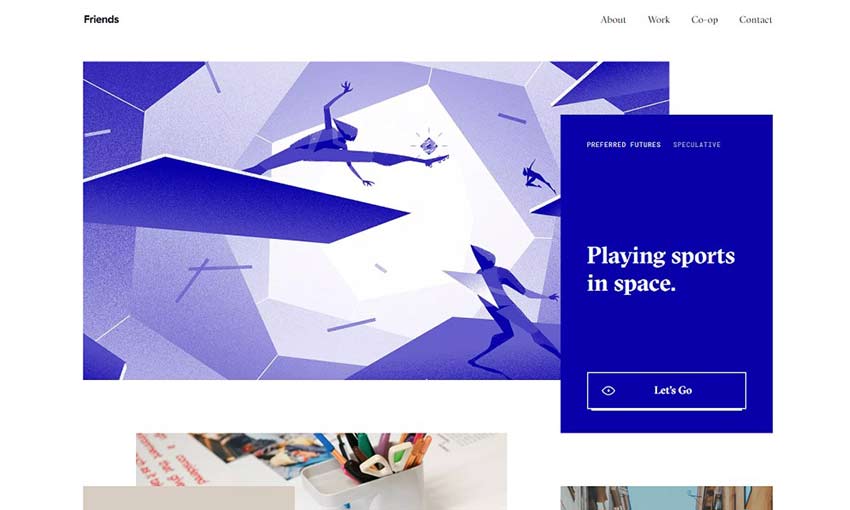
Friends

Friends

Here’s one reminiscent of a business card: Sophisticated, beautiful and simply but carefully designed. There are plenty of case studies to learn more about the company and its methods. Nothing is better than understanding your designer’s goals and processes.

Baptiste Ringot

Baptiste Ringot

This is a portfolio made with readability and ease of navigation in mind. There’s a lot of content and past work, but text is frequently broken up by interesting images of past design projects. It’s simple to navigate the sections. And the slight change of background color as you scroll is a nice touch.

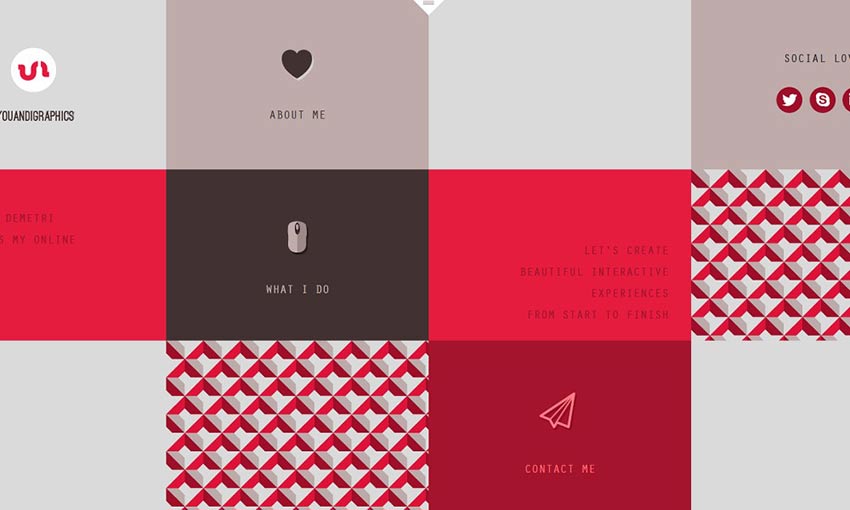
Youandigraphics

Youandigraphics

A beautiful palette, unique layout, and cute art and animations certainly make this a standout website. Looking at this portfolio, you know the designer truly has an artist’s eye.

Amazing Portfolios by Designers

There’s nothing more inspiring than a skilled web designer’s portfolio. Experts and innovators are always pushing the limits of what a website should be capable of, with portfolios that skillfully display their mastery in design.

Which portfolio was your favorite? There’re just too many awesome ones to choose from!


Top 5 Free Web Statistics Tools

Original Source: https://www.hongkiat.com/blog/top-14-free-web-statistics-tools/

Either you own a website or a blog, it cannot be a one-way process where you just keep posting stuff and don’t pay heed to how the users are reacting to it. Therefore, it is important to keep…

Visit hongkiat.com for full content.

Build a better personal brand

Original Source: http://feedproxy.google.com/~r/CreativeBloq/~3/jtfH3Oy3KUQ/build-a-better-personal-brand

Browsing the portfolio websites of design studios and freelance creatives, you can easily play a successful game of bingo. 'About' pages brim with words like 'meaningful', 'impact', 'stories' and 'difference', and you'll be striking white-walled offices, brainstorm scribbles, bikes and plants from your scorecard like nobody's business. 

It shows that even creatives who craft the most thought-provoking, disruptive and provocative work for their clients can be a bit – we hate to say it – unadventurous when it comes to presenting themselves to the world. 

34 brilliant design portfolios to inspire you

But whether you've just started out or currently run a decades-old studio with a zillion employees, it's never too late for a bit of self-love. Not only will it make sure your work is getting the presentation – and explanation – it needs, but rethinking your own brand can be a trajectory-changing experience that helps you recalibrate and prepare for the future.

01. Define your vision

Double Standards' website

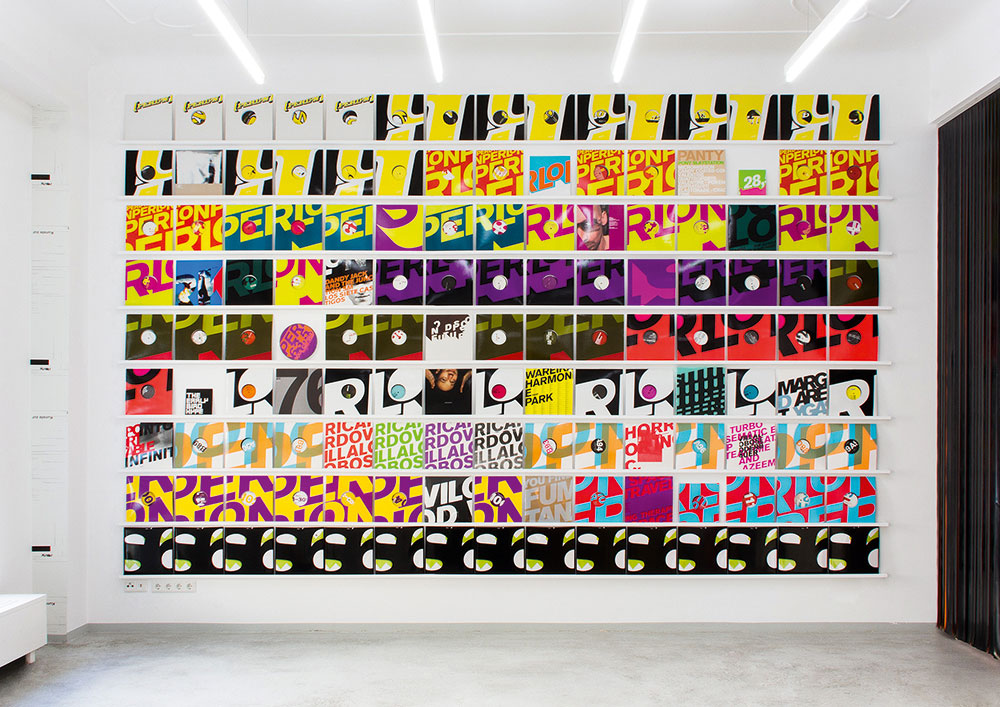
Double Standards’ website features pictures of its Berlin studio and adjacent art space

Whether you're creating a new company or having a spring clean, the temptation might be to go straight to the visuals – images are what designers do best, after all. But Ansel Neckles, co-founder of platform Let's Be Brief who works with brands and creative entrepreneurs to refine their positioning, suggests taking several large steps back. 

"Try to establish what you're trying to achieve in a broader holistic sense – a vision for your work," says Neckles. "From working out what you want to achieve you'll find a natural alignment with the folks that are working in those spaces and the clients that fit with that vision."

This sense of vision, says Chris Rehberger, founder of Berlin studio Double Standards – whose bold typographic-led rebrands have been sought by everyone from orchestras to Lacoste – should hinge on your motivations for getting up and going to work. 

"Dig down deep, ask yourself why you're doing it," says Rehberger, "If you want to do it for stardom that's okay, but communicate that." If that feels too complex, reframe the question to ask where you'd like to be in five years. "It's combining these two poles, where you're coming from and where you want to go," Rehberger adds, "Somewhere in between you find yourself."

5 essential rules of self promotion
02. Align with your clients 

As well as working out what you want to do and why you do it, working out who you want to do it for may also help bring focus to your brand. "Knowing you want to work for Nike is good, but everyone will say that," says Neckles, using an example that often comes up when he's coaching. "Knowing why you want to work for Nike is better." 

The strength of Nike's brand, Neckles explains, is in inspiring motivation in their customer base. "If I'm working as an art director at an agency – which I did for many years – I want to find someone's work that supplements the concepts I've developed," says Neckles. "If you're not about betterment through activity and proactivity, or people don't take that feeling away from your work, there's no way Nike will want to align with you."

Unpicking what potential clients are like, to see whether they match your own approach, is key to pitching for work. "You can then talk about the alignment of your brands rather than 'I make nice posters or I'm really good at typography', which may also be true," adds Neckles.

03. Promote your personality

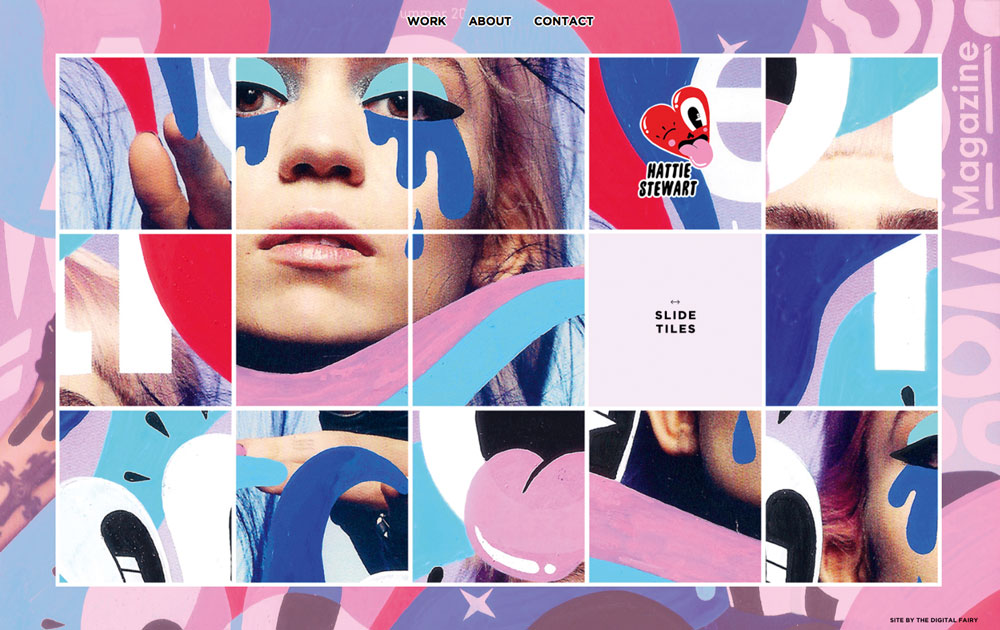
Hattie Stewart's website

Hattie Stewart’s site features a sliding puzzle for visitors

Whether you're developing identity systems for FTSE giants or you specialise in the most niche comic styles, reflecting your work in your personal brand – and its most obvious representation, your website – is essential.

For example, illustrator Hattie Stewart, who specialises in cheeky flower-filled defacements of celebrities, allows her website visitors to remix her illustrations as a digital sliding puzzle in a similar style to her own re-workings. Manchester-based designer Craig Oldham's site features a playful soundboard – reflective of Oldham's humour, but also of his status as a disruptor who is willing to do things differently. 

04. Consider your logo

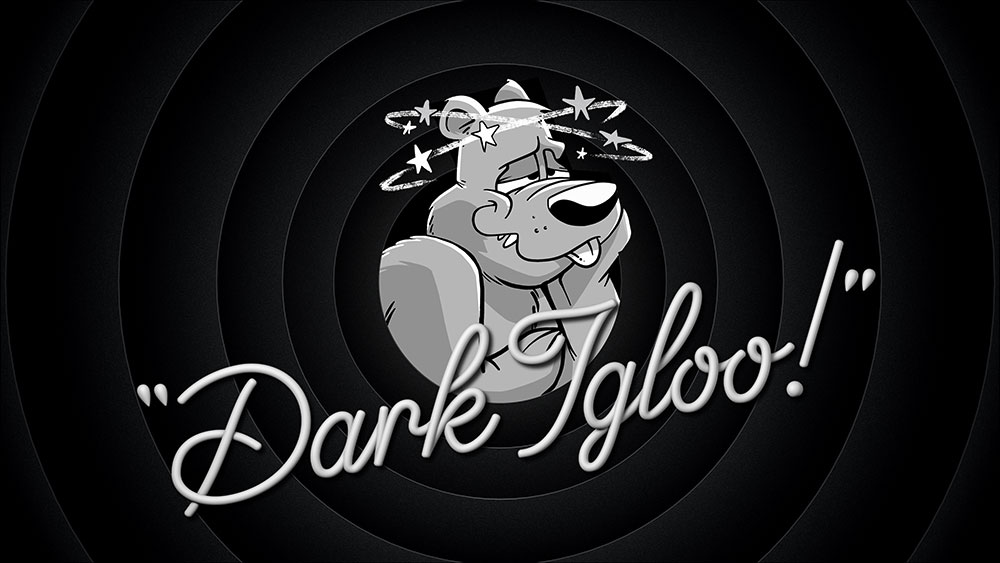
When US design studio Dark Igloo first started working on its own logo, it decided on a mash-up of the state flags of its two founders Dave Franzese and Mark Richard Miller (whose first names combined also produced the 'Dark'). 

Although the state insignia says little about Dark Igloo's current work – which includes motion-heavy branding for Giphy and Miami-inspired art direction for Converse – its treatment of this logo and mascot does. A grizzly bear with 10 stars circling its head, the logo soon morphed into a cartoon character which the studio uses on its site, its lighters-cum-business cards and as its social media avatars.

"It has a dazed personality, joyous and following the bliss," says Miller. Whether he's scrolling through an iPad on Dark Igloo's blog page or laden with swag in the shop, the bear is an anchor across the hectic site. It's fun, nostalgic and showcases the animation skills that Dark Igloo has in buckets. 

Coupled with a surreal landing page and a contacts section that you can play as a racer game, self-initiated projects such as Dark Igloo's ad for an '80s megamix board game that never existed (complete with wizard and dry ice) show prospective clients exactly the feel and ambitious scope of the work Dark Igloo could do for them.

05. Extend your personality through social media

For New York designer Wade Jeffree, the idea of performance is a key facet of his personal visual identity, often appearing in his own work as a way of playing out design ideas or aesthetics. "It's a combination of time, discipline and being critical that has led me to where I am now," says Jeffree of his distinctively surreal and funny vision. 

Just as with Dark Igloo, it's clear from the consistency of his social feeds that Jeffree lives and breathes his personal brand,  expressing himself through colour, awkward angles and weird props – something essential for its longevity. "You also need to be honest with yourself about what you enjoy making – so those things can get better."

Whether you're part of a studio or a solo practitioner, collaborating with a copywriter, fellow designer or developer is a sure-fire way to get some much needed perspective on your personal brand. When Gabriella Marcella redeveloped the website for her print studio Risotto, the advice and skills of developer and motion graphics expert Brendan Bennett was invaluable. 

"It's simultaneously easy and hard being your own client," admits Marcella. "Working with Brendan has been essential to ensuring decisions are challenged and thought-through. It was one big puzzle that was exciting to solve."

06. Nail the text

Dark Igloo's bear mascot

Dark Igloo’s bear mascot is a mash-up of the state flags of its two founders

Although visual branding comes easily to most designers, expressing personality verbally might not be so straightforward. When working with designers and other businesses to help them talk about what they do, copywriter Roshni Goyate starts with a spot of homework: asking participants to bring in an example of brand language from outside their industry that's stood out to them. 

"We go through what is happening in those pieces, what kind of language is being used, and analyse what the brand could have said and why they said what they did," says Goyate. Untangling other brands' verbal communications allows you to see some of the choices at work, and make your own. 

The next step is a series of writing exercises that ask designers to describe what they do in their job to their grandma or to an eight-year-old child. "It's about getting them to step away from using jargon and established ways of communicating what they do, and show their personality instead," she adds.

07. Find the hook

The first impression, Goyate says, counts as much as the 'About' page. "Imagine that the person reading your site has no time at all – which is all of us – but you want them to understand what you do from the first line that they read. With design studios, it's about being provocative or being brave and finding that hook that sets you apart from others."

Goyate also recommends weaving information around a website through interesting labelling, so readers aren't overwhelmed with lots of information all at once. The most important thing is consistency – on your site, in publications and especially on social media. "It's just as important as your visual language," says Goyate. "You wouldn't use different logos on different pieces of collateral or different colours. In the same way, your brand language should be one watertight personality that you're communicating."

Whereas Double Standard's brand language is clipped and conceptually driven, Dark Igloo's is equally as playful as its visual identity. "I think we want there to be a level of entertainment in it, even in the writing." For example, instead of telling readers to click the link to see more about Giphy, they opt for "Ditch water polo practice and fill a powerade bottle with vodka with Giphy to see the rest." The pair also devised the tagline 'Dark Igloo is a company that specialises'.

"We never say what we specialise in," explains Franzese. "We could be puppeteers one month, animators the next, and branding experts the month after that. Come to us with the brains and we'll figure out the execution with you."

Next page: Present your work through the right lens, and three more tips

08. Present your work through the right lens

Studio Output

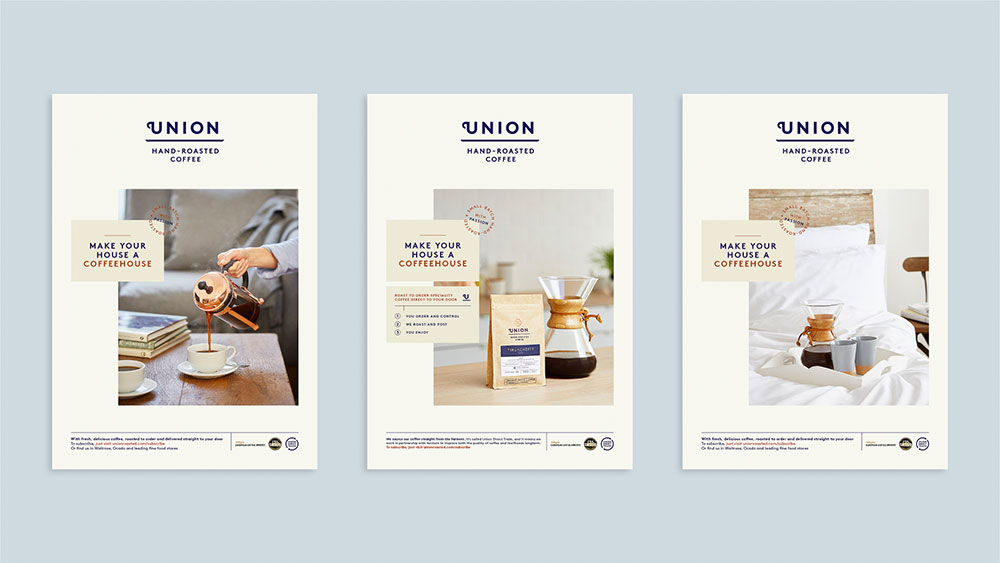
Studio Output reshaped its strategy into one of solving problems for its clients, such as Union Hand-Roasted Coffee

With its 15th anniversary in sight, a couple of years ago, London-based design practice Studio Output worked with a consultant (and former client) to identify how it could reshape its internal positioning. The result was a dramatic new strategy that recalibrated all its projects through the lens of problem-solving. 

Its identity for Union Hand-Roasted Coffee is headlined as 'Supporting scale-up of a fast-growing business' for example, and its branding of Viber 'Driving user acquisition and retention in a congested market'. "The biggest issue for clients is they're going to have a big problem you need them to solve," says Studio Output's client services director Gemma Ballinger. "If you can show that quite succinctly through other work, then it's going to resonate with them."

The repositioning also involved updating the questions that the Studio Output team ask clients in order to ensure the team has solid KPIs to work towards, and by which they can assess their effectiveness at the end of a project. This set of questions was distilled to a skeleton version, which was then used as a script for their website landing page's showreel. 

How to build a thriving studio

Many studios – from ustwo to Made Thought to ILoveDust  – greet visitors to their sites with a film featuring their best projects. Whereas ILoveDust's is moody and atmospheric, ustwo prioritises its R&D model. "If clients are really short on time, it might be all they need to see," adds Ballinger.  

Whether to show sketches, research or opinion pieces is another key factor when defining your brand. Dark Igloo is keen to show the development of its projects, an approach shared by motion specialists ManvsMachine and Universal Everything. 

"Usually the bottom half of the project on our site is behind-the-scenes imagery," says Miller. "That's not just to show you that this can be done on a small scale, but it also represents that we pride ourselves on having fun sets and making things that don't feel like work."

But don't panic if presenting work is not an option. Dark Igloo didn't show any projects for its first three years and freelance designer Craig Jackson, whose clients include Google, BBC, Apple and HSBC, still doesn't. "It was getting really hard to actually show the work due to NDAs so I thought it was time to take things offline for a bit to see what happens," says Jackson. Luckily it was a risk worth taking, with the added bonus that it allows Jackson to handpick work for every project. "The general mystique of it all also seems to go down really well."

09. Consider 'brand in the hand'

Knowing their lighters were always being pinched, the Dark Igloo team turned them into business cards

Just as Dark Igloo's '80s TV-inspired landing page presents the studio as inventive and fun-loving, its brand is similarly thoughtful when entering the physical realm. Instead of business cards, the duo make lighters to give to potential clients and collaborators. 

"People would always take ours," shrugs Miller. "When we added the characters people started going crazy. You would bump into someone that you hadn't seen in 10 months, and maybe they didn't remember you exactly, but they definitely still had that lighter. It was an incredible touch-point." 

When it first started out, Dark Igloo gave any client taking on a major project with them badges based on a patch that the crew of the Nostromo wore in the film Alien. "It was to show we were going on a journey together," says Franzese. 

Similarly the studio wooed potential clients by sending them lighters inside boxes that were inspired by old Sega packaging and featuring its Contacts page game. "Put ultimate care and craft into something you'd want yourself and share it with someone as a gift," Franzese adds.

The same is certainly true of Double Standards' foray into branded products. Its calendar – which is sold through its online shop, as well as distributed to collaborators – began as something sleek and functional for the studio, and was soon requested by a visiting client. Now, making them is an annual tradition. "Every November I get the first email asking when the new calendar is out," laughs Double Standards' Chris Rehberger.

Similarly, the necessity to create other functional products for projects, and the subsequent interest on Facebook, inspired the studio to design a lamp and table, both now stocked in one of Berlin's coolest concept stores, Andreas Murkudis. Double Standards even opened a physical shop in October.

Even though it operates in a very different landscape, Studio Output also suggests creating something useful when sending mailers. To celebrate its 15th anniversary, the studio gave prospective clients a brainstorming pack complete with branded notebooks, Sharpies, Post-it Notes and a set of thought-starter postcards. 

These featured Studio Output projects on one side and related advice on how to do things such as write briefs on the other. "We do find that things we send physically – because people don't get them much any more – do have a good impact," says Ballinger. "You've just got to make sure you follow it up properly." 

This article was originally published in Computer Arts – the world's leading design magazine. Subscribe to Computer Arts here.

Related articles:

Promote your brand with content marketingTraditional branding is dead21 outstanding uses of colour in branding

3 Tips for Creating a Effective User Flow

Original Source: https://www.webdesignerdepot.com/2019/01/3-tips-for-creating-a-effective-user-flow/

The purpose of almost every web design is to entice customers into buying your products, or subscribing to your services. However, your website can’t accomplish that goal without providing a superior user experience, which is largely defined by a great user flow.

User flow refers to a series of steps that will help your prospects interact with your website without any distractions or hindrances. Thus, it improves your conversion funnel and reduces the bounce rate. The better the user flow is, the higher the sales conversions will be.

However, designing a great user flow is easier said than done. It is a complicated process that involves creating and evaluating different stages. However, if you keep a few things in mind, you can enable a superior user flow quickly.

1. Know Thy Customers

When you build a user flow, the first thing you should think about is your customers. In-depth understanding of the target audience is fundamental to creating a well-defined user flow. If you know what solutions they expect from you, designing a suitable user flow is a lot easier. It will allow you to design a perspective similar to your users, resulting in higher conversions. This is why you need to create user personas as well as map out customer journey of your prospects.

Creating Buyer Personas

You can think of user personas as a set of characteristics that define the majority of your potential users. These are not fictional guesses. Naturally, creating buyer personas involves a lot of qualitative and quantitative research. You need to study and recognize behavior patterns, goals, skills, attitudes, and background information about your customers.

Collect as much information about your users as possible

Collect as much information about your users as possible. Make sure your user persona focuses on the present. You must know how the users are interacting with your product right now, and not speculate on how they will do so in the future.

You should also tie every characteristic of your buyer persona to real data. You can create more than one persona. In such a case, however, you will need to prioritize them as the primary (most relevant) and secondary personas. You will also need to design different user flows for each persona.

Mapping User Journeys

The next critical aspect of knowing your customers is mapping their journey. A user journey is a timeline of user actions that will show you different touch points between the customers and your website. It allows you to understand how users interact with your site and what you can do to improve this engagement. For example, you may be able to find that removing or realigning a particular stage from the journey can improve your conversions.

It usually consists of personas, timelines, touch points, and engagement channels. Detailed customer personas will allow you to identify the trigger points or problems of your consumers. The timeline determines how long the journey will take, while touch points are the stages where users will interact or take specific actions such as registering for your email list.

Engagement channels are nothing but various ways to interact with your customers such as sending promotional emails, text messaging or online chatting. However, a customer journey map will largely depend on your market niche and customer personas.

Identify the Entry Points

In addition to the user personas and buyer journey, you also need to know the various entry points. Entry points are the way your potential customers reach your website. Usually, they will get to your site through one of the following entry points.

Directly typing the web address of your site.
Through social media sites such as Facebook and Instagram. They will click on the links provided in your promotional content to reach your site.
Through organic search (or pay-per-click ads if you are running a PPC campaign) by typing the search queries in search engines such as Google or Bing.
Through advertisements and referrals on other websites, online forums, and blogging sites.
Via email links sent in your promotional emails or monthly newsletters.

Knowing these entry points is crucial because they will affect your user flow. For example, a user coming to your site by clicking a link in a promotional email is likely to be a recurring customer. This user is more interested in availing a specific offer mentioned in the email rather than exploring your site.

On the other hand, someone coming through organic search or social media promotion is more likely to be a first-time visitor. So, they will browse your site for a while and try to find out more about your business before taking any action. They will have a longer user flow with several micro-interactions compared to a returning customer.

2. Avoid Overwhelming Users with Too Much Content

In their attempt to engage users, UX designers often end up creating user flows that are overflowing with content. Unfortunately, this creates the opposite effect. Overwhelming content or features are more likely to distract or frustrate users, resulting in increased bounce rate.

Scrape off Excess Content

Whether it is excessive content or UI elements, you need to minimize as many visual distractions as possible. They are not only unnecessary, but also unattractive. So, make sure to remove all the excessive content, graphics, animations, flashy text, and flickering logos. In other words, you need to embrace simplicity.

If possible, go for a minimalist design. Most static and service-oriented websites can use a minimalist approach to design simple, yet remarkably attractive user flows for their websites. Create site layouts with only the essential elements. Use a balanced mix of images, text and other features that compliment your user flow.

Shorten the Number of Features and Options

A minimalist design also works for various features or options on your website. You need to minimize the features or choices on your site. Too many choices can lead to decision paralysis. Always make sure to provide clear-cut choices that will lead to a specific action.

The easiest way to make that happen is to create the right Calls-To-Action (CTAs) and place them suitably on your site. For example, if the primary goal is to increase your email list, your CTA should focus on asking your prospects to share their email ID with you. You can tempt them with a discount coupon for their next purchase or entice them with a monthly newsletter.

3. Create and Test Your Prototypes

Once you have a firm outline for the user flow, it is time to create different prototypes and test them. A prototype is the tangible variant of your site’s user flow. It will allow you to troubleshoot potential issues before the actual design is built, saving time and money.

Test Your Prototype with Real Users

It is always better to test your user flow prototype with real users. You can use a small group of your target audience (that matches your buyer persona) for testing. Create as many prototypes as you need. Ask this group to check out your prototype and find out what actions they take. Encourage them to provide honest feedback.

It is always better to test your user flow prototype with real users

Once you have their feedback, try to address the bottlenecks and areas of frustration using A/B testing. You can provide more than one alternative to fix a specific issue. A/B testing will help you choose the best possible solution with certainty.

Of course, getting real customers involved in prototype testing is expensive. However, consider this as an investment in building a website with high sales conversions. Alternatively, you can also hire a UX expert to find out potential issues with your existing user flow. It will be less expensive, but may not be as comprehensive as testing with real customers.

Keep Optimizing

Creating a user flow is an ongoing process. Consumers will use new entry points, your competitors will incorporate better user flow elements, and the web will also keep evolving. You will also need to keep optimizing your user flow regularly to stay relevant to these changes.

You can ask your user the following questions:

What do they love about your site? Is there something unique that encourages them to keep coming back?
Which is the most attractive feature of your site and why?
Which part of the site do they find unattractive?
What else would they recommend your website should have?
Finally, how will they rate their user experience (or shopping experience)?

Take this feedback into account when updating your user flow. For example, you can try to change the unattractive elements on your site based on the customer feedback and see if the changes can improve your sales.

Parting Words

User flow and user experience are closely interlinked. If you improve user flow, user experience is also elevated. But, before you set out to design the user flow, make sure to go through these three points. They will help you to prepare for a major user flow overhaul of your website. Once you know what needs to be built, nothing can stop you from attracting your prospects.


Featured image via Unsplash.

Add Realistic Chalk and Sketch Lettering Effects with Sketch’it – only $5!

Source

p img {display:inline-block; margin-right:10px;}
.alignleft {float:left;}
p.showcase {clear:both;}
body#browserfriendly p, body#podcast p, div#emailbody p{margin:0;}

How Improving Website Performance Can Help Save The Planet

Original Source: https://www.smashingmagazine.com/2019/01/save-planet-improving-website-performance/

How Improving Website Performance Can Help Save The Planet

How Improving Website Performance Can Help Save The Planet

Jack Lenox

2019-01-15T13:30:32+01:00
2019-01-16T07:54:18+00:00

You may not think about it often, but the Internet uses a colossal amount of electricity. This electricity needs to be produced somewhere. In most countries, this means the burning of fossil fuels. This, in turn, means that the Internet’s carbon footprint has grown to the point where it may have eclipsed global air travel, and this makes the Internet the largest coal-fired machine on Earth.

The Mozilla Internet Health Report 2018 states that — especially as the Internet expands into new territory — “sustainability should be a bigger priority.” But as it stands, websites are growing ever more obese, which means that the energy demand of the Internet is continuing to grow exponentially.

All the while, the impacts of climate change grow worse and more numerous with each passing year. The vast majority of climate scientists attribute the increasing ferocity and frequency of extreme weather events around the world to climate change, which they largely attribute to human activity. While some question the science, even the world’s largest oil companies now accept it, and concede that their business models need to change.

Every country on Earth (with the exception of the US), is signed up to the Paris Climate Agreement. Although the US controversially pulled out, many of America’s most influential individuals, cities, states, and companies — representing more than half the US population and economy — have retained their commitment to the agreement by way of the America’s Pledge initiative.

Front-end is messy and complicated these days. That’s why we publish articles, printed books and webinars with useful techniques to improve your work. Even better: Smashing Membership with a growing selection of front-end & UX goodies. So you get your work done, better and faster.

Explore Smashing Membership ↬

Smashing Cat, just preparing to do some magic stuff.

As web developers, it’s understandable to feel that this is not an issue over which we have any influence, but this isn’t true. Many efforts are afoot to improve the situation on the web. The Green Web Foundation maintains an ever-growing database of web hosts who are either wholly powered by renewable energy or are at least committed to being carbon neutral. In 2013, A List Apart published Sustainable Web Design by James Christie. For the last three years, the SustainableUX conference has seen experts in web sustainability sharing their knowledge across an array of web-based disciplines.

Since 2009, Greenpeace has been putting pressure on big Internet companies to clean up their energy mix by way of their Clicking Clean campaign. Partly as a result of this campaign, Google announced last year that for the first time it had purchased enough renewable energy to match 100% of its global consumption for operations.

So, apart from powering servers with renewable energy, what else can web developers do about climate change?

“You Can’t Manage What You Can’t Measure”

Perhaps the biggest win when it comes to making websites more sustainable is that performance, user experience and sustainability are all neatly intertwined. The key metric for measuring the sustainability of a digital product is its energy usage. This includes the work done by the server, the client and the intermediary communications networks that transmit data between the two.

With that in mind, perhaps the first thing to consider is how do we measure the energy usage of our website? This is actually a trickier undertaking than you might imagine, and it’s difficult to get precise data here. There are, however, some good fallbacks which we can use that demonstrate energy usage. These include data transfer (i.e. how much data does the browser have to download to display your website) and resource usage of the hardware serving and receiving the website. An obvious metric here is CPU usage, but memory usage and other forms of data storage also play their part.

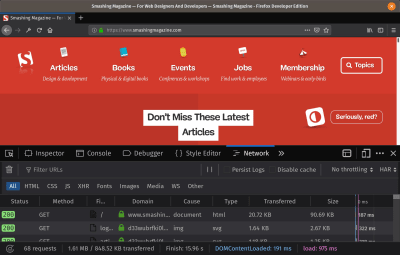
Data transfer is one thing that we can measure quite easily. All of the major browsers provide developer tools that allow us to measure network activity. In this screenshot below, for example, we can see that loading the Smashing Magazine website for the first time incurs just under a megabyte of data transfer. Firefox’s developer tools actually provide us with two numbers: the first is the uncompressed size of the files that have been transferred, and the latter is the compressed size.

SmashingMag - Firefox Developer Edition

(Large preview)

The most common tool for compressing assets as they travel across the network is gzip, so the difference between those two numbers is typically a result of gzip’s work. This latter number represents how much data has actually been transmitted and is the one to keep an eye on.

Note: There are plenty of other tools that provide us with a metric for data transfer including the much revered WebPagetest.

For measuring CPU usage, Chrome provides us with a granular Task Manager that shows the memory footprint, CPU usage and network activity of individual tabs. For the more adventurous/technical, the top (table of processes) command provides similar metrics on most Unix-like operating systems such as macOS and Ubuntu. Generally speaking, we can also run the top command on any server to which we have shell access.

Fortunately, there are efforts such as WebsiteCarbon and Ecograder that seek to translate these metrics into a specific CO2 figure (in the case of WebsiteCarbon) or a score (in the case of Ecograder).

Sustainable Web Design

Now we know how to measure the impact of our site, it’s time to think about how we can optimize things to make it more sustainable, more performant, and generally a better experience to use.

There are some existing works we can draw on to help us here. In 2016, O’Reilly published “Designing For Sustainability” by Tim Frick. In this book, Tim takes us on a tour of the whys and hows of sustainable design. But we can also draw on a wealth of existing ideas, conference talks and articles which — while not having an explicit focus on sustainability — have a huge overlap with the philosophy of sustainable web design. Particularly good examples here are Brad Frost’s side-project, “Death To Bullshit”, Heydon Pickering’s articles and talks about writing less damn code, and Adam Silver’s blog post, “Designing For Actual Performance.”

If we’re doing a complete redesign of a website, or starting a new one from scratch, we can start with some really high-level questions here. For example, what actually deserves or needs to be on a homepage? And more specifically, what value does each element on a homepage bring? As Heydon Pickering puts it:

“The most performant, accessible and easily maintainable feature of a website is the one that you don’t make in the first place.”

I work on the WordPress.com VIP team, so in this vein, I decided to challenge myself by putting together a minimalist WordPress theme to see how far I could take the techniques of sustainable web design. The result is a theme called Susty, and it can be seen in action on the accompanying website I put together: sustywp.com. In that particular example, the website is delivered in just over 6KB of data transfer, which feels good given that the median website is about 1.5MB.

So, what did I do? Well, I’ll tell you.

Reduce Network Requests

As I have outlined above, network requests are something we can easily measure, so they make for a good starting point. In putting Susty together, I noticed there were a number of HTTP requests going on that didn’t appear to be necessary. For example, WordPress bundles some CSS and JavaScript that detects the usage of emojis and makes sure they don’t appear as illegal characters. There’s nothing inherently wrong with this, but if you aren’t planning to use emojis, or you’re happy and confident that the various system defaults will have you covered, you can prevent these from loading.

This represents a relatively meager saving, but by establishing a philosophy of pruning unwanted code and requests from our pages, we can make much more significant performance improvements. For example:

Are we loading the whole of jQuery for some basic DOM operations?
Could we achieve the same ends with pure JavaScript? You can read about more advanced dead code elimination (aka tree shaking) in this post for Google by Jeremy Wagner.
Do we have a carousel of images?
Do we really need all those images? Are they significantly enhancing the user experience? Or could we reduce it to just one, strong image? Or even randomly show one of a selection of images, to give a sense of dynamism to returning users? By the way, the research that has been done here shows that most users neither like nor engage with carousels.
If we are using a lot of images, would we benefit from providing our images using the WebP format for those browsers that support it?
For the longest time, WebP’s support has been frustratingly limited. But with Firefox due to begin support for it in version 65 (due in January 2019), it’s only a matter of time before remaining stragglers like Safari catch up.
Are we loading hundreds of kilobytes of web fonts?
Are we using all of the web fonts that we’re loading? Do we even need web fonts? Most devices these days have a stack of half-decent fonts, could we just specify a list of fonts we’d like to see arranged by preference? If we must use web fonts, we should make sure our fonts are as performant as is reasonably possible.
Are we embedding YouTube videos?
An embedded YouTube video typically adds about a megabyte of data transfer before anyone even interacts with it. If only a fraction of our users are actually going to sit and watch the embedded video on our website, could we just link to it instead?

Scrutinise Everything

In this vein, we can also interrogate every aspect of our pages. What really deserves to be there? Does our sidebar add any real value, or have we just put one there because convention dictates that websites have sidebars? So, we’ve added one and filled it with crap.

With Susty, I’ve experimented with the somewhat unorthodox approach of relegating the navigation to its own page. This allows me to have pages that are stripped down to literally the bare essentials, with additional content only being loaded at the user’s explicit request. Susty is so lightweight and so fast that I realized through some user research (aka my partner) that the loading of the menu didn’t really feel like a new page, so I decided to make it look like an overlay, with a cross to dismiss that actually just takes you back to the previous page.

As well as helping me to create pleasingly lightweight pages, the relegated navigation also removes the need for any fancy hide/reveal code for showing it. At this point, I’d like to make it clear that Susty is an example of taking sustainable web design techniques to an extreme (I’m not suggesting it’s an archetype of a good website).

Write CSS Like Your Grandmother

When it comes to serious performance enhancement, we should bear in mind that literally every character of code counts. Every character represents a byte, and even after they’ve been compressed by gzip, they’re still taking up weight. CSS is a domain where we often see a lot of bloat. Fortunately, there are a growing number of increasingly complex tools that can help you weed out unused CSS. This fantastic post by Sarah Dayan outlines how she reduced her CSS bundle from 259KB to 9KB!

If we’re starting from scratch, perhaps we should think more deeply about how we write CSS in the first place. Heydon Pickering wrote an excellent post about how we can write CSS in a way that plays to the strengths of how the syntax was designed, and how this can help developers prevent repetition. Heydon also points out how much wastage goes on with excessive usage of divs and classes — both in HTML and CSS.

What Are You Analyzing?

It seems to have become more-or-less ubiquitous on the web for everyone to analyze what their website’s visitors do via tools like Google Analytics, KISSmetrics, Piwik, etc. While I have no doubt that there are legitimate use cases, do we really need analytics on every website? I, for one, have typically added Google Analytics to every site I manage as a matter of course. But it dawned on me relatively recently that for most of the websites in question, this has been an almost completely pointless endeavor: “Oh, six people came to this post via Facebook today.” Who cares?

Unless you really need it, and you’re going to analyze and act upon the data, just ditch analytics and find a better way to spend your time than gawping at the mundanity of how many people visited website X today.

As well as adding to your page weight, usage of something like Google Analytics raises ethical questions around the data you’re collecting on your users on Google’s behalf, i.e. there’s a reason Google provides you with Analytics for free.

Let’s Not Forget The Basics

There’s so much information around these days about the following, but we should never get complacent and forget about them. Alongside everything above, we absolutely should always minify HTML, CSS, and JavaScript, and concatenate where appropriate. We should also compress all images to ensure they are as small as possible, use the right formats in the right settings, and use progressive rendering.

Server-Side Performance

So far, our focus has been almost entirely on the front-end, but a lot of this is made irrelevant if we don’t also optimize things on the server-side. I’ve already mentioned it a couple of times, but we should absolutely enable gzip compression at all times.

We should make serving our website as easy for our server as possible. I predominantly use Nginx, and I have a particular fondness for FastCGI cache and have found it to be especially efficient. If you have shell access to your own server, here’s a post that explains how to configure it. There are less technical options if you don’t have (or don’t want) as much control over your server. A particular favorite in the WordPress space is WP Super Cache.

We should use HTTP2 over HTTPS. Using HTTPS opens up a world of new web technologies like service workers that allow us to treat the network itself as a nice-to-have. If you want to learn more about this, I highly recommend Jeremy Keith’s new book, “Going Offline.”

Note: You also may want to investigate Google’s PageSpeed Module, available for both Apache and Nginx.

Finally, the biggest impact we can have here is to host our websites in data centers powered by renewable energy. In the UK, I can highly recommend Krystal and Kualo in terms of companies with which I directly host my sites. (For a full directory of green web hosts, check out The Green Web Foundation.)

In Conclusion

I hope I have convinced you that it’s worth putting in the effort to make our websites more sustainable. Especially given that in the process we also make our websites:

More performant,
More user-friendly,
More accessible,
More server-friendly,
Better optimized for search engines.

A response that some people have to the idea of sustainable web design — which is not unreasonable — is that it seems to be a very small concession to the environmental cause. Of course, how much of an impact you can have depends on how busy the websites are that you work on. But as well as helping the web become a bit more environmentally friendly, sustainable web design is fundamentally best practice web design.

It’s also worth thinking about offsetting the carbon emissions that you can’t avoid. Carbon offsetting is sometimes derided, and with good cause. The main problem with offsetting is that typically the term over which carbon will be offset is quite long. For example, with tree planting, the figure given for an amount of carbon sequestering is typically based over a 100-year period. So, in terms of reducing carbon emissions now, it’s not really a solution. But it is better than nothing.

The motto of myclimate is to do your best, and offset the rest. I have written a blog post about rolling your own carbon offset scheme. I also highly recommend the 1% For The Planet initiative. Finally, if you are a business owner and would like to join an alliance of companies that want to see better social, environmental and economic justice, check out the Certified B Corporation scheme.

Smashing Editorial
(ra, il)

Grow Your Design Business with Lead Magnets

Original Source: https://www.webdesignerdepot.com/2019/01/grow-your-design-business-with-lead-magnets/

All of the work you do to grow your web design business requires an investment of time and energy. And if you do this song-and-dance routine for long enough, you’re bound to become exhausted by it all.

So, how do you stop doing so much without losing momentum?

Productivity tools help quite a bit as do templates — be they for managing projects, clients, or  to streamline your design work. In other words, anything you can do to automate, delegate, or outsource work completely can reduce how much work you have to do without cutting too much into your profits.

But then there are still those pesky business management activities that require your involvement. Proposal development. Invoicing. Client onboarding. Marketing. And, on top of all that, you have to look for new clients.

Or do you?

If you’re not familiar with lead magnets and how they can improve your client search efforts, it’s time you became acquainted with them.

What Are Lead Magnets?

As a web designer, you instill trust in your clients by providing a quality service. But have you ever thought about how you could turn trust into a profitable long-term relationship with clients?

Lead magnets are one of the best ways to do this.

In summary, a lead magnet is something that you give away for free on your website, that is immensely valuable to clients. In exchange, you get their email address.

Why Would Web Designers Want to Use Lead Magnets?

If you’re feeling overworked and wishing there were an easier way to grow your web design business, pay close attention to these five benefits:

It’s easy for designers. Because you’re already equipped with a great set of design skills, creating lead magnets will be easy for you (unlike other professionals who usually have to pay others to do it for them).
It’s passive lead generation. Hunting for clients online is time-intensive and tedious. Lead magnets lure prospective clients to your site and help sell them on your services.
List building is automated. You know you need to stay in touch with prospects by email if you want to foster them to conversion. With a lead magnet, you don’t have to deal with the hassle of creating your lead list. Everything is automated.
It makes your business memorable. You’re now not just the guy or gal who designed that amazing website for Company X. You’re the full-fledged web design business that provided a prospective client with a valuable tool that improves how they do business.
The ROI is huge. A lead magnet is something you only have to create once. Aside from promoting it on your marketing channels, you don’t have to do any other work.

Why Would Prospects Be Willing to Give You Their Email?

A lead magnet has to have real value attached to it, as you’ll soon see. Because of this, the people who encounter them understand and accept the trade off.

Look, it takes some effort to unsubscribe from email lists you don’t want to be on. Most people won’t put themselves through this if they don’t believe the communication is worth it — which is good! It means you’ve already done some of the work in convincing them of your value as a design expert.

Now you need to use their contact information and convince them to pay for your services.

How Can Web Designers Use Lead Magnets?

Here are some real examples from designers, agencies, and others in this space that make good use of lead magnets:

Informational Content

As a web designer, you might not be too keen on having to write anything. That said, ebooks are an effective way to generate leads on a website.

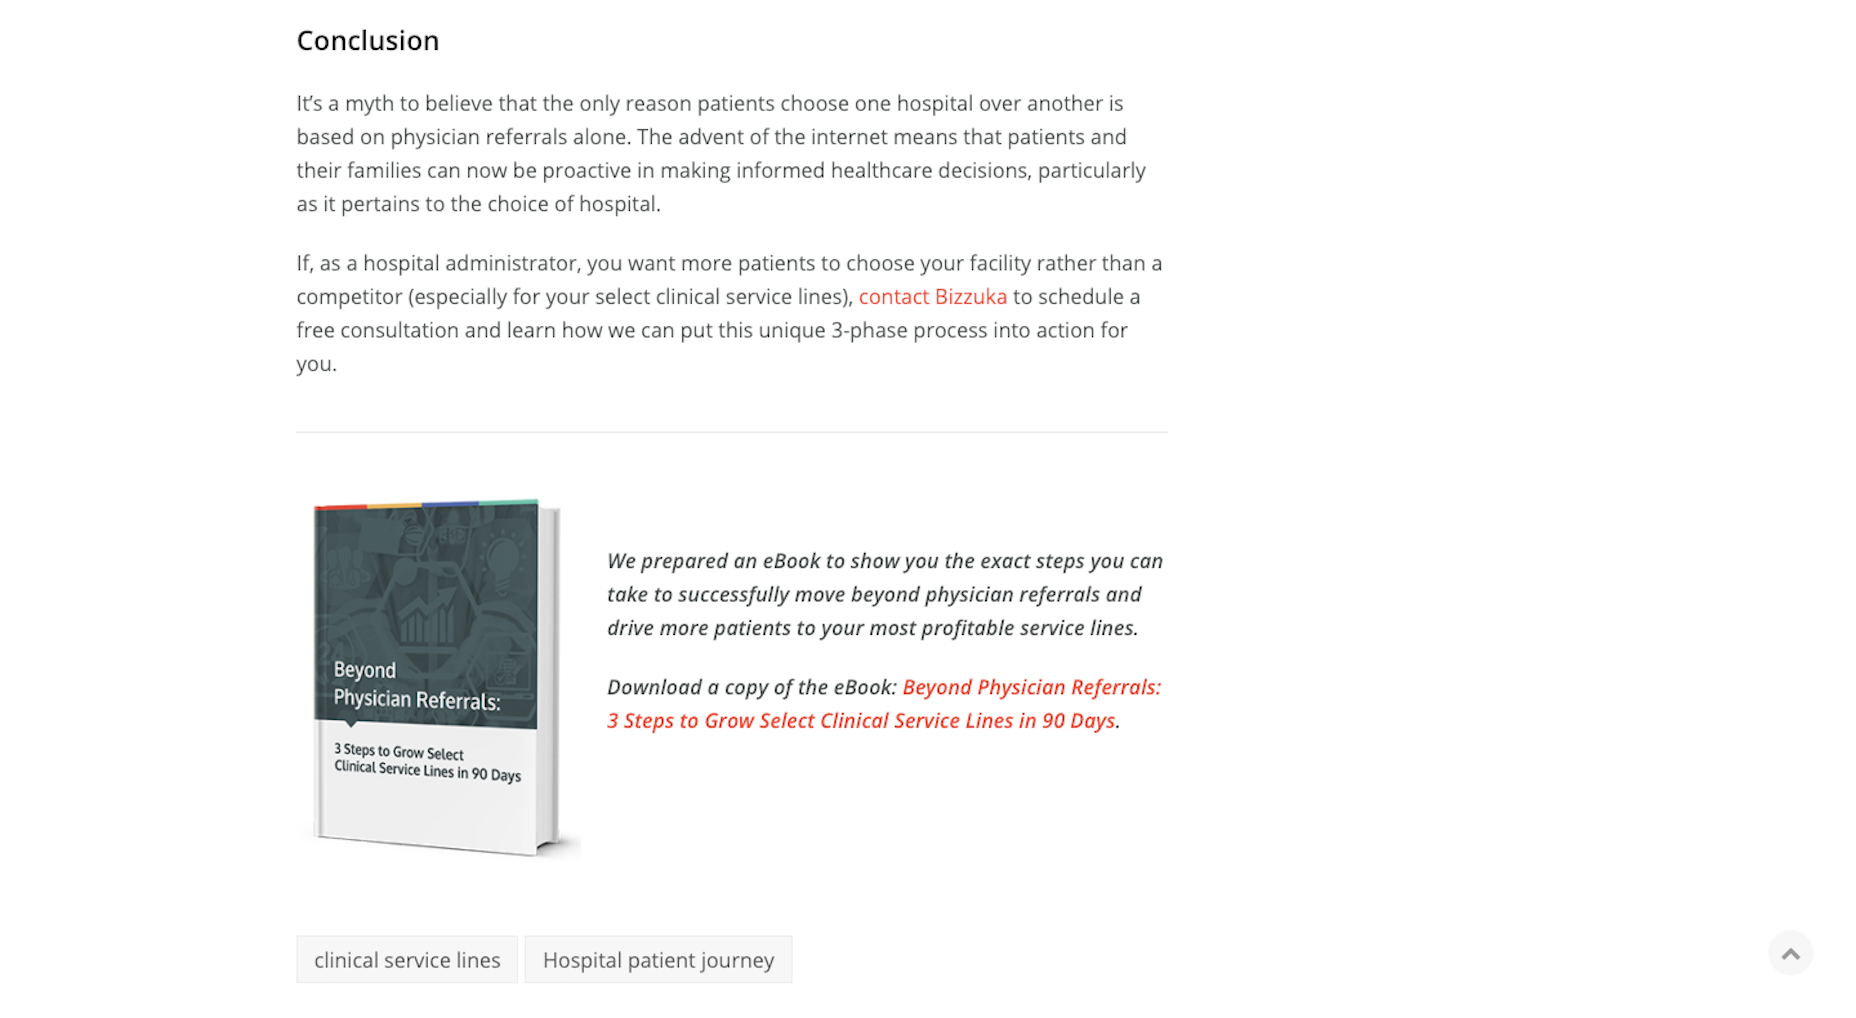
Web marketing solutions company Bizzuka has examples of these all over their website.

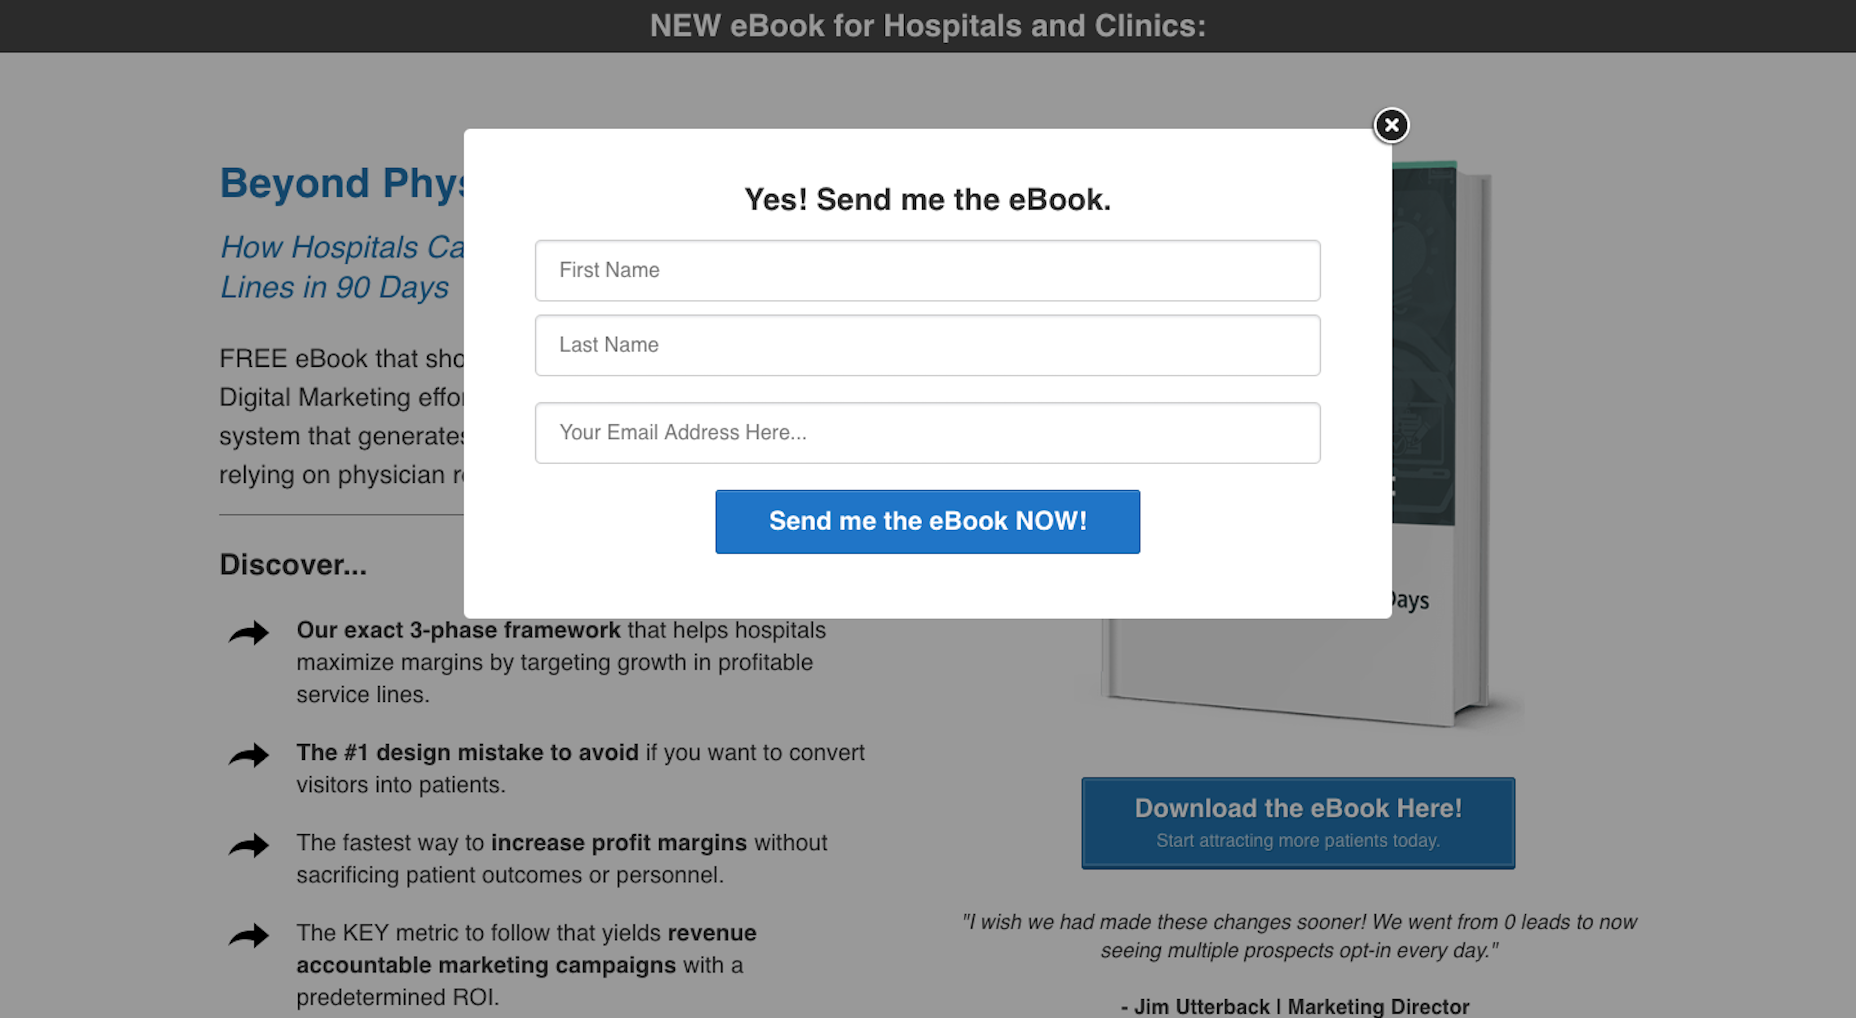
As you can see, it’s appended to the end of a related blog post. It then drives visitors to a landing page with more information and a simple form.

But if you’re really not comfortable or confident in writing an ebook, and don’t want to pay someone to do it for you, think about filming a video or developing an infographic. Just make sure it’s full of valuable information they’ll be dying to get their hands on.

Educational Content

For those of you that enjoy educating others, this could be a good one for you. You’ll just need to find a way to make this relevant to what you do and how you serve clients.

Web Design Journey has a neat example.

As their target audience is web designers and developers, they’ve produced an email course that reveals valuable insights gleaned over nearly two decades of working in the industry.

Again, if you want to avoid any writing, you could always create your own video course and then gate it off with a landing page and form. Or you could publish a webinar (live or pre-recorded) that offers highly targeted educational content.

Design Templates

It’s up to you to decide what type of design templates would be the most valuable to your prospective client base. Realistically, these templates will be things like:

Icon sets
Email designs
Infographic wireframes
Presentation shells
Social media kits

Basically, focus on the smaller marketing bits that require a designer’s touch and that they won’t be able to handle on their own. Once they realize how helpful those were, they’ll come to you for web design assistance.

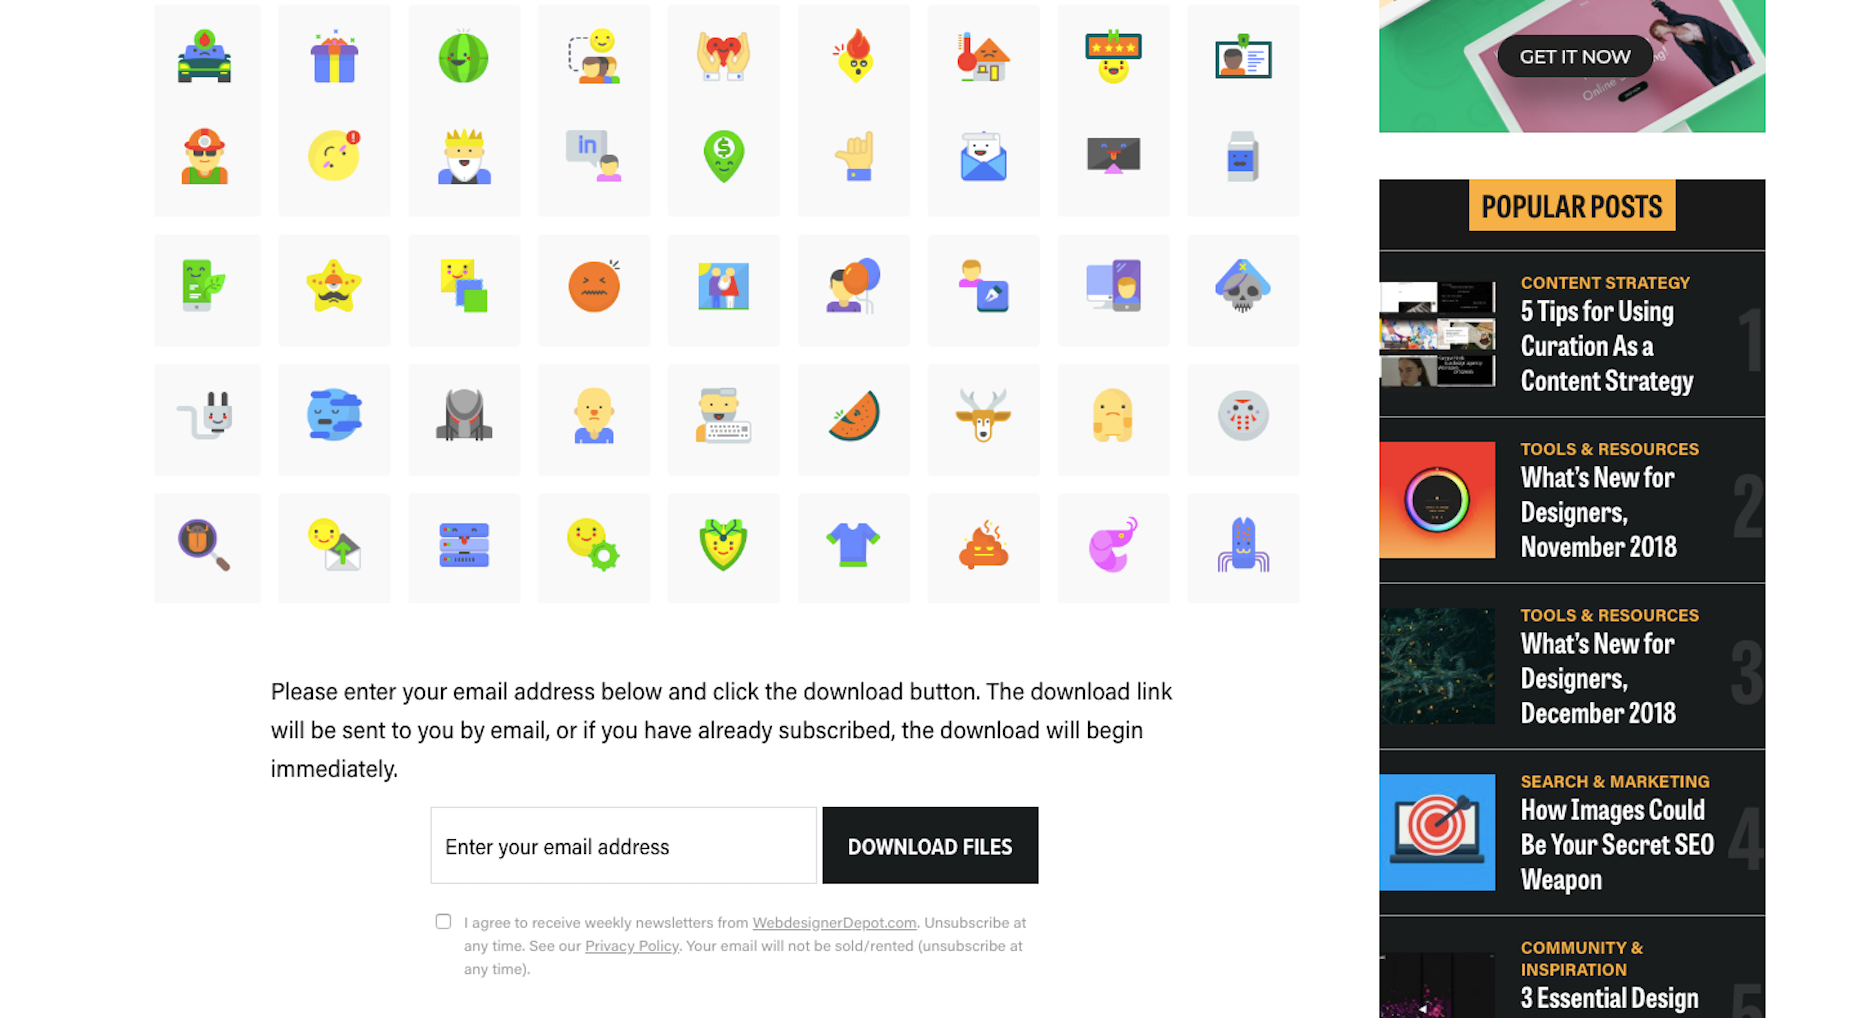
If you’re looking for inspiration on how to promote this type of lead magnet, take WebDesignerDepot’s lead:

Visitors get to see the awesome lead magnet for themselves, but can only gain access to editable files through a form.

Audits

When you first started designing websites for clients, you probably offered consultation and auditing services for free. But you recognize that time equals money, so why give away valuable advice for free and run the risk of them taking your tips to the competition?

A safe way to do this is to turn your audits into lead magnets. This way, you at least get their email address, so you can follow up post-delivery and work on convincing them to work with you through that direct channel.

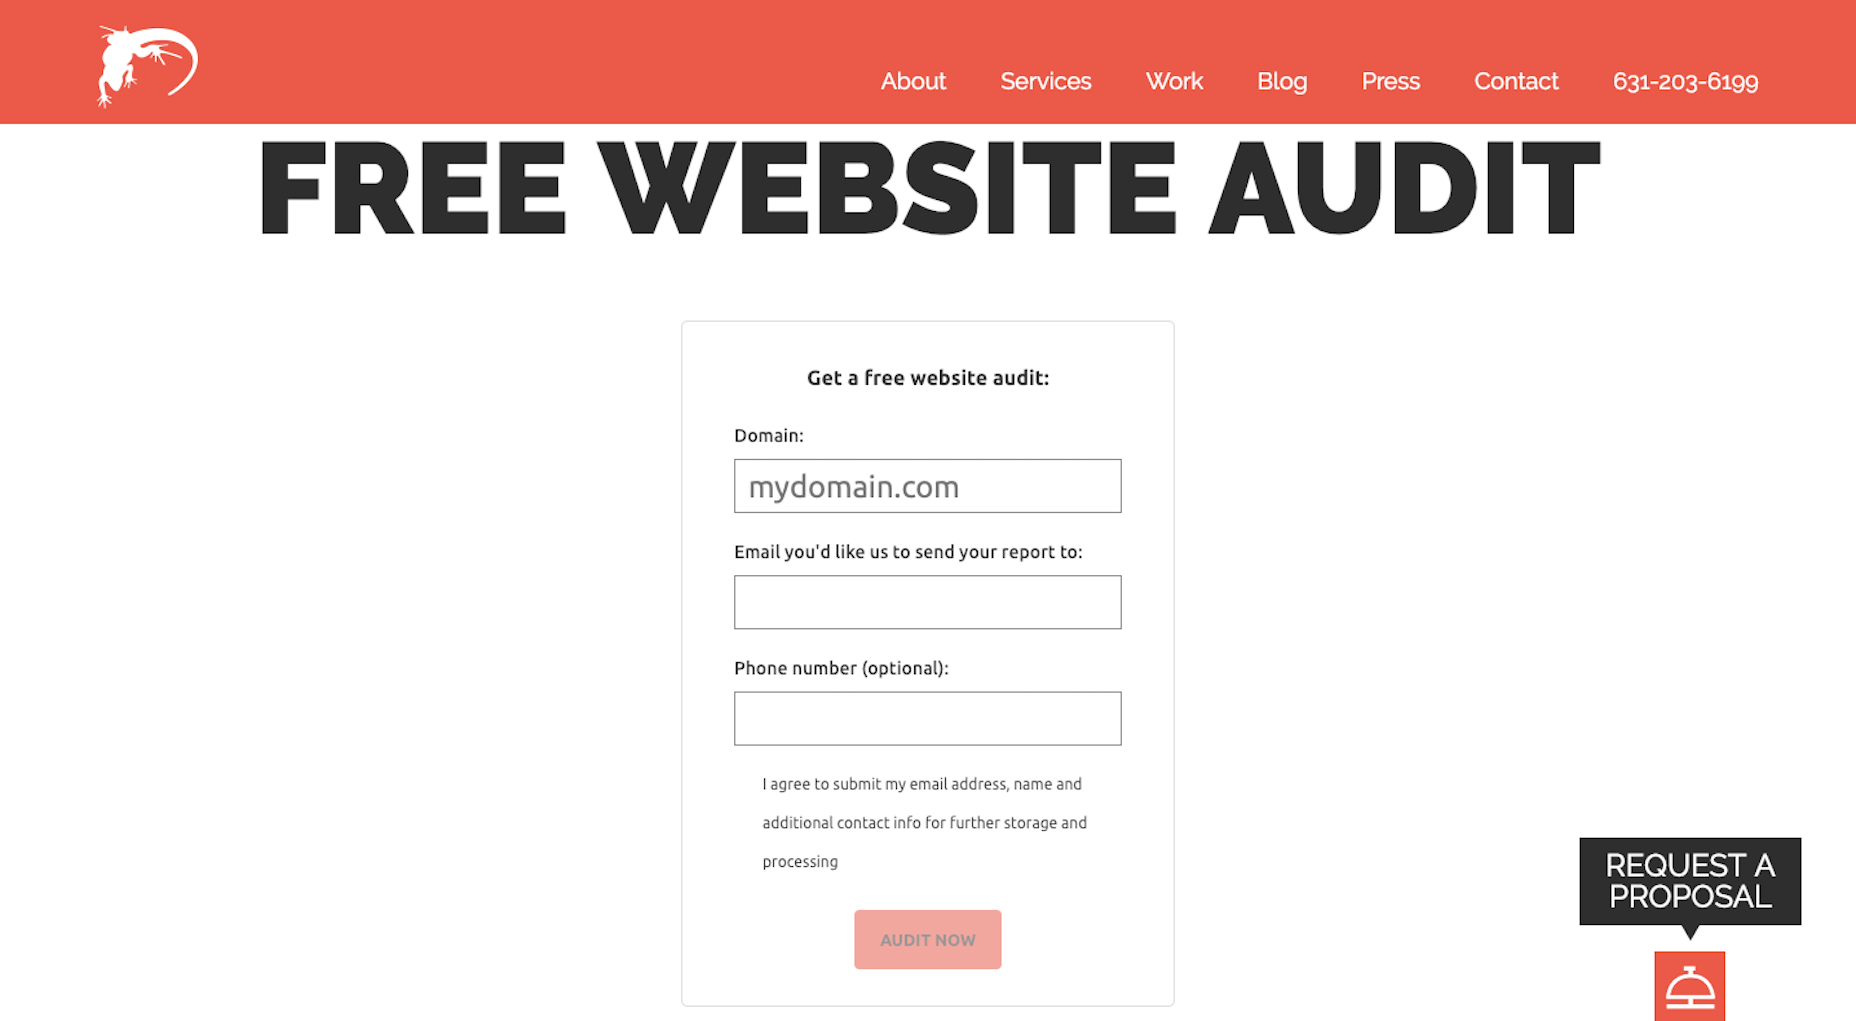
Lounge Lizard has found a neat way to do this.

When visitors take a peek under their list of Services, they find “Free Website Audit” at the bottom of the list. They’re then taken to the simplest of landing pages:

Lounge Lizard proves that they’re not out to waste anyone’s time. There’s no big sales pitch and no need to ask for excessive information. Just “what’s your domain and how can we contact you”, and that’s it!

Wrapping Up

Before you do anything else, make sure you have an impressive-looking website that attracts visitors. And also get yourself on social media channels like Twitter. Lead magnets don’t usually take too long to make, but you don’t want to waste time building one if you don’t have a reliable place to house it or strategies in place to promote it.


Featured image via DepositPhotos.

Add Realistic Chalk and Sketch Lettering Effects with Sketch’it – only $5!

Source

p img {display:inline-block; margin-right:10px;}
.alignleft {float:left;}
p.showcase {clear:both;}
body#browserfriendly p, body#podcast p, div#emailbody p{margin:0;}

SVG Filters 101

Original Source: http://feedproxy.google.com/~r/tympanus/~3/u-tx2d4nO8M/

SVGFilters101_featured

CSS currently provides us with a way to apply color effects to images such as saturation, lightness, and contrast, among other effects, via the filter property and the filter functions that come with it.

We now have 11 filter functions in CSS that do a range of effects from blurring to changing color contrast and saturation, and more. We have a dedicated entry in the CSS Reference if you want to learn more about them.

Albeit powerful and very convenient, CSS filters are also very limited. The effects we are able to create with them are often applicable to images and limited to color manipulation and basic blurring. So, in order to create more powerful effects that we can apply to a wider range of elements, we’ll need a wider range of functions. These functions are available today —and have been available for over a decade— in SVG. In this article, which is the first in a series about SVG filters, you will learn about the SVG filter functions — known as “primitives” — and how to use them.

CSS filters are imported from SVG. They are fairly more optimized versions of a subset of filter effects present in SVG, and that have been around in the SVG specification for years.

There are more filters effects in SVG than there are in CSS, and the SVG versions are more powerful and capable of far more complex effects than their CSS shortcuts. For example, it is currently possible to blur an element using the CSS blur() filter function. Applying a blur effect using this function will create a uniform Gaussian Blur to the element it is applied to. The following image shows the result of applying a 6px blur to an image in CSS:

Screen Shot 2019-01-02 at 12.46.04

The blur() function creates a blur effect that is uniformly applied in both directions — X & Y — on the image. But this function is merely a simplified and limited shortcut for the blur filter primitive available in SVG, which allows us to blur an image either uniformly, or apply a one-directional blur effect along either the X- or the Y-axis.

The result of applying a blur along the x and y axes, respectively, using SVG filters.The result of applying a blur along the x and y axes, respectively, using SVG filters.

SVG filters can be applied to HTML elements as well as SVG elements. An SVG filter effect can be applied to an HTML element in CSS using the url() filter function. For example, if you have a filter effect with an ID “myAwesomeEffect” defined in your SVG (we’ll talk about defining filters effects in SVG shortly), you can apply that effect to an HTML element or image like this:

.el {
filter: url(#myAwesomeEffect);
}

Best of all, as you’re going to see in this series, SVG filters are capable of creating Photoshop-grade effects in the browser, using a few lines of code. I hope this series will help demystify and unlock part of SVG Filters’ potential and inspire you to start using them in your own projects.

But what about browser support, you ask..?

Browser Support

Browser support for the majority of SVG filters is impressively good. How an effect is applied may, however, vary across a few browsers depending on the browser support for the inidvidual filter primitives used in the SVG filter effect, as well as depending on any possible browser bugs. Browser support may also vary when the SVG filter is applied to SVG elements versus HTML elements.

I would recommend that you treat filter effects as an enhancement: you can almost always apply an effect as an enhancement on top of a perfectly usable filter-less experience. (Those of you who know me would know that I endorse a progressive enhancement approach to building UIs whenever possible.) So, we won’t be too concerned about browser support in this series.

Lastly, even though SVG Filter support is generally good, do keep in mind that some of the effects we will cover later in the series may be considered experimental. I will mention any major issues or bugs if and when there are any.

So, how do you define and create a filter effect in SVG?

The <filter> Element

Just like linear gradients, masks, patterns, and other graphical effects in SVG, filters have a conveniently-named dedicated element: the <filter> element.

A <filter> element is never rendered directly; its only usage is as something that can be referenced using the filter attribute in SVG, or the url() function in CSS. Such elements (elements that are not rendered unless explicitly referenced) are usually defined as templates inside <defs> elements in SVG. But an SVG <filter> doesn’t need to be wrapped in a defs element. Whether you wrap the filter in a defs element or not, it will simply not be displayed.

The reason for that is that a filter requires a source image to work on, and unless you explicitly define that source image by calling the filter on that source image, it won’t have anything to render, and so it doesn’t.

A very basic, minimal code sample defining an SVG filter and applying it to a source image in SVG would look like this:

<svg width=”600″ height=”450″ viewBox=”0 0 600 450″>
<filter id=”myFilter”>
<!– filter effects go in here –>
</filter>
<image xlink:href=”…”
width=”100%” height=”100%” x=”0″ y=”0″
filter=”url(#myFilter)”></image>
</svg>

The filter in the above code sample does nothing at this point because it is empty. In order to create a filter effect, you need to define a series of one or more filter operations that create that effect inside the filter. In other words, the filter element is a container to a series of filter operations that, combined, create a filter effect. These filter operations are called “Filter Primitives” in SVG.

Filter Primitives

So, in SVG, each <filter> element contains a set of filter primitives as its children. Each filter primitive performs a single fundamental graphical operation on one or more inputs, producing a graphical result.

A filter primitive is conveniently named after whatever graphical operation it performs. For example, the primitive that applies a Gaussian Blur effect to the source graphic is called feGaussianBlur. All primitives share the same prefix: fe, which is short for “filter effect”. (Again, names in SVG are conveniently chosen to resemble what an element is or does.)

The following snippet shows what a simple filter would look like if that filter were to apply a 5px Gaussian Blur to an image:

<svg width=”600″ height=”450″ viewBox=”0 0 600 450″></feGaussianBlur>
<filter id=”myFilter”>
<feGaussianBlur stDeviation=”5″></feGaussianBlur>
</filter>
<image xlink:href=”…”
width=”100%” height=”100%” x=”0″ y=”0″
filter=”url(#myFilter)”></image>
</svg>

There are currently 17 filter primitives defined in the SVG Filter specification that are capable of extremely powerful graphical effects, including but not limited to noise and texture generation, lighting effects, color manipulation (on a channel by channel basis), and more.

A filter primitive works by taking a source graphic as input and outputting another one. And the output of one filter effect can be used as input to another. This is very important and very powerful because it means that you have an almost countless combination of filter effects and therefore you can create an almost countless number of graphical effects.

Each filter primitive can take one or two inputs and output only one result. The input of a filter primitive is defined in an attribute called in. The result of an operation is defined in the result attribute. If the filter effect takes a second input, the second input is set in the in2 attribute. The result of an operation can be used as input to any other operation, but if the input of an operation is not specified in the in attribute, the result of the previous operation is automatically used as input. If you don’t specify the result of a primitive, its result will automatically be used as input to the primitive that follows. (This will become clearer as we start looking into code examples.)

In addition to using the result(s) of other primitives as input, a filter primitive also accepts other types of inputs, the most important of which are:

SourceGraphic: the element to which the entire filter is applied; for example, an image or a piece of text.
SourceAlpha: this is the same as the SourceGraphic, except that this graphic contains only the alpha channel of the element. For a JPEG image, for example, it is a black rectangle the size of the image itself.

You’ll find that you’ll sometimes want to use the source graphic as input and sometimes only its alpha channel. The examples we will cover in this post and the following posts will provide a clear understanding of when to use which.

This code snippet is an example of what a filter with a bunch of filter primitives as children could look like. Don’t worry about the primitives and what they do. At this point, just pay attention to how the inputs and outputs of certain primitives are being defined and used amongst them. I’ve added some comments to help.

<svg width=”600″ height=”400″ viewBox=”0 0 850 650″>
<filter id=“filter”>
<feOffset in=”SourceAlpha” dx=”20″ dy=“20″></feOffset>

<!– since the previous filter did not have a result defined and this following one
does not have the input set, the result of the above primitive is automatically used
as input to the following filter –>
<feGaussianBlur stdDeviation=”10″ result=“DROP”></feGaussianBlur>

<!– setting/defining the result names in all caps is a good way to make them more
distinguishable and the overall code more readable –>
<feFlood flood-color=”#000″ result=”COLOR”></feFlood>

<!– This primitive is using the outputs of the previous two primitives as
input, and outputting a new effect –>
<feComposite in=”DROP” in2=”COLOR” operator=”in” result=”SHADOW1″></feComposite>

<feComponentTransfer in=”SHADOW1″ result=”SHADOW”>
    <feFuncA type=”table” tableValues=”0 0.5″></feFuncA>
</feComponentTransfer>

<!– You can use ANY two results as inputs to any primitive, regardless
of their order in the DOM.
The following primitive is a good example of using two previously-generated
outputs as input. –>
<feMerge>
<feMergeNode in=”SHADOW”></feMergeNode>
<feMergeNode in=”SourceGraphic”></feMergeNode>
</feMerge>
</filter>
<image xlink:href=”…” x=”0″ y=”0″ width=”100%” height=”100%” filter=”url(#filter)”></image>
</svg>

Now, the last concept I want to cover briefly before moving to our first filter example is the concept of a Filter Region.

The Filter Region

The set of filter operations need a region to operate on— an area they can be applied to. For example, you may have a complex SVG with many elements and you want to apply the filter effect only to a specific region or one or a group of elements inside that SVG.

In SVG, elements have “regions” whose boundaries are defined by the borders of the element’s Bounding Box. The Bounding Box (also abbreviated “bbox“) is the smallest fitting rectangle around an element. So for example for a piece of text, the smallest fitting rectangle looks like the pink rectangle in the following image.

The smallest fitting rectangle around a piece of text.The smallest fitting rectangle around a piece of text.

Note that this rectangle might include some more white space vertically because the line height of the text is taken into consideration when calculating the height of the bounding box.

The default filter region of an element is the element’s bounding box. So if you were to apply a filter effect to our piece of text, the effect will be restricted to this rectangle, and any filter result that lies beyond the boundaries of it will be clipped off. Albeit sensible, this is not very practical because many filters will impact pixels slightly outside the boundaries of the bounding box and, by default, those pixels will end up being cut off.

For example, if we apply a blur effect to our piece of text, you can see the blur getting cut off at the left and right edges of the text’s bounding box:

Image showing how The blur effect applied to the text is cut off on both the right and left side of the text’s bounding box area.The blur effect applied to the text is cut off on both the right and left side of the text’s bounding box area.

So how do we prevent that from happening? The answer is: by extending the filter region. We can extend the region the filter is applied to by modifying the x, y, width and height attributes on the <filter> element.

According to the specification,

It is often necessary to provide padding space in the filter region because the filter effect might impact bits slightly outside the tight-fitting bounding box on a given object. For these purposes, it is possible to provide negative percentage values for ‘x’ and ‘y’, and percentage values greater than 100% for ‘width’ and ‘height’.

By default, filters have regions extending 10% the width and height of the bounding box in all four directions. In other words, the default values for the x, y, width and height attributes are as follows:

<filter x=”-10%” y=”-10%” width=”120%” height=”120%”
filterUnits=”objectBoundingBox”>
<!– filter operations here –>
</filter>

If you omit these attributes on the <filter> element, these values will be used by default. You can also override them to extend or shrink the region as you need.

One thing to keep in mind is that the units used in the x, y, width and height attributes are dependent on which filterUnits value is in use. The filterUnits attribute defines the coordinate system for the x, y, width and height attributes. It takes one of two values:

objectBoundingBox: this is the default value. When the filterUnits is objectBoundingBox, the values of the x, y, width and height attributes are percentages or fractions of the size of the element’s bounding box. This also means that you can use fractions as values instead of percentages if you prefer.
userSpaceOnUse: when filterUnits is set to userSpaceOnUse the coordinates of the x, y, width and height attributes are set relative to the current user coordinate system in use. In other words, it is relative to the current coordinate system in use in the SVG, which uses pixels as a unit and is, usually, relative to the size of the SVG itself, assuming the viewBox values matches that of the initial coordinate system. (You can learn all you need to know about coordinate systems in SVG in this post I wrote a few years ago.)

<!– Using objectBoundingBox units –>
<filter id=”filter”
x=“5%” y=“5%” width=”100%” height=“100%”>

<!– Using userSpaceOnUse units –>
<filter id=“filter”
filterUnits=”userSpaceOnUse”
x=“5px” y=“5px” width=”500px” height=”350px”>

Quick Tip: Visualizing the current filter region with feFlood

If you ever need to see the extent of your filter region you can visualize it by flooding the filter region with color. Conveniently, a filter primitive called feFlood exists whose sole purpose is to do exactly that: fill the current filter region with a color that you specify in the flood-color attribute.

So, assuming we have a piece of text whose filter region we want to visualize, the code would look as simple as:

<svg width=”600px” height=”400px” viewBox=”0 0 600 400″>
<filter id=”flooder” x=”0″ y=”0″ width=”100%” height=”100%”>
<feFlood flood-color=”#EB0066″ flood-opacity=”.9″></feFlood>
</filter>

<text dx=”100″ dy=”200″ font-size=”150″ font-weight=”bold” filter=”url(#flooder)”>Effect!</text>
</svg>

As you can see in the above code snippet, the feFlood primitive also accepts a flood-opacity attribute which you can use to make the flood color layer translucent.

The above snippet floods the filter region with a pink color. But here is the thing: when you flood the region with color, you’re literally flooding it with color, meaning that the color will cover everything in the filter region, including any elements and effects you’ve created before, as well as the text itself. After all, this is what the definition of flooding is, right?

Before and after flooding the text's filter region with color.Before and after flooding the text’s filter region with color.

In order to change that, we need to move the color layer to the “back” and show the source text layer on top.

Whenever you have multiple layers of content that you want to display on top of each other in an SVG filter, you can use the <feMerge> filter primitive. As its name suggests, the feMerge primitive is used to merge together layers of elements or effects.

The <feMerge> primitive does not have an in attribute. To merge layers, two or more <feMergeNode>s are used inside feMerge, each of which has its own in attribute that represents a layer that we want to add.

Layer (or “node”) stacking depends on the <feMergeNode> source order — the first <feMergeNode> will be rendered “behind” or “below” the second. The last <feMergeNode> represents the topmost layer. And so on.

So, in our text example, the flood color is a layer, and the source text (the source graphic) is another layer, and we want to place the text on top of the flood color. Our code will hence look like this:

<svg width=”600px” height=”400px” viewBox=”0 0 600 400″>
<filter id=”flooder”>
<feFlood flood-color=”#EB0066″ flood-opacity=”.9″ result=”FLOOD”></feFlood>

<feMerge>
<feMergeNode in=”FLOOD” />
<feMergeNode in=”SourceGraphic” />
</feMerge>
</filter>

<text dx=”100″ dy=”200″ font-size=”150″ font-weight=”bold” filter=”url(#flooder)”>Effect!</text>
</svg>

Notice how I named the result of the feFlood in the result attribute so that I can reference that name in the <feMergeNode> as input. Since we want to display the source text on top of the flood color, we reference this text using SourceGraphic. The following is a live demo of the result:

See the Pen Filter Region Visualization with feFlood by Sara Soueidan (@SaraSoueidan) on CodePen.light

Now that we’ve gotten a quick introduction into the world of SVG filters with this demo, let’s create a simple SVG drop shadow.

Applying a drop shadow to an image

Let me start with a quick disclaimer: you’re better off creating a simple drop shadow using the CSS drop-shadow() filter function. The SVG filter way is much more verbose. After all, as we mentioned earlier, the CSS filter functions are convenient shortcuts. But I want to cover this example anyway as a simple entry point to the more complex filter effects we’ll cover in the coming articles.

So, how is a drop shadow made?

A drop shadow is usually a light-gray layer behind—or underneath—an element, that has the same form (or shape) as the element itself. In other words, you can think of it as a blurred gray copy of the element.

When creating SVG filters, we need to think in steps. What steps are needed to achieve a particular effect? For a drop shadow, a blurred gray copy of the element can be created by blurring a black copy of the element and then colorizing that black copy (making it gray). Then that newly created blurred grey copy is positioned behind the source element, and offset a little in both directions.

So we’re going to start by getting a black copy of our element and blurring it. The black copy can be created by using the alpha channel of the element, using SourceAlpha as input to our filter.

The feGaussianBlur primitive will be used to apply a Gaussian blur to that SourceAlpha layer. The amount of blur you need is specified in the stdDeviation (short for: Standard Deviation) attribute. If you provide one value to the stdDeviation attribute, that value will be used to apply a uniform blur to the input. You can also provide two numerical values— the first will be used to blur the element in the horizontal direction and the second will be used to apply a vertical blur. For a drop shadow, we need to apply a uniform blur, so our code will start with this:

<svg width=”600″ height=”400″ viewBox=”0 0 850 650″>
<filter id=”drop-shadow”>

<– Grab a blakc copy of the source image and blur it by 10 –>
<feGaussianBlur in=”SourceAlpha” stdDeviation=”10″ result=”DROP”></feGaussianBlur>

</filter>
<image xlink:href=”…” x=”0″ y=”0″ width=”100%” height=”100%” filter=”url(#drop-shadow)”></image>
</svg>

The above code snippet results in the following effect, where only the blurred alpha channel of the image is rendered at this point:

screenshot of the filter effect after applying a drop shadow to the alpha channel of the image

Next, we want to change the color of the drop shadow and make it grey. We will do that by applying a flood color to the filter region and then compositing that flood color layer with the drop shadow layer we have created.

Compositing is the combining of a graphic element with its backdrop. A backdrop is the content behind the element and is what the element is composited with. In our filter, the Flood color is the upper layer, and the blurred shadow is its backdrop (because it lies behind it). We will see the feComposite primitive more in the upcoming articles, so if you’re not familiar with what compositing is and how it works, I have a very comprehensive introductory article on my blog that I recommend checking out.

The feComposite primitive has an operator attribute which is used to specify which composite operation we want to use.

By using the in composite operator, the flood color layer will be “cropped” and only the area of the color that overlaps with our shadow layer will be rendered, and the two layers will be blended where they intersect, which means that the grey color will be used to colorize our black drop shadow.

The feComposite primitive requires two inputs to operate on, specified in the in and in2 attributes. The first input is our color layer, and the second input is our blurred shadow backdrop. With the composite operation specified in the operator attribute, our code now looks like this:

<svg width=”600″ height=”400″ viewBox=”0 0 850 650″>
<filter id=”drop-shadow”>
<feGaussianBlur in=”SourceAlpha” stdDeviation=”10″ result=”DROP”></feGaussianBlur>

<feFlood flood-color=”#bbb” result=”COLOR”></feFlood>

<feComposite in=”COLOR” in2=”DROP” operator=”in” result=”SHADOW”></feComposite>

</filter>
<image xlink:href=”…” x=”0″ y=”0″ width=”100%” height=”100%” filter=”url(#drop-shadow)”></image>
</svg>

Notice how the results of the feGaussianBlur and the feFlood primitives are used as inputs for feComposite. Our demo now looks like this:

the result of colorizing the drop shadow using feFlood and feComposite

Before we layer our original image on top of the drop shadow, we want to offset the latter vertically and/or horizontally. How much you offset the shadow and in which direction is completely up to you. For this demo, I’ll assume we have a source light coming from the top left corner of our screen, so I will move it by a few pixels down to the right.

To offset a layer in SVG, we use the feOffset primitive. In addition to the in and result attributes, this primitive takes two main attributes: dx and dy, which determine the distance by which you want to offset the layer along the x and y axes, respectively.

After offsetting the drop shadow, we will merge it with the source image using feMerge, similar to how we merged the text and flood color in the previous section— one mergeNode will take our drop shadow as input, and another mergeNode will layer the source image using SourceGraphic as input. Our final code now looks like this:

<svg width=”600″ height=”400″ viewBox=”0 0 850 650″>
<filter id=”drop-shadow”>

<!– Get the source alpha and blur it; we’ll name the result “DROP” –>
<feGaussianBlur in=”SourceAlpha” stdDeviation=”10″ result=”DROP”></feGaussianBlur>

<!– flood the region with a ligh grey color; we’ll name this layer “COLOR” –>
<feFlood flood-color=”#bbb” result=”COLOR”></feFlood>

<!– Composite the DROP and COLOR layers together to colorize the shadow. The result is named “SHADOW” –>
<feComposite in=”COLOR” in2=”DROP” operator=”in” result=”SHADOW”></feComposite>

<!– Move the SHADOW layer 20 pixels down and to the right. The new layer is now called “DROPSHADOW” –>
<feOffset in=”SHADOW” dx=”20″ dy=”20″ result=”DROPSHADOW”></feOffset>

<!– Layer the DROPSHADOW and the Source Image, ensuring the image is positioned on top (remember: MergeNode order matters) –>
<feMerge>
<feMergeNode in=”DROPSHADOW”></feMergeNode>
<feMergeNode in=”SourceGraphic”></feMergeNode>
</feMerge>
</filter>

<!– Apply the filter to the source image in the `filter` attribute –>
<image xlink:href=”…” x=”0″ y=”0″ width=”100%” height=”100%” filter=”url(#drop-shadow)”></image>
</svg>

And the following is a live demo of the above code:

See the Pen Drop Shadow: Tinted shadow with feComposite by Sara Soueidan (@SaraSoueidan) on CodePen.light

And that is how you apply a filter effect in SVG using SVG filters. You’ll find that this effect works across all major browsers.

There is another way…

There is another, more common way of creating a drop shadow. Instead of creating a black shadow and applying color to it to make it lighter, you could apply transparency to it, thus making it translucent and, consequently, lighter.

In the previous demo, we learned how to apply color to the drop shadow using feFlood, which is a coloring technique you’ll probably find yourself needing and using often. This is why I thought it was necessary to cover. It is also useful to learn because this is the way to go if you want to create a shadow that, for whatever reason, has a colorful shadow, for example, instead of a black or grey one.

In order to change the opacity of a layer, you can use either the feColorMatrix primitive or the feComponentTransfer primitive. I’ll talk about the feComponentTransfer primitive in more detail in upcoming articles, so I’ll use feColorMatrix to reduce the opacity for our shadow now.

The feColorMatrix primitive deserves an article of its own. For now, I highly recommend reading Una Kravet’s article which is a great introduction with really good examples.

In short, this filter applies a matrix transformation to the R(Red), G(Green), B(Blue), and A(Alpha) channels of every pixel in the input graphic to produce a result with a new set of color and alpha values. In other words, you use a matrix operation to manipulate the colors of your object. A basic color matrix looks like this:

<filter id=”myFilter”>
<feColorMatrix
type=”matrix”
values=”R 0 0 0 0
0 G 0 0 0
0 0 B 0 0
0 0 0 A 0 “/>
</feColorMatrix>
</filter>

Once again I recommend checking Una’s article out to learn more about this syntax.

Since we only want to reduce the opacity of our shadow, we will use an identity matrix that does not alter the RGB channels, but we will reduce the value of the alpha channel in that matrix:

<filter id=”filter”>

<!– Get the source alpha and blur it, –>
<feGaussianBlur in=”SourceAlpha” stdDeviation=”10″ result=”DROP”></feGaussianBlur>

<!– offset the drop shadow –>
<feOffset in=”SHADOW” dx=”20″ dy=”20″ result=”DROPSHADOW”></feOffset>

<!– make the shadow translucent by reducing the alpha channel value to 0.3 –>
<feColorMatrix type=”matrix” in=”DROPSHADOW” result=”FINALSHADOW”
values=”1 0 0 0 0
0 1 0 0 0
0 0 1 0 0
0 0 0 0.3 0″>
</feColorMatrix>

<!– Merge the shadow and the source image –>
<feMerge>
<feMergeNode in=”FINALHADOW”></feMergeNode>
<feMergeNode in=”SourceGraphic”></feMergeNode>
</feMerge>
</filter>

And this is our live demo:

See the Pen Drop Shadow: Translucent shadow with feColorMatrix by Sara Soueidan (@SaraSoueidan) on CodePen.light

Final Words

In this series, I will try to steer away from the very technical definitions of filter operations and stick to simplified and friendly definitions. Often, you don’t need to get into the gnarly little details of what happens under the hood, so getting into those details would only add to the complexity of the articles, possibly make them less digestible, and would bring little benefit. Understanding what a filter does and how to use it is more than enough, in my opinion, to take advantage of what it has to offer. If you do want to get into more details, I recommend consulting the specification to start. That said, the spec may prove to be of little help, so you’ll probably end up doing your own research on the side. I’ll provide a list of excellent resources for further learning in the final article of this series.

Now that we’ve covered the basics of SVG filters and how to create and apply one, we will look into more examples of effects using more filter primitives in the upcoming articles. Stay tuned.

SVG Filters 101 was written by Sara Soueidan and published on Codrops.

10 Free Barebones Starter Templates for Bootstrap

Original Source: http://feedproxy.google.com/~r/1stwebdesigner/~3/rNWSzoqZRYw/

The Bootstrap framework is quite popular with web designers. It provides everything you need to get a design project off to a running start. Plus, it’s been created with mobile devices in mind.

On the downside, it seems like many sites using Bootstrap tend to have a similar look and layout. But that is more of a product of taking design shortcuts rather than an indictment on the framework itself. Going beyond the default styles is quite possible and much easier than you may think.

With that in mind, we went on a search for free Bootstrap templates that lean toward the barebones end of the spectrum. They offer a virtual clean slate and give you the power to customize both the look and layout as much as you’d like. So, instead of ripping apart an existing design, you can get straight to making your own mark.

All the Bootstrap Templates You Could Ask For


2M+ items from the worlds largest marketplace for Bootstrap Templates, Themes & Design Assets. All of it can be found at Envato Market.

DOWNLOAD NOW

Bare

Bare is designed to help you get started without any fuss. There are no fancy styles applied and it comes with predefined paths. The template works with Bootstrap 4 and sports a fixed top navigation.

Bare bootstrap template

Simplex

Touted as both “Mini and Minimalist”, Simplex contains some basic styles that will provide you with a great starting point. You’ll find minimal navigation, buttons, typography, forms, containers and more goodies within this lightweight package.

Simplex bootstrap template

Understrap

Understrap is a clever mix of Automattic’s Underscores barebones WordPress theme and Bootstrap. Thus, your next WordPress project can utilize Bootstrap without the excess bloat of a prebuilt theme. Understrap features Bootstrap 4, is compatible with the WordPress Customizer and supports WooCommerce.

Understrap bootstrap template

Initializr

Initializr will generate a simple HTML template based on your requirements. Bootstrap 3.3.1 can be bundled right in with your template.

Initializr bootstrap template

Bootply

Use Bootply to build your own custom Boostrap starter template. Using their online builder, you can make things as simple (or complex) as you’d like. There are options for different layouts, various sidebars (including off-canvas) and more.

Bootply bootstrap template

WP Bootstrap Starter

WP Bootstrap Starter is aimed at developers who want to build upon basic features to make their own custom theme. Like Understrap above, it’s based on Underscores. That means it’s lightweight and ready for full-on customization.

WP Bootstrap Starter bootstrap template

LayoutIt!

LayoutIt! is a tool featuring a drag-and-drop interface for quickly building Bootstrap-based templates. There are three base templates to choose from (Starter, Basic Marketing Site and Article). Once you’ve selected a template, you’ll be able to add elements such as grids, components and even JavaScript. You can have a basic, yet functional template set up within minutes.

LayoutIt! bootstrap template

Sage

A competitor to Undesrcores, Sage is a WordPress starter theme that comes with Bootstrap baked right in. The theme features task automation via gulp, and the ability to easily add front-end packages via Bower. Template markup is based on HTML5 Boilerplate.

Sage bootstrap template

Bootstrap 4 Starter Template

If you’re looking for dead simple way to start off a new site, WebNots has put together their own Bootstrap 4 Starter Template. Not only can you grab a copy of their template, there is also a handy guide for building your own.

Bootstrap 4 Starter Template bootstrap template

BS Starter

BS Starter provides the basics you’ll need to get up and running with your design project. The template features a full-width slider and is minimally styled. It gives you just enough to help you create your own look and layout.

BS Starter bootstrap template

Give Complex Templates the Boot

When embarking on a new project, you’re better off using a starter Bootstrap template that lets you make all of the important design decisions. That’s where these minimal and barebones options really shine. Instead of having a Bootstrap-based theme that simply looks like everyone else, you’ll have the flexibility to use the framework to create something unique.

You might also like these Free Bootstrap Dashboard Admin Templates.


11 Podcasts Every Web Designer Should Listen To

Original Source: http://feedproxy.google.com/~r/1stwebdesigner/~3/Qau0JH4s6LA/

Are you looking to get a glimpse into the world of web design? Podcasts, like an online talk show, are a wonderful way to examine a new perspective from the more experienced. Tips, insights and interviews are what they’re are all about, along with thoughtful discussion.

When you have a lot of downtime, such as when you’re driving or even working, fill the silence with one of these podcasts! You might learn something new, or at least be entertained by the stories and interesting hosts.

Boagworld

Boagworld

This fun podcast has been in business since 2005. It discusses all sorts of interesting web design topics, and is made with both beginners and veteran designers in mind. You can listen on the website or on a variety of other platforms including Spotify and Google Play.

Presentable

Presentable

A 40-minute podcast is perfect for those quick breaks, and you can listen to a designer who’s been in the business for 20+ years talk to all sorts of guests. Learn how to become a successful designer!

ShopTalk

ShopTalk

This two-person podcast is great for both aspiring and established web designers and developers. ShopTalk is usually an hour long and it’s just packed with helpful tips. On the website you can jump to certain points in the podcast, download the file, or even ask them a question!

The Web Ahead

The Web Ahead

Though it’s retired, plenty of valuable episodes remain in this podcast. The Web Ahead focused on bringing in experts in the internet from around the world. While some content may become outdated, this remains a timeless source of advice for those who work online.

The Changelog

The Changelog

Want to keep up with trends in web development? Coding languages, programs and everything open source is what this podcast is all about. Many episodes feature three people, so this is definitely a lively one.

Seanwes

Seanwes

Though not focused on design, this huge archive is a wonderful resource for freelancers of all stripes. Knowing how to run a small business is essential, and there’s hundreds of episodes to listen to here. Pick a topic you like and listen up!

Hacking UI

Hacking UI

The designer-developer duo is here to talk about those topics, as well as a mish-mash of other info that every freelancer wants to hear. Want to blog, start a business, or keep up with technology? Hacking UI is perfect!

The Big Web Show

The Big Web Show

This is a great one for designers in particular, offering advice on art, content and technology. Each episode usually features a skilled guest – often an experienced designer or developer in their field. Most run at just under or over an hour.

Syntax

Syntax

Made for developers, Syntax covers a variety of broad topics including programming languages, design standards and even life tips. There are also shorter “Hasty Treat” episodes for when you’re low on time.

Unfinished Business

Unfinished Business

Entertaining and funny, Unfinished Business goes over a variety of topics with a focus on design and the internet. Everything from dealing with unruly clients to mental health issues in the design industry is covered here.

Responsive Web Design

Responsive Web Design

Here’s a podcast with a strong niche: Interviewing people at the head of making the web more responsive. The internet is becoming more dynamic and mobile-friendly, and the hosts of RWD will teach you how to stay ahead.

Another Viewpoint

Everyone has a unique way of learning. Some do best with lots of reading and research, while others can only learn by experience. Many do best simply by listening and absorbing information.

If you’d love to listen to web designers talk about their experiences and offer advice, try out one of these podcasts! They can offer an enlightening extra perspective into the world of design and development.


Does Your App Include Open Source Components? 5 Security Tips

Original Source: https://www.sitepoint.com/does-your-app-include-open-source-components-5-security-tips/

A modern web application is bundled with tons of open-source dependencies. Developers are usually unaware of the number of open-source packages that's running under their package's hood. If you've ever wondered why your node_modules were so large, well that's why!

Contrary to popular belief, open-source components and dependencies are not more secure than their proprietary counterpart. Sure, there's a fleet of developers who volunteer to maintain certain repositories and that's great! However, the mere fact that lots of people use something doesn't make it more secure.

Add to this the issues around obsolete and abandoned packages. They're still popular amongst developers, but no longer maintained by anyone. In certain other cases, the developers are at fault by not prioritizing security updates. It becomes clear that protecting an organization's applications on a daily basis has now become a crucial necessity for survival in the market.

As you might already know, layered security is imperative and crucial. No one layer or program can withstand the numerous attacks from the unknowns of the dark web. Therefore, once organizations follow some of these best practices, they should be empowered to implement a robust strategy for a secure environment around their business-critical applications.

Package Your Components in a Container

The first stage in securing your applications is to ensure that they are sheltered within a Docker-like container. The inbuilt security of a container, along with its default configurations render a much stronger security posture. Applications that reside within settings such as this automatically inherit the same security guidelines. Furthermore, you can limit the damage your open source dependencies and APIs can do by running your app inside a container.

To make matters simpler, containers can be understood to be a protective shield of sorts. They isolate an application from the host computer as well as other containers. This helps to inhibit any vulnerabilities as well as any malicious use of the software.

The post Does Your App Include Open Source Components? 5 Security Tips appeared first on SitePoint.