Collective #518

Original Source: http://feedproxy.google.com/~r/tympanus/~3/pcwxtsmNUbw/

C518_WOTW

Inspirational Website of the Week: Nike Circular Design Guide

A razor-sharp grid-based design with lots of personality. Our pick this week.

Get inspired

C518_ucraftwhitelabel

This content is sponsored via Syndicate Ads
Website Builder Software With Your Branding

This B2B platform fits designers, freelancers, agencies and anyone who wants to make beautiful websites for their clients or let them do it on their own.

Find out more

C518_TakeBackWeb

Take Back Your Web

“Own your domain. Own your content. Own your social connections. Own your reading experience.” —Tantek Çelik talks about how we can use IndieWeb services, tools, and standards to take back our web.

Watch it

C518_accbutton

Accessible Icon Buttons

An overview of how an icon button can be implemented accessibly. By Sara Soueidan.

Read it

Screen-Shot-2019-05-23-at-19.26.07

SCAR

SCAR is a deployment stack that make it easy for you to deploy a static website with a custom domain, SSL, and a CDN

Check it out

C518_plotter

Twisted Polygons

A Vue.js project for generating SVGs of polygons for plotting. By Maks Surguy.

Check it out

C518_animation

Animation Handbook

A free ebook that will teach you how to use animation to demonstrate abstract concepts, make products feel more life-like, and instill more emotion into digital experiences. By Ryan McLeod.

Get it

C518_tesla

Tesla’s Touchscreen UI: A Case Study of Car-Dashboard User Interface

Some valuable information on what’s important when designing for car-dashboard user interfaces.

Read it

C518_typography

The State of Fluid Web Typography

A very insightful article by Matej Latin on the current state of fluid typography and its issues.

Read it

Screen-Shot-2019-05-23-at-19.47.52

The “Inside” Problem

Chris Coyier explains the “inside” layout problem and shows how to tackle it.

Read it

Screen-Shot-2019-05-23-at-19.36.23

Few-Shot Adversarial Learning of Realistic Neural Talking Head Models

Some amazing work from the Samsung AI lab with the potential to animate heads using only few or even one shot of a target person.

Watch it

Screen-Shot-2019-05-23-at-19.45.58

Vue.js And SEO: How To Optimize Reactive Websites For Search Engines And Bots

Paolo Mioni writes about how reactive JavaScript frameworks like Vue and React perform in terms of SEO.

Read it

C518_smile

Face Button

Katherine Kato created this fun button that you can startle by hovering or tapping on.

Check it out

C518_lines

THREE – Optimized Line Mess!

A demo by Colin van Eenige where “lines are created, stored and animated”.

Check it out

Screen-Shot-2019-05-23-at-19.46.04

Colour Diver

A wonderful animation made by Chris Gannon.

Check it out

C518_svgacc

Contextually Marking up accessible images and SVGs

Scott O’Hara explains the various methods for providing accessible names for images or SVGs and points out related quirks in browser.

Read it

C518_iconfonts

Font-display is incompatible with icon fonts

Zach Leatherman writes how the font-display descriptor has no valid value that is compatible with icon fonts.

Read it

C518_burberry

Burberry: The Monogram Universe

A very cool WebGL powered interactive explorer for showcasing a new collection.

Check it out

C518_cloud

A Cloud

A beautiful volume ray marching demo of a cloud.

Check it out

C518_wolfram

Launching Today: Free Wolfram Engine for Developers

Read about the release of the free Wolfram Engine for developers and learn what you can do with it.

Read it

C518_datatables

Flexible data tables with CSS Grid

Adam Lynch shows how to use CSS Grid for making versatile, responsive tables.

Read it

Screen-Shot-2019-05-23-at-19.49.16

Font Kiko

Font Kiko is a pack of more than 700 Open Source icons suitable for many types of projects.

Get it

Screen-Shot-2019-05-23-at-19.24.45

Color Designer

A tool to help you with building a color palette and generate tints and shades based on it.

Check it out

C518_quiz

On How I Approach Teaching CSS, CodePen Quizzes and Playing Cards

PeHaa Hetman shares a series of three quizzes around the CSS selectors and explains her process of teaching web development.

Read it

C518_undesign

Undesign

A collection of free design tools and resources for makers, developers and designers.

Check it out

Collective #518 was written by Pedro Botelho and published on Codrops.

6 Popular Page Builders for WordPress in 2019

Original Source: http://feedproxy.google.com/~r/1stwebdesigner/~3/XngK5tTxuT8/

WordPress is without a doubt one of the easiest and yet most customizable site-building platforms available. It brings the difficulty of creating a website down for beginners, while also not chaining down expert designers and developers.

But what if you want to customize your website with your own special touch? Making a theme isn’t exactly easy. Thanks to WordPress page builders, anyone can easily customize their website with tons of design options and functionality.

Both individuals creating a personal site and new designers breaking into WordPress site building should try out these six great page builders.

Semplice

Semplice

Built by designers for designers, Semplice is a feature-rich portfolio page builder optimized for the needs of professional artists. Everyone from agencies down to individual designers can use this platform; the Single, Studio, and Business plans are priced just right. And you only need to pay once!

Semplace uses a dynamic layout builder rather than sticking you with repetitive templates. Drag and drop to create your responsive website, use the blocks feature on Studio+ plans, and create stunning full screen designs for your work.

If you need a designer-focused tool, Semplice is the way to go.

Elementor

Elementor

With two million users, Elementor is one of the most popular page builders, and you can see why. Built just for professionals, Elementor offers a simple yet powerful page builder that integrates seamlessly with almost any theme.

With 80+ design elements from simple image widgets to buttons and forms, everything you need is there. You can also use it for free! But pay a per-year fee for the advanced plans, and you’ll get more widgets, WooCommerce integration, and a theme builder just for designers.

Divi Builder

Divi Builder

Do you feel overwhelmed with most page builders? Divi is made for simplicity. It’s super easy to learn its drag-and-drop system. But as you grow, you’ll find that this builder is more powerful than it seems.

46 content modules let you easily insert sliders, menus, forms, portfolios, and other helpful widgets. Pay per-year or a one-time fee; no crucial features locked behind pricey paywalls. And designers can use Elegant Themes and Divi to build client websites!

Beaver Builder

Beaver Builder

Beaver Builder was made for both users and professionals, with some special features for WordPress designers. The front-end editor is easy to use and allows you to build column-based pages or position elements with precision.

Editor Mode allows designers to give their clients the freedom of editing their site, while removing features that might allow them to break it. Beaver Builder is simple enough for clients to learn, too!

The builder uses three plans on per-year pricing, but later plans only unlocks features useful for companies like white labeling, multisite, and a framework theme.

Visual Composer

Visual Composer

Fast, easy to learn, and straightforward to use, Visual Composer offers a page builder that absolutely anyone can try. Templates, blocks, and elements are essential to its design. Start with a template, insert smaller template blocks, and use elements to enhance your design. Premium users can download more!

And developers will love Visual Composer. Extend it with the API, or create your own custom templates and elements!

SiteOrigin Page Builder

SiteOrigin Page Builder

If you need a free page builder without any features behind a paywall, SiteOrigin is the way to go. The builder is simple, but it has everything you need. Fast and efficient code means no drain on your website speed, and the live editor is very easy to use, even for beginners.

The extra widgets mean you can still spice things up with elements like calendars, buttons, comments, sliders, and more to your website. SiteOrigin may not come with all the fancy bells and whistles that a $200 page builder would, but it gets the job done and it does it well.

Create Beautiful WordPress Sites

With WordPress such a popular platform, there are always new competitors arising for plugins, themes – and page builders. These are some of the most popular ones so far in 2019, and that popularity clearly exists for a reason. Try one of these builders and you won’t be disappointed.


How many of these 15 web design tools & resources have you tried?

Original Source: https://www.hongkiat.com/blog/how-many-of-these-design-tools-youve-tried/

As a web designer or design agency, you’ve learned to keep a close watch on design trends. They come and go as well as changes in digital design technology and how they affect your profession….

Visit hongkiat.com for full content.

It’s Time to Talk About Testimonials

Original Source: https://www.webdesignerdepot.com/2019/05/its-time-to-talk-about-testimonials/

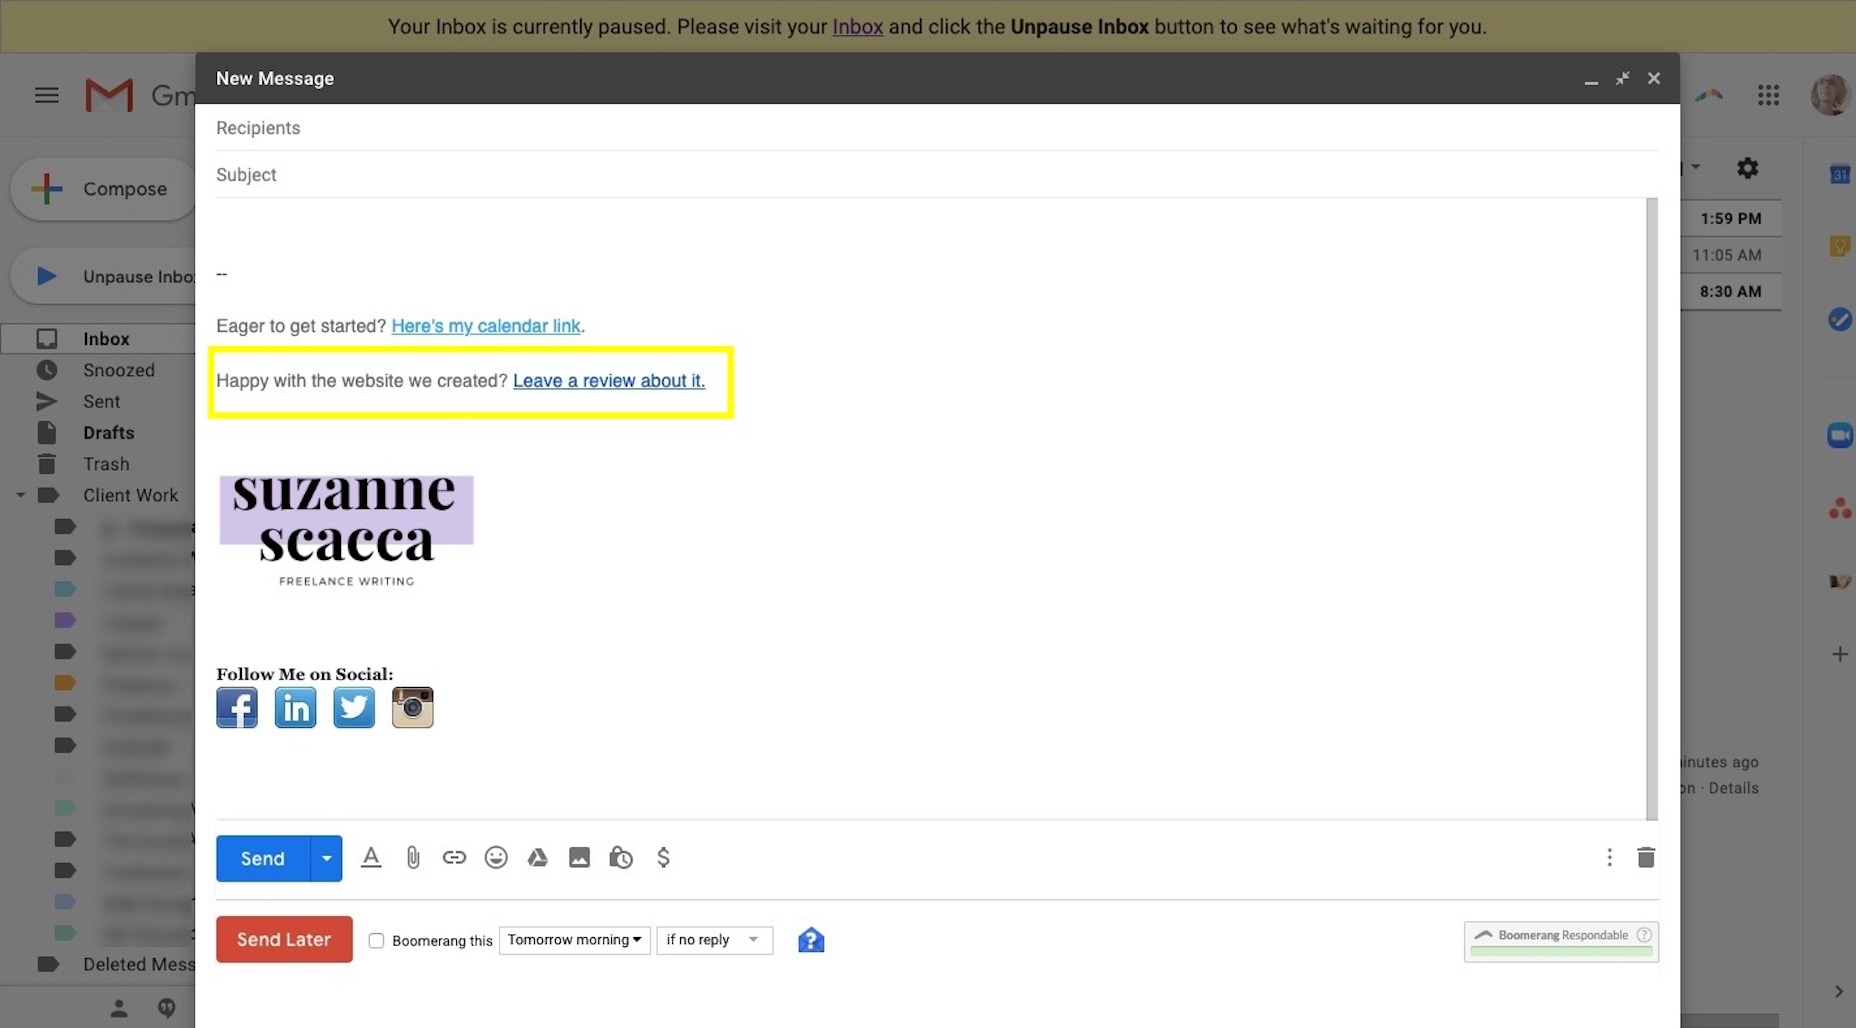
Word-of-mouth marketing is one of the best ways to get new business — and high-quality business at that. But unless you’re focused on a very small space where everyone knows each other, it can be hard to get your clients to refer you to others on their own.

That’s why you need to be willing to ask clients for testimonials and online reviews.

Look, consumers are smart. They know that anyone can build a website for their business and claim that they’re the best in their space. “We build websites that get you results” isn’t going to mean anything to prospective clients unless you have proof of those results.

That’s where client testimonials and reviews come into play. You’re going to let the words of former clients and proof of their satisfaction and results speak on your behalf.

How to Ask Clients for Testimonials and Reviews

As a web designer, it would greatly benefit you to collect as many client testimonials as you can for your website. And, beyond that, to start encouraging clients to leave positive reviews for you on Google.

Think about it like this:

consumers need to read about 10 online reviews before they can trust a business

Prospective clients are taking a big risk when they hire a designer to build their website. If they don’t know you, have never heard of your business, and don’t know anyone who’s used your services, how can they trust that you’ll design a great website for them?

Bright Local conducted a Local Consumer Review Survey a couple years back and found that consumers need to read about 10 online reviews before they can trust a business.

That’s because client reviews and testimonials are valuable. They give prospective clients a sense for what it’s like to work with you and what they can realistically expect to get out of the relationship.

For example, you can see here the level of detail included in this testimonial for BA Creative:

Then, you have to think about what happens when reviews come into a channel like Google and are assigned a star rating. That could be really great for standing out in search results amongst the competition. For instance, here is a search I did for “web designer London”:

Above the organic search results is this map snippet that highlights the most popular and well-reviewed results that match the search. Imagine what that would do for your business’s visibility.

That said, you can’t just expect former clients to start shouting to anyone who will listen: “This designer was amazing to work with and, thanks to the website he/she built for me, I now make 25% more in sales every month!”

It’s just not going to happen that way. You’re going to have to ask them for testimonials and reviews.

Here’s what you can do:

1. Create a Google My Business Page

According to the Bright Local survey, 86% of consumers are actively looking for and reading reviews for local businesses. So, if you have a physical address or P.O. box you’re comfortable associating with your business, you should create a Google My Business page. It’s completely free and takes no more than a few minutes to set up your business profile.

This is the only way your business listing will show up in Google search results, like this one for Ted Angel Design:

It’s also how you get your listing to show up in Maps results:

If you don’t have an address you can work with, Google won’t be an option. However, you can set yourself up with a Facebook page as Ted Angel has (Yelp will only work with an address, too):

Google loves to see positive customer reviews on platforms like these, so anything you can do to collect those reviews and get good star ratings will help you in search results.

Just make sure to monitor the reviews and respond to them, too. 89% of consumers surveyed by Bright Local said that they not only read reviews, but they look at the businesses’ responses to them, too.

2. Send an Offboarding Survey

In your client offboarding process, you should have a step where you follow up 30 to 60 days after the project ends. Why not put a link to a questionnaire in that email, asking them for feedback on the experience?

By putting it out there like that, you’re not pressuring them to say something good about you on the spot. Instead, you’re giving them a valid reason to share their positive sentiments. And, if they don’t, consider this a great opportunity to collect criticisms and improve your business.

Now, if you’re not comfortable combing through their response and asking if you can use their statement as a testimonial, that’s okay. Instead, make the last slide of the questionnaire say something like:

“It was an absolute pleasure working with you and I’m glad I had a hand in helping you create the perfect website for your business. If you were happy with the experience, I’d greatly appreciate it if you’d leave a review on my Google page so other business owners like yourself can find my services when they need them!”

Stay positive, don’t sound desperate, and leave it up to them to take action.

3. Add a Link in Your Email Signature

Chances are good that the bulk of your communication with clients is through email. So, why not put something in your email signature about leaving a review?

Your email signature is always a good place to leave small notes, reminding prospects and clients of things they should check out or next steps they should take. An invitation to leave a review would fit right in.

4. Write a Testimonial for Them

In the past, I would ask clients at the end of a job if they’d be comfortable writing a testimonial that I could share with prospective clients. However, I found that most of them were reluctant to do so — not because they secretly hated my work, but because they were too busy to do so. What was nice, though, was that many of those clients asked me to just write it for them. That’s when I decided to change my approach.

These days, when I conduct offboarding calls and final training with clients, I listen closely to what they say. If they are really happy with the experience and what they got in the end, they’re bound to say something about it to me. Or they’ll email me later on, with their thanks and kind words.

If they do, I jot it down on a notepad. Then, I turn the quote into a testimonial and email it to them later in the day:

“I’m so happy to hear how well the project worked out for you. I was wondering if you’d let me publish a testimonial from you with a link back to your website? It would really help me get more clients like yourself!

I know you’re busy, so I took the time to write this up from our call/email earlier:

[Include testimonial here.]

If you’re happy with it, please let me know. Feel free to tweak it if you have something else to say!”

If you know that they were happy with the website you built and you’ve taken the time to summarize their thoughts into a concise testimonial so they don’t have to, why wouldn’t they say “yes”? Plus, they’ll get a free backlink to their new website, which is a fantastic bonus.

Wrap-Up

Don’t forget to make sure that the rest of your website is prepared to sell on your behalf. By publishing an impressive portfolio and sharing other trust marks from your clientele (past and present), you can more easily and quickly convince prospects to work with you over the competition.


Featured image via Unsplash.

Add Realistic Chalk and Sketch Lettering Effects with Sketch’it – only $5!

Source

p img {display:inline-block; margin-right:10px;}
.alignleft {float:left;}
p.showcase {clear:both;}
body#browserfriendly p, body#podcast p, div#emailbody p{margin:0;}

A Beginner’s Guide to Webpack

Original Source: https://www.sitepoint.com/webpack-beginner-guide/?utm_source=rss

A Beginner’s Guide to Webpack

Nowadays, we’re forced to use many accessory tools to facilitate, speed up and optimize our web development workflow. Often though, such tools add an extra layer of complexity into the stack. As a result, we need to utilize additional time and effort to learn, understand and use these tools correctly. The same is true for webpack.

When using webpack for the first time, it can be difficult to understand how it works and how it should be used. Although it has good documentation, it can be daunting for novices, and it has a steep learning curve. However, webpack is worth learning and can save considerable time and effort in the long run. In this tutorial, I’ll introduce all the core concepts to help you get started.

Note: in this tutorial I’ve used webpack 4.30.

What Is Webpack?

As its core, webpack is a static module bundler. In a particular project, webpack treats all files and assets as modules. Under the hood, it relies on a dependency graph. A dependency graph describes how modules relate to each other using the references (require and import statements) between files. In this way, webpack statically traverses all modules to build the graph, and uses it to generate a single bundle (or several bundles) — a JavaScript file containing the code from all modules combined in the correct order. “Statically” means that, when webpack builds its dependency graph, it doesn’t execute the source code but stitches modules and their dependencies together into a bundle. This can then be included in your HTML files.

Now, to expand the above cursory overview, let’s explore the main concepts webpack uses.

Webpack Main Concepts

Webpack has some main concepts which we need to understand clearly before digging in its practical implementation. Let’s examine them one by one:

Entry. The entry point is the module, which webpack uses to start building its internal dependency graph. From there, it determines which other modules and libraries that entry point depends on (directly and indirectly) and includes them in the graph until no dependency is left. By default, the entry property is set to ./src/index.js, but we can specify a different module (or even multiple modules) in the webpack configuration file.

Output. The output property instructs webpack where to emit the bundle(s) and what name to use for that file(s). The default value for this property is ./dist/main.js for the main bundle and ./dist for other generated files — such as images, for example. Of course, we can specify different values in the configuration depending on our needs.

Loaders. By default, webpack only understands JavaScript and JSON files. To process other types of files and convert them into valid modules, webpack uses loaders. Loaders transform the source code of non-JavaScript modules, allowing us to preprocess those files before they’re added to the dependency graph. For example, a loader can transform files from a CoffeeScript language to JavaScript or inline images to data URLs. With loaders we can even import CSS files directly from our JavaScript modules.

Plugins. Plugins are used for any other task that loaders can’t do. They provide us with a wide range of solutions about asset management, bundle minimization and optimization, and so on.

Mode. Typically, when we develop our application we work with two types of source code — one for the development build and one for the production build. Webpack allows us to set which one we want to be produced by changing the mode parameter to development, production or none. This allows webpack to use built-in optimizations corresponding to each environment. The default value is production. The none mode means that there won’t be used any default optimization options. To learn more about the options webpack uses in development and production mode, visit the mode configuration page.

How Webpack Works

In this section we’ll examine how webpack works. Even a simple project contains HTML, CSS and JavaScript files. Also, it can contains assets such as fonts, images, and so on. So, a typical webpack workflow would include setting up an index.html file with the appropriate CSS and JS links, and the necessary assets. Also, if you have many CSS and JS modules which depend on each other, they need to be optimized and properly combined in one unit ready for production.

To do all this, webpack relies on configuration. Although webpack 4 comes with reasonable defaults, for any non-trivial project you’ll need to provide a special configuration file webpack.config.js, which describes how the files and assets should be transformed and what kind of output should be generated. This file can quickly become quite monolithic, which makes it hard to understand how webpack does its job unless you know the main concepts behind its working.

Based on the provided configuration, webpack starts from the entry points and resolves each module it encounters while constructing the dependency graph. If a module contains dependencies, the process is performed recursively against each dependency until the traversal has completed. Then webpack bundles all project’s modules into a small number of bundles — usually, just one — to be loaded by the browser.

Getting Started

Note: you can find the files for our project in the GitHub repo.

Now that we have solid theoretical foundation, let’s implement it in practice.

To start, we’ll create a new directory and switch to it. Then we’ll initialize a new project:

mkdir learn-webpack
cd learn-webpack
npm init -y

Next, we need to install webpack and webpack CLI locally:

npm install webpack webpack-cli –save-dev

Now, the content of the generated package.json should be similar to the following:

{
“name”: “learn_webpack”,
“version”: “1.0.0”,
“description”: “”,
“main”: “index.js”,
“scripts”: {
“test”: “echo “Error: no test specified” && exit 1″
},
“keywords”: [],
“author”: “”,
“license”: “ISC”,
“devDependencies”: {
“webpack”: “^4.30.0”,
“webpack-cli”: “^3.3.0”
}
}

Besides bundling modules, webpack can be used as a simple task runner. We can create webpack tasks by including the name of our task followed by its instructions in the scripts section of the package,json file. Let’s try this now. Open package.json and change the scripts object to the following:

“scripts”: {
“test”: “echo “Error: no test specified” && exit 1″,
“dev”: “webpack –mode development”,
“build”: “webpack –mode production”
},

Within the scripts property, webpack allows us to reference locally installed npm packages by their names. We use that and the –mode flag to define dev and build tasks, which will run webpack in development (npm run dev) and production (npm run build) mode respectively.

Before we test the tasks we’ve just created, let’s create a src directory and put an index.js file in it so that it contains console.log(“Hello webpack”);. Now we can already to run the dev task to start webpack in development mode:

$ npm run dev

> learn_webpack@1.0.0 dev C:UsersUserWebpacklearn_webpack
> webpack –mode development

Hash: 5bb3bdc1efd7b7f4b627
Version: webpack 4.30.0
Time: 226ms
Built at: 2019-04-16 17:48:32
Asset Size Chunks Chunk Names
main.js 3.8 KiB main [emitted] main
Entrypoint main = main.js
[./src/index.js] 27 bytes {main} [built]

Great! It works as expected. But to verify that we get the correct output, we need to display the result in the browser. To do that, let’s create an index.html file in the dist directory:

<!doctype html>
<html>
<head>
<title>Getting Started</title>
</head>
<body>
<script src=”main.js”></script>
</body>
</html>

Now, if we open the file in the browser, we should see the Hello webpack message in the console.

So far, so good. But writing our index.html file manually can be problematic in some cases. For example, if we change the name of our entry point, the generated bundle will be renamed, but our index.html file will still reference the old name. So, we’ll need to update our HTML file manually every time we rename an entry point or add new one. Fortunately, we can easily fix that with the html-webpack-plugin. Let’s install it now:

npm install html-webpack-plugin –save-dev

At this point, to activate the plugin, we need to create a webpack.config.js file in the root directory with the following content:

const HtmlWebpackPlugin = require(“html-webpack-plugin”);

module.exports = {
plugins: [
new HtmlWebpackPlugin({
title: “Webpack Output”,
}),
],
};

As you can see, to activate a webpack plugin, we need to include it and then add it to the plugins array. If needed, we also pass options to the plugin.

Let’s run our build now to see what will happen:

$ npm run build

> learn_webpack@1.0.0 build C:UsersUserWebpacklearn_webpack
> webpack –mode production

Hash: e56a796f5ccfebcc8270
Version: webpack 4.30.0
Time: 1088ms
Built at: 2019-04-16 20:44:47
Asset Size Chunks Chunk Names
index.html 183 bytes [emitted]
main.js 956 bytes 0 [emitted] main
Entrypoint main = main.js
[0] ./src/index.js 27 bytes {0} [built]
Child html-webpack-plugin for “index.html”:
1 asset
Entrypoint undefined = index.html
[2] (webpack)/buildin/global.js 472 bytes {0} [built]
[3] (webpack)/buildin/module.js 497 bytes {0} [built]
+ 2 hidden modules

Let’s open the index.html. As we can see, the plugin automatically creates an updated index.html file for us which uses the title option from the configuration:

<!DOCTYPE html>
<html>
<head>
<meta charset=”UTF-8″>
<title>Webpack Output</title>
</head>
<body>
<script type=”text/javascript” src=”main.js”></script></body>
</html>

Let’s now expand our project and specify custom names for the entry and output properties. In webpack.config.js we add the following before the plugins property:

entry: ‘./src/app.js’,
output: {
filename: ‘[name].bundle.js’,
path: path.resolve(__dirname, ‘dist’)
},

Now, we’ll create an src/component.js file:

export default (text = “Hello webpack”) => {
const element = document.createElement(“p”);

element.innerHTML = text;

return element;
};

Next, we rename index.js to app.js to reflect our changes, and swap its content with the following:

import component from “./component”;

document.body.appendChild(component());

Now, let’s run webpack in production mode:

$ npm run build

> learn_webpack@1.0.0 build C:UsersUserWebpacklearn_webpack
> webpack –mode production

Hash: 9f78936f8a2a21061f0b
Version: webpack 4.30.0
Time: 1689ms
Built at: 2019-04-17 23:43:40
Asset Size Chunks Chunk Names
index.html 190 bytes [emitted]
main.bundle.js 1.04 KiB 0 [emitted] main
Entrypoint main = main.bundle.js
[0] ./src/app.js + 1 modules 227 bytes {0} [built]
| ./src/app.js 79 bytes [built]
| ./src/component.js 148 bytes [built]
Child html-webpack-plugin for “index.html”:
1 asset
Entrypoint undefined = index.html
[2] (webpack)/buildin/global.js 472 bytes {0} [built]
[3] (webpack)/buildin/module.js 497 bytes {0} [built]
+ 2 hidden modules

Let’s examine and clarify the information from the webpack output. Beginning from the top, we see the hash of the build, webpack version, and the time it took to execute the build. Next, we see the files generated in the dist directory (index.html and main.bundle.js). Below them, we see the entry module (app.js) and its dependency (component.js). The output after Child html-webpack-plugin for “index.html”: is related to the internal work of the html-webpack-plugin and we can safely ignore it.

So now, in the dist folder, we have the newly generated bundle file main.bundle.js. If we open index.html in the browser, we should see Hello webpack displayed on the page. Also, if we check the source of index.html, we’ll see that the value of the src property in the script tag is updated to main.bundle.js.

The post A Beginner’s Guide to Webpack appeared first on SitePoint.

Why the Highest Paid Developers “Fight” Their Coworkers

Original Source: https://www.sitepoint.com/why-the-highest-paid-developers-fight-their-coworkers/?utm_source=rss

You’re going to be asked to do it.

At some point, if it hasn’t happened already, your coworkers or your boss will ask you to do something foolish. Something you know will make things worse for you, your coworkers, maybe even the business itself.

If you’re like most developers, you do it anyway.

That’s what most will do, right? It’s better to keep your head down, avoid making waves and simply do what you’re told. Job security isn’t a thing anymore, but that’s one of the best things you can do to keep your job, for a while at least.

This Common Mistake Creates a Career Handicap

This is the problem.

Most employees want to keep their jobs and their clients. They don’t have the leverage or control they want over their own careers. They need their job. In fact, most people are terrified of losing their jobs.

This has a cascading effect.

Research shows the fear of losing your job creates job dissatisfaction and a lack of commitment at work. This, in turn, affects job performance, negatively increasing the likelihood that you will lose your job. It’s a vicious cycle that seems to repeat itself over and over.

But there’s something worse than the fear of a job loss.

It’s the misplaced confidence or expectation of job security, the kind of confidence that crushes you when you’re actually let go. Both of these issues are a problem, and both of these issues are continually ignored.

Why is it a problem?

Because 78 percent of employees live paycheque-to-paycheque. This includes workers making $100,000+ per year. This is the real reason why most employees have no leverage, no ability to say no. This is the reason most developers won’t fight with their coworkers.

Why Developers Need to Fight Their Coworkers

What do I mean by “fight?”

The post Why the Highest Paid Developers “Fight” Their Coworkers appeared first on SitePoint.

A Look at Top Flat File CMS Options

Original Source: http://feedproxy.google.com/~r/1stwebdesigner/~3/Uy9iRDKkbpU/

When we think of content management systems (CMS), we often think about popular offerings such as WordPress and Drupal. Both rely on a traditional MySQL database, where a website’s content and settings are stored. However, not all systems work this way.

A flat file CMS, for example, eschews the need for a database server. They store site data in a simple text file. This cuts down on latency and can vastly improve site performance. It also opens the door for more customized data structures, easier portability and the ability to scale.

Today, we’ll introduce you to some of the more popular and intriguing flat file systems. They vary in feature sets and range anywhere from free to a few hundred dollars. Read on to find an option that fits your needs.

Statamic

Statamic

One of the most well-known flat file systems, Statamic is based on the popular Laravel PHP framework. It offers a full suite of features, from built in forms, powerful media management and version control via git.

Manage your site through a well-thought-out dashboard (you can even access updates and maintenance features via the command line). There is also a library of third-party themes and addons that allow you to extend site functionality.

We should note that Statamic is commercial software, with a single site license running $199 USD. This entitles you to unlimited support and updates, however. And the software will run on virtually any server that can handle PHP. If you want to try it out first on a local environment, a free trial is available.

Kirby

Kirby

Kirby is all about customization. For example, while an installation includes a templating engine based on PHP and HTML, you also have the ability to replace it with just about anything you want. But it doesn’t stop with your standard design and development. The CMS also allows developers to customize the admin panel to reflect the needs of the site itself. Things like the admin layout, permissions and fields can be added via files called Blueprints.

You’ll also find some unique features, such as the ability to use Markdown (extended via KirbyText), version control and a built-in REST API. True to form, Kirby will also work with other data sources – including databases.

Note that Kirby is also commercial software, with licenses running €99 per site. But you can try it for free on your local server.

October CMS

October CMS

Like Statamic above, October CMS is based on Laravel. It features unobtrusive templating and utilizes the Twig template engine. This makes theming a fairly straightforward experience. Included support for Partials and Components allow for building modular sites, where code can be used and re-used. Extend things even further by installing (or creating your own) plugins.

Assets such as media files can be easily managed through the UI. Plus, you can integrate files from AWS or other cloud-based services. Files are sortable by type (images, video, documents, etc.) and can be stored in folders. This is somewhat similar to what you’d expect to find in an operating system.

October CMS is free and open source.

Grav

Grav

Grav separates itself from some other flat file systems in a few ways. First, the admin panel is optional. The CMS can be administered directly via the command line by default, but a full-featured dashboard is available via a free plugin. Second, like WordPress, it’s capable of a multisite installation – meaning you can run multiple websites from one instance of the CMS.

Like others in this roundup, you’ll also find lots of flexibility. Grav includes the ability to write content in Markdown or HTML, add custom fields, posts types or taxonomies, and works with the Twig templating engine. You can also extend functionality via plugins.

Free and open source, Grav boasts an enthusiastic community of developers.

Bolt

Bolt

Featuring a back end built with a focus on content creation, Bolt offers a plethora of options for online publishers. A user management feature allows administrators to assign user levels to specific types of content, while a developer level allows for settings and template tweaks.

Theming is handled via Twig, and built-in form capabilities allow you to correspond with users without the use of a plugin. On the back end, Bolt is built on top of the Silex PHP framework and uses Symfony components. One unique feature is the ability to completely white-label the CMS – allowing developers to fully brand the admin area.

Bolt is open source available for free. Plus, all of its core code is available on GitHub.

Fast and Full of Features

Just hearing the term “flat file” can give the impression that you’re missing out on something. If it doesn’t use a traditional database, it can’t be very good, right?

A deeper look shows that a flat file CMS can be very competitive. The features available in the systems above are on par with their database-driven counterparts. And there are even some pretty compelling advantages to choosing flat file.

Among the biggest is that you can run a full-featured CMS quite efficiently on just about any level of web hosting. You don’t need a ton of horsepower to run a fairly large, high-performance website.

So, if you’re in the market for a new CMS, don’t be afraid to check out a flat file system. You may be surprised at how much they can do.


Artist Raku Inoue making floral arrangements at its purest form

Original Source: http://feedproxy.google.com/~r/abduzeedo/~3/i-ocd41um6Y/artist-raku-inoue-making-floral-arrangements-its-purest-form

Artist Raku Inoue making floral arrangements at its purest form

AoiroStudioMay 15, 2019

Our good pal Raku Inoue has been slaying incredible pieces via his Instagram and now has been collaborating with many many incredible brands. We are hugely happy for his success and incredible ride so far. We just wanted to share his latest work to keep the momentum going and again back with his insane skills with floral arrangements. Make sure to check Raku’s own tag on ABDZ and make sure to give some love to the latest from the Seven Butterflies – The Protectors of Nature series.

More Links
Instagram
Natura Scroll

The Scroll represents the Past. It is a humbling reminder of the unparalleled force in which Mother Nature can act upon.

Artist Raku Inoue making floral arrangements at its purest form

Natura Kabuto

The Kabuto represents the Determination: Nature often finds ways to balance itself regardless of the external forces it might be facing. It will continue to supporting and destroying Life as we know until its completely broken down.

Artist Raku Inoue making floral arrangements at its purest form

Natura Katana

The Katana represents the Actions: Nature creates and destroys. Both of these actions are achieved in such precision and force that we as human can do nothing but stand in awe.

Artist Raku Inoue making floral arrangements at its purest form

Artist Raku Inoue making floral arrangements at its purest formArtist Raku Inoue making floral arrangements at its purest formArtist Raku Inoue making floral arrangements at its purest form

Life Lesson – My learnings from completing 30+ UX Design Interviews

Original Source: http://feedproxy.google.com/~r/abduzeedo/~3/uWW5yUZnnJE/life-lesson-my-learnings-completing-30-ux-design-interviews

Life Lesson – My learnings from completing 30+ UX Design Interviews
Life Lesson - My learnings from completing 30+ UX Design Interviews

AoiroStudioMay 16, 2019

François here from ABDZ. I would like to share a life lesson, it’s more than a lesson actually. I recently completed about 30+ UX design interviews during the course of the last 4-5 months, It’s not something I would pride myself about but I did learn numerous lessons that I would treasure to share on ABDZ. Wherever you are a long-time reader, new to the blog, professional or beginner; there are some actions in this article you can unquestionably learn from. Shall we give it a start?

Why? What? How?

First of all, why did I started this ambition? What were my goals? And how did I managed to tackle them. Right? Well it all started from a lack of accomplishment and unhappiness I was feeling from my previous gig. This lack of happiness became more of a real issue so I decided to part ways and tackle this “quest” to find me, the best design job I could possibly find and for my family. I was going to go all out on this “quest” because I have true confidence in my past work, my profile, and furthermore with my skill set. First and foremost I had my list of “requirements”:

Good salary
On-site anywhere in the World
Great challenges
Team ethics, design process
Benefits

A remote position would be a great addition to the list. For my case, I needed a change in the scenery. I have been living in the same city for 30+ years and cold winter days shouldn’t be part of our daily life anymore. *Cough Hello Montreal!

Some tools

During the course of these interviews, there were some weeks where I actually had more than 6 interviews all lined up in the path of two days, which is a lot to take in. So It was good to have Notion for example where I was able to create a “workspace” for all the places that I applied to and enter the individually updates. You should definitely check it out if you haven’t yet. Find the best tools that work the best for you and I find out that going “analog” helped a lot as well: the simple pencil/notebook was easily my choice for quick note-taking and later review everything into Notion.

Life Lesson - My learnings from completing 30+ UX Design InterviewsNotion HQ

Before to begin

Remember job searching is not easy. Depending on your goals, your background, your experience and etc. During my search, I did get false hopes, got lied to, ghosted and it’s part of the game. It’s draining and not motivating at times, but again if you have the right balance and preparation. You should be able to balance it all, be warned still. There is nothing short of easy unless you have to give it your best. On the other side, I did meet and had conversation exchanges with some of the best in our industry. It’s always rewarding to know there are good people in our community. I will come back to that.

There is nothing short of easy unless you have to give it your best.

First, your resume

Be as transparent as possible. Look at your resume and if you were sharing a piece of you especially your work experience. I did manage to get my resume reviewed by several recruiters and collect their feedback so I can improve it. It helped a lot to justify several questions they might have got and I solved them through iterations on my own. I did collect small details that I just didn’t care but it was very important. Think of previous job dates! Recruiters and managers have little time to scan your resume so make sure you have a clear description of:

Company, your role, dates
What were your tasks for the role
What were your/or team design process
Skills, tools, “fields of design”
Be prepared to rework your portfolio many “many” times

Yes, you heard me! I think I have worked my portfolio 5-6 times and now I just can’t look at it anymore! Hah! It’s the best part of our job I think, reliving the past work and re-envision what worked well and what you would have done better under different circumstances.

Include the problem, process and solution
Include your contributions vs your team
If you wanna share a side-project? Please do!

Build your portfolio with 3-5 case studies, why case studies? It’s great to emphasize your past work through storytelling and share the pillars: problem, process, and solution. Try to visualize it this way, imagine yourself presenting your portfolio without you being there. Is it easy to navigate, does it answer to the pillars? We can totally continue this subject on the next on ABDZ…to be continued.

Life Lesson - My learnings from completing 30+ UX Design Interviews

Understanding the hiring process

Hiring teams nowadays are doing a tremendous job to keep you in the loop during the entire process. Hat’s off to the recruiters for their work and taking the time to process it all. I am thankful for the many recruiters I have met and their work to make the entire process easier and less painful at times. Especially when “wait” becomes a great factor of “inquiétudes” which means worries. Some companies will even take the time to send proper documentation so you understand the entire hiring process which is a huge step from past years. Don’t be afraid to ask questions, even if you think they are dumb. They are no dumb questions.

Prep, prep and prep!

Recruiters might help you a chunk with the hiring process but you still have to do the heavy lifting. Preparations! Take the time to learn about the company you are applying for:

their story, product and services (if it does apply)
hiring process (on-site interviews), design process, company’s ethics
be passionate on learning more about them

About the on-site interviews, I beautifully “failed” one last year and I wrote my experience on ABDZ. There are a tons of great references out there but my piece of advice. Practice! The more you practice, the more you will be comfortable when you will be in this situation.

Build a network

You think the community is big but it is actually small. So keep it alive! My biggest job facilitator for me has been Twitter. I love Twitter and it’s an incredible platform to meet and interact with some of the best in the industry. If you are not on Twitter yet, please do NOW. Like NOW. If things don’t work out, don’t burn bridges with people because you never know when you will cross their path again. This is a lesson for me, I did burn bridges in the past and it’s not a great feeling. I learned my lesson though. Now, I rather take a neutral approach with everybody and keep it leveled even if things don’t go the way you would expect.

Life Lesson - My learnings from completing 30+ UX Design Interviewsby YaroFlasher

Don’t be an a**hole. Period.

It’s kind of related to my previous paragraph, we navigate through a small but powerful community. Let me share this story that will totally make you see how our community is amazing and filled with incredible people. I went inside someone’s DMs on Twitter and poked that person for a job opportunity (That company was looking for their next designer). That person went to ask for my resume and portfolio so I sent it. And that person came back with very good critique feedback on my portfolio. It mentioned that my portfolio (at the time) was just “a detailed version of my resume.” I could have just flipped that person off and that would be it. But instead, I was so motivated by that critique so I spent the next four days redesigning my portfolio. That newer version of my portfolio opened even more doors that I could ever imagine. It totally pays off to listen for a change and learn to accept a critique of your work which is never easy. Thank you to this person for taking their time to critique my portfolio.

It totally pays off to listen for a change and learn to accept a critique of your work which is never easy.

Epicjobs by Dann Petty

One last thing but not least. I would like to share a shout to epicjobs.co, it’s a rad initiative by the mighty Dann Petty who is making this mission to help us find a job. You get to meet the people behind those job postings which is pretty wicked if you ask me. I wish this initiative existed before I started my search but wanted to take with you guys because it’s really great and helpful for our design community. Make sure to follow #epicjobs.

Life Lesson - My learnings from completing 30+ UX Design Interviews

Last words

I hope this article helped you in some ways, again this experience helped me a lot understanding my goals and your dream job might be closer than you think. Again, be yourself. It’s the best advice I have ever got and if things don’t work out. Don’t let it go and work harder to achieve your goals. If you have any feedback, give me a shout on Twitter and if you have any inquiries for us at ABDZ. You find us through ABDZ Facebook.


Color Inspiration: Spotify 2018 Wrapped

Original Source: http://feedproxy.google.com/~r/abduzeedo/~3/gw_nAf2-6Xc/color-inspiration-spotify-2018-wrapped

Color Inspiration: Spotify 2018 Wrapped

AoiroStudioMay 16, 2019

If you are a Spotify user, you must remember their insanely beautiful 2018 Wrapped where each year, this initiative will attract quite a buzz on social media. I personally loved the UI layouts and especially getting the data on which songs I listened the most during the past year. Imagine crossing 20+ millions of fans visited the campaign site on the first day alone. That’s beautiful! I decided to share the entire set of Spotify 2018 Wrapped as a color inspiration. It’s filled with sublime color combination for your next thing, enjoy!

With 2018 Wrapped, Spotify invited both artists and fans to explore and celebrate their year in music. Over 20 million fans visited the campaign site on the first day alone, to discover their stats, top artist, collect personalized playlists, and uncover more unexpected insights. And of course, they shared their musical snapshot, driving 2018 Wrapped to be Twitter’s top Global Trending Topic on launch day. Over 35 million fan visits. And every experience was unique.

More Links
Full Behance Project
Live Image Data Analyzation
Color Inspiration: Spotify 2018 WrappedColor Inspiration: Spotify 2018 Wrapped

Transforming people’s data into dynamic layouts and animations
Color Inspiration: Spotify 2018 WrappedColor Inspiration: Spotify 2018 WrappedColor Inspiration: Spotify 2018 WrappedColor Inspiration: Spotify 2018 WrappedColor Inspiration: Spotify 2018 WrappedColor Inspiration: Spotify 2018 Wrapped

And more…
Color Inspiration: Spotify 2018 WrappedColor Inspiration: Spotify 2018 WrappedColor Inspiration: Spotify 2018 WrappedColor Inspiration: Spotify 2018 WrappedColor Inspiration: Spotify 2018 WrappedColor Inspiration: Spotify 2018 WrappedColor Inspiration: Spotify 2018 WrappedColor Inspiration: Spotify 2018 WrappedColor Inspiration: Spotify 2018 WrappedColor Inspiration: Spotify 2018 Wrapped