Hiroshima Illustration Guidebook by IC4DESIGN inc.

Original Source: http://feedproxy.google.com/~r/abduzeedo/~3/HcCoO73o6rk/hiroshima-illustration-guidebook-ic4design-inc

Hiroshima Illustration Guidebook by IC4DESIGN inc.

Hiroshima Illustration Guidebook by IC4DESIGN inc.

AoiroStudio
Oct 12, 2018

I just came back from my week visiting Hiroshima including the island of Naoshima (Art Island). Departing from Okayama, it has been an incredible journey and one of the things you encounter when you are traveling in another country is the art & design (as a designer for the least). From the architecture, interior, tv advertisements…just everything. Among them, I stumbled across the work of IC4DESIGN inc., a two-team of illustrators based in Hiroshima, Japan. We are showcasing a series of illustrations they worked for the city’s guidebook. Check it out and for anyone who has been in Hiroshima. That represents Hiroshima very well, enjoy!

We made Hiroshima island.

More Links
Studio Site
Behance
Illustration
Hiroshima Illustration Guidebook by IC4DESIGN inc.Hiroshima Illustration Guidebook by IC4DESIGN inc.Hiroshima Illustration Guidebook by IC4DESIGN inc.Hiroshima Illustration Guidebook by IC4DESIGN inc.Hiroshima Illustration Guidebook by IC4DESIGN inc.Hiroshima Illustration Guidebook by IC4DESIGN inc.Hiroshima Illustration Guidebook by IC4DESIGN inc.Hiroshima Illustration Guidebook by IC4DESIGN inc.

illustration
hiroshima
japan


5 Secrets of Image-Rich Websites

Original Source: https://www.webdesignerdepot.com/2018/10/5-secrets-of-image-rich-websites/

When was the last time you visited a website with no images?

As web designers, we love adding images to our designs because images are memorable and give us a direct channel of communication to the audience’s brain. Also, images are universal and processed by our brains faster than text. That’s partly why the “story” medium (short-form videos with effects and overlays) and emojis attract engagement.

But something else has also been happening since “web 2.0” came along. The high usage of images all over the web, some fueled by user-generated content, is creating a problem for web designers who now must deliver rich experiences in the face of an ever-increasing number of images.

In the following sections, we’ll discuss in detail five things to keep in mind when designing smart, image-rich websites in the modern era.

1. Enhance Performance

Whenever someone thinks about images on the web, their content, resolution, and style immediately come to mind. But the most important factor for delivering superior UX of images is actually performance, which is even more important than the image itself. That’s because most visitors to your site won’t bother to wait for your images to load.

a slow-loading ecommerce website that clocks $1,000 in revenue per day loses $250,000 in sales every year

In short, image-rich websites can’t afford to be slow. For every second of increase in load time, there’s a 7-percent reduction in conversions. That means that a slow-loading ecommerce website that clocks $1,000 in revenue per day loses $250,000 in sales every year.

Big companies like Ryanair and Marks & Spencer had massive website redesigns that failed abominably because of critical performance issues. So be sure to keep in mind that a user-centered website is, first and foremost, performance based. You can enhance performance in many ways, here’s a good place to start.

Use optimized and responsive images. Show the users the image only when and exactly how they need it. Below are three essential tips.

Tip 1: Use Sprite Sheets

One of the oldest tricks for speeding up load times on the web. Loading multiple images takes time and resources. However, loading a single image and displaying its components is much faster because doing so reduces the number of server requests and optimizes bandwidth.

With Cascading Image Style Sheet (CSS) sprites, the browser loads just one image, say, a row of social-media icons, displaying only portions of it in the relevant places.

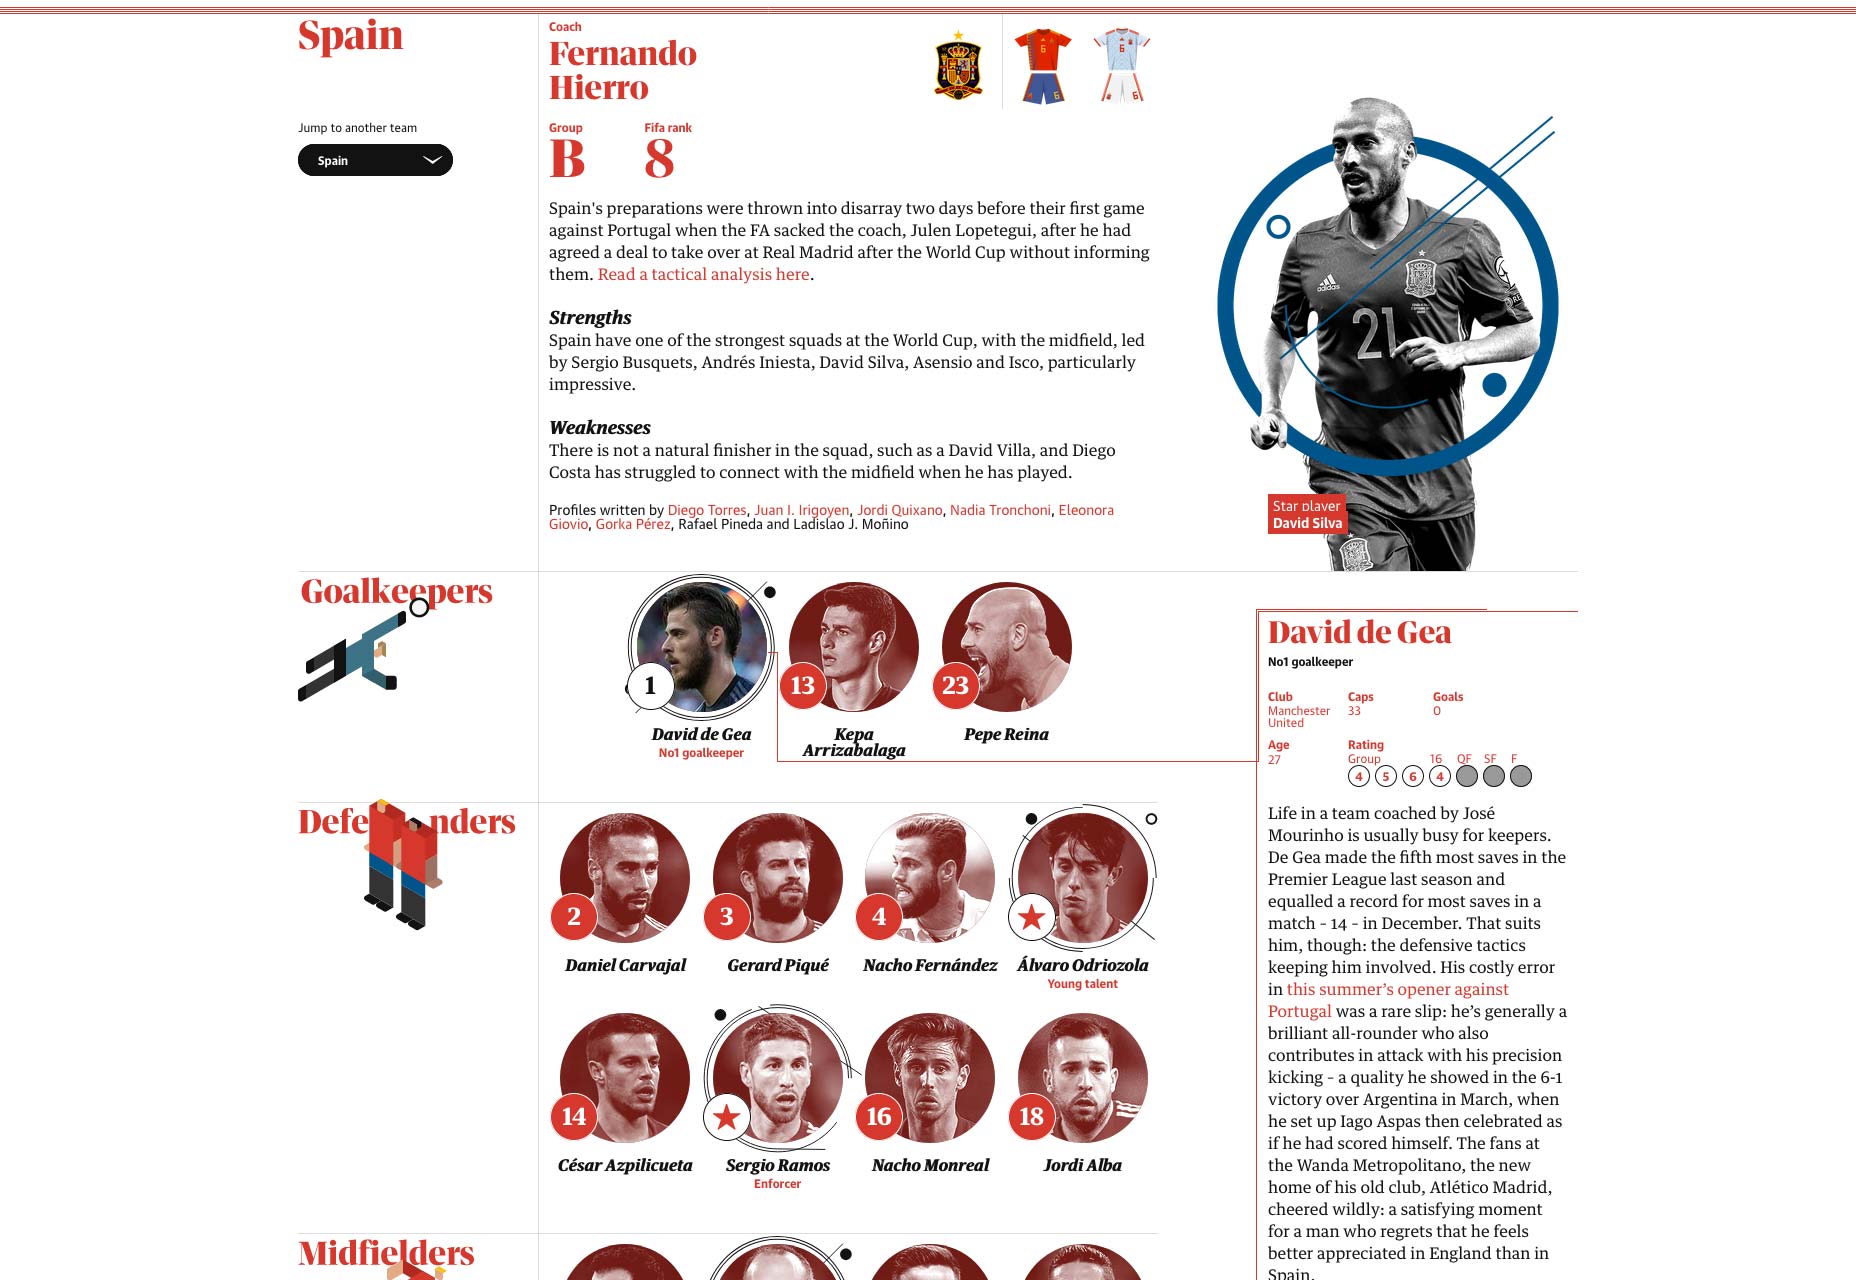
A good recent example of such a technique is The Guardian’s World Cup 2018 infographic. At the outset, the page ran into a problem with the large amount of images to show: 32 competing teams, each with over 20 players. As a solution, the website leverages CSS sprites to show the players for each of the teams. See the page below that displays all 23 players of the Spanish team, the page source being only one single image, which loads superfast.

Tip 2: Lazy-Load Images

Another critical issue, especially in the case of a multitude of images, is lazy loading. The principle is simple: Load an image only when it is visible in the viewport of the browser instead of having the visitor wait by loading the entire collection of images.

For a classic example, scroll down the Unsplash home page.

Tip 3: Load a Site Skeleton First

Images never show up in advance, which is why you must account for perceived performance.

Loading a basic skeleton version of a website before its images creates a better experience for visitors. They are then aware of  what to expect and, in some cases, can even start to interact with the site (before images load).

Consider the loading sequence of Klook:

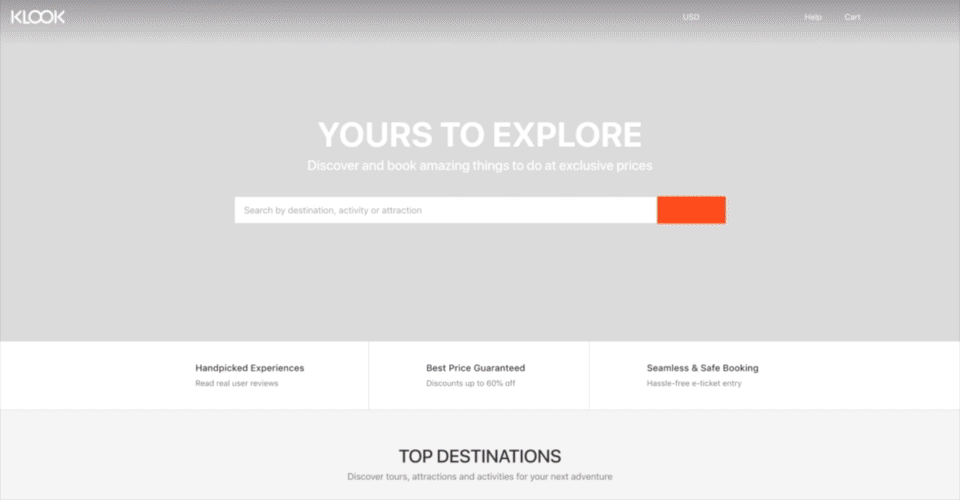
Here, for each image, the browser first loads a light version of the site (with a white backdrop) and then the actual background image. Such an approach might seem fast or trivial to some, but keep in mind that performance varies across connections and devices.

(If you are working with React or Vue, you can use this cool tool to create skeleton components.)

2. Treat Images as Part of the Design

This rule might seem obvious but is frequently overlooked. Images are an integral part of the design and, as such, must be taken into account. Because designs serve a goal, the related images and composition of the page must support that goal.

Design Images to Complement

Remember to identify and prioritize the goals of the page. Whether your objective is to solicit newsletter signups or offer a catalog for browsing, your images must complement the intended purpose.

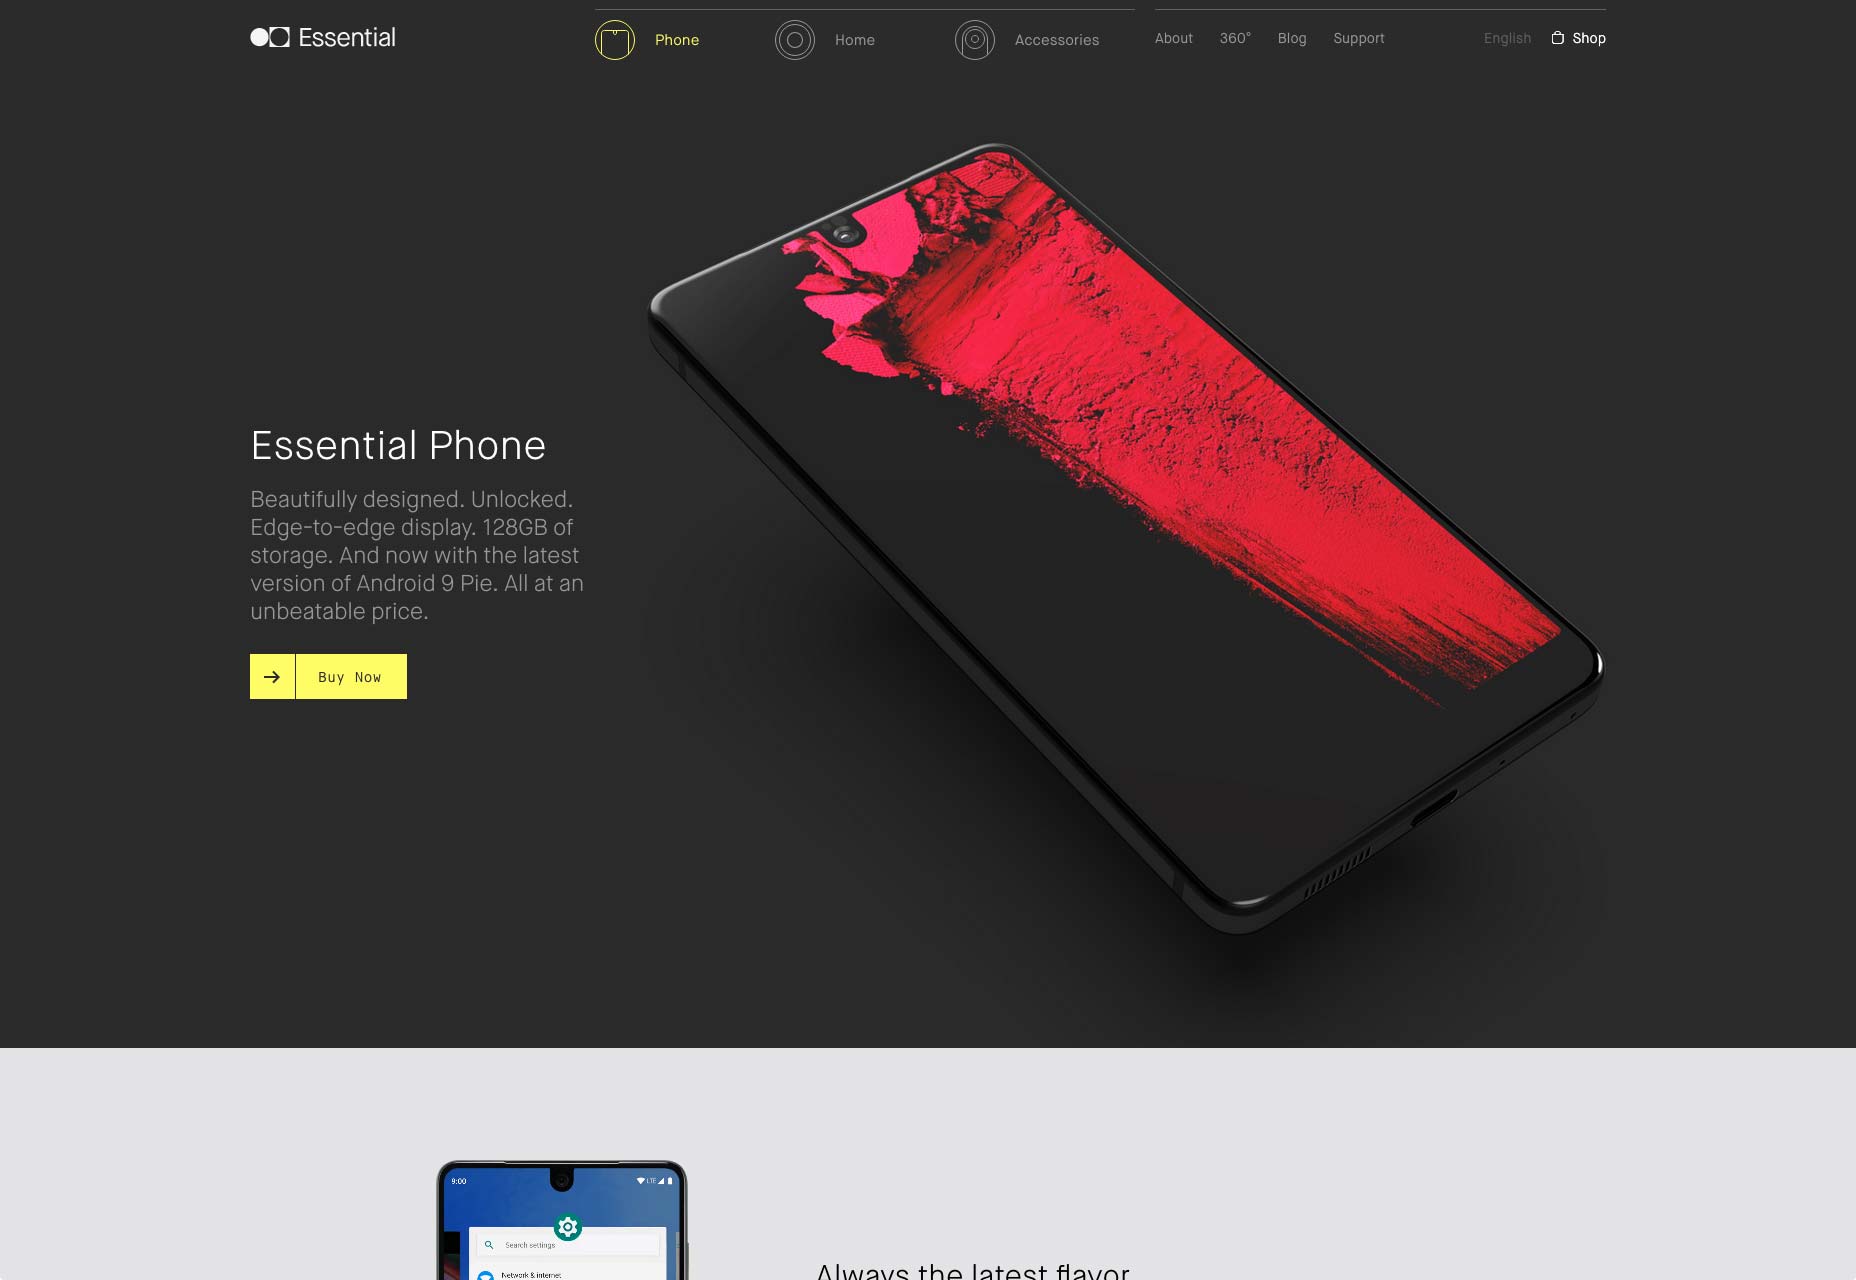
As an example, Essential Phone’s landing page displays a single, eye-catching image of the product. The yellow Buy Now button prominently stands out, steering the visitor’s attention to the intended action. Because the image shows the product itself, it’s never cut off, nor does it serve as a background to the text.

Have Images Take the Back Seat

Even though image-focused designs often deliver better results, be sure to follow the basic usability principles because those designs do not guarantee success. For example, you might overlook the visual hierarchy by assigning equal weightage to both the primary and secondary elements.

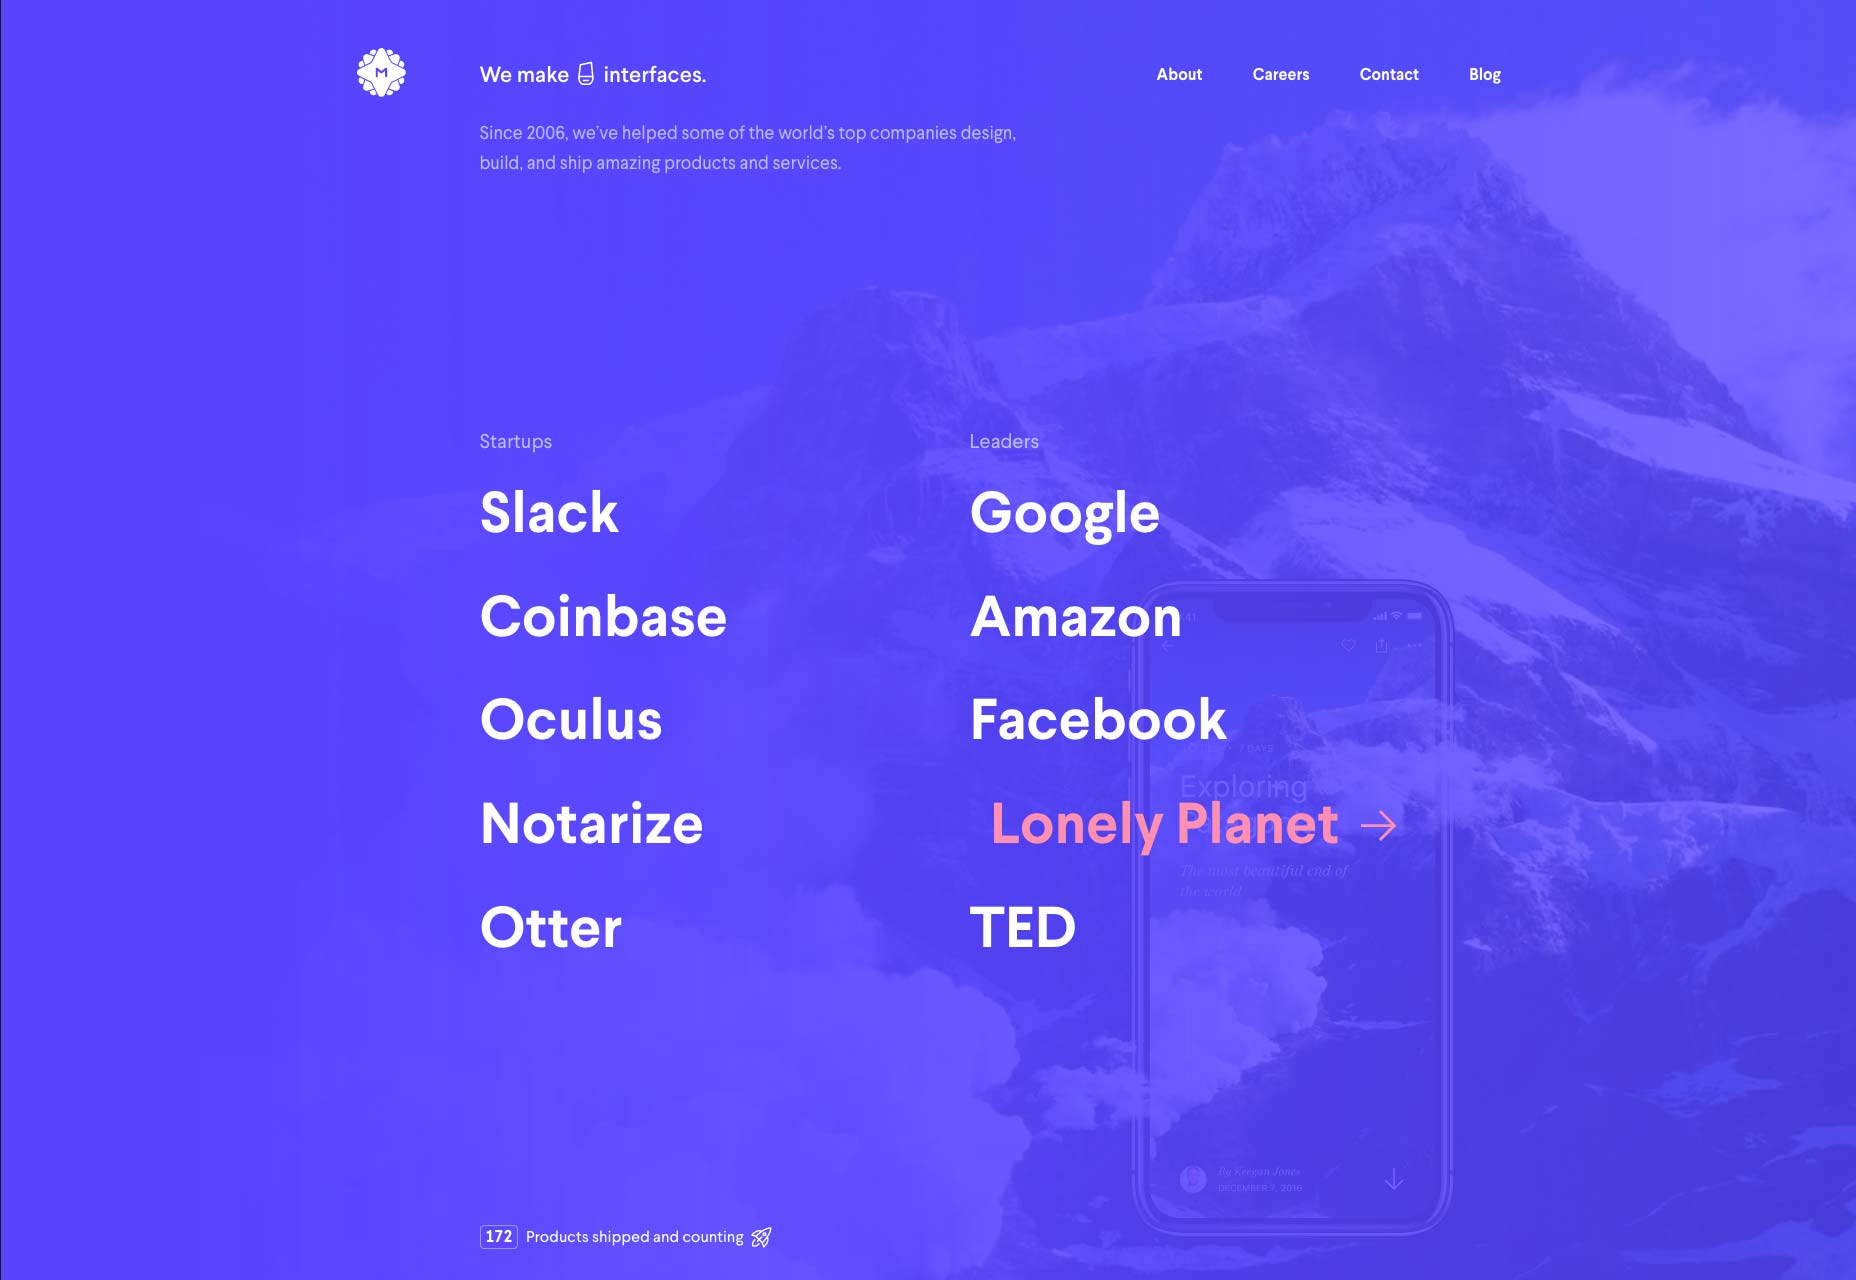
MetaLab is a design agency that specializes in designing interfaces. When first displayed, its single-fold landing page shows only a solid-color background with minimal text, mainly the names of its clientele. However, as soon as you mouse over a company name, the background subtly changes, displaying a contextual image. That means no more suffering through context switching each time. Such a home-page design ably conveys the message that MetaLab’s clientele is impressively extensive.

3. Let Text and Images Be Friends

Displaying both text and images on the same page can be a tricky business. The challenge is to find that perfect balance of text and imagery for your website.

Place Text on a Soft Background Overlay

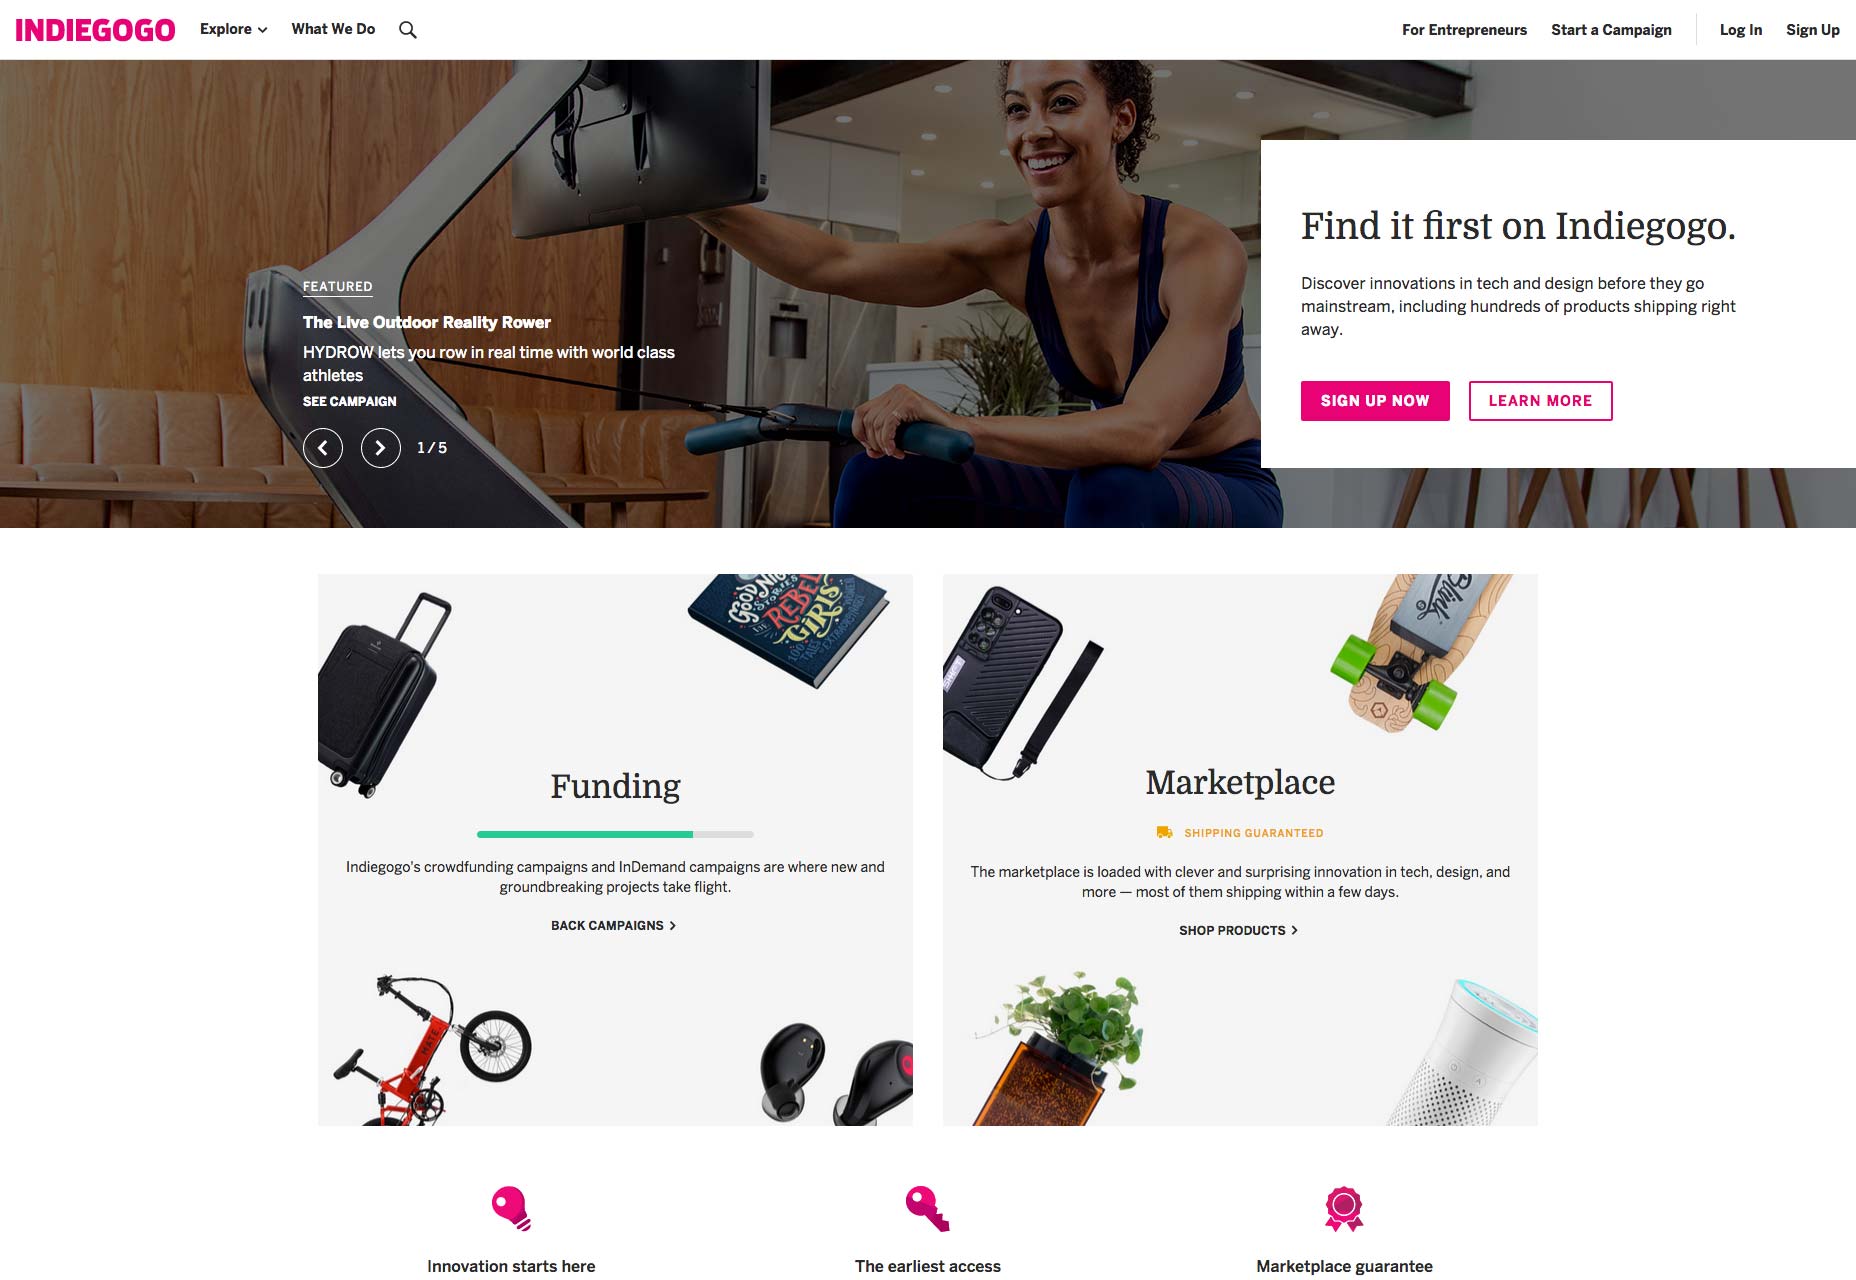
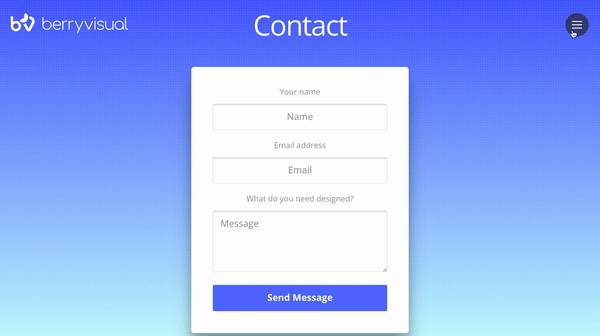
Placing text on a soft background overlay is one of the simplest techniques for presenting contrasting images and text. Indiegogo’s landing page is a vintage example, on which the title and description are displayed atop a soft, dark overlay on an image of each of the products offered on the site. The text is easy to read with no sacrifice in visual appeal.

Blend Text and Images

Airbnb adopts a fantastic visual blend of text and images for their home-listing page.

The images for the home categories contain the wording inside the images themselves, enabling the designer to play with hiding the text between overlay objects in the photographs. (See “Family”) Such an approach works seamlessly, demonstrating that text and image need not be separate entities.

(A side note on accessibility: Keep in mind that using text in images also means no keywords for search engines except for those specified in the images’ alt tags, causing problems in accessibility unless you use the aria-label tags. Your final choice depends on the design context and your page’s objective.)

Combine Text and Images as a Single Interactive Unit

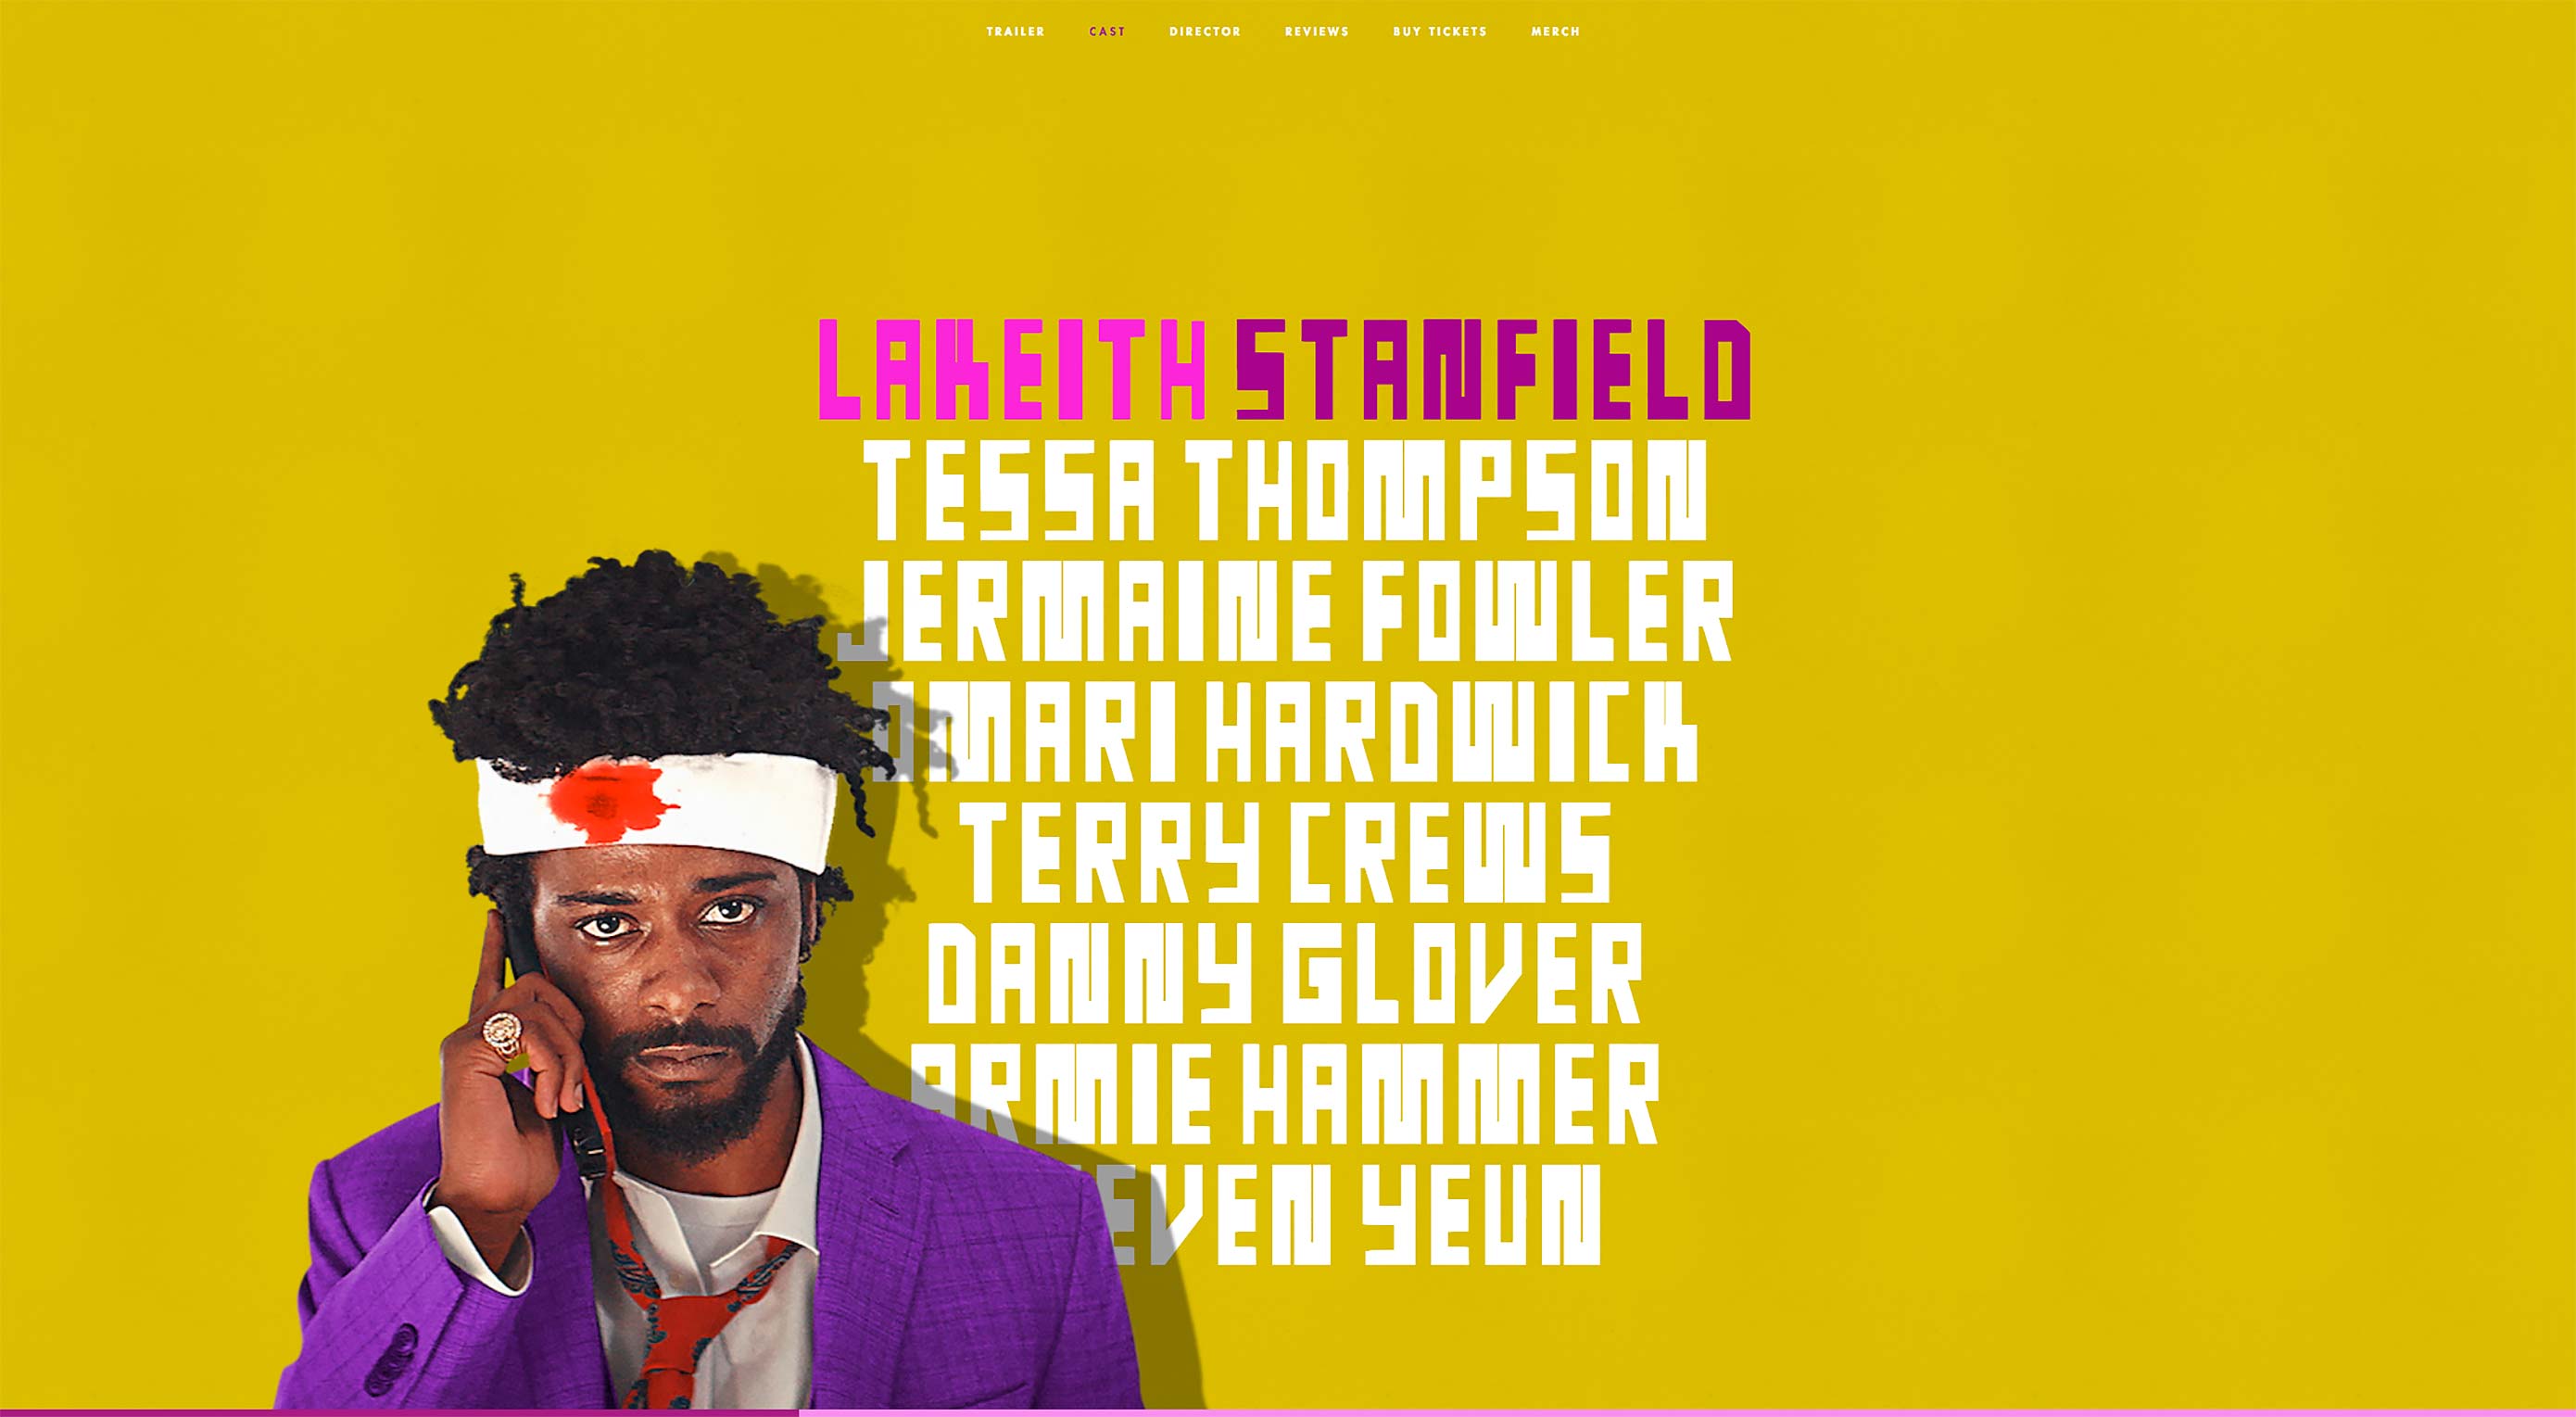
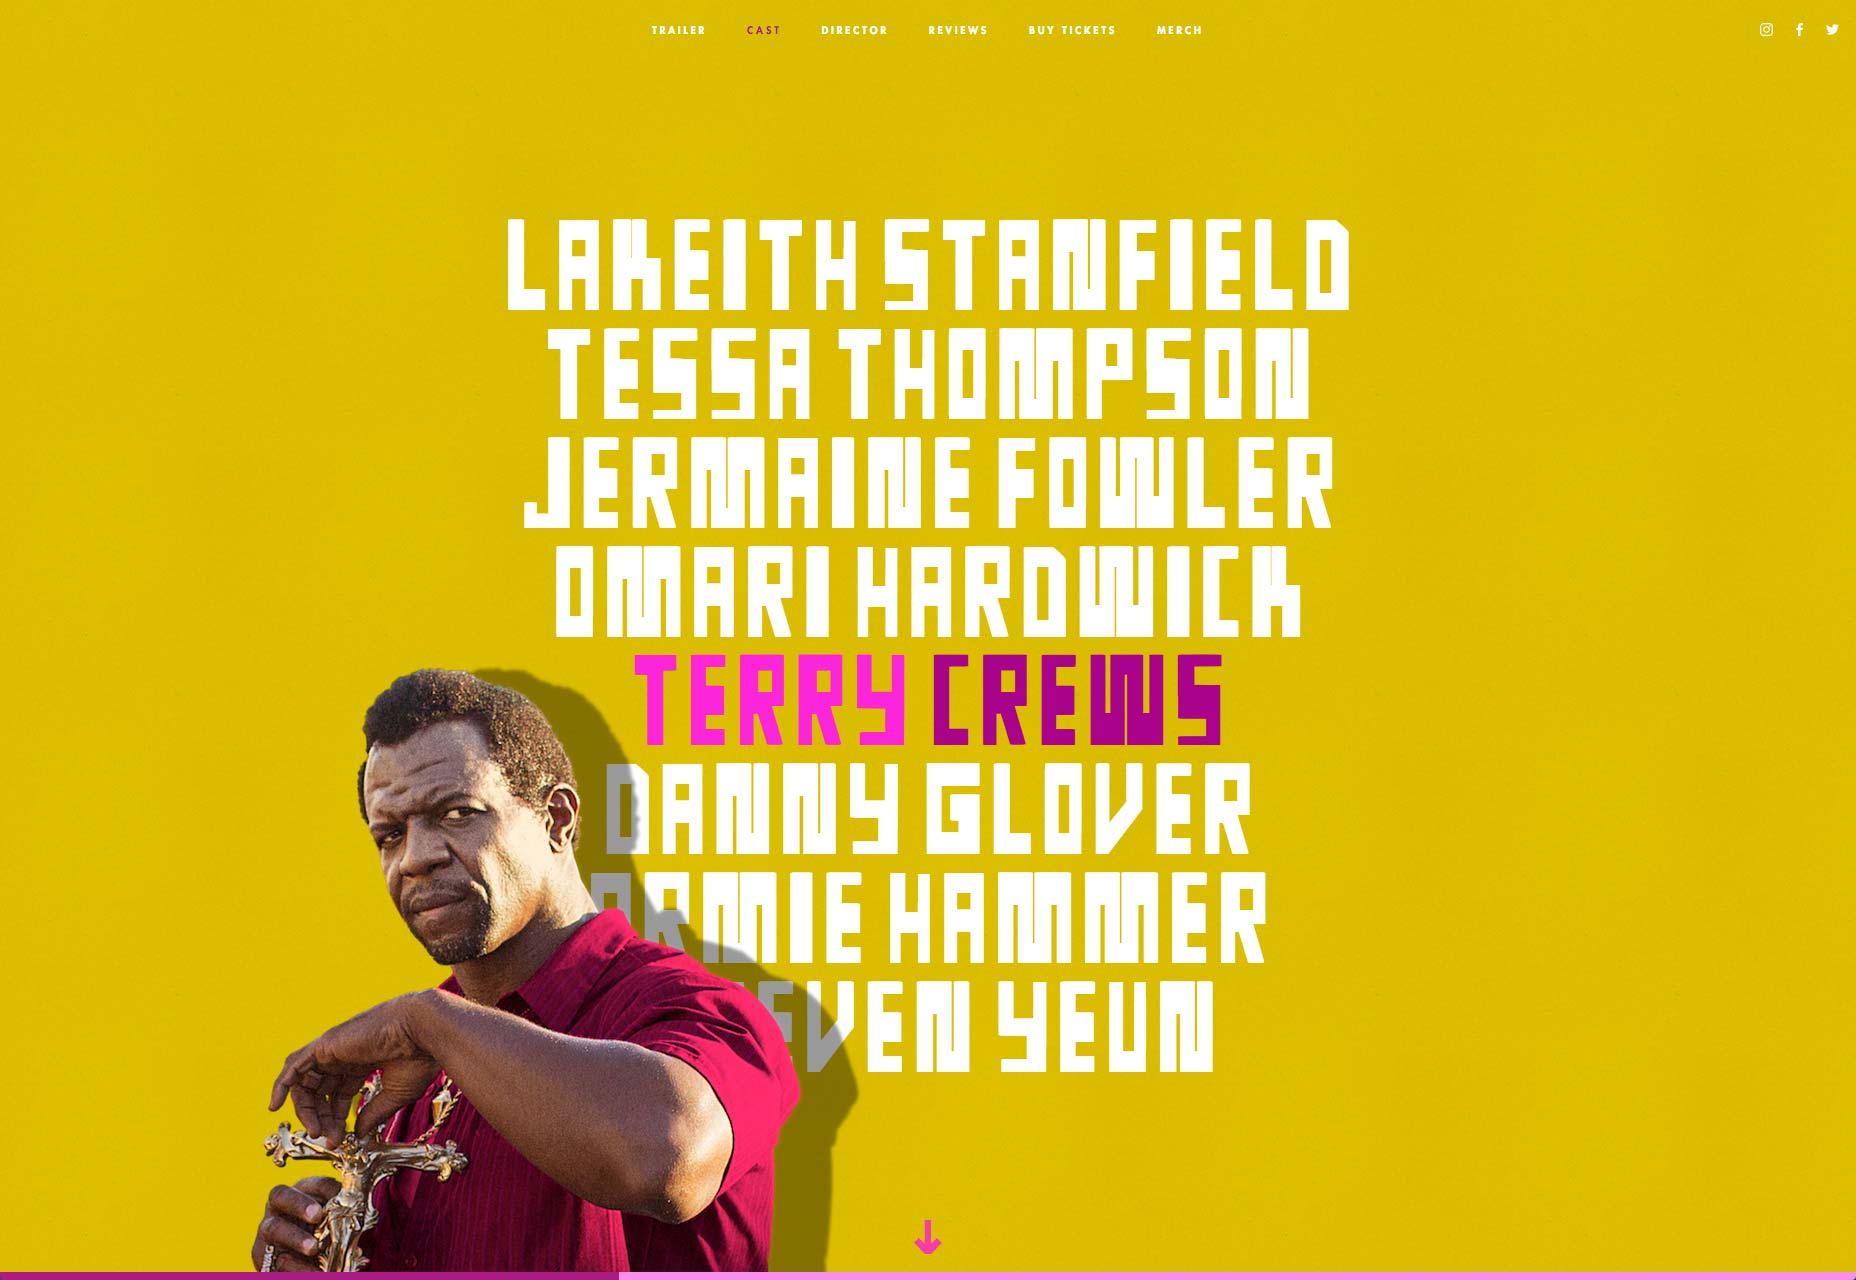
The landing page of the 2018 film Sorry to Bother You shows the image of each member of the cast only on a mouseover of the member’s name, simultaneously lazy-loading the image. Although the text is composed of live text (list element), it uses a styled font and color along with the images’ drop shadow to make the presentation look like one piece of art (or movie). The line between image and text is blurry.

Showing the right image at the right time embodies a playful and engaging user experience.

4. Apply the Right Layout

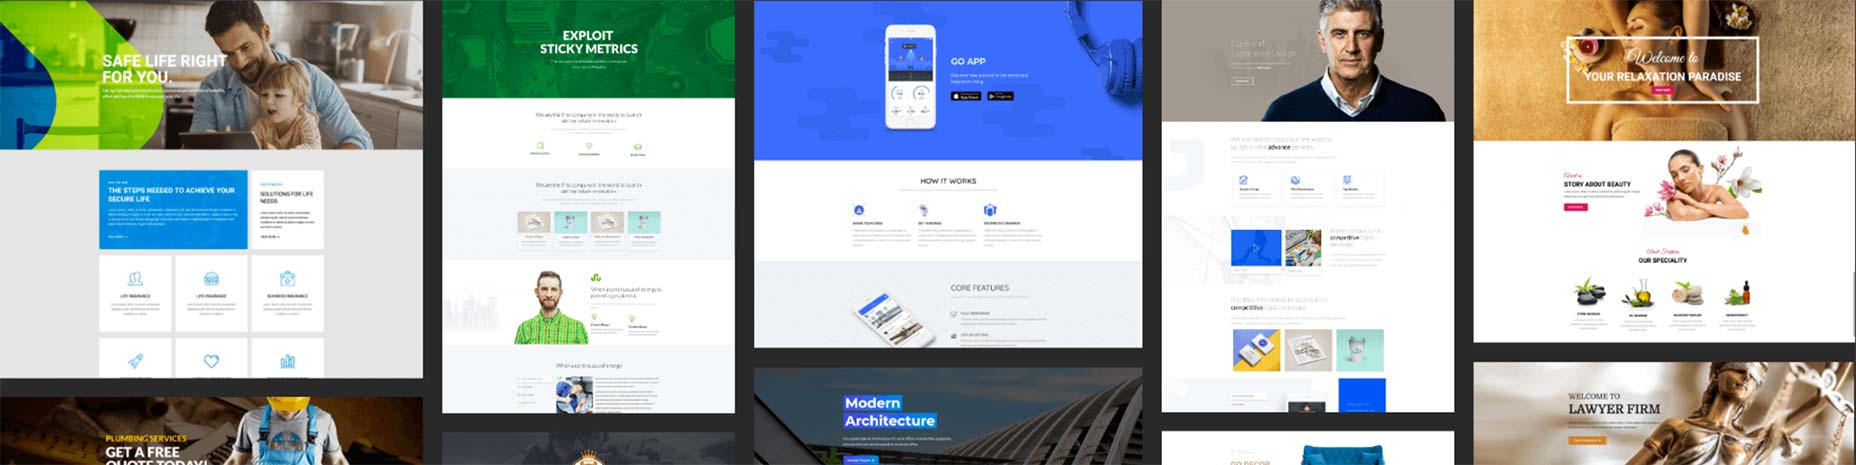
As we’re aware, user experience largely hinges on the layout of the website. For media-rich websites, the common layout choice is usually the grid. That’s because the grid’s pattern immaculately shows a list of images, also each one of them side by side.

The sections below describe the three main grid types with an example for each of them.

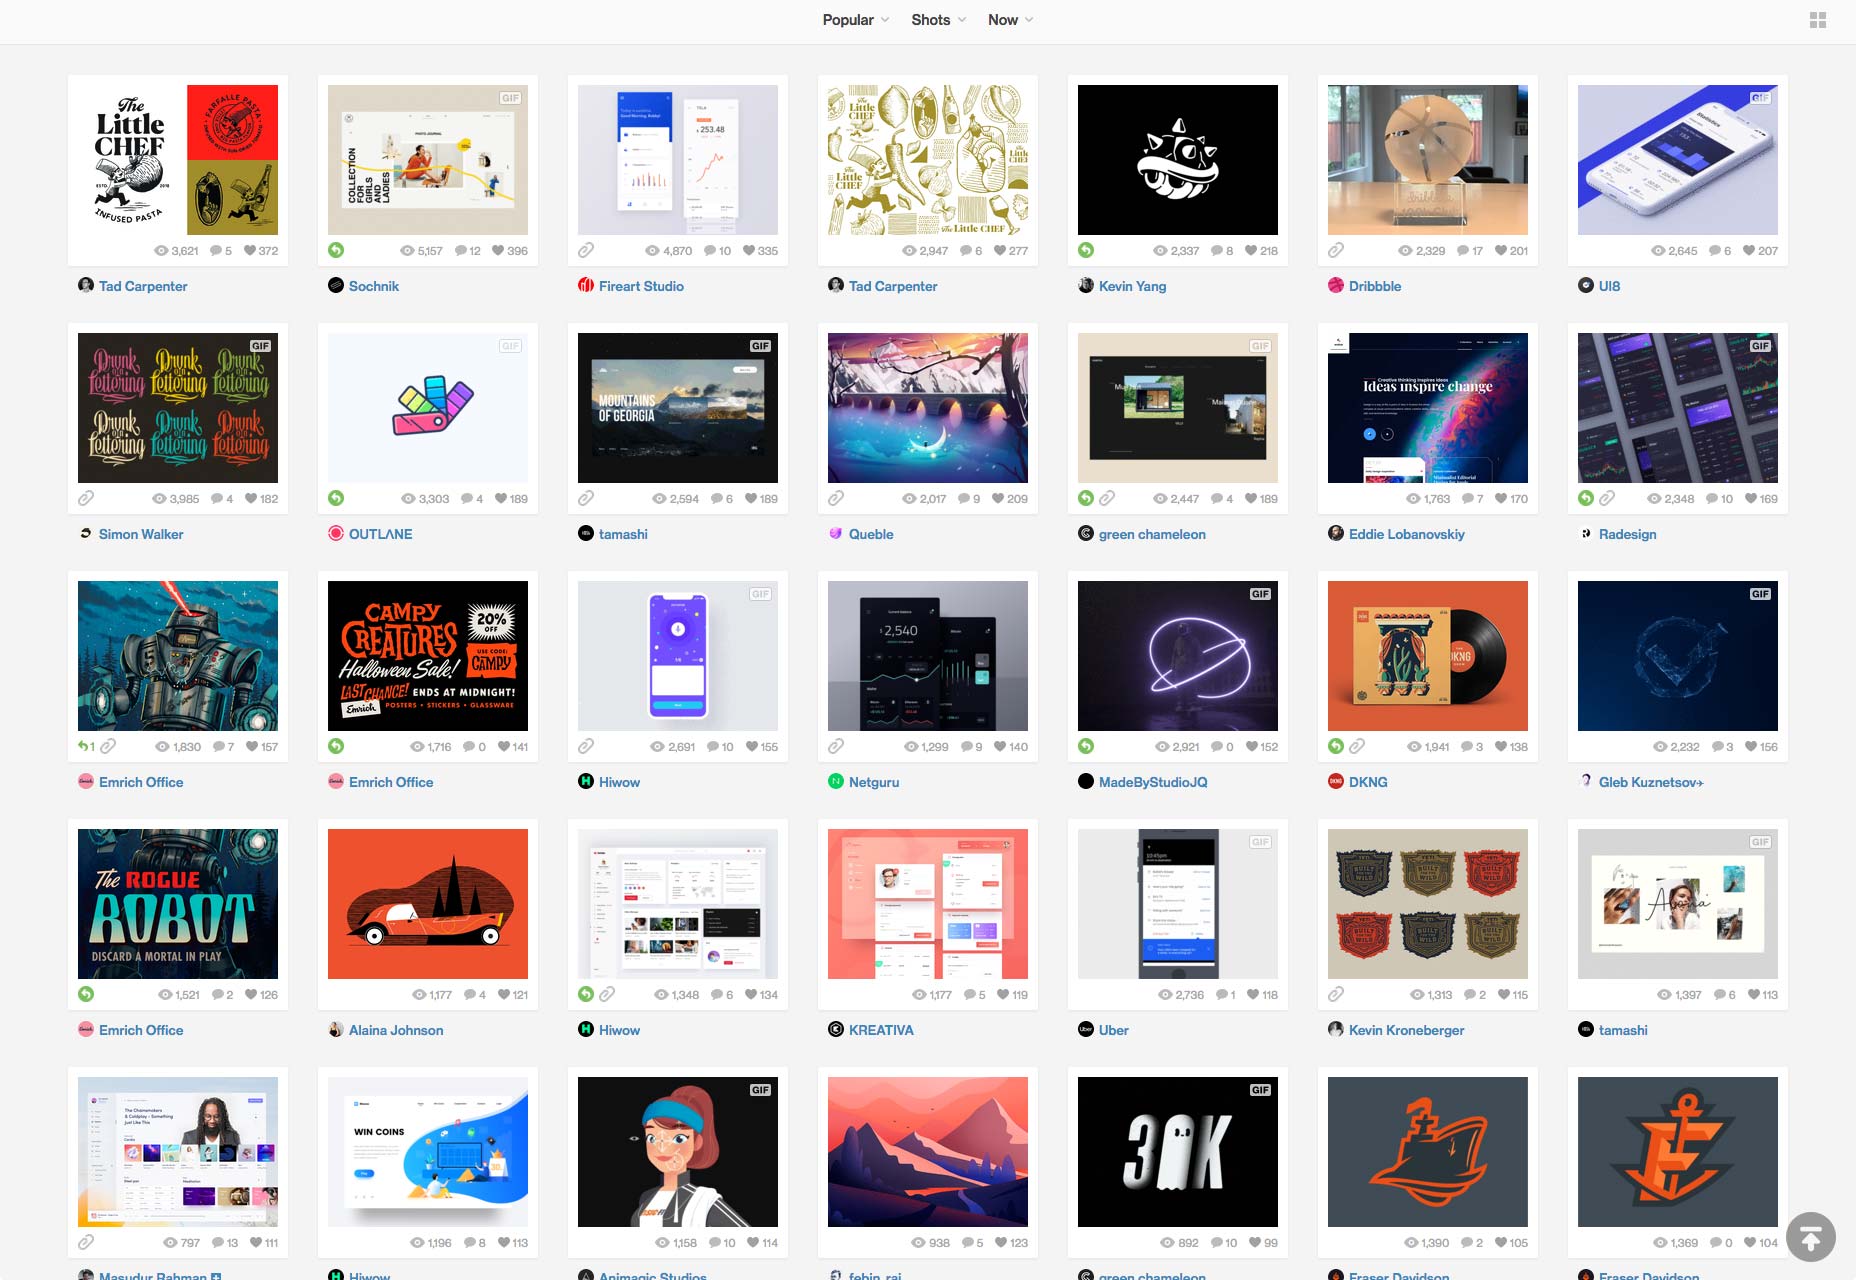
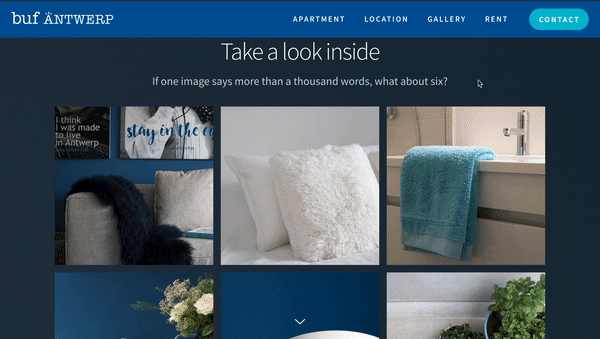
Apply a Classic Grid

A classic grid is one that contains square image-thumbs in equal sizes. It brings forth a sense of balance and harmony and is suitable for pages in which images are not the lead items for scanning. A list of cards is an option for a classic grid. Think of common use cases like YouTube and Dribbble.

Apply a Brutalist Grid

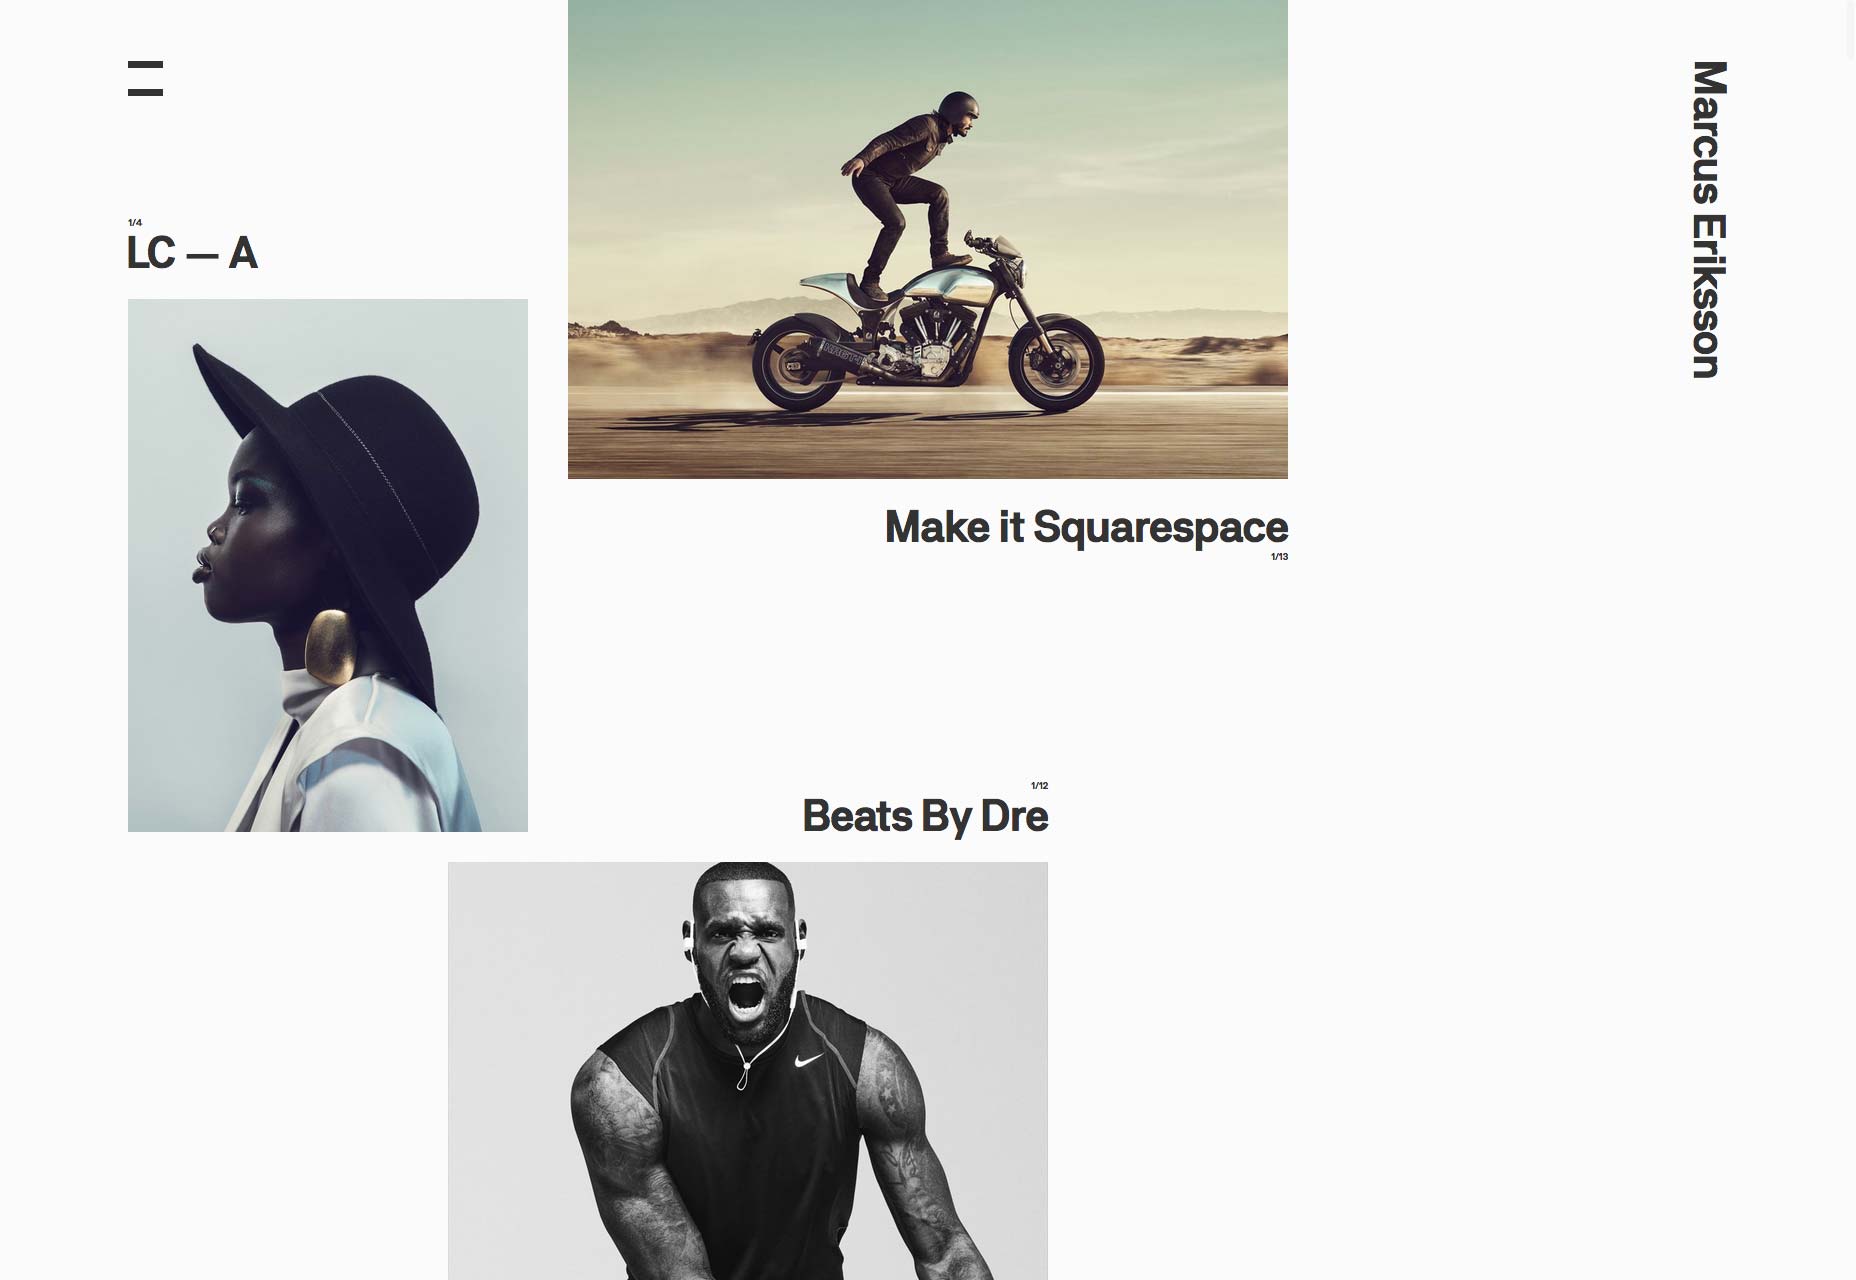
Below is an example of a portfolio site that does not adhere to the all-too-familiar grid layout while still focusing on content. Marcus Eriksson is a sought-after photographer whose clientele includes top brands like Nike and ESPN. His website features an unconventional grid layout that draws the viewer’s attention to the content without sacrificing usability. The site also lazy-loads pretty nicely.

Use this pattern if you want your visitors to focus on several individual images. The chaotic layout is very engaging and has an element of surprise. Beware, however, that  some images might “get lost on the way” from all the racket.

Apply a Masonry Grid

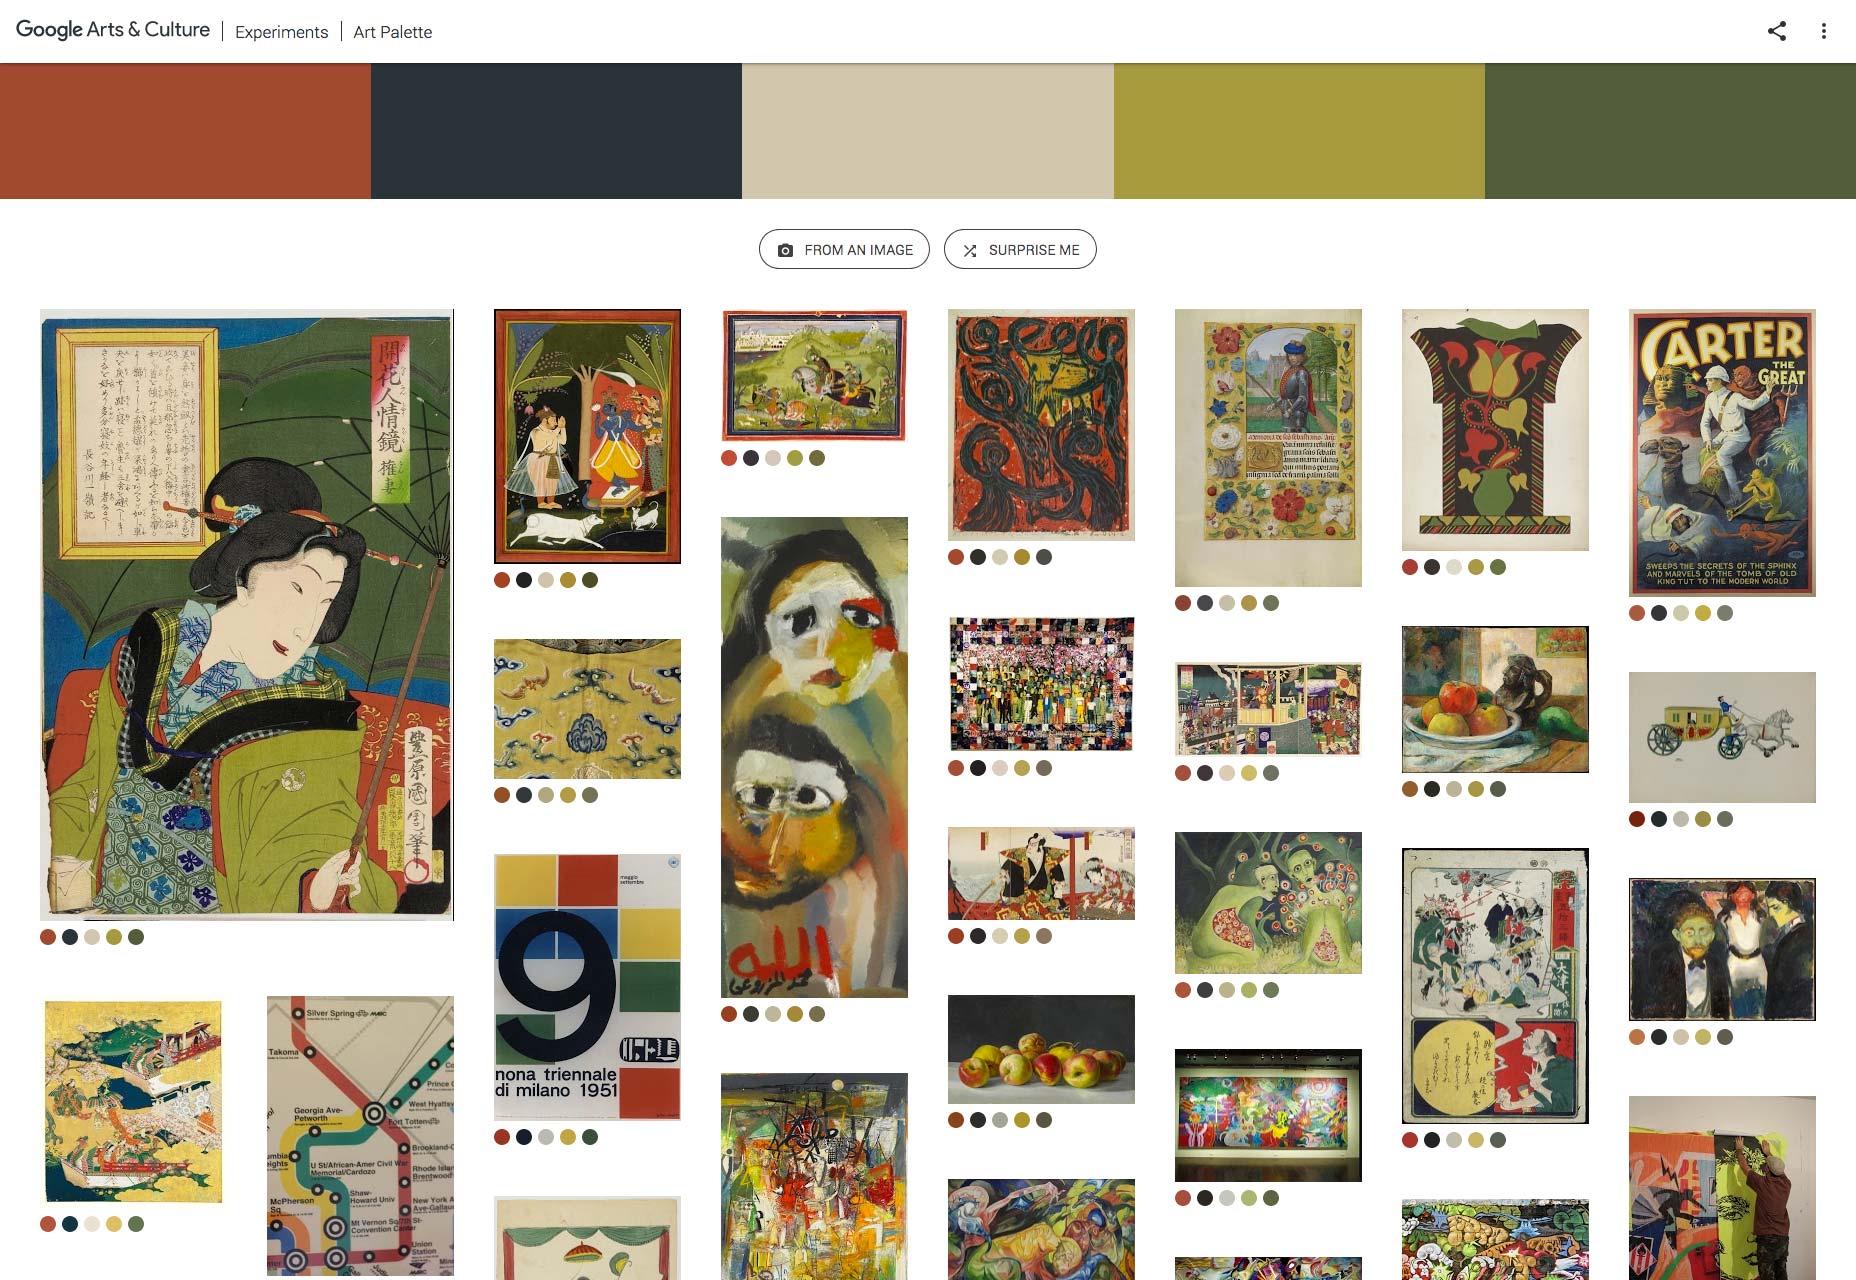
The Art Palette experiment from Google Art & Culture breaks down popular artwork into their fundamental color palettes. Inversely, it can also display artforms based on a color palette of your choice.

For our purpose, the Art Palette site is inspiring. It’s a good example of a masonry grid, showing different sizes of images while keeping them “in order.” That’s an optimal way of displaying numerous images while keeping their original aspect ratio.

(You can build your own masonry grid with this plugin.)

A side note on performance: Remember the skeleton technique mentioned earlier? The Art Palette site takes it up a notch by initially loading a lazily-loaded, dominant color block and then progressively loading low quality image placeholders (LQIP). A highly recommended move!

5. Add Motion for a Purpose

The element of motion adds to a website’s visual flair. However, just like with text, when tackling a large quantity of images, ensure that both motion and images work together.

Some best practices of motion design principles are noted in Google’s Material Design. Below are some examples of how to employ animation to support UX in websites.

Announce Layout Changes

In many cases, layout changes are unsettling for visitors, as if the ground was shifting as everything on the page changes location. Animation can help soften the changes for your visitors.

Consider this example, which displays images in a classic grid. On a mouseover of an image, a subtle motion gently nudges the visitor’s attention to that element. In other words, the animation deftly steers the visitor from the grid layout to a single-image one. Simple, yet brilliantly effective.

Load With Ease

Another interesting example is Uber’s design website. Because the main user action is simply scrolling down the page, which triggers image loading, the website enriches the browsing experience with smooth transitions and subtle animations, concurrently presenting the related information in a clear, easily-accessible manner.

Switch Images

Fubiz softens switches between images in an image gallery with animation techniques, displaying a peek inside each and every image on the post.

Incorporate Animation to Tell a Story

A final example: Avocode’s 2017 design report, in which each page has a story to share along with illustrations created by some of the world’s top design talent. The report acts as a comic strip, with each illustration built and animated to reinforce the key findings of the report.

Don’t Forget the Advantages of Video

Here is a good rule of thumb: If you can post videos instead of images, do it. See this example of a Nike product gallery, in which one of the items, disguised as an image, is, in fact, a video. An image is shown until the video is loaded so the shopper’s experience is not abstracted.

Conclusion

Having to tackle the display of a massive amount of images or visual media doesn’t mean that you should ignore design principles. Designing a trendy website without taking into account user experience invariably fails. Planning images as part of your website’s goal, enforcing performance, and incorporating animation can make all the difference between a spectacular experience and a boring one.

[Special thanks to Sourav Kundu and Mickey Aharony for helping with this article.]

Add Realistic Chalk and Sketch Lettering Effects with Sketch’it – only $5!

Source

p img {display:inline-block; margin-right:10px;}
.alignleft {float:left;}
p.showcase {clear:both;}
body#browserfriendly p, body#podcast p, div#emailbody p{margin:0;}

Create Sites Easily with WP Page Builder

Original Source: https://www.webdesignerdepot.com/2018/10/create-sites-easily-with-wp-page-builder/

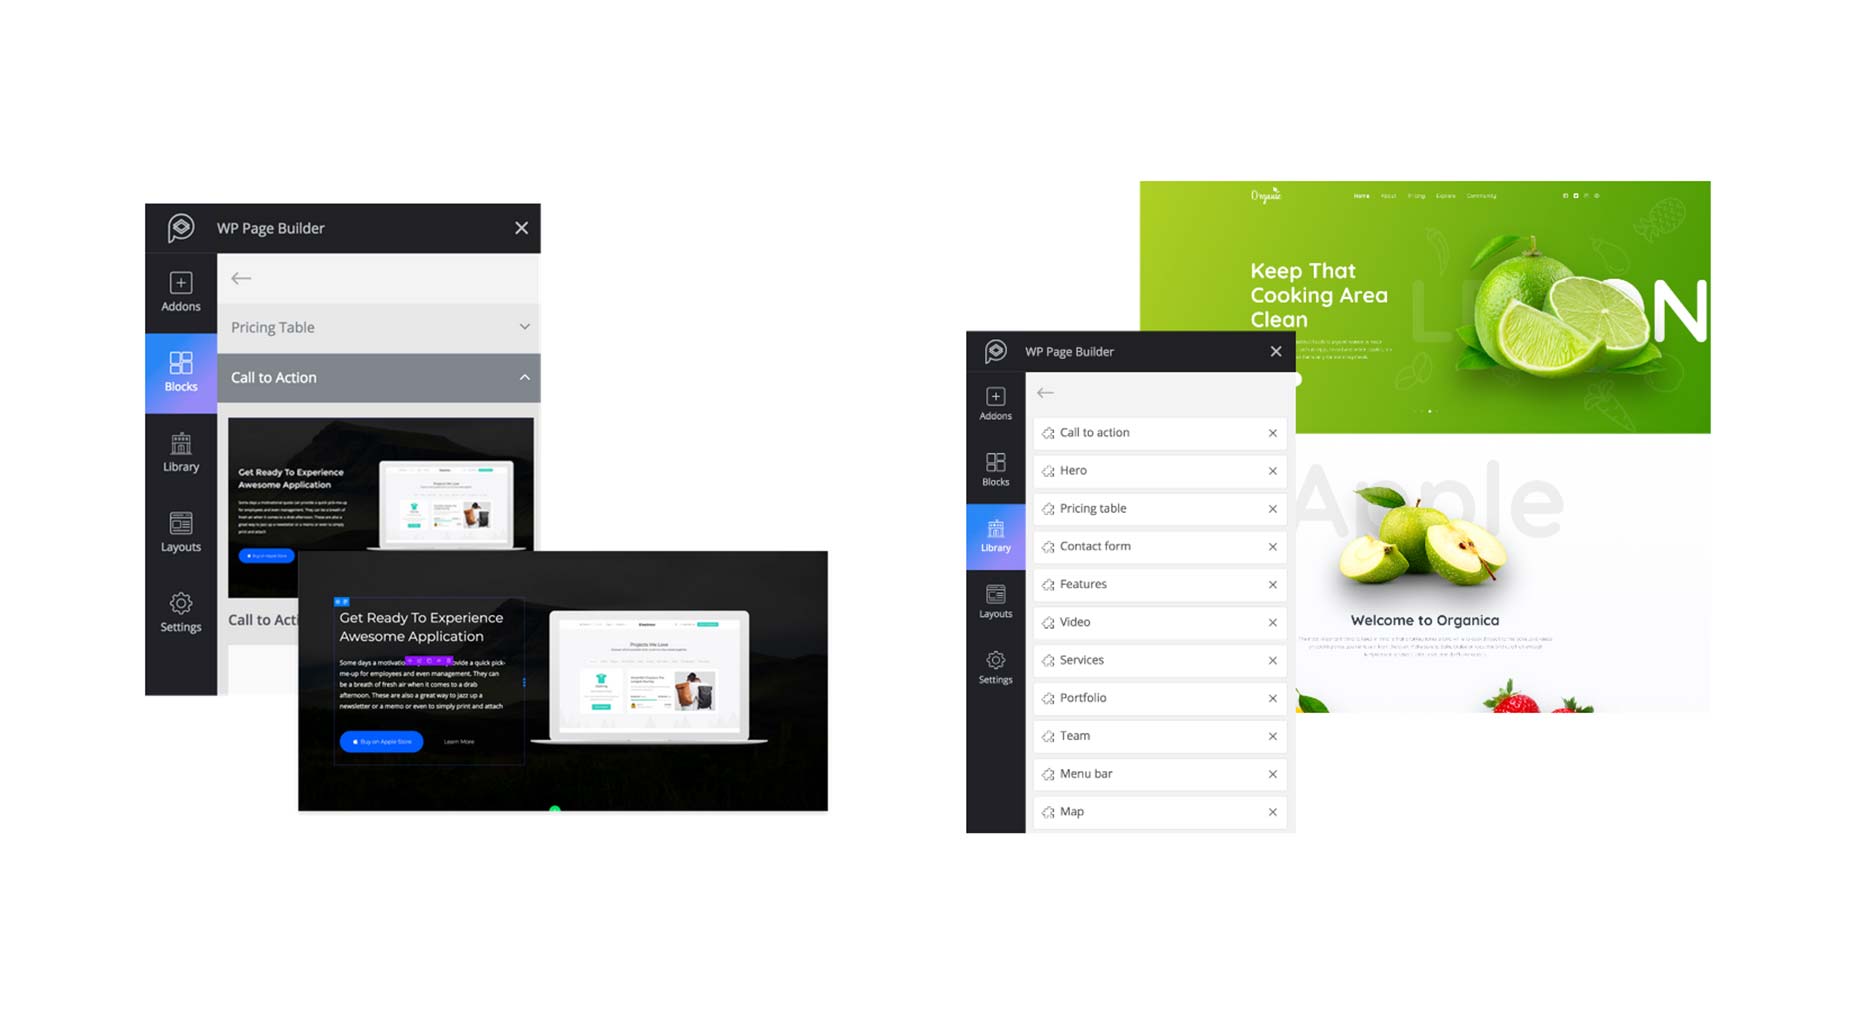
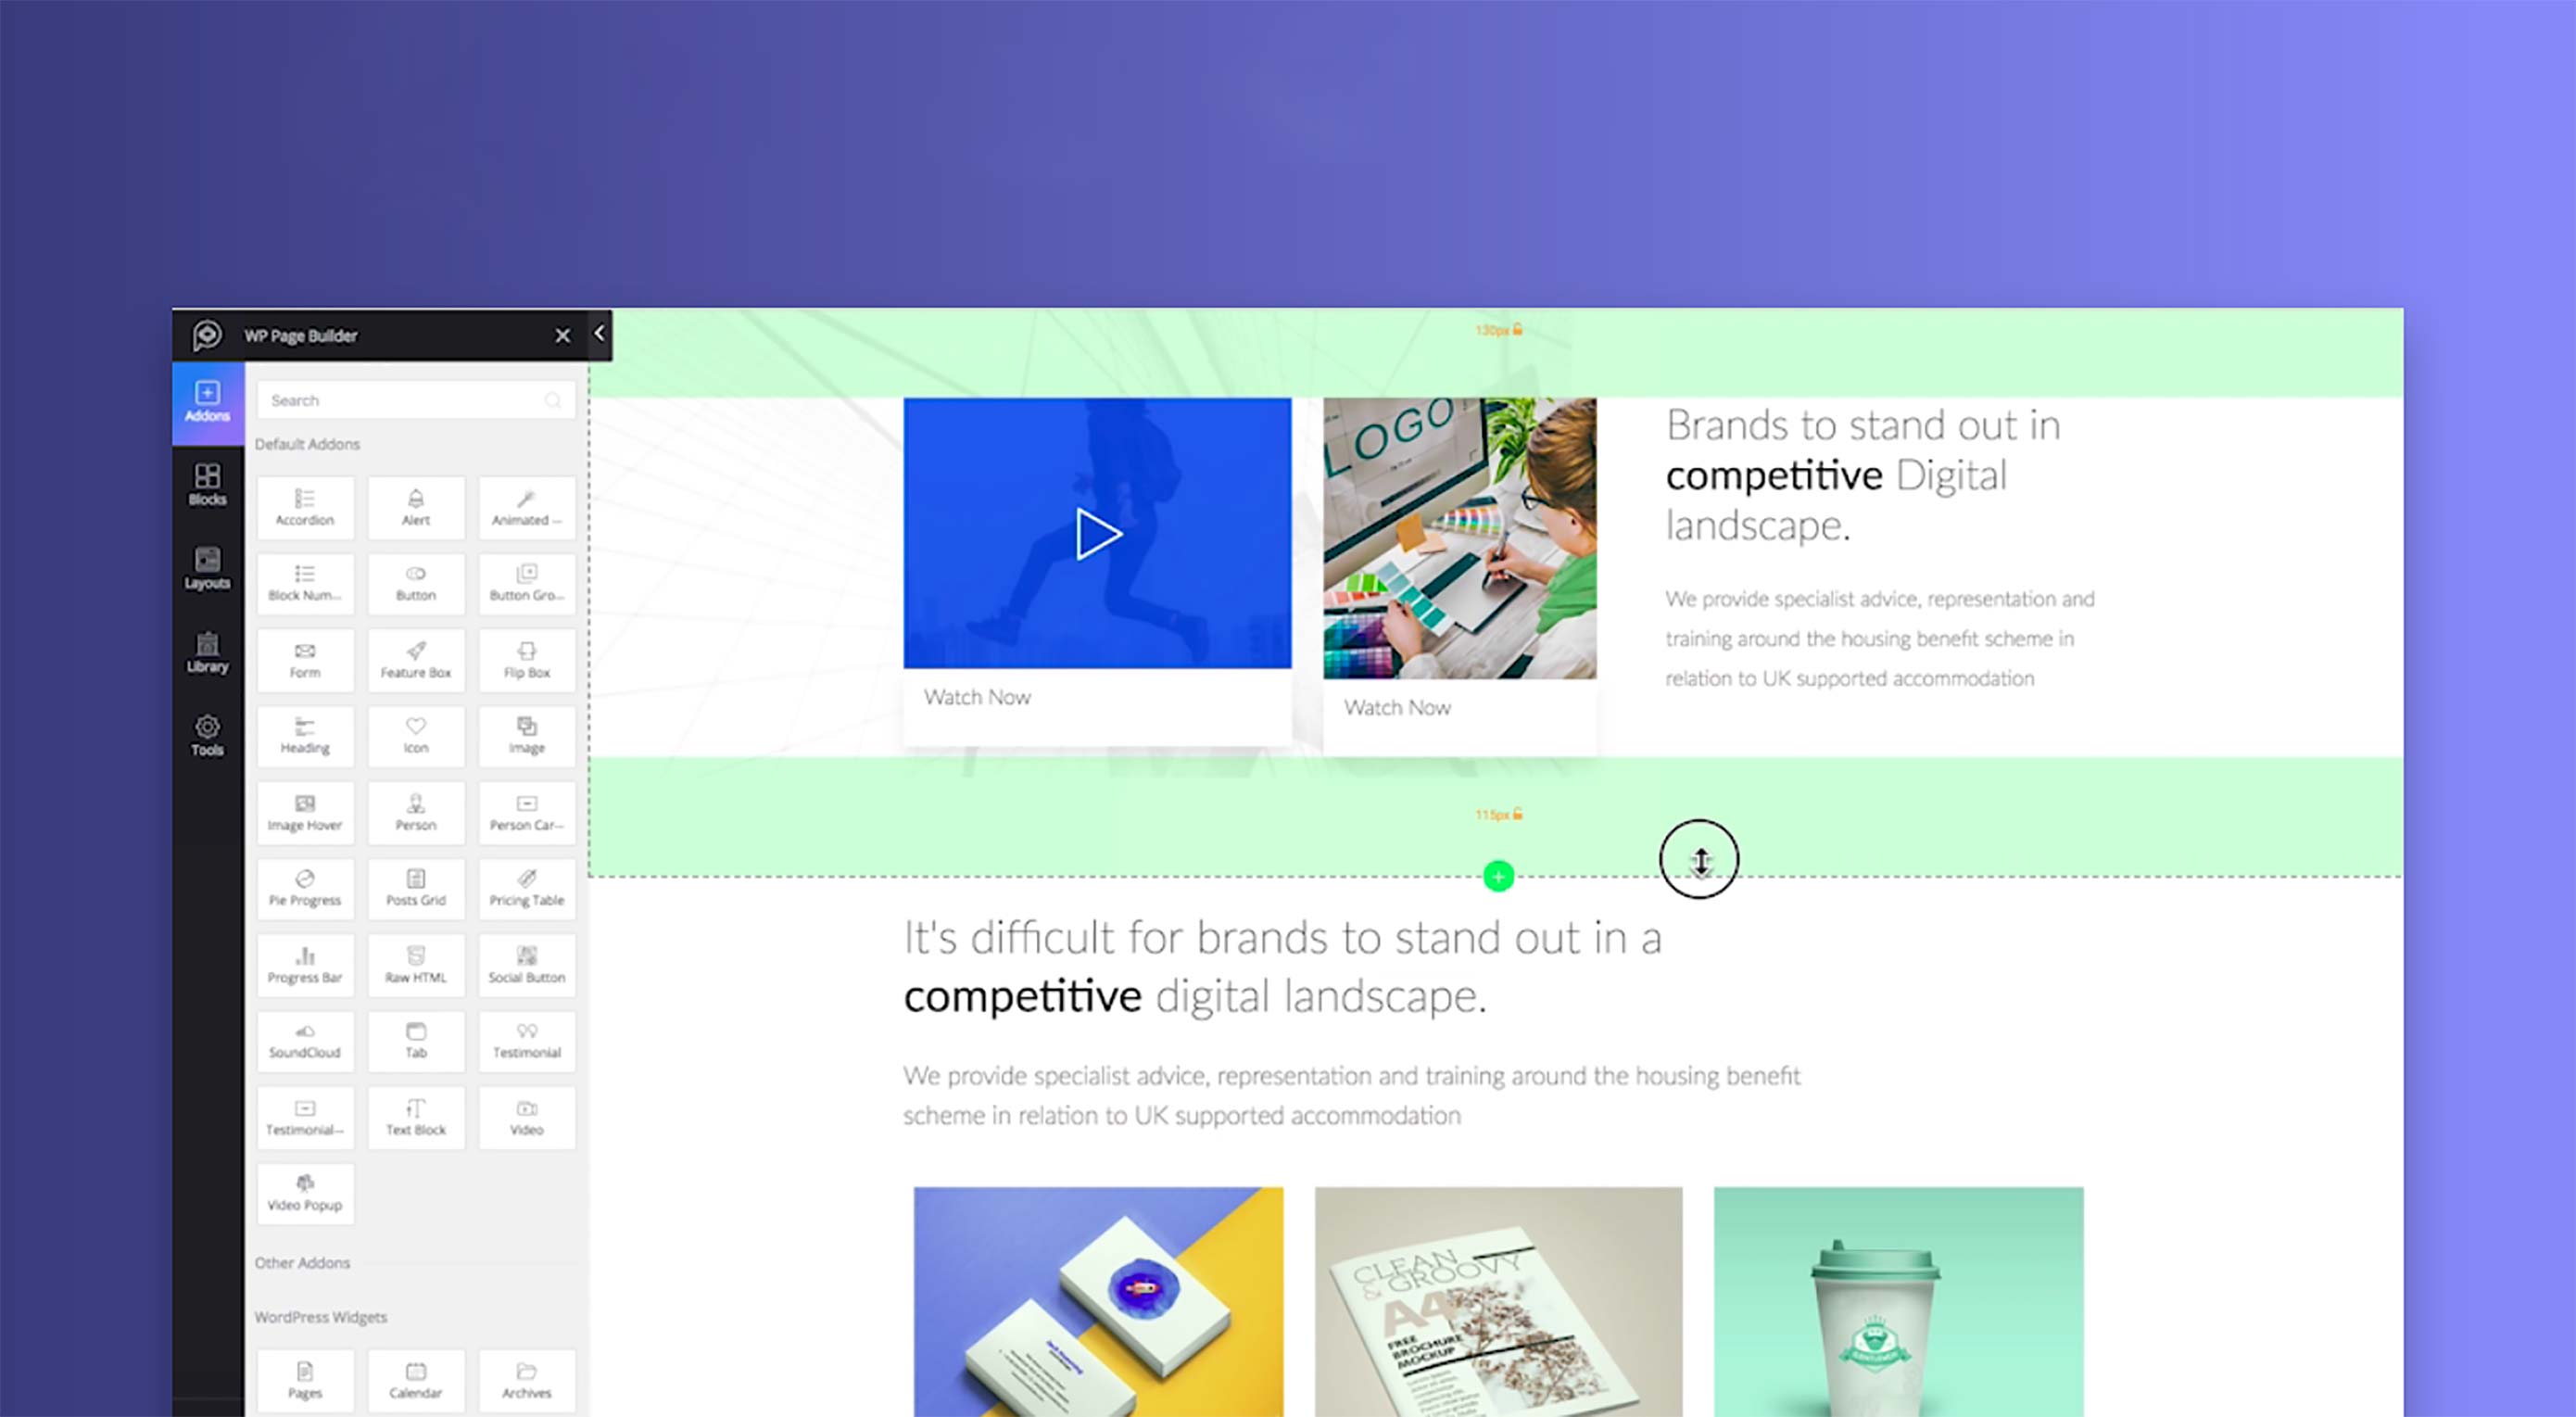
There’s little doubt that WordPress is one of the biggest web technologies in the world, powering around a third of the web, and growing all the time. Until recently WordPress was only for the initiated, those developers who’d spent years learning how to dig into the source code and tinker, without breaking their whole site.

In the last few years WordPress has been revolutionized by the introduction of page builders, applications that allow anyone—even someone with no design or coding knowledge—to create a professional standard WordPress site on the fly. Today, we’re talking about one of the most lightweight options on the market, with performance that outstrips many rival tools: WP Page Builder.

WP Page Builder is the perfect tool for web professionals who want to branch into WordPress, but don’t want to hire expensive designers or developers. Thanks to its intuitive drag and drop interface, WP Page Builder allows you to quickly and easily develop websites for your, or your clients’ businesses, with none of the hassle of old-school WordPress development.

Real-Time Frontend Customization for Everyone

There’s absolutely no need to hire a designer, or developer, to work with WP Page Builder. Simply create a page in WordPress, and drop your content wherever you want it.

The real-time front-end customization means that you will see exactly what you’re coding—yes, coding, because WP Page Builder generates all the code a professional developer would write, and inserts it for you.

And should you get lost at any point, Themeum’s simple to understand documentation, and friendly customer support will get you back on track.

Responsive Design with Flexible Layouts

Themeum’s WP Page Builder uses a flexible row-column layout structure, which is perfect for responsive design. Flexibly add rows and columns of content, and adjust the sizing and spacing as you like. Everything you add will be flexible across all viewport sizes, so your site will look perfect no matter what device it’s previewed on.

Feature-Rich Add-Ons

There are 30+ add-ons included with WP Page Builder, including:

Post Grid – ideal for posting a scannable grid of post thumbnails to introduce your content;
Accordion – a vertical open/close menu that’s great for discovering options;
Form – everyone needs forms for collecting information from your new-found customers;
Carousel – present your content in an attractive animated slider that users will love;
Pricing Table – the simplest way to present your pricing to new customers in a format they’ll recognize and understand;
Testimonial Carousel – boast about how great your company is, with animated reviews from other customers;
Video Popup – show videos in a pop-up modal so they don’t interfere with the rest of your content;
Flip Box – present content in an attractive 3D style, using both sides of a card;
Feature Box – easily highlight the main features of your company for customers;
and a whole load more…

In fact, WP Page Builder features so many add-ons, you can produce just about any content you can imagine. And more add-ons are being introduced all the time.

Rich Libraries

The library system allow you to design blocks within your design, and save them for reuse. Just design a section of your site, save it to the library, then access it at any time to use the same design block on any other page of your site. It’s a huge productivity gain that will help you generate sites faster, and turn projects around more quickly.

Predesigned Templates and Blocks

WP Page Builder includes a gamut of predesigned templates, so you can get a head-start on your build by selecting a template you like and modifying it to fit your preferences.

To make your flow even faster, WP Page Builder includes a host of professionally designed blocks, ready to drag and drop into your page. Simply select the block you want, drag and drop it onto your page, and it will be ready instantly.

WP Page Builder’s front-end customization is even compatible with your themes—even themes from 3rd parties—so you can really boost your site development by starting with a ready-made design from Themeum, or another provider, then customize using WP Page Builder.

Be Empowered by WP Page Builder

WP Page Builder is a professional quality drag and drop site builder, with a whole heap of add-ons to keep you happy. The visually intuitive site editor, the total lack of coding, and the predesigned blocks and templates, mean that even novices can use it.

With the library system for rapid builds, and the simple one-click duplication system, it’s a super-fast solution for anyone who wants to build a great website without hiring an expensive designer or developer.


[– This is a sponsored post on behalf of Themeum –]

Add Realistic Chalk and Sketch Lettering Effects with Sketch’it – only $5!

Source

p img {display:inline-block; margin-right:10px;}
.alignleft {float:left;}
p.showcase {clear:both;}
body#browserfriendly p, body#podcast p, div#emailbody p{margin:0;}

This Browser Extension Quickly Copies All Code Snippets For You

Original Source: https://www.hongkiat.com/blog/this-browser-extension-quickly-copies-all-code-snippets-for-you/

A browser extentsion that adds a click-to-copy button onto every code snippet block.

The post This Browser Extension Quickly Copies All Code Snippets For You appeared first on Hongkiat.

Visit hongkiat.com for full content.

Beautiful Brand Identity for Colono

Original Source: http://feedproxy.google.com/~r/abduzeedo/~3/-jhV0Tl3TyY/beautiful-brand-identity-colono

Beautiful Brand Identity for Colono

Beautiful Brand Identity for Colono

abduzeedo
Oct 10, 2018

When people ask why we run Abduzeedo, our answer is always, we are always looking for things that inspire us. We are also trying to find new projects before they get featured on other publications. There are some projects that we have to share even after they get featured because they are too good. That’s the case of the brand identity project created by the awesome people at atipo ®.

Colono is a culinary project based in Vienna that is mainly dedicated to the import of food from the Iberian peninsula to Austria. Through a direct collaboration with the producer from “colono” they  are responsible for getting the best product to the main restaurants, catering services and delicatessen. in addition, in order to publicize its own line of groceries the firm has opened, in 2018, its first physical store in the center of Vienna under the concept “groceries-bar-gourmet”.

For the project, Colono (‘settler’ in english) was our name proposal; direct reference to the person who is established in another territory and the grocery stores, commercial establishments that sell various food products (and that take their name from the set of imports brought from the former spanish colonies).

The journey made by the products is the guiding thread of the whole identity and it is represented in the different pieces and packaging through a red line that connects two imaginary points.

Brand Identity

The logo is composed with the Retiro font, elegant didona of spanish airs that perfectly communicates the origin and the select character of the products. in contrast, as a secondary font it is used a monospaced that brings freshness and a contemporary air.

The palette of colors is sober and elegant and seeks to convey the gourmet nature of the project and, in turn, enhance the prominence of the typography where only the red color present in the lines of the graphics stands out above all else.

The set forms a distinctive and faithful identity to a project proud of its origin, but that flees from the clichés and declares itself in love with the product that selects and commercializes.


In addition to selected products from different origins, Colono wants to enhance their own range of groceries. the same as the identity, the design of the packaging is eminently typographic and is marked by the red line that invites the consumer to discover the origin of each product.


The premises, an update of the grocery stores, developed by Serrano + Barquero, is a place where you can buy and also “tapear”  –basically dishes made with preserves, salted fish and pickles– the products in their bar-gourmet. Cozy atmosphere, noble materials and dark tones for a place that pays homage to the product.


branding


Amazon Prime – 10 Reasons Why It’s Totally Worth It

Original Source: https://www.hongkiat.com/blog/10-reasons-why-amazon-prime-is-totally-worth-it/

People who’re into online shopping would certainly know about Amazon Prime – the latest subscription program by Amazon that offers extremely fast shipping. Instead of waiting for a couple…

Visit hongkiat.com for full content.

How to Create Magnetic Content

Original Source: https://www.webdesignerdepot.com/2018/10/how-to-create-magnetic-content/

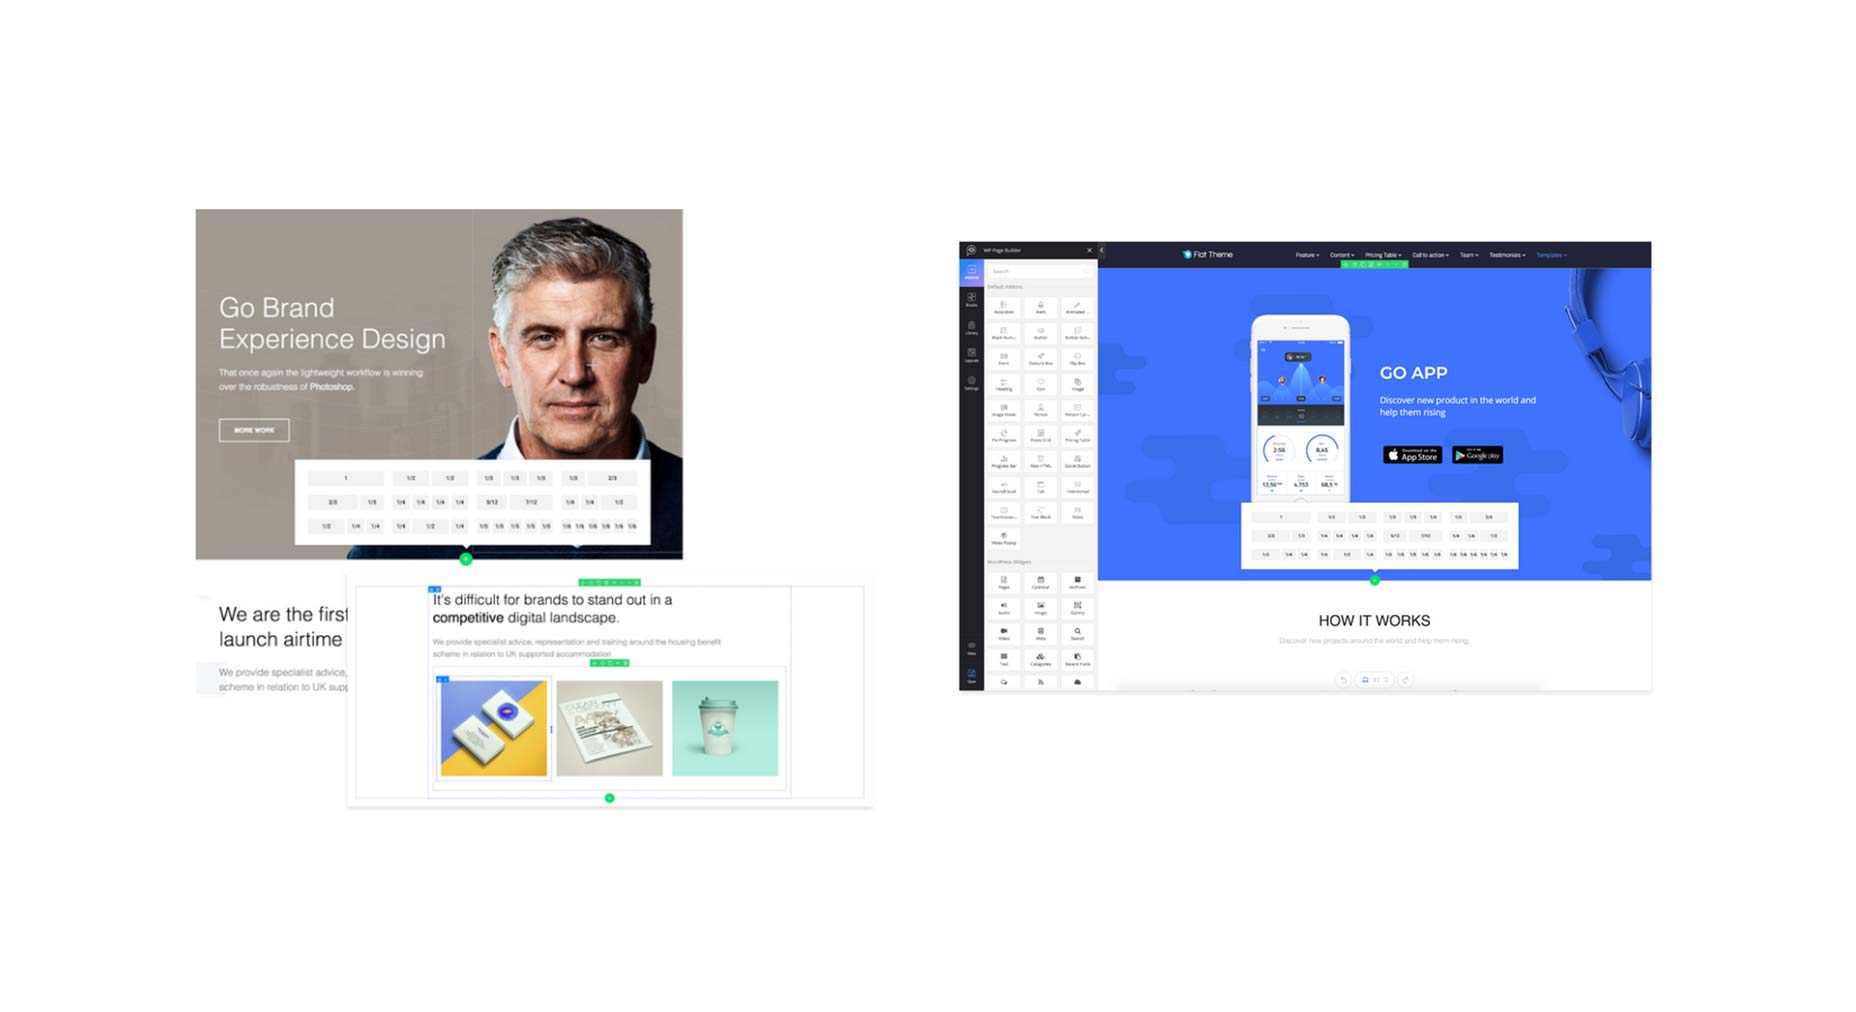
I know I know: Content is king! You’re already sick to the back-teeth of hearing it.
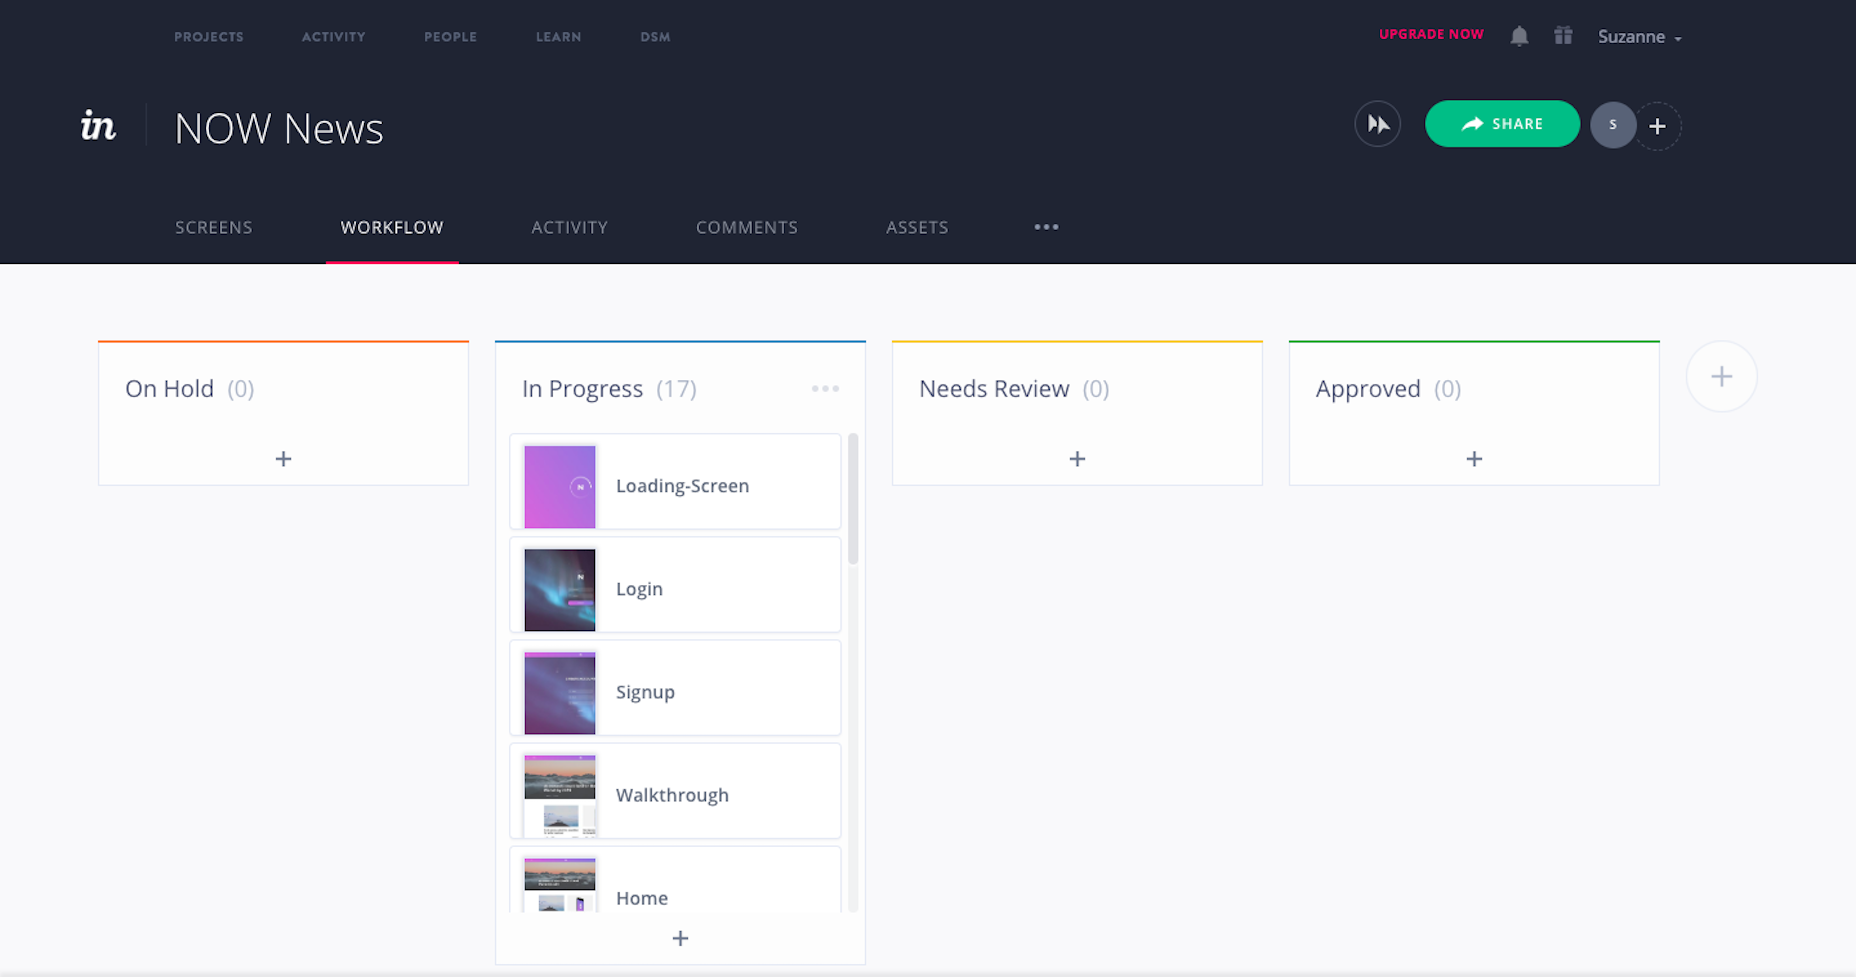
 You’ve made your content, you know your target audience—you just want to build some links and get some darn traffic to that content, am I right?


Not to rain on your parade, but what if your content really is trash?
 Will anyone actually link to it? If it is subpar, then probably not, and trying to build links to it will be a colossal waste of time.

I’m borrowing this saying from a giant in the SEO field, Ryan Stewart:

If you don’t have anything of value to say, don’t say anything at all

Only create content which will be of real value to people. If you provide, true, honest value in your content the audience will love you. Don’t hold back! Don’t worry about things like “does providing free stuff devalue my service?” “what will people think?” or “but I’m embarrassed about appearing on video…”

None of that matters. 
The more value you can provide online, the more likely you can strike a chord with your audience and the more likely they’ll come back again and again.

And if you can turn your audience into a community of loyal fans it’ll work wonders for your company or brand.

Define Your Goals

Your overall marketing goal should be ranking everything you have on organic search. If you can do that, you’ll have a long term, steady stream of traffic going straight to your site—and once there, you’ll barely have to lift a finger to keep it there.

But before we can get there, here’s a few things you need to do first:

Why Do You Need the Content?

Is it for traffic? Reach? Customers? Branding?
 Depending on your answer, it’ll affect the type of content you create and where you distribute it.

For instance, if you want to rank on organic search, you’ll need large content pieces (1000-1500 words+) which are very insightful and informative. But, if you want to build a social following, this requires, shorter, opinion type pieces, which will be shared on social media.

So, define your goals to determine the exact type of content you need.

Who are Your Audience?

Make sure you’re creating it for the right people.

So think about:

Who are they? What do they do for a living, how much money do they make?
Where do they hang out online? What kind of sites do they read?
What does “value” mean to them? What kind of pain points need to be addressed?

Key Things to Bear in Mind

Whether it’s yourself, or you have a team in place, you need a good, streamlined way of creating content. In addition, some key points to bear in mind:

Narrative – your content needs to be able to tell a story, and engage with an audience.
Expertise – you really will have to inject some industry knowledge or be willing to do extensive research to create content that’s advanced enough.


Content That People Will Engage With

Not every content piece will be a hit, believe me, even I have experience of this.
 But the more content you make for your brand, the more you’ll learn about what works…and what doesn’t.

There are many ways to generate ideas:

What info is your audience looking for?
 Industry forums and Quora.com is great for ideas. Use the threads with the most views/comments and generate a list from this.
Have you/your company done anything cool? Could be any range of things, from developing a new product, to a charity event—it’s all content that people will want to read about.
What’s in the news lately? Is there something in the news, or some recent trend that you can relate to your own business or product?

Proper Keyword Research

Don’t overdo the keyword research part. A lot of people obsess over this and spend far too much time on it; 
it’s not as complicated as you may think. 
See where your audience hang out, the kind of words/jargon they use, subject matters they discuss, etc.
 Use this to generate keywords and even use Google’s suggested keywords to come up with more ideas.

The Keywords Everywhere browser plugin is great for finding the keywords with the most search volume.

And funnily enough, when you start writing truly valuable content, you’ll be naturally including these keywords anyway, so this part really won’t be the difficult part!

This ties into the idea of where keywords are now going: keyword intent.

In a nutshell what this means is, assessing if the intent of the keyword you’re trying to target, is actually going to be useful to your business, in terms of driving just the right type of traffic to your site. 
So in other words, optimize your content in terms of what the searcher is looking for, rather than trying to look for individual keywords.

Choose Your Content Types

The format you choose can play a huge role and you could have a mixture of any of the following:

Short Form Posts

E.g. Q & As, review posts. Even something as simple as a stickied forum post, or a Quora thread could be a method of sharing content and driving traffic

Infographics

Visually appealing way of displaying and summarizing content or sets of statistics. Also a quick and easy way for someone to display the content and attribute a link back to your site.

Videos

Great way to communicate with your audience, and if you want to utilize YouTube it’s a necessity. Also, the majority of your competitors won’t be using video content effectively. The reason is, it’s harder and requires more effort—but don’t let that put you off!


Long Form Posts

E.g. round ups, in-depth articles. A great way to discuss a complex issue within your industry. However, you need to have evidence and data to back up your claims.

Slideshow

Good for B2B marketing. Can also be embedded within posts and particularly shareable on LinkedIn.

Ultimate Guides

(Like this one!) Perform well in every single industry and in any channel. Rank well and (if written well) can earn you a lot of links.

Repurpose Repurpose Repurpose

And once you’ve created this content, there’s nothing to stop you using it in multiple ways to get the best use out of it and spread its reach.
 For example, if you film a video, you could create a PowerPoint and share the slideshow on LinkedIn. But you could also transcribe it into written format and create a blog post. You could then summarize all the main points and hire a designer to create an infographic.

Optimizing Your Content

I’ve said it once, but I’ll say it again: you definitely don’t want to ignore your on-page SEO. Make sure this is on point and you can capitalize on it even further when you do start building links to those pages.
 You also want to optimize the content in terms of improving the user experience. 
That means:

Keep your URL structure short, and with the keywords in it;
Make the content easy to navigate (should be able to navigate to it from the home page, in under 4 clicks);
Write good, enticing titles with your keyword;
Don’t make your content too wordy! Should be easy to read, and broken up with images when appropriate;
Keep the tone casual, keep sentences short and don’t write it like you’re writing a university dissertation;
Don’t be a robot, don’t be afraid to show your personality in your content—people will love it and will respect you for it;
And here’s a very key thing I want to end with: Don’t just write stuff for the sake of it, don’t write about something just out of necessity, write about things you are genuinely interested in and want to help people with.

If you write content with passion, your customer base will follow.


Featured image via DepositPhotos.

Add Realistic Chalk and Sketch Lettering Effects with Sketch’it – only $5!

Source

p img {display:inline-block; margin-right:10px;}
.alignleft {float:left;}
p.showcase {clear:both;}
body#browserfriendly p, body#podcast p, div#emailbody p{margin:0;}

Project Management Templates: The Key to Improving Your Workflow

Original Source: https://www.webdesignerdepot.com/2018/10/project-management-templates-the-key-to-improving-your-workflow/

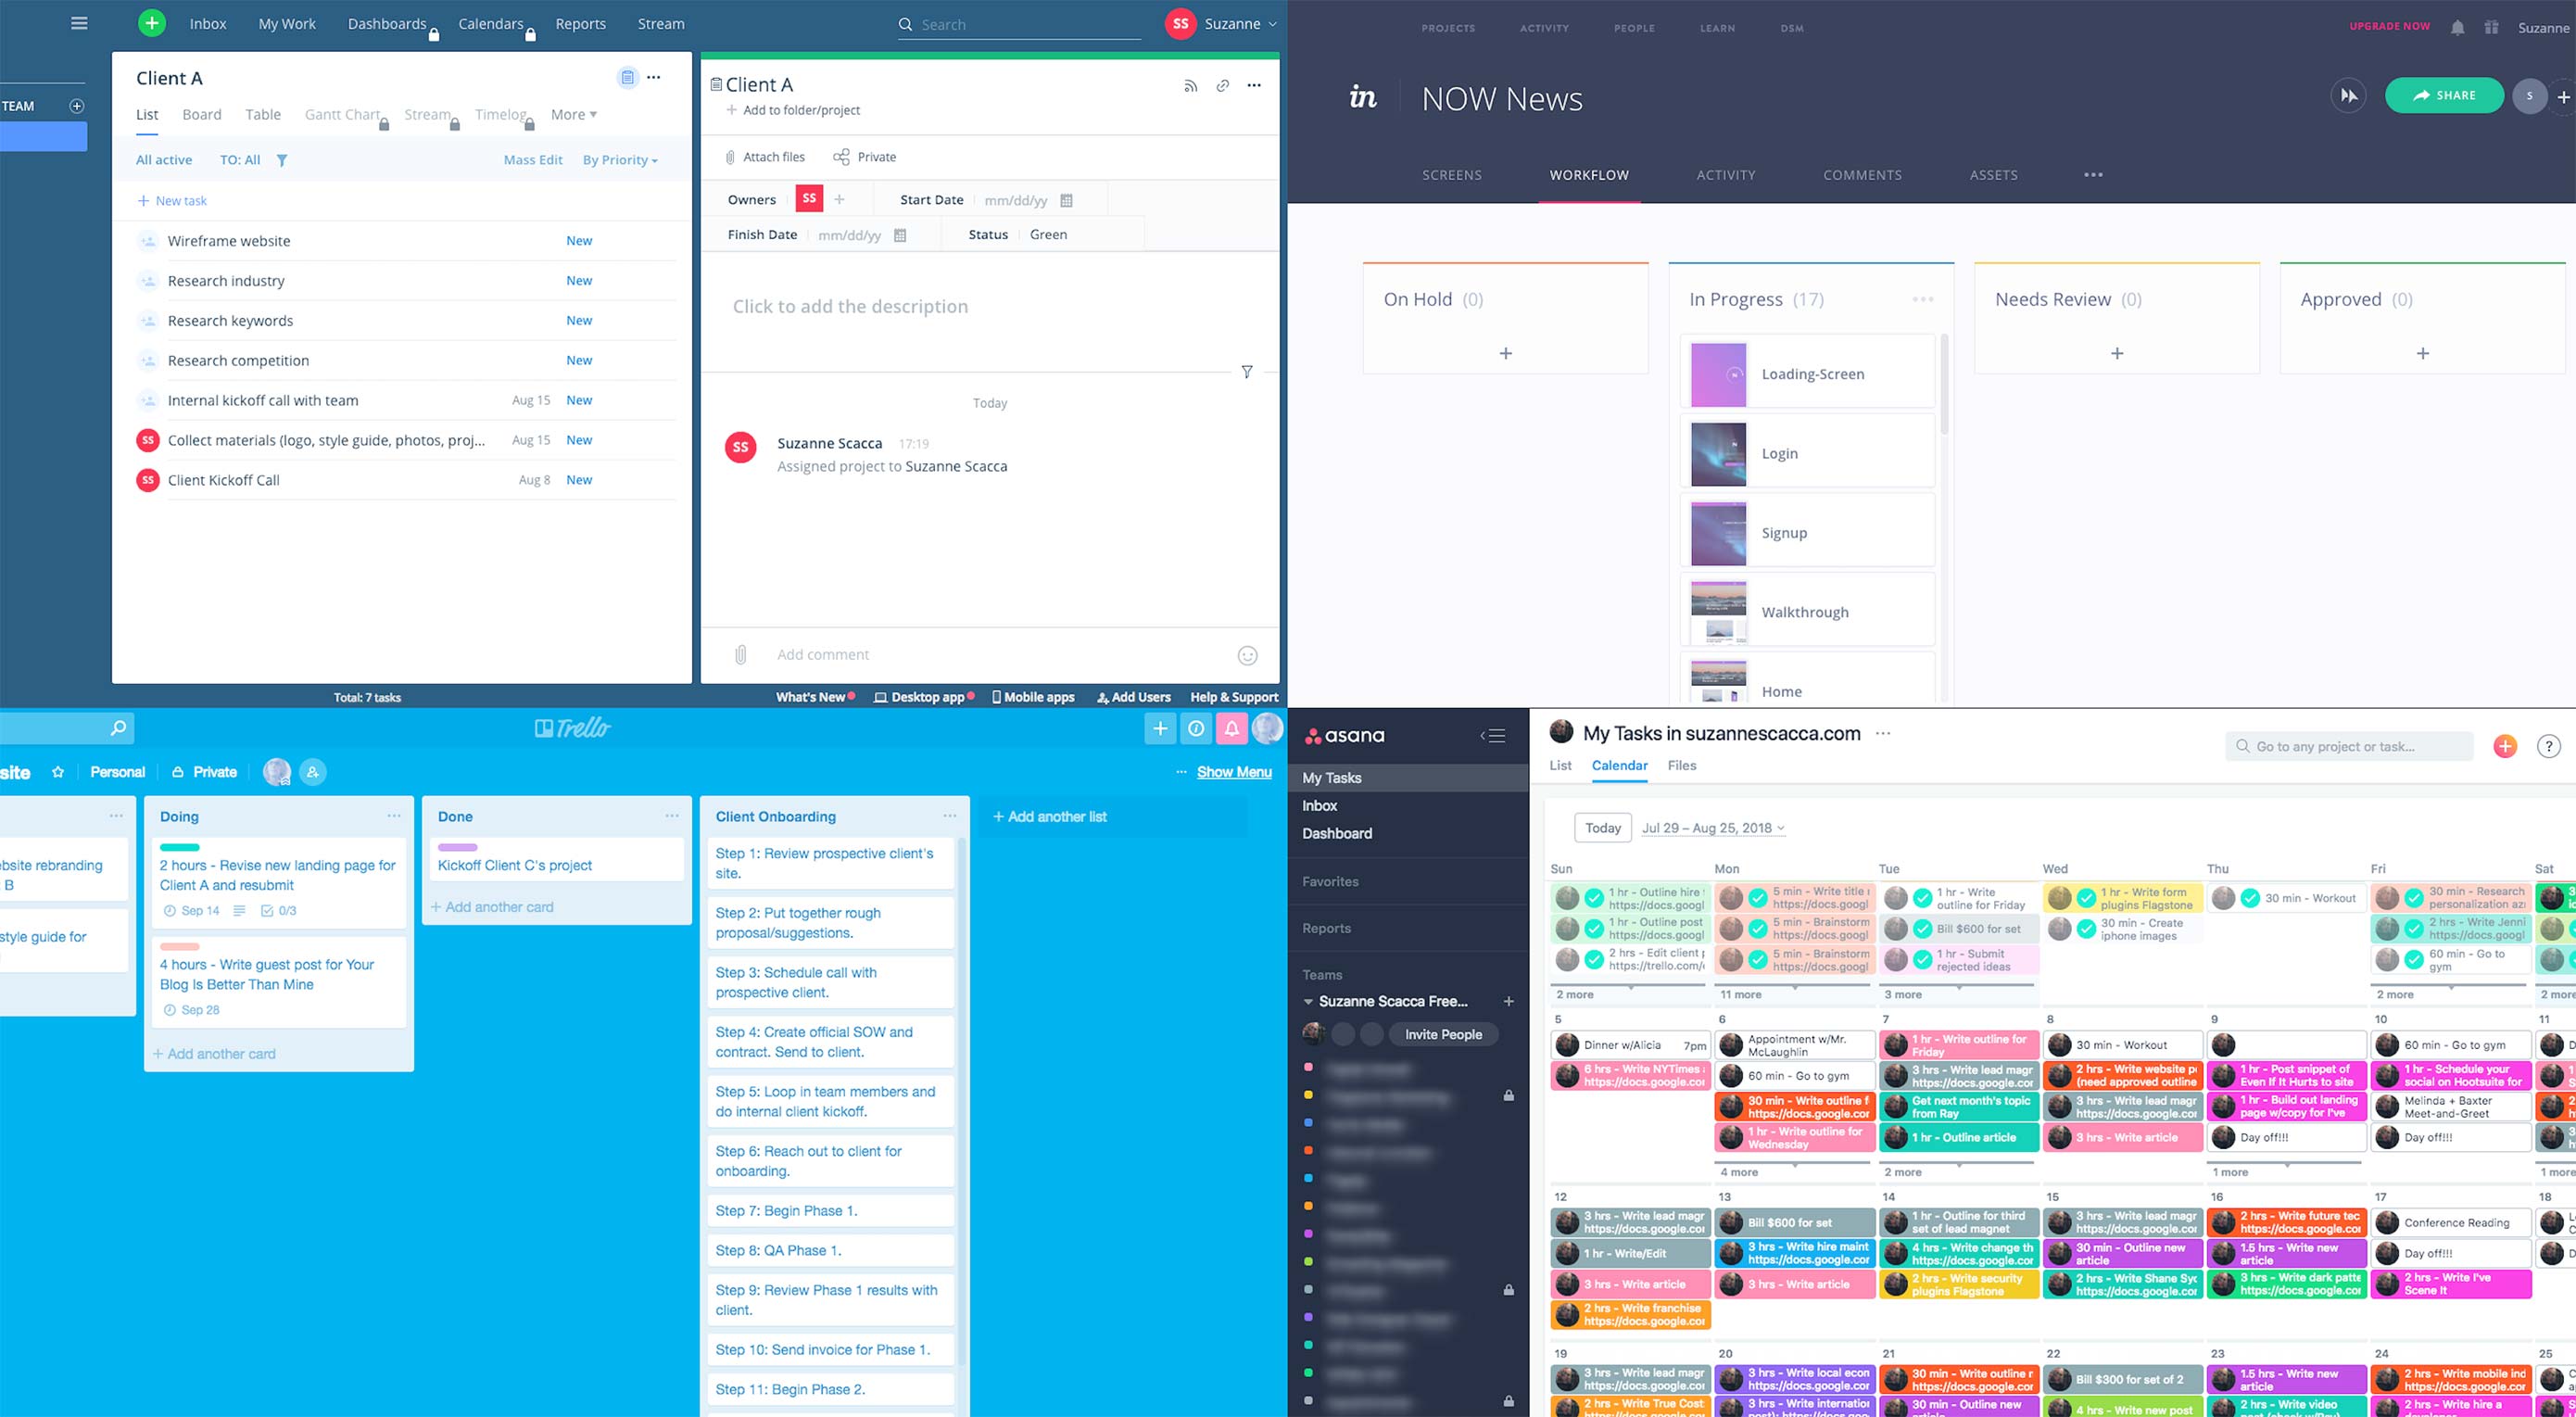
Last year, Rachel McPherson shared 9 ways to organize successful creative projects. It’s a very useful article that highlights the main things to do if you want to bring greater control and organization to your web design workflow.

Tip #2: Take Advantage of a Project Management Tool, is the one I want to focus on today. Specifically, I want to look at some of the best tools for web designers, how to choose the right one for you, as well as give you a quick lesson on how to use project management templates to improve your workflow.

How to Choose the Best Project Management Tool for You

When considering a project management platform for your web design business, here are some things to pay attention to:

Generic vs. Web Design Tools

These are four project management tools I would recommend you start with:

Asana
Trello
Wrike
InVision

Of the four, InVision is the only one strictly made for the web design process. As such, there’s a greater emphasis on managing design work.

Here, you can see how to collaborate within uploaded designs, prototypes, wireframes, etc.:

And this is an example of how InVision enables you to create design-specific workflows for yourself:

There are limitations to what you can do with a design task management tool, so you may find one of the other options a better choice if your goal is to bring greater control to projects, client communication, and team collaboration.

Free vs. Paid

Most task management software you’ll find comes either with a free plan—typically for one person or a strict limitation on the number of projects—or with a free trial.

Here is an example from Teamwork:

Typically, you can get a good sense for whether a platform will be a good fit for you or not within 15 minutes. This is nice as it allows you to try a tool before adding on another business expense.

Workflow View

Project management tools offer a variety of workflow styles and views.

Here is an example from Asana of a calendar view:

This happens to be my preferred style since I work on shorter-term and one-off assignments as opposed to longer jobs that require greater organization of tasks, sub-tasks, and timelines. Asana has list views and kanban boards, too.

Here is an example from Trello of a kanban board:

Basically, you create high-level folders dedicated to each client (you can also break them up at the project level). Within each board, create columns for each phase of your project. The cards that fall below them are then dedicated to each of your tasks. If you prefer this type of card-sorting system and visualization, Trello is a great choice.

One other platform I’d strongly recommend looking at is Wrike and it’s because of its flexibility in workflow views:

Tables:

Boards:

Lists:

All the same tasks are present; they’re just displayed differently.

In summary, I’d suggest:

Asana for designers that work on smaller or shorter jobs.
Trello for designers that need greater control over lengthier project phases.
Wrike for designers that have a growing team and client list and want to offer more flexibility to them.

Features

Be sure to think through the features that matter most to you and will help you acquire the degree of control you want over projects. Here are some noteworthy features from these project management platforms:

Asana

Calendar, list, and kanban views
Internal chat area
Task and sub-task creation
Cloning of tasks and projects
Organization by color
Drag-and-drop task management
Integrate time-tracking software

Trello

Kanban view
Chat directly within cards
Use cards to create tasks or add checklists to individual cards
Drag-and-drop organization
Cloning of cards and lists

Wrike

Table, list, and kanban board views
Internal inbox for direct communications with team and clients
List of personal tasks or access to full projects
Set full timelines for each task
Customize status of tasks
Export lists and use as re-importable templates

Before upgrading to any premium tools, take some time to get acquainted with the base (free) product. Once you’ve found one that fits you well, you can upgrade when the time is right.

Templatization for Improved Workflows

There are so many great things that come out of using project management tools for a web design workflow:

Centralization of communication, files, status updates, etc.
Greater control over projects and all associated tasks
Better adherence to schedules
Improved communication with clients and teams
More efficient collaboration
Increased accountability from all involved parties
More consistent and higher quality of results
Automation of workflow

I think each of the points above—except for maybe the last one—are obvious when you look at how these project management tools work. However, if you’ve ever dreamed of working less while making more money, you really should be taking advantage of automation.

Specifically, I’m talking about project management templates.

To demonstrate this point, I’m going to use Trello to create pre-configured project boards, workflows, and checklists. Follow along to see how easy it is to do this with project management tools:

1. Create a New Board

In the top right corner, select “Create Board”.

Name it, add your team, and create.

2. Create Project Phases

This is what you will start with:

To create your phases (known as “Lists” in Trello), start typing.

Make the buckets as big or as small as you want. The organizational structure and workflow are up to you.

3. Add Tasks to the Phases

In this next part, you can decide how broad or specific you want each task (or card) to be. For my own organization, I allocate one task to one card:

However, you might prefer to create one broad task and then divvy up steps within the card using the checklist feature:

Again, it’s up to you to decide how you want to manage your projects here.

4. Copy the Template

With your project folder, phases, and tasks all broken out, this template is now ready for you to use.

To copy a project (board), click on “…Show Menu” in the top-right. Expand the “…More” option. Then, select “Copy Board”.

To copy just one of your project phases (lists), click on the “…” in the top-right corner of the list. Select “Copy List”.

And to copy an individual task (card), click on the “Copy” button under Actions.

If you can believe it, it’s really as easy as that. Simply break down your workflow however you best can manage it. Then, copy it!

Wrapping Up

If you’ve been using inefficient project management tools or have been relying on too many spreadsheets to keep everything in line until now, it’s time for a change. There’s so much you can do with the right project management tool, not to mention the time-saving and profit-boosting benefits that come from templatizing your process with them!

Add Realistic Chalk and Sketch Lettering Effects with Sketch’it – only $5!

Source

p img {display:inline-block; margin-right:10px;}
.alignleft {float:left;}
p.showcase {clear:both;}
body#browserfriendly p, body#podcast p, div#emailbody p{margin:0;}

Practical Suggestions To Improve Usability Of Landing Pages With Animation From Slides

Original Source: https://www.smashingmagazine.com/2018/10/improving-usability-landing-pages-animation-slides/

Practical Suggestions To Improve Usability Of Landing Pages With Animation From Slides

Practical Suggestions To Improve Usability Of Landing Pages With Animation From Slides

Nick Babich

2018-10-09T14:00:09+02:00
2018-10-09T12:28:41+00:00

(This is a sponsored post.) For a long time, UI animation was an afterthought for designers. Even today, many designers think of animation as something that brings delight but does not necessarily improve usability. If you share this point of view, then this article is for you. I will discuss how animation can improve the user experience of landing pages, and I’ll provide the best examples of animation created using the Slides framework.

The Slides framework is an easy-to-use tool for creating websites. It allows anyone to create a sleek landing page in a few minutes. All you need to do is choose an appropriate design from the list of predefined slides.

A collection of predefined designs in Slides.

Four Ways Animation Supports Usability of Landing Pages

Landing page design is more than just about visual presentation; it’s about interaction. Details of interaction design make a fundamental difference on modern websites. And animated effects can reinforce interactions. To improve the usability of a landing page, an animation must be a functional element, not just decoration. It should serve a clear functional purpose. Below are a few common ways that animation can improve usability.

1. Create a Narrative

Every designer is a storyteller. When we create a website, we are telling a story to our visitors. And it’s possible to tell a much more engaging story by using animation.

Animation can help bring content to life. One good example of such animation can be found on Ikonet. The animation there keeps users engaged as they scroll the page and learn about the company.

Animation can also be used to call the visitor’s attention to something they should notice and act upon. For example, if you have an important text section or a call to action, sliding them in (instead of having them just appear) can help visitors understand where they should focus. Take a look at the Preston Zeller example below. The way elements appear on the pages drives the user’s focus to those areas. The great thing about this animation is that it draws attention to important information without being disruptive.

When visitors scroll on Preston Zeller, elements gradually appear on the page. As a result, attention is drawn to vital information.

2. Provide Feedback

Human-computer interaction is based on two fundamentals: user input and system feedback. All interactive objects should react to user input with appropriate visual or audio feedback.

Below you can see the Custom Checkbox effect created using the Slides framework. The subtle bouncing animation the user sees when they change the state of the toggle reinforces the feeling of interactivity.

With Slides, you can create nice hover animations and encourage users to interact with objects. Take a look at Berry Visual. When you hover the mouse on “Send Message” or on the hamburger menu in the top-right corner, a nice animated effect occurs. It creates a sense that these elements are interactive.

Buf Antwerp is another excellent example of how on-hover animated feedback can improve the user experience. When visitors hover over a tile, a semi-transparent overlay appears, and text provides additional information about the item.

3. Create Relationships

A great place to add animation to a landing page is at moments of change. All too often, moments of change are abrupt &mdahs; for example, when users click on a link, a new screen suddenly appears. Because sudden changes are hard for users to process, such changes usually result in a loss of context — the brain has to scan the new page to understand how the new context is connected to the previous one.

Consider this example of an abrupt change:

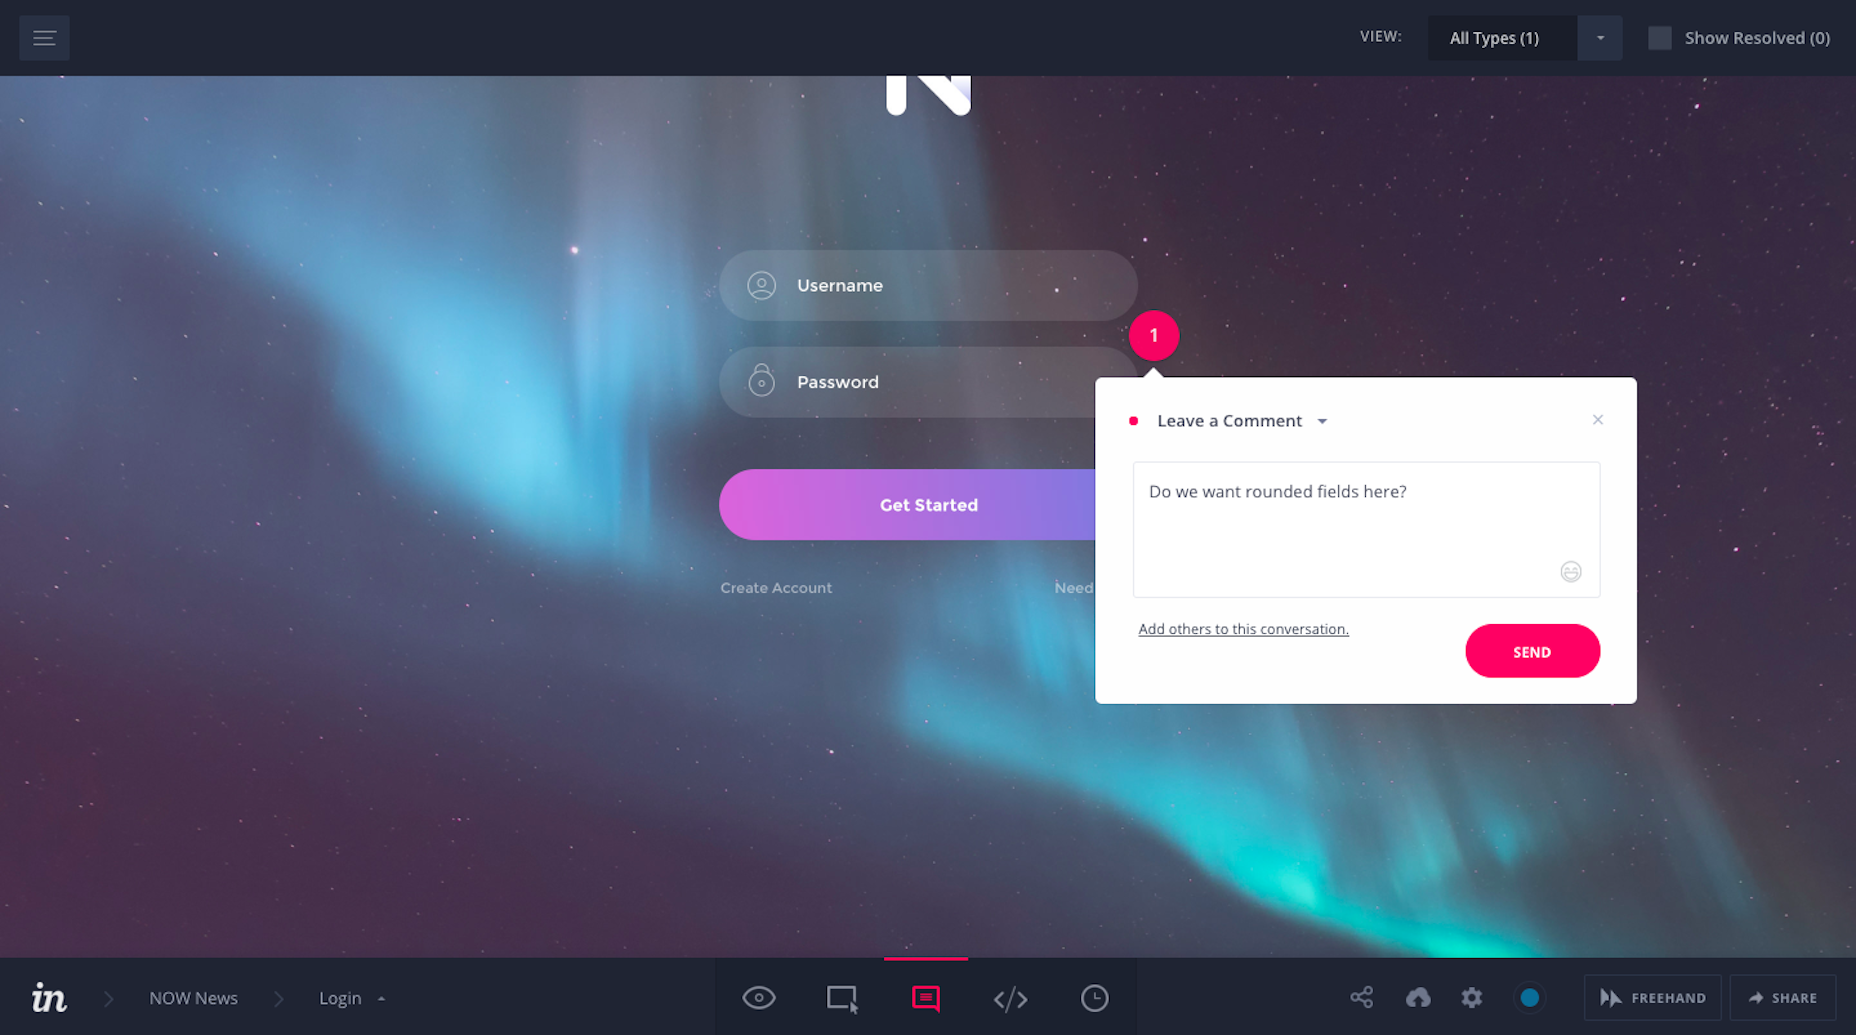
This abrupt change feels unnatural and leads to unnecessary brain work (the brain has to scan entire layout to understand what has just happened). (Image: Adrian Zumbrunnen via Smashing Magazine)

Compare that to the following example, in which a smooth animated transition guides the user to the different parts of the screen:

A simple animated transition maintains context, making it easy to understand what has changed about a screen. (Image: Adrian Zumbrunnen via Smashing Magazine)

It’s clear that in the second example, animation prevents abrupt change — it fills the gap and connects two stages. As a result, visitors understand that the two stages belong together. This principle applies equally when you have a parent-to-child relationship between two objects:

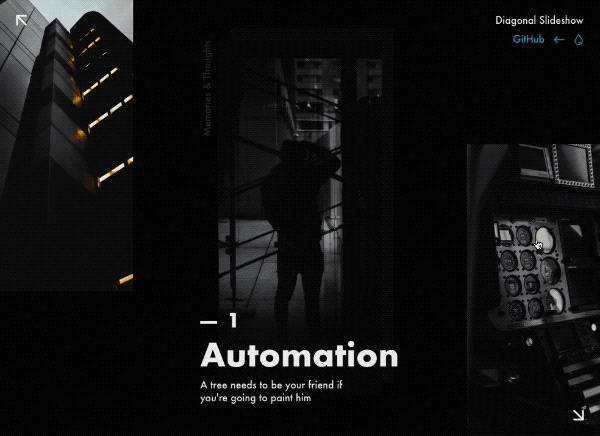
Animated transition between preview and details. (Image: Tympanus)

It also applies when you create a transition between stages. The smooth transitions between slides in the example below create a sense of sequence, rather than separate unrelated parts of the page.

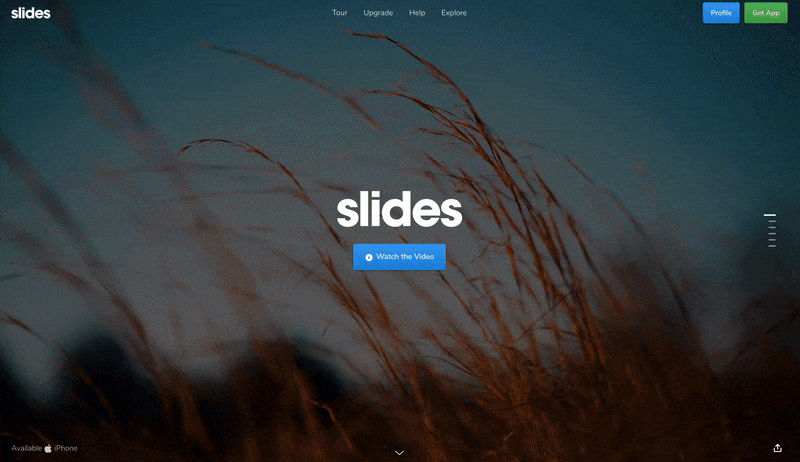
Using animation, it’s possible to define object relationships and hierarchies when introducing new elements.

4. Making Boring Tasks Fun

It might be difficult to imagine how to introduce playful elements into everyday experiences. But by adding a bit of surprise where it’s most unexpected, we can turn a familiar interaction into something unexpected and, thus, memorable.

When you visit Tympanus’ 3D Room Exhibition, it looks like any other gallery website that you’ve visited before. But your impression of the website changes immediately once you interact with a page. As you move the cursor, the page moves, and this effect creates a sense of 3D space. This feeling is reinforced when you go from one page to another; it looks like you’re traveling from one room to another within a 3D space.

Large preview

Now let’s talk about something much more familiar than 3D effects: web forms. Who loves filling out forms? Probably nobody. Still, filling out forms is one of the most common tasks on the web. And it is possible to turn this dull activity into a fun exercise. Take a look Darin Senneff’s Yeti character, which is used in a form. When the user starts typing their password, the mascot covers its eyes. Such an animated effect brings a lot of delight when you see it for the first time.

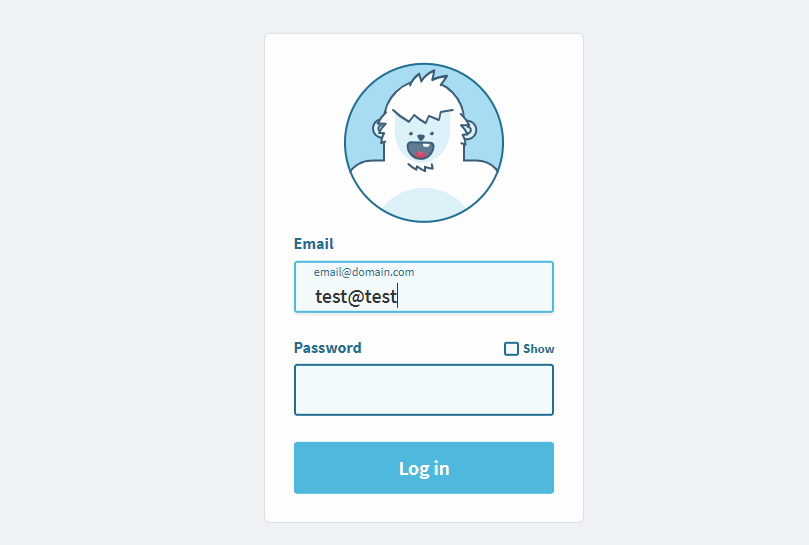
The Yeti character responds to user input.

Last but not least, it’s possible to make the scrolling experience not just more visually interesting, but also helpful for readers. Below is Storytelling Map, an interactive journey in which a path along a map is animated according to the content being scrolled through on the page. The idea ties the text, visuals and locations together; visitors read the information and see it in the context of the map).

Large preview

Six Best Practices for Landing Page Animation

Identifying the places where animation has utility is only half the story. Designers also need to implement animation properly. In this section, we’ll find out how to animate like a pro.

1. Don’t Animate Several Elements at Once

When a few objects are animated simultaneously, it becomes distracting for users. Because the human brain and eye are hardwired to pay attention to moving objects, the user’s focus will jump from one element to another, and the brain will need extra time to figure out what just happened (especially if the movement happens very quickly). Thus, it’s important to schedule animations properly.

It’s vital to understand the concept of transition choreography: the coordinated sequence of motions that maintain the visitor’s focus as the interface changes. Minimize the number of elements that move independently; only a few things should happen at the same time (typically, no more than two or three). Thus, if you want to move more than three objects, group some objects together and transform them as a single unit, rather than animating them independently.

Don’t animate everything at the same time. It will make the objects compete for attention and divide focus. (Image: Google)

Slides offers an excellent benefit to web designers: It prevents them from overusing motion in design. Each animated effect available in Slides has been carefully designed to deliver content in the best possible way.

2. Animation Shouldn’t Conflict With Landing Page’s Personality

Each time you add animation to a design, you introduce personality. This personality will largely depend on the animated effect you choose to use.

When people interact with a product, they have certain expectations. Imagine designing a landing page for a banking service, and you decide to use a bouncing animation to introduce a form that collects the user’s personal information. Many users will hesitate to provide their details because the form conflicts with their expectations.

An example of bouncing animation. Avoid bouncing animation in forms that collect bank account details. Users might hesitate to provide their data. (Image: Joel Besada)

The Slides framework allows you to choose from 10 animated styles, such as Stack, Zen, Film, Cards and Zoom. Experiment with different effects, and choose what’s best for your case.

Large preview

3. Watch the Time

When it comes to designing animation, timing is everything. The timing of your animation can mean the difference between a good interaction and a bad one. When working on animation, you’ll usually spend a third of your time finding the right animated effects and the other two thirds finding the right timing to make the animation feel smooth.

Generally, keep the animation short. Animation should never get in the way of the user completing a task, because even the most beautifully executed animation would be really annoying if it slows down users. The optimal speed for a UI animation is between 200 and 500 milliseconds. An animation that lasts less than 1 second is considered as instant, whereas an animation longer than 5 seconds can convey a feeling of delay.

When it comes to creating an animated effect, one parameter has a direct impact on how the animation is perceived: easing, or timing function in CSS terms. Easing helps designers make movement more natural.

The Slides framework enables web designers to customize easing. You’ll find easing along with other effects in the section “Effect Settings”.

Large preview

4. Think About Accessibility

Animation is a double-edged sword. It can improve usability for one group of users, while causing problems for another group. Apple’s release of iOS 7 was a recent example of the latter. iOS 7 was full of animated effects, and shortly after its release, iPhone users reported that the animated transitions were making them feel dizzy.

Your responsibility as a designer is to think about how people with visual disorders will interact with your design. Check the WCAG’s guidelines on animation, and be sure that your design aligns with them. Track whether a user wants to minimize the amount of animation or motion. A special CSS media feature, “prefers-reduced-motion”, detects whether the user has requested that the system minimize the amount of animation or motion used. When it is set to “reduce”, then it’s better to minimize the amount of movement and animation (for example, by removing all non-essential movement).

Also, conduct usability testing to check that users will all abilities, including people with visual disorders, won’t have any problem interacting with your design.

5. Prototype and Test Your Design Decisions

Animation is fun to play with. It’s easy to go overboard and end up with a design that overwhelms users with too much motion. Unfortunately, there is no silver bullet for great animation; it’s hard to set clear criteria of what is “just enough”. Be ready to spend time on prototyping, testing and optimizing animated effects.

Here are a few tips worth taking into account during testing:

Test on different hardware.
Many hardware factors can drastically affect animation performance: screen size, screen density, GPU performance, to name just a few. As a result, a user on a high-definition screen might have a completely different experience than a user on an older screen. Consider such factors when designing animation to prevent performance bottlenecks. Don’t blame slow hardware; optimize your animation to work great on all sort of devices.

Test on mobile.
Most websites are built and tested on a desktop; the mobile experience and animation performance is often treated as an afterthought. Lack of testing on mobile could cause a lot of problems for mobile users, because some animated techniques work great on desktop but not as well on mobile. To avoid a negative experience, confirm that your design works fine on both desktop and mobile. Test on mobile early and often.

Watch animation at a slow speed.
It might be hard to notice problems when an animation (especially a complex one) runs at full speed. When you slow the animation down (say, at one tenth the speed), such issues become evident. You can also record slow-motion video of your animations and show them to other people to get other perspectives.

With the Slides framework, you can create a high-fidelity interactive prototype in minutes. You can use a WYSIWYG editor to create animated effects, publish the design, and see how it works on both desktop and mobile devices.

6. Animation Shouldn’t Be an Afterthought

There’s a reason why so many designers think of animation as an unnecessary feature that overloads the user interface and makes it more complicated. In most cases, that’s true when designers introduce animation at the end of the design process, as lipstick for the design — in other words, animation for the sake of animation. Random motion without any purpose won’t benefit visitors much, and it can easily distract and annoy.

To make meaningful animation, take time at the beginning of the project to think about areas where animation would naturally fit. Only in this way will animation be natural to the user flow.

Conclusion

Good functional animation makes a landing page not just more appealing, but also more usable. When done correctly, animation can turn a landing page from a sequence of sections into a carefully choreographed, memorable experience. The Slides framework helps web designers use animation to communicate clearly.

Smashing Editorial
(ms, ra, al, yk, il)

What’s Missing in Your Design Business?

Original Source: http://feedproxy.google.com/~r/1stwebdesigner/~3/gEr9H9fN0Co/

Running a freelance web design business may sound fairly simple. In practice, it’s very challenging. There are so many facets required to find success. And even when you think that you’ve checked all the right boxes, prosperity can still feel elusive.

When your business just isn’t going as well as you’d hoped, you have to find what’s lacking. Today, we’re going to dedicate some time to search for those missing ingredients.

Analyze Your Situation

The first step to improving your design business is to conduct an analysis of where you are. It doesn’t have to be incredibly deep. Think of it more as a summary of what you’re doing and what you’ve done.

You’ll want to focus on the following areas:

Projects
Think about the projects you’ve worked on over the past year (or any time period you choose). Try to find some common threads between them. Perhaps your clients were in the same industry, or the projects were similarly priced.

Or, maybe you’ll find that they didn’t have much in common at all. That’s okay, too. The main idea here is to review the types of gigs that have crossed your desk over a period of time.

Finances
Similarly, review how your business has performed financially. Take a look at how you’re doing this year as compared to the past. Has your income grown? What about your expenses?

Diving in even deeper, look back at how you’ve done historically in specific quarters or months. You might notice, for example, that some times of the year produce more revenue than others.

Busy-ness
Lastly, analyze your workload. Has it fluctuated much over the past year or two? Do you find yourself overwhelmed with work? Or, do you have too much free time on your hands?

Put these three items together and you should have a solid grasp of how your business is doing. Hopefully, you’ll even spot some patterns that you may not have previously noticed. Jot them down on a piece of paper for future reference.

Man writing on paper

Think About the Results

Once you have taken a hard look at your business, you can then figure out the areas that need improved. The results are definitely not one-size-fits-all. What you find will be specific to your situation.

Therefore, it’s important to think about what it is you want from all of this. What’s your passion? What led you to start your own design business in the first place?

Now, let’s take another look at the three items you analyzed above. Only this time we’ll include some examples to serve as guidance for determining your own path forward.

Projects
There are times when freelancing means being stuck with projects that aren’t exactly attractive to us. This type of “grunt work” just isn’t very stimulating. It can really make you dread having to go to work each day.

If you’ve found yourself taking on the wrong types of projects, it’s time to hit the reset button. While we all have to pay the bills, we don’t have to settle.

Instead of saying “yes” to whatever comes your way, allow yourself to be more selective. If you really love a certain design niche, actively look for work in that area. Or, if you only want to work with WordPress, make it the core of your services.

We have the freedom to work the way we want. But it’s up to us to make it a reality.

Finances
Staying afloat financially is one of the biggest challenges of being a freelancer. Money often arrives in bunches, only to be followed up by a dry spell.

One way to counter that is to create steady streams of revenue. You could, for instance, offer maintenance packages to clients. Include an allotted amount of time that your clients have available to them, whether they use it or not. Odds are, not everyone is going to use the package to the full extent. You, on the other hand, gain some predictable income.

The other part of the equation is in your pricing. Many freelancers undervalue their services. The result is that you’re working hard, but not getting paid accordingly. Take a look at your pricing structure and see if a reasonable increase is in order.

Busy-ness
Part of the freelance lifestyle is setting a schedule that works for you. It means that you’re able to build a workday that takes your kids into consideration. Or you can choose to work at night if you find that you’re more productive.

If your schedule is either too full or too sparse, make a change. This really does go hand-in-hand with the types of projects you choose and your financial situation. Set yourself up in those areas while keeping your workload in mind. It is possible to strike a balance that is more to your liking.

Laptop with business concepts on its screen

Solving the Puzzle

Every design business can benefit from the occasional tune-up. But in order to make the right adjustments, we have to take an honest look at where things stand. Only then can we find the missing pieces to happiness and success.

The great part of being a freelancer is that we don’t have to rely on anyone else to implement changes. We have the power to make our business exactly what we want it to be.