SVG Filters 101

Original Source: http://feedproxy.google.com/~r/tympanus/~3/u-tx2d4nO8M/

SVGFilters101_featured

CSS currently provides us with a way to apply color effects to images such as saturation, lightness, and contrast, among other effects, via the filter property and the filter functions that come with it.

We now have 11 filter functions in CSS that do a range of effects from blurring to changing color contrast and saturation, and more. We have a dedicated entry in the CSS Reference if you want to learn more about them.

Albeit powerful and very convenient, CSS filters are also very limited. The effects we are able to create with them are often applicable to images and limited to color manipulation and basic blurring. So, in order to create more powerful effects that we can apply to a wider range of elements, we’ll need a wider range of functions. These functions are available today —and have been available for over a decade— in SVG. In this article, which is the first in a series about SVG filters, you will learn about the SVG filter functions — known as “primitives” — and how to use them.

CSS filters are imported from SVG. They are fairly more optimized versions of a subset of filter effects present in SVG, and that have been around in the SVG specification for years.

There are more filters effects in SVG than there are in CSS, and the SVG versions are more powerful and capable of far more complex effects than their CSS shortcuts. For example, it is currently possible to blur an element using the CSS blur() filter function. Applying a blur effect using this function will create a uniform Gaussian Blur to the element it is applied to. The following image shows the result of applying a 6px blur to an image in CSS:

Screen Shot 2019-01-02 at 12.46.04

The blur() function creates a blur effect that is uniformly applied in both directions — X & Y — on the image. But this function is merely a simplified and limited shortcut for the blur filter primitive available in SVG, which allows us to blur an image either uniformly, or apply a one-directional blur effect along either the X- or the Y-axis.

The result of applying a blur along the x and y axes, respectively, using SVG filters.The result of applying a blur along the x and y axes, respectively, using SVG filters.

SVG filters can be applied to HTML elements as well as SVG elements. An SVG filter effect can be applied to an HTML element in CSS using the url() filter function. For example, if you have a filter effect with an ID “myAwesomeEffect” defined in your SVG (we’ll talk about defining filters effects in SVG shortly), you can apply that effect to an HTML element or image like this:

.el {
filter: url(#myAwesomeEffect);
}

Best of all, as you’re going to see in this series, SVG filters are capable of creating Photoshop-grade effects in the browser, using a few lines of code. I hope this series will help demystify and unlock part of SVG Filters’ potential and inspire you to start using them in your own projects.

But what about browser support, you ask..?

Browser Support

Browser support for the majority of SVG filters is impressively good. How an effect is applied may, however, vary across a few browsers depending on the browser support for the inidvidual filter primitives used in the SVG filter effect, as well as depending on any possible browser bugs. Browser support may also vary when the SVG filter is applied to SVG elements versus HTML elements.

I would recommend that you treat filter effects as an enhancement: you can almost always apply an effect as an enhancement on top of a perfectly usable filter-less experience. (Those of you who know me would know that I endorse a progressive enhancement approach to building UIs whenever possible.) So, we won’t be too concerned about browser support in this series.

Lastly, even though SVG Filter support is generally good, do keep in mind that some of the effects we will cover later in the series may be considered experimental. I will mention any major issues or bugs if and when there are any.

So, how do you define and create a filter effect in SVG?

The <filter> Element

Just like linear gradients, masks, patterns, and other graphical effects in SVG, filters have a conveniently-named dedicated element: the <filter> element.

A <filter> element is never rendered directly; its only usage is as something that can be referenced using the filter attribute in SVG, or the url() function in CSS. Such elements (elements that are not rendered unless explicitly referenced) are usually defined as templates inside <defs> elements in SVG. But an SVG <filter> doesn’t need to be wrapped in a defs element. Whether you wrap the filter in a defs element or not, it will simply not be displayed.

The reason for that is that a filter requires a source image to work on, and unless you explicitly define that source image by calling the filter on that source image, it won’t have anything to render, and so it doesn’t.

A very basic, minimal code sample defining an SVG filter and applying it to a source image in SVG would look like this:

<svg width=”600″ height=”450″ viewBox=”0 0 600 450″>
<filter id=”myFilter”>
<!– filter effects go in here –>
</filter>
<image xlink:href=”…”
width=”100%” height=”100%” x=”0″ y=”0″
filter=”url(#myFilter)”></image>
</svg>

The filter in the above code sample does nothing at this point because it is empty. In order to create a filter effect, you need to define a series of one or more filter operations that create that effect inside the filter. In other words, the filter element is a container to a series of filter operations that, combined, create a filter effect. These filter operations are called “Filter Primitives” in SVG.

Filter Primitives

So, in SVG, each <filter> element contains a set of filter primitives as its children. Each filter primitive performs a single fundamental graphical operation on one or more inputs, producing a graphical result.

A filter primitive is conveniently named after whatever graphical operation it performs. For example, the primitive that applies a Gaussian Blur effect to the source graphic is called feGaussianBlur. All primitives share the same prefix: fe, which is short for “filter effect”. (Again, names in SVG are conveniently chosen to resemble what an element is or does.)

The following snippet shows what a simple filter would look like if that filter were to apply a 5px Gaussian Blur to an image:

<svg width=”600″ height=”450″ viewBox=”0 0 600 450″></feGaussianBlur>
<filter id=”myFilter”>
<feGaussianBlur stDeviation=”5″></feGaussianBlur>
</filter>
<image xlink:href=”…”
width=”100%” height=”100%” x=”0″ y=”0″
filter=”url(#myFilter)”></image>
</svg>

There are currently 17 filter primitives defined in the SVG Filter specification that are capable of extremely powerful graphical effects, including but not limited to noise and texture generation, lighting effects, color manipulation (on a channel by channel basis), and more.

A filter primitive works by taking a source graphic as input and outputting another one. And the output of one filter effect can be used as input to another. This is very important and very powerful because it means that you have an almost countless combination of filter effects and therefore you can create an almost countless number of graphical effects.

Each filter primitive can take one or two inputs and output only one result. The input of a filter primitive is defined in an attribute called in. The result of an operation is defined in the result attribute. If the filter effect takes a second input, the second input is set in the in2 attribute. The result of an operation can be used as input to any other operation, but if the input of an operation is not specified in the in attribute, the result of the previous operation is automatically used as input. If you don’t specify the result of a primitive, its result will automatically be used as input to the primitive that follows. (This will become clearer as we start looking into code examples.)

In addition to using the result(s) of other primitives as input, a filter primitive also accepts other types of inputs, the most important of which are:

SourceGraphic: the element to which the entire filter is applied; for example, an image or a piece of text.
SourceAlpha: this is the same as the SourceGraphic, except that this graphic contains only the alpha channel of the element. For a JPEG image, for example, it is a black rectangle the size of the image itself.

You’ll find that you’ll sometimes want to use the source graphic as input and sometimes only its alpha channel. The examples we will cover in this post and the following posts will provide a clear understanding of when to use which.

This code snippet is an example of what a filter with a bunch of filter primitives as children could look like. Don’t worry about the primitives and what they do. At this point, just pay attention to how the inputs and outputs of certain primitives are being defined and used amongst them. I’ve added some comments to help.

<svg width=”600″ height=”400″ viewBox=”0 0 850 650″>
<filter id=“filter”>
<feOffset in=”SourceAlpha” dx=”20″ dy=“20″></feOffset>

<!– since the previous filter did not have a result defined and this following one
does not have the input set, the result of the above primitive is automatically used
as input to the following filter –>
<feGaussianBlur stdDeviation=”10″ result=“DROP”></feGaussianBlur>

<!– setting/defining the result names in all caps is a good way to make them more
distinguishable and the overall code more readable –>
<feFlood flood-color=”#000″ result=”COLOR”></feFlood>

<!– This primitive is using the outputs of the previous two primitives as
input, and outputting a new effect –>
<feComposite in=”DROP” in2=”COLOR” operator=”in” result=”SHADOW1″></feComposite>

<feComponentTransfer in=”SHADOW1″ result=”SHADOW”>
    <feFuncA type=”table” tableValues=”0 0.5″></feFuncA>
</feComponentTransfer>

<!– You can use ANY two results as inputs to any primitive, regardless
of their order in the DOM.
The following primitive is a good example of using two previously-generated
outputs as input. –>
<feMerge>
<feMergeNode in=”SHADOW”></feMergeNode>
<feMergeNode in=”SourceGraphic”></feMergeNode>
</feMerge>
</filter>
<image xlink:href=”…” x=”0″ y=”0″ width=”100%” height=”100%” filter=”url(#filter)”></image>
</svg>

Now, the last concept I want to cover briefly before moving to our first filter example is the concept of a Filter Region.

The Filter Region

The set of filter operations need a region to operate on— an area they can be applied to. For example, you may have a complex SVG with many elements and you want to apply the filter effect only to a specific region or one or a group of elements inside that SVG.

In SVG, elements have “regions” whose boundaries are defined by the borders of the element’s Bounding Box. The Bounding Box (also abbreviated “bbox“) is the smallest fitting rectangle around an element. So for example for a piece of text, the smallest fitting rectangle looks like the pink rectangle in the following image.

The smallest fitting rectangle around a piece of text.The smallest fitting rectangle around a piece of text.

Note that this rectangle might include some more white space vertically because the line height of the text is taken into consideration when calculating the height of the bounding box.

The default filter region of an element is the element’s bounding box. So if you were to apply a filter effect to our piece of text, the effect will be restricted to this rectangle, and any filter result that lies beyond the boundaries of it will be clipped off. Albeit sensible, this is not very practical because many filters will impact pixels slightly outside the boundaries of the bounding box and, by default, those pixels will end up being cut off.

For example, if we apply a blur effect to our piece of text, you can see the blur getting cut off at the left and right edges of the text’s bounding box:

Image showing how The blur effect applied to the text is cut off on both the right and left side of the text’s bounding box area.The blur effect applied to the text is cut off on both the right and left side of the text’s bounding box area.

So how do we prevent that from happening? The answer is: by extending the filter region. We can extend the region the filter is applied to by modifying the x, y, width and height attributes on the <filter> element.

According to the specification,

It is often necessary to provide padding space in the filter region because the filter effect might impact bits slightly outside the tight-fitting bounding box on a given object. For these purposes, it is possible to provide negative percentage values for ‘x’ and ‘y’, and percentage values greater than 100% for ‘width’ and ‘height’.

By default, filters have regions extending 10% the width and height of the bounding box in all four directions. In other words, the default values for the x, y, width and height attributes are as follows:

<filter x=”-10%” y=”-10%” width=”120%” height=”120%”
filterUnits=”objectBoundingBox”>
<!– filter operations here –>
</filter>

If you omit these attributes on the <filter> element, these values will be used by default. You can also override them to extend or shrink the region as you need.

One thing to keep in mind is that the units used in the x, y, width and height attributes are dependent on which filterUnits value is in use. The filterUnits attribute defines the coordinate system for the x, y, width and height attributes. It takes one of two values:

objectBoundingBox: this is the default value. When the filterUnits is objectBoundingBox, the values of the x, y, width and height attributes are percentages or fractions of the size of the element’s bounding box. This also means that you can use fractions as values instead of percentages if you prefer.
userSpaceOnUse: when filterUnits is set to userSpaceOnUse the coordinates of the x, y, width and height attributes are set relative to the current user coordinate system in use. In other words, it is relative to the current coordinate system in use in the SVG, which uses pixels as a unit and is, usually, relative to the size of the SVG itself, assuming the viewBox values matches that of the initial coordinate system. (You can learn all you need to know about coordinate systems in SVG in this post I wrote a few years ago.)

<!– Using objectBoundingBox units –>
<filter id=”filter”
x=“5%” y=“5%” width=”100%” height=“100%”>

<!– Using userSpaceOnUse units –>
<filter id=“filter”
filterUnits=”userSpaceOnUse”
x=“5px” y=“5px” width=”500px” height=”350px”>

Quick Tip: Visualizing the current filter region with feFlood

If you ever need to see the extent of your filter region you can visualize it by flooding the filter region with color. Conveniently, a filter primitive called feFlood exists whose sole purpose is to do exactly that: fill the current filter region with a color that you specify in the flood-color attribute.

So, assuming we have a piece of text whose filter region we want to visualize, the code would look as simple as:

<svg width=”600px” height=”400px” viewBox=”0 0 600 400″>
<filter id=”flooder” x=”0″ y=”0″ width=”100%” height=”100%”>
<feFlood flood-color=”#EB0066″ flood-opacity=”.9″></feFlood>
</filter>

<text dx=”100″ dy=”200″ font-size=”150″ font-weight=”bold” filter=”url(#flooder)”>Effect!</text>
</svg>

As you can see in the above code snippet, the feFlood primitive also accepts a flood-opacity attribute which you can use to make the flood color layer translucent.

The above snippet floods the filter region with a pink color. But here is the thing: when you flood the region with color, you’re literally flooding it with color, meaning that the color will cover everything in the filter region, including any elements and effects you’ve created before, as well as the text itself. After all, this is what the definition of flooding is, right?

Before and after flooding the text's filter region with color.Before and after flooding the text’s filter region with color.

In order to change that, we need to move the color layer to the “back” and show the source text layer on top.

Whenever you have multiple layers of content that you want to display on top of each other in an SVG filter, you can use the <feMerge> filter primitive. As its name suggests, the feMerge primitive is used to merge together layers of elements or effects.

The <feMerge> primitive does not have an in attribute. To merge layers, two or more <feMergeNode>s are used inside feMerge, each of which has its own in attribute that represents a layer that we want to add.

Layer (or “node”) stacking depends on the <feMergeNode> source order — the first <feMergeNode> will be rendered “behind” or “below” the second. The last <feMergeNode> represents the topmost layer. And so on.

So, in our text example, the flood color is a layer, and the source text (the source graphic) is another layer, and we want to place the text on top of the flood color. Our code will hence look like this:

<svg width=”600px” height=”400px” viewBox=”0 0 600 400″>
<filter id=”flooder”>
<feFlood flood-color=”#EB0066″ flood-opacity=”.9″ result=”FLOOD”></feFlood>

<feMerge>
<feMergeNode in=”FLOOD” />
<feMergeNode in=”SourceGraphic” />
</feMerge>
</filter>

<text dx=”100″ dy=”200″ font-size=”150″ font-weight=”bold” filter=”url(#flooder)”>Effect!</text>
</svg>

Notice how I named the result of the feFlood in the result attribute so that I can reference that name in the <feMergeNode> as input. Since we want to display the source text on top of the flood color, we reference this text using SourceGraphic. The following is a live demo of the result:

See the Pen Filter Region Visualization with feFlood by Sara Soueidan (@SaraSoueidan) on CodePen.light

Now that we’ve gotten a quick introduction into the world of SVG filters with this demo, let’s create a simple SVG drop shadow.

Applying a drop shadow to an image

Let me start with a quick disclaimer: you’re better off creating a simple drop shadow using the CSS drop-shadow() filter function. The SVG filter way is much more verbose. After all, as we mentioned earlier, the CSS filter functions are convenient shortcuts. But I want to cover this example anyway as a simple entry point to the more complex filter effects we’ll cover in the coming articles.

So, how is a drop shadow made?

A drop shadow is usually a light-gray layer behind—or underneath—an element, that has the same form (or shape) as the element itself. In other words, you can think of it as a blurred gray copy of the element.

When creating SVG filters, we need to think in steps. What steps are needed to achieve a particular effect? For a drop shadow, a blurred gray copy of the element can be created by blurring a black copy of the element and then colorizing that black copy (making it gray). Then that newly created blurred grey copy is positioned behind the source element, and offset a little in both directions.

So we’re going to start by getting a black copy of our element and blurring it. The black copy can be created by using the alpha channel of the element, using SourceAlpha as input to our filter.

The feGaussianBlur primitive will be used to apply a Gaussian blur to that SourceAlpha layer. The amount of blur you need is specified in the stdDeviation (short for: Standard Deviation) attribute. If you provide one value to the stdDeviation attribute, that value will be used to apply a uniform blur to the input. You can also provide two numerical values— the first will be used to blur the element in the horizontal direction and the second will be used to apply a vertical blur. For a drop shadow, we need to apply a uniform blur, so our code will start with this:

<svg width=”600″ height=”400″ viewBox=”0 0 850 650″>
<filter id=”drop-shadow”>

<– Grab a blakc copy of the source image and blur it by 10 –>
<feGaussianBlur in=”SourceAlpha” stdDeviation=”10″ result=”DROP”></feGaussianBlur>

</filter>
<image xlink:href=”…” x=”0″ y=”0″ width=”100%” height=”100%” filter=”url(#drop-shadow)”></image>
</svg>

The above code snippet results in the following effect, where only the blurred alpha channel of the image is rendered at this point:

screenshot of the filter effect after applying a drop shadow to the alpha channel of the image

Next, we want to change the color of the drop shadow and make it grey. We will do that by applying a flood color to the filter region and then compositing that flood color layer with the drop shadow layer we have created.

Compositing is the combining of a graphic element with its backdrop. A backdrop is the content behind the element and is what the element is composited with. In our filter, the Flood color is the upper layer, and the blurred shadow is its backdrop (because it lies behind it). We will see the feComposite primitive more in the upcoming articles, so if you’re not familiar with what compositing is and how it works, I have a very comprehensive introductory article on my blog that I recommend checking out.

The feComposite primitive has an operator attribute which is used to specify which composite operation we want to use.

By using the in composite operator, the flood color layer will be “cropped” and only the area of the color that overlaps with our shadow layer will be rendered, and the two layers will be blended where they intersect, which means that the grey color will be used to colorize our black drop shadow.

The feComposite primitive requires two inputs to operate on, specified in the in and in2 attributes. The first input is our color layer, and the second input is our blurred shadow backdrop. With the composite operation specified in the operator attribute, our code now looks like this:

<svg width=”600″ height=”400″ viewBox=”0 0 850 650″>
<filter id=”drop-shadow”>
<feGaussianBlur in=”SourceAlpha” stdDeviation=”10″ result=”DROP”></feGaussianBlur>

<feFlood flood-color=”#bbb” result=”COLOR”></feFlood>

<feComposite in=”COLOR” in2=”DROP” operator=”in” result=”SHADOW”></feComposite>

</filter>
<image xlink:href=”…” x=”0″ y=”0″ width=”100%” height=”100%” filter=”url(#drop-shadow)”></image>
</svg>

Notice how the results of the feGaussianBlur and the feFlood primitives are used as inputs for feComposite. Our demo now looks like this:

the result of colorizing the drop shadow using feFlood and feComposite

Before we layer our original image on top of the drop shadow, we want to offset the latter vertically and/or horizontally. How much you offset the shadow and in which direction is completely up to you. For this demo, I’ll assume we have a source light coming from the top left corner of our screen, so I will move it by a few pixels down to the right.

To offset a layer in SVG, we use the feOffset primitive. In addition to the in and result attributes, this primitive takes two main attributes: dx and dy, which determine the distance by which you want to offset the layer along the x and y axes, respectively.

After offsetting the drop shadow, we will merge it with the source image using feMerge, similar to how we merged the text and flood color in the previous section— one mergeNode will take our drop shadow as input, and another mergeNode will layer the source image using SourceGraphic as input. Our final code now looks like this:

<svg width=”600″ height=”400″ viewBox=”0 0 850 650″>
<filter id=”drop-shadow”>

<!– Get the source alpha and blur it; we’ll name the result “DROP” –>
<feGaussianBlur in=”SourceAlpha” stdDeviation=”10″ result=”DROP”></feGaussianBlur>

<!– flood the region with a ligh grey color; we’ll name this layer “COLOR” –>
<feFlood flood-color=”#bbb” result=”COLOR”></feFlood>

<!– Composite the DROP and COLOR layers together to colorize the shadow. The result is named “SHADOW” –>
<feComposite in=”COLOR” in2=”DROP” operator=”in” result=”SHADOW”></feComposite>

<!– Move the SHADOW layer 20 pixels down and to the right. The new layer is now called “DROPSHADOW” –>
<feOffset in=”SHADOW” dx=”20″ dy=”20″ result=”DROPSHADOW”></feOffset>

<!– Layer the DROPSHADOW and the Source Image, ensuring the image is positioned on top (remember: MergeNode order matters) –>
<feMerge>
<feMergeNode in=”DROPSHADOW”></feMergeNode>
<feMergeNode in=”SourceGraphic”></feMergeNode>
</feMerge>
</filter>

<!– Apply the filter to the source image in the `filter` attribute –>
<image xlink:href=”…” x=”0″ y=”0″ width=”100%” height=”100%” filter=”url(#drop-shadow)”></image>
</svg>

And the following is a live demo of the above code:

See the Pen Drop Shadow: Tinted shadow with feComposite by Sara Soueidan (@SaraSoueidan) on CodePen.light

And that is how you apply a filter effect in SVG using SVG filters. You’ll find that this effect works across all major browsers.

There is another way…

There is another, more common way of creating a drop shadow. Instead of creating a black shadow and applying color to it to make it lighter, you could apply transparency to it, thus making it translucent and, consequently, lighter.

In the previous demo, we learned how to apply color to the drop shadow using feFlood, which is a coloring technique you’ll probably find yourself needing and using often. This is why I thought it was necessary to cover. It is also useful to learn because this is the way to go if you want to create a shadow that, for whatever reason, has a colorful shadow, for example, instead of a black or grey one.

In order to change the opacity of a layer, you can use either the feColorMatrix primitive or the feComponentTransfer primitive. I’ll talk about the feComponentTransfer primitive in more detail in upcoming articles, so I’ll use feColorMatrix to reduce the opacity for our shadow now.

The feColorMatrix primitive deserves an article of its own. For now, I highly recommend reading Una Kravet’s article which is a great introduction with really good examples.

In short, this filter applies a matrix transformation to the R(Red), G(Green), B(Blue), and A(Alpha) channels of every pixel in the input graphic to produce a result with a new set of color and alpha values. In other words, you use a matrix operation to manipulate the colors of your object. A basic color matrix looks like this:

<filter id=”myFilter”>
<feColorMatrix
type=”matrix”
values=”R 0 0 0 0
0 G 0 0 0
0 0 B 0 0
0 0 0 A 0 “/>
</feColorMatrix>
</filter>

Once again I recommend checking Una’s article out to learn more about this syntax.

Since we only want to reduce the opacity of our shadow, we will use an identity matrix that does not alter the RGB channels, but we will reduce the value of the alpha channel in that matrix:

<filter id=”filter”>

<!– Get the source alpha and blur it, –>
<feGaussianBlur in=”SourceAlpha” stdDeviation=”10″ result=”DROP”></feGaussianBlur>

<!– offset the drop shadow –>
<feOffset in=”SHADOW” dx=”20″ dy=”20″ result=”DROPSHADOW”></feOffset>

<!– make the shadow translucent by reducing the alpha channel value to 0.3 –>
<feColorMatrix type=”matrix” in=”DROPSHADOW” result=”FINALSHADOW”
values=”1 0 0 0 0
0 1 0 0 0
0 0 1 0 0
0 0 0 0.3 0″>
</feColorMatrix>

<!– Merge the shadow and the source image –>
<feMerge>
<feMergeNode in=”FINALHADOW”></feMergeNode>
<feMergeNode in=”SourceGraphic”></feMergeNode>
</feMerge>
</filter>

And this is our live demo:

See the Pen Drop Shadow: Translucent shadow with feColorMatrix by Sara Soueidan (@SaraSoueidan) on CodePen.light

Final Words

In this series, I will try to steer away from the very technical definitions of filter operations and stick to simplified and friendly definitions. Often, you don’t need to get into the gnarly little details of what happens under the hood, so getting into those details would only add to the complexity of the articles, possibly make them less digestible, and would bring little benefit. Understanding what a filter does and how to use it is more than enough, in my opinion, to take advantage of what it has to offer. If you do want to get into more details, I recommend consulting the specification to start. That said, the spec may prove to be of little help, so you’ll probably end up doing your own research on the side. I’ll provide a list of excellent resources for further learning in the final article of this series.

Now that we’ve covered the basics of SVG filters and how to create and apply one, we will look into more examples of effects using more filter primitives in the upcoming articles. Stay tuned.

SVG Filters 101 was written by Sara Soueidan and published on Codrops.

10 Free Barebones Starter Templates for Bootstrap

Original Source: http://feedproxy.google.com/~r/1stwebdesigner/~3/rNWSzoqZRYw/

The Bootstrap framework is quite popular with web designers. It provides everything you need to get a design project off to a running start. Plus, it’s been created with mobile devices in mind.

On the downside, it seems like many sites using Bootstrap tend to have a similar look and layout. But that is more of a product of taking design shortcuts rather than an indictment on the framework itself. Going beyond the default styles is quite possible and much easier than you may think.

With that in mind, we went on a search for free Bootstrap templates that lean toward the barebones end of the spectrum. They offer a virtual clean slate and give you the power to customize both the look and layout as much as you’d like. So, instead of ripping apart an existing design, you can get straight to making your own mark.

All the Bootstrap Templates You Could Ask For


2M+ items from the worlds largest marketplace for Bootstrap Templates, Themes & Design Assets. All of it can be found at Envato Market.

DOWNLOAD NOW

Bare

Bare is designed to help you get started without any fuss. There are no fancy styles applied and it comes with predefined paths. The template works with Bootstrap 4 and sports a fixed top navigation.

Bare bootstrap template

Simplex

Touted as both “Mini and Minimalist”, Simplex contains some basic styles that will provide you with a great starting point. You’ll find minimal navigation, buttons, typography, forms, containers and more goodies within this lightweight package.

Simplex bootstrap template

Understrap

Understrap is a clever mix of Automattic’s Underscores barebones WordPress theme and Bootstrap. Thus, your next WordPress project can utilize Bootstrap without the excess bloat of a prebuilt theme. Understrap features Bootstrap 4, is compatible with the WordPress Customizer and supports WooCommerce.

Understrap bootstrap template

Initializr

Initializr will generate a simple HTML template based on your requirements. Bootstrap 3.3.1 can be bundled right in with your template.

Initializr bootstrap template

Bootply

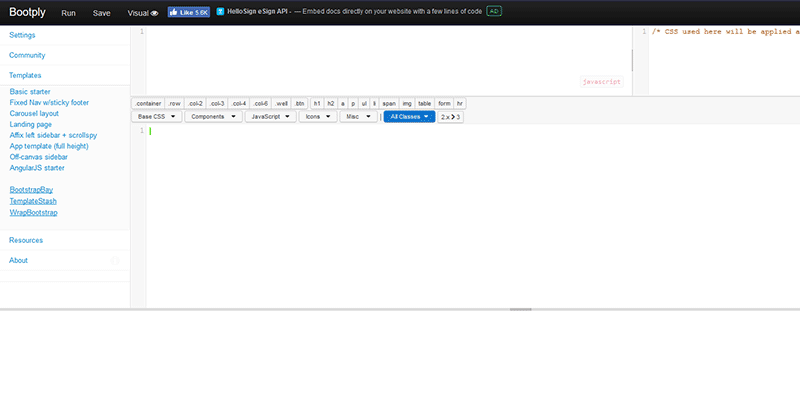
Use Bootply to build your own custom Boostrap starter template. Using their online builder, you can make things as simple (or complex) as you’d like. There are options for different layouts, various sidebars (including off-canvas) and more.

Bootply bootstrap template

WP Bootstrap Starter

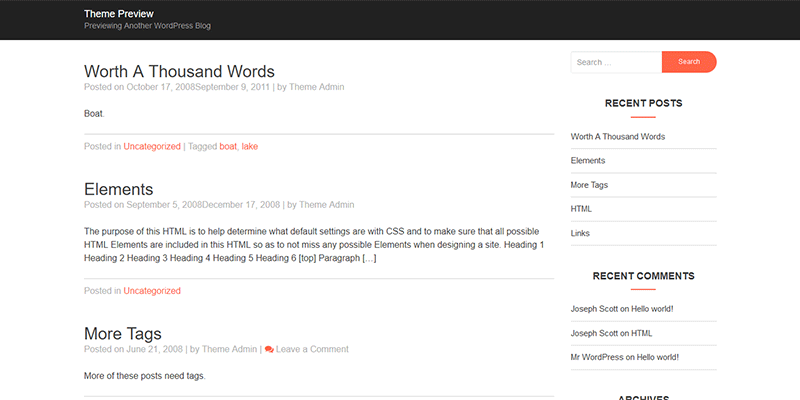
WP Bootstrap Starter is aimed at developers who want to build upon basic features to make their own custom theme. Like Understrap above, it’s based on Underscores. That means it’s lightweight and ready for full-on customization.

WP Bootstrap Starter bootstrap template

LayoutIt!

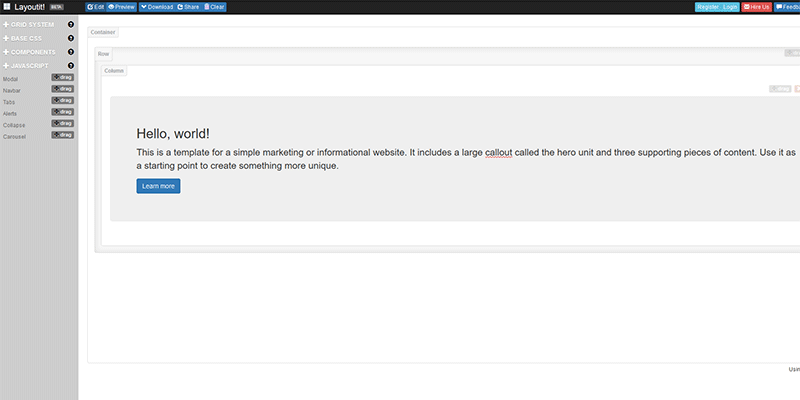
LayoutIt! is a tool featuring a drag-and-drop interface for quickly building Bootstrap-based templates. There are three base templates to choose from (Starter, Basic Marketing Site and Article). Once you’ve selected a template, you’ll be able to add elements such as grids, components and even JavaScript. You can have a basic, yet functional template set up within minutes.

LayoutIt! bootstrap template

Sage

A competitor to Undesrcores, Sage is a WordPress starter theme that comes with Bootstrap baked right in. The theme features task automation via gulp, and the ability to easily add front-end packages via Bower. Template markup is based on HTML5 Boilerplate.

Sage bootstrap template

Bootstrap 4 Starter Template

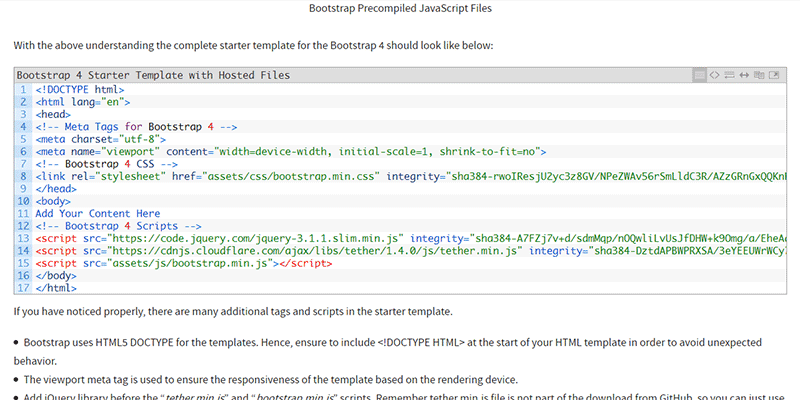
If you’re looking for dead simple way to start off a new site, WebNots has put together their own Bootstrap 4 Starter Template. Not only can you grab a copy of their template, there is also a handy guide for building your own.

Bootstrap 4 Starter Template bootstrap template

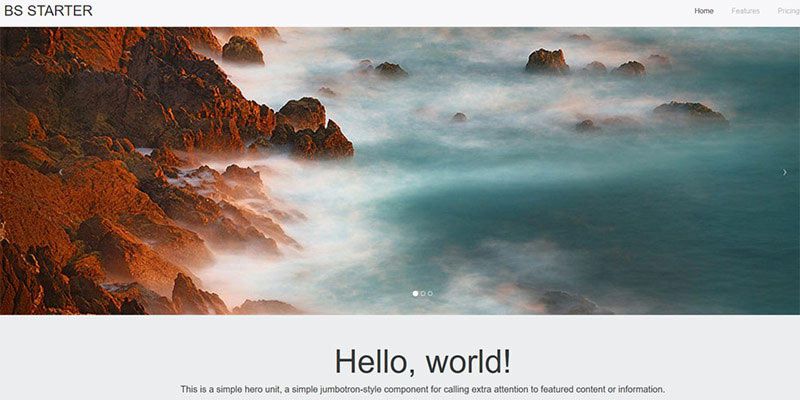
BS Starter

BS Starter provides the basics you’ll need to get up and running with your design project. The template features a full-width slider and is minimally styled. It gives you just enough to help you create your own look and layout.

BS Starter bootstrap template

Give Complex Templates the Boot

When embarking on a new project, you’re better off using a starter Bootstrap template that lets you make all of the important design decisions. That’s where these minimal and barebones options really shine. Instead of having a Bootstrap-based theme that simply looks like everyone else, you’ll have the flexibility to use the framework to create something unique.

You might also like these Free Bootstrap Dashboard Admin Templates.


11 Podcasts Every Web Designer Should Listen To

Original Source: http://feedproxy.google.com/~r/1stwebdesigner/~3/Qau0JH4s6LA/

Are you looking to get a glimpse into the world of web design? Podcasts, like an online talk show, are a wonderful way to examine a new perspective from the more experienced. Tips, insights and interviews are what they’re are all about, along with thoughtful discussion.

When you have a lot of downtime, such as when you’re driving or even working, fill the silence with one of these podcasts! You might learn something new, or at least be entertained by the stories and interesting hosts.

Boagworld

Boagworld

This fun podcast has been in business since 2005. It discusses all sorts of interesting web design topics, and is made with both beginners and veteran designers in mind. You can listen on the website or on a variety of other platforms including Spotify and Google Play.

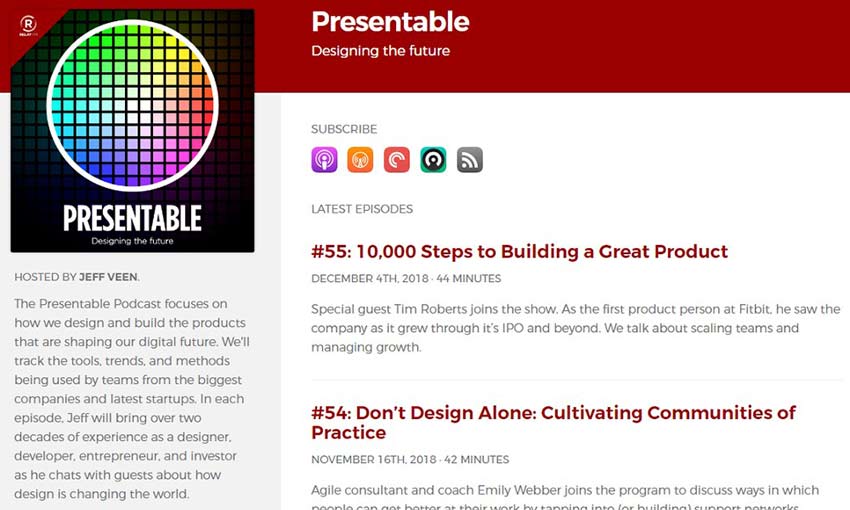
Presentable

Presentable

A 40-minute podcast is perfect for those quick breaks, and you can listen to a designer who’s been in the business for 20+ years talk to all sorts of guests. Learn how to become a successful designer!

ShopTalk

ShopTalk

This two-person podcast is great for both aspiring and established web designers and developers. ShopTalk is usually an hour long and it’s just packed with helpful tips. On the website you can jump to certain points in the podcast, download the file, or even ask them a question!

The Web Ahead

The Web Ahead

Though it’s retired, plenty of valuable episodes remain in this podcast. The Web Ahead focused on bringing in experts in the internet from around the world. While some content may become outdated, this remains a timeless source of advice for those who work online.

The Changelog

The Changelog

Want to keep up with trends in web development? Coding languages, programs and everything open source is what this podcast is all about. Many episodes feature three people, so this is definitely a lively one.

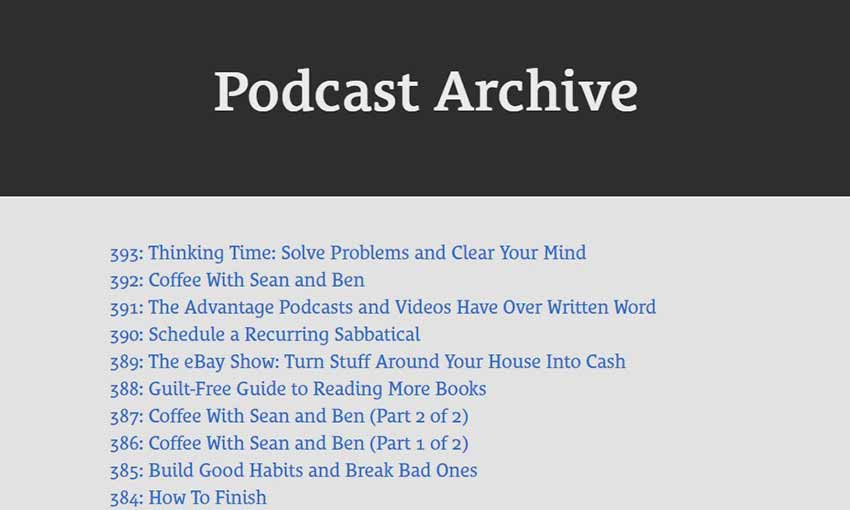
Seanwes

Seanwes

Though not focused on design, this huge archive is a wonderful resource for freelancers of all stripes. Knowing how to run a small business is essential, and there’s hundreds of episodes to listen to here. Pick a topic you like and listen up!

Hacking UI

Hacking UI

The designer-developer duo is here to talk about those topics, as well as a mish-mash of other info that every freelancer wants to hear. Want to blog, start a business, or keep up with technology? Hacking UI is perfect!

The Big Web Show

The Big Web Show

This is a great one for designers in particular, offering advice on art, content and technology. Each episode usually features a skilled guest – often an experienced designer or developer in their field. Most run at just under or over an hour.

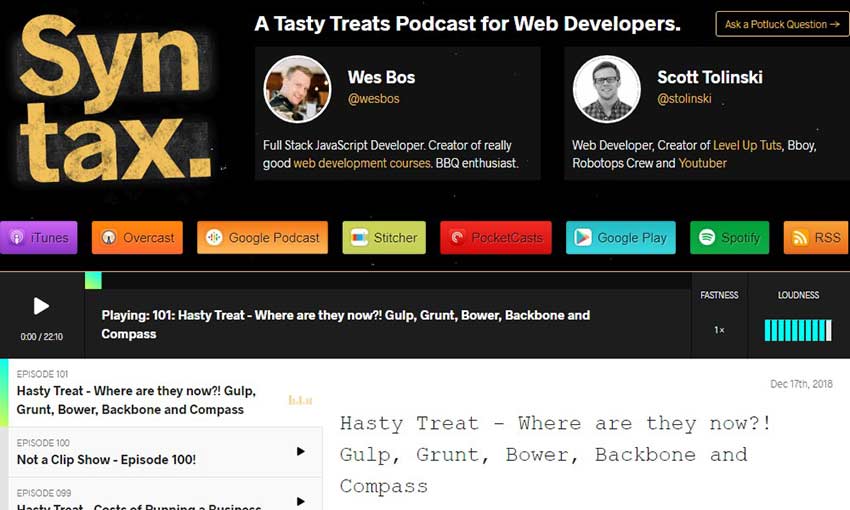
Syntax

Syntax

Made for developers, Syntax covers a variety of broad topics including programming languages, design standards and even life tips. There are also shorter “Hasty Treat” episodes for when you’re low on time.

Unfinished Business

Unfinished Business

Entertaining and funny, Unfinished Business goes over a variety of topics with a focus on design and the internet. Everything from dealing with unruly clients to mental health issues in the design industry is covered here.

Responsive Web Design

Responsive Web Design

Here’s a podcast with a strong niche: Interviewing people at the head of making the web more responsive. The internet is becoming more dynamic and mobile-friendly, and the hosts of RWD will teach you how to stay ahead.

Another Viewpoint

Everyone has a unique way of learning. Some do best with lots of reading and research, while others can only learn by experience. Many do best simply by listening and absorbing information.

If you’d love to listen to web designers talk about their experiences and offer advice, try out one of these podcasts! They can offer an enlightening extra perspective into the world of design and development.


Does Your App Include Open Source Components? 5 Security Tips

Original Source: https://www.sitepoint.com/does-your-app-include-open-source-components-5-security-tips/

A modern web application is bundled with tons of open-source dependencies. Developers are usually unaware of the number of open-source packages that's running under their package's hood. If you've ever wondered why your node_modules were so large, well that's why!

Contrary to popular belief, open-source components and dependencies are not more secure than their proprietary counterpart. Sure, there's a fleet of developers who volunteer to maintain certain repositories and that's great! However, the mere fact that lots of people use something doesn't make it more secure.

Add to this the issues around obsolete and abandoned packages. They're still popular amongst developers, but no longer maintained by anyone. In certain other cases, the developers are at fault by not prioritizing security updates. It becomes clear that protecting an organization's applications on a daily basis has now become a crucial necessity for survival in the market.

As you might already know, layered security is imperative and crucial. No one layer or program can withstand the numerous attacks from the unknowns of the dark web. Therefore, once organizations follow some of these best practices, they should be empowered to implement a robust strategy for a secure environment around their business-critical applications.

Package Your Components in a Container

The first stage in securing your applications is to ensure that they are sheltered within a Docker-like container. The inbuilt security of a container, along with its default configurations render a much stronger security posture. Applications that reside within settings such as this automatically inherit the same security guidelines. Furthermore, you can limit the damage your open source dependencies and APIs can do by running your app inside a container.

To make matters simpler, containers can be understood to be a protective shield of sorts. They isolate an application from the host computer as well as other containers. This helps to inhibit any vulnerabilities as well as any malicious use of the software.

The post Does Your App Include Open Source Components? 5 Security Tips appeared first on SitePoint.

3 Best Mobile Apps to Earn Some Extra Income

Original Source: https://www.hongkiat.com/blog/cash-rewarding-mobile-apps/

Most apps require you to spend money, but did you know there are apps that could help earn money instead? That’s right, doing some simple tasks like completing surveys and offers or even just…

Visit hongkiat.com for full content.

Powerful Image Analysis With Google Cloud Vision And Python

Original Source: https://www.smashingmagazine.com/2019/01/powerful-image-analysis-google-cloud-vision-python/

Powerful Image Analysis With Google Cloud Vision And Python

Powerful Image Analysis With Google Cloud Vision And Python

Bartosz Biskupski

2019-01-09T13:45:32+01:00
2019-01-09T17:16:57+00:00

Quite recently, I’ve built a web app to manage user’s personal expenses. Its main features are to scan shopping receipts and extract data for further processing. Google Vision API turned out to be a great tool to get a text from a photo. In this article, I will guide you through the development process with Python in a sample project.

If you’re a novice, don’t worry. You will only need a very basic knowledge of this programming language — with no other skills required.

Let’s get started, shall we?

Never Heard Of Google Cloud Vision?

It’s an API that allows developers to analyze the content of an image through extracted data. For this purpose, Google utilizes machine learning models trained on a large dataset of images. All of that is available with a single API request. The engine behind the API classifies images, detects objects, people’s faces, and recognizes printed words within images.

To give you an example, let’s bring up the well-liked Giphy. They’ve adopted the API to extract caption data from GIFs, what resulted in significant improvement in user experience. Another example is realtor.com, which uses the Vision API’s OCR to extract text from images of For Sale signs taken on a mobile app to provide more details on the property.

Machine Learning At A Glance

Let’s start with answering the question many of you have probably heard before — what is the Machine Learning?

The broad idea is to develop a programmable model that finds patterns in the data its given. The higher quality data you deliver and the better the design of the model you use, the smarter outcome will be produced. With ‘friendly machine learning’ (as Google calls their Machine Learning through API services), you can easily incorporate a chunk of Artificial Intelligence into your applications.

Recommended reading: Getting Started With Machine Learning

Ahoy! The hunt for shiny front-end & UX treasures has begun! Meet SmashingConf San Francisco 2019 ?? — a friendly conference on performance, refactoring, interface design patterns, animation and all the CSS/JS malarkey. Brad Frost, Sara Soueidan, Miriam Suzanne, Chris Coyier and many others. April 16–17. You can easily convince your boss, you know.

Check the speakers ↬

Smashing Cat, just preparing to do some magic stuff.

How To Get Started With Google Cloud

Let’s start with the registration to Google Cloud. Google requires authentication, but it’s simple and painless — you’ll only need to store a JSON file that’s including API key, which you can get directly from the Google Cloud Platform.

Download the file and add it’s path to environment variables:

export GOOGLE_APPLICATION_CREDENTIALS=/path/to/your/apikey.json

Alternatively, in development, you can support yourself with the from_serivce_account_json() method, which I’ll describe further in this article. To learn more about authentication, check out Cloud’s official documentation.

Google provides a Python package to deal with the API. Let’s add the latest version of google-cloud-vision==0.33 to your app. Time to code!

How To Combine Google Cloud Vision With Python

Firstly, let’s import classes from the library.

from google.cloud import vision
from google.cloud.vision import types

When that’s taken care of, now you’ll need an instance of a client. To do so, you’re going to use a text recognition feature.

client = vision.ImageAnnotatorClient()

If you won’t store your credentials in environment variables, at this stage you can add it directly to the client.

client = vision.ImageAnnotatorClient.from_service_account_file(
‘/path/to/apikey.json’
)

Assuming that you store images to be processed in a folder ‘images’ inside your project catalog, let’s open one of them.

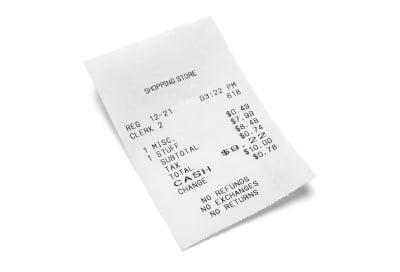
Image of receipt that could be processed by Google Cloud Vision

An example of a simple receipt that could be processed by Google Cloud Vision. (Large preview)

image_to_open = ‘images/receipt.jpg’

with open(image_to_open, ‘rb’) as image_file:
content = image_file.read()

Next step is to create a Vision object, which will allow you to send a request to proceed with text recognition.

image = vision.types.Image(content=content)

text_response = client.text_detection(image=image)

The response consists of detected words stored as description keys, their location on the image, and a language prediction. For example, let’s take a closer look at the first word:

[

description: “SHOPPING”
bounding_poly {
vertices {
x: 1327
y: 1513
}
vertices {
x: 1789
y: 1345
}
vertices {
x: 1821
y: 1432
}
vertices {
x: 1359
y: 1600
}
}

]

As you can see, to filter text only, you need to get a description “on all the elements”. Luckily, with help comes Python’s powerful list comprehension.

texts = [text.description for text in text_response.text_annotations]

[‘SHOPPING STOREnREG 12-21n03:22 PMnCLERK 2n618n1 MISCn1 STUFFn$0.49n$7.99n$8.48n$0.74nSUBTOTALnTAXnTOTALnCASHn6n$9. 22n$10.00nCHANGEn$0.78nNO REFUNDSnNO EXCHANGESnNO RETURNSn’, ‘SHOPPING’, ‘STORE’, ‘REG’, ’12-21′, ’03:22′, ‘PM’, ‘CLERK’, ‘2’, ‘618’, ‘1’, ‘MISC’, ‘1’, ‘STUFF’, ‘$0.49’, ‘$7.99’, ‘$8.48’, ‘$0.74’, ‘SUBTOTAL’, ‘TAX’, ‘TOTAL’, ‘CASH’, ‘6’, ‘$9.’, ’22’, ‘$10.00’, ‘CHANGE’, ‘$0.78’, ‘NO’, ‘REFUNDS’, ‘NO’, ‘EXCHANGES’, ‘NO’, ‘RETURNS’]

If you look carefully, you can notice that the first element of the list contains all text detected in the image stored as a string, while the others are separated words. Let’s print it out.

print(texts[0])

SHOPPING STORE
REG 12-21
03:22 PM
CLERK 2
618
1 MISC
1 STUFF
$0.49
$7.99
$8.48
$0.74
SUBTOTAL
TAX
TOTAL
CASH
6
$9. 22
$10.00
CHANGE
$0.78
NO REFUNDS
NO EXCHANGES
NO RETURNS

Pretty accurate, right? And obviously quite useful, so let’s play more.

What Can You Get From Google Cloud Vision?

As I’ve mentioned above, Google Cloud Vision it’s not only about recognizing text, but also it lets you discover faces, landmarks, image properties, and web connections. With that in mind, let’s find out what it can tell you about web associations of the image.

web_response = client.web_detection(image=image)

Okay Google, do you actually know what is shown on the image you received?

web_content = web_response.web_detection
web_content.best_guess_labels
>>> [label: “Receipt”]

Good job, Google! It’s a receipt indeed. But let’s give you a bit more exercise — can you see anything else? How about more predictions expressed in percentage?

predictions = [
(entity.description, ‘{:.2%}’.format(entity.score))) for entity in web_content.web_entities
]

>>> [(‘Receipt’, ‘70.26%’), (‘Product design’, ‘64.24%’), (‘Money’, ‘56.54%’), (‘Shopping’, ‘55.86%’), (‘Design’, ‘54.62%’), (‘Brand’, ‘54.01%’), (‘Font’, ‘53.20%’), (‘Product’, ‘51.55%’), (‘Image’, ‘38.82%’)]

Lots of valuable insights, well done, my almighty friend! Can you also find out where the image comes from and whether it has any copies?

web_content.full_matching_images
>>> [
url: “http://www.rcapitalassociates.com/wp-content/uploads/2018/03/receipts.jpg”,
url:”https://media.istockphoto.com/photos/shopping-receipt-picture-id901964616?k=6&m=901964616&s=612×612&w=0&h=RmFpYy9uDazil1H9aXkkrAOlCb0lQ-bHaFpdpl76o9A=”,
url: “https://www.pakstat.com.au/site/assets/files/1172/shutterstock_573065707.500×500.jpg”
]

I’m impressed. Thanks, Google! But one is not enough, can you please give me three examples of similar images?

web_content.visually_similar_images[:3]
>>>[
url: “https://thumbs.dreamstime.com/z/shopping-receipt-paper-sales-isolated-white-background-85651861.jpg”,
url: “https://thumbs.dreamstime.com/b/grocery-receipt-23403878.jpg”,
url:”https://image.shutterstock.com/image-photo/closeup-grocery-shopping-receipt-260nw-95237158.jpg”
]

Sweet! Well done.

Is There Really An Artificial Intelligence In Google Cloud Vision?

As you can see in the image below, dealing with receipts can get a bit emotional.

Man screaming and looking stressed while holding a long receipt

An example of stress you can experience while getting a receipt. (Large preview)

Let’s have a look at what the Vision API can tell you about this photo.

image_to_open = ‘images/face.jpg’

with open(image_to_open, ‘rb’) as image_file:
content = image_file.read()
image = vision.types.Image(content=content)

face_response = client.face_detection(image=image)
face_content = face_response.face_annotations

face_content[0].detection_confidence
>>> 0.5153166651725769

Not too bad, the algorithm is more than 50% sure that there is a face in the picture. But can you learn anything about the emotions behind it?

face_content[0]
>>> [

joy_likelihood: VERY_UNLIKELY
sorrow_likelihood: VERY_UNLIKELY
anger_likelihood: UNLIKELY
surprise_likelihood: POSSIBLE
under_exposed_likelihood: VERY_UNLIKELY
blurred_likelihood: VERY_UNLIKELY
headwear_likelihood: VERY_UNLIKELY

]

Surprisingly, with a simple command, you can check the likeliness of some basic emotions as well as headwear or photo properties.

When it comes to the detection of faces, I need to direct your attention to some of the potential issues you may encounter. You need to remember that you’re handing a photo over to a machine and although Google’s API utilizes models trained on huge datasets, it’s possible that it will return some unexpected and misleading results. Online you can find photos showing how easily artificial intelligence can be tricked when it comes to image analysis. Some of them can be found funny, but there is a fine line between innocent and offensive mistakes, especially when a mistake concerns a human face.

With no doubt, Google Cloud Vision is a robust tool. Moreover, it’s fun to work with. API’s REST architecture and the widely available Python package make it even more accessible for everyone, regardless of how advanced you are in Python development. Just imagine how significantly you can improve your app by utilizing its capabilities!

Recommended reading: Applications Of Machine Learning For Designers

How Can You Broaden Your Knowledge On Google Cloud Vision

The scope of possibilities to apply Google Cloud Vision service is practically endless. With Python Library available, you can utilize it in any project based on the language, whether it’s a web application or a scientific project. It can certainly help you bring out deeper interest in Machine Learning technologies.

Google documentation provides some great ideas on how to apply the Vision API features in practice as well as gives you the possibility to learn more about the Machine Learning. I especially recommend to check out the guide on how to build an advanced image search app.

One could say that what you’ve seen in this article is like magic. After all, who would’ve thought that a simple and easily accessible API is backed by such a powerful, scientific tool? All that’s left to do is write a few lines of code, unwind your imagination, and experience the boundless potential of image analysis.

Smashing Editorial
(rb, ra, il)

Popular Design News of the Week: December 31, 2018 – January 6, 2019

Original Source: https://www.webdesignerdepot.com/2019/01/popular-design-news-of-the-week-december-31-2018-january-6-2019/

Every week users submit a lot of interesting stuff on our sister site Webdesigner News, highlighting great content from around the web that can be of interest to web designers. 

The best way to keep track of all the great stories and news being posted is simply to check out the Webdesigner News site, however, in case you missed some here’s a quick and useful compilation of the most popular designer news that we curated from the past week.

Note that this is only a very small selection of the links that were posted, so don’t miss out and subscribe to our newsletter and follow the site daily for all the news.

8 Undoubtably True Predictions for UX in 2019


Design Style Guides to Learn from in 2019


A Collection of Great UI Designs


Site Design: Coding is Fun!


8 Examples of How to Effectively Break Out of the Grid


The 15 Coolest Interfaces of the Year


4 Useless Things You Shouldn’t Have Put in your Design Portfolio


Meet Twill: An Open Source CMS Toolkit for Laravel


The Grumpy Designer’s Bold Predictions for 2019


This is not User Experience


Branding Design – What You Need to Know Before Creating a Brand Identity


The Year that Was: 2018 in Web Design


Flat Design Vs. Traditional Design: Comparative Experimental Study


Users Don’t Read


Writing Copy for Landing Pages


The Elements of UI Engineering


Motion Design Looks Hard, but it Doesn’t Have to Be


Merge by UXPin


Responsive Design, and the Role of Development in Design


Material Design Colors Listed


Designing a Great User Onboarding Experience


How to Name UI Components


Is Design Valuable?


40+ Best Bootstrap Admin Templates of 2019


UI Design: Look Back at 12 Top Interface Design Trends in 2018


Want more? No problem! Keep track of top design news from around the web with Webdesigner News.

Add Realistic Chalk and Sketch Lettering Effects with Sketch’it – only $5!

Source

p img {display:inline-block; margin-right:10px;}
.alignleft {float:left;}
p.showcase {clear:both;}
body#browserfriendly p, body#podcast p, div#emailbody p{margin:0;}

How To Design Search For Your Mobile App

Original Source: https://www.smashingmagazine.com/2019/01/design-search-mobile-app/

How To Design Search For Your Mobile App

How To Design Search For Your Mobile App

Suzanne Scacca

2019-01-08T14:00:40+01:00
2019-01-08T17:46:05+00:00

Why is Google the search behemoth it is today? Part of the reason is because of how it’s transformed our ability to search for answers.
Think about something as simple as looking up the definition of a word. 20 years ago, you would’ve had to pull your dictionary off the shelf to find an answer to your query. Now, you open your phone or turn on your computer, type or speak the word, and get an answer in no time at all and with little effort on your part.

This form of digital shortcutting doesn’t just exist on search engines like Google. Mobile apps now have self-contained search functions as well.

Is a search bar even necessary in a mobile app interface or is it overkill? Let’s take a look at why the search bar element is important for the mobile app experience. Then, we’ll look at a number of ways to design search based on the context of the query and the function of the app.

Using The Web With A Screen Reader

Did you know that VoiceOver makes up 11.7% of desktop screen reader users and rises to 69% of screen reader users on mobile? It’s important to know what sort of first-hand difficulties visually impaired users face and what web developers can do to help. Read article →

Our new book, in which Alla Kholmatova explores
how to create effective and maintainable design systems to design great digital products. Meet Design Systems, with common traps, gotchas and the lessons Alla has learned over the years.

Table of Contents →

Mobile App Search Is Non-Negotiable

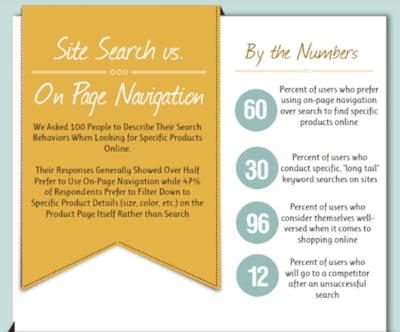
The search bar has been a standard part of websites for years, but statistics show that it isn’t always viewed as a necessity by users. This data from Neil Patel and Kissmetrics focuses on the perception and usage of the search bar on e-commerce websites:

Kissmetrics site search infographic

Data from a Kissmetrics infographic about site search. (Source: Kissmetrics) (Large preview)
As you can see, 60% of surveyed users prefer using navigation instead of search while 47% opt for filterable “search” over regular search functionality.

On a desktop website, this makes sense. When a menu is well-designed and well-labeled — no matter how extensive it may be — it’s quite easy to use. Add to that advanced filtering options, and I can see why website visitors would prefer that to search.

But mobile app users are a different breed. They go to mobile apps for different reasons than they do websites. In sum, they want a faster, concentrated, and more convenient experience. However, since smartphone screens have limited space, it’s not really feasible to include an expansive menu or set of filters to aid in the navigation of an app.

This is why mobile apps need a search bar.

You’re going to find a lot of use for search in mobile apps:

Content-driven apps like newspapers, publishing platforms, and blogs;
e-Commerce shops with large inventories and categorization of those inventories;
Productivity apps that contain documents, calendars, and other searchable records;
Listing sites that connect users to the right hotel, restaurant, itinerary, item for sale, apartment for rent, and so on;
Dating and networking apps that connect users with vast quantities of “matches”.

There are plenty more reasons why you’d need to use a search bar on your mobile app, but I’m going to let the examples below speak for themselves.

Ways To Design Search For Your Mobile App

I’m going to break down this next section into two categories:

How to design the physical search element in your mobile app,
How to design the search bar and its results within the context of the app.

1. Designing The Physical Search Element

There are a number of points to consider when it comes to the physical presence of your app search element:

Top Or Bottom?

Shashank Sahay explains why there are two places where the search element appears on a mobile app:

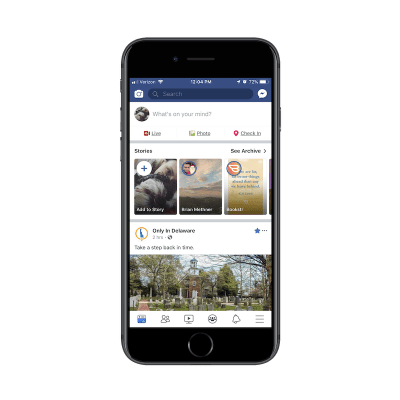
1. Full-width bar at the top of the app.
This is for apps that are driven by search. Most of the time, users open the app with the express purpose of conducting a search.

Facebook app search

Facebook prioritizes app search by placing it at the top. (Source: Facebook) (Large preview)

Facebook is a good example. Although Facebook users most likely do engage with the news feed in the app, I have a sneaking suspicion that Facebook’s data indicates that the search function is more commonly engaged with — at least in terms of first steps. Hence, why it’s placed at the top of the app.

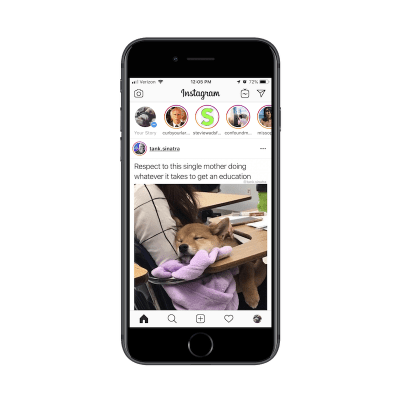
2. A tab in the bottom-aligned navigation bar.
This is for apps that utilize search as an enhancement to the primary experience of using the app’s main features.

Let’s contrast Facebook against one of its sister properties: Instagram. Unlike Facebook, Instagram is a very simple social media app. Users follow other accounts and get glimpses into the content they share through full-screen story updates as well as from inside their endless-scroll news feed.

Instagram app search

Instagram places its search function in the bottom navigation bar. (Source: Instagram) (Large preview)

With that said, the search function does exist in the navigation bar so that users can look up other accounts to peruse through or follow.

As far as this basic breakdown goes, Sahay is right about how placement of search correlates with intention. But the designing of the search element goes beyond just where it’s placed on the app.

Shallow Or Deep?

There will be times when a mobile app would benefit from a search function deep within the app experience.

You’ll see this sort of thing quite often in e-commerce apps like Bed Bath & Beyond:

Bed Bath & Beyond app search

Bed Bath & Beyond uses deep search to help users find nearby stores (Source: Bed Bath & Beyond) (Large preview)

In this example, this search function exists outside of the standard product search on the main landing page. Results for this kind of search are also displayed in a unique way which is reflective of the purpose of the search:

Bed Bath & Beyond map search results

Bed Bath & Beyond displays search results on a map. (Source: Bed Bath & Beyond) (Large preview)

There are other ways you use might need to use “deep” search functions on e-commerce apps.

Think about stores that have loads of comments attached to each product. If your users want to zero in on what other consumers had to say about a product (for example, if a camping tent is waterproof), the search function would help them quickly get to reviews containing specific keywords.

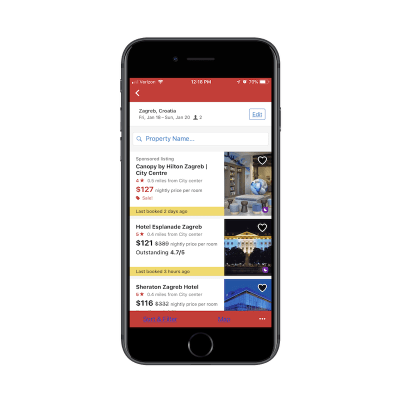
You’ll also see deep searches planted within travel and entertainment apps like Hotels.com:

Hotels.com app search

Hotels.com includes a deep search to narrow down results by property name. (Source: Hotels.com) (Large preview)

You’re all probably familiar with the basic search function that goes with any travel-related app. You enter the details of your trip and it pulls up the most relevant results in a list or map format. That’s what this screenshot is of.

However, see where it says “Property Name” next to the magnifying glass? This is a search function within a search function. And the only things users can search for here are actual hotel property names.

Bar, Tab, Or Magnifying Glass?

This brings me to my next design point: how to know which design element to represent the search function with.

You’ve already seen clear reasons to use a full search bar over placing a tab in the navigation bar. But how about a miniaturized magnifying glass?

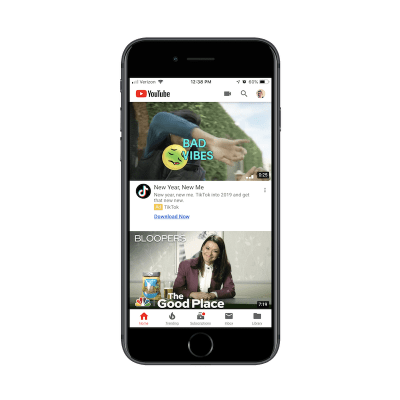
Here’s an example of how this is used in the YouTube mobile app:

YouTube app search icon

YouTube uses a magnifying glass to represent its search function. (Source: YouTube) (Large preview)

The way I see it, the magnifying glass is the search design element you’d use when:

One of the primary reasons users come to the app is to do a search,
And it competes against another primary use case.

In this case, YouTube needs the mini-magnifying glass because it serves two types of users:

Users that come to the app to search for videos.
Users that come to the app to upload their own videos.

To conserve space, links to both exist within the header of the YouTube app. If you have competing priorities within your app, consider doing the same.

“Search” Or Give A Hint?

One other thing to think about when designing search for mobile apps is the text inside the search box. To decide this, you have to ask yourself:

“Will my users know what sort of stuff they can look up with this search function?”

In most cases they will, but it might be best to include hint text inside the search bar just to make sure you’re not adding unnecessary friction. Here’s what I mean by that:

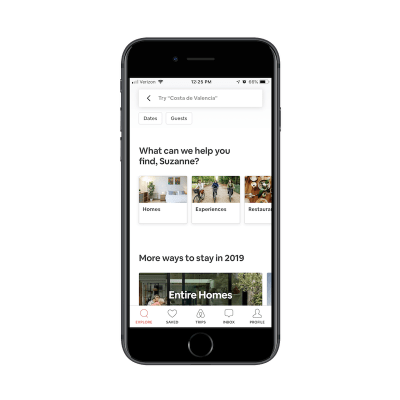
This is the app for Airbnb:

Airbnb app search text

Airbnb offers hint text to guide users to more accurate search results. (Source: Airbnb) (Large preview)

The search bar tells me to “Try ‘Costa de Valencia’”. It’s not necessarily an explicit suggestion. It’s more helping me figure out how I can use this search bar to research places to stay on an upcoming trip.

For users that are new to Airbnb, this would be a helpful tip. They might come to the site thinking it’s like Hotels.com that enables users to look up things like flights and car rentals. Airbnb, instead, is all about providing lodging and experiences, so this search text is a good way to guide users in the right direction and keep them from receiving a “Sorry, there are no results that match your query” response.

2. Designing The Search Bar And Results In Context

Figuring out where to place the search element is one point to consider. Now, you have to think about how to present the results to your mobile app users:

Simple Search

This is the most basic of the search functions you can offer. Users type their query into the search bar. Relevant results appear below. In other words, you leave it up to your users to know what they’re searching for and to enter it correctly.

When a relevant query is entered, you can provide results in a number of ways.

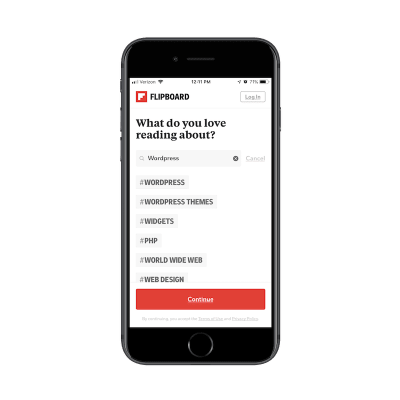
For an app like Flipboard, results are displayed as trending hashtags:

Flipboard app search results

Flipboard displays search results as a list of hashtags. (Source: Flipboard) (Large preview)

It’s not the most common way you’d see search results displayed, but it makes sense in this particular context. What users are searching for are categories of content they want to see in their feed. These hashtagged categories allow users to choose high-level topics that are the most relevant to them.

ESPN has a more traditional basic search function:

ESPN app search results

ESPN has designed its search results in a traditional list. (Source: ESPN) (Large preview)

As you can see, ESPN provides a list of results that contain the keyword. There’s nothing more to it than that though. As you’ll see in the following examples, you can program your app search to more closely guide users to the results they want to see.

Filtered Search

According to the aforementioned Kissmetrics survey, advanced filtering is a popular search method among website users. If your mobile app has a lot of content or a vast inventory of products, consider adding filters to the end of your search function to improve the experience further. Your users are already familiar with the search technique. Plus, it’ll save you the trouble of having to add advancements to the search functionality itself.

Yelp has a nice example of this:

Yelp app search filters

Yelp users have filter options available after doing a search. (Source: Yelp) (Large preview)

In the search above, I originally looked for restaurants in my “Current Location”. Among the various filters displayed, I decided to add “Order Delivery” to my query. My search query then became:

Restaurants > Current Location > Delivery

This is really no different than using breadcrumbs on a website. In this case, you let users do the initial work by entering a search query. Then, you give them filters that allow them to narrow down their search further.

Again, this is another way to reduce the chances that users will encounter the “No results” response to their query. Because filters correlate to actual categories and segmentations that exist within the app, you can ensure they end up with valid search results every time.

e-Commerce websites are another good use case for filters. Here is how Wayfair does this:

Wayfair app search filters

Wayfair includes filters in search to help users narrow down results. (Source: Wayfair) (Large preview)

Wayfair’s list of search results is fairly standard for an e-commerce marketplace. The number of items are displayed, followed by a grid of matching product images and summary details.

Here’s the thing though: Wayfair has a massive inventory. It’s the same with other online marketplaces like Amazon and Zappos. So, when you tell users that their search query produced 2,975 items, you need a way to mitigate some of the overwhelm that may come with that.

By placing the Sort and Filter buttons directly beside the search result total, you’re encouraging users to do a little more work on their search query to ensure they get the best and most relevant results.

Predictive Search

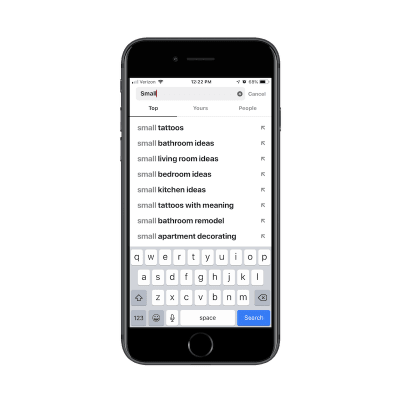
Autocomplete is something your users are already familiar with. For apps that contain lots of content, utilizing this type of search functionality could be majorly helpful to your users.

For one, they already know how it works and so they won’t be surprised when related query suggestions appear before them. In addition, autocomplete offers a sort of personalization. As you gather more data on a user as well as the kinds of searches they conduct, autocomplete anticipates their needs and provides a shortcut to the desired content.

Pinterest is a social media app that people use to aggregate content they’re interested in and to seek out inspiration for pretty much anything they’re doing in life:

Pinterest app search autocomplete

Pinterest anticipates users’ search queries and provides autocomplete shortcuts. (Source: Pinterest) (Large preview)

Take a look at the search results above. Can you tell what I’ve been thinking about lately? The first is how I’m going to decorate my new apartment. The second is my next tattoo. And despite only typing out the word “Small”, Pinterest immediately knew what’s been top-of-mind with me as of recent. That doesn’t necessarily mean I as a user came to the app with that specific intention today… but it’s nice to see that personalized touch as I engage with the search bar.

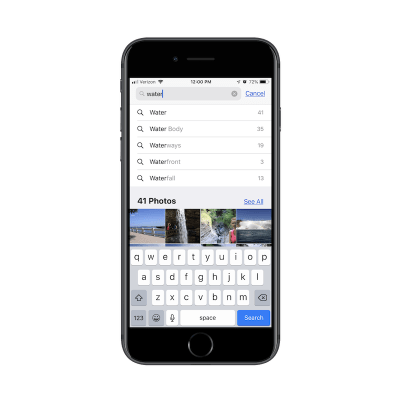
Another app I engage with a lot is the Apple Photos app:

Apple Photos app search

Apple Photos uses autocomplete to help users find the most relevant photos. (Source: Apple) (Large preview)

In addition to using it to store all of my personal photos, I use this on a regular basis to take screenshots for work (as I did in this article). As you can imagine, I have a lot of content saved to this app and it can be difficult finding what I need just by scrolling through my folders.

In the example above, I was trying to find a photo I had taken at Niagara Falls, but I couldn’t remember if I had labeled it as such. So, I typed in “water” and received some helpful autocomplete suggestions on “water”-related words as well as photos that fit the description.

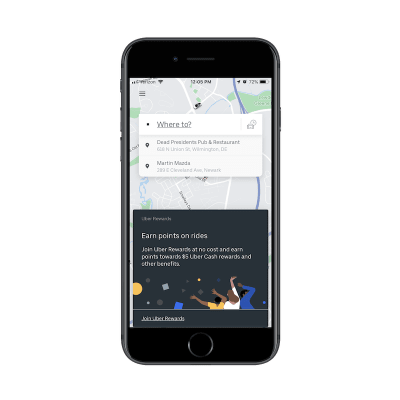
I would also put “Recent Search” results into this bucket. Here’s an example from Uber:

Uber app recent search results

Uber’s recent search results provide one-click shortcuts to repeat users. (Source: Uber) (Large preview)

Before I even had a chance to type my search query in the Uber app, it displays my most recent search queries for me.

I think this would be especially useful for people who use ride-sharing services on a regular basis. Think about professionals who work in a city. Rather than own a car, they use Uber to transport to and from their office as well as client appointments. By providing a shortcut to recent trips in search results, the Uber app cuts down the time they spend booking a trip.

If you have enough data on your users and you have a way to anticipate their needs, autocomplete is a fantastic way to personalize search and improve the overall experience.

Limited Search

I think this time savings point is an important one to remember when designing search for mobile apps.

Unlike websites where longer times-on-page matter, that’s not always the case with mobile apps. Unless you’ve built a gaming or news app where users should spend lots of time engaging with the app on a daily basis, it’s not usually the amount of time spent inside the app that matters.

Your goal in building a mobile app is to retain users over longer periods, which means providing a meaningful experience while they’re inside it. A well-thought-out search function will greatly contribute to this as it gets users immediately to what they want to see, even if it means they leave the app just a few seconds later.

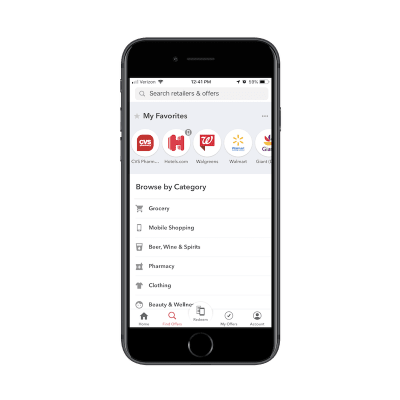
If you have an app that needs to get users in and out of it quickly, think about limiting search results as Ibotta has done:

Ibotta app search categories

Ibotta displays categories that users can search in. (Source: Ibotta) (Large preview)

While users certainly can enter any query they’d like, Ibotta makes it clear that the categories below are the only ones available to search from. This serves as both a reminder of what the app is capable of as well as a means for circumventing the search results that don’t matter to users.

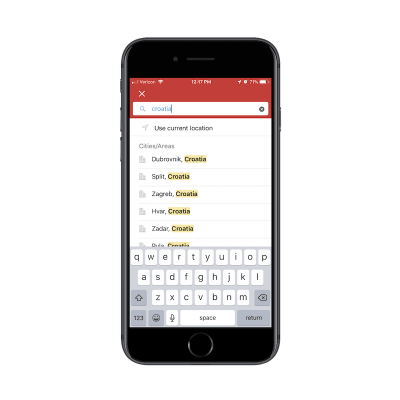
Hotels.com also places limits on its search function:

Hotels.com limiting search results

Hotels.com forces users to make a choice so they don’t end up with too many results. (Source: Hotels.com) (Large preview)

As you can see here, users can’t just look for hotels throughout the country of Croatia. It’s just too broad of a search and one that Hotels.com shouldn’t have to provide. For one, it’s probably too taxing on the Hotels.com server to execute a query of that nature. Plus, it would provide a terrible experience for users. Imagine how many hotels would show up in that list of results.

By reining in what your users can search for and the results they can see, you can improve the overall experience while shortening the time it takes them to convert.

Wrapping Up

As you can see here, a search bar isn’t some throwaway design element. When your app promises a speedy and convenient experience to its users, a search bar can cut down on the time they have to spend inside it. It can also make the app a more valuable resource as it doesn’t require much work or effort to get to the desired content.

Smashing Editorial
(ra, yk, il)

10 Things to Quit Doing in 2019

Original Source: https://www.hongkiat.com/blog/things-to-quit-doing-2019/

Read the word “quit” and I’m almost certain you’re already imagining me telling you to leave it all behind, to start anew, to forget the past and other similar sounding advice…

Visit hongkiat.com for full content.

Incredible Reinterpretations of Picasso in 3D using Cinema 4D and Octane

Original Source: http://feedproxy.google.com/~r/abduzeedo/~3/hrPG1jsyW4s/incredible-reinterpretations-picasso-3d-using-cinema-4d-and-octane

Incredible Reinterpretations of Picasso in 3D using Cinema 4D and Octane

abduzeedoJan 08, 2019

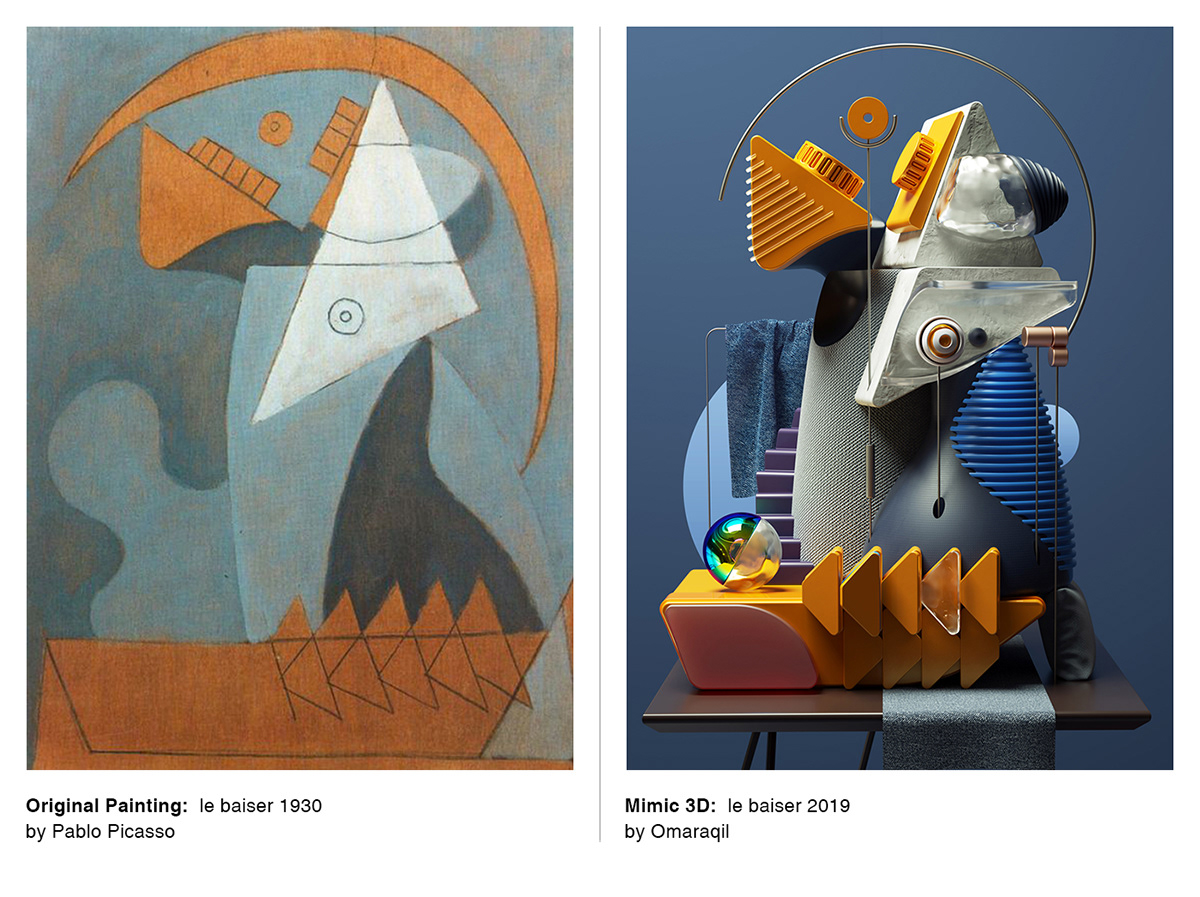
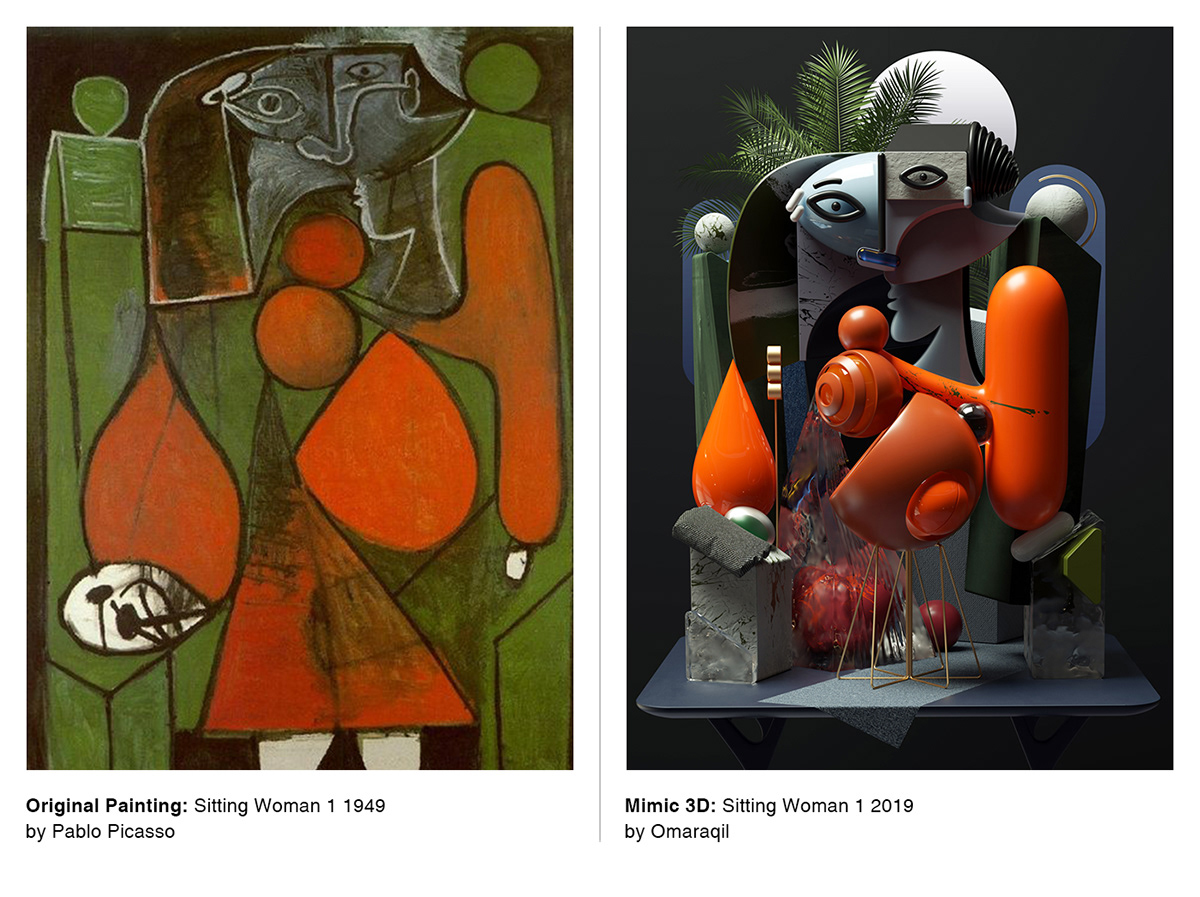
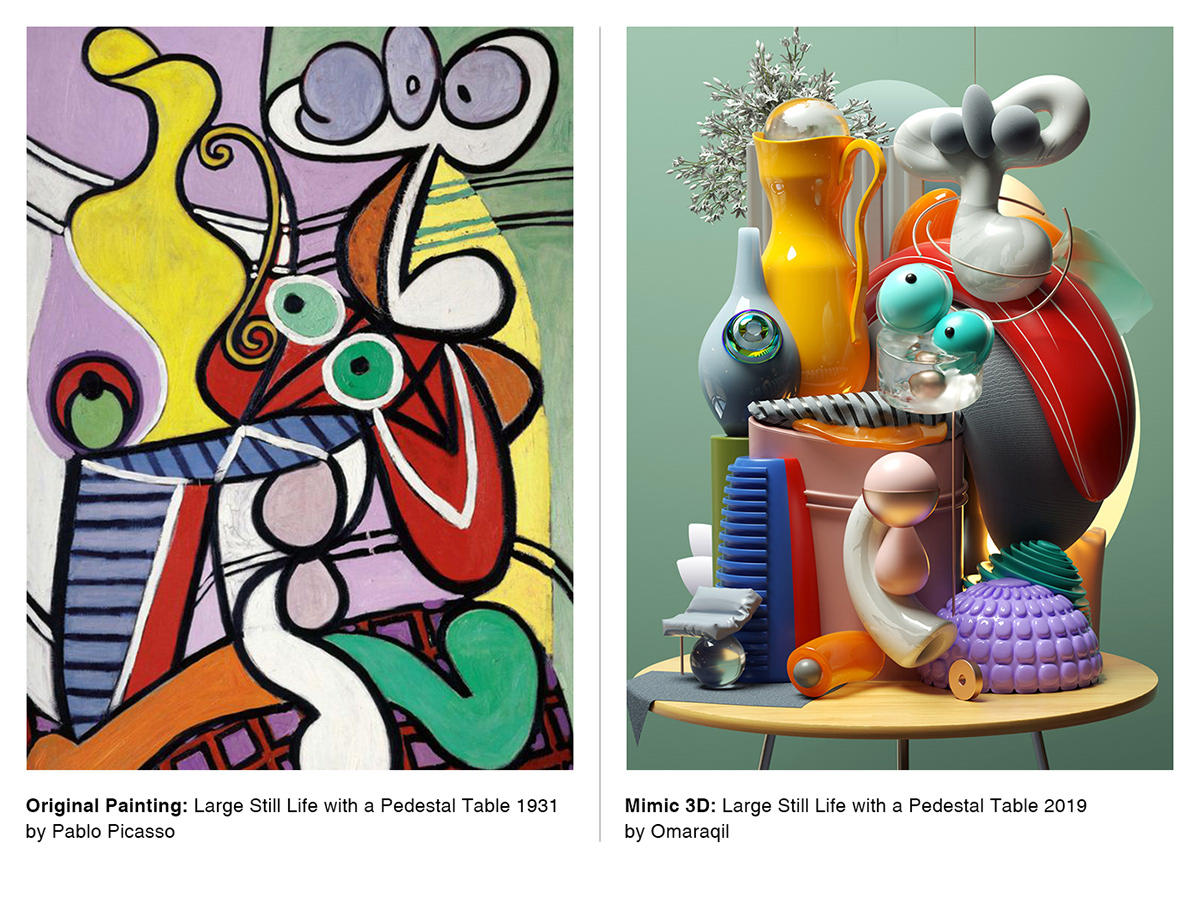
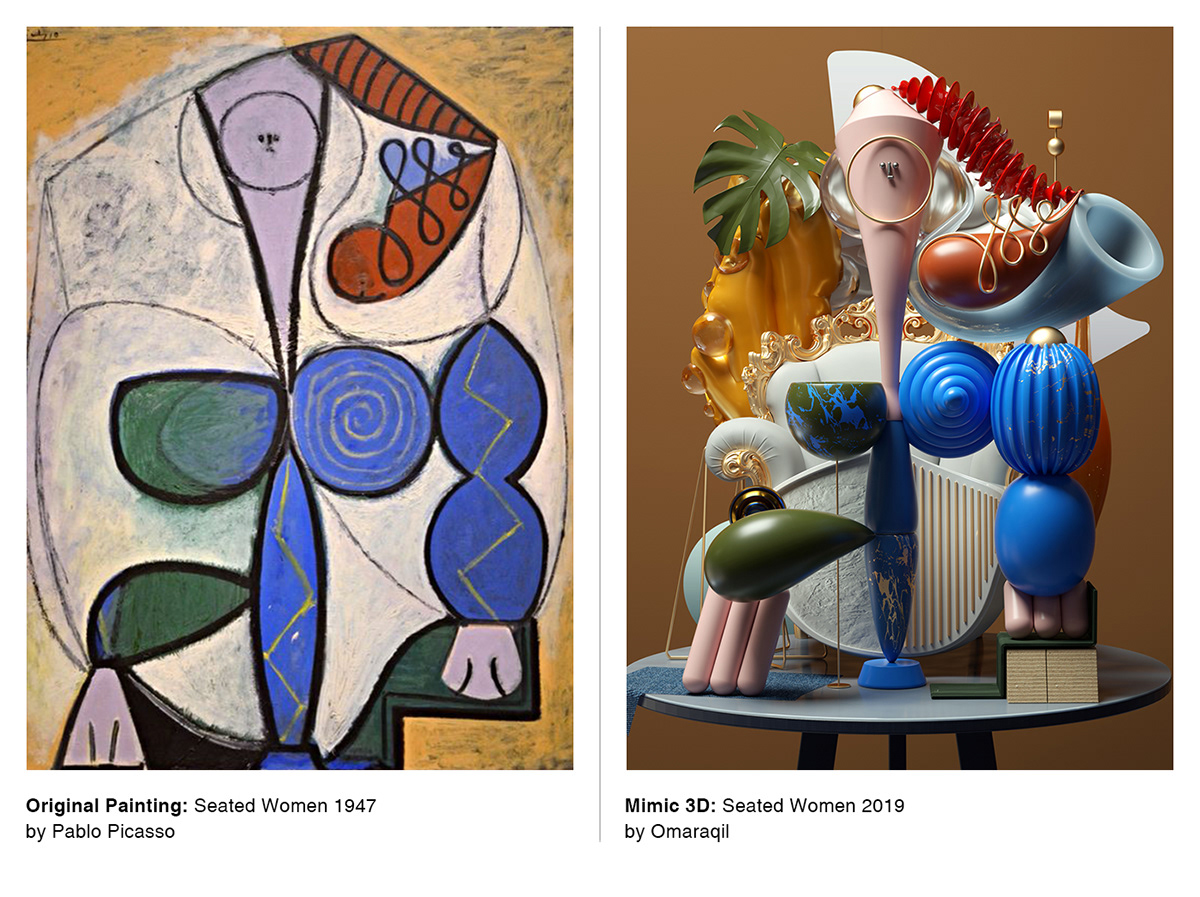
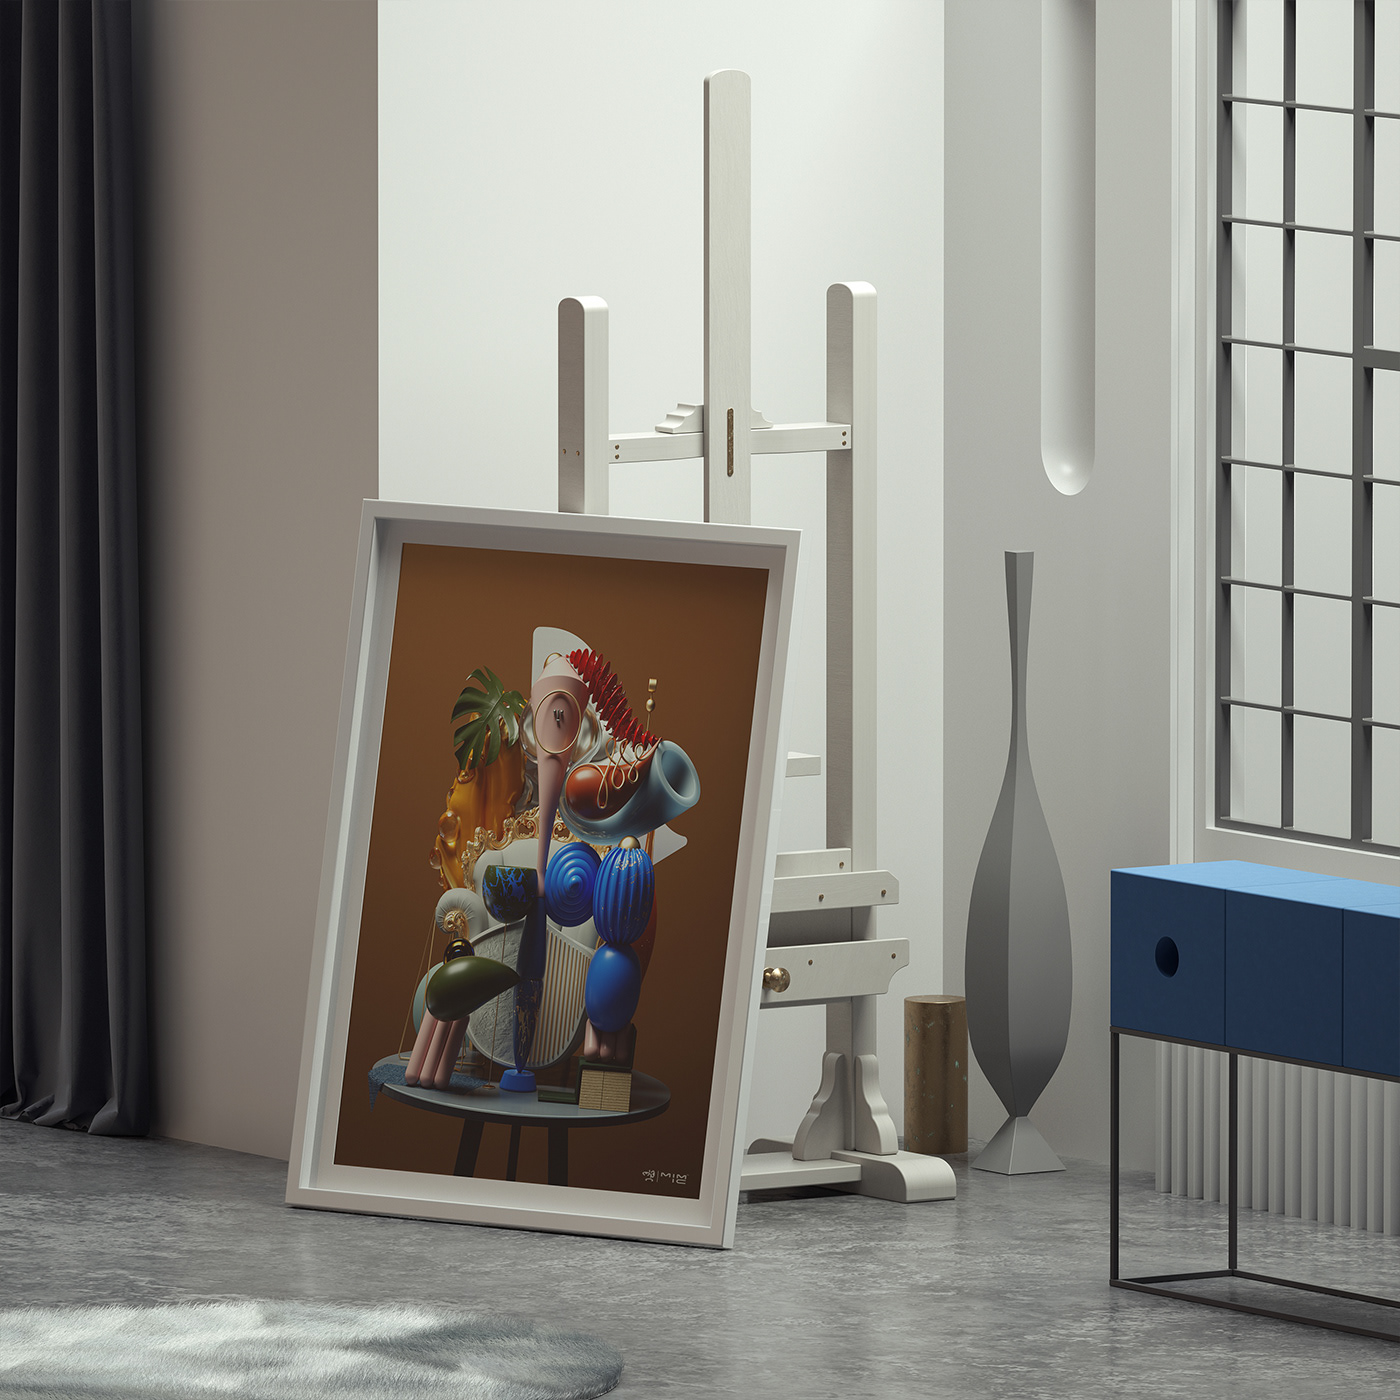
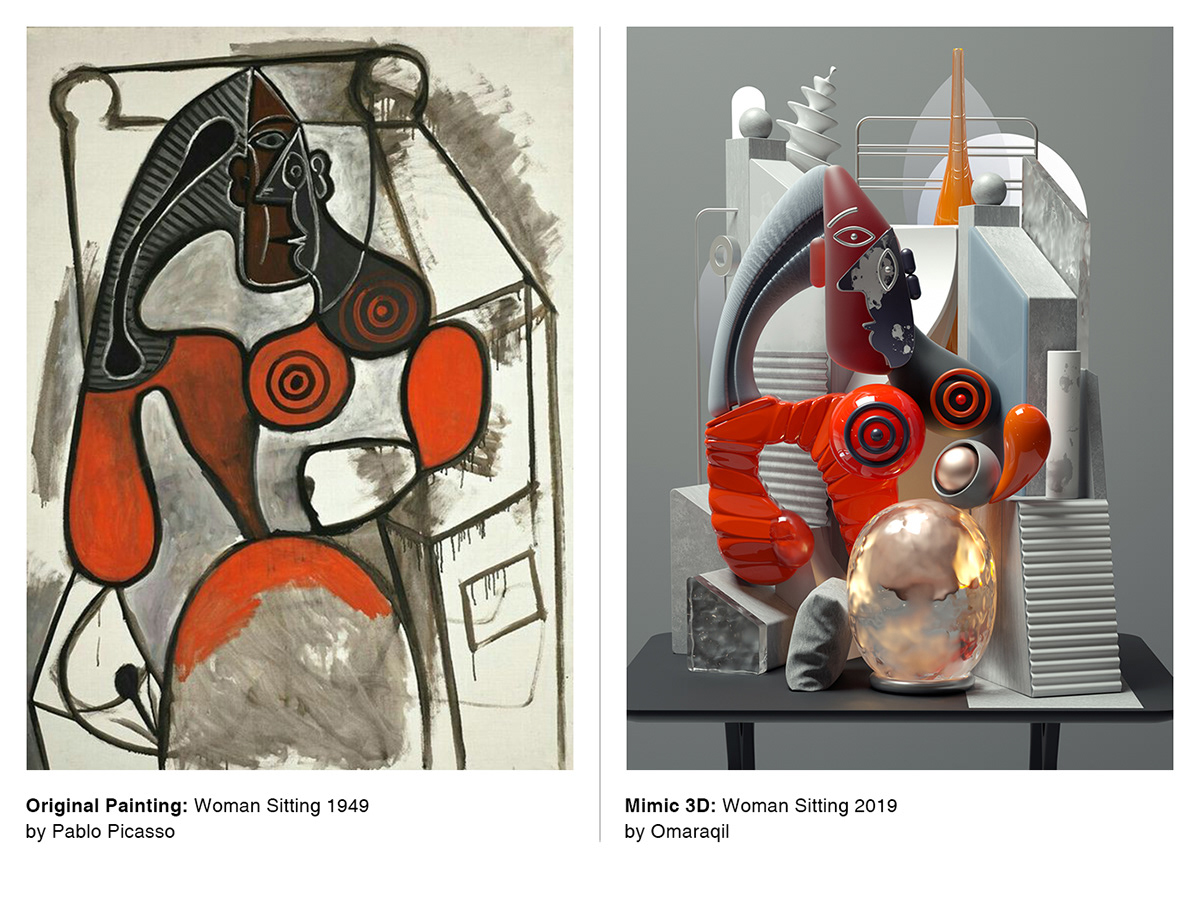
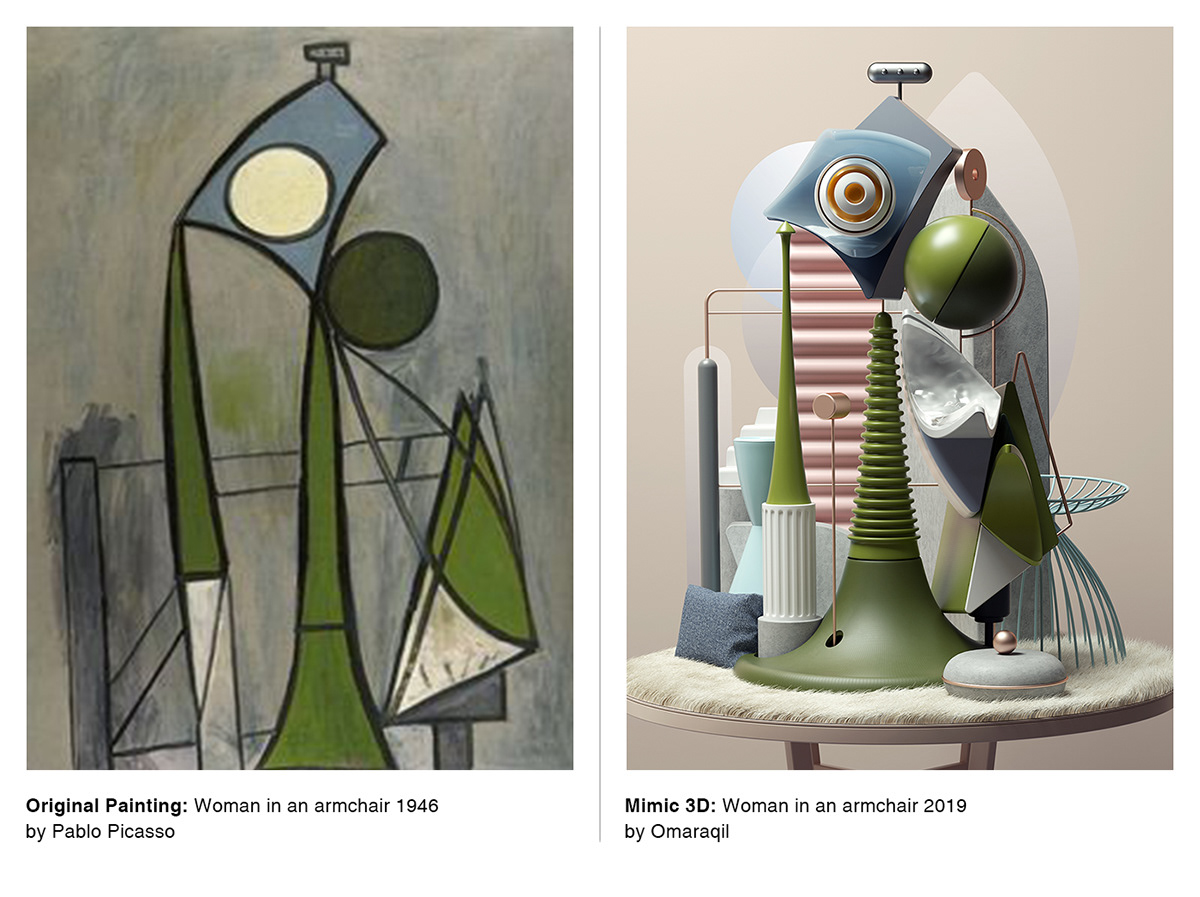
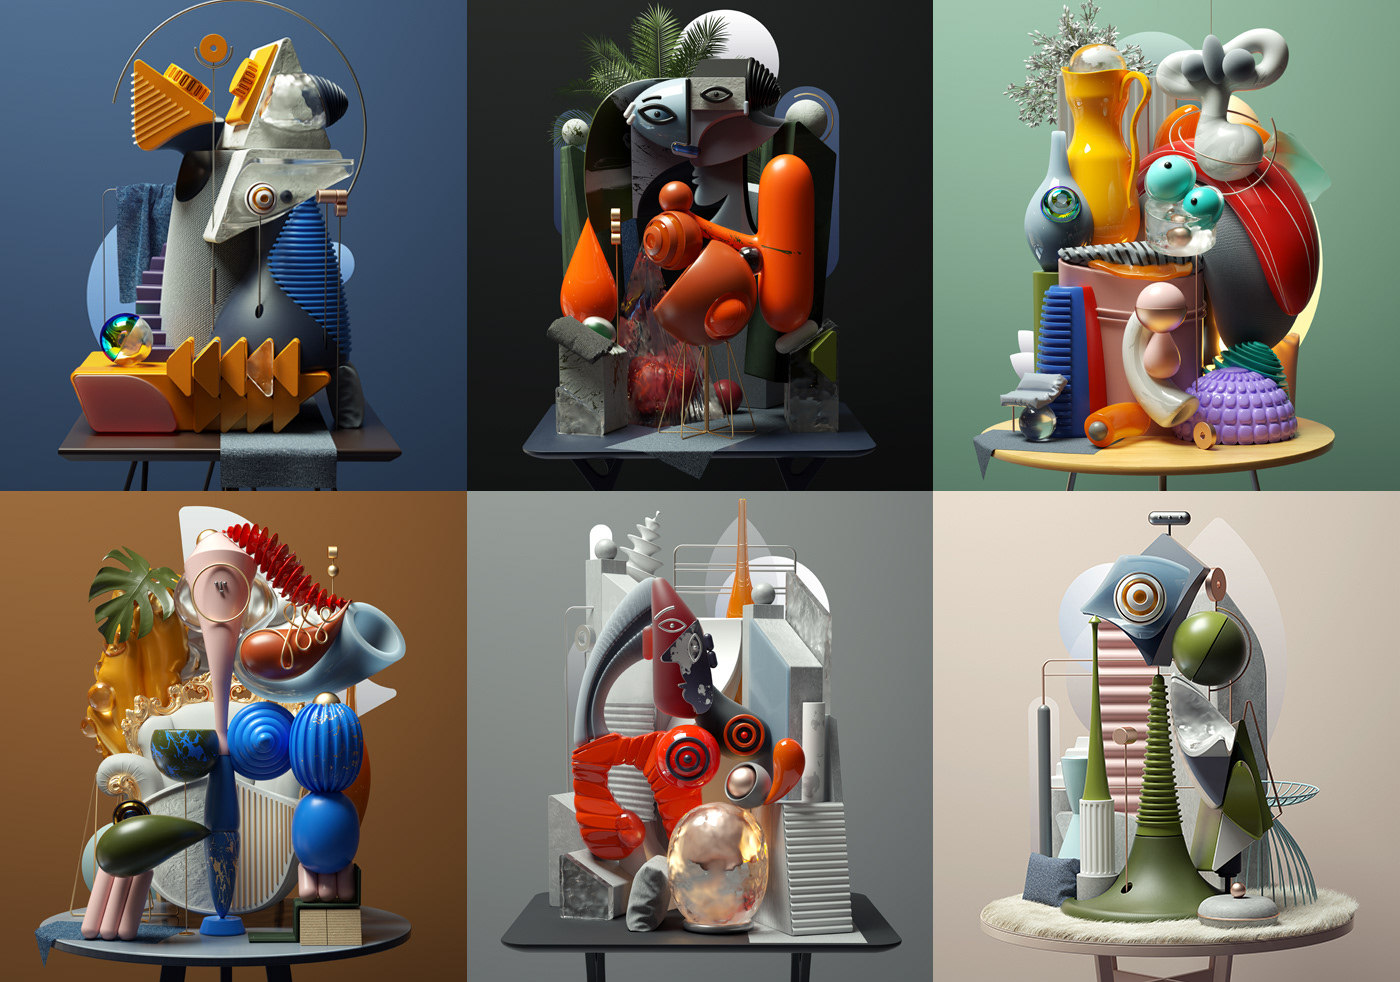
Construed MIMIC III is the 3rd installment of the series of studies of Picasso’s artwork and translation to 3D form using Maxon Cinema 4D and Otoy Octane. The project was created by Omar. Aqil and it’s been a great experience for him as he mentioned on his Behance post. “I have learned a lot from his work” – he adds. Omar this time picked six art pieces from Picasso’s work and try to recreate them in a different way. “I am trying to explore more complexity and abstraction of the shapes he used” – adds Omar. The result is a set of beautiful 3D artwork that brings a new dimension to the amazing work of Pablo Picasso. I am trying to explore more complexity and abstraction of the shapes he used

Omar is an art director, CGI, and illustrator currently working at CR Studio. He is based in Lahore, Pakistan and his portfolio includes much more amazing 3D work including the previous two series of artworks for the MIMIC series, the Atypical Portraits. MIMIC II and the original MIMIC. There are other incredible 3D projects in character design and typography, but the highlight for me is the abstract pieces. There are the Cubist Compositions that is also awesome to check out. As you can see, we highly recommend visiting Omar’s portfolio it’s truly inspiring.

Interpreting Picasso in 3D