Interaction Design: Learn some basics of Sign Language with Uber

Original Source: http://feedproxy.google.com/~r/abduzeedo/~3/EWD0OQblccU/interaction-design-learn-some-basics-sign-language-uber

Interaction Design: Learn some basics of Sign Language with Uber

Interaction Design: Learn some basics of Sign Language with Uber

AoiroStudio
Oct 24, 2017

To me, it’s an interesting take on building your brand and at the same time listening to your community on what can be done to improve the overall experience. Let’s take Uber for example who recently built what they called a series of features in the effort of the Deaf or Hard of Hearing community. It’s a beautiful step in the right direction. We are taking a look at the interaction design of their new microsite where you can learn the basics of American sign language. You’ll learn how to sign: Thank you, Goodbye and even sign your name. The microsite is rightful simple to navigate and love the intention of expressing a mobile experience.

In their Words

Unemployment or underemployment in the Deaf or Hard of Hearing community is close to 70%. At Uber, we’re proud to provide earning opportunities to Deaf and Hard of Hearing drivers across the world and in more than 200 US cities. That’s why in 2015 we built a suite of features including flashing trip request notifications, text-only communication, and notifications so riders knew they were being matched with a Deaf or Hard of Hearing driver.

Interaction Design: Learn some basics of Sign Language with UberUber Sign Language

Today, we’re excited to introduce a tool that helps teach riders simple phrases in American Sign Language, including how to sign their name, hello, thank you, and goodbye. We hope this tool will help start a conversation between our riders and our Deaf and Hard of Hearing partners.

More Links
Learn more about Uber Sign Language
ABDZ in Sign Language
Interaction Design: Learn some basics of Sign Language with UberInteraction Design: Learn some basics of Sign Language with UberInteraction Design: Learn some basics of Sign Language with UberInteraction Design: Learn some basics of Sign Language with UberInteraction Design: Learn some basics of Sign Language with Uber


uber
interaction design
UI/UX


Why Adobe Photoshop the perfect tool to design a website layout?

Original Source: http://feedproxy.google.com/~r/Designrfix/~3/RXOOSDyYaLY/adobe-photoshop-perfect-tool-design-website-layout

As a web developer, you have to work with a variety of tools for creating the most awesome designs for your clients. Similarly, we also have to use different tools for conceptualizing, making wireframes, content creation and code generation for a perfect workflow in web design and development.   No matter how much-advanced tools we […]

The post Why Adobe Photoshop the perfect tool to design a website layout? appeared first on designrfix.com.

How to Use Adobe XD’s Smart Guides

Original Source: https://www.sitepoint.com/using-adobe-xds-smart-guides/

The following is a short extract from our book, Jump Start Adobe XD, written by Daniel Schwarz, a highly practical tutorial on this fantastic prototyping tool. SitePoint Premium members get access with their membership, or you can buy a copy in stores worldwide.

Smart Guides were originally introduced in Sketch and later adopted in Photoshop after the feature became a hit. Adobe XD explains them in their help section: “When you move an object or artboard, use Smart Guides to align the selected object or artboard to other objects or artboards. The alignment is based on the geometry of objects and artboards. Guides appear as the object approaches the edge or center point of other objects."

Let me start by saying than an object is a common term used to describe a shape layer, text layer, group or bitmap on the canvas. Basically, any type of layer or group is an object.

Guides are visual cues that illustrate how objects align to one another — they can display the distance between two layers, or indicate whether or not a layer has snapped to the bounds of another object or artboard edge. Adobe XD will try to anticipate where you want to move a layer, and automatically snap to that location when you draw close to it, while showing how far you have left until you reach it. You can work out the distance manually by selecting the first layer, holding Option/Alt, and hovering over the second layer.

Manual Alignments

Let's start by aligning a layer manually, so we understand the difference. A moment ago we grouped two text layers together — select both of them once more (hold Shift while you click them) and click the Align Center (Horizontally) button in the Inspector, or use the shortcut: Cmd + Control + C (Shift + C in Windows).

Smart Guides When Moving Layers

Now select the actual group. You can either use the Select tool (keyboard shortcut: V) and select the group by clicking on it, or use the Esc key to traverse up to the parent container, which is the group. Move it until two things happen:

It appears 28px below the form
It snaps to the dead-center of the artboard horizontally

You’ll know you’ve done this correctly because the colored lines of the smart guides will illustrate what the object has snapped to (which will be the dead-center of the artboard, as indicated by the vertical line that appears). You'll also notice the relative distance between the search function group and the welcome text group (as indicated by the numerical value).

Smart Guides With Option/Alt-Hold

Select the bottom-most layer of this group, hold Option (Alt in Windows), then hover the cursor over the top-most layer. This is a manual approach (also known as Option/Alt-hold) to measuring the relative distance between two layers. You can move layers as normal while option-holding, so use the ↑→↓← arrow keys until the distance is 5px.

Let's use what we've learned to add some more elements. So far we’ve taken our first look at shape layers, text layers, grouping of layers, alignments, smart guides, and some other basics. Let's recap some of that and finish off this screen, starting with a bottom navigation component with four links.

Continue reading %How to Use Adobe XD’s Smart Guides%

How to Achieve Your Own Definition of Success as a Freelance Web Designer

Original Source: http://feedproxy.google.com/~r/1stwebdesigner/~3/lRFWskyidhg/

In society, success is often portrayed as having pretty close to a singular definition. We think of a successful entrepreneur driving a Tesla and living in the smartest of smart homes. Or we see the opulence of a big shot executive “living the life”, as they say.

But success is a very personal and subjective thing. There is no right or wrong definition because it’s a matter of what is in our hearts. My measure of success may be different than yours. But does that mean we should still take the same approach to achievement?

While traits like hard work and integrity will always be shared factors, how we approach our freelance design businesses should better reflect our personal definition of success. Here are some ways to tailor your business to help you get to your happy place.

Focus on the Right Types of Projects

For some people, part of what defines success involves working on specific kinds of projects. Fulfillment may come in the form of designing websites for non-profit organizations or a favorite sport. Others may not care about industry so much as they care about luring projects that pay big money.

The point is to figure out the types of projects that will get you to where you want to go. From there, it’s a matter of marketing yourself to whatever niche that interests you.

Of course, this is much easier said than done. The realities of running your own business sometimes mean having to take on projects that aren’t necessarily aligned with your vision of success. But that’s okay – so long as you don’t get stuck with something that interferes with your long-term goals.

Indeed, unless you already have industry connections, pointing your business towards a specific type of project is often a process that takes time. But once you get your foot in the door, it can open up all sorts of possibilities.

Think About Where, When and How Much You Work

Success can be greatly influenced by your work environment. When you think about it, this is an area that both affects and defines our success. If you’re cranking out websites from a place you don’t want to be, it’s going to be that much more difficult to do well.

But it also goes well beyond just location. There are a number of scenarios where part of our success is not only where we do our work, but also the time we spending working. Consider three of the most common ones:

Being a Parent and a Designer
Freelancing provides a great opportunity for parents to both make a living and be there for their children. Personally, it allows me to get my daughter to and from school, along with the chance to spend extra quality time with her. So for me, working standard daylight hours at home is the right situation. Weekends are generally off-limits unless absolutely necessary.

This can be a fairly simple arrangement in terms of initial business setup. The biggest challenge is that there are interruptions in the day that can be a bit chaotic. But being at home certainly makes any chaos easier to handle than it would be at a traditional office.

Putting the ‘Free’ in Freelancer
There are many designers who use their freelance career as a vehicle to pursue other passions like travel or volunteering. Therefore, the flexibility to work your own hours is a big deal. It’s also a bit more of a challenge to achieve.

Working odd hours really depends on the type of clientele you have. Some gigs demand that you to be available during “normal” business hours. And being in the office less than the standard 5 days a week can also take some careful planning.

Still, it can be done. It’s all about finding an equation that a) lets you work a personalized schedule; and b) enables you to make a living. If you’re really passionate about something, you’ll find a way to make it all work.

Hitting the Big Time
Those looking for big ticket projects may take a different tact to freelancing than the two scenarios above. For one, higher level projects might mean working with big companies. While some clients may be comfortable with remote meetings, others may prefer to meet you in person. This means either traveling or having a meeting space may be necessary.

The other major consideration here is the amount of extra work involved. Even if you’re managing other freelancers, there could be plenty of nights and weekends filled with work (not to mention the time spent marketing yourself).

If this sounds like your jam, then focusing on process efficiency can do wonders for keeping everything running smoothly. Establish a process for how projects get done on-time and on-budget so that you can keep that money machine cha-chinging.

When Progress is Slow…

One of the best aspects of being a freelancer is the ability to do things your own way. That’s a big responsibility, though. It’s easy to get into bad habits that end up hurting your chances to live and work the way you want.

So, if you’re not seeing the progress you hoped for, it may be time to take a hard look at how you’re running your business. While bad luck can play a role, most often you’ll find that are specific things you could be doing differently.

When it comes to your financial situation, scrutinize how much you charge and how you collect payment. Web design, in particular, is an industry where prices run the gamut. You want to make sure that you’re not charging too much or too little.

As for collection, ask yourself if you’ve made it easy enough for people to both receive invoices and make payments. For example, I noticed that not long after I started accepting online payments, I had a significantly lower number of clients who were late with payment. While online payment processors usually charge a fee for every transaction, I found that this was a worthy tradeoff over being stressed out by unpaid invoices.

It’s also vital to review the services you offer. Are you providing services that don’t fit in with your goals? Do your services set you up for a predictable stream of income? While it may be hard to fully weed out services that aren’t in your best interest, you can always grandfather them out over time. Or, you might structure pricing in such a way that it’s much more worthwhile.

Lastly, review just how organized (or not) you are. If you find that you’re always scrambling to put out fires, you might want to invest some effort into better organizing your average workday. There are plenty of tools and services out there to help. If something makes your life easier and doesn’t require you to sacrifice quality – go for it.

Creating Success on Your Own Terms

Being a freelancer puts you in a unique position to determine your own present and future. It enables you to achieve the kind of success that reflects who you are as a person.

But getting there requires a thoughtful approach. Simply working day-to-day without regards to your goals isn’t enough (I now know that from experience). The key is to find out what it is you want and then implement any necessary changes in order to make it a reality.

It may take some time to get there, but that journey is part of the fun.


Which Design Elements Are The Must-Have For Mobile App?

Original Source: http://feedproxy.google.com/~r/Designrfix/~3/9FyBgebcCCA/design-elements-musthave-mobile-app

According to a Gartner research, “The global app downloads worldwide will reach the mark of 268.7 billion in 2017.” The astronomical usage of the mobile app is an eye-opening fact. When the businesses are consumer-first, then the need of mobile app has turned from an option to a necessity. Witnessing the benefits and use of […]

The post Which Design Elements Are The Must-Have For Mobile App? appeared first on designrfix.com.

Dynamic Shape Overlays with SVG

Original Source: http://feedproxy.google.com/~r/tympanus/~3/Wm5XKeRCXqI/

Today we’d like to share another way of achieving morphing page transitions. This time, we’ll generate multiple SVG curves with JavaScript, making many different looking shapes possible. By controlling the individual coordinates of the several layers of SVG paths, the curved shapes animate to a rectangle (the overlay) with a gooey motion. We use some nice easing functions from glsl-easings and by tuning the curve, speed and the delay value, we can generate many interesting effects.

ShapeOverlays

Attention: We use some new CSS properties in the demos; please view them with a modern browsers.

This demo is kindly sponsored by HelloSign API: The dev friendly eSign.

Building the SVG

Let’s have a look at the SVG which we will use to insert the path coordinates dynamically.
First, we’ll make sure that the whole SVG and the overlay paths are stretched to the size of the screen. For that, we’ll set the preserveAspectRatio attribute to none. Depending on how many layers we want, we’ll create that amount of paths:

<svg class=”shape-overlays” viewBox=”0 0 100 100″ preserveAspectRatio=”none”>
<path class=”shape-overlays__path”></path>
</svg>

The styles that will allow the SVG to match the size of the browser window looks as follows:

.shape-overlays {
width: 100vw;
height: 100vh;
position: fixed;
top: 0;
left: 0;
}

Each path element corresponds to a layer of the overlay. We’ll specify the fill for each of these layers in our CSS. The last path element is the background that stays after the overlay expansion:

.shape-overlays path:nth-of-type(1) { fill: #c4dbea; }
.shape-overlays path:nth-of-type(2) { fill: #4c688b; }
.shape-overlays path:nth-of-type(3) { fill: #2e496a; }

Note that in our demos, we make use of CSS custom properties to set the path colors.

The JavaScript

For our demos, we define an overlay control class that allows us to set and control a couple of things. By changing each value, you can create unique looking shapes and effects:

class ShapeOverlays {
constructor(elm) {
this.elm = elm; // Parent SVG element.
this.path = elm.querySelectorAll(‘path’); // Path elements in parent SVG. These are the layers of the overlay.
this.numPoints = 18; // Number of control points for Bezier Curve.
this.duration = 600; // Animation duration of one path element.
this.delayPointsArray = []; // Array of control points for Bezier Curve.
this.delayPointsMax = 300; // Max of delay value in all control points.
this.delayPerPath = 60; // Delay value per path.
this.timeStart = Date.now();
this.isOpened = false;
}

}
const elmOverlay = document.querySelector(‘.shape-overlays’);
const overlay = new ShapeOverlays(elmOverlay);

Further methods that determine the appearance of the overlay are the ShapeOverlays.toggle() method and the ShapeOverlays.updatePath() method.

The ShapeOverlays.toggle() method has the function of opening and closing the overlay, and also of setting the delay value of each control point for every time it opens and closes. It is not necessary to set the delay value every time, but by altering it, it will create some nice randomness.

The ShapeOverlays.updatePath() controls the animation by specifying the easing function.

For example, in demo 1, the same easing function is used for all control points, and the delay value is set like a fine wave using trigonometric functions, so that we get a “melting” appearance.

toggle() {
const range = 4 * Math.random() + 6;
for (var i = 0; i < this.numPoints; i++) {
const radian = i / (this.numPoints – 1) * Math.PI;
this.delayPointsArray[i] = (Math.sin(-radian) + Math.sin(-radian * range) + 2) / 4 * this.delayPointsMax;
}

}

updatePath(time) {
const points = [];
for (var i = 0; i < this.numPoints; i++) {
points[i] = ease.cubicInOut(Math.min(Math.max(time – this.delayPointsArray[i], 0) / this.duration, 1)) * 100
}

}

In our demos we use this effect to create an overlay in order to show a menu in the end of the animation. But it could also be used for other types of transitions, like page transitions or scroll effects. Your imagination is the limit.

Here are a couple of screenshots:

ShapeOverlays_01

ShapeOverlays_02

ShapeOverlays_03

ShapeOverlays_04

We hope you enjoyed this effect and find it useful!

Credits

glsl-easings by glslify. Easing functions that use to demos are based on the code of glsl-easings module.

Dynamic Shape Overlays with SVG was written by Yoichi Kobayashi and published on Codrops.

10 top tools for illustrators to try this October

Original Source: http://feedproxy.google.com/~r/CreativeBloq/~3/7WNTvFch5bM/10-top-tools-for-illustrators-to-try-this-october

This month, we're taking a look at custom brushes for illustrators. We'll start with some brushes for Photoshop. These aren't all exactly new, but with so many options out there, it can be hard to know which ones to use. Beyond these top five, if you're looking for a more extensive collection, take a look at our roundup of The 60 best free Photoshop brushes.

Then we'll move on to top Clip Studio Paint (aka Manga Studio) brushes. Like Photoshop, you can also add custom brushes, as our guide to creating custom brushes in Clip Studio Paint shows. There's bound to be something here for you, so let's get started.

Custom brushes for Photoshop
01. 12 Free Halftone Texture Brushes

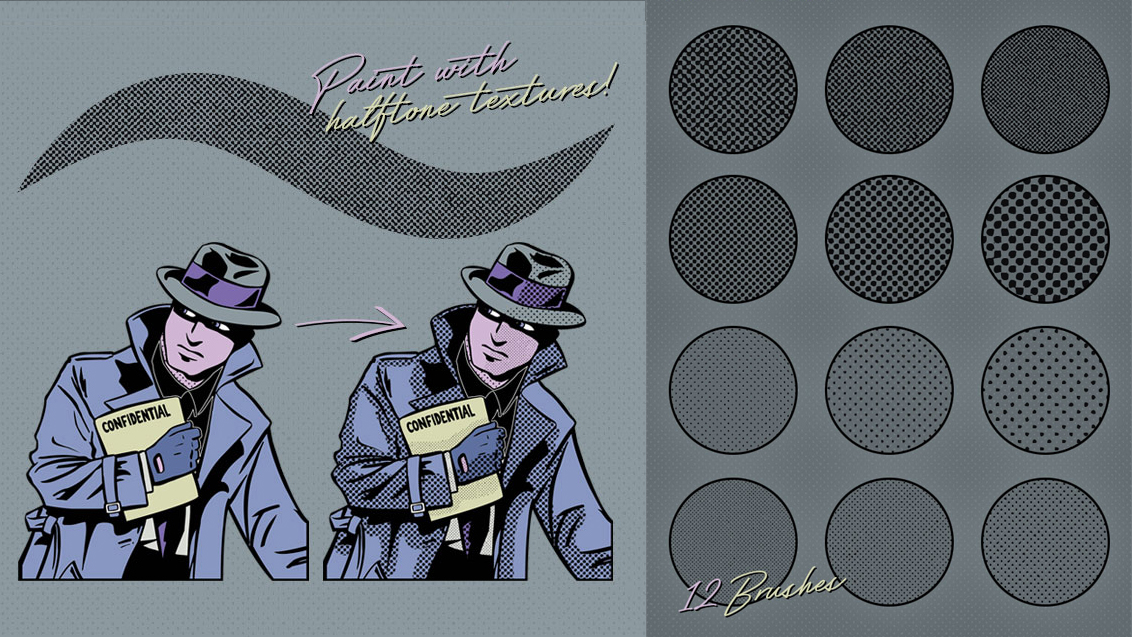
Halftone brushes are great for a retro comic book look

Free

If you're looking to add different tones to your illustrations, check out these free brushes by Spoon Graphics. With this set of 12 distressed halftone effects, you'll be able to add retro shading and halftone textures with ease.

The pack includes a range of dot patterns including Fine, Light, Heavy and Dark, each with three size options. The brushes are also sensitive to pen pressure, so graphics tablet users can easily adjust the size of brush this way.

02. 10 Free Subtle Grunge Texture Brushes

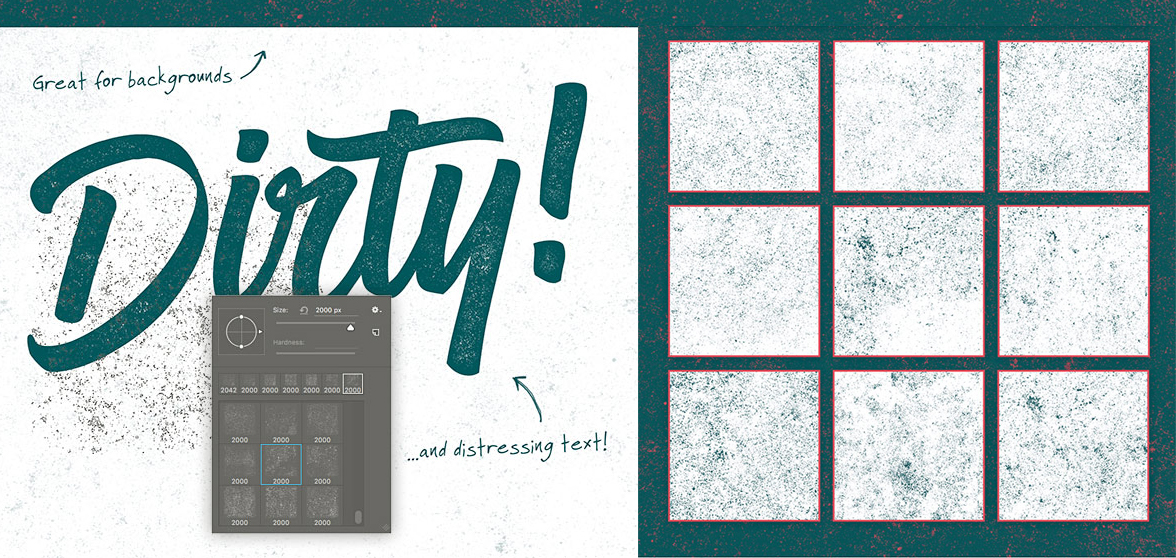
Great brushes for creating well-worn looks

Free

Here's another set of free Photoshop brushes from Spoon Graphics, which includes 10 presets at 2000 x 2000 resolution. The subtle textures here are versatile, and ideal for creating all kinds of distressed or worn looks.

They're easy to resize and edit to suit your needs. If you're looking to add a little grunge to your illustrations, this is an awesome pack to have loaded.

03. Strokes and Splatters

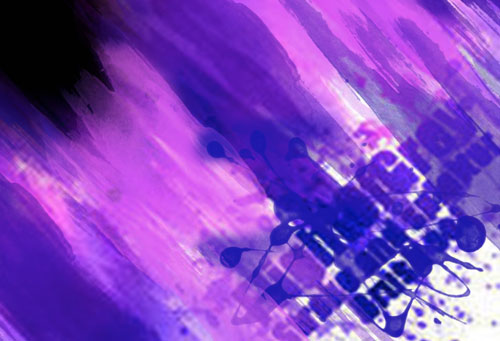
Create strokes and splatters easily

Free

This splatter pack was created by Brusheezy user Benjamin McFetridge, who's rather new to the game – this is his second ever brush set, which he created after his first one proved so popular.

It will have you tossing digital paint all over the place in no time. This set includes 25 hi-res custom brushes for Photoshop.

04. 20 Painter PS Brushes

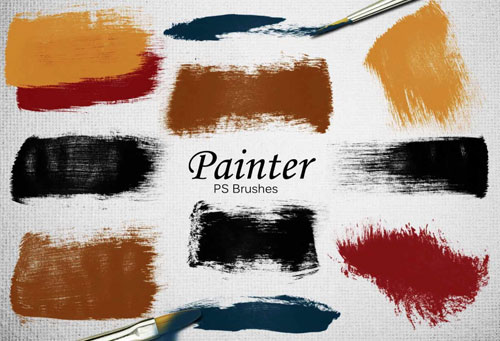
Add a painterly look to your digital art

Free

Liza Giannouri, another Brusheezy user, has a set of 20 painterly brushes ready for you to try. This isn't her first set. In fact, Giannouri has over 1063 uploads.

This particular set includes a number of brushes designed to mimic traditional paintbrushes, and is ideal for adding a painterly look to your digital artwork.

05. Kyle T. Webster's Brushes

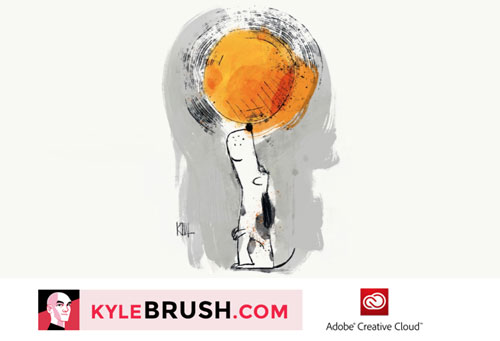
Webster’s brushes are now all included in Creative Cloud

Free

Quite possibly my favourite brush packs come from Kyle T. Webster – although you won't be able to get them from his site anymore. That's because Adobe has partnered with Webster and now all of his brushes are included in the Creative Cloud library.

How do access them? Launch Photoshop (if you don't have it already, get Creative Cloud here). Create a new document. Switch to the Libraries panel, and select the 'Kyle Brushes' library.

Bonus: Make your own custom Photoshop brushes

Are you interested in learning how to make your own custom brushes? If so, check out this video tutorial on how to make your own custom brushes in Photoshop.

Clip Studio Paint custom brushes
06. Assorted Inks and Pencils by lapinbeau

These brushes mimic different pencils and pens

Free

This set of Clip Studio Paint brushes by DeviantArt user lapinbeau comes with 14 different pencil and ink-style brushes, some of which were modelled after well-known artists. Styles include oil pencil, crow quill, soft pen and calligraphy.

07. Blue and Red Pencil Brushes by SerketXXI

A simple but handy pack of red and blue pencil brushes

Free

SerketXXI, another DeviantArt user, created this set of blues and reds for those of us who remember 'the good old days' of pencils, paper and copying machines. This pack includes four brushes: light and heavy versions of red and blue pencils, for use in Clip Studio Paint. Simple but handy.

08. Daub Brush Collection

DAUB offers an impressive range of brushes

€2.99 – €9.99

DAUB creates custom brushes for Clip Studio Paint, Affinity, Procreate and Photoshop. Its brushes are crafted using natural media and parametric generation, making them as realistic as possible.

There are a number of different packs from which to choose, or you can grab yourself the Super Bundle for €9.99 (around $11.80/£8.90 at today's exchange rates) and call it day.

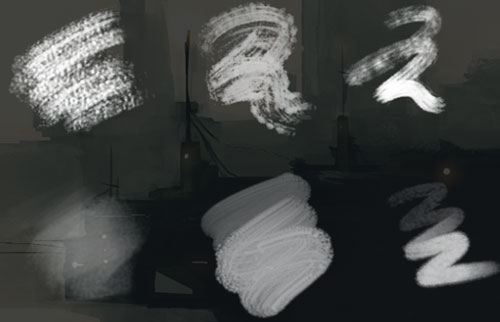
09. Yeti Rough Inker & Yeti-Go-To-Inker

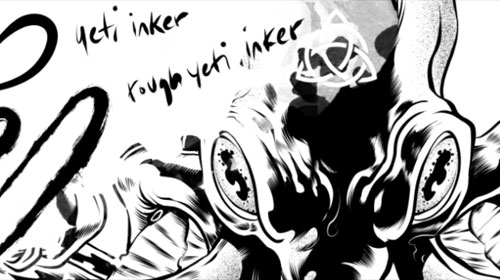
Zombie Yeti’s brushes are versatile and free

Free

The Yeti was one of the first brushes I added to my installation of Clip Studio. I use it with almost every illustration I create. These brushes are the work of the "damn nice, self-aware, humble, tall and hairy" Zombie Yeti. The brushes create a lovely ink pen effect, and the best part is: they're free.

10. Mega Pack from Flyland Designs

These are essentials in my Clip Studio ‘U-toolity’ belt

$6.99

Once again saving the best for last, Brian Allen at Flyland Designs has created what I like to call my Clip Studio 'U-toolity' belt. His mega-packs have everything you need to create the perfect illustration. 

For just $6.99 USD you can get Volume 1 and Volume 2, which combined has more than 220 brushes. These include crosshatch brushes, copic marker brushes, fur and hair brushes, inking brushes, pencil brushes, special pattern brushes, splatter brushes, stippling brushes and more. So what are you waiting for? Go grab those brushes!

Bonus: Make your own Clip Studio Paint brushes

Interested in making your own custom brushes? Try one of these helpful tutorials: Create custom brushes in Clip Studio Paint or Using custom brushes in Clip Studio Paint. You might also like our tutorial on how to create a custom sticker brush in Artrage.

Read more:

30 of the best Procreate brushesThe 23 best Illustrator brushesThe best drawing tablets in 2017

Top 12 Productivity Tips for WebStorm and Angular – Part 1

Original Source: https://www.sitepoint.com/productivity-tips-for-webstorm-and-angular-part-1/

This article was sponsored by JetBrains. Thank you for supporting the partners who make SitePoint possible.

In this 2-part series, Google Developer Experts Jurgen Van de Moere and Todd Motto share their favorite productivity tips for developing Angular applications using WebStorm.

In this first part, Jurgen shares his personal top 5 WebStorm features that allow him to increase his productivity on a daily basis:

Use Angular CLI from within WebStorm
Navigate like a pro
Take advantage of Angular Language Service
Auto format your code
Optimize your imports

Each tip can tremendously increase your development productivity, so let’s dig into them a little deeper one by one.

Tip 1: Use Angular CLI from Within WebStorm

Angular CLI is a Command Line Interface (CLI), written and maintained by the Angular team, to help automate your development workflow. You can use it to quickly create new Angular projects and add new features such as components, services and directives to existing Angular projects.

WebStorm’s integration with Angular CLI provides you with all its power right from within WebStorm, without using the terminal.

To create a new Angular Project, choose File | New | Project and select Angular CLI.

Enter a project location and hit the Create button. WebStorm uses Angular CLI to create a new Angular project and install dependencies.

When your new Angular application is in place, you can easily add new Angular features. Right click on src/app and choose New | Angular CLI to pick the type of feature you wish to add.

Once you’ve selected a feature, you can specify the name and optional parameters, just as you would with Angular CLI on the command line:

Create a new Angular module

To learn more about Angular CLI options and parameters, make sure to check out The Ultimate Angular CLI Reference.

What’s really awesome is that WebStorm automatically adds the component to the right Angular module for you, in this case AppModule.

If your application has multiple Angular modules, right click on the module you wish to add the feature to and choose New | Angular CLI. WebStorm will make sure the new files are created in the right location and that the new feature is added to the correct Angular module.

How sweet is that!

Tip 2: Navigate Like a Pro

Use cmd-click or cmd-B to easily jump to any definition within your project.

If you are a keyboard user, just put your cursor on a term and hit cmd-B. If you are a mouse user, hold down the cmd button and all terms you hover will turn into links to their definition.

WebStorm automatically recognizes Angular components and directives in your HTML, links to stylesheets, links to templates, classes, interfaces and much more.

No need to open file(s) manually, just jump to any definition you need:

Command-click words

When looking for a file that you don’t have an immediate reference to, hit shift twice to open the Search everywhere dialog. You don’t have to type the entire search string. If you want to open AppComponent, just type the first letter of each part — i.e. ac — and WebStorm will immediately narrow down the result list for you, so you can quickly pick the suggestion you wish to open:

Search everywhere

Another super useful navigation shortcut is cmd-E, which presents you with a list of recently edited files so you can easily navigate back and forth between them.

Recent files

Knowing how to quickly navigate to the code you need will save you a tremendous amount of time every single day.

Tip 3: Take Advantage of Angular Language Service

Angular Language Service is a service, designed by the Angular Team, to provide IDEs with error checking and type completion within Angular templates.

WebStorm integrates with Angular Language Service to better understand your code. To enable Angular Language Service, first make sure it is installed:

npm install @angular/language-service –save-dev

If you use Angular CLI to generate an Angular application, Angular Language Service is automatically installed.

Next, go to Preferences | Languages & Frameworks | TypeScript, make sure Use TypeScript Service is checked and click Configure…:

TypeScript recommendations

The Service Options modal will pop up. Enable Use Angular service and apply the changes:

TypeScript recommendations

By default, WebStorm already provides great assistance for writing Angular code.

When editing a script, WebStorm automatically imports the required JavaScript modules so you don’t have to import them manually.

If you open up the TypeScript panel, WebStorm provides you with immediate feedback on the validity of your code, so you can quickly resolve issues before having to compile your project.

Watch how the OnInit interface is automatically imported and how the live TypeScript feedback immediately tells you whether or not your TypeScript code is valid:

TypeScript recommendations

When you edit a template, WebStorm provides you with smart code completion that recognizes components, directives and even input and output properties:

Code completion in templates

With Angular Language Service enabled, WebStorm is able to improve code completion in template expressions:

Angular Language Service Expression Error

… and report template errors more precisely right inside your editor:

Highlighted errors

Catching errors without having to compile your project saves you incredible amounts of time.

Tip 4: Auto-format Your Code

Don’t worry about formatting your code manually. WebStorm has you covered.

Whether your are in a template, a script, a stylesheet or even a JSON file, just hit cmd-option-L and WebStorm will automatically format all code for you:

Continue reading %Top 12 Productivity Tips for WebStorm and Angular – Part 1%

Combining Graphical And Voice Interfaces For A Better User Experience

Original Source: https://www.smashingmagazine.com/2017/10/combining-graphical-voice-interfaces/


With​ ​the​ ​appearance​ ​of​ ​voice​ ​user​ ​interfaces,​ ​AI​ ​and​ ​chatbots,​ ​what is​ ​the​ ​future​ ​of​ ​graphical​ ​user​ ​interfaces (GUIs)?​ ​Don’t​ ​worry: Despite​ ​some dark​ ​predictions​,​ ​GUIs​ ​will​ ​stay​ ​around​ ​for​ ​many​ ​years​ ​to​ ​come. Let​ ​me​ ​share​ ​my​ ​personal, humble predictions​ ​and​ ​introduce​ ​multi-modal​ ​interfaces as​ ​a​ ​more​ ​human​ ​way​ ​of​ ​communication​ ​between​ ​user​ ​and​ machine.

Combining Graphical And Voice Interfaces For A Better User Experience

The​ ​old​ ​wisdom​ ​that​ ​a​ ​picture​ ​is​ ​worth​ ​a​ ​thousand​ ​words​ ​​is​ ​still​ ​true​ ​today.​ ​Our​ ​brain​ ​is​ ​an incredible​ ​image​-​processing​ ​machine.​ ​We​ ​can​ ​understand​ ​complex​ ​information​ ​faster​ ​when we​ ​see​ ​it​ ​visually.​ ​According​ ​to​ ​studies,​ ​even​ ​when​ ​we​ ​talk​ ​with​ ​someone​ ​else,​ n​​onverbal communication​​ ​represents​ ​two third​s ​of​ ​the​ ​conversation.​ ​According​ ​to​ ​​other​ ​studies​​, ​we​ absorb most​ ​information​ ​from​ ​our​ ​sight​ ​(83%​ ​sight,​ ​11%​ ​hearing,​ ​3%​ ​smell,​ ​2%​ ​touch​ ​and​ ​1% taste).​ ​In​ ​short,​ ​our​ ​eyes​ ​are​ our ​primary​ ​sensors​.

The post Combining Graphical And Voice Interfaces For A Better User Experience appeared first on Smashing Magazine.

Collective #358

Original Source: http://feedproxy.google.com/~r/tympanus/~3/YIJfw2is-kk/

C358_Nothwestern

Our Sponsor
Online Master’s in Information Design and Strategy

This online, part-time program at Northwestern University is taught by industry leaders and top professors.

Check it out

C358_Metaballs

Metaballs

A fantastic write up on how those organic looking squishy gooey blobs work with SVG path-only manipulations. By Varun Vachhar.

Read it

C358_VR

Design Beyond a Screen: A Primer for VR, AR and the Multiverse

A great introduction to the different types of realms we can potentially work with. By Graeme Fulton.

Read it

C358_Paypal

Introducing PayPal’s open-source cross-domain JavaScript suite

Paypal has open sourced a set of tools to make the integration on third-party sites easier and more reliable.

Read it

C358_schnack

Schnack.js

Schnack.js is an ad-free, open source Disqus clone that comes with a very minimal, hackable code base.

Check it out

C358_DevDesign

Design for Developers: Specific Steps to Improve Your Website Design

Some clear tips on how to become better at critiquing and improving ones own site as a non-designer.

Read it

C358_grid

Naming Things In CSS Grid Layout

Rachel Andrew takes an in-depth look at the various ways to name lines and areas in CSS Grid Layout.

Read it

C358_SketchtoReact

sketch-to-react-native

Automatically create React Native components out of Sketch designs.

Check it out

C358_WPA2

Key Reinstallation Attacks

Mathy Vanhoef has discovered an extremely crucial security weakness in all modern WPA2 protected Wi-Fi networks.

Read it

C358_creamy

Only CSS: Creamy <3

A fun CSS-only demo by Yusuke Nakaya.

Check it out

C358_Opensource

How open source licenses work and how to add them to your projects

Radu Raicea gives an overview of popular open source licenses and teaches how to apply them to your GitHub projects.

Read it

C358_Luna

While Apple is taking away buttons, we found a way to add one

Savannah Reising introduces the brilliant solution for Luna Display that adds another “button” to the iPad using the camera.

Read it

C358_Comments

The Art of Comments

Gread read by Sara Drasner on the necessity of commenting code.

Read it

C358_Trace

Image Trace Loader

Based on Mikael Ainalem’s interesting idea, this library loads images and exports traced outlines as image/svg+xml URL-encoded data. By Emil Tholin.

Check it out

C358_Audio

Sequence Creator with Web Audio API

An Excel-like sequence creator made with canvas and the Web Audio API. By Jon Kantner.

Check it out

C358_Structure

How to structure components in React

An article by Bartek Witczak on how to properly structure React component.

Read it

C358_Polygonal

Geometrical Birds Slideshow

A slideshow with morphing geometrical birds by Mikael Ainalem.

Check it out

C358_numerals

Web Typography: Numerals

An excerpt from Chapter 2 of Richard Rutter’s new book, “Web Typography”.

Read it

C358_Experiments

Experiments

A repo for collecting Audio/VR/AR/GL experiments. By Jordan Santell.

Check it out

C358_fontplop

Fontplop

An OSX/macOS application that takes ttf and otf files and outputs a webfont bundle with woff2, woff, tff, svg, and eot.

Check it out

C358_Hillclimber

Hillclimber

Hillclimber is a curated machine learning mashup resource.

Check it out

C358_Monopoly

Monopoly board

John Coppola made this Monopoly board with CSS grid.

Check it out

C358_LibrarySymbReplacer

Library Symbol Replacer

A Sketch plugin for replacing symbols in an existing document with library symbols

Check it out

Collective #358 was written by Pedro Botelho and published on Codrops.