Meet Success At Scale, A New Smashing Book By Addy Osmani

Original Source: https://smashingmagazine.com/2023/05/success-at-scale-pre-release/

Today, we are very happy to announce our new book: Success at Scale, a curated collection of best-practice case studies capturing how production sites of different sizes tackle performance, accessibility, capabilities, and developer experience at scale. Case studies are from industry experts with guidance that stands the test of time.

Join Addy Osmani, your curator, as we dive into a nuanced look at several key topics that will teach you tips and tricks that may help you optimize your own sites. The book will also include short interviews with each contributor on what additional lessons, challenges, and tips they have to share some time after each case study was written.

High-quality hardcover. Curated by Addy Osmani. Cover art by Espen Brunborg. Print and eBook shipping in fall 2023. Pre-order the book.

Contents

Each section of the book is filled with case studies from real-world large-scale web applications and services, interviews with the people involved, and key takeaways to help you achieve the same success.

Performance includes examples of measuring, budgeting, optimizing, and monitoring performance, in addition to tips for building a performance culture.
Capabilities is about bridging the gap between native capabilities and the modern web. You’ll explore web apps, native apps, and progressive web applications.
Accessibility makes web apps viable for diverse users, including people with temporary or permanent disabilities. Most of us will have a disability at some point in our lives, and these case studies show how we can make the web work for all of us.
Developer Experience is about building a project environment and culture that encourage support, growth, and problem-solving within teams. Strong teams build great projects!

Who This Book Is For

This book is for professional web developers and teams who want to deliver high-quality web experiences. We explore dimensions like performance, accessibility, capabilities, and developer experience in depth. Success at Scale goes beyond beginner material to cover the pragmatic approaches required to tackle these challenges in the real world.

About the Author

Addy Osmani is an engineering leader working on Google Chrome. He leads up Chrome’s Developer Experience organization, helping reduce the friction for developers to build great user experiences.

Technical Details

ISBN: 978-3-910835-00-9 (print)
Quality hardcover, stitched binding, ribbon page marker.
Free worldwide airmail shipping from Germany starting in fall 2023.
eBook available for download in fall 2023 as PDF, ePUB, and Amazon Kindle.
Pre-order the book.

Community Matters ❤️

Producing a book takes quite a bit of time, and we couldn’t pull it off without the support of our wonderful community. A huge shout-out to Smashing Members for the kind, ongoing support. The eBook is and always will be free for Smashing Members as soon as it’s out. Plus, Members get a friendly discount when purchasing their printed copy. Just sayin’! 😉

More Smashing Books & Goodies

Promoting best practices and providing you with practical tips to master your daily coding and design challenges has always been (and will be) at the core of everything we do at Smashing.

In the past few years, we were very lucky to have worked together with some talented, caring people from the web community to publish their wealth of experience as printed books that stand the test of time. Heather and Steven are two of these people. Have you checked out their books already?

Understanding Privacy

Everything you need to know to put your users first and make a better web.

Add to cart $44

Touch Design for Mobile Interfaces

Learn how touchscreen devices really work — and how people really use them.

Add to cart $44

Interface Design Checklists

100 practical cards for common interface design challenges.

Add to cart $39

15 Best New Fonts, May 2023

Original Source: https://www.webdesignerdepot.com/2023/05/15-best-new-fonts-may-2023/

15 Best New Fonts, May 2023

The choices you make when selecting a typeface have more impact on your design than almost any other decision, so it’s good to have some options at hand.

Best AI Video Generators

Original Source: https://ecommerce-platforms.com/articles/best-ai-video-generators

Through artificial intelligence, you can now generate creative content with the click of a few buttons. With the best AI video generators, you can harness this technology to create highly quality videos using features such as automatic editing, synthetic voiceover, and deepfake (using someone’s facial impressions digitally).

While there are many AI video generators on the market, the most popular platforms stand out due to their ease of use, advanced features, and remarkable results. To help you make your way through these options, here is a lowdown on 10 of the best AI video generator solutions.

In this article:

What is an AI Video Generator?

What are the Best AI Video Generators?

FAQ

Conclusion

What is an AI Video Generator?

An AI video generator is a program that creates custom videos using different subsets of AI technology. Typically, such solutions are able to generate natural looking videos with human avatars, synthetic voice, and video editing tools. For this purpose, these video generators use a vast collection of visual and sonic data that they process using AI and deep fake.

What are the Best AI Video Generators?

Synthesia

Runway

Synthesys

Rephrase

Hour One

FlexClip

Elai.io

Pictory

Veed

Lumen5

1. Synthesia

Synthesia - Best AI Video Generators

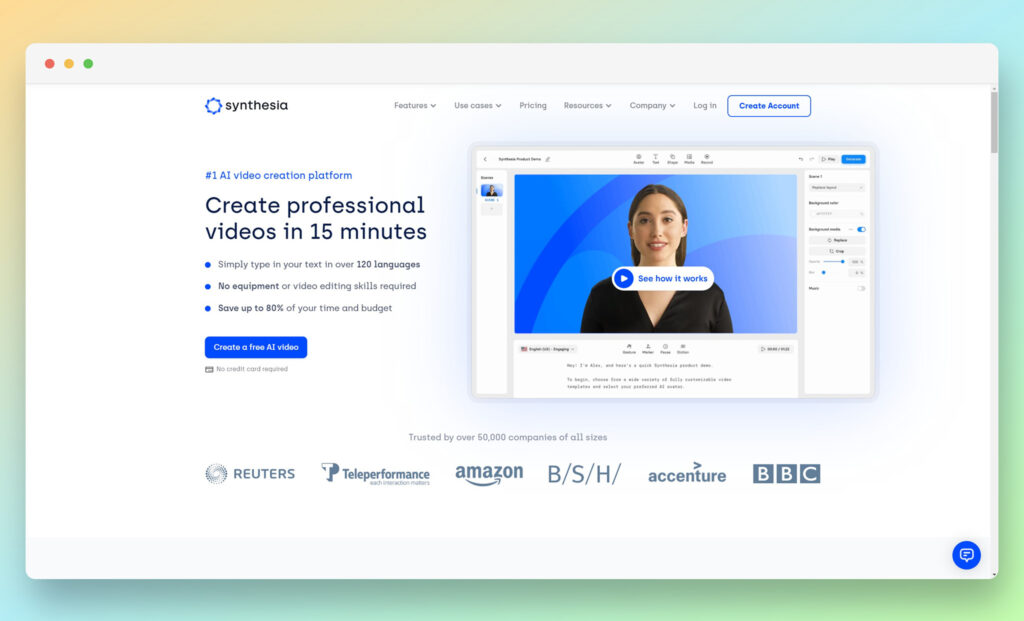
As one of the most powerful AI-based tools, Synthesia allows you to create professional videos with human presenters as well as matching voiceovers. With over 60 languages and accents, you can turn your text to speech along with a working model of a human presenter, which provides your videos with a high quality look through deepfake technology.

In addition to using human presenters from a diverse cast, Synthesia also gives you the option to customize your own avatar. You can also create your video with over 1 million visual assets such as backgrounds, clipart, fonts, and images. You can also use your own images and art into the video. With it, you can integrate your existing footage into the videos that you are generating through Synthesia.

You can use predetermined templates to generate your video, while also being able to use the point-and-click interface that is accessible from the web. No matter the type of template that you choose, you can have your human presenter “speak” your script with proper lip sync. This also includes different choices for inflection as well as accents in the same language. Once you are satisfied with the way that your video looks to the viewer, you can export it to your hard drive or embed it online.

These qualities have Synthesia establish its presence in the list of the best AI video generators. Its overall pricing also remains quite competitive, which further cements its status as one of the most sought after tools in this category. This especially holds true if you want to generate various tutorial or presentation videos for your audience, but don’t want to break the bank in the process.

Pricing

Synthesia has two pricing plans.

Personal Plan. $30/month. You can generate 10 minutes of video in this plan with up to 6 slides in your video. You can break the 10 minutes into 10 videos or use them all within one video. You also get the ability to use custom avatars at an additional price.

Corporate Plan. Price available upon request. This pricing plan is available to fit your specific needs and provides its quote upon request. This gives you access to 50 slides per video.

Custom avatar. $1000/year. You can sign-up to create a custom avatar that you can pay for on an annual basis.

Pros 👍
Cons 👎

Pros 👍

Highly capable tool that turns speech into presentation style videos.
Synthesized voice overs from real voices that can narrate your text in a natural way.
Diverse cast of presenters that can enhance your brand identity.
Easy to use interface that lets you create videos with a few clicks.

Cons 👎

The offering is billed monthly and does not offer a discount on annual payments.
The software can take some time to master.

Who is This Best For?

It is best for business owners who want to develop presentation style videos. Individuals who are marketers who plan to create outreach materials for their clients. At the same time, training experts who need to generate educational videos can also benefit from this specific platform.

Go to the top

illustration of a cat climbing a ladder

2. Runway

Runway - Best AI Video Generators

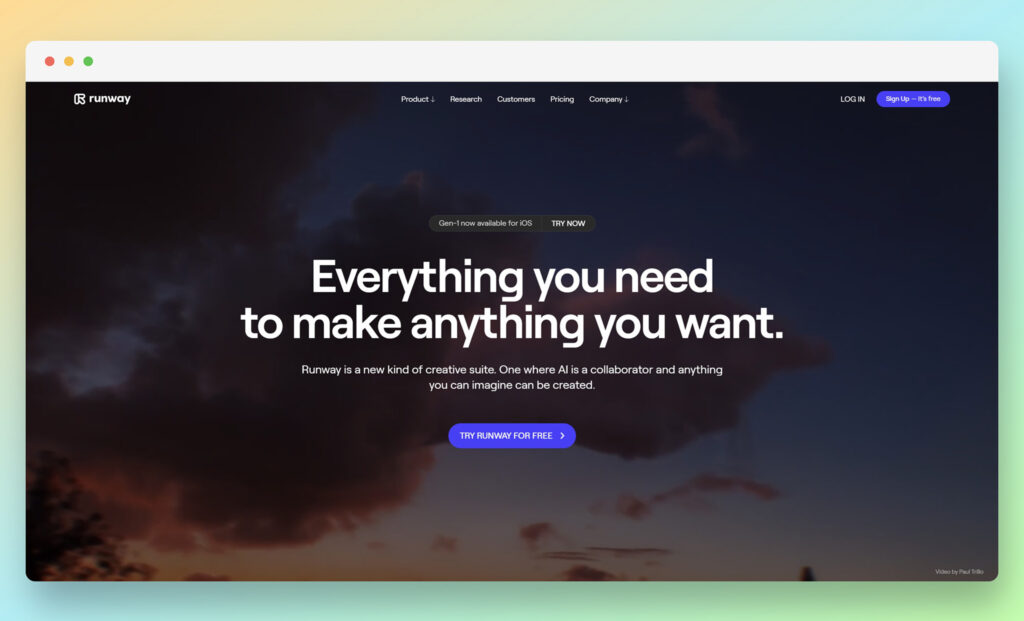
Runway is another one of the best AI video generators. The tool allows you to utilize its AI-based video editing, retouching, and production software through its web-based solution.

Through Runway, you can easily refine and enhance your existing videos with a point-and-click interface. Whether you want to replace anything in your video or add something to it, Runway and its set of self-proclaimed “Magic AI Tools” can help you get your desired effects without going through a steep learning curve.

Runway is more of a video editing tool than a generator, but it does have the qualities of letting you create images through text. It also allows you to color grade your existing video through text prompts, and brings about other tools that enable you to edit and enhance your video through the power of AI.

For instance, if you have a video with a low frame rate, Runway can help you generate and integrate new frames into the footage. This turns your previously low-frame video into a super-slow motion video and lets you use your footage in a more interesting and captivating way.

These types of features also come in handy for creating videos through images. Styled as the Frame Interpolation feature, this Runway offering lets you create an animated video through your existing set of images. You can also use other features such as blurring, replacing, or removing the background of a video; removing objects or people from videos; and adding effects to videos.

You can also use Runway to track the movement of any object in your chosen video. With it, you can use features such as removing the background noise from your video; eliminating unwanted silence from your videos; and adding transcripts as well as subtitles into your videos.

When put together, this suite of Magic AI Tools in Runway makes it a powerhouse video editor that lets you get the most out of your existing videos. This causes Runway to be featured on lists such as this compilation of the best AI video generators, even if the program itself doesn’t fit the evolving description of an AI video generator to begin with.

Pricing

Runway has three pricing plans. If you subscribe to the annual plans, you can get a discount on the monthly fee.

Free. This plan does not cost you anything but it has a limit of 3 projects and 5 GB assets as well as other restrictions.

Pro. $15/month per editor. This offers unlimited projects as well as 500 GB assets along with other features.

Team. $35/month per editor. This lets you reap rewards such as unlimited projects, 1 TB assets, and access to the full suite of Magic AI Tools.

Pros 👍
Cons 👎

Pros 👍

Easy to use features for basic video editing.
Additional functionalities such as AI image generation.
Easier interface as compared to typical video editing software.

Cons 👎

It is not a fully-fledged AI video generation platform.
It needs you to start working from your own existing videos instead of generating unique assets from scratch.
It charges a higher fee for the limited features that it has.

Who is This Best For?

It appears that this platform would work best for hobbyists who want to see what AI can do in the field of video editing. They can use the tool to tinker around, get acclimated with what it has to offer and step into this new world with ease. This platform can also be great for artists who want to create new effects on the production.

Go to the top

illustration of a cat climbing a ladder

3. Synthesys

Synthesys - Best AI Video Generators

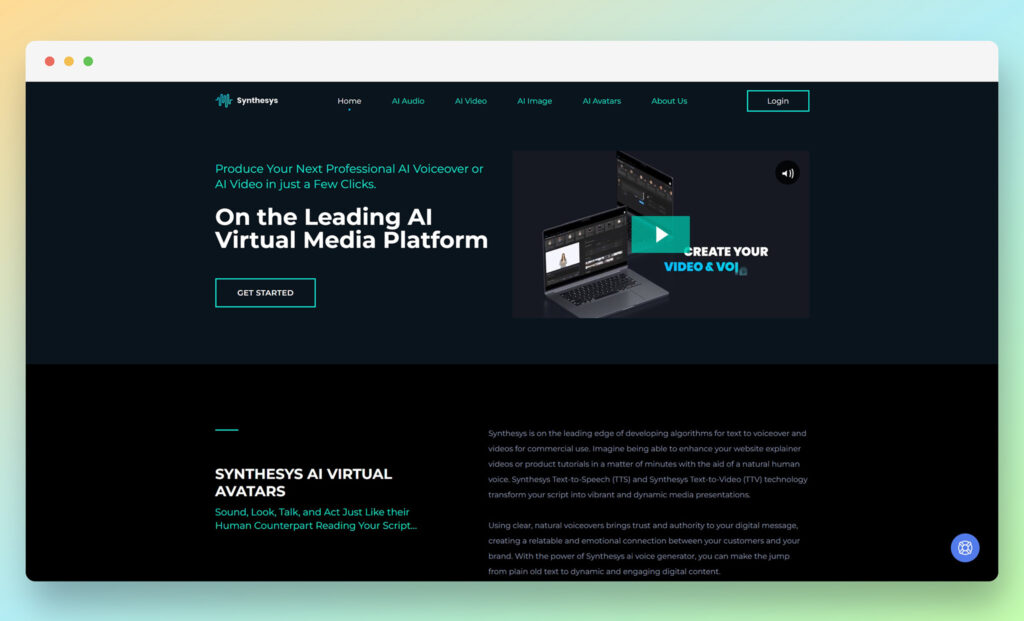
Branding itself as an AI virtual media platform, Syntheses makes its presence known on this list of the best AI video generators due to its video-centric features. Syntheses uses an AI-based synthetic voiceover system that lets you turn your typed text into spoken speech. It also has an AI based human avatar selection that allows you to have the speech be presented by a model.

With the use of AI and deep fake, the voiceover that is generated through Syntheses sounds aims to leave no doubt on its legitimacy of being spoken by an actual human. This is possible due to the way the AI has been trained to use the mannerisms of human speech.

This approach also holds true for when the avatars are speaking out the words in the video presentation. Through AI, the speech and mannerisms of the models are synced with the movements of their mouth. You can also create your own custom avatar. This, once again, is possible due to the use of deepfake technology.

With that being said, there are some aspects where Synthesys falters and does not provide results that are as seamless as some of its more refined competitors such as Synthesia. For instance, the human avatars can seem out of place and the voice can sound more artificial than natural. This makes Synthesys lag behind the competition when it comes to delivering next-generation AI video creation services.

However, Syntheses still finds its place on this list of the best AI video generators due to its additional features. Since you can easily change backgrounds or upload your own, it gives you the freedom to create engaging videos for your presentations, video tutorials, as well as client outreach and training programs.

Pricing

The pricing for Syntheses is structured over three plans. All plans let you access over 250 general voices in over 65 languages. They also provide you with a 20 percent discount if you subscribe to yearly billing.

Human Studio Syntheses. $31/month. This allows you to use the human avatars that adjust to your uploaded soundtrack. You can create unlimited videos with this plan.

Audio Syntheses. $23/month. This allows you to access unlimited voice-over tracks with 30 human voices. This provides you with a more natural voice over for your text-to-speech script.

Audio and Human Studio Syntheses. $47/month. This is a combination of both plans.

Pros 👍
Cons 👎

Pros 👍

Easy to use interface.
Large selection of human avatars and voices.
Ability to customize videos to an extent.
Unlimited downloads.

Cons 👎

Human avatars do not move seamlessly.
Voiceover does not sound completely natural.
Customization is limited.
Better offerings are available in the market.

Who is This Best For?

From what is present in this platform, it looks like it would be best for business owners who need to create marketing or outreach material. It can also provide value for marketing executives who plan on generating interesting video content. Further, training professionals who want to develop training video materials can find that this tool can offer quite a bit to make their lives a bit more simple.

Go to the top

illustration of a cat climbing a ladder

4. Rephrase

Rephrase - Best AI Video Generators

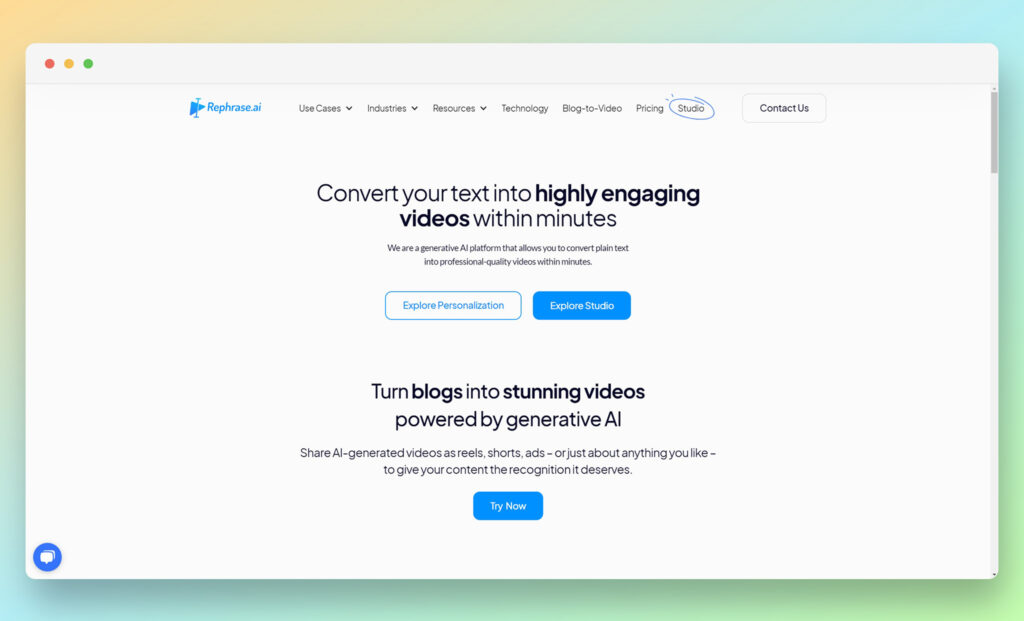
Rephrase makes its way on this list of the best AI video generators due to its use of deepfake technology that not only emulates human avatars, but also creates videos using the impressions of celebrities. This uses the technology in a highly interesting way, where the use of celebrities’ likeness through deepface can create captivating videos.

Rephrase also utilizes natural sounds or speech through AI, which allows you to integrate seamless audio in your videos. The text that you enter is processed through the technology and offered as a voiceover that emulates the delivery of human speech.

This deepfake technology is not limited to pre-generated avatars or celebrities. Instead, it extends to your own self, your customer service representatives, as well as your marketing professionals. Essentially, you can have your designated staff represent your brand in these videos without having to shoot the footage over and over again.

Rephrase has run most of its campaigns in India and typically uses Indian celebrities for its deep fake videos or offerings. However, you can easily customize the solution through its web-based portal that does not require you to install any program to your computer.

Besides video generation, Rephrase also allows you to optimize your outreach and marketing campaigns with the use of targeted tools. This can go a long way in enhancing through each video that you create using the platform.

However, these qualities might not be enough to earn Rephrase a spot in the best AI video generators list. With that being said, you can speak to the company’s sales team to make an informed decision.

Pricing

Rephrase has three plans in place, but it doesn’t outline the costs for them. Instead, it asks you to schedule a consultation with the team to determine the pricing for these solutions.

With Basic, Growth, and Pro plans, you can make use of 1 avatar and preset templates. The plans come with different extensions for avatar validity, video credits, and preset templates. The latter two plans also offer paid Whatsapp Integration and other functionalities.

Pros 👍
Cons 👎

Pros 👍

Ability to use deepfake technology for your own avatar or celebrities.
Use text-to-speech in a manner that emulates natural speech.
Get marketing tools to enhance your outreach campaigns for increased ROI.

Cons 👎

Using celebrity likeness for marketing campaigns can land you into legal trouble.
Interface is not as advanced as other competitors.
Value proposition is not competitive as compared to other providers.

Who is This Best For?

This tool can work out well for a wide variety of groups but these may benefit from it the most. Let’s take a look at who they are. The first one is business owners who want to create outreach ads.

It also looks like this tool can work well for marketers who need to establish engaging campaigns.At the same time it can make an impact on customer relationship experts who want to improve the customer experience.

Go to the top

illustration of a cat climbing a ladder

5. Hour One

Hour One - Best AI Video Generators

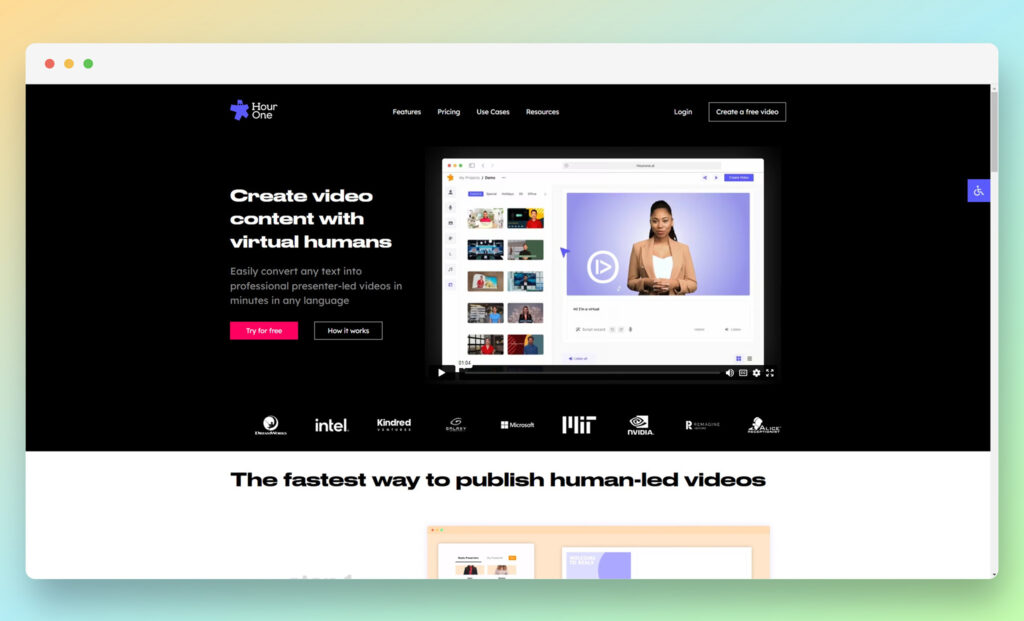
With its targeted focus on using virtual human presenters to create text-to-speech videos, Hour One aims to deliver affordable video generation through AI. The platform is easy to use and simple to customize, which adds to its overall productivity for your targeted use cases and makes it stand in line with some of the best AI video generators available at the moment.

Hour One works in the same way as many other competitors on this list: It lets you choose and customize your video and layout through a slew of present options. Afterwards, you can choose which presenter you want to integrate in your video. In this section, you can select the presenter’s appearance as well as their voice, tone, and inflection.

After you are through this step, you can move forward with making your script by entering text that turns into speech. This speech blends within your chosen human avatar and allows them to deliver the words while emulating natural human movements and mannerisms.

At the surface level, this makes Hour One’s value proposition simple to understand, but does not enable it to stand apart from many other competitors who offer identical services. That is, until you look at the offering to create your own human avatar that you can use to create a variety of video footage without repeated shoots.

This convenience to create a distinct brand image through Hour One provides you with a targeted and customized use of deepfake technology. While this feature is also being offered by a variety of platforms, it adds to Hour One’s offering for its target audience.

Hour One is also easy to use, and lets you browse through assets such as its voice library, backgrounds, and templates with ease. With over 100 human avatars, captions, and the ability to use your own video, you can easily make your Hour One video on your own. This elevates the platform from just another AI program and makes it stand beside the best AI video generators.

Pricing

Hour One comes with four pricing plans:

Free. This plan gives you up to 3 minutes of published video through the platform with unlimited stock media as well as the ability to utilize your own images and videos.

Lite. $30/month. This option includes everything from the free tier and lets you get 10 minutes of published video.

Business. $229/month. This offering allows you to create up to 20 minutes of published video. It also lets you create your own human avatar and gives you a brand kit.

Enterprise. Quote available on request. This plan personalizes the Hour One solution for your needs. It has a so-called industrial grade AI with unlimited minutes of published video.

Pros 👍
Cons 👎

Pros 👍

Ability to create quick videos through text and point-to-click interface.
Choice to create your own custom avatar.
Option to customize your videos through brand kit.

Cons 👎

Price is too steep as compared to competitors.
Features are limited as compared to competitors.
Limitations on published video minutes are stringent.

Who is This Best For?

The tool can work well for business owners who want to create branding and awareness material. It provides ease of use, simplicity, and customization that business owners and individuals who are marketers can benefit from. Indeed, marketers who need to generate engagement with interesting videos will find this tool to be useful.

Go to the top

illustration of a cat climbing a ladder

6. FlexClip

FlexClip - Best AI Video Generators

The inclusion of FlexClip on this list of the best AI video generators is a little peculiar. It is because FlexClip does not use AI to create its video clips. Instead, it utilizes a combination of online video editing tools that lets you put together your videos without having to install a software on your computer.

But it is still a web-based video editing software that allows you to create, edit, and enhance your existing videos with a few clicks. From preset templates to stock media, the platform has all the essentials in place to help you generate videos that fit right along your personal or professional style.

FlexClip’s offerings include preset templates including backgrounds, media positioning, and clip art. Through these templates, you can create videos for online courses, business introductions, and promotion announcements. The use of stock models and predetermined graphics allows you to save your time and money while generating the required design and recruiting additional talent, respectively.

But apart from business use, FlexClip also gives you templates for personal requirements. This includes wedding invites, party invites, holiday greetings, and image slideshows. Whether you want to create a birthday collage or a travel journal, you can count on FlexClip to make these videos within a few minutes.

This makes FlexClip highly different from the best AI video generators. But it still makes the platform land in this list due to the easy video editing functionalities that it brings to the table. With tools such as template editor, slideshow maker, meme generator, fancam maker, and GIF maker, FlexClip can be your go-to video editor for your professional and personal use.

FlexClip is available for free for most of its features. But if you want to use premium features such as HD video downloads and more stock videos per project, you can upgrade to one of its paid plans. This allows you to get the most out of FlexClip, its functionalities, as well as its library of assets.

Pricing

FlexClip is available in four pricing plans. The paid plans give you a 50 percent discount if you subscribe to annual billing.

Free. This plan is free and comes with features such as 480p video download, as well as 1 stock video and audio per project. You can create videos of up to 1 minute long.

Basic. $9.99/month. This option lets you access 720p video download, and the ability to create videos of up to 3 minutes.

Plus. $19.99/month. This offering upgrades you to 1080p video download and the option to use 5 stock videos and audio per project. You can also create videos of up to 10 minutes.

Business. $29.99/month. This plan lets you get access to unlimited stock video and audio, while also giving you the privileges to create videos of up to 30 minutes.

Pros 👍
Cons 👎

Pros 👍

Easy to use tools for video editing.
A variety of templates to choose from.
A completely online and web-based platform.

Cons 👎

It is not an actual AI video generator.
It does not have the functionalities to create deepfake videos with human avatars or synthetic voice.
It has a high price for its solutions as compared to its competitors.

Who is This Best For?

This tool can be great for key groups of people. The first is likely to be hobbyists who want to refine their videos. At the same time, social media managers who want to make quick edits can turn to this tool and seamlessly conduct edits to post. Further, marketers who want to enhance their videos can see that this tool will come to their aid.

Go to the top

illustration of a cat climbing a ladder

7. Elai.io

Elai.io - Best AI Video Generators

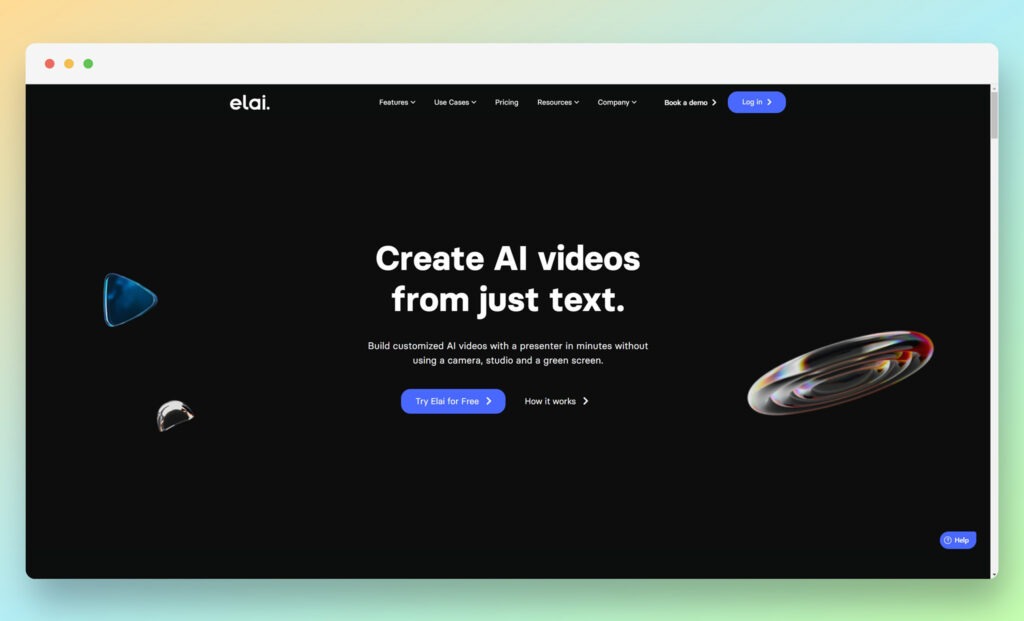
Stylized as Elai, the platform allows you to create videos with virtual human avatars and synthetic voice. Similar to many of the best AI video generators, Elai achieves this feat through deepfake, where the expressions of the virtual human avatars and the speech that they deliver is aided by deep learning.

Elai. lets you pick any of the 25 available human avatars, while also giving you the power to turn your usual text into a script that is delivered in a human-like voice. The avatars that you choose recite your script complete with mannerisms that accompany the words and tone, which allows you to use these videos as the representation of your professional or personal brand in various settings.

In addition to giving you the choice between over 25 available human avatars, Elai. also lets you create your own avatars. You can either choose a selfie-based avatar that is created almost instantly, or a 4K studio quality avatar that you can use for a more detailed impression.

No matter the type of avatar that you end up choosing, you can use the text-to-speech feature to create scripted videos in over 65 languages and dialects. This gives you the ability to connect with your audience across the globe.

The interface that Elai. has you working with is simple and intuitive, which makes it a breeze to utilize this new technology. In addition to making scripts from any text that you enter, you can also get Elai to fetch web copy from any link and turn it into a video.

While Elai can be categorized along with some of the best AI video generators in the market, its capabilities still have some room for improvement. For instance, the deepfake faces or human avatars that you see feel a bit uncanny with their movements. Whereas, the words that they speak are not always lip synced with all the human avatars. This means that you will have to move forward with some trial and error while using the service before you find the perfect match for your needs.

Pricing

Elai’s pricing is structured in four different plans. You can get a 20 percent discount if you subscribe to annual billing.

Free. This plan lets you create one minute of free video.

Basic. $29/month. This offering lets you create up to 15 minutes of video per month.

Advanced. $99/month. This option enables you to create up to 50 minutes of video per month.

Custom. If you have additional needs, you can get a quote on request.

Custom avatars. A custom selfie avatar costs you $250, while a custom 4K studio avatar comes at $500.

Pros 👍
Cons 👎

Pros 👍

Generate deepfake videos with over 25 human characters.
Create your own avatar to save up on shooting costs and time.
Develop videos for different professional needs.

Cons 👎

Deepfake and lip sync is not as refined as some competitors.
Pricing is steep for a limited number of video minutes per month.
Customization of videos leaves a lot to be desired.

Who is This Best For?

Business owners who want to develop presentation videos will find value with this tool because of the different human characters and the ability to save money on production. At the same time, marketing professionals who have to create outreach materials will also see that this tool can be of great assistance. It is best to make decisions on specific tools based on the pricing and value offered.

Go to the top

illustration of a cat climbing a ladder

8. Pictory

Pictory - Best AI Video Generators

Pictory is yet another entry on the list of the best AI video generators. With a simple interface that delivers remarkable results for video creation and editing, the platform earns its spot on its list for those who are looking for an easy to use solution.

Pictory uses AI to streamline the video editing process for existing videos, while also giving you the ability to create your own videos from scratch using text you enter as a script. This text is then turned into speech by AI-powered voice generators, giving you a voiceover for your videos.

But if you don’t want a synthesized voiceover for your videos, you can also upload your own audio track to the videos you create through Pictory. This provides you with the choice to integrate professionally-done voiceover tracks into videos that have been visually enhanced using Pictory.

Apart from using AI in these aspects, Pictory also uses deep learning to provide you with easy editing and integration tools to improve your video footage. The platform also lets you fetch engaging clips from your video footage that you can then turn into presentable videos. With it, you can also extract text from existing web pages that you can use in your video as voiceover or explanatory material.

Unlike some of the best AI video generators on the market, Pictory does not offer the use of human avatars. But if you do not want deepfake videos, this shortcoming may work in your favor by adding more editing and customization features for your videos.

Pictory has a plethora of assets that you can access to make your videos more visually interesting and engaging. This includes over 3 million video clips and over 15,00 music options. This media is royalty-free and makes sure that you steer clear of copyright infringement from their use.

Pricing

Pictory has three pricing plans in place. If you opt for annual payments, you can get 2 months free from the get go through the discounted price.

Standard. $23/month. This plan lets you make text-to-speech projects of up to 10 minutes in length. You can also create up to 30 videos per month.

Premium. $47/month. This offering allows you to generate text-to-speech projects for up to 20 minutes. You can generate up to 60 videos on a monthly basis.

Custom. Price available upon request. This option lets you create your own plan with Pictory according to your video creation needs.

Pros 👍
Cons 👎

Pros 👍

Easy video editing software that is available over the web.
Text-to-speech ability through AI-enabled voiceover.
Huge media asset library to use in your videos.

Cons 👎

Does not offer deepfake avatars.
Limited features as compared to many other competitors.
Steep price point for offered solutions.

Who is This Best For?

The tool can benefit business owners who want to create snippets or introductory videos. Thanks to simple pricing plans, users can benefit from longer times from the lowest pricing tier.

This tool can also benefit marketers who want to create engaging videos for their target audience.

It may provide value to more groups of people based on their text to speech and media asset needs.

Go to the top

illustration of a cat climbing a ladder

9. Veed

Veed - Best AI Video Generators

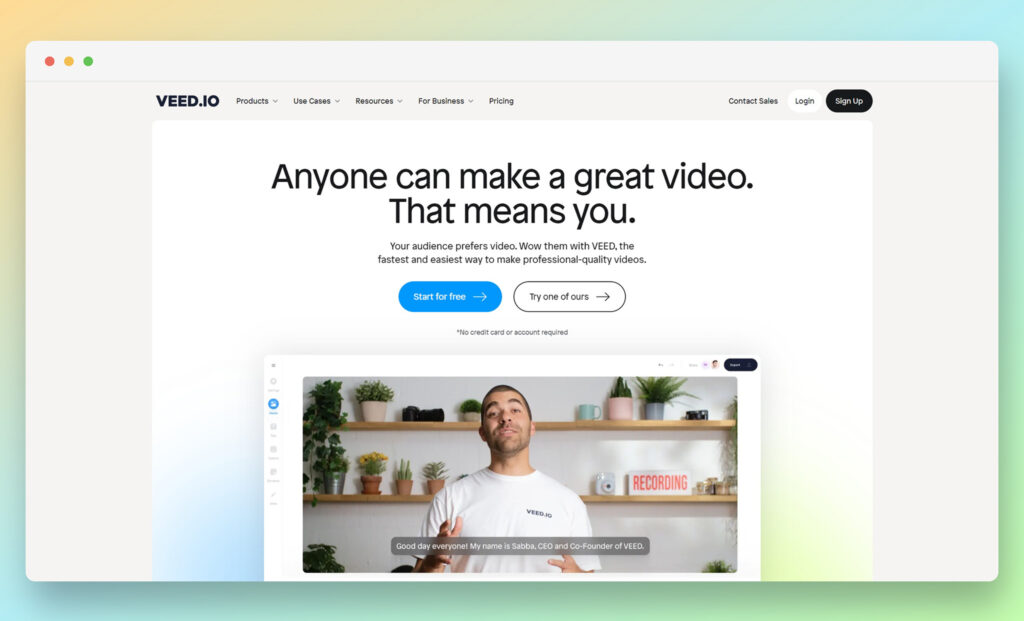
At first glance, Veed.io can seem like just another video editing software. But when you dig in a bit deeper into its offerings, the platform becomes one of the best AI video generators that are currently available for public use.

Veed’s main offering through AI is the addition of helpful features that would otherwise require you to consult a professional. By using different AI subsets to eliminate manual processes, Veed.io gives you the power to edit and refine your videos without turning to an expert or ultra-expensive video editing software. Whether you want to remove backgrounds from your videos or showcase them as snippets in a presentation, Veed lets you achieve all that and more.

With auto subtitles, quick transcriptions, as well as intro and outro templates, you can easily use Veed to craft engaging videos that catch your audience’s attention right away. You can also use templates for promos, pitches, and product showcases, which allows you to present your ideas and solutions in thought-out and well-crafted videos.

When it comes to personal solutions, you can use Veed.io for creating memes, GIFs, and lyric videos. With the social media-centric features of the platform, you can create content for your Facebook, Twitter, Instagram, and TikTok as well. This adds more weight to the Veed.io value proposition and strengthens the platform’s footing in the competitive segment.

While Veed.io does not offer text-to-speech or human avatars like some of the best AI video generators, it does make up for a compelling offering for those who are not looking for such features in the first place.

Pricing

Veed’s pricing is segmented into four tiers. You can get up to 28 percent of discount if you pay for the monthly plans through annual billing.

Free. This gives you access to Veed.io watermarked videos with auto subtitles of up to 30 minutes. You can export up to 10 minutes of videos.

Basic. $25/month per editor. This tier removes Veed.io watermarks from the videos and lets you create subtitles of up to 60 minutes per month. You can export up to 25 minutes of videos.

Pro. $38/month per editor. This plan gives you access to all the features in the Basic plan, while upgrading the subtitles to 120 minutes per month. You can also make use of transactions and access to premium stock assets.

Business. $70/month per editor. Containing all the features from the previous tiers, this option lets you get subtitles for up to 600 minutes per month. You can also use custom templates and utilize engagement analytics.

Pros 👍
Cons 👎

Pros 👍

Feature-rich video editor that lets you enhance your videos with an easy interface.
Competitive offering as compared to other video editors on the market.
Different templates and media assets make it easy to create engaging videos quickly.

Cons 👎

Does not offer a text-to-speech option.
Does not have a deepfake video generation feature.
Free plan leaves watermarks on videos.

Who is This Best For?

It appears that this tool will benefit business owners who plan to create and refine short videos. Further, marketers who have to generate content for social media channels will find value with this tool because of its different features.

Finally, hobbyists who want to develop content for their memes and personal use will find this tool to be useful.

Go to the top

illustration of a cat climbing a ladder

10. Lumen5

Lumen5 - Best AI Video Generators

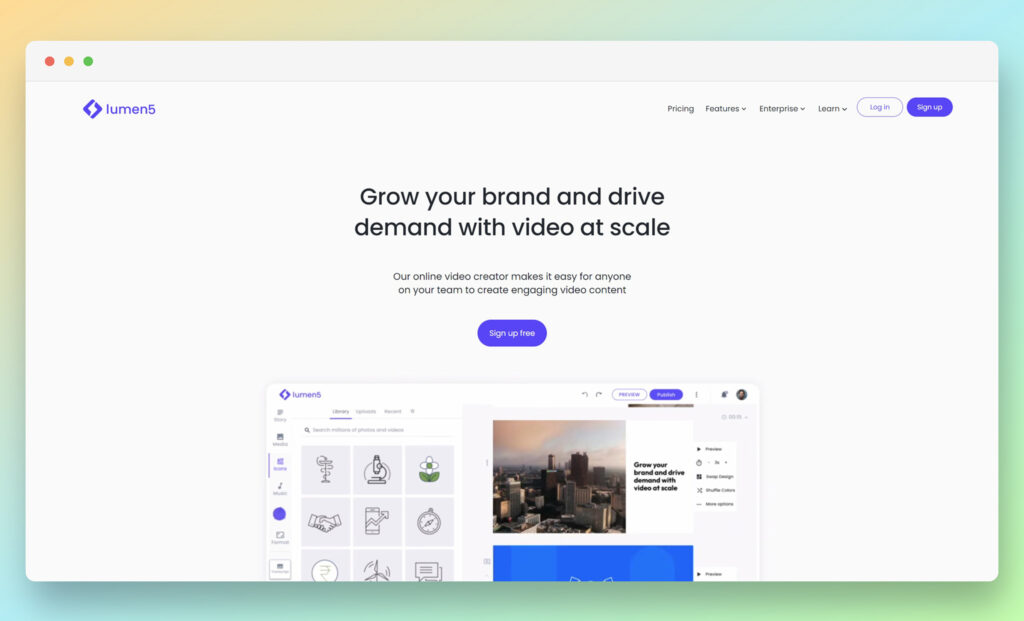
When it comes to exploring the best AI video generators, Lumen5 has to be mentioned on the list. As one of the most popular video creation platforms, Lumen5 uses AI in many ways to meet the needs of its target audience.

First and foremost, Lumen5 is focused on making video creation and editing easier. In the pursuit of this objective, the platform uses AI to simplify video editing and automate processes that would otherwise need manual intervention. For instance, if you have a long Zoom presentation video that has interesting snippets in bits and pieces, Lumen5 can help you extract and annotate these clips. Similarly, if you have a blog post that you want to transform into a video, you can use Lumen5 to easily achieve this feat.

With the power to turn blog posts into videos, you can save your time and money into exploring different concepts for your website’s text content and visual media. Instead, the minute that you create and publish a blog post that is high quality, you can turn to Lumen to fetch key points and data from your blog and present it as a captivating video that holds the audience’s interest.

With Lumen’s talking head video feature, you can boost the power and impact of your videos through captions, subtitles, and annotations. From introducing the speaker to using branded captions, this feature changes the outlook of your simple video into something far more engaging.

Lumen5 has hundreds of templates that you can customize with your logos and texts. This opens doors for you to design product showcases and corporate presentations with ease. Besides creating social engagement, you can also use these templates for personal use such as party invites or milestone announcements.

These features turn Lumen5 with its straightforward offerings to be one of the best AI video generators that are currently available. If you are not looking for deepfake avatars or text-to-speech features, you may also find Lumen5’s offerings to be interesting.

Pricing

Lumen5 has 5 different pricing plans. You can save 25 percent if you turn to annual billing on select plans.

Free. This plan gives you unlimited videos but still has the Lumen5 over the exported files.

Basic. $29/month. This option lets you create videos without a watermark, while also giving you access to icons.

Starter. $79/month. Besides offering the features of the Basic plan, this tier lets you access over 50 million of stock assets, while also giving you the ability to choose custom style options. This also has HD video in 1080p.

Professional. $199/month. This option has everything in the Starter tier, while also upgrading the stock assets to over 500 million. You can use custom watermarks and fonts, while also using multiple branding kits for your video creation.

Enterprise. Quote available on request. This plan has everything up to the Professional tier, along with offering the assistance of the Lumen5 design team and features such as bespoke templates.

Pros 👍
Cons 👎

Pros 👍

Focused features that cater to turning existing content into videos.
Ability to create interesting content for speaking engagements or training videos.
Easy to use interface.

Cons 👎

Not as feature-rich as other AI-based video generators.
No text-to-speech features.
No human avatars or deepfake technology usage.

Who is This Best For?

This tool is best for businesses that want to consistently create videos through pre-written content.

Further, marketers who plan to create content for their social media campaigns can find this tool, with its easy to use interface and generative capabilities to be valuable.

Finally, professionals who need to enhance their speaking or training engagements could turn to this tool and use existing content to create compelling video content.

Go to the top

illustration of a cat climbing a ladder

FAQ:

What are you looking for in an AI video generator?

This question helps you understand why you want to turn to AI for your video creation needs in the first place. Is it the use of deepfake, editing tools, automation, or something else? Finding the answer goes a long way towards helping you choose platforms that use AI for your specific requirements.

What is your overall AI video generator budget?

This question is highly important and allows you to determine whether saving costs is more of a priority for you than accessing the most modern features. Typically, using an AI video generator for deepfake will save you more money in shooting arrangements than turning to a video editor that has little to no use of AI.

What are your in-house design capabilities?

This question lets you figure out if you even need to look into the best AI video generators in the first place or if you are merely jumping onto the hype train. For instance, if your design staff is able to edit simple videos for you, you may not need to subscribe to an additional service. But if you don’t have such capabilities or want to access deepfake tech, turning to these solutions can be justified.

What goals do you need to accomplish through your new software?

This question is similar to exploring your basic needs, but it goes beyond that and looks at your long-term goals from using the AI video creation software. By analyzing what type of results you seek from your AI program, you can pick software that helps you with objectives such as building an audience, generating more sales, or establishing contacts in the business sector.

After going through these questions, you can shortlist those platforms that fit your requirements the best. From there, you can check reviews, features, and overall costs to make an informed decision. The process can seem tedious at first. But it allows you to reap its rewards in the long run.

With that being said, it is important to consider that AI is an evolving technology that allows programmers to keep adding and removing features across different services.

If you are committing to an AI-based program for the long haul, you may also be a part of this trial-and-error approach. However, if you get into this emerging age of AI at the ground floor, you can save significant costs while also benefiting from the technology well before your competitors start doing so.

Go to the top

illustration of a cat climbing a ladder

Conclusion

After looking at this list for the best AI video generators, it is easy for you to be a bit confused between the plethora of options and how they approach the use of AI differently. Here, you need to consider a few points to discern and determine your needs, which in turn helps you choose an option that fits your requirements to a T.

The post Best AI Video Generators appeared first on Ecommerce Platforms.

Practical Design Tips And Guidelines For Beginner Designers

Original Source: https://smashingmagazine.com/2023/05/practical-design-tips-guidelines-beginner-designers/

As someone who has worked with beginner designers for decades, I have observed a certain common problem. They often get overwhelmed with design tasks such as creating presentations, a personal website, mocking up an app idea, or even making menus or cards. It’s not due to a lack of ability and skills but rather because of unfamiliarity with the rules and systems that graphic designers are trained to understand.

To fill this gap, I have compiled some simple principles that are quick and easy to learn yet can greatly enhance any design project. In this article, we’ll focus on the four key elements of good design. Here they are:

Structure,
Spacing,
Rhythm,
Contrast.

By learning these simple concepts, anyone should be able to create effective designs that not only look good but also cater to diverse audiences, including those with disabilities. Are you ready to learn the power of these fundamental design concepts? If yes, follow me along!

Structure

Structure helps people absorb information. You see the toolbar before you can discern any individual tool in it. You recognize a form before you can identify a specific field in it. The proper structure helps you access information faster. It’s the main menu, the selection screen, before you dive in.

Let’s review an example. Imagine you are making a registration page for a webinar. The webinar page should contain the following information:

The event title,
A short synopsis,
The price of admission,
The time and date of the event,
The name of the host,
A photo of the host,
A short bio for the host,
Some social links for the host,
A register button,
A call-out: “Join me live!”.

Ask yourself, if you had to group those things into several groups/buckets, what would those be? How would you name each group/bucket? Here are the groups I would make, and it might not be precisely how you would group the information, but that’s OK; the idea is to just give you a start!

Headline
Host
Logistics

Call-out
Host name
Event date

Title
Host photo
Time & duration

Synopsis
Host bio
Price

Social links
Register button

Now that we have those buckets let’s continue: In what order do we want the audience to ingest them? My choice would be the headline first, then the logistics, with the big register button. I would keep the host information more as a detour, something optional to dive into if you would like to learn more.

Compare these two versions. Isn’t it easier to ingest the information in the one on the right?

As you can see, the structure of the information greatly influences your ability to absorb it. I will go one step further. I believe beauty is an artifact of well-organized information.

In short, don’t try to make something beautiful. Try to make something well-organized, and watch the beauty emerge!

“A well-designed, user-friendly information architecture ensures that users spend less time and effort searching for information and are successful in finding what they need. Key information-architecture tasks include identifying common features in content, forming groups of similar information objects, and linking documents to other documents on the same topic.”

— Anastasia Stefanuk, “The Importance of Information Architecture to UX Design”

Spacing

Spacing in graphic design refers to the arrangement of elements within a layout. Proper spacing can make your designs more visually appealing and easier for viewers to comprehend. It helps direct attention, creates hierarchy, and improves legibility.

Let’s look at another example. On the left, all the gaps are the same. On the right, the spacing is influenced by the structure. The inner group elements are more tightly grouped, creating a visible “scaffolding” for the content.

In print, space is expensive because the paper is not free. This is why in the past, only “luxury magazines” could afford those beautiful margins and airy layouts. Nowadays, white space is virtually free. Luxury for everybody!

“White space is the area between design elements. It is also the space within individual design elements, including the space between typography glyphs (readable characters). Despite its name, white space does not need to be white. It can be any color, texture, pattern, or even a background image. White space is a great tool to balance design elements and better organize content to improve the visual communication experience.”

— Mads Soegaard, “The Power of White Space in Design“

The Space Must Flow

Consistent spacing around elements gives visual harmony and unity to your work. It ensures a coherent look across all the components of your design. This is because irregular gaps draw the viewer’s attention away from the main focus, which is counterproductive. By maintaining even spacing between all objects, you allow the content to communicate without interference.

Here are some tips for creating a nice flowing space between and around elements.

Centering In A Box

Sometimes you need to put an image (like a logo, for example) inside a box. In this case, leave at least half its shortest dimension as a minimum margin. E.g., if the image is wide, use half its height as a minimum margin. If the image is tall, use half its width.

Vertically Centering Text

Most of the text mass sits between the baseline and the top of the lowercase letters — squint your eyes slightly, and you will see what I mean. When vertically centering text, a good rule of thumb is to center the lowercase letters’ height. In the designer speech, it is called the “x-height.” Some typefaces might need a tiny vertical adjustment, but we’re going for simple here.

“Why is it called ‘x’ height? Because the letter ‘x’ is the only letter in the alphabet that has all its terminals touch both the baseline and the meanline, with no extending points. Curved letters such as a, c, e, o, r, or s usually pass the font’s x-height slightly.”

— Sirine Matta, “What Are Cap Height and X Height in Typography?”

Text In A Shape

When centering text inside a box (like a button or a label), you need to use the height of the lowercase letters to do the centering and make sure there is the same amount of space all around the text, not just above and below.

Centering Polygons

When centering a polygon, center the circle passing by each point instead of centering the box around the polygon. Once again, this will ensure the space around the shape is nice and uniform.

Nested Rounded Boxes

The rounded boxes are great. They don’t have sharp edges. They feel more human, more organic as if these digital shapes have been sanded down or eroded, like pebbles.

However, when putting a rounded box into another one, a mistake I have seen often is to use the same border-radius on the box outside and the box inside. If you do this, the band (represented here with a colored gradient) will not have a consistent width. Instead, you need to use proportional radius when doing such rounded box nesting.

Rhythm

Human eyes get bored quickly. To keep their interest, you need to give them something new to parse and explore at regular intervals. But you don’t want to make it too hard either, too “new” every time — just a gentle walk along an interesting variety of patterns.

Rhythm contributes to a smooth flow that engages and holds the viewer’s interest while communicating effectively. A visual rhythm also provides directional cues to guide readers through the content.

Well, if you think about it, your slide deck is the same thing, and so is your portfolio, your app onboarding flow, and so many other things. Create variety constrained by a simple set of rules. Start with just left and right, and maybe one day, try using thirds if you feel comfortable. It’s not hard, you’ll see!

“Rhythm in art and design refers to a relationship between elements that creates a sense of harmony. Rhythm can be seen in patterns, in relationships between colors and shapes, and in repetitions of lines and forms. Rhythms help to guide the viewer’s eye around a piece rather than allowing the eye to settle on a particular focal point.”

— “Rhythm,” part of the “Principles of Design” BBC series

Repetition Is Key To A Rhythm

Repetition is key to a rhythm. Reusing elements such as colors, shapes, and text styles can create a sense of unity and coherence within your designs, making them feel more organized and visually appealing. It also makes your choices more intentional.

For example, I call a book-end any element that can be repeated to signal the beginning and the end of something. Shapes and colors are a great way to express creativity and bring some life to your content! It helps to tell your audience that a topic has ended in a nice and subtle way.

The repetition of certain visual elements creates patterns that catch our eye, engage our brains, and hold our interest, which can make any design feel more dynamic, expressive, and aesthetically pleasing. Find the guitar riff of your content; find the chorus!

Here is a meta example. These are the elements I reused throughout this article to create a sense of unity between all the illustrations. I had to pick some colors, decide on a style for the arrows, and make many more design choices. A bigger version of this is usually called a design system.

Reading Rhythm

When you are feeding words into people’s retinas, you need to find the right compromise between the size of the text chunks and the effort required to move the eye to the next line. That sounds mechanical because it kind of is. Too long a line, and it is hard to locate the beginning of the next line. Too short a line, and your reading gets interrupted too often for an eye carriage return.

I usually find that between eight and twelve words per line are a good goal for the main text block. Just count the words in a couple of sentences — no need to be too strict. Also, keep in mind that it’s a good rule for English, but other languages might have different sweet spots. For a sidebar, a caption, or something narrower, you can aim for five to six words.

Try reading some text in the example. You will see how much easier it is for your eyes to follow when the lines are not too long!

Before going further, I’d like to quote Gary Provost, an American writer and writing instructor, whose words on rhythm are spot-on:

“This sentence has five words. Here are five more words. Five-word sentences are fine. But several together become monotonous. Listen to what is happening. The writing is getting boring. The sound of it drones. It’s like a stuck record. The ear demands some variety. Now listen. I vary the sentence length, and I create music. Music. The writing sings. It has a pleasant rhythm, a lilt, a harmony. I use short sentences. And I use sentences of medium length. And sometimes, when I am certain the reader is rested, I will engage him with a sentence of considerable length, a sentence that burns with energy and builds with all the impetus of a crescendo, the roll of the drums, the crash of the cymbals–sounds that say listen to this, it is important.”

— Gary Provost

Not So Justified

Justified text appears aligned on both sides. This is a very desirable attribute, but it’s very hard for it to happen naturally. Editing and design tools all do a pretty bad job of creating justified text that looks good. Instead, you will need to fine-tune letter spacing, word spacing, use good hyphenation, and sometimes even rewrite your text. Your job is to avoid text gaps that will hurt the pace of reading.

So, unless you spend the time to do the work manually, I suggest that you use left-aligned text instead. The price to pay for this shiny right edge is not worth it!

Contrast

Contrast refers to the use of differences (in color, size, shape, weight, direction, or texture) to attract attention, create hierarchy, enhance readability, and even evoke emotions like calm or energy. If a rhythm is the beat, contrast is the melody.

Mind The Low Contrast

To ensure your content is accessible to everybody, including people with visual impairments, text on a colored background should have enough contrast to be easily readable. There are plenty of apps or plugins that can calculate that for you (I’ve included a few references at the end of the article, check Further Reading). For now, all you really need to know is that a contrast ratio of 4.5 or higher is recommended.

Text Size Contrast

Text size can be used as a very convenient tool for structuring information. A well-structured text can significantly lower the effort required for the viewer to ingest the information. The contrast between each heading level should be high enough for the structure to be visible.

If possible, a consistent ratio between different header levels usually looks more elegant. In general, the weight of the text (bold, regular, light) decreases as the level increases.

Text Weight Contrast

Sometimes, the typeface you are using comes with many weights, like medium, semi-bold, light, and so on. In those cases, it’s usually recommended to skip one weight when pairing them to create enough contrast between them.

Avoid Unintentional Contrast

Combining text with an icon can help comprehension, improve visual appeal, or increase the importance of an element. However, always make sure the thickness of the text matches the thickness of the icon. That will make it feel as if it were part of the typeface. It does look more elegant, but it also saves your audience from even thinking about it, which is a recurring theme in graphic design. Good design is invisible!

“Although we can’t help but notice poor design, good design is much harder to detect. We’d go even further: good design is invisible. This raises a logical question: what, then, is good design? Is it when form follows function? Is it the perfect arrangement of design elements on a modernist grid? Is it 24-point headings and 8-point body text? Is it a solid set of principles that you work to every time on every job? The answer might surprise you — good design is all of this. And none of it.”

— Damien Stanyer, “Why is good design invisible?”

Conclusion

That might have surprised you, but creating and iterating on designs isn’t about making things pretty. Your job as a designer is to lower the cognitive load for people to ingest the information, create a rhythm that keeps your viewer engaged, and make sure everybody can access the content.

“The most important advice I would give to emerging designers — even those that have already won awards — is that learning never stops. You can always improve your craft, whether you’ve won one award or twenty. Remember, you’re never going to be an expert in everything. I have worked on so many things, from book design to exhibition design, hospitality, tech, and everything in between — and I’ve taken something new from the experience every time. Now I’m the executive creative director at a global agency, and I still find myself learning something new every day.”

— Lisa Smith, “Learning Never Stops”

Next time you are faced with the need to design something, I hope those tips will make you feel a little bit more confident and comfortable! And remember, everybody can be a designer, but every designer has a lot to learn and to keep learning. It’s a process that never stops.

Further Reading

I created a list of additional resources about the topics that I have tried to cover briefly so far. (And if you think this list is missing something of value, please do leave a comment at the end of the article. Thank you! 💖)

“The Importance of Information Architecture to UX Design,” by Anastasia Stefanuk
“The Power of White Space in Design,” by Mads Soegaard
“X-height,” Wikipedia
“What Are Cap Height and X Height in Typography?,” by Sirine Matta
“Rhythm,” part of the Principles of Design BBC series
“Design Systems 101,” Nielsen Norman Group
“Good Design is Invisible: Understanding Design’s Impact,” by John Hawley
“Recommended contrast ratios,” University Information Technology Services (UITS)
“Contrast and Color Accessibility,” WebAIM
“10 Usability Heuristics for User Interface Design,” Nielsen Norman Group
“Why is good design invisible?,” by Damien Stanyer, Thirst Creative
“Learn the logic of great typography,” an interactive tutorial on type, Learn UI Design
“Accessible Color Generator,” a free accessibility tool by Learn UI Design
“Type Scale,” a beautiful design web app to make font scales
“Color Tools for Design Systems,” great color tools for text, data visualizations, and more
“Learning Never Stops”
Award-winning creatives share the secrets to success, PRINT magazine

Implementing Adaptive Dark Mode Based on User’s OS Settings: A Step-by-Step Guide

Original Source: https://1stwebdesigner.com/implementing-adaptive-dark-mode-based-on-users-os-settings-a-step-by-step-guide/

More and more users prefer browsing websites in dark mode to reduce eye strain and save battery life. To provide the best user experience, it’s helpful to implement an automatic dark mode on your website that adjusts according to a user’s operating system settings. In this tutorial, we’ll walk you through the steps to achieve this.

Your Web Designer Toolbox
Unlimited Downloads: 500,000+ Web Templates, Icon Sets, Themes & Design Assets
DOWNLOAD NOW


1. Create a CSS file for dark mode

First, create a separate CSS file called “darkmode.css” that contains the styles for your website’s dark mode. This file should include the color palette, font styles, and other design elements that cater to dark mode. For example:

body {
background-color: #121212;
color: #ffffff;
}

h1, h2, h3, h4, h5, h6 {
color: #f0f0f0;
}

a {
color: #ffffff;
text-decoration: underline;
}

2. Link the dark mode CSS file

In your website’s main HTML file, add the following link tag inside the head section to reference the dark mode CSS file:

<link id="darkmode-stylesheet" rel="stylesheet" href="darkmode.css" media="(prefers-color-scheme: dark)" />

The “media” attribute ensures that the dark mode CSS file will only be applied if the user’s operating system is set to dark mode.

3. Detect operating system’s color scheme

Now it’s time to detect the user’s operating system color scheme with JavaScript. Create a new JavaScript file called “darkmode.js” and add the following code:

function getSystemColorScheme() {
return window.matchMedia && window.matchMedia(‘(prefers-color-scheme: dark)’).matches ? ‘dark’ : ‘light’;
}

This function checks if the user’s operating system is set to dark mode or light mode by evaluating the ‘prefers-color-scheme’ media query.

4. Save the user’s preference

To improve the user experience, we’ll save their preference in the browser’s local storage. Add the following code to the “darkmode.js” file:

function saveUserPreference(preference) {
localStorage.setItem(‘color-scheme’, preference);
}

function loadUserPreference() {
return localStorage.getItem(‘color-scheme’);
}

These two functions save and load the user’s color scheme preference, respectively.

5. Toggle dark mode

Create a function to toggle dark mode on and off by adding or removing the “dark” class from the HTML body element:

function toggleDarkMode(enableDarkMode) {
if (enableDarkMode) {
document.body.classList.add(‘dark’);
} else {
document.body.classList.remove(‘dark’);
}
}

6. Initialize dark mode based on user preference or system settings

Now, add a function to initialize dark mode on page load. This function checks if the user has a saved preference in local storage; if not, it defaults to their operating system’s settings:

function initializeDarkMode() {
const userPreference = loadUserPreference();

if (userPreference) {
toggleDarkMode(userPreference === ‘dark’);
} else {
const systemColorScheme = getSystemColorScheme();
toggleDarkMode(systemColorScheme === ‘dark’);
}
}

document.addEventListener(‘DOMContentLoaded’, initializeDarkMode);

7. Allow users to toggle dark mode manually

As a fallback and also providing a better experience for your users, it is a good practice to give them the ability to switch between dark and light modes manually. To do this, add a button or a switch element in your website’s main HTML file:

<button id="toggle-darkmode">Toggle Dark Mode</button>

Next, add an event listener for this button in your “darkmode.js” file:

function handleDarkModeToggle() {
const currentPreference = loadUserPreference() || getSystemColorScheme();
const newPreference = currentPreference === ‘dark’ ? ‘light’ : ‘dark’;

toggleDarkMode(newPreference === ‘dark’);
saveUserPreference(newPreference);
}

document.getElementById(‘toggle-darkmode’).addEventListener(‘click’, handleDarkModeToggle);

This function toggles dark mode, saves the new preference in local storage, and updates the user interface.

8. Listen for operating system changes

To ensure that your website’s dark mode adapts to changes in the user’s operating system settings, add an event listener to the “darkmode.js” file that listens for changes to the ‘prefers-color-scheme’ media query:

function handleSystemColorSchemeChange(event) {
if (!loadUserPreference()) {
toggleDarkMode(event.matches);
}
}

window.matchMedia(‘(prefers-color-scheme: dark)’).addListener(handleSystemColorSchemeChange);

This function checks if the user has a saved preference in local storage. If not, it toggles dark mode based on the updated operating system settings.

9. Link the JavaScript file

Finally, include the “darkmode.js” file in your main HTML file by adding the following script tag inside the head section:

<script src="darkmode.js" defer></script>

The “defer” attribute ensures that the script is executed only after the HTML document has been fully parsed.

All done! Now you have everything you need to implement dark mode on your future projects!

Printify vs Redbubble (2023): Which is Best for Print On Demand Businesses?

Original Source: https://ecommerce-platforms.com/articles/printify-or-redbubble

Printify vs Redbubble: Which solution is best if you’re planning on starting a print-on-demand business? Both Printify and Redbubble offer ecommerce business owners a convenient way to start selling customized and unique products to consumers online.

With both tools, you can add your unique designs to a variety of different products, ranging from popular apparel garments such as shirts and hoodies, to phone cases, home accessories and more. However, Redbubble and Printify approach the “POD” market from very different angles.

While Printify gives you all the tools you need to create a POD business using your own ecommerce website, as well as various online marketplaces, Redbubble is a dedicated online market designed specifically for creators. Here’s everything you need to know about Redbubble and Printify to determine which solution is best for your company.

What is Printify?

printify homepage - printify vs redbubble

First founded in 2015, Printify is a print-on-demand and dropshipping platform, designed to help ecommerce retailers develop and sell customized products.

Ready to integrate with a host of website builders and marketplaces, such as Shopify, Amazon, eBay, and Etsy, Printify helps companies automate the POD sales model. The solution includes a mockup generator for product design, direct connections to global fulfillment companies, and tools for managing orders and inventory. Printify handles the whole order fulfillment process on behalf of companies, and offers a wide selection of white label product options to choose from.

What is Redbubble?

redbubble homepage - printify vs redbubble

First developed in 2006, long before Printify, Redbubble is a print on demand marketplace. Similar to Printify, Redbubble handles product creation and fulfillment on behalf of vendors, reducing the amount of time you need to spend on logistics and inventory management. Rather than integrating with existing websites, Redbubble acts as a unique platform where companies can connect with customers from an existing global audience.

Geared towards designers, Redbubble gives creators an easy way to monetize their designs without having to invest in the full website building process. The platform has its own mockup generator, tools for marketing and sales, and even useful templates to use for product design.

Go to the top

illustration of a cat climbing a ladder

How Does Printify Work?

On the surface, Printify and Redbubble appear to be two very similar solutions for business owners. They’re both platforms designed for the print-on-demand marketplace, which allow companies to add their own custom designs to products. Both tools offer access to a wide variety of product options, from custom t-shirts, to phone cases and home décor.

However, with Printify, you get all of the tools you need to leverage the print on demand model alongside your existing ecommerce website, or your storefront on common marketplaces. Printify can integrate directly with ecommerce platforms and marketplaces, allowing users to upload product mock-ups directly to their chosen storefront.

Once you’ve created an account and integrated the solution with your existing ecommerce store, you can use Printify to browse through a variety of products organized based on their category, the location of the manufacturer, and other factors. You’ll be able to use the mockup generator to add your own designs to each item, then list the products directly on your store or marketplace storefront.

Once a customer places an order, the Printify software will immediately issue that order to the manufacturer, who handles everything from producing your products, to packaging and shipping them to customers around the world. You can even handpick your supplier, to ensure you’re working with a company that can deliver excellent quality and fast delivery times.

Plus, Printify also gives you an opportunity to order samples of your product before you list them on your online store, so you can invest in effective quality management.

Printify’s range of partners can ship products around the world, to locations from Australia and the US to the UK and various European continents. The global print network offers a range of printing technology options, more than 800 high-quality products, and excellent customized service.

Go to the top

illustration of a cat climbing a ladder

How Does Redbubble Work?

Redbubble is a little different from Printify in terms of functionality. With Redbubble, you also gain access to manufacturing partners and fulfillment companies who can handle product development and shipping on your behalf. However, instead of integrating an end-to-end platform with your existing website, you’ll sell the items you create directly on the Redbubble marketplace.

With more than 18.5 million visitors in the US alone, and countless consumers located in regions around the world, Redbubble makes it easy for creators and business owners to create and sell merch anywhere. All you need to do is create a free account, upload your artwork, and use it to customize the various white label products on the Redbubble platform, using an included mockup generator.

You can then create sales pages for each product, with a title, description, and a selection of images for your product. Whenever a customer places an order through Redbubble, the back-end team produces the item and ships it directly to the consumer. Instead of paying for each product to be created and shipped, you’ll simply earn a commission from each sale, rather than the full sale price.

Redbubble is extremely straightforward for creators and artists who want to monetize their designs without managing a store themselves. Instant access to an existing audience makes it relatively easy to start selling instantly. However, you will need to make sure you research your target audience, create compelling products, and market your goods successfully to make a profit.

Notably, you will need to wait until you earn a specific amount through Redbubble before you can access your profits. Once a month, Redbubble will deposit your funds into your bank or PayPal account provided you’ve earned at least $20. Otherwise, you’ll need to wait for the funds to be released, which may be a problem for some retailers.

Go to the top

illustration of a cat climbing a ladder

Printify vs Redbubble: Ease of Use

Printify and Redbubble are both ideal for retailers and artists who want to access a relatively low barrier to entry when monetizing their designs.

With both of these tools, there are no minimum order quantity requirements, so you can avoid worrying about inventory management and high up-front payments. Additionally, both tools will handle fulfillment on your behalf, dealing with everything from packaging products, to making sure they reach customers as quickly as possible.

Redbubble and Printify also come with tools included to help you make the most of your designs. You can leverage a mockup generator to see what your products will look like in advance, and order samples of each item at a discounted rate.

However, while both tools are extremely straightforward to use, Redbubble might be simpler for those who consider themselves to be true beginners in the ecommerce space.

With Printify, you’re still responsible for establishing your online presence with an online store or marketplace storefront. You also need to handle all of the work of marketing your items yourself, ensuring you attract enough customers to your store to make a profit.

With Redbubble, you may still need to invest in external marketing strategies, but your products get an instant visibility boost, because they’re listed on a popular marketplace straight away. There are no store design concerns to worry about. You simply make a dedicated listing for each item you want to sell. Additionally, Redbubble even offers tools and guides to help you increase your sales.

That being said, Redbubble doesn’t give you as many opportunities to develop your own brand identity as you’ll get on Printify. Since you’re not developing your own online store, you can’t invest in developing a more significant online presence. However, you can still use SEO in your listings to increase visibility, and leverage tools for marketing, like email and social media separately.

Go to the top

illustration of a cat climbing a ladder

Printify vs Redbubble: Product Designs and Quality

Regardless of which niche you plan on targeting with your print on demand business, ensuring you can produce high-quality products is essential. The better the print options and the quality of the overall products you produce, the more likely you are to earn loyal customers.

The good news is that both Printify and Redbubble partner with a variety of companies and fulfillment centers around the world, to ensure you’ll have a selection of great products to choose from. There are various types of printing technology to explore, and a huge range of items available on each platform, from apparel to accessories and home décor.

The bad news is that because both Printify and Redbubble use partners for printing, the quality of your products can vary depending on a number of factors. While both of these platforms do their best to source the help of high-quality, sustainable manufacturers, there’s always a risk that the quality of your items might not live up to expectations.

While the majority of companies using both Printify and Redbubble say the print quality is good, and the materials used are excellent, it’s worth doing your due diligence when using either of these platforms. Ordering samples of your products before you list them on your website can be a good way to ensure you’re meeting the expectations of your customers.

Go to the top

illustration of a cat climbing a ladder

Pricing

Costs are another important factor to consider when choosing the right print on demand solution for your company. The print on demand business model often means that prices can vary drastically depending on the items you choose to produce, your customization options, and shipping.

Both Printify and Redbubble offer free plans, which allow you to get started with the service without paying anything. However, with Printify, you will need to pay for the base cost of the products you produce, as well as any customization fees after a customer places an order. With Redbubble, you don’t pay anything for the initial item, but you only earn a portion of the profits.

Printify Pricing

Alongside its free plan, Printify offers two paid package options, available either on a pay monthly basis, or an annual basis with a 14% discount. Options include:

Premium: $24.99 per month with support for 10 stores per account, unlimited product designs, up to 20% discounts on all products, and order management with Printify Connect.

Enterprise: Custom pricing for merchants with more than 10,000 orders per day, with unlimited stores per account, unlimited product designs, and all the features of Premium.

All plans include access to the Printify mockup generator, integrations with ecommerce platforms, manual and automated order creation, help centers, and custom order imports.

Redbubble Pricing

Redbubble doesn’t have any paid plan options. Instead, it simply pays designers a commission for every product they sell. Margins usually start at around 20% of the full product price, but it is possible to raise or lower the price of your products depending on your needs. It’s worth checking the current price for each item you want to sell before adding it to your store, as the base cost can vary, which influences your total profit margins.

Go to the top

illustration of a cat climbing a ladder

Integrations

As relatively unique print on demand platforms, Printify and Redbubble both take different approaches to integration. Redbubble currently doesn’t offer any native integrations with third-party platforms like Wix, WooCommerce, or Shopify. However, there are tools you can download which allow you to showcase your portfolio on your personal website.

Alternatively, Printify relies heavily on its flexible integration options to ensure companies can make the most of the platform. Printify can integrate directly with your Shopify and WooCommerce selling channels, allowing you to upload mockups, manage orders and automate fulfillment in one place.

Printify also integrates with marketplaces like Etsy, as well as platforms like Ebay, BigCommerce, PrestaShop, Squarespace, and Wix Stores. There’s also a selection of custom API solutions companies can use to create advanced automated workflows.

If you’re looking for a convenient way to create and sell products across a variety of existing channels, Printify is definitely the right option for you. However, if you want an all-in-one solution that allows you to sell custom merch without designing a website, Redbubble might be the best choice.

Go to the top

illustration of a cat climbing a ladder

Fulfillment and Shipping

The great news for would-be store owners is that both Printify and Redbubble can handle all of your fulfillment processes for you, giving you more time to focus on developing your brand, and connecting with customers. Printify has a global print provider network, spread across 110 facilities in the US, Canada, EU, Australia, UK, and China.

The company partners with local fulfillment companies around the world to ensure you can rapidly send products to customers wherever they are. All sales channels and print providers have standard shipping options available. Plus, some providers also offer priority shipping.

Standard shipping from US-based providers usually takes 2-3 days for domestic customers, or 3-5 days for international customers. However, shipping times can vary drastically depending on the supplier you choose and where your customer is located. Some international deliveries can take up to 30 days, and its uncertain whether this includes production times.

Printify does note that most orders are typically shipped within 2 to 7 days of the order submission date, however, and business leaders can track shipments within the app.

Redbubble also has a global printing and fulfillment network, allowing it to deliver products to customers globally. However, the company doesn’t ship to certain locations, such as Cuba and Sudan. Redbubble works with reputable couriers to ship customer orders, such as DHL, FedEx, and UPS.

However, shipping times can still vary depending on your chosen shipping method, and the customer’s location. Redbubble offers a range of standard and priority shipping options, and you can calculate the cost of shipping within your account. Like Printify, Redbubble also gives ecommerce retailers tools for tracking their orders, and allows merchants to share tracking numbers with customers, so they can keep an eye on their purchase.

With both platforms, shipping prices can fluctuate based on the prices provided with partner logistics companies. However, you should be able to calculate shipping prices before you sell anything.

Go to the top

illustration of a cat climbing a ladder

Customer Support

Customer support is an important consideration for any ecommerce business investing in print on demand. If something goes wrong with your order, it’s important to ensure you can contact logistics companies and manufacturers, to get extra help.

Printify offers a range of customer support options, including 24/7 merchant support on all plans, and a self-service help center where you can find crucial articles on a range of topics. You can learn all about troubleshooting common issues, using APIs and integrations, and creating orders.

Printify also runs a fantastic blog which has tips and tricks on how to create the best POD company and increase your profits. Depending on your plan, you may be able to access additional services, like order management with Printify Connect.

Redbubble takes a similar approach to Printify in terms of customer service. There’s a comprehensive help center and knowledge base, as well as FAQs you can check out for extra insights. You’ll also be able to contact Redbubble with questions using the “request submission” form on the website, or by messaging the company on Facebook or Twitter.

Go to the top

illustration of a cat climbing a ladder

Pros and Cons of Printify and Redbubble

Both Printify and Redbubble offer excellent print-on-demand service and support to companies around the globe. They’re ideal for creating and selling custom products online, although they target slightly different customer bases.

Printify is one of the best print-on-demand companies around for merchants who want to design their own products and sell them through an existing ecommerce website or marketplace. Alternatively, Redbubble offers an easy and cost-effective way for artists and creators to monetize their designs without creating a website. Here are some of the core pros and cons of both print on demand companies:

Printify Pros & Cons

Pros 👍
Cons 👎

Pros 👍

Excellent range of custom products to choose from, with stickers, apparel and accessories
Easy-to-use mockup generator for design customization
Various shipping and fulfillment options to choose from
Easy integration with a range of marketplaces and ecommerce store builders
High-quality POD products made with sustainable materials
Variable profit margins, as you can set your own price for items
Great range of branding options.

Cons 👎

Printing partner quality can vary
Requires the creation of your own website
Some products can be quite expensive
Delivery times can be lengthy in some areas

Redbubble Pros & Cons

Pros 👍
Cons 👎

Pros 👍

Easy to access and use for beginners in the commerce world
No monthly costs or set up fees
Various product options from leggings to art prints
Customizable markup options for profit margins
Built-in analytics and insights to increase sales
Low base price for many of the available products
Excellent global distribution network
Access to a large existing audience

Cons 👎

No integrations with existing online tools
Limited branding options for products and packaging
Slow payouts when it comes to receiving earnings
Lots of competition on the platform
Fewer design tools to work with

Go to the top

illustration of a cat climbing a ladder

Printify vs Redbubble: The Verdict

Ultimately, Redbubble and Printify are two excellent options for companies investing in print-on-demand business models. Both solutions offer fantastic fulfillment services, as well as a range of print on demand products to choose from, including wall art, tote bags, clothing, and accessories.

With both platforms, the shipping costs, times, and core price of products can vary, so it’s worth doing your research on both POD sites before you start building your business. Additionally, both of these platforms are designed to serve a slightly different audience.

Redbubble’s product creation and fulfillment tools are ideal for artists who want to monetize their designs without having to worry about building a website from scratch. You can create a wide variety of different products, list them on an active online marketplace, and start making money fast. However, the profit margins can be low to begin with, and there’s a lot of competition to fight against.

On the other hand, Printify is one of the best tools available if you’re looking for a company to help you produce custom products and ship them to customers, while developing a powerful brand. The solution can integrate with a wide variety of marketplace and ecommerce tools, and gives you plenty of ways to differentiate yourself from competitors.

The right option for you will depend on your ideal business model, but keep in mind there are plenty of other alternatives you can consider too, such as Zazzle, TeeSpring, and Printful.

Further reading 📚

Printful vs Redbubble (2023): Which Is Better?

Printify vs Gelato (2023): Which Is Best?

Printify vs Printful (May 2023): The Ultimate Print-on-Demand Services Comparison

Printify vs Spocket (2023): What’s The Difference?

The post Printify vs Redbubble (2023): Which is Best for Print On Demand Businesses? appeared first on Ecommerce Platforms.

How To Deal With Big Tooling Upgrades In Large Organizations

Original Source: https://smashingmagazine.com/2023/05/big-tooling-upgrades-large-organizations/

If you work in software development, you probably know a thing or two about using and maintaining third-party packages. While third-party tooling has its fair share of downsides, there are plenty of advantages as well. The efficiency you get from code that someone else has already written speeds up development and is hard to deny. Sure, there are all sorts of considerations to take in before plopping code from a third party — accessibility, technical debt, and security, to name a few — but the benefits may make taking on those considerations worthwhile for your team.

Upgrades are also part of that set of considerations. Usually, your team may treat this sort of maintenance as a simple task or chore: upgrading dependencies and (automatically) validating that all of the features keep functioning as expected. You probably even have automated checks for keeping all package versions up to date.

But what if the third-party tooling you adopt is big? I mean big, big. That’s common in large organizations. I happen to work for a fairly large organization that leverages big third-party resources, and upgrading those tools is never as simple as running a package update and moving on. I thought I’d share what’s involved in that process because there are many moving pieces that require ample planning, strategy, and coordination. Our team has learned a lot about the process that I hope will benefit you and your team as well.

Some Context On My Organization

I work for Jumbo Supermarkten in the Jumbo Tech Campus (JTC), which is a department of over 350 developers working in agile teams on a range of digital products that help facilitate our core grocery and e-commerce processes.

We have a variety of responsibilities, where 70% of the work is allocated to the primary objectives for each team, and the remaining 30% is dedicated to anything a team wants, as long as it is beneficial to the JTC, which is very useful if you want to deliver value outside of your own team.

When we look at maintaining tooling and packages, balancing the goals of each team with the goals of JTC means that teams effectively maintain their own codebases while also collectively maintaining internally shared codebases that serve as the tooling and foundation of our applications.

Centralized Code As A Bottleneck

To build our applications with consistent standards, we rely on an internal design system and the component library we call Kompas (Dutch for “Compass”). We have built this system ourselves and rely on Vue to render our components and build interactions. Kompas is a hard dependency for virtually all of our applications to ensure uniformity.

This project was not allocated to a dedicated team. Instead, we adopted a strategy that introduced plenty of guidance to allow all front-end developers to contribute. Any developer can add new components to the library as well as features to existing components and keep everything in sync with the designs.

Teams normally work on business features since product owners love delivering customer value. The way we set up our process would allow a team to, in one sprint:

Make the required change in Kompas,
Have it reviewed by peers from both inside and outside a particular team,
Publish the latest version of the component library, and
Use that version in that team’s own application to deliver to the end user.

We can only do this with automation on repetitive processes — linting, formatting, quality assurance, testing, visual comparisons, and publishing — in order to provide enough room for developers to contribute to the process. Our component library is very much a living document of our design system, with multiple minor releases and patches a week. With semantic versioning, we can keep our own applications up to date easily and with confidence.

For bigger undertakings, such as setting up visual snapshot tests, we established temporary working groups alongside our existing teams that we called “front-end chapters” where members join on a voluntary basis. In these meetings, we discuss what needs to be done, and in the available 30% of free time we are allotted, the members of these teams carry out the work and report back to the chapter.

As you can imagine, we’ve spent a lot of time and effort ensuring the quality and making it a reliable part of our landscape.

This all began when Vue was in Version 2. That’s the version we baked into Kompas, which means we effectively forced our whole application landscape to follow suit. This worked perfectly for us; people could focus on their team’s needs while leaning on the support of the entire front-end chapter that works on Kompas.

Following the Vue ecosystem that we introduced, Vuex and Nuxt became part of our environment. And then Vue 3 was announced, and it was a massive breaking change from Vue 2! With the announcement, the end-of-life date for Vue 2 was set for December 31, 2023. We still have some time as of this writing, but the news had a massive impact that cascaded throughout our organization.

We Needed A Strategy

We needed to upgrade Vue from 2 to 3. The first thing that we needed to figure out was when we could reasonably start the process. To assess and strategize, we formed a small virtual team of developers consisting of members from various teams so that multiple perspectives were represented.

We figured that there would be a period of time when we would need to support both versions in order to allow time for migrating between teams. It would be nearly impossible to orchestrate a monolithic release. Thus, we prefer gradual incrementing over massive sweeping changes. On the other hand, having to maintain two versions of Vue for, basically, the same business feature presented costs in time and complexity.

So, in order to execute this process as responsibly as possible, we set out to figure out when we could start, taking into account the longevity of maintaining two codebases while getting early experience from upgrading. We started to map the different tech stacks for each team and plotted out potential bottlenecks for the sake of making the process of our work as widely visible as possible. At this time, our organization had a very flat structure, so we also needed to get internal stakeholders (i.e., product owners, architects, and managers) involved and convey the effect this upgrade would have on teams across the board.

Creating A Map

With our starting point set, we move on to establish a direction. Not having a dedicated team did pose some challenges because it meant that we needed to align everybody in a democratic way. This is, in Dutch culture, also known as polderen:

We try to find consensus in a way where everybody is equally happy, or unhappy, about the final direction.

And this can be challenging in a department that consists of many cultures!

One thing we knew we could rely on was the published best practices from official Vue resources to guide our decision-making process. Referencing the documentation, we did notice opportunities for incremental upgrades. The release of Vue 2.7 (Naruto) was really helpful in the sense that it backported features from Vue 3 back to a Vue 2-compatible version.

We also noted that in our landscape, not all applications were actually using Nuxt. A stable release of Nuxt 3 would be a prerequisite for those applications to even be considered for migration since the Vue major version is tightly coupled with the Nuxt major version. Luckily, some applications in our landscape are standalone Vue apps. These are ideal candidates for the first Vue 3-compatible components.

But first, we would need to have components that were compatible with Vue 3.

The Big Divide

By this point, we were confident enough to get to work. We had a plan and clear strategy, after all. The first order of business was to make sure that our component library was compatible with Vue 3, preferably while minimizing duplicative efforts.

We found a really nice way of doing this:

We created a new workspace called “Kompas-next” next to the regular components folder, which was scaffolded out using Vue 3. Then we imported the components from the original library.

This only works because:

The backported features in Vue 2.7 allowed us to move closer toward the Vue 3 composition API (among other things).
The component syntax between Vue 2 and Vue 3 isn’t radically different anymore.
Vue Demi allowed us to convert components, one by one, to be compatible with both versions.
We made sure that Kompas-next runs isolated tests to ensure stability.

We did have to slightly modify each and every component to adapt to the new standards. We’ll get to that process in a minute.

That said, we were able to publish two versions of our component library: one that is compatible with Vue 2 (Kompas) and one that is compatible with Vue 3 (Kompas-next). This, in turn, meant that the teams that did not have Nuxt as a dependency could potentially start migrating!

Getting Organized

Up to this point, most of the groundwork had been done in a relatively small team. We were in charge of the investigations, communication, and alignment. But we still needed to get stuff done — a lot of stuff!

With every developer being able to contribute, we came to an agreement that fits with the way everybody was already contributing to the component library:

If you touch a component that is not yet compatible, convert it to be compliant with both Vue 2 and Vue 3 using Vue-demi. Add the existing component with tests to the imports of the Kompas-next folder.

Having communicated this strategy early in the process, we immediately saw the Kompas-next library growing. The Vue core team has put so much effort into closing the gap between the two versions, which made our lives much easier.

Feedback From Early Adopters

The teams that were not blocked by a Nuxt 3 release could spend their time migrating their complete app to Vue 3, providing feedback along the way on how we were setting up our packages and converting components.

Seeing the first applications using Vue 3 was a milestone we could all be proud of since we managed to reach it together, collaboratively, and with a united strategy. The strategy worked for us because it closely resembled the way we were already working.

There were indeed some components that were not migrated using this strategy, which indicated to us that they were stale in terms of development. We reasoned that “stale” equals “stable” and that it would be perfectly fine to migrate them by manual assignment and distribution since we can expect it to be close to a one-off migration per component.

We also started to add Vue 3-specific capabilities to our component library, such as our own composables. I think that’s a nice testament to the investment and adoption by our front-end chapter.

With the component library now supporting Vue, we cleared a significant migration hurdle in our organization. We enabled teams to start migrating to Vue 3, and we encouraged new applications to use the latest standards. As a result, we could start thinking about a deprecation path for our Vue 2 codebase. We were cautiously optimistic and aligned the end-of-life date for Kompas with the same date for Vue 2: December 31, 2023.

So, yes, we are not yet finished and still have work to do. In fact, we had…

Two (Minor) Elephants In The Room

To support communication between micro-applications that run on our e-commerce domain, we had resorted to using Vuex in the past. We used to register stores globally so other applications could dispatch actions and retrieve a shared state. This is now gradually being migrated in the sense that we are replacing Vuex with Pinia for internal state management.

For cross-app communication, we are in the process of decoupling Vuex as an external interface and promoting the use of custom events tied to a specific domain. This prevents us from locking ourselves out of future state management tooling.

We are also in the process of preparing our Nuxt applications to be cleared for migration as well. Within our e-commerce domain, we’ve been building specific modules that take a lot of overhead out of our hands: They handle tasks like setting meta headers, security, and analytics. These are being rewritten to use plugins rather than modules. The impact of this breaking change is smaller because it is limited to the teams that use these modules. We see that these teams are using a similar strategy, albeit on a smaller scale, to organize and structure the tasks at hand.

Looking Back

I believe we have a few key takeaways from how we upgraded (and continue to upgrade) from one version of a large third-party resource to another within our large network of teams and shared codebases. I believe the lessons we learned are relevant beyond Vue and can be applied to the processes of other large organizations migrating between versions of a core piece of architecture.

Let’s review what we learned:

Ensure the transition period is clear and as short as possible.
Facilitate breaking the work down into small steps that progress iteratively and solicit feedback from those involved in the process as early and as often as possible.
Onboard key stakeholders to make sure your team has ample time and resources to do the work.
Define a strategy that fits with your organization’s culture.
Foster a collaborative mindset and establish clear communication between teams.
Celebrate wins, even the smallest ones!

The Work Is Never Done, Really

As I mentioned earlier, maintenance is a never-ending piece of the software development process. As Vue creator Evan You stated in the State of the Vuenion 2023, Vue plans to ship more frequent updates and releases. This will keep impacting our work, but that’s okay. We have a plan and blueprint for future releases.

We’re not there yet, but we now know how to get there!

Further Reading On SmashingMag

How To Maintain A Large Next.js Application, Nirmalya Ghosh
Moving From Vue 1 To Vue 2 To Vue 3: A Case Study Of Migrating A Headless CMS System, Lisi Linhart
Optimizing A Vue App, Michelle Barker
Why Web Application Maintenance Should Be More Of A Thing, Darren Beale

Getting Started with Flask, a Python Microframework

Original Source: https://www.sitepoint.com/flask-introduction/?utm_source=rss

Introduction to Flask for the Modern Web

Learn how to install and set up an app with Flask, a popular microframework for Python that offers an alternative to the much larger Django.

Continue reading
Getting Started with Flask, a Python Microframework
on SitePoint.

This AI-generated book cover is causing controversy

Original Source: https://www.creativebloq.com/news/ai-book-cover

New Sarah J. Maas book design angers artists.