Collective #780
Original Source: https://tympanus.net/codrops/collective/collective-780/
Bézier Curves * CSS Loaders * Godly * Refraction in Three.js
Original Source: https://tympanus.net/codrops/collective/collective-780/
Bézier Curves * CSS Loaders * Godly * Refraction in Three.js
Original Source: https://smashingmagazine.com/2023/09/generating-real-time-audio-sentiment-analysis-ai/
In the previous article, we developed a sentiment analysis tool that could detect and score emotions hidden within audio files. We’re taking it to the next level in this article by integrating real-time analysis and multilingual support. Imagine analyzing the sentiment of your audio content in real-time as the audio file is transcribed. In other words, the tool we are building offers immediate insights as an audio file plays.
So, how does it all come together? Meet Whisper and Gradio — the two resources that sit under the hood. Whisper is an advanced automatic speech recognition and language detection library. It swiftly converts audio files to text and identifies the language. Gradio is a UI framework that happens to be designed for interfaces that utilize machine learning, which is ultimately what we are doing in this article. With Gradio, you can create user-friendly interfaces without complex installations, configurations, or any machine learning experience — the perfect tool for a tutorial like this.
By the end of this article, we will have created a fully-functional app that:
Records audio from the user’s microphone,
Transcribes the audio to plain text,
Detects the language,
Analyzes the emotional qualities of the text, and
Assigns a score to the result.
Note: You can peek at the final product in the live demo.
Automatic Speech Recognition And Whisper
Let’s delve into the fascinating world of automatic speech recognition and its ability to analyze audio. In the process, we’ll also introduce Whisper, an automated speech recognition tool developed by the OpenAI team behind ChatGPT and other emerging artificial intelligence technologies. Whisper has redefined the field of speech recognition with its innovative capabilities, and we’ll closely examine its available features.
Automatic Speech Recognition (ASR)
ASR technology is a key component for converting speech to text, making it a valuable tool in today’s digital world. Its applications are vast and diverse, spanning various industries. ASR can efficiently and accurately transcribe audio files into plain text. It also powers voice assistants, enabling seamless interaction between humans and machines through spoken language. It’s used in myriad ways, such as in call centers that automatically route calls and provide callers with self-service options.
By automating audio conversion to text, ASR significantly saves time and boosts productivity across multiple domains. Moreover, it opens up new avenues for data analysis and decision-making.
That said, ASR does have its fair share of challenges. For example, its accuracy is diminished when dealing with different accents, background noises, and speech variations — all of which require innovative solutions to ensure accurate and reliable transcription. The development of ASR systems capable of handling diverse audio sources, adapting to multiple languages, and maintaining exceptional accuracy is crucial for overcoming these obstacles.
Whisper: A Speech Recognition Model
Whisper is a speech recognition model also developed by OpenAI. This powerful model excels at speech recognition and offers language identification and translation across multiple languages. It’s an open-source model available in five different sizes, four of which have an English-only variant that performs exceptionally well for single-language tasks.
What sets Whisper apart is its robust ability to overcome ASR challenges. Whisper achieves near state-of-the-art performance and even supports zero-shot translation from various languages to English. Whisper has been trained on a large corpus of data that characterizes ASR’s challenges. The training data consists of approximately 680,000 hours of multilingual and multitask supervised data collected from the web.
The model is available in multiple sizes. The following table outlines these model characteristics:
Size
Parameters
English-only model
Multilingual model
Required VRAM
Relative speed
Tiny
39 M
tiny.en
tiny
~1 GB
~32x
Base
74 M
base.en
base
~1 GB
~16x
Small
244 M
small.en
small
~2 GB
~6x
Medium
769 M
medium.en
medium
~5 GB
~2x
Large
1550 M
N/A
large
~10 GB
1x
For developers working with English-only applications, it’s essential to consider the performance differences among the .en models — specifically, tiny.en and base.en, both of which offer better performance than the other models.
Whisper utilizes a Seq2seq (i.e., transformer encoder-decoder) architecture commonly employed in language-based models. This architecture’s input consists of audio frames, typically 30-second segment pairs. The output is a sequence of the corresponding text. Its primary strength lies in transcribing audio into text, making it ideal for “audio-to-text” use cases.

Real-Time Sentiment Analysis
Next, let’s move into the different components of our real-time sentiment analysis app. We’ll explore a powerful pre-trained language model and an intuitive user interface framework.
Hugging Face Pre-Trained Model
I relied on the DistilBERT model in my previous article, but we’re trying something new now. To analyze sentiments precisely, we’ll use a pre-trained model called roberta-base-go_emotions, readily available on the Hugging Face Model Hub.
Gradio UI Framework
To make our application more user-friendly and interactive, I’ve chosen Gradio as the framework for building the interface. Last time, we used Streamlit, so it’s a little bit of a different process this time around. You can use any UI framework for this exercise.
I’m using Gradio specifically for its machine learning integrations to keep this tutorial focused more on real-time sentiment analysis than fussing with UI configurations. Gradio is explicitly designed for creating demos just like this, providing everything we need — including the language models, APIs, UI components, styles, deployment capabilities, and hosting — so that experiments can be created and shared quickly.
Initial Setup
It’s time to dive into the code that powers the sentiment analysis. I will break everything down and walk you through the implementation to help you understand how everything works together.
Before we start, we must ensure we have the required libraries installed and they can be installed with npm. If you are using Google Colab, you can install the libraries using the following commands:
!pip install gradio
!pip install transformers
!pip install git+https://github.com/openai/whisper.git
Once the libraries are installed, we can import the necessary modules:
import gradio as gr
import whisper
from transformers import pipeline
This imports Gradio, Whisper, and pipeline from Transformers, which performs sentiment analysis using pre-trained models.
Like we did last time, the project folder can be kept relatively small and straightforward. All of the code we are writing can live in an app.py file. Gradio is based on Python, but the UI framework you ultimately use may have different requirements. Again, I’m using Gradio because it is deeply integrated with machine learning models and APIs, which is ideal for a tutorial like this.
Gradio projects usually include a requirements.txt file for documenting the app, much like a README file. I would include it, even if it contains no content.
To set up our application, we load Whisper and initialize the sentiment analysis component in the app.py file:
model = whisper.load_model(“base”)
sentiment_analysis = pipeline(
“sentiment-analysis”,
framework=”pt”,
model=”SamLowe/roberta-base-go_emotions”
)
So far, we’ve set up our application by loading the Whisper model for speech recognition and initializing the sentiment analysis component using a pre-trained model from Hugging Face Transformers.
Defining Functions For Whisper And Sentiment Analysis
Next, we must define four functions related to the Whisper and pre-trained sentiment analysis models.
Function 1: analyze_sentiment(text)
This function takes a text input and performs sentiment analysis using the pre-trained sentiment analysis model. It returns a dictionary containing the sentiments and their corresponding scores.
def analyze_sentiment(text):
results = sentiment_analysis(text)
sentiment_results = {
result[’label’]: result[’score’] for result in results
}
return sentiment_results
Function 2: get_sentiment_emoji(sentiment)
This function takes a sentiment as input and returns a corresponding emoji used to help indicate the sentiment score. For example, a score that results in an “optimistic” sentiment returns a “😊” emoji. So, sentiments are mapped to emojis and return the emoji associated with the sentiment. If no emoji is found, it returns an empty string.
def get_sentiment_emoji(sentiment):
# Define the mapping of sentiments to emojis
emoji_mapping = {
“disappointment”: “😞”,
“sadness”: “😢”,
“annoyance”: “😠”,
“neutral”: “😐”,
“disapproval”: “👎”,
“realization”: “😮”,
“nervousness”: “😬”,
“approval”: “👍”,
“joy”: “😄”,
“anger”: “😡”,
“embarrassment”: “😳”,
“caring”: “🤗”,
“remorse”: “😔”,
“disgust”: “🤢”,
“grief”: “😥”,
“confusion”: “😕”,
“relief”: “😌”,
“desire”: “😍”,
“admiration”: “😌”,
“optimism”: “😊”,
“fear”: “😨”,
“love”: “❤️”,
“excitement”: “🎉”,
“curiosity”: “🤔”,
“amusement”: “😄”,
“surprise”: “😲”,
“gratitude”: “🙏”,
“pride”: “🦁”
}
return emoji_mapping.get(sentiment, “”)
Function 3: display_sentiment_results(sentiment_results, option)
This function displays the sentiment results based on a selected option, allowing users to choose how the sentiment score is formatted. Users have two options: show the score with an emoji or the score with an emoji and the calculated score. The function inputs the sentiment results (sentiment and score) and the selected display option, then formats the sentiment and score based on the chosen option and returns the text for the sentiment findings (sentiment_text).
def display_sentiment_results(sentiment_results, option):
sentiment_text = “”
for sentiment, score in sentiment_results.items():
emoji = get_sentiment_emoji(sentiment)
if option == “Sentiment Only”:
sentiment_text += f”{sentiment} {emoji}n”
elif option == “Sentiment + Score”:
sentiment_text += f”{sentiment} {emoji}: {score}n”
return sentiment_text
Function 4: inference(audio, sentiment_option)
This function performs Hugging Face’s inference process, including language identification, speech recognition, and sentiment analysis. It inputs the audio file and sentiment display option from the third function. It returns the language, transcription, and sentiment analysis results that we can use to display all of these in the front-end UI we will make with Gradio in the next section of this article.
def inference(audio, sentiment_option):
audio = whisper.load_audio(audio)
audio = whisper.pad_or_trim(audio)
mel = whisper.log_mel_spectrogram(audio).to(model.device)
_, probs = model.detect_language(mel)
lang = max(probs, key=probs.get)
options = whisper.DecodingOptions(fp16=False)
result = whisper.decode(model, mel, options)
sentiment_results = analyze_sentiment(result.text)
sentiment_output = display_sentiment_results(sentiment_results, sentiment_option)
return lang.upper(), result.text, sentiment_output
Creating The User Interface
Now that we have the foundation for our project — Whisper, Gradio, and functions for returning a sentiment analysis — in place, all that’s left is to build the layout that takes the inputs and displays the returned results for the user on the front end.

The following steps I will outline are specific to Gradio’s UI framework, so your mileage will undoubtedly vary depending on the framework you decide to use for your project.
Defining The Header Content
We’ll start with the header containing a title, an image, and a block of text describing how sentiment scoring is evaluated.
Let’s define variables for those three pieces:
title = “””🎤 Multilingual ASR 💬”””
image_path = “/content/thumbnail.jpg”
description = “””
💻 This demo showcases a general-purpose speech recognition model called Whisper. It is trained on a large dataset of diverse audio and supports multilingual speech recognition and language identification tasks.
📝 For more details, check out the [GitHub repository](https://github.com/openai/whisper).
⚙️ Components of the tool:
– Real-time multilingual speech recognition
– Language identification
– Sentiment analysis of the transcriptions
🎯 The sentiment analysis results are provided as a dictionary with different emotions and their corresponding scores.
😃 The sentiment analysis results are displayed with emojis representing the corresponding sentiment.
✅ The higher the score for a specific emotion, the stronger the presence of that emotion in the transcribed text.
❓ Use the microphone for real-time speech recognition.
⚡️ The model will transcribe the audio and perform sentiment analysis on the transcribed text.
“””
Applying Custom CSS
Styling the layout and UI components is outside the scope of this article, but I think it’s important to demonstrate how to apply custom CSS in a Gradio project. It can be done with a custom_css variable that contains the styles:
custom_css = “””
#banner-image {
display: block;
margin-left: auto;
margin-right: auto;
}
#chat-message {
font-size: 14px;
min-height: 300px;
}
“””
Creating Gradio Blocks
Gradio’s UI framework is based on the concept of blocks. A block is used to define layouts, components, and events combined to create a complete interface with which users can interact. For example, we can create a block specifically for the custom CSS from the previous step:
block = gr.Blocks(css=custom_css)
Let’s apply our header elements from earlier into the block:
block = gr.Blocks(css=custom_css)
with block:
gr.HTML(title)
with gr.Row():
with gr.Column():
gr.Image(image_path, elem_id=”banner-image”, show_label=False)
with gr.Column():
gr.HTML(description)
That pulls together the app’s title, image, description, and custom CSS.
Creating The Form Component
The app is based on a form element that takes audio from the user’s microphone, then outputs the transcribed text and sentiment analysis formatted based on the user’s selection.
In Gradio, we define a Group() containing a Box() component. A group is merely a container to hold child components without any spacing. In this case, the Group() is the parent container for a Box() child component, a pre-styled container with a border, rounded corners, and spacing.
with gr.Group():
with gr.Box():
With our Box() component in place, we can use it as a container for the audio file form input, the radio buttons for choosing a format for the analysis, and the button to submit the form:
with gr.Group():
with gr.Box():
# Audio Input
audio = gr.Audio(
label=”Input Audio”,
show_label=False,
source=”microphone”,
type=”filepath”
)
# Sentiment Option
sentiment_option = gr.Radio(
choices=[“Sentiment Only”, “Sentiment + Score”],
label=”Select an option”,
default=”Sentiment Only”
)
# Transcribe Button
btn = gr.Button(“Transcribe”)
Output Components
Next, we define Textbox() components as output components for the detected language, transcription, and sentiment analysis results.
lang_str = gr.Textbox(label=”Language”)
text = gr.Textbox(label=”Transcription”)
sentiment_output = gr.Textbox(label=”Sentiment Analysis Results”, output=True)
Button Action
Before we move on to the footer, it’s worth specifying the action executed when the form’s Button() component — the “Transcribe” button — is clicked. We want to trigger the fourth function we defined earlier, inference(), using the required inputs and outputs.
btn.click(
inference,
inputs=[
audio,
sentiment_option
],
outputs=[
lang_str,
text,
sentiment_output
]
)
Footer HTML
This is the very bottom of the layout, and I’m giving OpenAI credit with a link to their GitHub repository.
gr.HTML(’’’
<div class=”footer”>
<p>Model by <a href=”https://github.com/openai/whisper” style=”text-decoration: underline;” target=”_blank”>OpenAI</a>
</p>
</div>
’’’)
Launch the Block
Finally, we launch the Gradio block to render the UI.
block.launch()
Hosting & Deployment
Now that we have successfully built the app’s UI, it’s time to deploy it. We’ve already used Hugging Face resources, like its Transformers library. In addition to supplying machine learning capabilities, pre-trained models, and datasets, Hugging Face also provides a social hub called Spaces for deploying and hosting Python-based demos and experiments.

You can use your own host, of course. I’m using Spaces because it’s so deeply integrated with our stack that it makes deploying this Gradio app a seamless experience.
In this section, I will walk you through Space’s deployment process.
Creating A New Space
Before we start with deployment, we must create a new Space.
The setup is pretty straightforward but requires a few pieces of information, including:
A name for the Space (mine is “Real-Time-Multilingual-sentiment-analysis”),
A license type for fair use (e.g., a BSD license),
The SDK (we’re using Gradio),
The hardware used on the server (the “free” option is fine), and
Whether the app is publicly visible to the Spaces community or private.

Once a Space has been created, it can be cloned, or a remote can be added to its current Git repository.
Deploying To A Space
We have an app and a Space to host it. Now we need to deploy our files to the Space.
There are a couple of options here. If you already have the app.py and requirements.txt files on your computer, you can use Git from a terminal to commit and push them to your Space by following these well-documented steps. Or, If you prefer, you can create app.py and requirements.txt directly from the Space in your browser.
Push your code to the Space, and watch the blue “Building” status that indicates the app is being processed for production.

Final Demo
Conclusion
And that’s a wrap! Together, we successfully created and deployed an app capable of converting an audio file into plain text, detecting the language, analyzing the transcribed text for emotion, and assigning a score that indicates that emotion.
We used several tools along the way, including OpenAI’s Whisper for automatic speech recognition, four functions for producing a sentiment analysis, a pre-trained machine learning model called roberta-base-go_emotions that we pulled from the Hugging Space Hub, Gradio as a UI framework, and Hugging Face Spaces to deploy the work.
How will you use these real-time, sentiment-scoping capabilities in your work? I see so much potential in this type of technology that I’m interested to know (and see) what you make and how you use it. Let me know in the comments!
Further Reading On SmashingMag
“The Future Of Design: Human-Powered Or AI-Driven?,” Keima Kai
“Motion Controls In The Browser,” Yaphi Berhanu
“JavaScript APIs You Don’t Know About,” Juan Diego Rodríguez
“The Safest Way To Hide Your API Keys When Using React,” Jessica Joseph
Original Source: https://www.sitepoint.com/laravel-introduction/?utm_source=rss

Learn about the Laravel PHP framework, exploring its history, its purpose, and some of its key components and features.
Continue reading
An Introduction to the Laravel PHP Framework
on SitePoint.
Original Source: https://www.sitepoint.com/graphql-gateway-combine-stitch-merge/?utm_source=rss

Learn how to fetch data from multiple sources, while still keeping your frontend snappy, by building your own GraphQL gateway.
Continue reading
Build a GraphQL Gateway: Combine, Stitch or Merge any Datasource
on SitePoint.
Original Source: https://www.hongkiat.com/blog/boom3d-mac-review/
If you love music, gaming, or high-quality audio, you’ve probably been disappointed by your device’s speakers at some point. You might be wondering: should you splurge on high-end headphones or a top-notch speaker system?
Before you open your wallet, think about a software solution to elevate your audio experience. We’ve previously discussed several sound booster apps that are making waves.
Today, our spotlight is on Boom3D by Global Delight. This app aims to do more than just pump up the volume. It strives to enhance the overall audio quality, adding depth and clarity. Let’s dive into how this software can upgrade your listening experience on multiple platforms.
What is Boom3D?
Boom3D is a user-friendly app that enhances your audio experience on various desktop platforms, such as Mac and Windows. It offers features like 3D Surround Sound and an equalizer to make your audio more immersive.

This app smartly adjusts the audio settings for your device, so you don’t need extra equipment. It has preset options for different activities like watching movies or listening to music. You can also manage the volume for each app on your computer individually. In short, Boom3D makes improving your audio simple and effective.
Now, let’s explore the features of Boom3D in more detail.
Visit Boom3D
Key Features of Boom3D
Immersive 3D Sound Experience
Boom3D employs cutting-edge technology to deliver a 3D surround sound experience, making you feel like you’re at the center of the action. This enhances your enjoyment of music, movies, and games. You can also customize the 3D effects and bass to your liking.

Customizable 31-Band Equalizer
The 31-Band Equalizer allows you to tailor your audio experience to your taste. Whether you love classical or rock music, you can easily adjust the sound settings. The app also provides preset options for different music genres, helping you quickly find the ideal sound for your mood.

Volume Boost for Mac
If you’re a Mac user, Boom3D offers a volume booster that amplifies your computer’s sound without sacrificing quality. This is especially handy when you want to fully immerse yourself in movies or music.
Ambient and Night Mode Sound Effects
The Ambient feature adds depth to your audio, making your games and movies more engaging. It enhances background noises for a richer experience.
Night Mode is perfect for late-night movie or show watching. It tones down loud sounds while boosting softer ones, so you can enjoy your content without bothering others. You can also adjust the balance to suit your needs.
All-in-One Audio Player
Beyond enhancing your audio, Boom3D also serves as a full-fledged music player. You can play songs stored on your computer, create playlists, and manage your music library.

Access to 20,000+ Internet Radio Stations
Boom3D gives you free access to an extensive selection of internet radio stations from around the globe. This feature lets you discover new music from various genres and countries.

User Experience
Easy-to-Use Interface
Boom3D is convenient because it can run in the background and be controlled from the menu bar. This clears up space on my dock. All I had to do was go to settings and disable the “Show dock icon” option. Now, I can easily toggle features without opening the full application.

High-Quality Audio
The audio quality in Boom3D is impressive, surpassing my Mac’s default settings. Activating the Boom3D engine noticeably enhances the sound. This improvement is consistent across various apps, whether I’m using Apple Music or a local media player.
Flexible Audio Controls
Boom3D offers more than just volume control; it provides a range of audio effects and settings. This is great for me because the default system settings often fall short of my audio quality expectations.
All-Encompassing Audio Features
Boom3D delivers audio enhancements that work system-wide, including 3D Surround Sound, Equalizers, and other effects. I appreciate not having to upload my audio files to the app to enjoy these benefits. To fully utilize the 3D surround sound, a free additional component needs to be installed.
Where to Use Boom3D
Boom3D is a versatile app compatible with various devices. You can use it on Mac and Windows desktops as well as Android and iOS smartphones.
Get Boom3D for:
Mac
Windows
Boom3D Browser Extensions for Netflix
If you’re a Netflix user and browse on Chrome or Safari, Boom3D offers extensions to enhance your experience. These add-ons provide 5.1 surround sound and support 1080p video quality, depending on the content.

Download: Boom3D 5.1 Surround for Netflix
Boom3D Pricing Details
Boom3D offers a 30-day free trial, allowing you to explore its features before committing. Here’s the pricing breakdown:
For Mac: The app costs $12.51, and you can install it on up to two Macs.
For Windows: The app too is priced at $12.51, and you can install it on up to two Windows PCs.
Note: Each platform version is sold separately. Buying the Mac version won’t give you access to the Windows or mobile versions. To use Boom3D on multiple platforms, you’ll need to purchase each version individually.
FAQ
What Sets Boom 2 Apart from Boom3D?
Boom 2 is tailored for macOS users who want high-quality stereo sound. It features a 31-band equalizer and 20 dB gain, perfect for those who desire fine-tuned audio for music, videos, and games. On the other hand, Boom3D delivers 3D surround sound and is compatible with both macOS and Windows.
Is Boom3D a One-Time Buy or a Subscription?
Boom3D is available on both Windows and Mac for a one-time fee of $12.51. It also comes with a 30-day free trial. For mobile users, Boom offers a one-week free trial, after which you can either make a one-time payment for lifetime access or opt for a subscription.
Is Boom3D Compatible with AirPlay?
No, Boom3D’s special audio features are not compatible with AirPlay or FaceTime. To continue enjoying 3D surround sound, close AirPlay or FaceTime.
How to Install the Boom3D Component Installer?
The Boom3D Component Installer enhances your device’s audio quality. It includes features like 3D Surround Sound and Equalizers. To install, click here. Note: macOS 10.10.3 or later is required.
What Is Boom Remote and How Do I Get It?
Boom Remote is an additional app for Boom 2 and Boom3D. It allows you to control key features and is compatible with popular Mac apps like Spotify and iTunes. It’s available for iOS users and can be downloaded from the Apple Store.
Conclusion
If you’re looking to elevate your audio experience for music, movies, or games, Boom3D is worth a try. It’s user-friendly and offers a free 30-day trial. So, if you’re not satisfied with your current audio setup, Boom3D could be the solution you’ve been searching for.
Lastly, here are my personal pros and cons of Boom3D:
Pros:
Deep bass enhances sound quality
3D Surround Sound for an immersive experience
Free access to over 20,000 radio stations
Various Equalizer Presets for easy customization
Also serves as a versatile audio player
Cons:
No AirPlay support
Desktop purchase doesn’t include premium mobile app
The post Boom3D for Mac Review: Features, Prices, Pros, and Cons appeared first on Hongkiat.
Original Source: https://www.creativebloq.com/how-to/working-on-a-commission
A trio of digital artists share their advice for working on a commission.
Original Source: https://tympanus.net/codrops/2023/08/30/connected-grid-layout-animation/
Some ideas for simple on-scroll animations on “connected” grid layouts.
Original Source: https://www.creativebloq.com/news/painted-movie-posters
From The Killer to Zombie Town, some delightful designs just dropped.
Original Source: https://smashingmagazine.com/2023/08/oklch-color-spaces-gamuts-css/
I woke up one morning in early 2022 and caught an article called “A Whistle-Stop Tour of 4 New CSS Color Features” over at CSS-Tricks.
Wow, what a gas! A new and wider color gamut! New color spaces! New color functions! New syntaxes! It is truly a lot to take in.
Now, I’m no color expert. But I enjoyed adding new gems to my CSS toolbox and made a note to come back to that article later for a deeper read. That, of course, led to a lot of fun rabbit holes that helped put the CSS Color Module Level 4 updates in a better context for me.
That’s where Oklch comes into the picture. It’s a new color space in CSS that, according to experts smarter than me, offers upwards of 50% more color than the sRGB gamut we have worked with for so long because it supports a wider gamut of color.
Color spaces? Gamuts? These are among many color-related terms I’m familiar with but have never really understood. It’s only now that my head is wrapping around these concepts and how they relate back to CSS, and how I use color in my own work.
That’s what I want to share with you. This article is less of a comprehensive “how-to” guide than it is my own personal journey grokking new CSS color features. I actually like to this of this more as a “love story” where I fall for Oklch.
The Deal With Gamuts And Color Spaces
I quickly learned that there’s no way to understand Oklch without at least a working understanding of the difference between gamuts and color spaces. My novice-like brain thinks of them as the same: a spectrum of colors. In fact, my mind goes straight to the color pickers we all know from apps like Figma and Sketch.
I’ve always assumed that gamut is just a nerdier term for the available colors in a color picker and that a color picker is simply a convenient interface for choosing colors in the gamut.
(Assumed. Just. Simply. Three words you never want to see in the same sentence.)
Apparently not. A gamut really boils down to a range of something, which in this case, is a range of colors. That range might be based on a single point if we think of it on a single axis.

Or it might be a range of multiple coordinates like we would see on a two-axe grid. Now the gamut covers a wider range that originates from the center and can point in any direction.

The levels of those ranges can also constitute an axis, which results in some form of 3D space.

sRGB is a gamut with an available range of colors. Display P3 is another gamut offering a wider range of colors.
So, gamuts are ranges, and ranges need a reference to determine the upper and lower limits of those axes. That’s where we start talking about color spaces. A color space is what defines the format for plotting points on the gamut. While more trained folks certainly have more technical explanations, my basic understanding of color spaces is that they provide the map — or perhaps the “shape” — for the gamut and define how color is manipulated in it. So, sRGB is a color gamut that spans a range of colors, and Hex, RGB, and HSL (among others, of course) are the spaces we have to explore the gamut.
That’s why you may hear a color space as having a “wider” or “narrower” gamut than another — it’s a range of possibilities within a shape.
If I’ve piqued your interest enough, I’ve compiled a list of articles that will give you more thorough definitions of gamuts and color spaces at the end of this article.
Why We Needed New Color Spaces
The short answer is that the sRGB gamut serves as the reference point for color spaces like Hex, RGB, and HSL that provide a narrower color gamut than what is available in the newer Display P3 gamut.
We’re well familiar with many of sRGB-based color notations and functions in CSS. The values are essentially setting points along the gamut space with different types of coordinates.
/* Hex */ #f8a100
/* RGB */ rgb(248, 161, 2)
/* HSL */ hsl(38.79 98% 49%)
For example, the rgb() function is designed to traverse the RGB color space by mixing red, blue, and green values to produce a point along the sRGB gamut.

If the difference between the two ranges in the image above doesn’t strike you as particularly significant or noticeable, that’s fair. I thought they were the same at first. But the Display P3 stripe is indeed a wider and smoother range of colors than the sRGB stripe above it when you examine it up close.
The problem is that Hex, RGB, and HSL (among other existing spaces) only support the sRGB gamut. In other words, they are unable to map colors outside of the range of colors that sRGB offers. That means there’s no way to map them to colors in the Display P3 gamut. The traditional color formats we’ve used for a long time are simply incompatible with the range of colors that has started rolling out in new hardware. We needed a new space to accommodate the colors that new technology is offering us.
Dead Grey Zones
I love this term. It accurately describes an issue with the color spaces in the sRGB gamut — greyish areas between two color points. You can see it in the following demo.

Oklch (as well as the other new spaces in the Level 4 spec) doesn’t have that issue. Hues are more like mountains, each with a different elevation.

That’s why we needed new color spaces — to get around those dead grey zones. And we needed new color functions in CSS to produce coordinates on the space to select from the newly available range of colors.
But there’s a catch. That mountain-shaped gamut of Oklch doesn’t always provide a straight path between color points which could result in clipped or unexpected colors between points. The issue appears to be case-specific depending on the colors in use, but that also seems to indicate that there are situations where using a different color space is going to yield better gradients.
Consistent Lightness
It’s the consistent range of saturation in HSL muddying the waters that leads to another issue along this same train of thought: inconsistent levels of lightness between colors.
The classic example is showing two colors in HSL with the same lightness value:

The Oklab and Oklch color spaces were created to fix that shift. Black is more, well, black because the hues are more consistent in Oklab and Oklch than they are in LAB and LCH.
So, that’s why it’s likely better to use the oklch() and oklab() functions in CSS than it is to use their lch() and lab() counterparts. There’s less of a shift happening in the hues.
So, while Oklch/LCH and Oklab/LAB all use the same general color space, the Cartesian coordinates are the key difference. And I agree with Sitnik and Turner, who make the case that Oklch and LCH are easier to understand than LAB and Oklab. I wouldn’t be able to tell you the difference between LAB’s a and b values on the Cartesian coordinate system. But chroma and hue in LCH and Oklch? Sure! That’s as easy to understand as HSL but better!
The reason I love Oklch over Oklab is that lightness, chroma, and hue are much more intuitive to me than lightness and a pair of Cartesian coordinates.
And the reason I like Oklch better than HSL is because it produces more consistent results over a wider color gamut.
OKLCH And CSS
This is why you’re here, right? What’s so cool about all this is that we can start using Oklch in CSS today — there’s no need to wait around.
“Browser support?” you ask. We’re well covered, friends!

In fact, Firefox 113 shipped support for Oklch a mere ten days before I started writing the first draft of this article. It’s oven fresh!
Using oklch() is a whole lot easier to explain now that we have all the context around color spaces and gamuts and how the new CSS Color Module Level 4 color functions fit into the picture.
I think the most difficult thing for me is working with different ranges of values. For example, hsl() is easy for me to remember because the hue is measured in degrees, and both saturation and lightness use the same 0% to 100% range.
oklch() is different, and that’s by design to not only access the wider gamut but also produce perceptively consistent results even as values change. So, while we get what I’m convinced is a way better tool for specifying color in CSS, there is a bit of a learning curve to remembering the chroma value because it’s what separates OKLCH from HSL.
The oklch() Values
Here they are:
l: This controls the lightness of the color, and it’s measured in a range of 0% to 100% just like HSL.
c: This is the chroma value, measured in decimals between 0 and 0.37.
h: This is the same ol’ hue we have in HSL, measured in the same range of 0deg to 360deg.
Again, it’s chroma that is the biggest learning curve for me. Yes, I had to look it up because I kept seeing it used somewhat synonymously with saturation.
Chroma and saturation are indeed different. And there are way better definitions of them out there than what I can provide. For example, I like how Cameron Chapman explains it:
“Chroma refers to the purity of a color. A hue with high chroma has no black, white, or gray added to it. Conversely, adding white, black, or gray reduces its chroma. It’s similar to saturation but not quite the same. Chroma can be thought of as the brightness of a color in comparison to white.”
— Cameron Chapman
I mentioned that chroma has an upper limit of 0.37. But it’s actually more nuanced than that, as Sitnik and Turner explain:
“[Chroma] goes from 0 (gray) to infinity. In practice, there is actually a limit, but it depends on a screen’s color gamut (P3 colors will have bigger values than sRGB), and each hue has a different maximum chroma. For both P3 and sRGB, the value will always be below 0.37.”
— Andrey Sitnik and Travis Turner
I’m so glad there are smart people out there to help sort this stuff out.
The oklch() Syntax
The formal syntax? Here it is, straight from the spec:
oklab() = oklab( [ <percentage> | <number> | none]
[ <percentage> | <number> | none]
[ <percentage> | <number> | none]
[ / [<alpha-value> | none] ]? )
Maybe we can “dumb” it down a bit:
oklch( [ lightness ] [ chroma ] [ hue ] )
And those values, again, are measured in different units:
oklch( [ lightness = <percentage> ] [ chroma <number> ] [ hue <degrees> ] )
Those units have min and max limits:
oklch( [ lightness = <percentage (0%-100%)> ] [ chroma <number> (0-0.37) ] [ hue <degrees> (0deg-360deg) ] )
An example might be the following:
color: oklch(70.9% 0.195 47.025);
Did you notice that there are no commas between values? Or that there is no unit on the hue? That’s thanks to the updated syntax defined in the CSS Color Module Level 4 spec. It also applies to functions in the sRGB gamut:
/* Old Syntax */
hsl(26.06deg, 99%, 51%)
/* New Syntax */
hsl(26.06 99% 51%)
Something else that’s new? There’s no need for a separate function to set alpha transparency! Instead, we can indicate that with a / before the alpha value:
/* Old Syntax */
hsla(26.06deg, 99%, 51%, .75)
/* New Syntax */
hsl(26.06 99% 51% / .75)
That’s why there is no oklcha() function — the new syntax allows oklch() to handle transparency on its own, like a grown-up.
Providing A Fallback
Yeah, it’s probably worth providing a fallback value for oklch() even if it does enjoy great browser support. Maybe you have to support a legacy browser like IE, or perhaps the user’s monitor or screen simply doesn’t support colors in the Display P3 gamut.
Providing a fallback doesn’t have to be hard:
color: hsl(26.06 99% 51%);
color: oklch(70.9% 0.195 47.025);
There are “smarter” ways to provide a fallback, like, say, using @supports:
.some-class {
color: hsl(26.06 99% 51%);
}
@supports (oklch(100% 0 0)) {
.some-class {
color: oklch(70.9% 0.195 47.025);
}
}
Or detecting Display P3 support on the @media side of things:
.some-class {
color: hsl(26.06 99% 51%);
}
@media (color-gamut: p3) {
.some-class {
color: oklch(70.9% 0.195 47.025);
}
}
Those all seem overly verbose compared to letting the cascade do the work. Maybe there’s a good reason for using media queries that I’m overlooking.
There’s A Polyfill
Of course, there’s one! There are two, in fact, that I am aware of: postcss-oklab-function and color.js. The PostCSS plugin will preprocess support for you when compiling to CSS. Alternatively, color.js will convert it on the client side.
That’s Oklch 🥰
O, Oklch! How much do I love thee? Let me count the ways:
You support a wider gamut of colors that make my designs pop.
Your space transitions between colors smoothly, like soft butter.
You are as easy to understand as my former love, HSL.
You are well-supported by all the major browsers.
You provide fallbacks for handling legacy browsers that will never have the pleasure of knowing you.
I know, I know. Get a room, right?!
Resources
CSS Color Module Level 4, W3C
W3C Workshop on Wide Color Gamut and High Dynamic Range for the Web, Chris Lilley (W3C)
“OKLCH in CSS: why we moved from RGB and HSL,” Andrey Sitnik and
Travis Turner
“Color Formats in CSS,” Joshua Comeau
“High Definition CSS Color Guide,” Adam Argyle
“LCH colors in CSS: what, why, and how?,” Lea Verou
“OK, OKLCH 👑,” Chris Coyier
“It’s Time to Learn oklch Color,” Keith J. Grant
“Color Theory For Designers, Part 2: Understanding Concepts And Color Terminology,” Cameron Chapman (Smashing Magazine)
HSL and HSV, Wikipedia
Original Source: https://ecommerce-platforms.com/articles/best-ecommerce-platforms-for-printful
The best ecommerce platforms for Printful users, leverage native integrations and APIs to ensure you can easily automate various aspects of your print-on-demand business model.
Printful is easily one of the most popular print on demand solutions in the market today, with more than 200,000 customers, and a host of amazing products to choose from.
Printful offers ecommerce store owners, creators, and would-be vendors an excellent opportunity to start selling custom products online, with minimal effort.
Not only does the company handle all of the fulfillment and logistics elements of selling custom products for you, but it integrates directly with some of the world’s leading platforms and sales channels.
Today, we’re looking at just some of the best ecommerce platforms and integration worth considering if you’re thinking of launching a store with Printful.
What are The Best Ecommerce Platforms for Printful?
Shopify
Squarespace
Wix
Square Online
Ecwid
WooCommerce
Adobe Commerce
Big Cartel
Amazon
eBay
Etsy
Notably, we’ll be looking at a range of different options here, to suit different kinds of merchants, including software-as-a-service platforms like Shopify, open-source solutions like WooCommerce, and even popular marketplaces like Etsy.
Let’s dive in.
1. Shopify
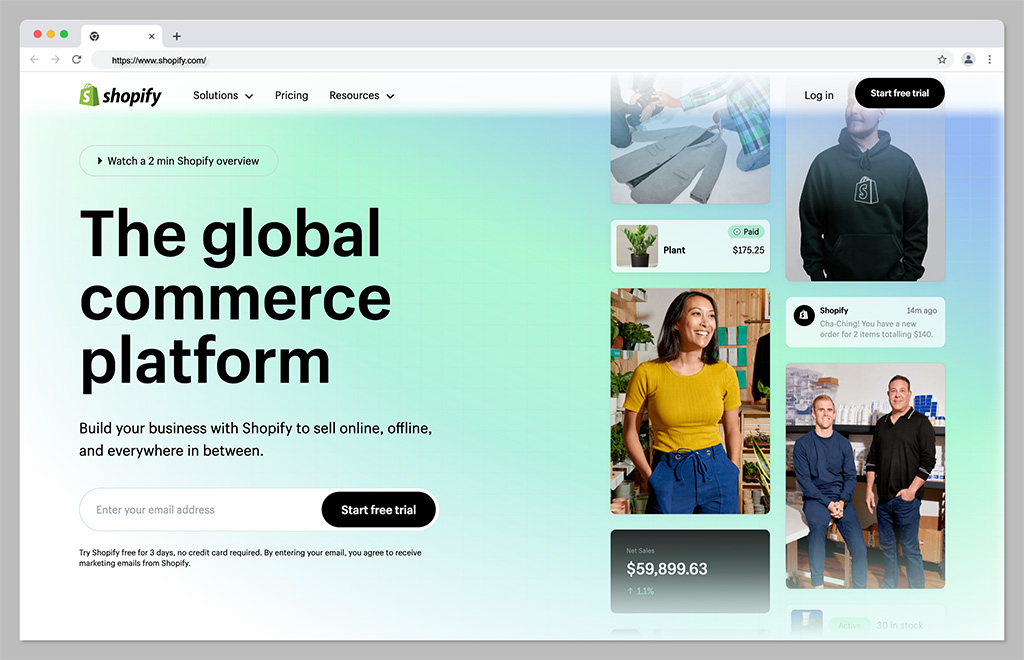
Let’s start with perhaps the biggest, most popular ecommerce platform of all for Printful sellers: Shopify. One of the world’s most popular ecommerce tools, Shopify is a software-as-a-service hosted platform, that offers everything you need to run a successful store in one place.
It comes with an intuitive interface, plenty of templates to choose from, and a comprehensive app marketplace so users can extend the functionality of their online store. Plus, it integrates directly with Printful, making it easy to automate your Print on Demand sales strategy.
With Shopify, you can sell across multiple channels at once, including marketplaces and social media platforms. Plus, there are plenty of tools for tracking orders and inventory, increasing sales with discount codes, and marketing your store through SEO, social media, and email.
Pricing
Pricing for Shopify starts with a 3-day free trial, followed by the option to sign up for 3 months for just $1 per month. After that, packages cost $39 per month for the Basic Shopify experience, or you can upgrade to Standard Shopify for $105 per month. Advanced Shopify costs $399 per month, and there are enterprise options (Shopify Plus) available with a custom cost (starting at $2000 per month).
Pros:
Huge range of themes and customizable templates
Lots of plugins, extensions, and apps in the marketplace
Integrated payment options
Included marketing and sales tools
Multi-channel and multi-location selling
Cons:
Transaction fees can eat into profits
Difficult to make some site customizations
Go to the top
2. Wix
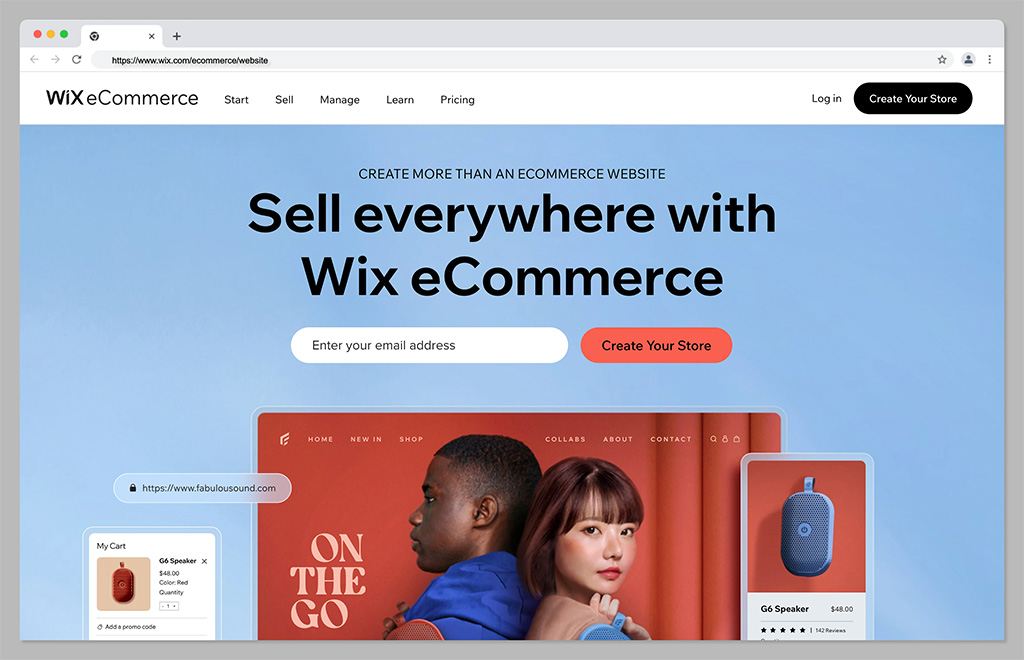
If you’re looking for a combination of exceptional ease of use and feature-rich performance, Wix could be the ideal ecommerce platform for you. Wix makes it simple to create beautiful and functional stores, either with a drag-and-drop editor, or the Wix AI design service.
There are tons of available tools to help you grow, such as Wix’s logo maker, loyalty programs, and SEO wizards. Plus, you’ll have plenty of payment solutions and a secure checkout system to help you make the most of every sale. Wix is ideal for small businesses, with it’s all-in-one functionality, and it’s easy to scale with tons of available integrations.
The platform integrates seamlessly with Printful, and has plenty of useful tools for calculating global tax and shipping, managing orders, and tracking inventory.
Pricing
Plans for Wix vary depending on whether you’re launching an ecommerce store or a standard website. If you want to make sales online, you’ll need one of the “Business” plans, starting at $38 per month if you pay monthly, or $32 per month if you pay annually. There’s also a “Business Elite” plan starting at $156 per month, and an Enterprise plan with custom pricing.
Pros:
Extremely easy to use website designer with AI tools
Lots of secure payment options to choose from
Excellent blogging, SEO, and marketing tools
Integrations with a wide range of software solutions
Extra branding tools, like a free logo maker
Cons:
Difficult to export data to another store
Some limitations on customization
Go to the top
3. Squarespace
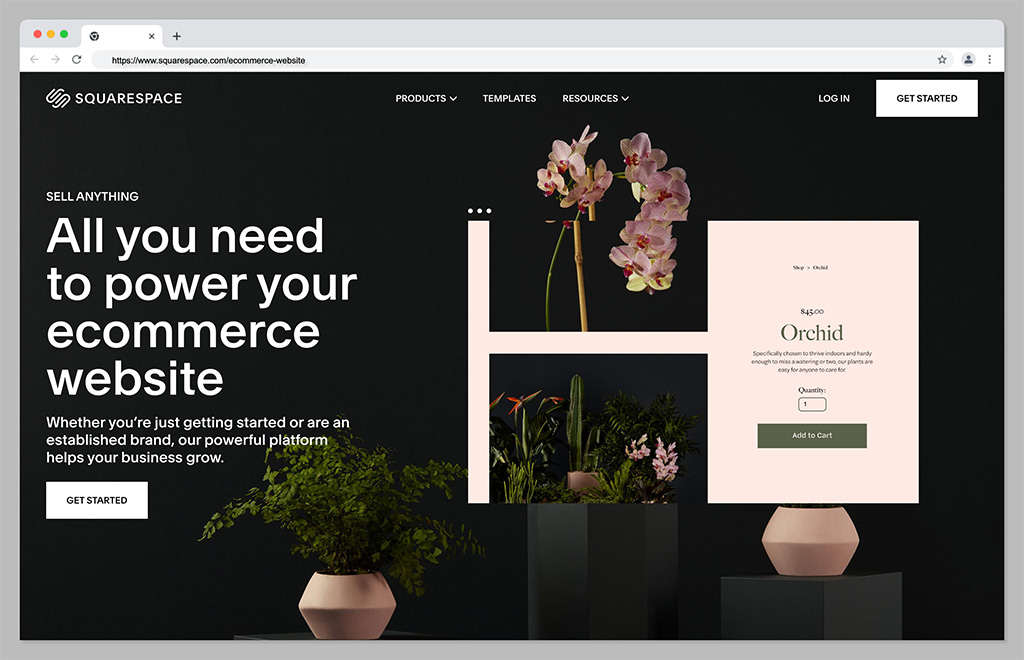
If, like many companies in the print on demand world, you’re focusing on the fashion industry, and want to stand out as a creative expert, Squarespace could be the perfect platform. Squarespace boasts some of the most attractive templates and themes in the ecommerce landscape.
The Squarespace website builder comes with a ton of advanced features, such as integrations with social media channels, booking tools, and the ability to set up subscription plans. The platform comes with fully mobile optimized designs, integrated ecommerce checkout features, and a free custom domain on some plans.
What’s more, you can access in-depth analytics for your website, to make it easier to track which of your products generate the most sales and opportunities. As you might have guessed, Squarespace also integrates directly with Printful.
Pricing
Like Wix, Squarespace pricing varies depending on whether you’re launching a website for personal reasons, or for ecommerce. Business plans start at $18 per month but come with transaction fees. To remove the transaction fees, you can upgrade to Commerce Basic for $26 per month annually, or $30 per month on a month-to-month basis.
Pros:
Beautiful and high-quality templates
Excellent integrations with social media
Free domain with annual plans
Advanced website analytics
Powerful merchandising tools
Cons:
No app marketplace
Limited payment options
Go to the top
4. Square Online
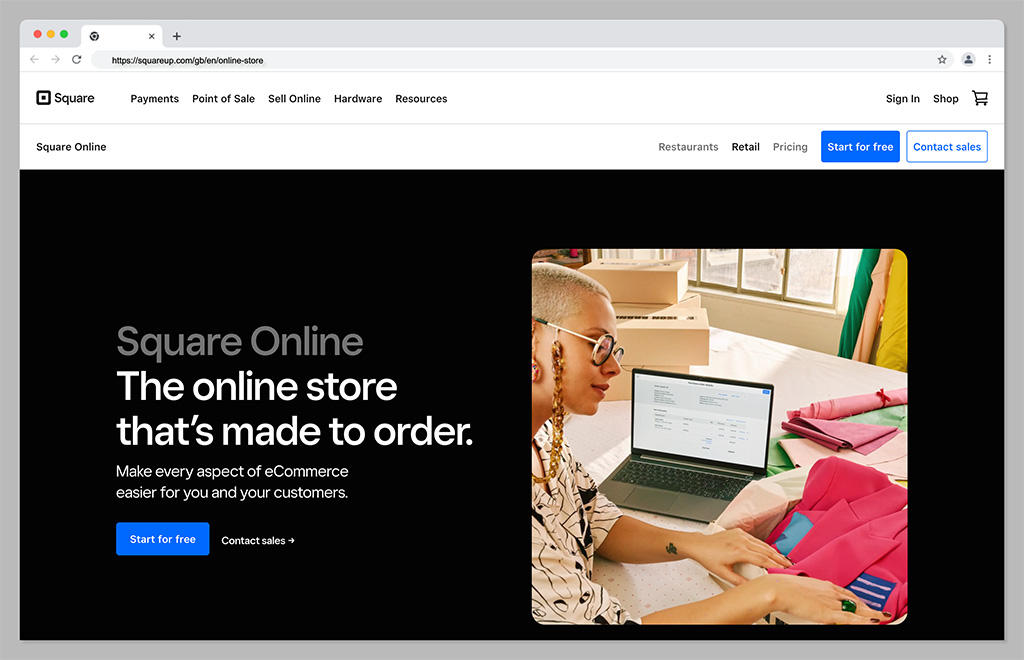
Square is best-known for it’s payment processing solutions, but it also offers a handy website building tool to smaller business owners. Square is one of the simplest tools on the market for companies in search of a low-cost way to take their business online. It’s even free to get started if you’re already using Square for payment processing.
The store builder is powered by Weebly, which makes it extremely easy to use. Plus, everything integrates seamlessly with your Square Point of Sale system (and Printful) so you can dive into omnichannel selling with minimal effort.
Square offers access to AI design tools, helpful features for showcasing your products, and a range of analytical tools. Although it doesn’t allow you to track important data like live shipping rates.
Pricing
You can start an online store with Square without paying anything at all. The only costs are transaction fees, which average out at 2.9% of your product price, plus 30 cents. There’s an option to upgrade to slightly more advanced versions of Square Online, with expanded site customization and more payment options, too, starting at around $25 per month.
Pros:
Excellent for omnichannel online and offline selling
Easy to use design tools for beginners
AI design features
Inventory management tools built-in
Analytics and reporting features
Cons:
Limited customization options
Transaction fees
Go to the top
5. Ecwid

Ecwid, by Lightspeed, is a powerful tool for omnichannel selling, intended to support small and growing companies alike. With this convenient tool, you can sell across a range of social media platforms, as well as marketplaces. Plus, you can set up an account for free online and keep it for as long as you like.
The Ecwid cloud-based platform is hosted for you, which means there’s no installation required, and you can add Ecwid’s ecommerce functionality to any existing website, including Joomla, Wix, WordPress, and Drupal sites.
Plus, there are tons of helpful tool for marketing your company too, such as Google and Facebook adds, and integrations with marketing ads. You can also manage your store with a host of fantastic tools, automated tax solutions, and discount shipping options.
Pricing
There’s a free forever plan for Ecwid which is ideal for smaller companies just getting started online. Alternatively, monthly prices start at $19 per month for the basic plan, or $99 per month for everything you need to start selling online.
Pros:
Options for selling on various marketplaces and social sites
Automatic language detection for global selling
Secure payment options available
You can create a mobile app for the app store
Free plan available for beginners
Cons:
Not a standalone solution for ecommerce
Limited analytical tools
Go to the top
6. Adobe Commerce
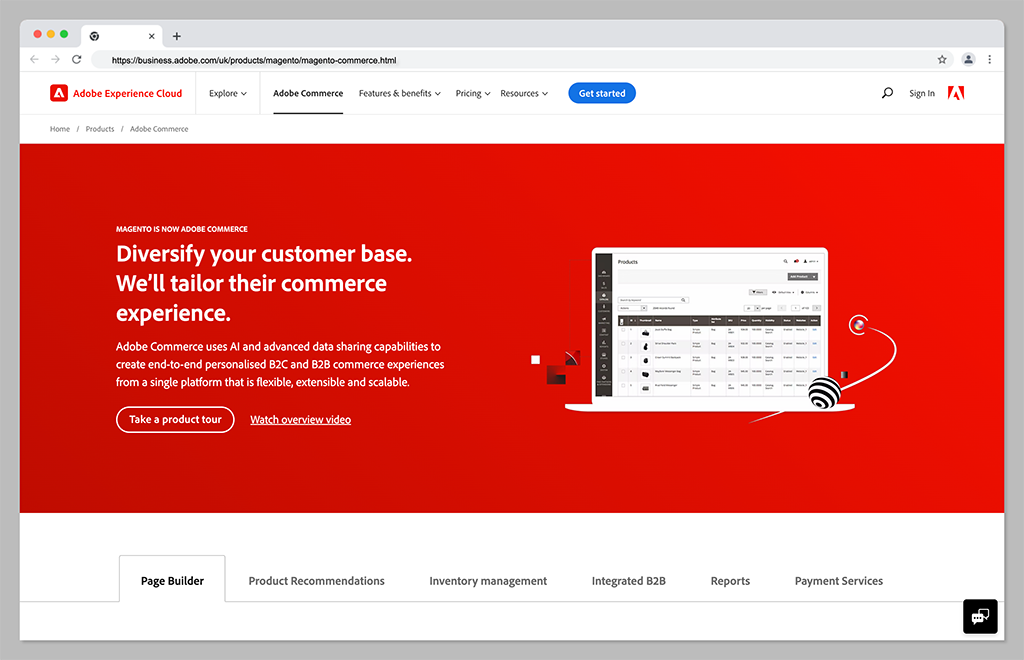
Adobe Commerce, previously known as Magento, is a comprehensive ecommerce solution, powered by the Adobe company. Supported by the Adobe Commerce platform, the solution integrates with a host of solutions in the Adobe landscape, as well as Printful, and a range of other tools.
With Adobe Commerce, companies can sell across a range of different channels. There’s even an integrated channel manager, to help you keep track of all your different platforms. Adobe Commerce also comes with access to a variety of great website building tools, and tons of customization options. You can even access headless commerce solutions as your business grows.
Although the solution is a little more complex to set up than other solutions, it does provide some more advanced features than you’ll get on other ecommerce solutions. Plus, Adobe Commerce is great for rapidly scaling brands.
Pricing
Adobe isn’t particularly forthcoming with its pricing options. You’ll need to contact the customer service team to get a quote for one of two packages. The first is Adobe Commerce Pro, an all-in-one solution for merchants of any size. The second is the “Managed Services” package, which comes with extra support from the Adobe team.
Pros:
Support for B2B and B2C multichannel selling
Excellent customization options
Wide range of fulfilment tools
Lots of payment methods
Insights and analytics
Cons:
Complex initial setup
No transparent pricing
Go to the top
7. WooCommerce
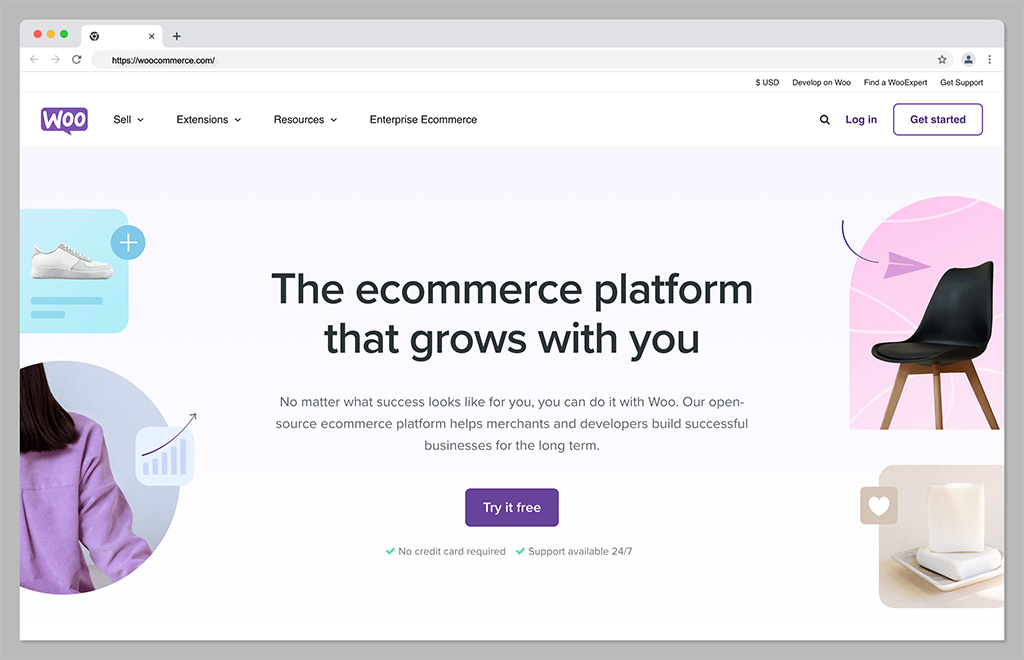
Ideal for those in search of absolute flexibility with their Printful store, WooCommerce is an ecommerce solution designed for WordPress. The solution is extremely easy to use, with a huge community of developers and experts you can reach out to for help. What’s more because its open source, it can flexibly integrate with a huge variety of tools.
WooCommerce is one of the most customizable ecommerce platforms out there, giving you complete freedom over everything from sales and inventory management to marketing. Plus, because it’s built on WordPress, you’ll have no problems with SEO and content marketing.
WooCommerce can offer live shipping insights, out of stock displays, and product personalization tools. You’ll also be able to take unlimited orders, and integrate all of your fulfillment providers into the same ecosystem.
Pricing
WooCommerce is a free, open-source solution, available to add to any WordPress store. However, because the solution is open source, you will need to pay for other features, like your domain name, website hosting, security and payment gateways.
Pros:
Exceptional customization options
Lots of built-in ecommerce and payment processing options
Affordable for beginners
No limits on how much or what you can sell
Built on top of WordPress for ease of use
Excellent for marketing and SEO
Cons:
Slight learning curve for beginners
Requires a third-party payment gateway
Go to the top
8. Big Cartel
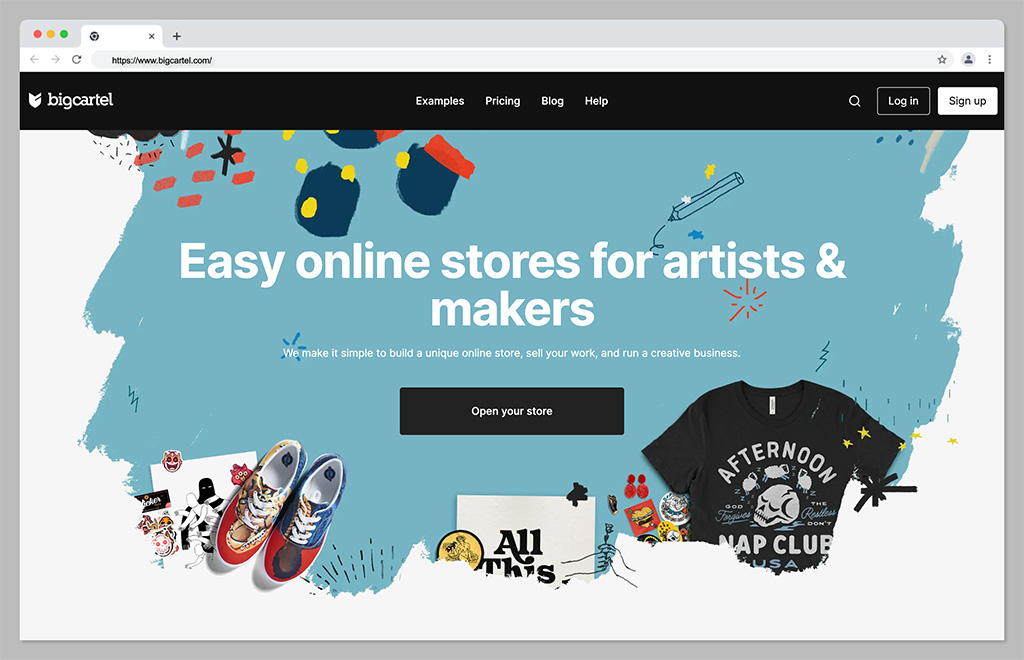
Another fantastic ecommerce platform solution that integrates directly with Printful, Big Cartel is a highly scalable tool for sellers. The platform is specifically focused on supporting independent artists and creators, with flexible templates and themes. There are theme code editing options, so you can make your own unique changes to your storefront.
Plus, Big Cartel supports both online and online selling, custom domains, real-time statistics and analytics, and inventory tracking. There’s even a sales tax autopilot solution available on some plans to help you with your financial strategies.
Though Big Cartel does require a little bit of technical knowledge, it’s an excellent choice if you want to boost the visibility of your store with some unique features. Just keep in mind there are no built-in blogging tools to help you promote your store.
Pricing
The free forever plan for Big Cartel allows users to sell up to 5 products for free with a custom domain. If you want more functionality, and the option to sell additional products, premium plans start at $9.99 per month for 50 products, or $19.99 per month for 500 products.
Pros:
Very affordable pricing
Lots of customization options and code editing
Built-in analytics and reports
Comprehensive inventory and shipment tracking
Support with sales tax calculation
Cons:
Limited payment options
Does require some coding knowledge
Go to the top
9. Amazon

If creating and managing your own store doesn’t appeal to you, then you could always consider a different approach with your Printful integrations. Amazon is by far one of the world’s largest marketplaces, known for selling virtually every kind of product imaginable.
With more than 300 million active customers worldwide, the platform offers businesses an easy way to rapidly connect with endless buyers. What’s more, Amazon offers sellers access to a host of great benefits, from ultra-fast fulfillment to simple setup processes.
With Amazon, you can build, grow, and scale your brand effortlessly, taking advantage of world-class logistics, a fantastic customer experience team, rich data insights, and even a host of advertising and marketing solutions.
Pricing
There are some fees to pay when selling on Amazon. For most US customers, subscription prices start at around $39.99 per month, plus referral fees. There may also be additional payment processing and currency conversion fees to consider.
Pros:
Instant access to a huge audience
Worldwide logistics and fulfillment team
Excellent customer support for end-users
Built-in advertising and marketing solutions
Easy set up for beginners
Cons:
Lots of competition
Can be difficult to scale your brand
Go to the top
10. eBay
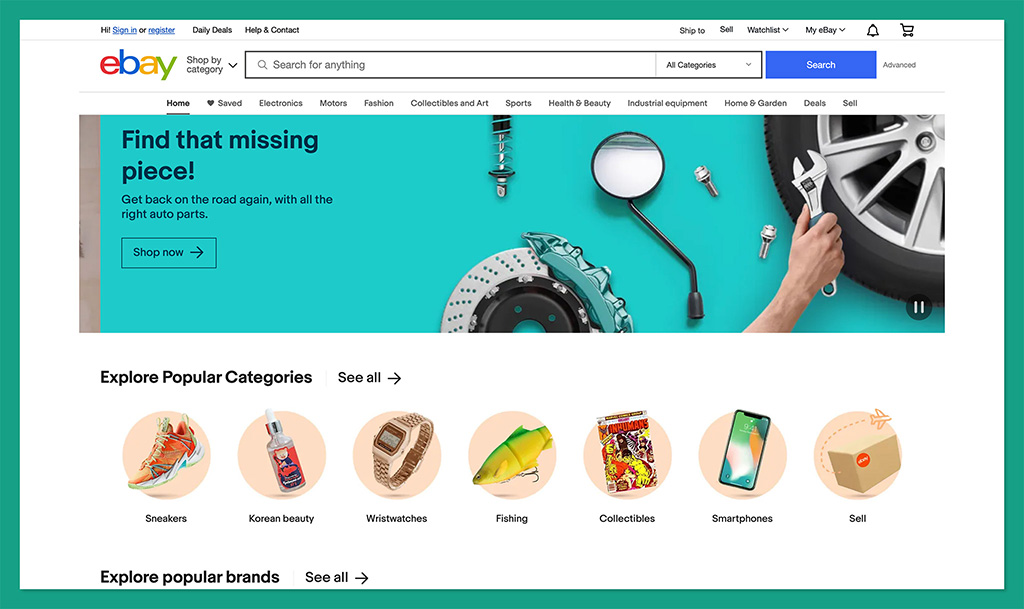
Another excellent option if you want to take the marketplace approach to selling online, eBay is a versatile platform for buyers and sellers alike. More than 109.4 million monthly visitors shop on eBay, giving you instant access to a massive potential audience.
What’s more, the platform is extremely easy to use, with simple tools for listing products, managing fulfillment, and even connecting with buyers. You can access marketing tools to boost your chances of making sales, and detailed sales information with information on daily sales trends.
Plus, advanced features provide merchants with the option to customize their selling overview, and active listing pages. You can also ship products to customers all over the world, giving yourself excellent opportunities to grow.
Pricing
It’s free to set up a seller account on eBay, but you will need to pay transaction fees, which vary depending on your location. There’s also a listing fee of $0.35 whenever you want to add a new product to your storefront.
Pros:
Extremely easy to use for beginners
Worldwide reach for a global audience
Support for marketing and promotion
Built-in analytics and reporting
Low fees for listings
Cons:
A lot of competition from other brands
Not ideal for scaling companies
Go to the top
11. Etsy
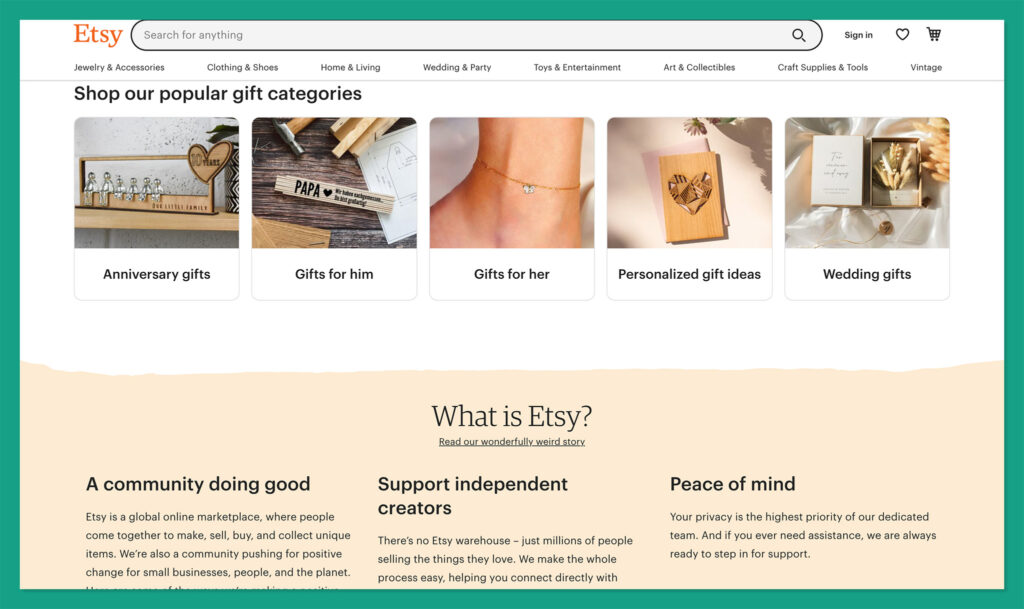
As the ultimate marketplace for creative professionals, Etsy stands out as one of the best ways to get started in the world of print on demand selling. The landscape attracts millions of potential buyers every day, so you can spend less time searching for customers, and more time designing.
Etsy comes with access to Google Analytics tools, for tracking information about your top-performing products and customers. You can track orders in your backend environment, purchase, and print postage labels directly from Etsy, and even customize your Etsy storefront.
Etsy even offers users the option to make their own custom website for branding purposes, with the “Pattern” service. This means you’re not limited to marketplace selling alone.
Pricing
Like Ebay, Etsy doesn’t charge merchants anything to get started on the platform. However, you will pay a 6.5% transaction fee on every order, and there’s a $0.20 listing fee for every product. Access to other features, like Pattern, will incur additional fees.
Pros:
Easy to use for beginners
Options to build your own store with Pattern
Convenient tools for sales and promotion
Help with fulfilment and logistics
Access to a large global audience
Cons:
High transaction fees
Significant competition
Go to the top
Choosing the Best Ecommerce Platform for Printful
Printful is one of the most versatile print on demand platforms available today, with a host of integrations available to choose from. As well as all of the options above, you’ll be able to connect your Printful platform to a variety of other vendors, from Prestashop and Weebly, to Gumroad, Shift4Shop and many others.
Plus, there’s a Printful API available for custom connections. The right solution for you will all depend on your goals, and how you want to get started in the print on demand space. The good news is that in all cases, Printful will make it easy to automate your fulfillment processes.
Go to the top
FAQ
Can I integrate Printful with my own website?
Printful integrates directly with a wide variety of ecommerce platforms and marketplaces, as well as shipment and fulfillment tools. There’s also a dedicated API available, so you can form your own connections with crucial resources too.
Can I sell directly on Printful?
Unfortunately, you can’t sell directly on Printful, as the platform doesn’t offer any online storefront or ecommerce site building services. Instead, you’ll need to use one of the platform’s integrations with other ecommerce tools or marketplaces.
Is Shopify Better than WooCommerce for Selling With Printful?
The right ecommerce integration for Printful for your business will depend on a number of factors. There’s no one-size-fits-all solution. If you want more customization and control, WooCommerce might be the ideal option. If you want a simple hosted solution, Shopify may be the better choice.
The post 11 Best Ecommerce Platforms and Integrations for Printful (2023) appeared first on Ecommerce Platforms.

