Inspirational Websites Roundup #49
Original Source: https://tympanus.net/codrops/2023/09/08/inspirational-websites-roundup-49/
A thoughtfully curated collection of websites showcasing exceptional web designs.
Original Source: https://tympanus.net/codrops/2023/09/08/inspirational-websites-roundup-49/
A thoughtfully curated collection of websites showcasing exceptional web designs.
Original Source: https://abduzeedo.com/los-kalakos-tequila-blanco-minimalist-packaging-design
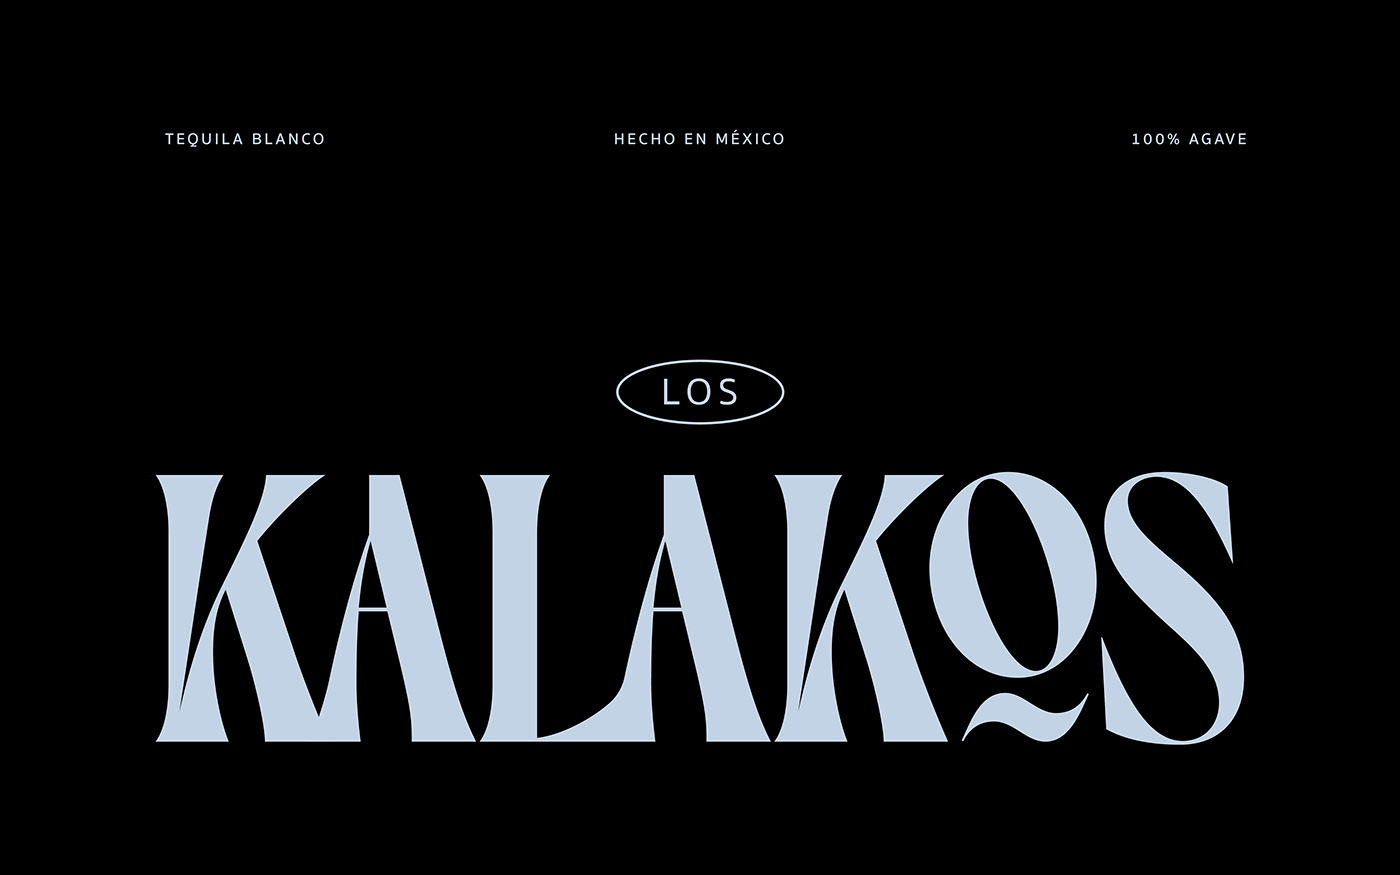
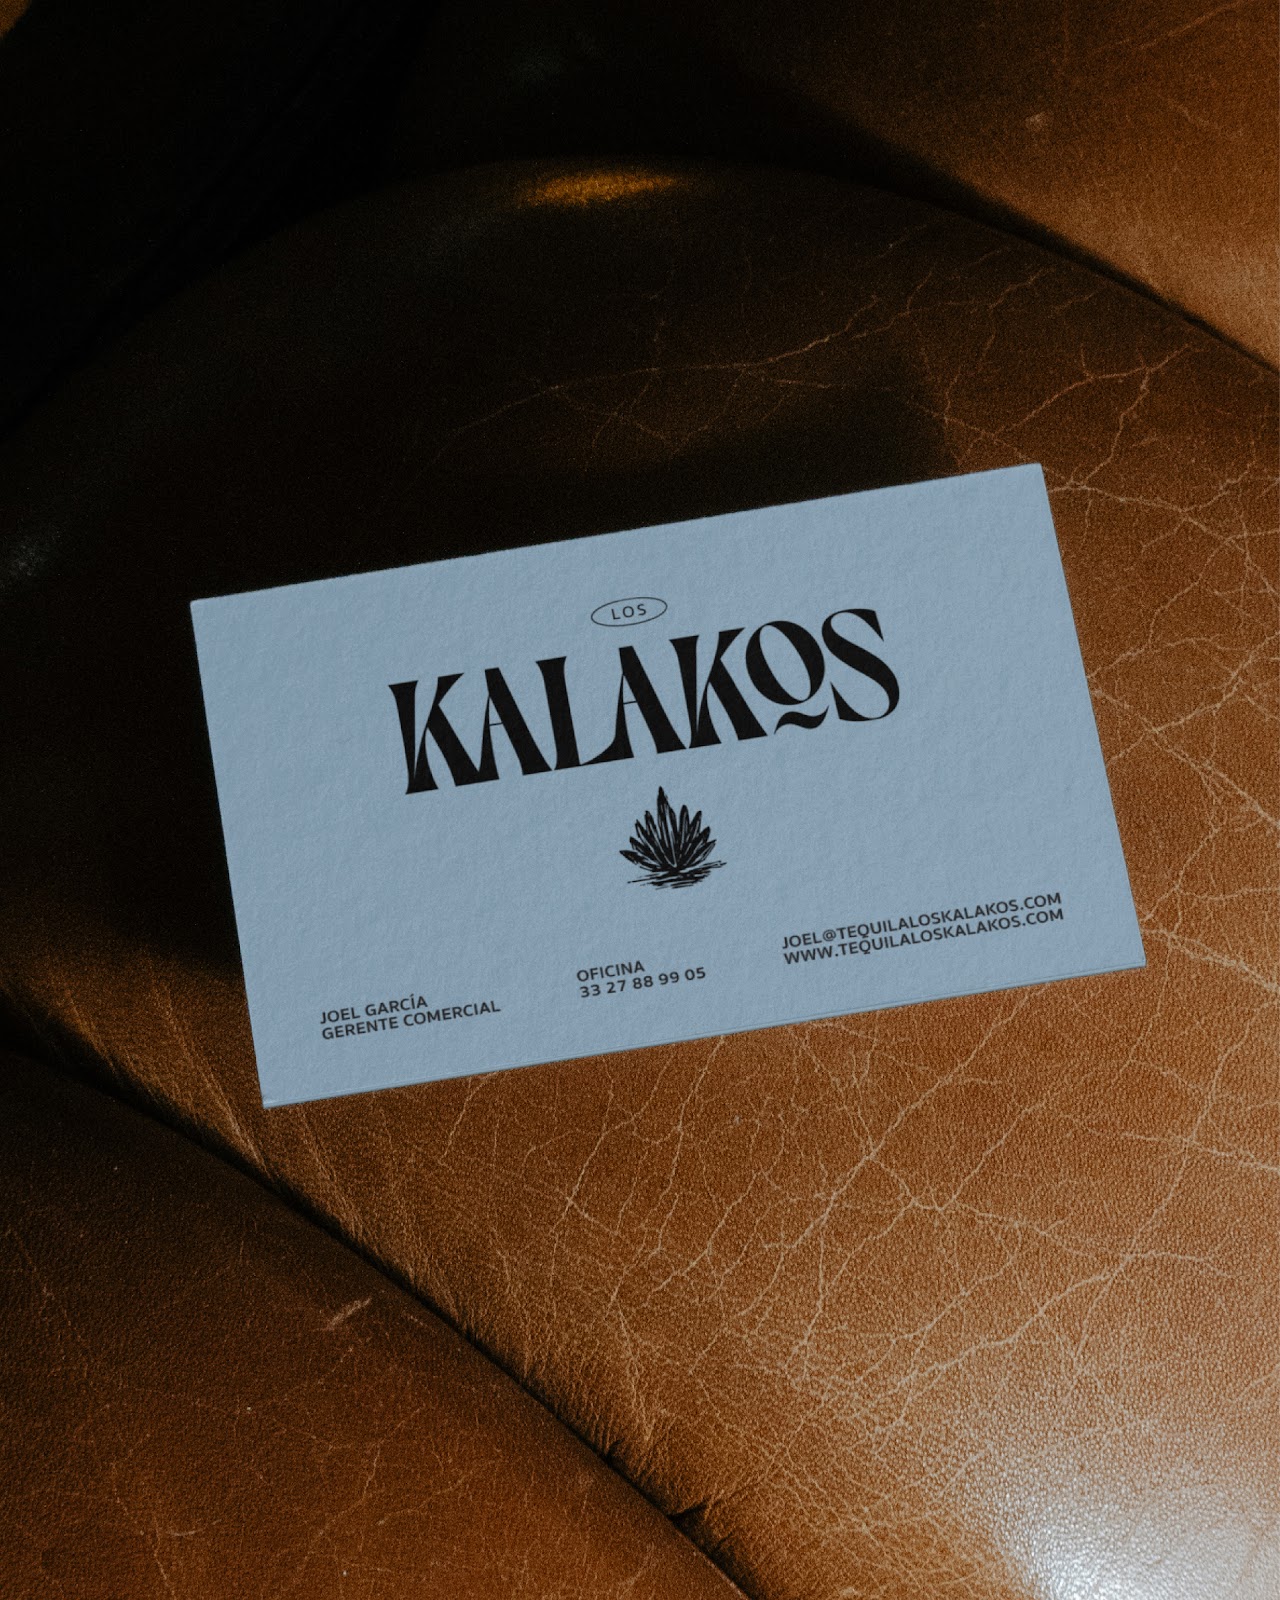
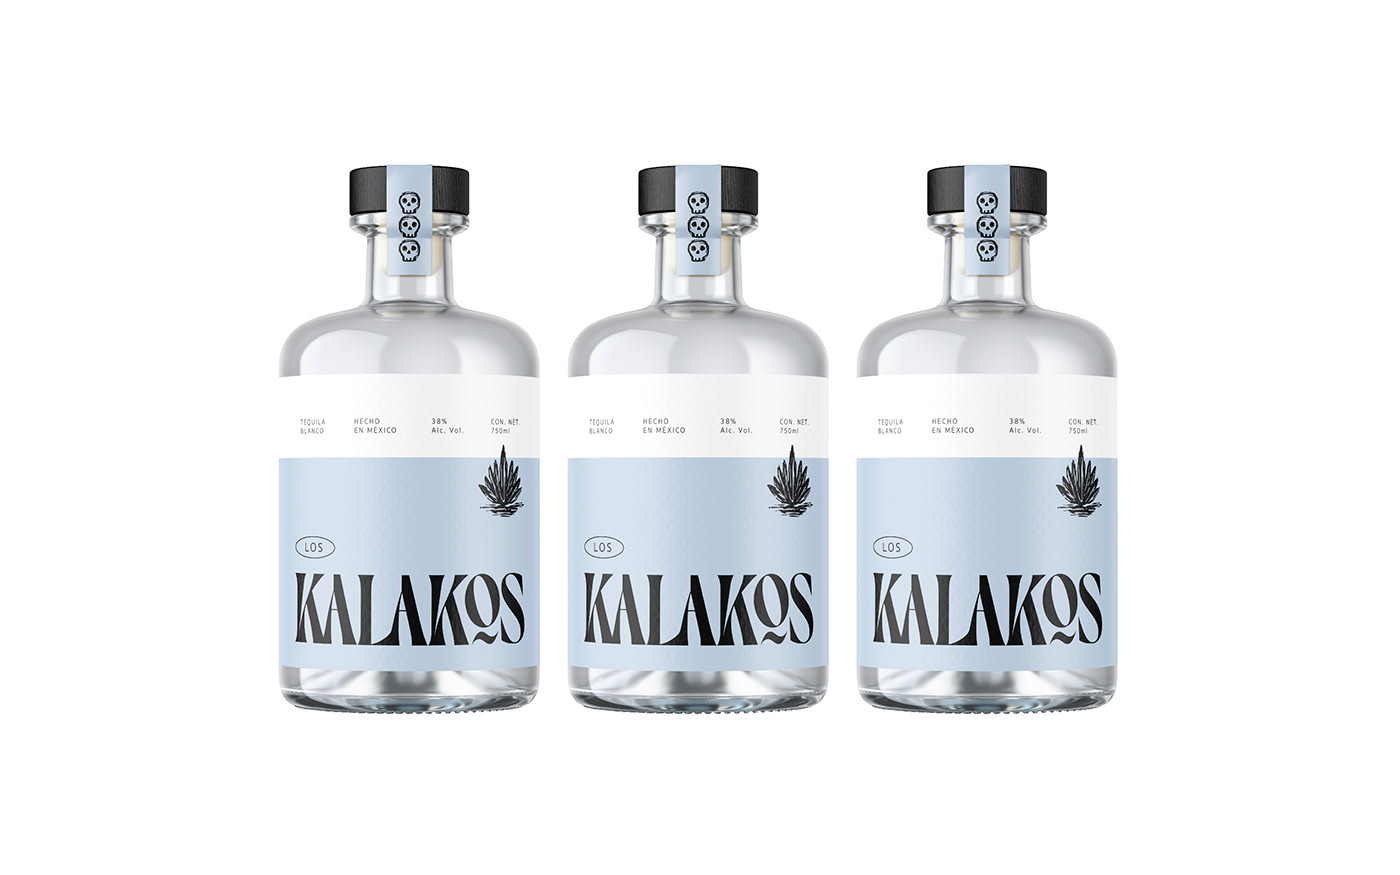
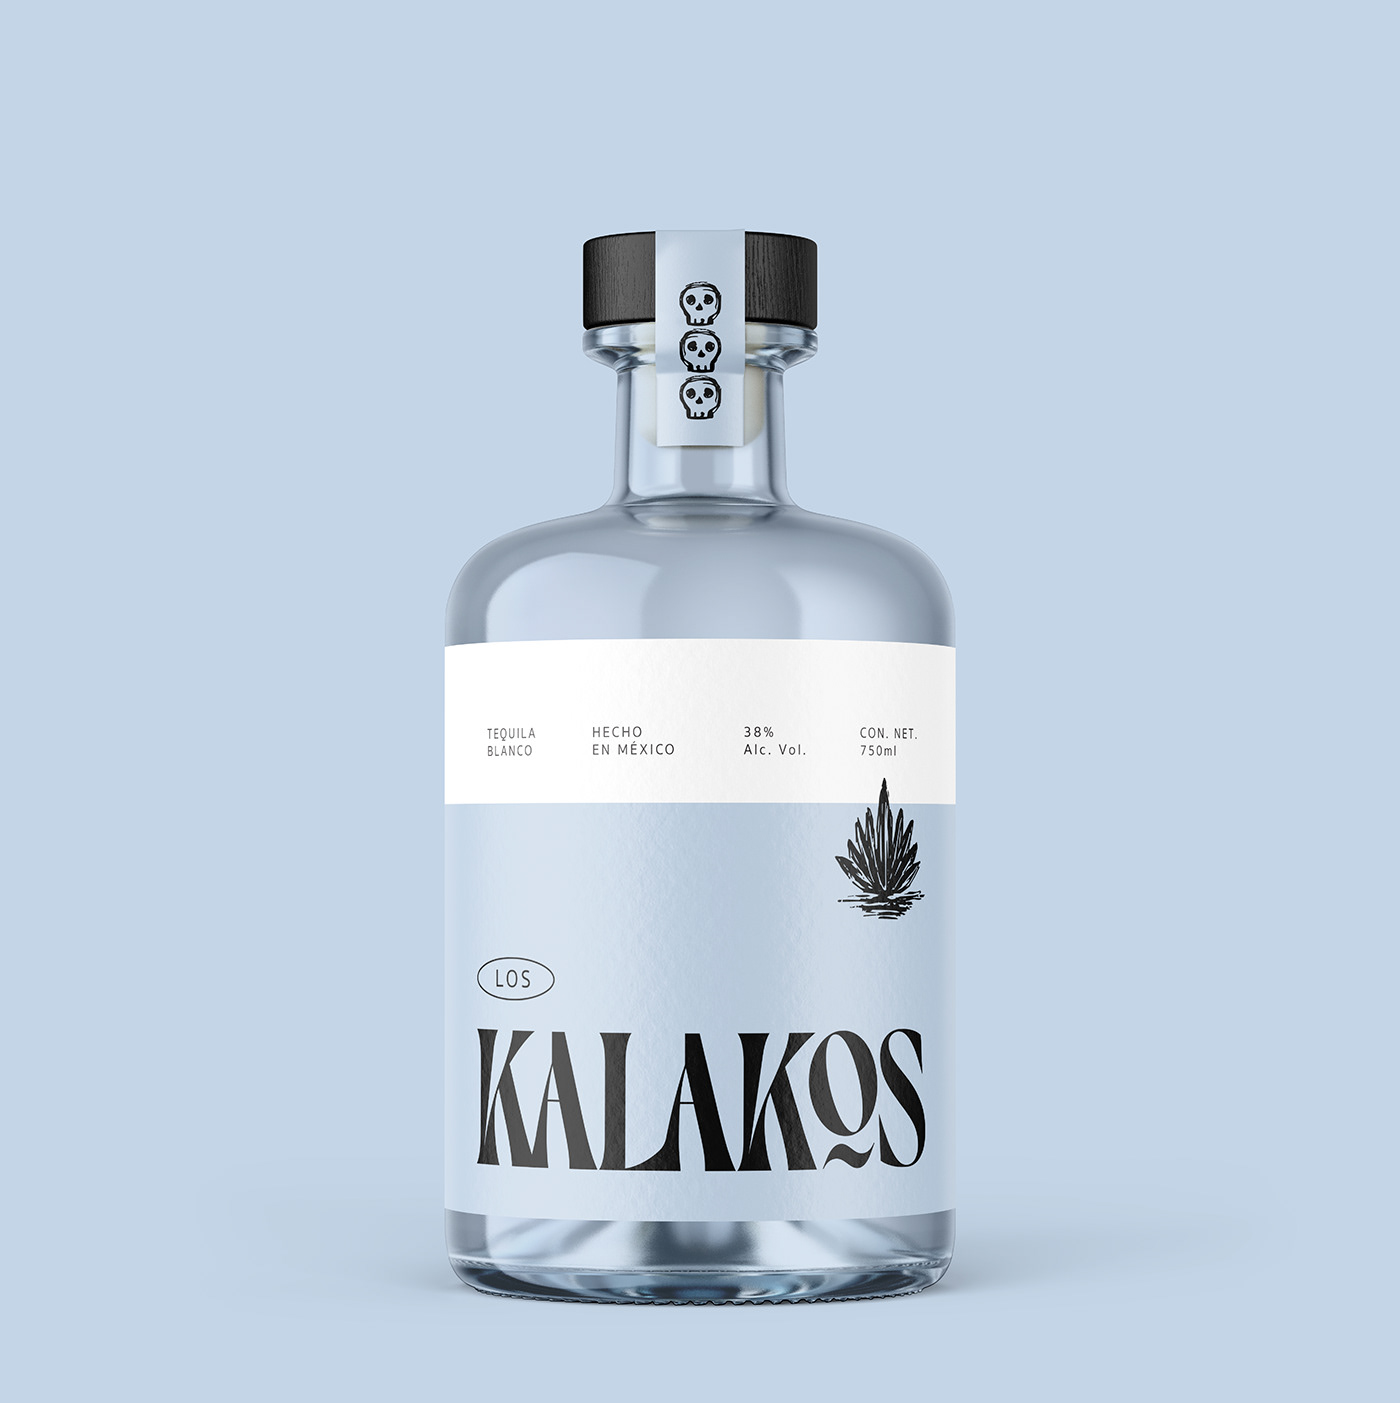
Los Kalakos Tequila Blanco: Minimalist Packaging Design

abduzeedo0913—23
Los Kalakos’ Tequila Blanco 2023 isn’t just another beverage in the spirits aisle – it’s a masterclass in brandjng and packaging design presented on a bottle. Commissioned by the illustrious Ernesto Serna, known to many as Sr. Brander, this project had its visual DNA mapped out by the artful hands of Moisés Guillén.
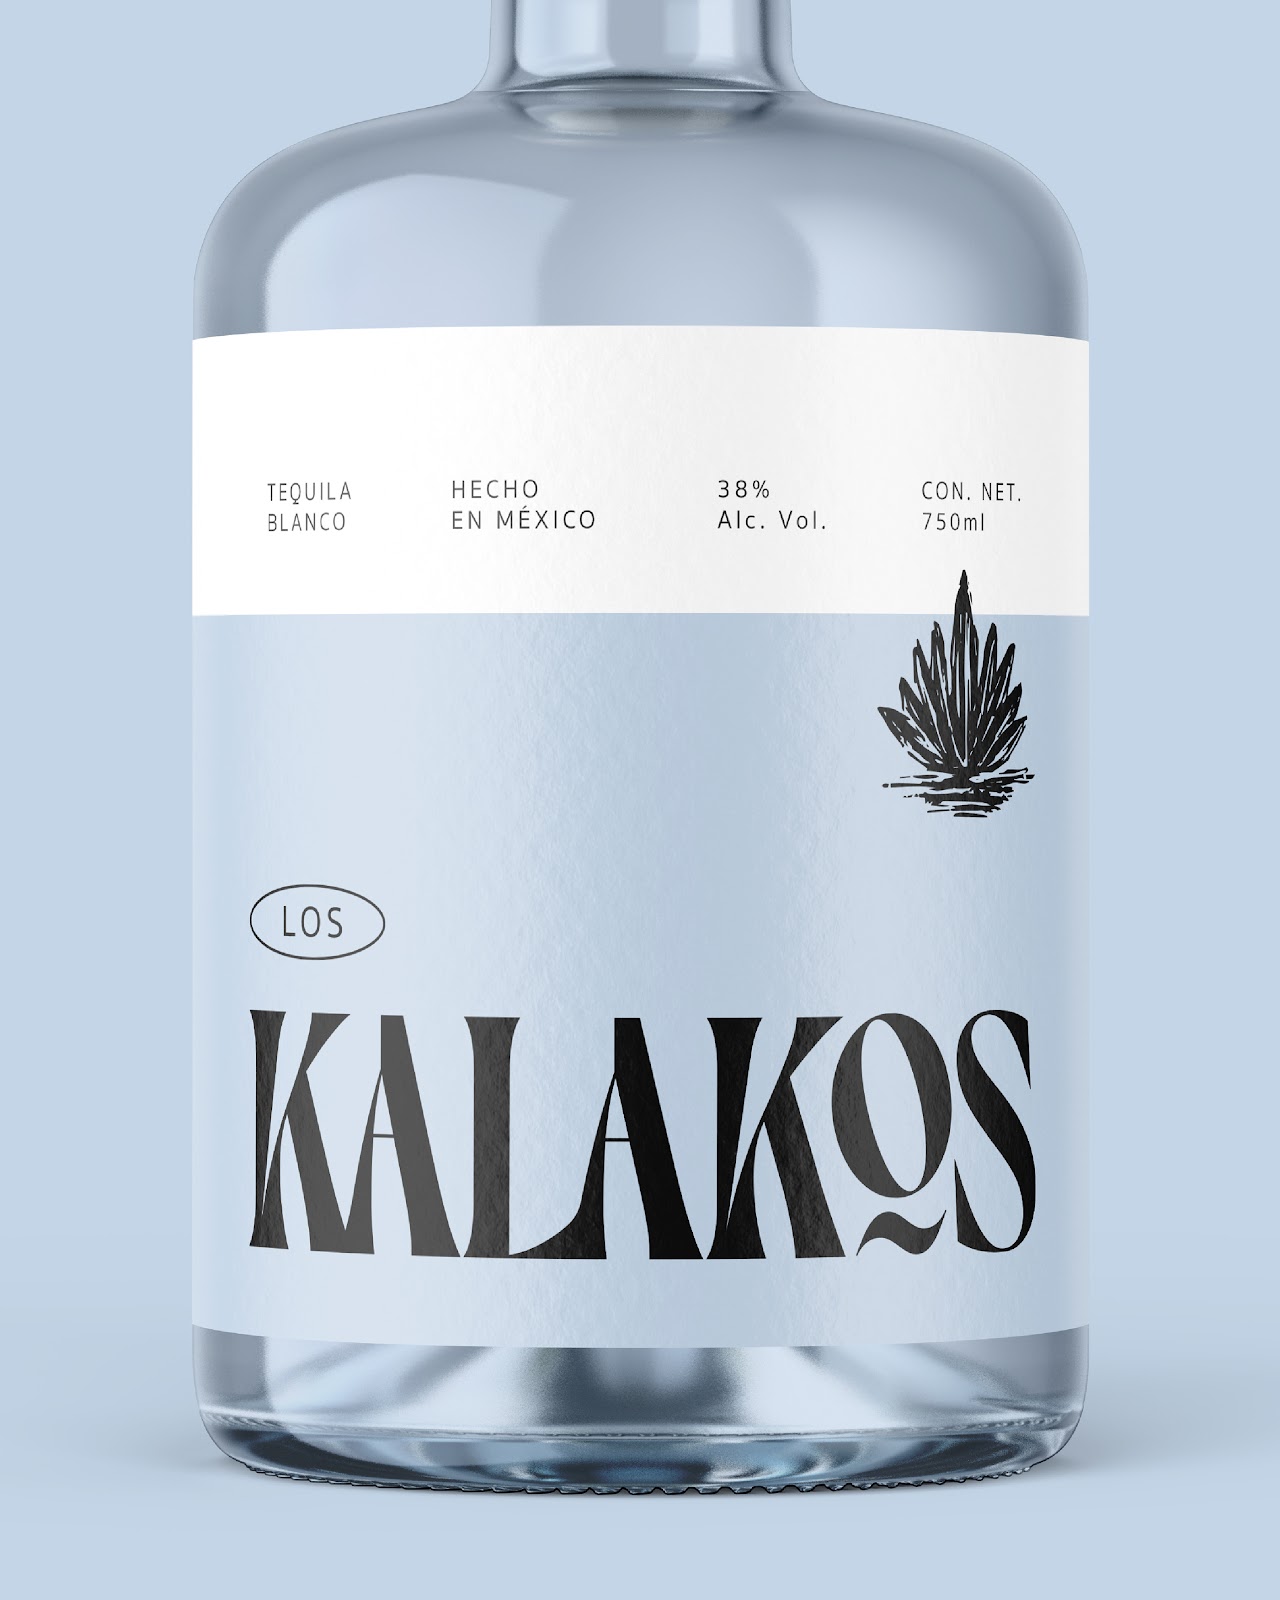
What is immediately striking is the deceptive simplicity of the design. Guillén doesn’t just do minimalism. He *owns* it. His minimalistic approach allows the beauty of the white label to shine, painting a canvas of purity and refinement. But do not mistake this simplicity for lack of depth. With the faintest of strokes, Guillén ensures that every element sings, even in its subtlety.
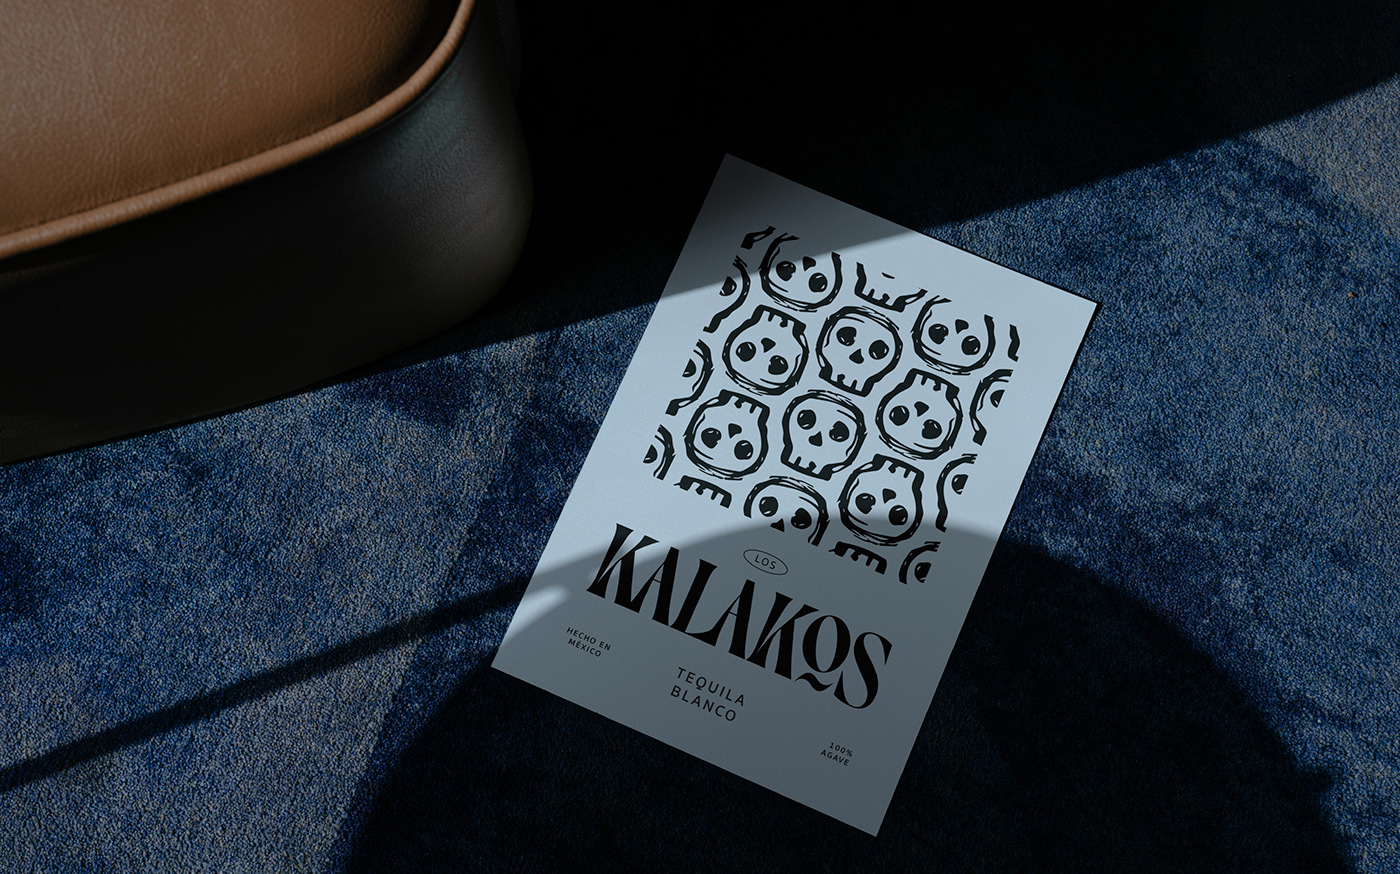
The custom logotype, for instance, is a feat in itself. While many might marvel at the clean lines, the cognoscenti will appreciate the cunning use of negative space that gives the letters an illusion of depth. It’s reminiscent of the agave leaves folding in on themselves – a delightful nod to the very heart of tequila. This is not just a logotype; it’s Guillén’s witty tip of the hat to the spirit’s origins.
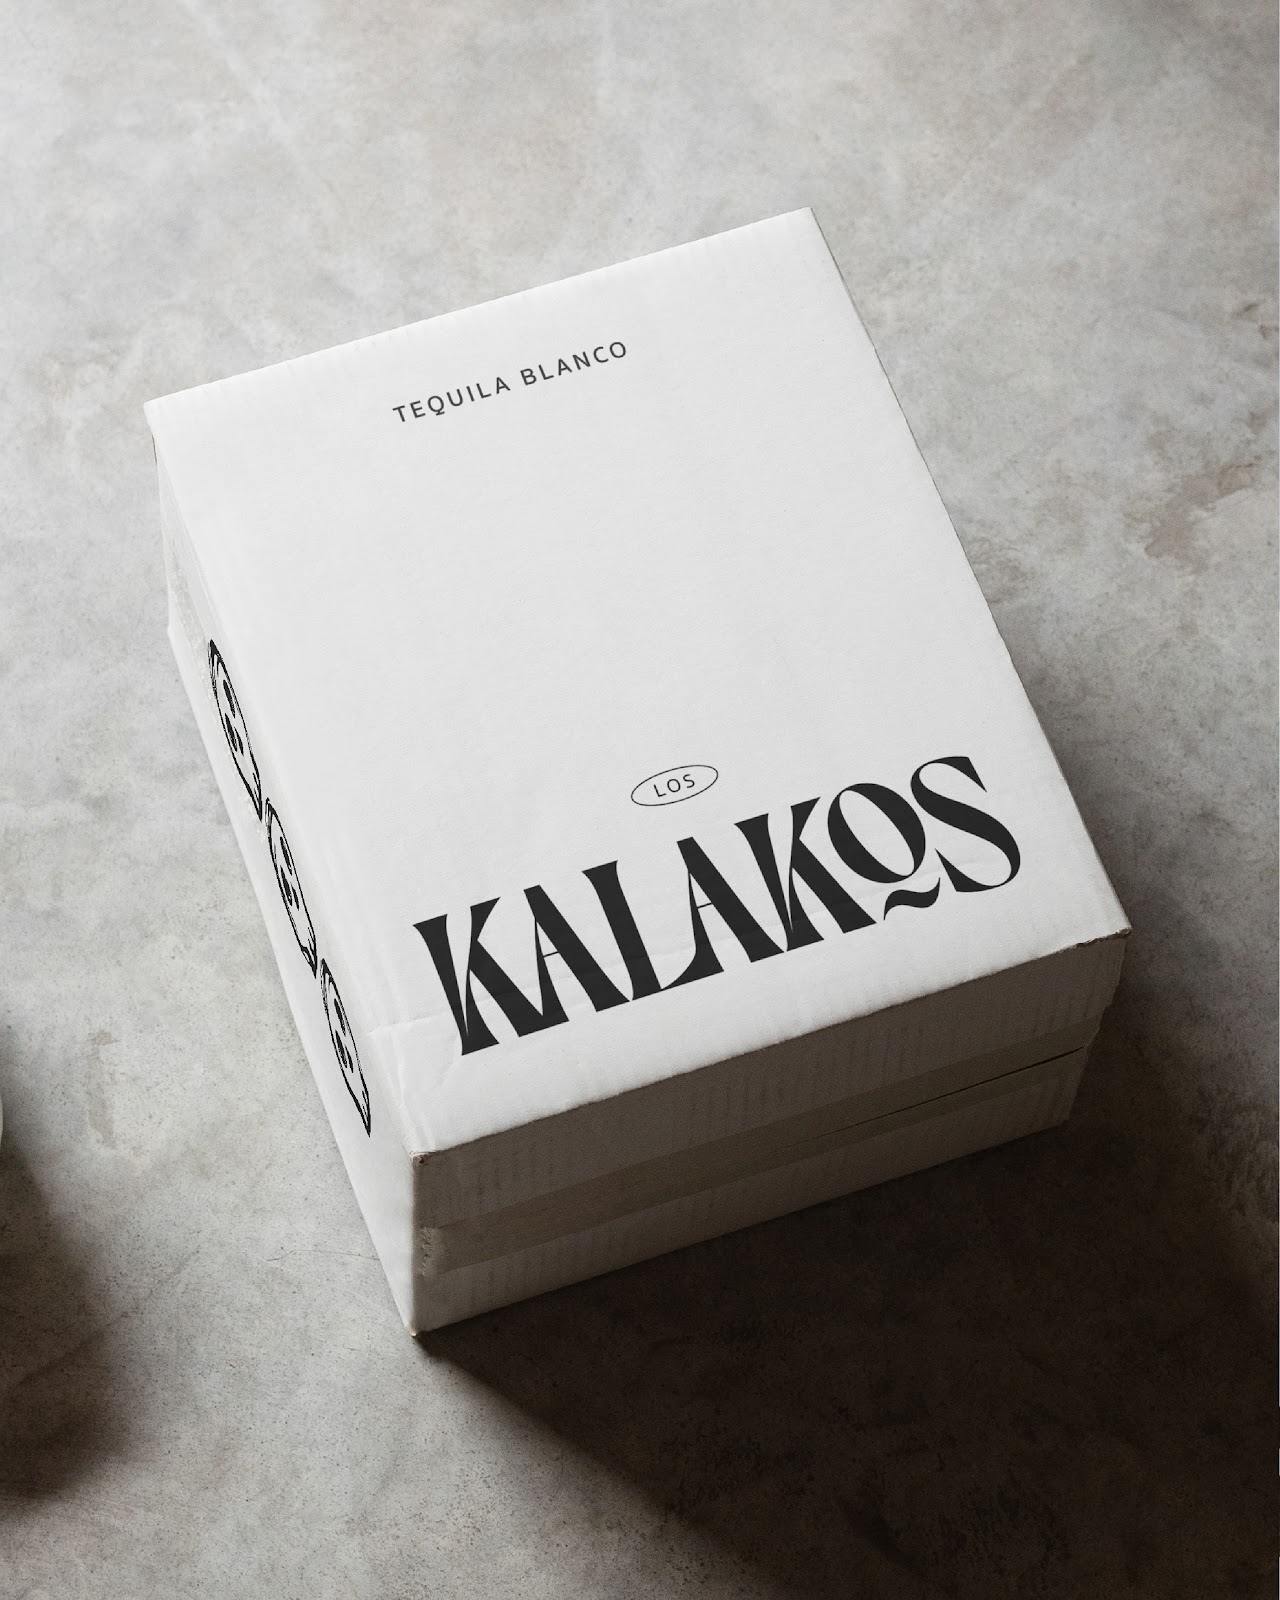
Perhaps the true hallmark of great design is scalability. And this branding identity doesn’t falter, whether it’s embossed on glass, stamped on cork, or imprinted on paper. Guillén has crafted an identity for Los Kalakos that seamlessly adapts, echoing a consistent narrative irrespective of the medium.
In a world overflowing with loud designs clamoring for attention, Los Kalakos’ Tequila Blanco reminds us of the power of restraint. It isn’t just about being seen; it’s about being remembered. Guillén’s work isn’t just about branding; it’s about leaving an indelible impression.
For those who understand design, Los Kalakos isn’t just another tequila. It’s a visual narrative, bottled. Cheers to Guillén, for serving us design perfection with a hint of agave.
Branding, packaging design and visual identity
Credits
Project Concept, Art Direction, Graphic Identity, Illustration & Packaging: Moisés Guillén.
Commissioned by: Ernesto Serna (Sr. Brander).
Original Source: https://smashingmagazine.com/2023/09/facilitating-inclusive-online-workshops-part1/
Have you ever found yourself trapped in an hour-long meeting, listening to someone’s endless talk without understanding their main point? Or sat through a discussion where everyone speaks, but no actions are decided upon in the end? Or perhaps felt like the meeting you’re participating in is simply a waste of time?
If you have, you’re not alone.
According to a survey conducted by Clarizen and Harris Poll (2017), three in five employed adults reported that preparing for a meeting “takes longer than the meeting itself,” and 35% of those who attend status meetings called them a waste of time. In fact, 46% of employed Americans would rather engage in any unpleasant activity than sit in a meeting.
Meetings, when organized well, can serve as an effective way to share information and make decisions. The harsh reality, however, is that many meetings are poorly structured, ending up as a drain of resources.
One of the possible ways to replace meetings with something better and more effective is the implementation of workshops. But while workshops can be a highly effective way to foster collaboration and generate innovative solutions, they often require active participation from everyone involved. Yet, not everyone feels comfortable voicing their thoughts or taking the lead in a group setting, even though these quieter voices can be just as valuable and insightful. This is what led to the concept of an “inclusive” workshop — a workshop that ensures everyone feels heard, connected, and comfortable expressing their ideas.
What’s Inclusivity, And What’s Its Impact?
Before we dive into the concept of an inclusive workshop, let’s first talk about the foundation. At its core, inclusivity means recognizing, appreciating, and respecting the diverse tapestry of human individuality. It’s about valuing the uniqueness everyone brings to the table, from attributes like ethnicity, gender, age, and religion to less apparent characteristics such as cognitive style or socioeconomic background.
Inclusivity is deeply rooted in the social identity theory, introduced by Tajfel & Turner in 1979. This theory suggests that our identities — who we think we are — are partly defined by the social groups we feel part of. It’s human nature to seek acceptance and to want to belong to a group that appreciates us for who we are. This need for social acceptance influences how we view ourselves and how we interact with others.
An inclusive environment embraces this diversity and uses this as an advantage to create a collaborative environment. Think of an orchestra, for example. Every instrument, whether it’s a violin, a trumpet, a cello, or a drum, brings with it its unique sound. Some may play a melody, others a harmony, and some keep the rhythm. Each of these sounds is different, but when combined, they create a harmonious symphony. In an inclusive setting, each person, with their distinct qualities, comes together with others to form a symphony of collaboration and understanding.
However, people are beautifully complex, and although this complexity is what often breathes life into a workshop, it can also introduce an element of unpredictability, which, if not managed well, can potentially lead to discord among the participants.
The only thing we can do is acknowledge the fact that not everyone will be comfortable speaking up, particularly in group settings. There could be various reasons for this, including individual personality traits, cultural backgrounds, past experiences, or simply the fear of judgment. As a facilitator, it is your responsibility to ensure that every individual in the room feels comfortable expressing their opinions and ideas. In the remainder of this article, I will be introducing some practical principles and techniques that could guide you in facilitating an inclusive workshop.
Preparing For An Inclusive Workshop
If you are familiar with design thinking and design in general, you’ll find similarities between the design process and structuring an inclusive workshop. In design, we start by trying to understand our users, identifying their goals, and then crafting an effective user experience to guide them from start to finish. The same principles apply to designing an inclusive workshop:
Understand the participants,
Recognize their goals,
Plan an engaging experience to achieve these goals.
Here are some “pre-works” you can do to better prepare for your workshop.
Step 1. Make Sure You Include The Right People
The most important thing in any meeting or workshop is including the right participants. Failing to do so could prevent you from guiding the team in order to reach the goals of the workshop.
If you are facilitating a workshop for your own team (or within your company, which you know well), ask yourself the following questions so as to decide if a person should be included:
Is the meeting relevant to this person’s work and core responsibilities?
Can this person provide critical information, aid in the decision-making, or contribute meaningfully to the conversation?
Is this person’s presence necessary to achieve the meeting’s goals?
On the other hand, if you’re facilitating a workshop with an external team, provide a list of criteria that outlines what the ideal participant looks like and ask your client to include all the relevant individuals.
At this stage, bear in mind that adding a new participant not only means that you are bringing in a new viewpoint but you’re also increasing the number of necessary agreements among the members of the group. This could potentially lead to more disagreements and conflicts among different parties. Have a look at the points of agreement graph (below) to better understand how this mechanism works.

Step 2. Know Your Participants Well
Once your participant wish list is set, it’s important to invite all the participants to the workshop in a manner that is welcoming and inclusive — for example, not just sending a calendar invite and expecting them to show up. If it’s feasible, try to arrange a pre-workshop call or meeting with each participant to gain a better understanding of them. Building these personal connections before the workshop is important in ensuring your workshop activities are inclusive and productive.
Here are some more detailed steps to consider.
Personalize The Invitation
Instead of a generic invite, personalize your invitations. Clearly outline the workshop’s purpose and activities and why you think they would be a valuable addition. Be open to participant’s opinions and concerns about attendance. If there’s uncertainty about their availability or relevance to the workshop, offer them an option to contribute asynchronously if they can’t participate in real-time.
An example message could be crafted along these lines:
“Hey Lewis, I am reaching out as I am planning to run a workshop with Max to brainstorm around how we can build the AI dashboard (which is the next initiative on our roadmap), and I would love to invite you to the workshop as I believe your front-end knowledge will help us a lot to understand the tech limitations. How does that sound to you? The workshop will be approximately two hours long and is scheduled for next week. Here’s the high-level agenda…”
A message like this — where you can explain what the workshop will be about, who will be involved, and how they can contribute to the workshop — will help the participant decide whether their involvement will be useful or not.
Schedule Pre-Workshop Conversations
If possible, have a brief, informal chat with the participants, especially if you’re unfamiliar with them. This could be as simple as a quick coffee chat where you just talk about your hobbies and favorite movies. Such interactions can help build rapport before the workshop and provide insights into the participant’s goals and expectations.
Identify Personality Types And Preferences
The personality traits of your workshop participants can be grouped along two main axes: their preference for group work (individualistic vs. collaborative) and their communication style (introverted vs. extroverted). By understanding and accommodating these preferences, you can create a workshop environment that truly values and harnesses the benefits of diversity.
Individualistic participants
They may prefer tasks they can work on independently and discussions in smaller groups. Designing certain portions of the workshop that allow for individual thinking and ideation can help engage these participants.
Collaborative participants
They enjoy large group discussions and team activities. Incorporating collaborative tasks where everyone can contribute can keep these participants involved and motivated.
Introverted participants
They might feel more comfortable with structured turn-taking or with written contributions. They might not voice their thoughts as readily in a group setting, but that doesn’t make their ideas any less valuable. Establishing clear turn-taking rules or offering opportunities for written input can help ensure their voices are heard, too.
Extroverted participants
They might be more engaged in free-flowing discussions or roles that involve presenting to the group. Ensuring that the workshop format has room for open discussions can cater to their preference.

Step 3. Plan The Workshop Steps
Once you have defined your participant list and understand the participants well, the next step is to plan the workshop accordingly to meet their needs.
In the next section, I will share some high-level tips relevant in particular to inclusivity.
The specifics of planning an entire workshop is another topic altogether — I recommend reading a few books on this topic, such as Gamestorming by Dave Gray, Sunni Brown, and James Macanufo and Facilitator’s Guide to Participatory Decision-Making by Sam Kaner, as well as Smashing Magazine articles that will help you dive deeper into the specifics of crafting a workshop. You might also want to look at the 4C framework developed by AJ & Smart, which can guide you in structuring your workshop logically.
Start By Defining The Break Time
No matter the nature of your workshop, it’s important to plan regular breaks which will promote an inclusive environment.
Catering to individuals’ unique needs, be they physical or cognitive, is very important. Breaks help counter the “Zoom fatigue” prevalent in virtual workshops and respect cultural sensitivities by allowing time for personal and cultural practices.
Numerous studies indicate that people can generally focus effectively for about 45 to 50 minutes at a time. Hence, consider scheduling a 5–10 minute break every hour. These intervals offer participants time to relax, regroup, and reset their mental focus, thereby maintaining engagement and productivity throughout the session.
“Excessive focus exhausts the focus circuits in your brain. It can drain your energy and make you lose self-control. This energy drain can also make you more impulsive and less helpful. As a result, decisions are poorly thought out, and you become less collaborative. So what do we do then? Focus or unfocus? In keeping with recent research, both focus and unfocus are vital. The brain operates optimally when it toggles between focus and unfocus, allowing you to develop resilience, enhance creativity, and make better decisions too.”
— Srini Pillay, “Your Brain Can Only Take So Much Focus” (Harvard Business Review)
Choose The Right Tools
The selection of tools in a remote environment can substantially influence participants’ experience. Complex or unfamiliar tools can affect the effectiveness of even the most well-planned workshop. Thus, it’s important to select tools that can help with collaboration, address diverse participants’ needs, and are accessible and straightforward to use.
Below, you’ll find a list of some popular tools for facilitating workshops, including their advantages, disadvantages, and best-suited participant types.
Whiteboard Tools
Miro
Miro is a popular and user-friendly digital whiteboard tool known for its intuitive interface and collaborative features. It’s great for visual learners and those who thrive on a free-form canvas. Additionally, for facilitators, a wide range of workshop templates is provided so that you don’t need to start from scratch. However, this tool can be overwhelming for those who prefer more structured interfaces. In addition, in Miroverse, there are more than 1000+ templates for you to get inspired by and to better plan your workshop.
Mural
Another alternative digital whiteboard platform, Mural, is known for its ability to onboard new users easily. People can join and edit your Mural board without the need to create an account, which reduces friction. However, for facilitators who wish to have more powerful features such as AI, tables, charts, and integrations, Mural might not completely satisfy their needs.
FigJam
FigJam is a top choice for designers and those familiar with Figma. It combines the flexibility of a digital whiteboard and design-focused features. This tool suits visually oriented and design-minded participants alike but may feel less intuitive to those unfamiliar with design software in general.

Video Conferencing Tools
Microsoft Teams, Zoom, and Google Meet
These are the “traditional” tools that almost everyone knows how to use. While their interfaces may lack extensive interactive features (which leads to a somewhat basic look and feel), their key strength lies in their consistent performance and accessibility. Their familiarity among users ensures a low learning curve, contributing to smooth and efficient workshop sessions.
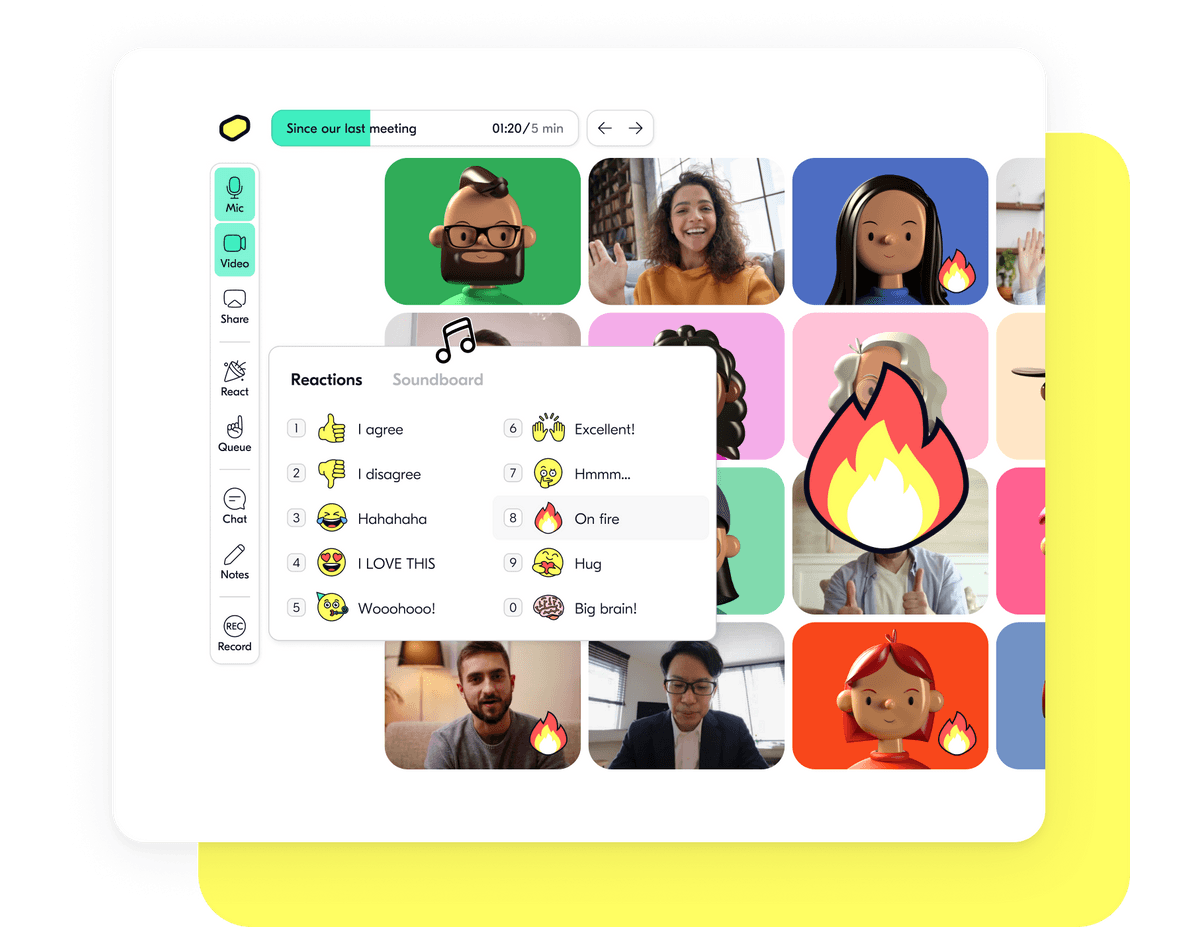
Butter
This tool is purpose-built for running interactive workshops, offering creative features specifically focused on workshops and collaborative meetings. Butter can cater to a broad range of personality types. For extroverted participants, it enables easy active engagement in discussions, while it also allows more introverted participants to express themselves using reactions, emojis, or GIFs in a less confrontational manner.
Group Discussion Tools
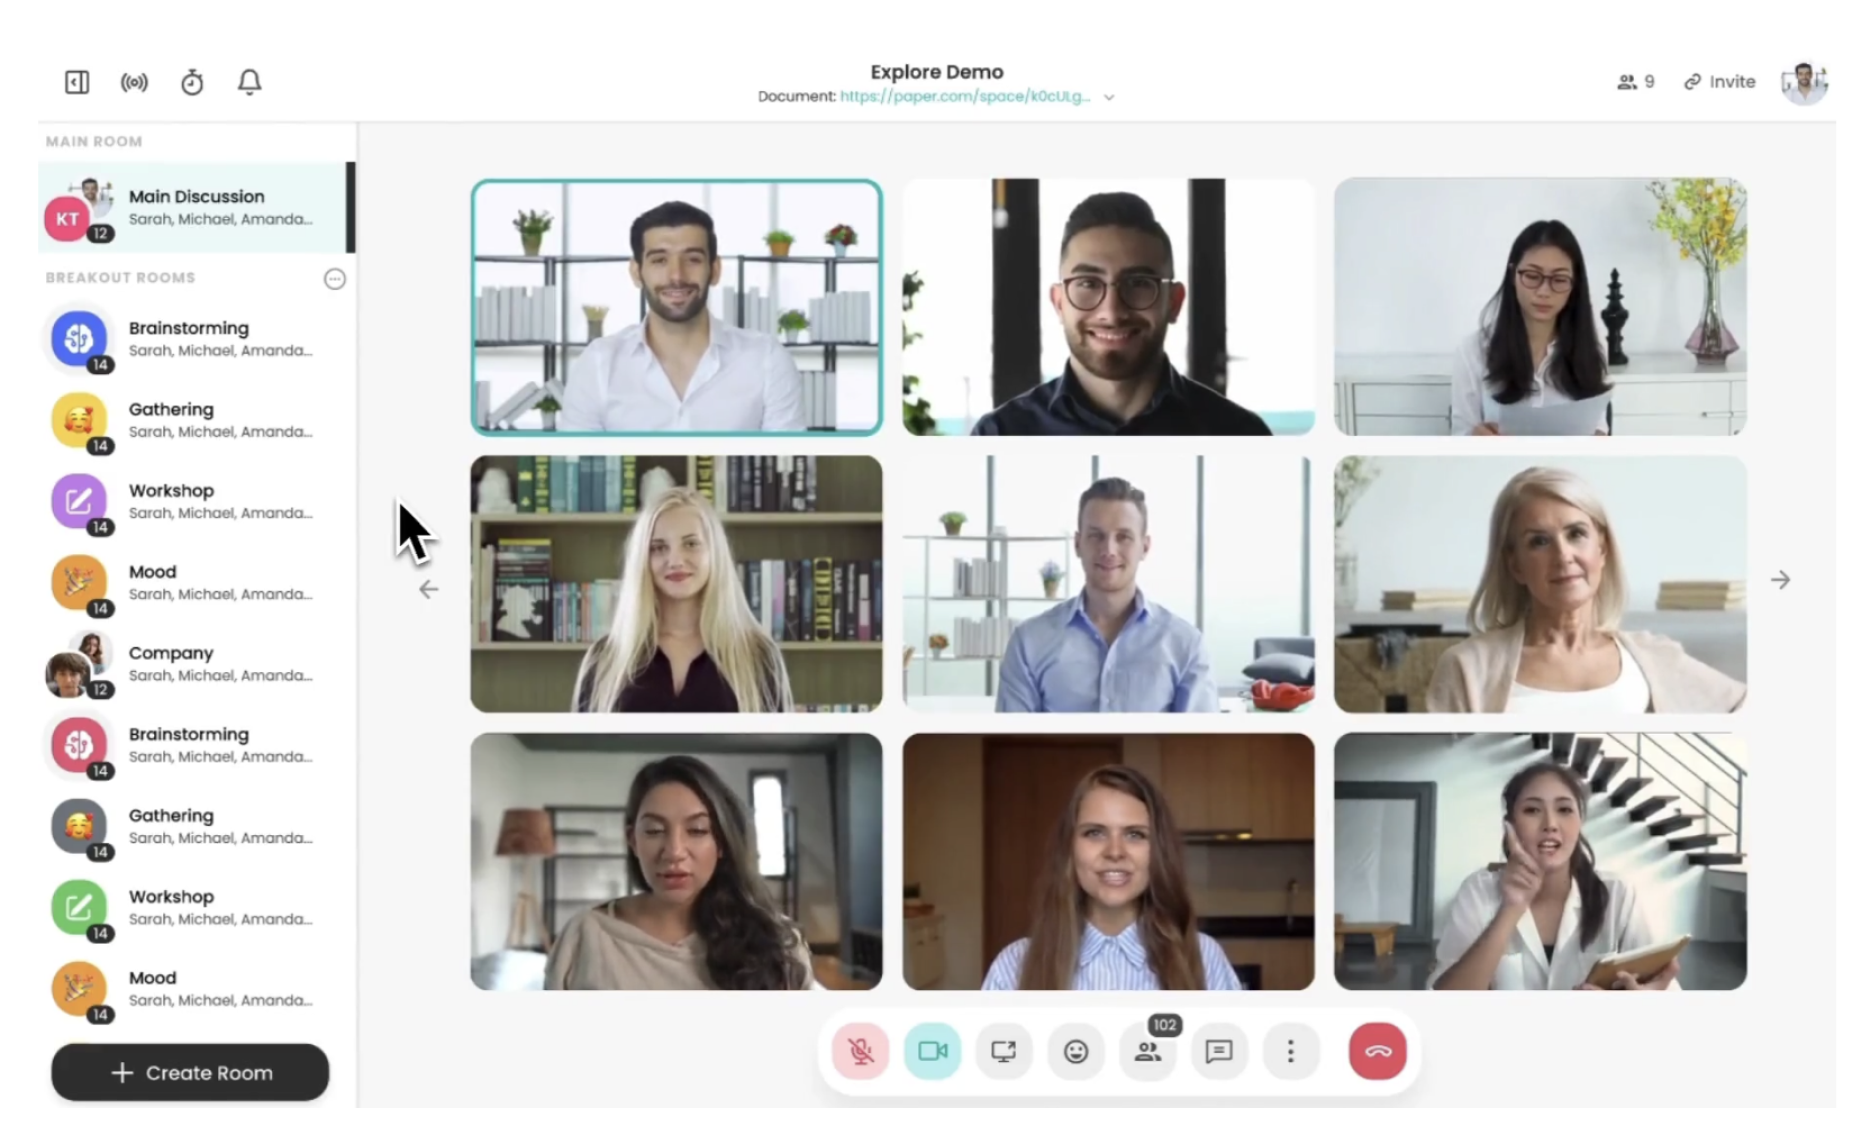
Mixerchat
This platform facilitates interactive group discussions. Participants can freely navigate different breakout rooms, engaging in breakout sessions or world café-style activities.
Choose The Activities And Communication Methods
The next and perhaps most critical step is to carefully choose activities that cater to the diversity of your participants. Use the personality types and goals you identified in Step 2 to guide your decisions. Here are some suggestions to help you get started.
If most of your participants are Introverted & Individualistic.
These participants prefer to think through ideas independently before sharing them, and they may be more comfortable in a quieter setting. A few activities for this group of people could be:
Silent Brainstorming: Each participant works individually to generate ideas and write them down. After a set period, everyone shares their ideas one by one. This approach gives introverted participants time to think and formulate their ideas before sharing them.
Silent Dot-Voting: These tools allow participants to share their views or vote on ideas anonymously, which can be less intimidating than speaking up in a group.
If most of your participants are Introverted & Collaborative.
These participants may enjoy working in groups, but they prefer quieter, more thoughtful discussions. A few activities for this group of people could be:
Small Group Discussions: Divide participants into smaller groups of 3-4 people to discuss a topic or question. This setup can feel less overwhelming than large group discussions.

Think-Pair-Share: In this activity, participants first consider a question or problem individually, then they pair up to discuss their thoughts, and finally, they share their ideas with the larger group.
Fishbowl Conversation: A small group sits in a circle (the fishbowl) to discuss a topic while the rest of the participants observe. After a while, allow participants to switch places, ensuring everyone gets a chance to contribute.
If most of your participants are Extroverted & Individualistic.
These participants enjoy expressing their ideas and might prefer to work independently. A few activities for this group of people could be:
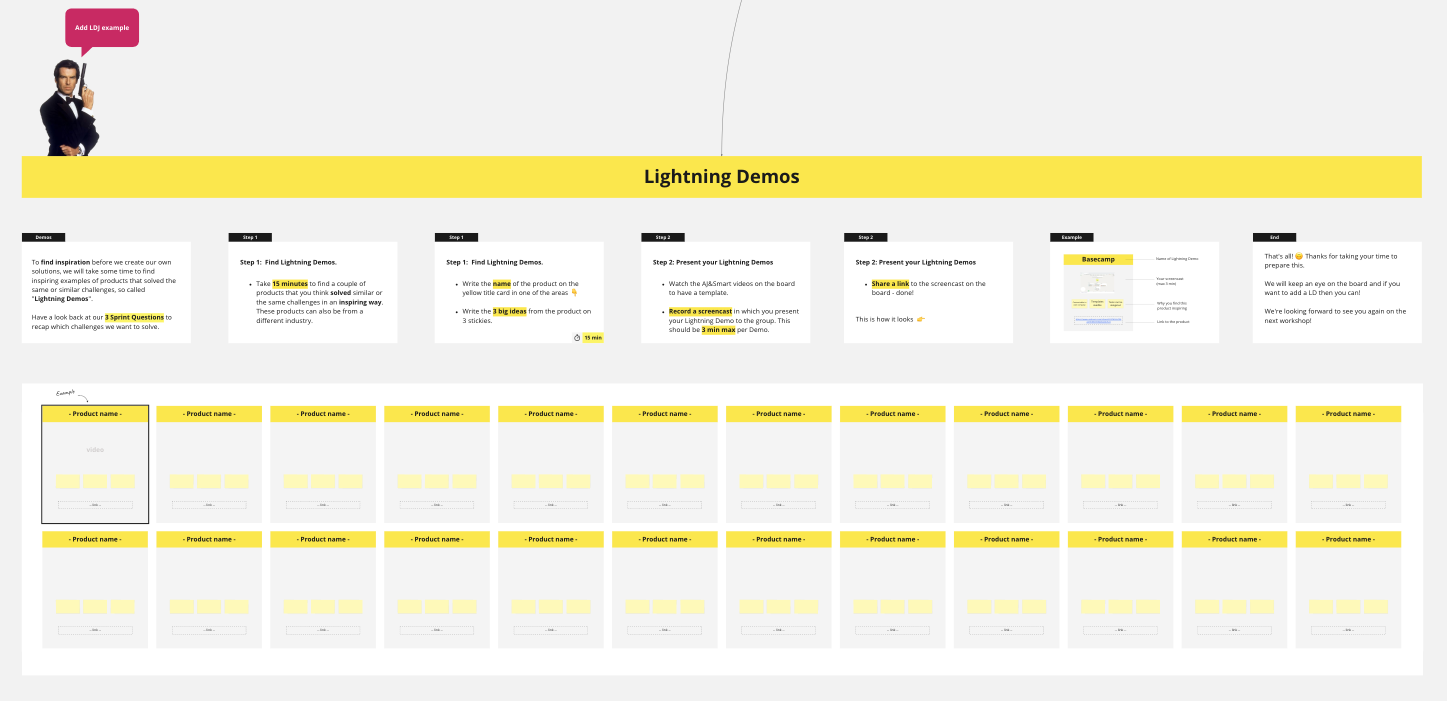
Lightning Talks: Each participant prepares a short presentation on a topic related to the workshop’s theme. This activity allows participants to express their ideas and share their expertise.
Idea Gallery/Lightning Demo: Participants work individually to create a visual or written representation of their ideas (like a poster), then everyone walks around to view the “gallery” and discuss the ideas.
Note: The idea is not new and is also known as a “Poster Session.” The goal of a poster session is to create a set of compelling images that summarize a challenge or topic for further discussion. Creating this set might be an “opening act,” which then sets the stage for choosing an idea to pursue, or it might be a way to get indexed on a large topic. The act of creating a poster forces experts and otherwise passionate people to stop and think about the best way to communicate the core concepts of their material.
Jigsaw Activity: In this exercise, each participant becomes an “expert” in a specific aspect of a larger topic. They then share their knowledge with the group, allowing for individual exploration and public speaking.
If most of your participants are Extroverted & Collaborative.
These participants enjoy the energy of group discussions and collaborative work. A few activities suitable for this group of people could be:
Open Discussions: Provide a topic or question and allow the conversation to flow naturally. Extroverted participants typically thrive in this open format.
Group Projects: Split participants into teams and assign a project related to the workshop’s theme. This could be anything from creating a mock-up for a new product to brainstorming strategies for overcoming a business challenge.
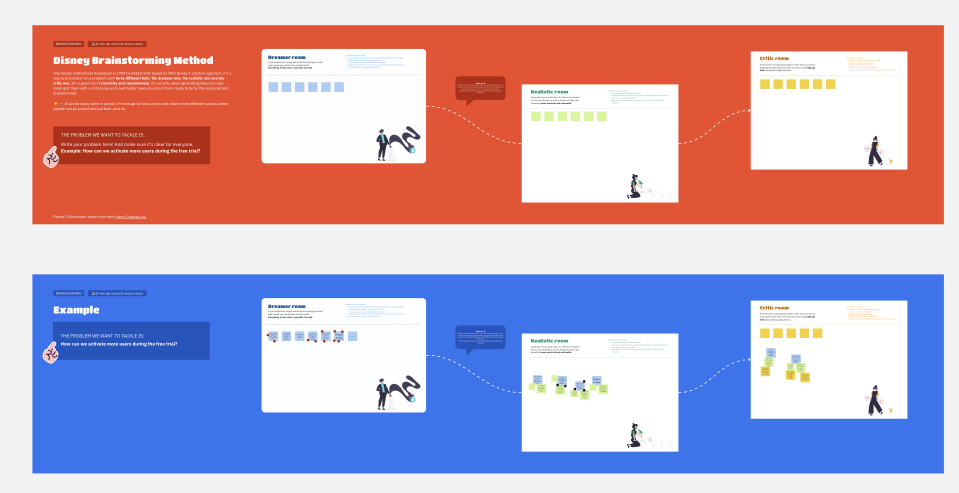
Role-play: This group activity allows participants to act out different scenarios or perspectives related to the workshop theme, encouraging dynamic discussion and cooperative problem-solving.
Step 4. Estimate The Right Time And Allocate An Extra “Buffer”
Once you have completed planning the workshop activities, if possible, try to conduct a pilot run so that you can decide the appropriate duration for each activity.
Time management is critical for inclusivity since participants may have other engagements, and if time management is out of control, both the facilitator and the participants may feel uncomfortable as they may need to shift focus to other commitments. Therefore, it is crucial to estimate the appropriate time and allocate extra “buffer” time to avoid rushing participants during engaging discussions.
I usually like to add a 20% buffer to each activity to ensure there is always some time to spare in case some people are slower. For instance, if you have set a 10-minute brainstorming session, schedule it to be 12 minutes so that you can have some extra buffer.
Step 5. Send A Pre-note Out
Inclusion often starts before the workshop even begins. A pre-workshop note can make a significant difference in setting the stage for inclusivity. It allows all participants, regardless of their background or understanding of the key topic, to start from a common ground.
For example, if you’re conducting a workshop on project management, your pre-note could include an outline of the topics to be covered, such as agile methodology, risk management, or team leadership. You could also include a brief case study for participants to review before the workshop.
The pre-note can also include logistical details such as the workshop date, time, location (or virtual meeting link), any software they need to install (like Zoom or Microsoft Teams), and what they should bring with them (like a laptop or a notebook). By sending a pre-note, you ensure that all participants come prepared and are aligned with the workshop’s objectives right from the start.

Step 6. Bonus Tip: Personalize The Experience
Once you’ve established the framework of your workshop, it’s time to season it with some personal flair. This “secret sauce” could be a unique icebreaker or an element of surprise that sparks laughter and lightens up the atmosphere.
For instance, I’ve often incorporated the pets of my colleagues into the Miro board during my workshops. The sight of familiar furry friends not only brings a smile but also fosters a sense of community and connection within the team.

Conclusion
This was the first half of our journey exploring inclusive remote workshops where we’ve “peeled back” the layers of their essence and highlighted some critical techniques and approaches to lay out the groundwork. Remember, the key to running a successful inclusive workshop is to know your participants well and to create a space where they feel at ease. Take the time to understand them and shape the workshop activities in such a way that they match participant’s personal preferences. The most important bit, perhaps, is that every attendee should feel valued and heard.
In the second part of this two-part series, I will dive deeper into what you can do during and after the workshop in order to better tailor the experience to the workshop attendees, and I will also introduce you to the P.A.R.T.S. principle, which stands for Promote, Acknowledge, Respect, Transparency, and Share.
Original Source: https://ecommerce-platforms.com/articles/shopify-vs-custom-website
For ecommerce web design, two paths stand before you, each promising unique experiences for building an online store.
On one side, there’s Shopify, the renowned platform that offers a seamless and user-friendly experience for ecommerce web design.
On the other side, there’s the allure of a custom website, crafted by a skilled developer, offering limitless possibilities and complete control over your digital kingdom.
But which path should you choose?
In this blog post, we compare Shopify vs custom website builds.
We highlight the pros and cons of each path, helping you make an informed decision that aligns with your unique vision and goals.
We should mention: Shopify is just about the polar opposite of a custom website build. It’s not quite as “rudimentary” as a solution like Wix, but the whole idea behind Shopify is for merchants to create an online store on their own, without the need for a college degree in web design.
A custom website build, on the other hand, requires web development knowledge from you, or the person you hire. In short, Shopify is a more clean, packaged, off-the-shelf platform for launching an ecommerce site within minutes (if you’re really fast).
A custom website, although pricey and complicated and more time-consuming, provides significantly more flexibility and control over the final product that is your site.
They both have advantages, and significant downsides. So, we’ve done the work to break down a detailed comparison of Shopify vs custom website builds.
This way, you’re equipped with knowledge. The knowledge needed to launch a website with confidence, with the control or convenience you want from an ecommerce website. Now that you’re prepped, keep reading to learn all about the differences between Shopify vs custom website builds.
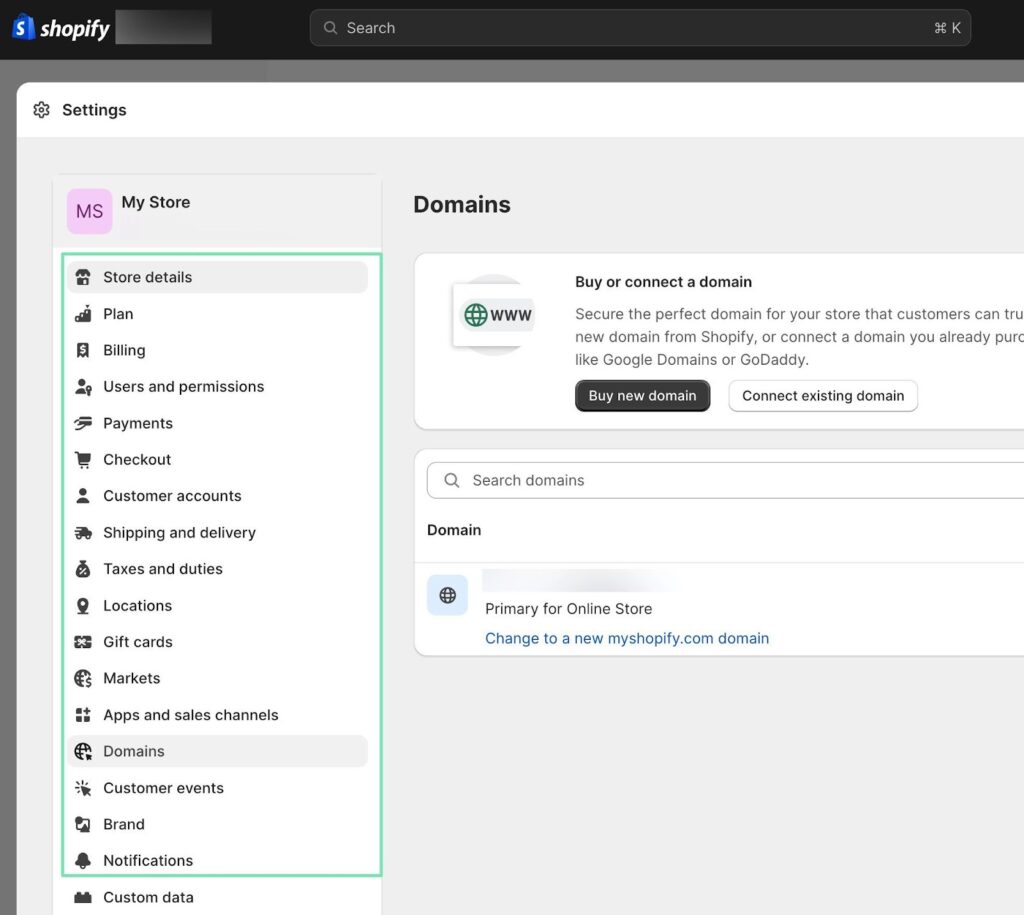
The Main Differences Between Using Shopify vs Custom Website
When it comes to creating an online store, merchants have various options, two of which are: using Shopify or building a custom website.
The differences between these two approaches are significant and can greatly impact the success of an online business. In this section, we detail the main differences between the two approaches to ecommerce website development.
These are the basic, surface-level elements that make them unique.
Shopify: A SaaS Solution for Ecommerce
Shopify is a Software-as-a-Service (SaaS) solution that allows anyone to build an online store thanks to templates, apps, and built-in tools for marketing, inventory management, and product sourcing. It is designed specifically for ecommerce and provides a seamless experience for merchants.

On Shopify, you don’t have to worry about getting your own hosting, domain name, or additional tools to make your site run well. All of this is managed by Shopify, which also takes care of site security, performance, and overall maintenance. This makes it incredibly easy for anyone to get started with their online store.
One advantage of using Shopify is that it offers a wide range of themes and apps to choose from, allowing merchants to customize their store to some extent. However, the flexibility is limited compared to a custom website.
Custom Website: More Control, More Responsibility
A custom website is generally built using an open-source system like WordPress, Drupal, Joomla, or Adobe Commerce (formerly Magento). In some cases, a custom ecommerce site may be generated without an open-source site builder or content management system. Instead, the developer would produce site files from scratch.

With a custom website, you have full control over the visuals and functionality of your site. You can build anything you want, but this also means you have to piece together multiple elements like hosting, a domain name, custom plugins, and site files.
All of this is managed by your developer. As is site security, performance, and overall maintenance, which could get expensive or end up falling onto your shoulders.
While a custom website offers advanced control, it requires more technical knowledge and can be time-consuming and expensive to set up and maintain.
There you have it. On the surface, Shopify is a neatly packaged software. It’s affordable and easy to use, but without the infinite control of a custom website.
A custom site promises nothing. It’s a surprise depending on your developer. However, you can communicate as much as possible to get exactly what your brand needs. For an in-depth comparison of areas like ease of use, pricing, and features, take a look at the sections below.
Try Shopify with $1 per month for the first 3 months!
Shopify has begun offering a special deal for sellers who sign up for a new Shopify plan. That deal? Pay Shopify $1/month for 3 months of full access to the platform! Learn more about the trial here.
This offer is is now available on all standard plans: Starter, Basic, Shopify, and Advanced.
» Start your free trial here «
A Complete Comparison of Shopify vs Custom Website Builds
When deciding between Shopify and a custom website, it’s important to consider various aspects of the site building process and the maintenance that comes along with it. Let’s compare these two options in detail.
Ease of Use: Shopify vs a Custom Website
Shopify is known for its user-friendly interface and intuitive dashboard. It provides a smooth experience for both the launch and management of an online store. Anyone can learn how to use Shopify, even without technical knowledge.

On the other hand, building a custom website may require you to learn a content management system that is more complex. This can be a steep learning curve for those who are not familiar with web development.
Shopify Ease of Use:
User-friendly interface
Intuitive dashboard
No technical knowledge required
You still get access to custom file areas for advanced customization
Apps help extend the functionality of your site
Custom Website Ease of Use:
Full control over the website
Ability to customize every aspect
Total freedom to hire whomever you want to design and develop the site
You may have to learn a new content management system, but many of the usuals—like WordPress and Joomla—are simple enough
Limited to how much you can do yourself; you’re almost always going to be reliant on the developer, sometimes even for simple changes on the site (depending on the platform
As you can see, the ease of use from Shopify is unmatched. Yet, that’s because a custom website isn’t meant to be user-friendly for the business owner. It’s an option that you go with when you’d rather not pick a template (that many other businesses have used) from Shopify. It’s an option for gaining complete control of the design of your site. That calls for a professional developer/designer, and a more robust platform.
With some clarity on the overall ease of use from each option, let’s dive into the amount of time it takes to launch a website with Shopify vs custom website builds.
Launch Time: Shopify vs Custom Website
Shopify allows for an incredibly quick launch of an ecommerce store. With its pre-built templates and easy-to-use tools, you can have your store up and running in minutes—at least for a smaller store without much content. Realistically, you can launch a Shopify site within a few hours, and have it completely filled with product content, marketing elements, and apps within about a week.
Creating a website, after all, is a continuous process, so you technically never really finish when it comes to development and maintenance. Launching (publishing the site for the world to see, and buy products) actually only takes a few seconds with Shopify.
Though, we’d argue a truly professional website, with solid content and media, will take anyone a few days to complete.
Building a custom website, on the other hand, can take longer. It involves designing the website from scratch, integrating various features, and ensuring everything works seamlessly.
Not to mention, you may need to hire a developer, or even a team of developers and designers, to work on everything from the wireframes to the media elements and site infrastructure.
With such an undertaking—one that’s highly customized and involving so many moving parts— we would expect to spend at least a month on a small ecommerce website, one that’s custom made.
For a website considered medium or large (with hundreds or thousands of products) budget anywhere from 3 to 6 months to launch a custom online store.
Shopify Launch Time:
Quick and easy
You can technically launch a website within seconds or minutes
To realistically complete all your content and optimization, expect to spend a few days or weeks
Custom Website Launch Time:
Longer and more time-consuming
Small websites may take anywhere from a few weeks to several months to launch
Medium and large websites have longer timeframes, often ranging between 3 to 6 months for a complete site launch
Design Potential and Control: Shopify vs A Custom Website
There’s something to be said about the ability to design a beautiful online store without touching any code. That’s what Shopify offers its users. With that, however, comes various restrictions due to the simplicity of it all.
Shopify offers a wide range of themes and a drag-and-drop builder, allowing you to create a beautiful website without any coding knowledge.

You can, however, utilize custom coding to add specific features or designs. So, there’s always the option to hire a professional Shopify developer, or try your hand if you have the experience.
But to be clear, the main focus of Shopify is to generally eliminate that requirement. It’s a platform built on simplicity, helping merchants sell more, without spending too much on web development.
That said, Shopify has limitations when it comes to the control over your website. It uses proprietary code, making it harder to transfer to another platform, and you have less access of your site files. Again, you’re still able to access many of the site files for customization, but it’s not quite as “open” of a platform as you would get from the likes of WordPress or Joomla.
With a custom website, you have granular control over the site’s design and functionality. You can build anything you want, but this requires technical expertise and can be more expensive.
Shopify Design Potential and Control:
Quick and seamless design with templates and a drag-and-drop builder
Beautiful templates for a wide range of industries
Yet, you’re never getting something entirely custom; you always know that there’s another (if not thousands) of other companies using the same template as yours
Less control over site files
Proprietary coding language makes for complicated customizations (even if you hire someone)
It’s nearly impossible to migrate away from Shopify to another platform, thanks to the proprietary coding languages and its theme system
Custom Website Design Potential and Control:
Complete control over design and functionality
Requires technical expertise
You can ask your developer to create anything on your website, or integrate with any app or plugin
There’s still the potential to utilize simpler elements like templates and apps, as long as your developer opts for a platform like WordPress or Joomla
Custom sites generally use well known coding languages like HTML, CSS, and Javascript, allowing you to turn to a different developer in the future if the previous one doesn’t pan out
Features: Shopify vs Custom Website Builds
Shopify covers the vast majority of required ecommerce features you would expect to run a viable online store. It supports:
Physical and digital products
Payment processing
Professional reports
Product sourcing
Shipping management
Abandoned cart recovery
A point of sale
And much more
With a custom website, you have the flexibility to add any feature you desire. However, this can often lead to clutter and unnecessary complexity. It can also be expensive to create custom features.
Shopify Features:
Built in features like payment processing, reports, shipping, abandoned cart recovery, POS, product sourcing, and
Access to apps help obtain functionality for anything that’s not built into Shopify, like for advanced marketing tools or accounting apps
There’s still the potential for adding your own integrations with access to the Shopify API and its site files (though this isn’t nearly as common)
Custom Website Features:
Flexibility to add any feature, as long as your budget allows
Potential for clutter and unnecessary complexity, considering it’s tempting to add every feature that comes to mind
Perfect for extremely unique feature building, like if you need a specialty ordering system for a monthly box subscription
Customer Support: Shopify vs Custom Website Builds
Shopify provides excellent customer support through various channels, including live chat, email, and phone support.
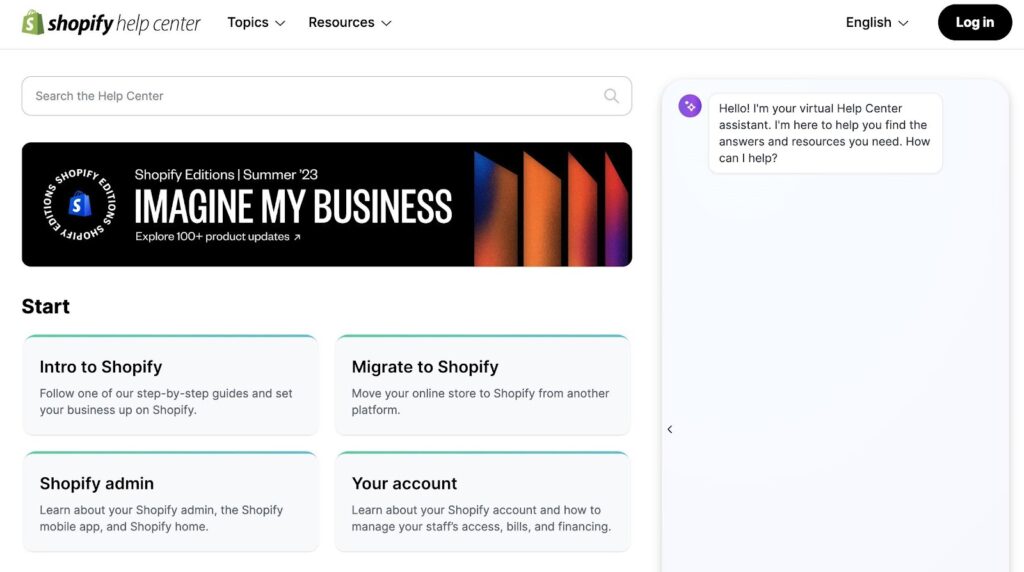
They also have extensive documentation and a vibrant community of users. As a large company, Shopify is more likely to remain as a customer support option when compared to a developer who works on a custom website build. After all, Shopify is more likely to be around in ten years than a random guy who created your website.
Customer support for a custom website depends on the developer or agency you hire. There is a risk that the developer may disappear or stop providing support, leaving you with a website that is difficult to maintain. Luckily, you’re able to call up another developer if that happens. For your own online documentation and support, it’s simply not possible for a merchant to just call up WooCommerce or someone from Joomla to assist with a downed website. Instead, you must browse the sea of online articles to locate the information needed.

Shopify Customer Support:
Live chat, email, and phone support
Extensive documentation
Large community of users
All of this is included with your monthly subscription
When you stop paying for your subscription, that customer support comes to a halt
Custom Website Customer Support:
Depends on the developer or agency hired
You most likely have to pay a steep fee for customer support from the original developer of your site
Risk of disappearing support
You can still always hire a new developer for customer support
Some companies offer small monthly subscriptions to handle customer support and minor maintenance of WordPress and Joomla sites
There’s a significant amount of documentation online about content management systems like WordPress and Joomla online; yet, that makes for daunting research when you need to resolve your own issues
Pricing of Shopify vs Custom Website
Shopify offers various pricing plans to suit different business needs. The plans range from basic to advanced, with different features and transaction fees. The costs include hosting, security, updates, and customer support, all wrapped into one simple subscription fee.
Shopify Pricing Plans:
Basic: $29/month
Shopify: $79/month
Advanced: $299/month
Building a custom website can be more expensive. Scratch that. It will almost always be more expensive in the short term, but not necessarily the long term (depending on your site). The costs include custom development work, domains, themes, plugins, apps, hosting, transaction fees, shipping labels, payment processing, marketing, SEO, and more. Fees vary depending on the complexity of the website and the expertise of the developer.
You may be able to find a developer who offers packages for website building and maintenance. For instance, some agencies and freelance developers charge several hundred dollars per month for the entire package of building the site and running it into the future.
Estimated Costs for a Custom Website:
Development work: $5,000 – $50,000+
Domains: $10 – $50/year
Themes: $0 – $200+
Apps and plugins: $0 – $500+
Hosting: $5 – $500+/month
Transaction fees: Varied, but often starting around 2.9% + $0.30 per transaction
Shipping labels: Varies
Payment processing: Sometimes you must pay a monthly or setup fee
As such, a custom website is likely going to cost you more money than using Shopify. Having said that, a small site, with a reasonably priced developer, may end up saving you money compared to one of the higher priced Shopify pricing plans. That’s especially true if you end up installing a handful of pricey apps in Shopify.
Maintenance, Security, and Updates
Shopify takes care of all maintenance, security, and updates in the background. This is included in the subscription fee, allowing you to focus on running your business. You don’t have to worry about hiring a developer or relying on one person to keep your website secure and up to date.
With a custom website, maintenance, security, and updates are handled by the developer or yourself. This means additional payments and potential reliance on one person for ongoing support. While this often results in personalized customer experience, it can also mean in a website that is rarely maintained.
Shopify Maintenance, Security, and Updates:
Handled by Shopify
Included in subscription fee
You never have to think about any of these elements
Shopify is constantly improving its approach toward security and optimization
Custom Website Maintenance, Security, and Updates:
Handled by the developer or yourself
Additional payments required
This could actually be a good thing, since you may get very personalized customer support, as opposed to the generic support from Shopify
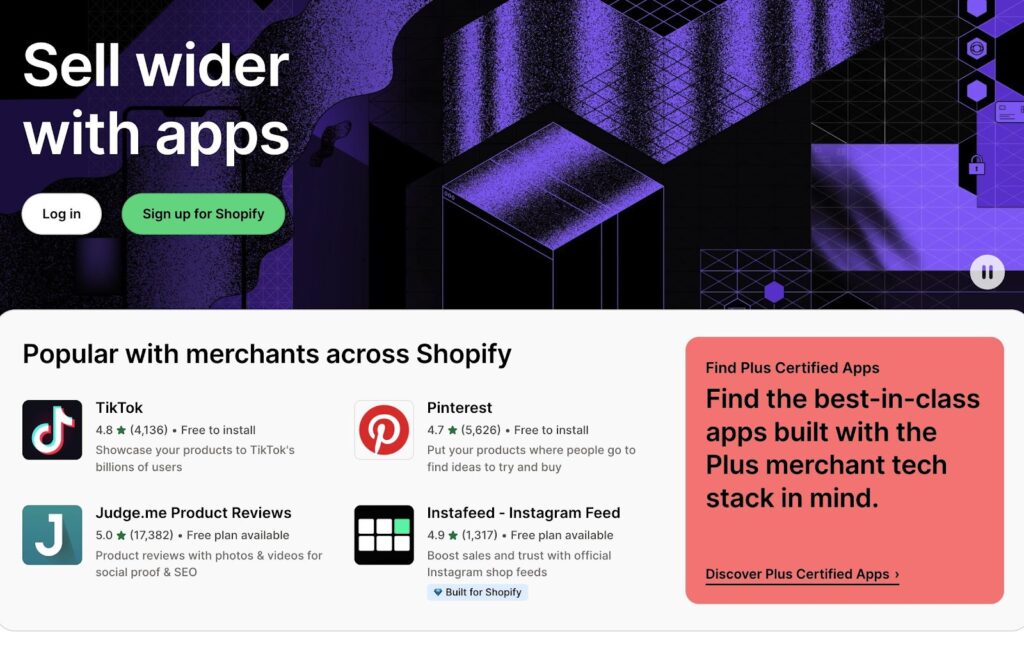
Third-party Extensions, Apps, and Services
Shopify has a large app store with thousands of apps to extend your store’s functionality. These apps cover various categories, including marketing, inventory management, customer support, and more.
It’s impossible to predict which third-party services and apps will be used when launching a custom website. The developer may choose the extensions they prefer, which could come with a steep learning curve for you. These extensions are often paid for by the developer and included in the maintenance fees. This means you won’t end up saving money; the costs are just wrapped up into your maintenance charges.
Shopify Third-party Extensions, Apps, and Services:
Marketing apps
Inventory management apps
Customer support apps
And hundreds of other categories
Custom Website Third-party Extensions, Apps, and Services:
Depends on the developer’s choices
Potential for a steep learning curve
Costs included in maintenance fees
There’s the possibility of the developer utilizing extensions in an efficient manner, resulting in lower costs and a highly optimized website
Our Conclusion on Shopify vs Custom Website Builds
Both Shopify and custom websites have their advantages and disadvantages. Shopify is a user-friendly and comprehensive solution for ecommerce, offering ease of use, a quick launch time, and a wide range of features. It provides excellent customer support and takes care of maintenance, security, and updates.
On the other hand, a custom website offers more control and flexibility in design and functionality. It allows for any feature you want, but requires technical expertise and can be more expensive to set up and maintain. Customer support and ongoing maintenance can also be less reliable.
Ultimately, the choice between Shopify and a custom website depends on your specific needs, budget, and technical expertise.
If you’re looking for a hassle-free and comprehensive ecommerce solution, Shopify is a great choice.
If you require complete control and customization, a custom website may be the better option.
For those with questions about Shopify, or building a custom website, feel free to leave a comment below. We’re here to help!
The post Shopify vs Custom Website: How Should You Build an Online Store? appeared first on Ecommerce Platforms.
Original Source: https://1stwebdesigner.com/ripple-button-effect-using-pure-css/
Google’s Material Design guidelines introduced the ripple effect, a subtle animation that indicates user action. The ripple effect rapidly gained popularity in web design as a sophisticated visual feedback form that refines user interaction, particularly on buttons. Today, we’ll show you how to create a ripple button effect using nothing but pure CSS.
Your Web Designer Toolbox
Unlimited Downloads: 500,000+ Web Templates, Icon Sets, Themes & Design Assets
DOWNLOAD NOW
Building the Button
The basic structure of our button is quite simple. It’s a single line of HTML:
<button class="btn-ripple">CLICK ME</button>
This is a standard button element with a class btn-ripple attached to it, which will be our reference when we define the ripple effect in CSS.
Casting Ripples With CSS
/* Styling for the ripple button */
.btn-ripple {
border: none; /* Removing the default button border */
border-radius: 6px; /* Giving our button rounded corners */
padding: 12px 16px; /* Providing some padding around the button text */
font-size: 1.2em; /* Increasing the font size of the button text */
cursor: pointer; /* Changing the cursor to a hand icon when hovering over the button */
color: white; /* Making the button text color white */
background-color: #fa6e83; /* Setting the initial button background color */
outline: none; /* Removing the outline from the button */
background-position: center; /* Setting the position of the background image to center */
transition: background 1s; /* Adding a transition to the background color */
}
/* Defining the hover state */
.btn-ripple:hover {
background: #f94b71 radial-gradient(circle, transparent 1%, #f94b71 1%)
center/15000%; /* Creating a radial gradient background on hover */
}
/* Defining the active (clicked) state */
.btn-ripple:active {
background-color: #f97c85; /* Changing the button color when active */
background-size: 100%; /* Increasing the size of the background image */
transition: background 0s; /* Removing the transition from the background color */
}
Let’s break down the CSS setup:
The .btn-ripple class sets up the basic appearance of the button. The background-color is initially set to #FA6E83, a light color, and the background-position is centered to ensure our ripple effect starts from the middle of the button.
When you hover over the button, the :hover pseudo-class is activated. It changes the background to a radial gradient that’s centered where the pointer is located, simulating the ripple effect. The gradient starts as transparent (transparent 1%) and transitions to the button color (#F94B71 1%), creating a soft ripple effect.
Upon clicking the button, the :active pseudo-class takes effect. It changes the background-color to a darker shade (#F97C85) and expands the background-size to 100%, reinforcing the ripple effect. The transition for the background is also set to 0s, making the effect appear instantaneously when the button is clicked.
The Result
See the Pen
Pure CSS Ripple Button Effect by 1stWebDesigner (@firstwebdesigner)
on CodePen.0
Final Thoughts
We demonstrated a classic example of how simple CSS can be used to create appealing interactivity in a user interface. But as you strive to refine your UI, it’s critical to remember that each interface element might require different tweaks.
Consider the context in which your buttons are used. A button for submitting form data might benefit from a more subdued ripple effect, while a call-to-action button could be more prominent with a stronger one.
For more intricate animations or synchronizing with other UI events, JavaScript could be leveraged for more granular control. CSS provides a solid base for styling and basic animations, but JavaScript opens up more advanced possibilities.
And of course, customization is key. While we used specific colors for our ripple button here, feel free to experiment with colors, shapes, and transitions that align with your brand and design aesthetic.
Original Source: https://tympanus.net/codrops/2023/09/13/grid-item-hover-effect/
Three hover effects based on a grid design by Alena Orlova.
Original Source: https://www.creativebloq.com/news/curepedia-andy-vella-the-cure-artist-interview
Andy Vella tells us about his influences, Fiction Records and working across multiple creative disciplines.
Original Source: https://www.creativebloq.com/news/foldable-purse-phone
It’s definitely putting fashion over function.
Original Source: https://abduzeedo.com/field-notes-latest-limited-edition-foiled-again
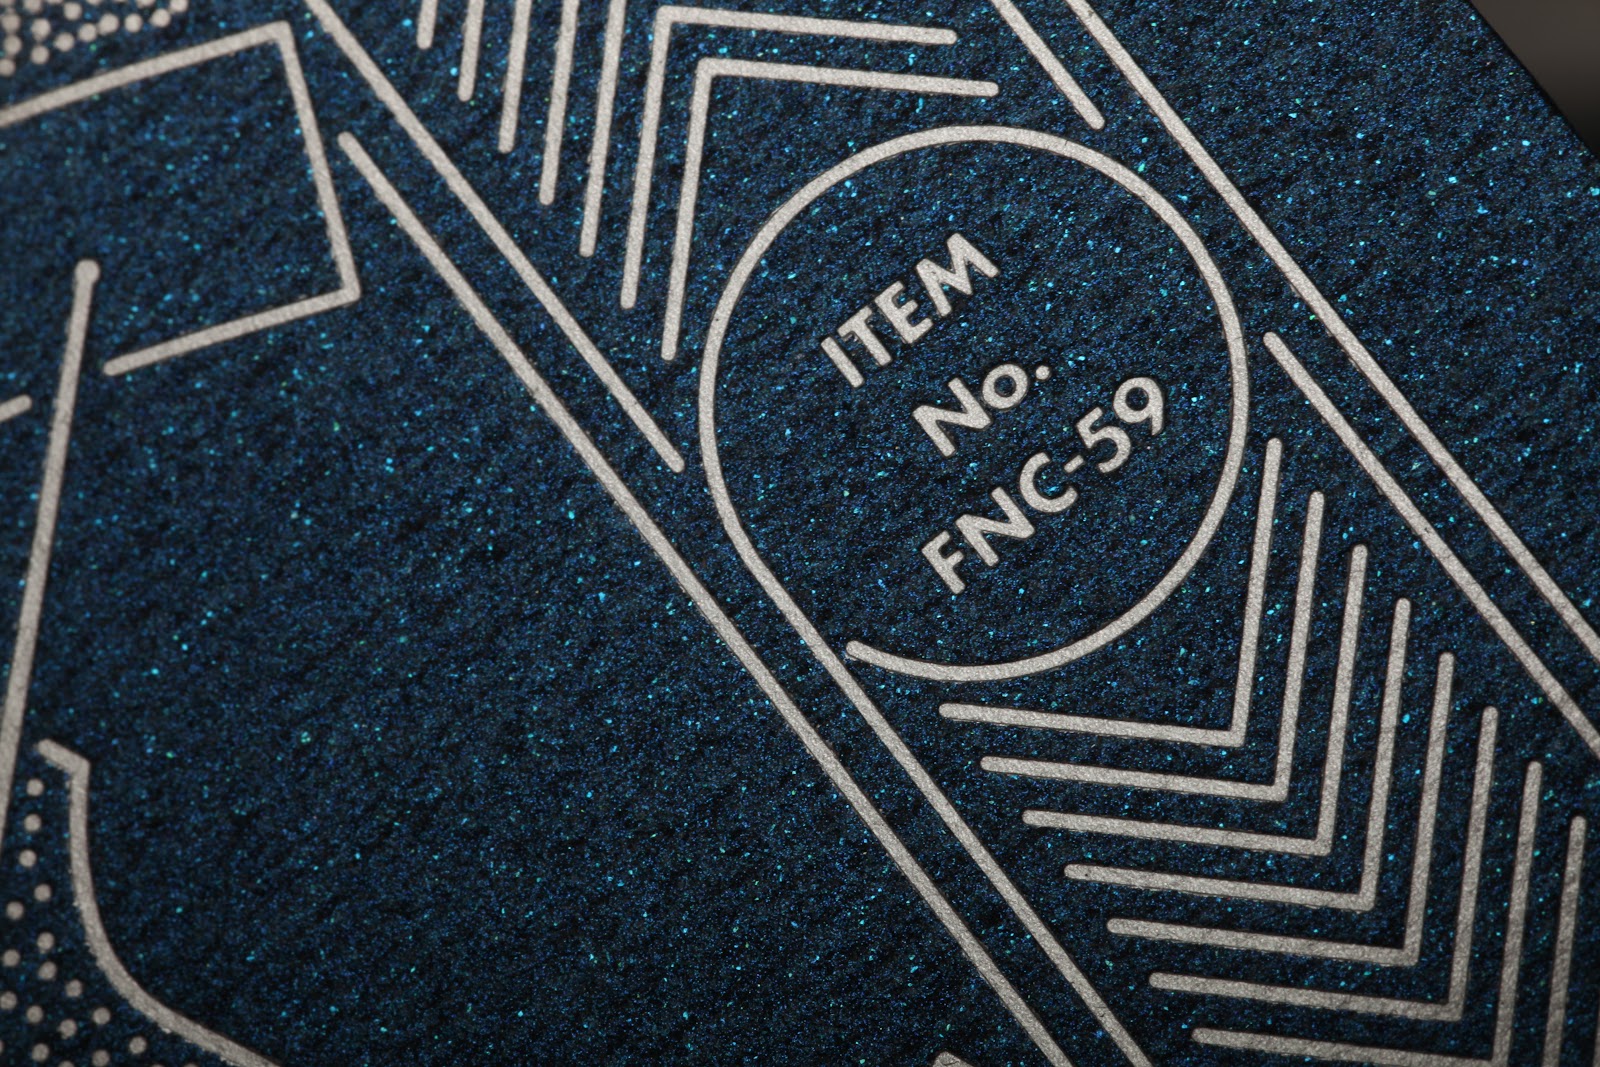
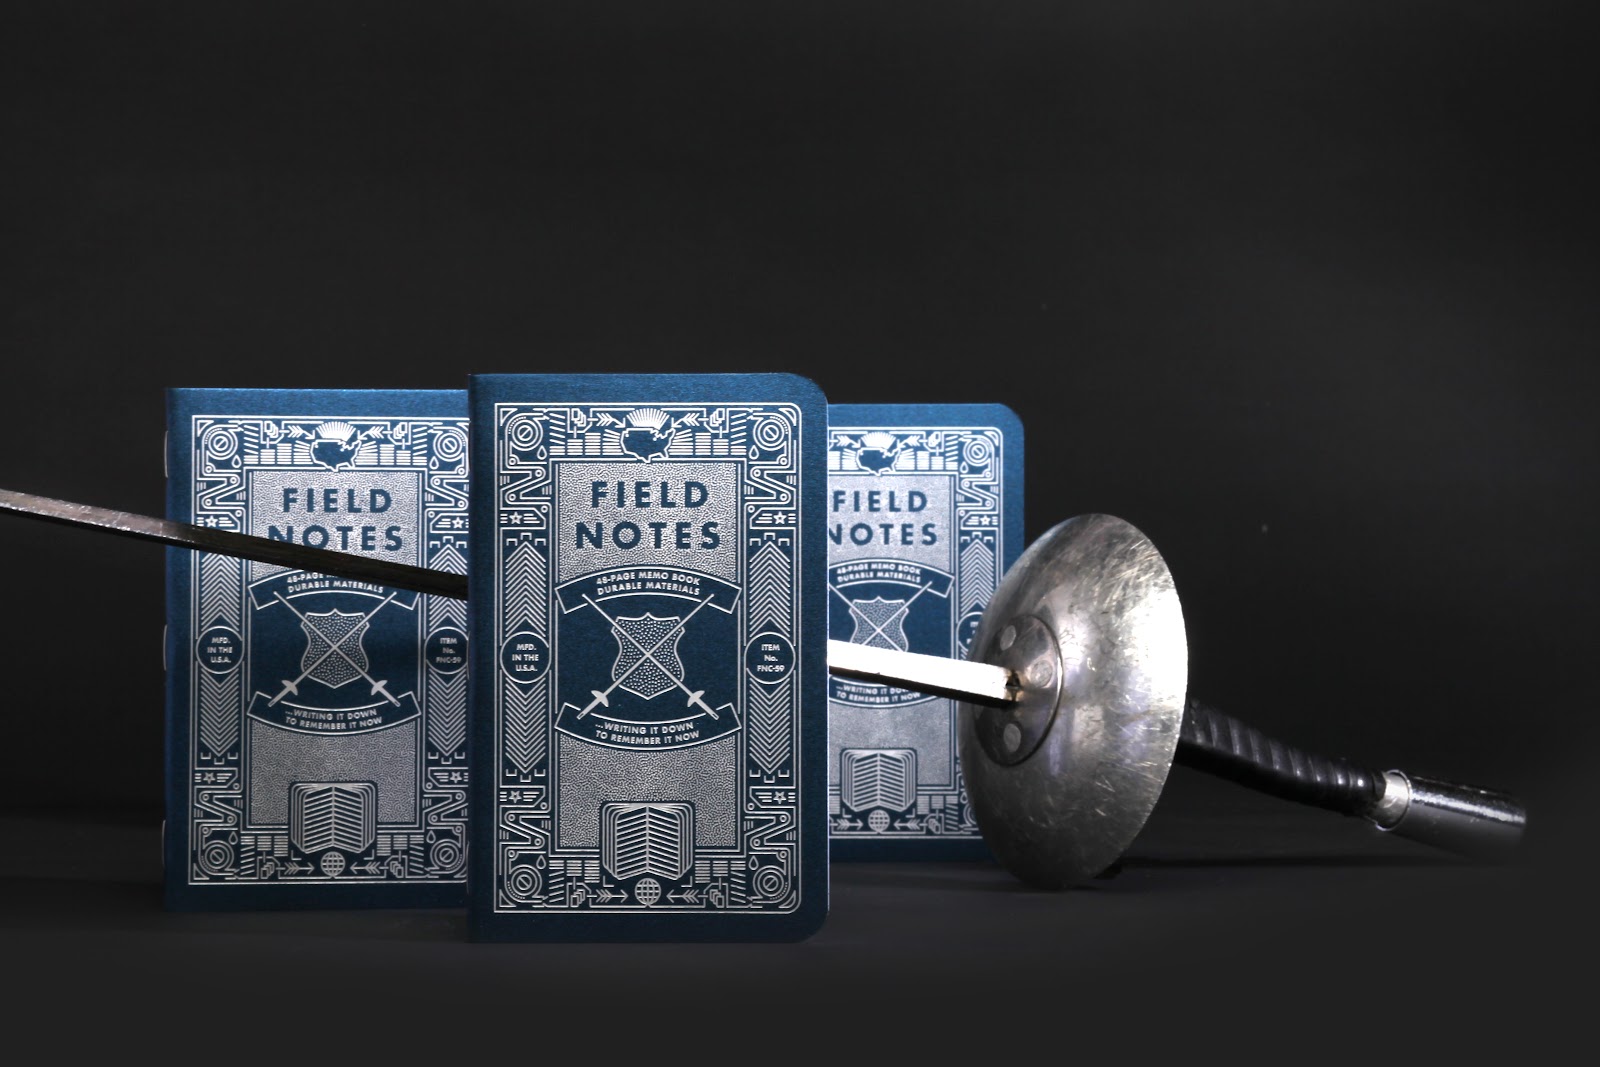
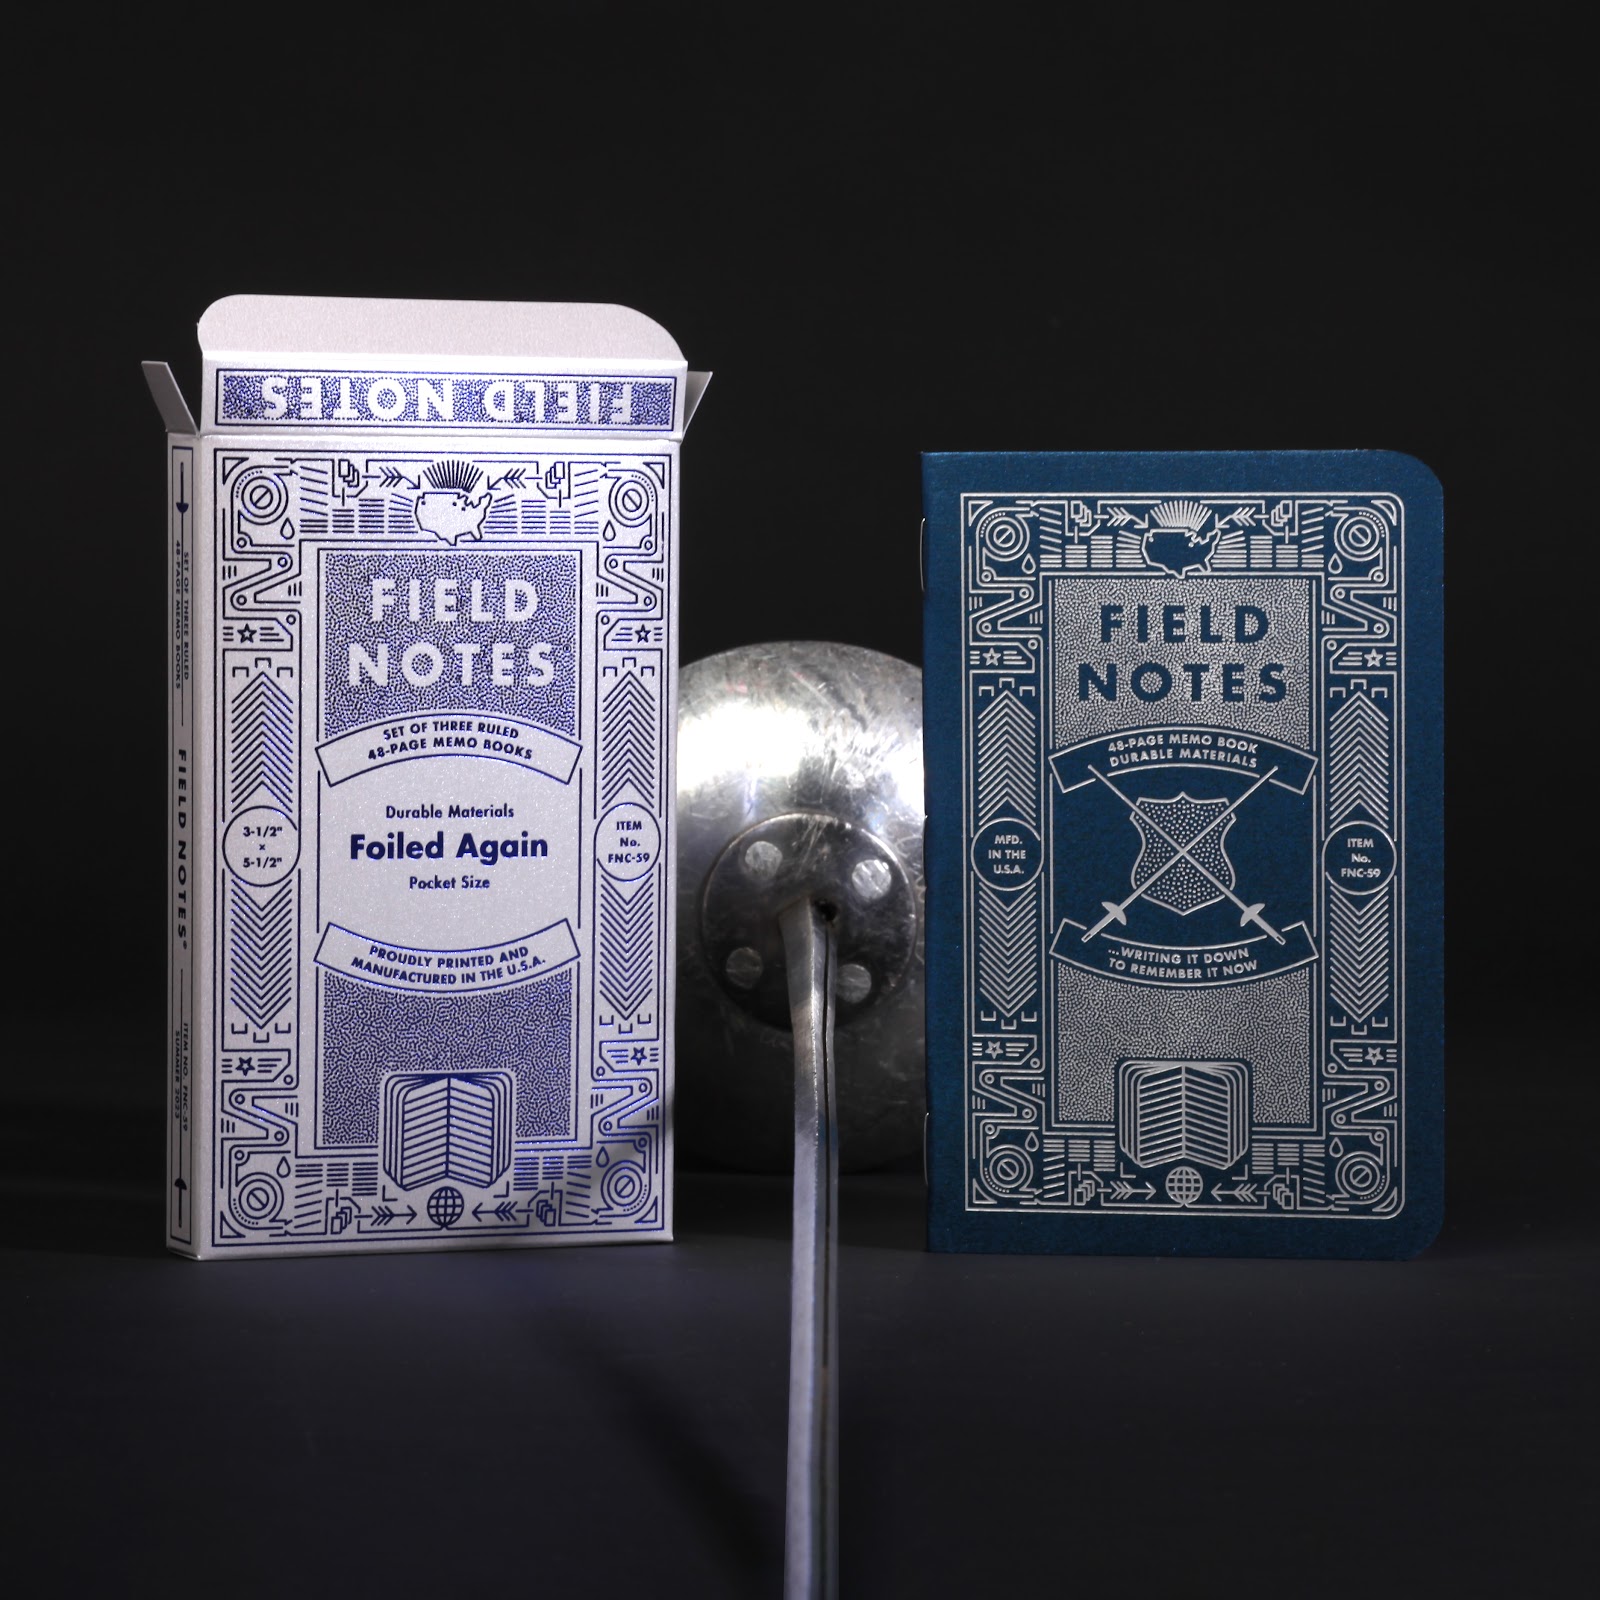
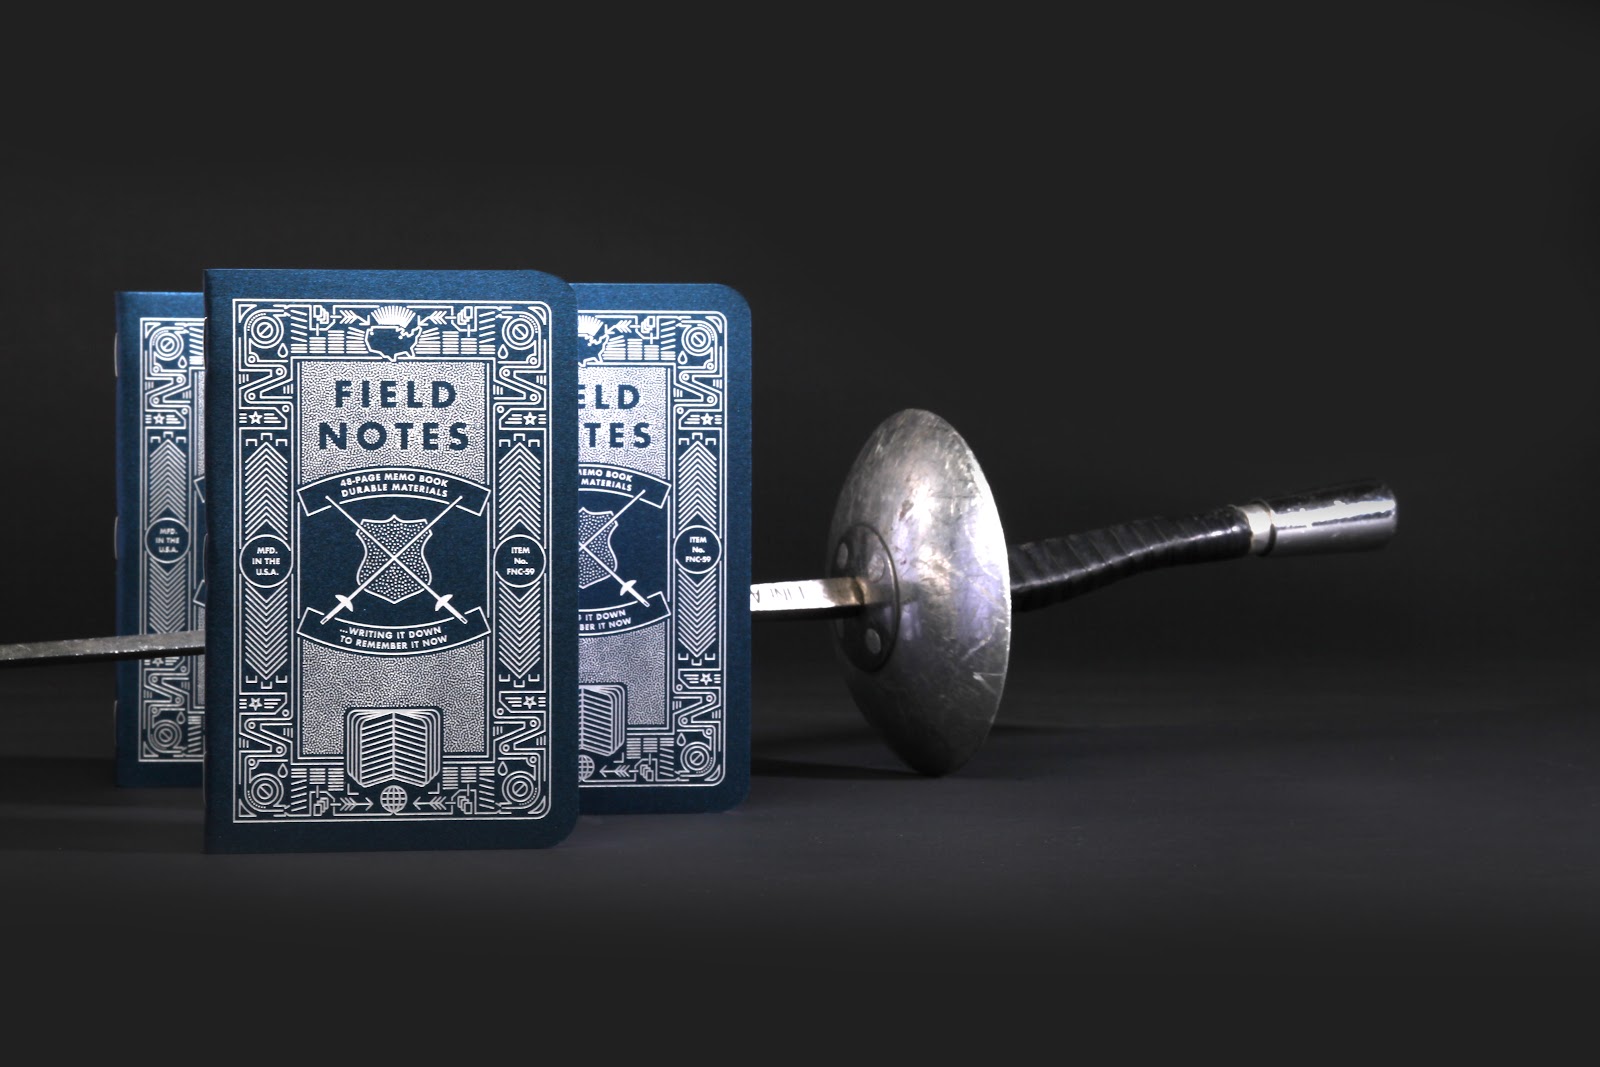
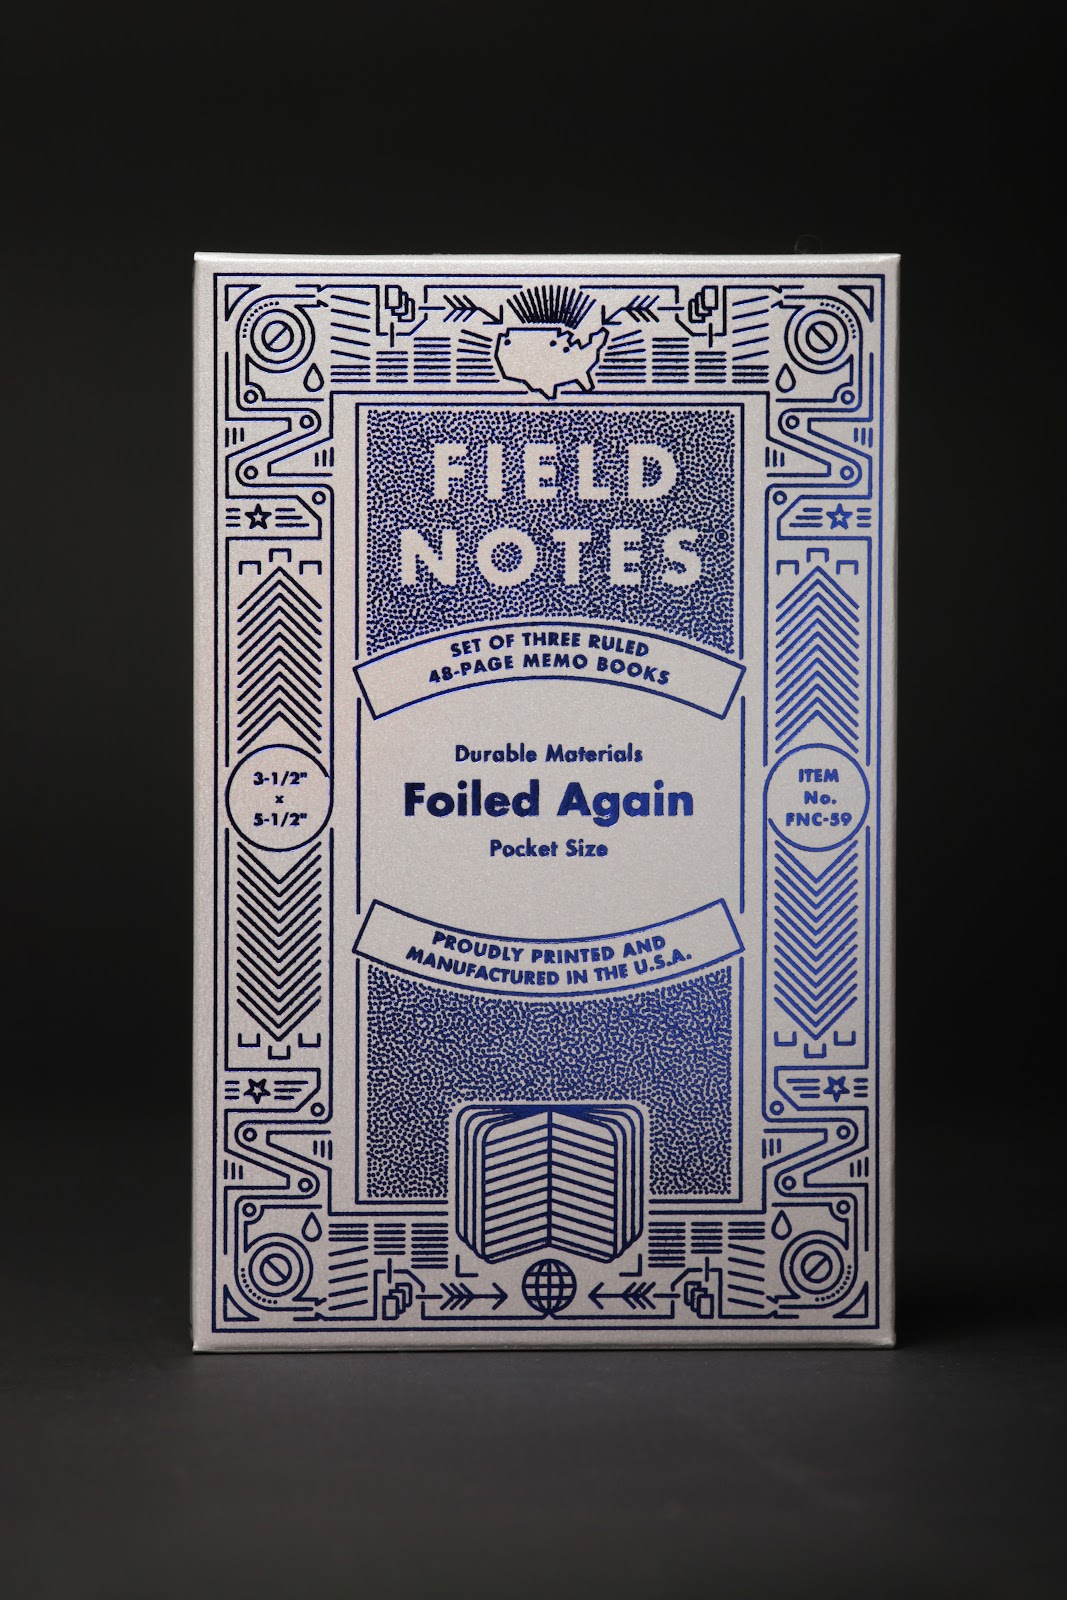
Field Notes’ latest limited edition: Foiled Again

abduzeedo0905—23
The 59th Quarterly Edition from Field Notes titled “Foiled Again,” showcases a revered printing technique. Over the years, various Field Notes editions have incorporated the art of hot-foil stamping – a method where metallic or pigmented foils are applied to paper through heat and pressure. This process, initially patented by Ernst Oeser from Germany in 1892, modernized the traditional gold leaf manual application in the publishing sector. The 1950s witnessed further refinement as plastics enhanced these foils, introducing innovative applications in printing, packaging, and related fields.
The distinction of “Foiled Again” lies in its collaboration with Studio on Fire, based in St. Paul, Minn. Renowned for their foil-stamping and die-cutting precision, Studio on Fire’s craftsmanship is often deemed unparalleled. Their accolades span across sectors, including cannabis, alcohol, and playing cards, where they’ve masterfully blended multiple foils, inks, embossing, and diecuts. Abduzeedo.com shared insights from a visit to Studio on Fire, praising their blend of traditional and modern technologies and the adept team steering the helm.
The edition features always awesome artwork by Aaron Draplin, highlighting the production process. This artwork was hot-stamped in silver foil on the newly introduced Neenah Pearl “Indigo” 110# cover stock by Studio on Fire. Inside, it houses 48 pages of 60# Finch Opaque text, lined with silver ink and bound together with three staples.
An added touch to this edition is a complementary tuck box, reversing the cover art’s colors: using blue foil on Neenah Pearl “Sterling” stock. This box safeguards three Field Notes notebooks, ensuring they remain pristine until used. However, potential buyers should be aware of the limited print run due to the edition’s intricate design.
A special gesture for their subscribers saw Field Notes requesting Studio on Fire to use gold foil on “Poppy” stock, encased in a red-foil-on-“Bright Gold” box. Subscribers are set to receive both the “Indigo”/Silver and exclusive “Poppy”/Gold “Foiled Again” 3-Packs in the unique 2023 subscriber box. Future editions for Fall, Winter, and Spring are eagerly anticipated.
Product images
Specifications
01. Proudly foil-stamped by the good people of Studio on Fire, St. Paul, Minn., and printed by the good people of Active Graphics, Inc., Oak Brook, Ill.
02. Cover: Neenah Pearl 105#C “Indigo” (Subscriber edition: “Poppy”) foil stamped on a Saroglia FUB Die Cutter Foil Stamper.
03. Innards: Finch Paper Opaque Smooth 60#T “Bright White,” with a fine, 1-color application of metallic soy-based Toyo ink.
04. Inside covers/innards printed on a Mitsubishi Diamond Series 40″ 6-color press.
05. Bound by a Heidelberg ST350 Stitchmaster 8-pocket saddle stitcher, with appreciation to Samuel Slocum, George W. McGill, and William J. Brown, the “Founding Fathers of the Staple.”
06. Corners precisely rounded to 3/8″ (9.5mm) by a CRC round-corner machine.
07. Ruled lines: 1/4″ (6.4mm).
08. Memo book dimensions are 3-1/2″ × 5-1/2″ (89mm × 140mm).
09. FIELD NOTES uses only the Futura typeface family (Paul Renner, 1927) in its materials.
10. All FIELD NOTES memo books are printed and manufactured in the U.S.A.
11.Limited edition of 26,000 3-Packs
12.UPC: 850032279246
About Field Notes
Founded in 2007, Field Notes is a memo book brand headquartered in Chicago, and is a joint venture between Portland, Oregon-based Draplin Design Company and Chicago-based design firm Coudal Partners. Its memo books are proudly printed and manufactured in the United States. Learn more at fieldnotesbrand.com.
Original Source: https://tympanus.net/codrops/collective/collective-780/
Bézier Curves * CSS Loaders * Godly * Refraction in Three.js